
Choosing to migrate from LearnDash to Tutor LMS is an exciting step toward growing your online education platform. You are likely looking for new features and capabilities to enhance your courses and better serve your students. We understand that a successful move means bringing all of your hard work, your courses, users, and data with you safely.
That is why we created the Tutor LMS Migration Tool. Think of it as the official bridge between your old platform and your new one. It is designed to make the entire LMS migration process as smooth as possible by carefully transferring your valuable content over to its new home in Tutor LMS.
Preparing for Your Migration: A Two-Part Checklist
A successful migration always starts with smart preparation. Before you begin, it is helpful to review two key areas: the essential safety measures to protect your work and the technical requirements needed for the tools to function correctly.
Safety First: Backup and Staging
For complete peace of mind, taking a couple of safety steps first is highly recommended:
- Create a Full Site Backup. This step acts as your safety net. Having a complete backup of your website provides total peace of mind before you start the process.
- Test on a Staging Environment. A staging site is a private clone of your live platform. Running the migration here first lets you work out any issues without any risk to your active online school.
Technical Requirements
The migration tool works best when your software is up to date. Your site should have the following minimum versions installed and active for a successful data transfer:
- Tutor LMS: Version 3.6.0 or later
- LearnDash: Version 4.0 or later
- Tutor LMS – Migration Tool: Version 2.3.1 or later
For the most stable and seamless experience, updating LearnDash to its very latest version before you start is also strongly advised. This helps prevent potential compatibility issues during the migration process.
Installing the Migration Tool
Once your website meets all the prerequisites, the next step is to install the tool that will handle the migration. The Tutor LMS Migration Tool is a free plugin, and you can find it directly within your WordPress dashboard.
The installation process follows the standard WordPress plugin setup, which should feel very familiar.
- From your WordPress admin panel, navigate to Plugins > Add New.
- In the search field on the top right, type “Tutor LMS Migration Tool” to find the plugin and click the Install Now button.
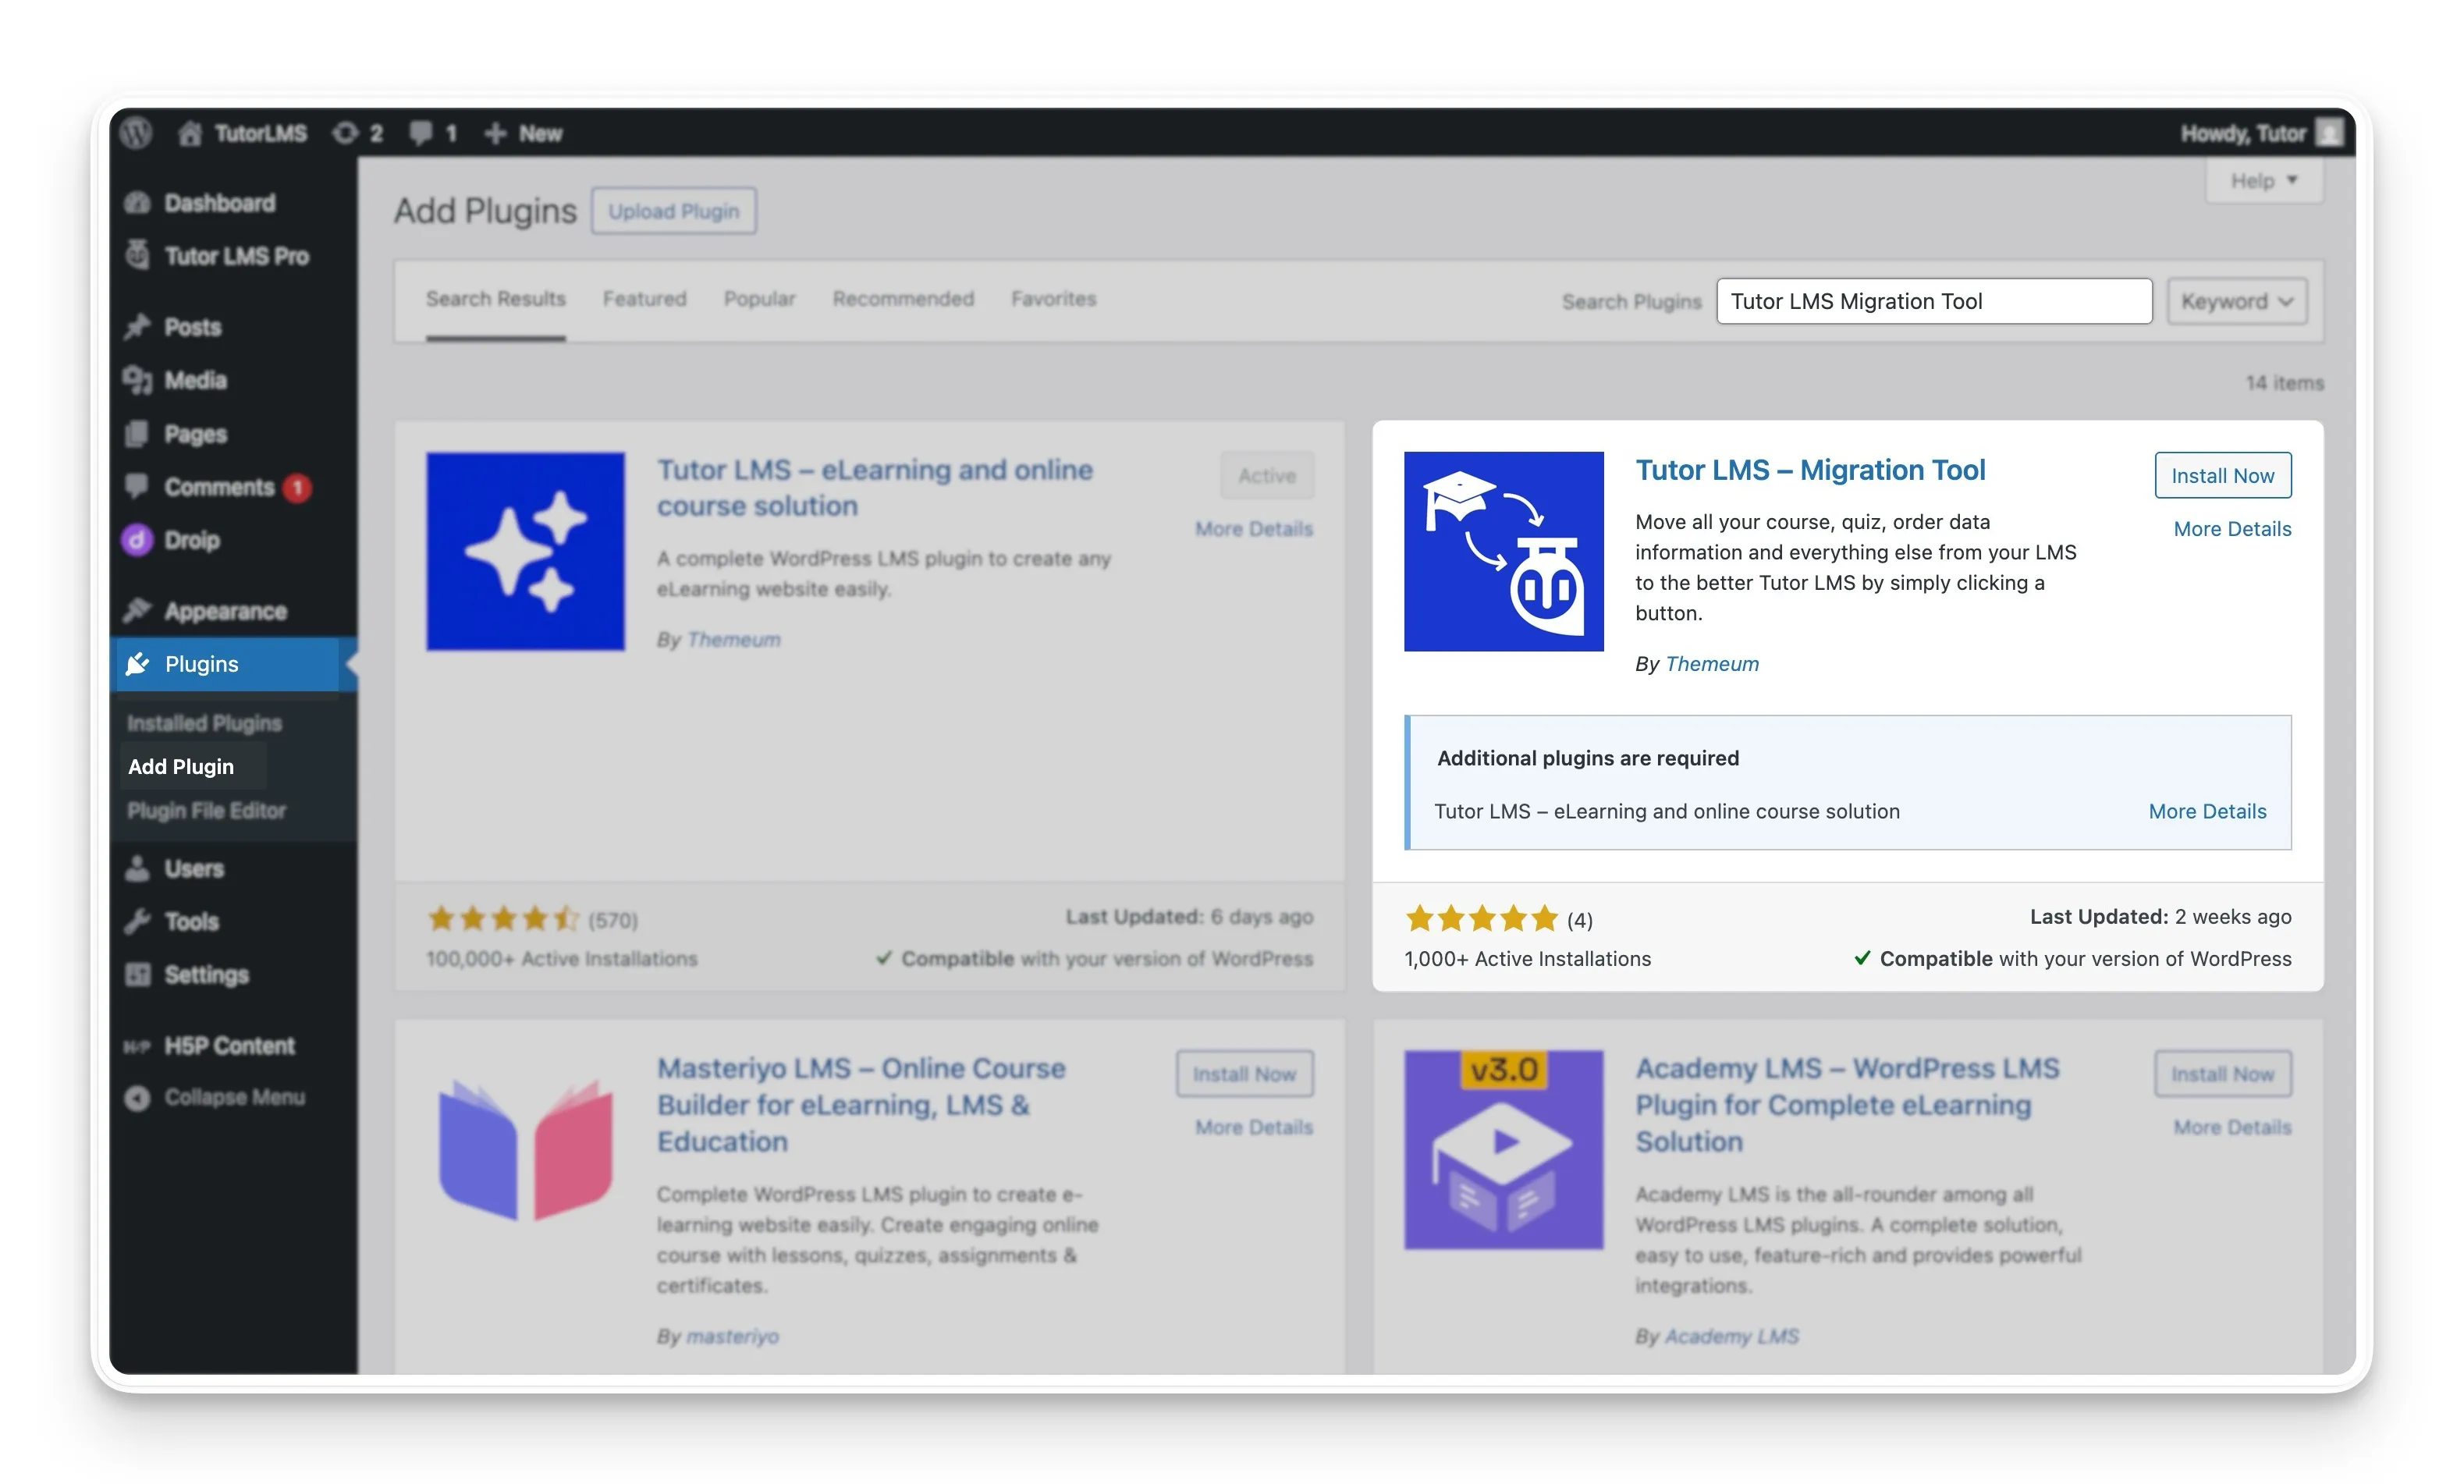
- After WordPress finishes the installation, you can complete the setup by selecting the Activate button.
With the migration tool now installed and active on your site, you are ready to look at what data will be transferred to your new Tutor LMS platform.
What Data Will Be Migrated?
A common concern during any LMS migration is knowing exactly what information will be transferred. The good news is that the Tutor LMS Migration Tool is designed to be comprehensive.
It carefully moves all the key components of your LearnDash site over to Tutor LMS. Below is a complete list of the data that will be included in the migration process, so you know exactly what to expect.
- Your Courses: This includes the entire course structure, along with all associated lessons, topics, quizzes, and assignments.
- User Data: All student and instructor profiles are transferred, preserving your user base.
- Sales & Order Data: The financial history of your platform, including all sales and order information, will be moved.
- Course Enrollment Records: The important connection between your students and their courses is kept intact by migrating all enrollment data.
- eCommerce Products: Any course-related products you created in WooCommerce or Easy Digital Downloads (EDD) are also transferred.
- Course Reviews: The valuable feedback and ratings your students have left on your courses will be preserved.
Knowing that all of this critical LearnDash data is accounted for, you can proceed with the migration steps with confidence.
The Step-by-Step Migration Guide
Now that you know what data the tool will transfer, you are ready for the migration itself. The process is designed to be as clear as possible, and this guide will walk you through each stage, from locating the tool to verifying your completed migration.
Important Note on Your Original Data: A crucial point to understand is that after a successful migration, the migration tool will delete the original courses from your LearnDash database. This is another reason why creating a full site backup before you start is so important.
Step 1: Locate the Migration Tool
First, you will need to access the migration dashboard. You can find this by navigating from your WordPress admin panel to WP Admin > Tutor LMS > Tools, and then selecting the LearnDash Migration tab.
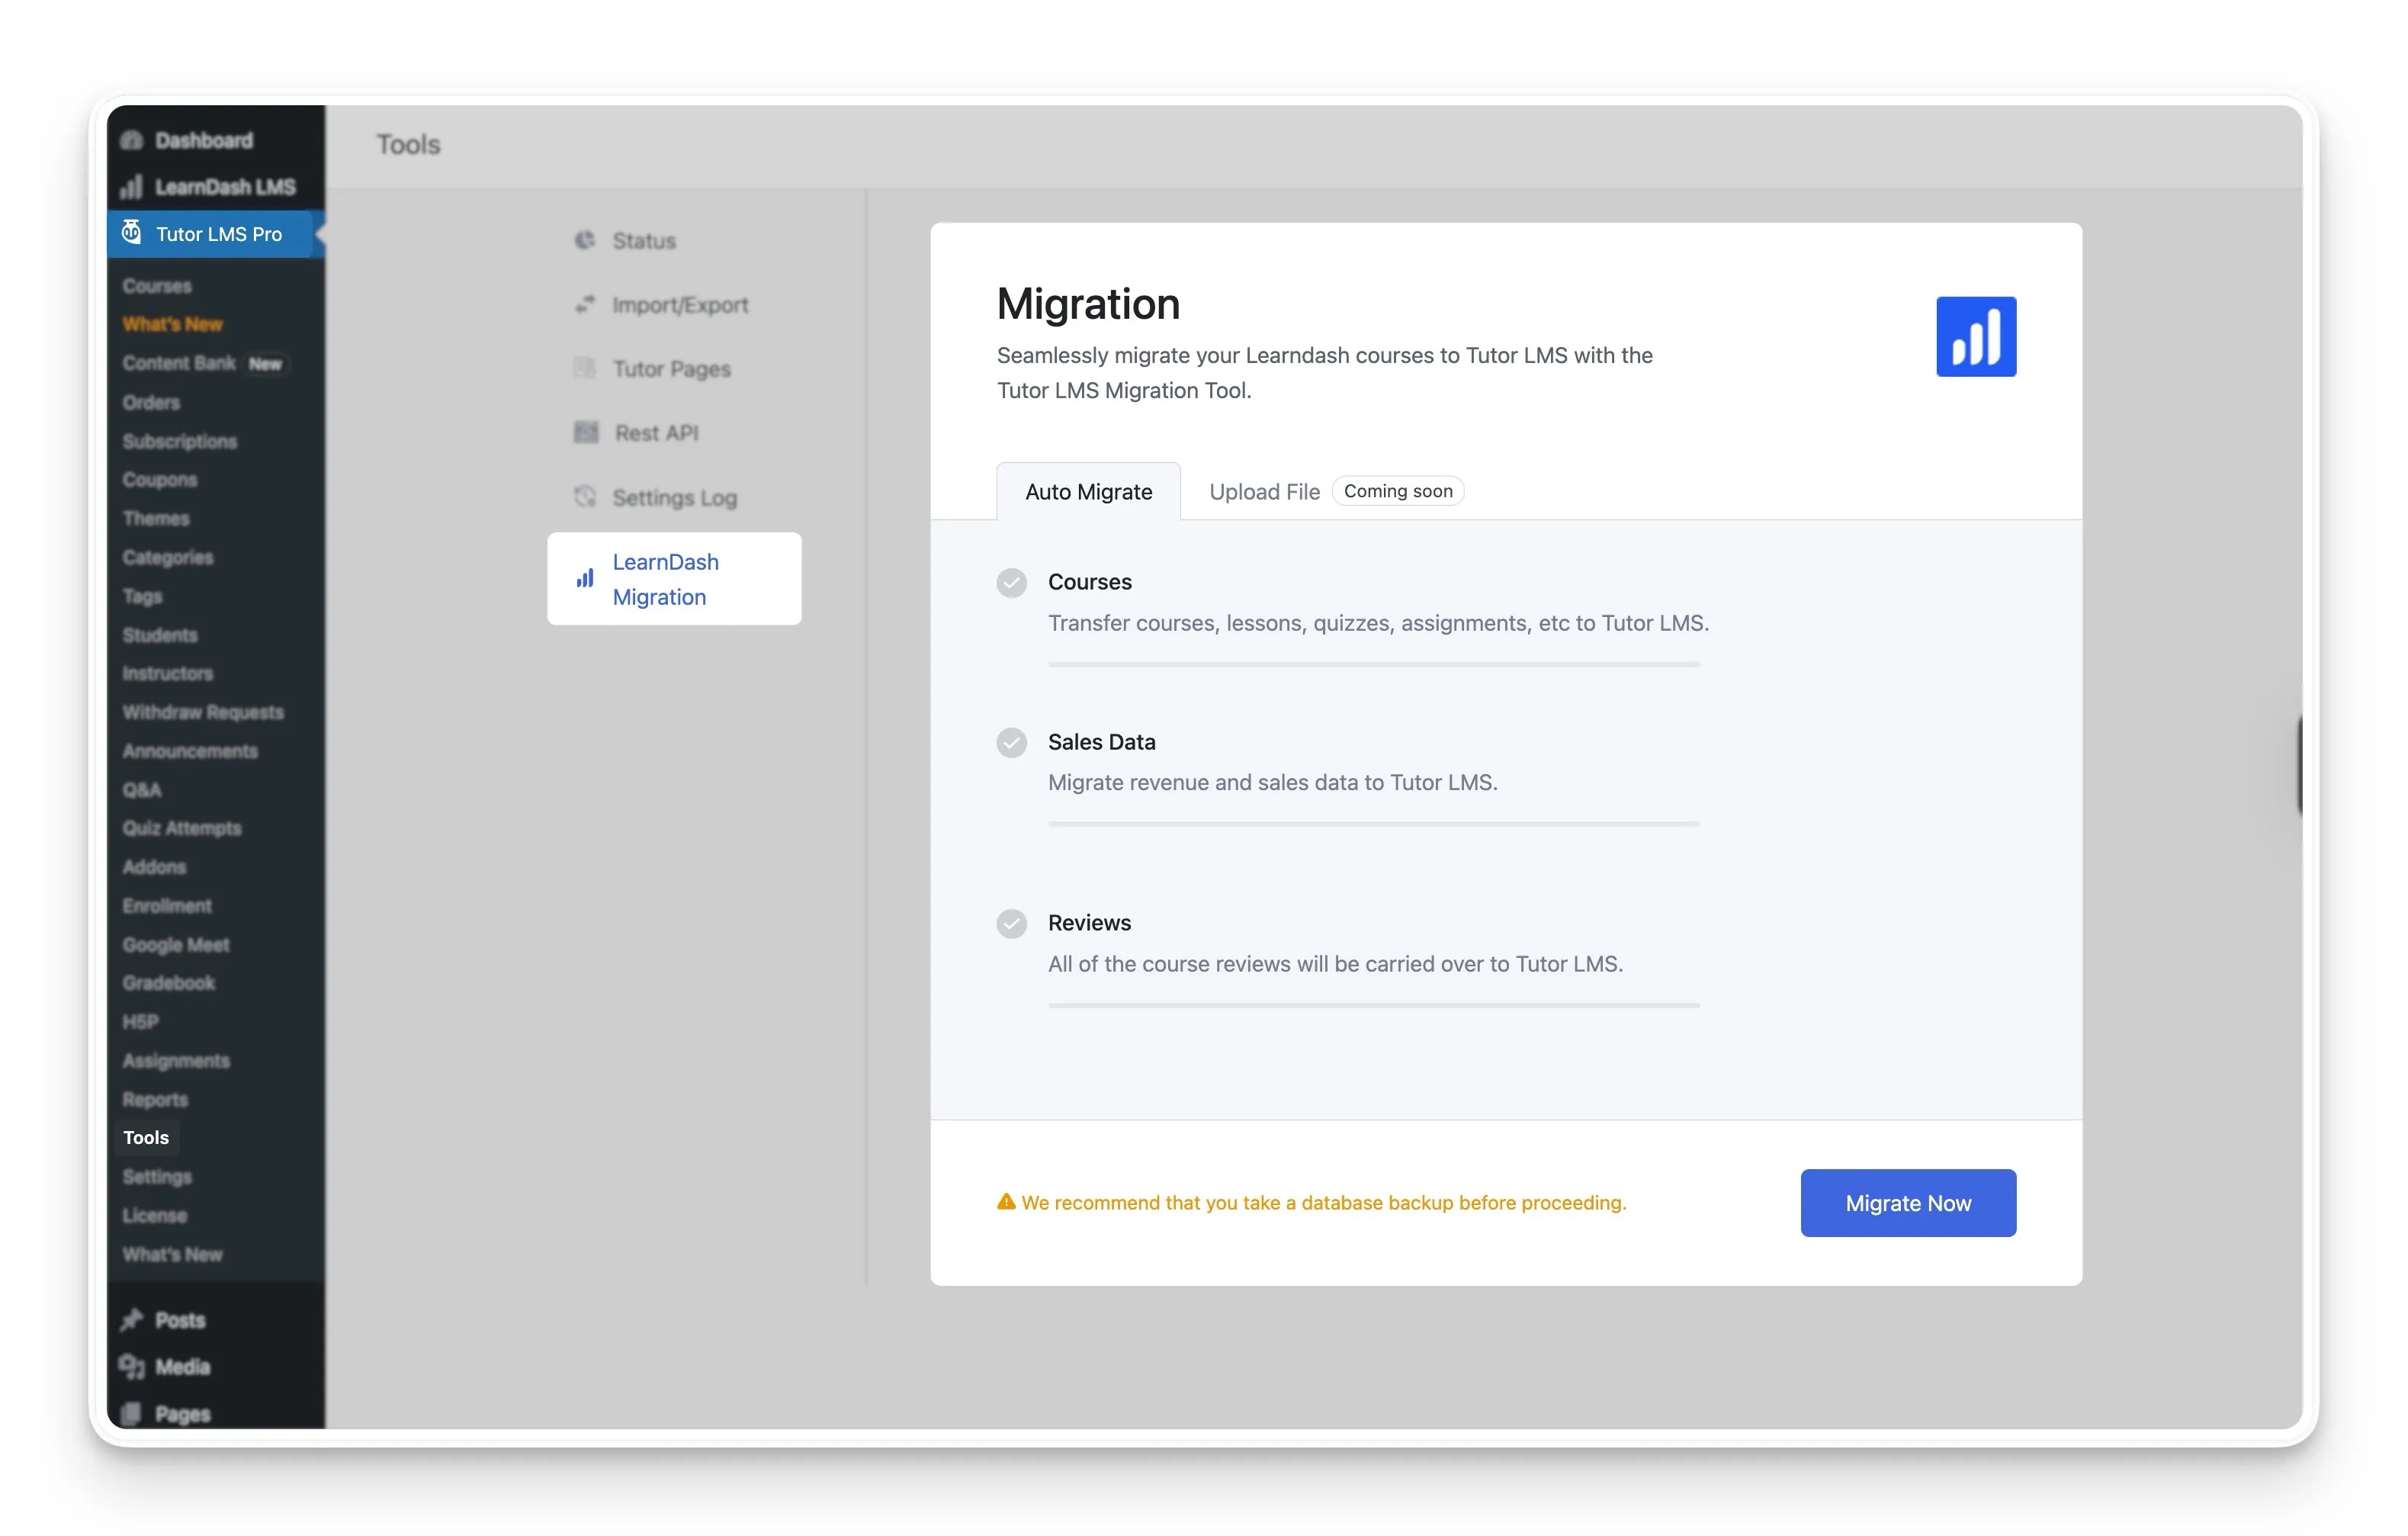
Step 2: Configure Pre-Migration Settings
Before starting the data transfer, a couple of settings should be reviewed to ensure everything goes to the right place.
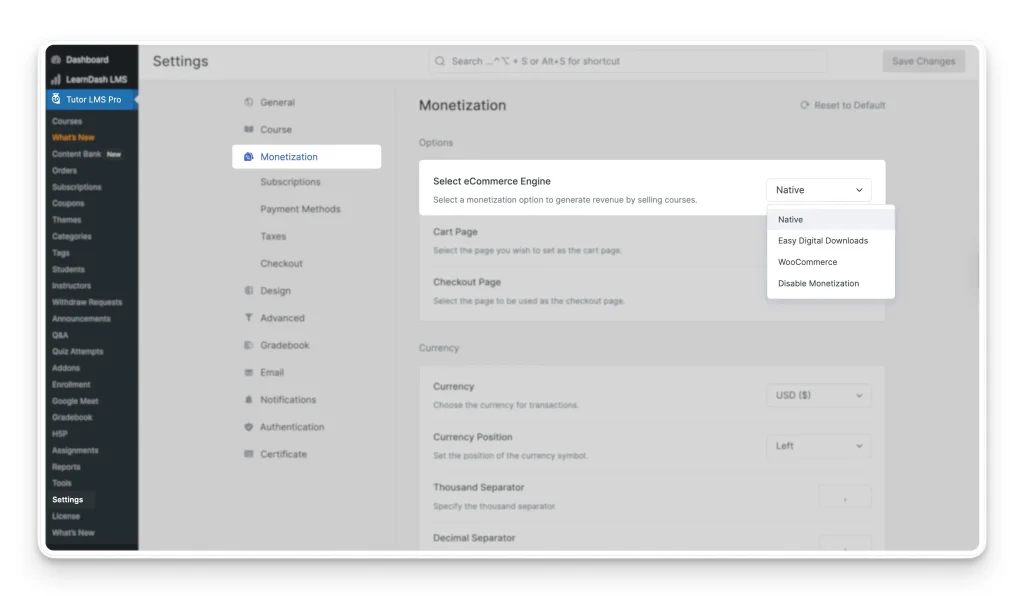
- eCommerce Data: This is an important step if you sell your courses. The migration tool will automatically send your sales data to the monetization engine that is currently active in your Tutor LMS settings. Your options include plugins like WooCommerce and Easy Digital Downloads, or you can use the built-in Tutor LMS native monetization engine. The key is to ensure your chosen engine is fully configured before you migrate.
- Automatic Certificate Generation: If you use the Certificate addon for Tutor LMS, the tool can automatically generate new certificates for your students. For this time-saving feature to work, the Certificate addon should be active and fully configured before you start the migration.
Step 3: Run the Migration
With all your preparations in place, you can now start the core migration process. On the migration dashboard, you will see a Migrate Now button. Selecting this button will initiate the transfer. The tool will show you a real-time progress bar, so you can see your data moving over. Once it is finished, a success message will pop up to let you know the migration is complete.
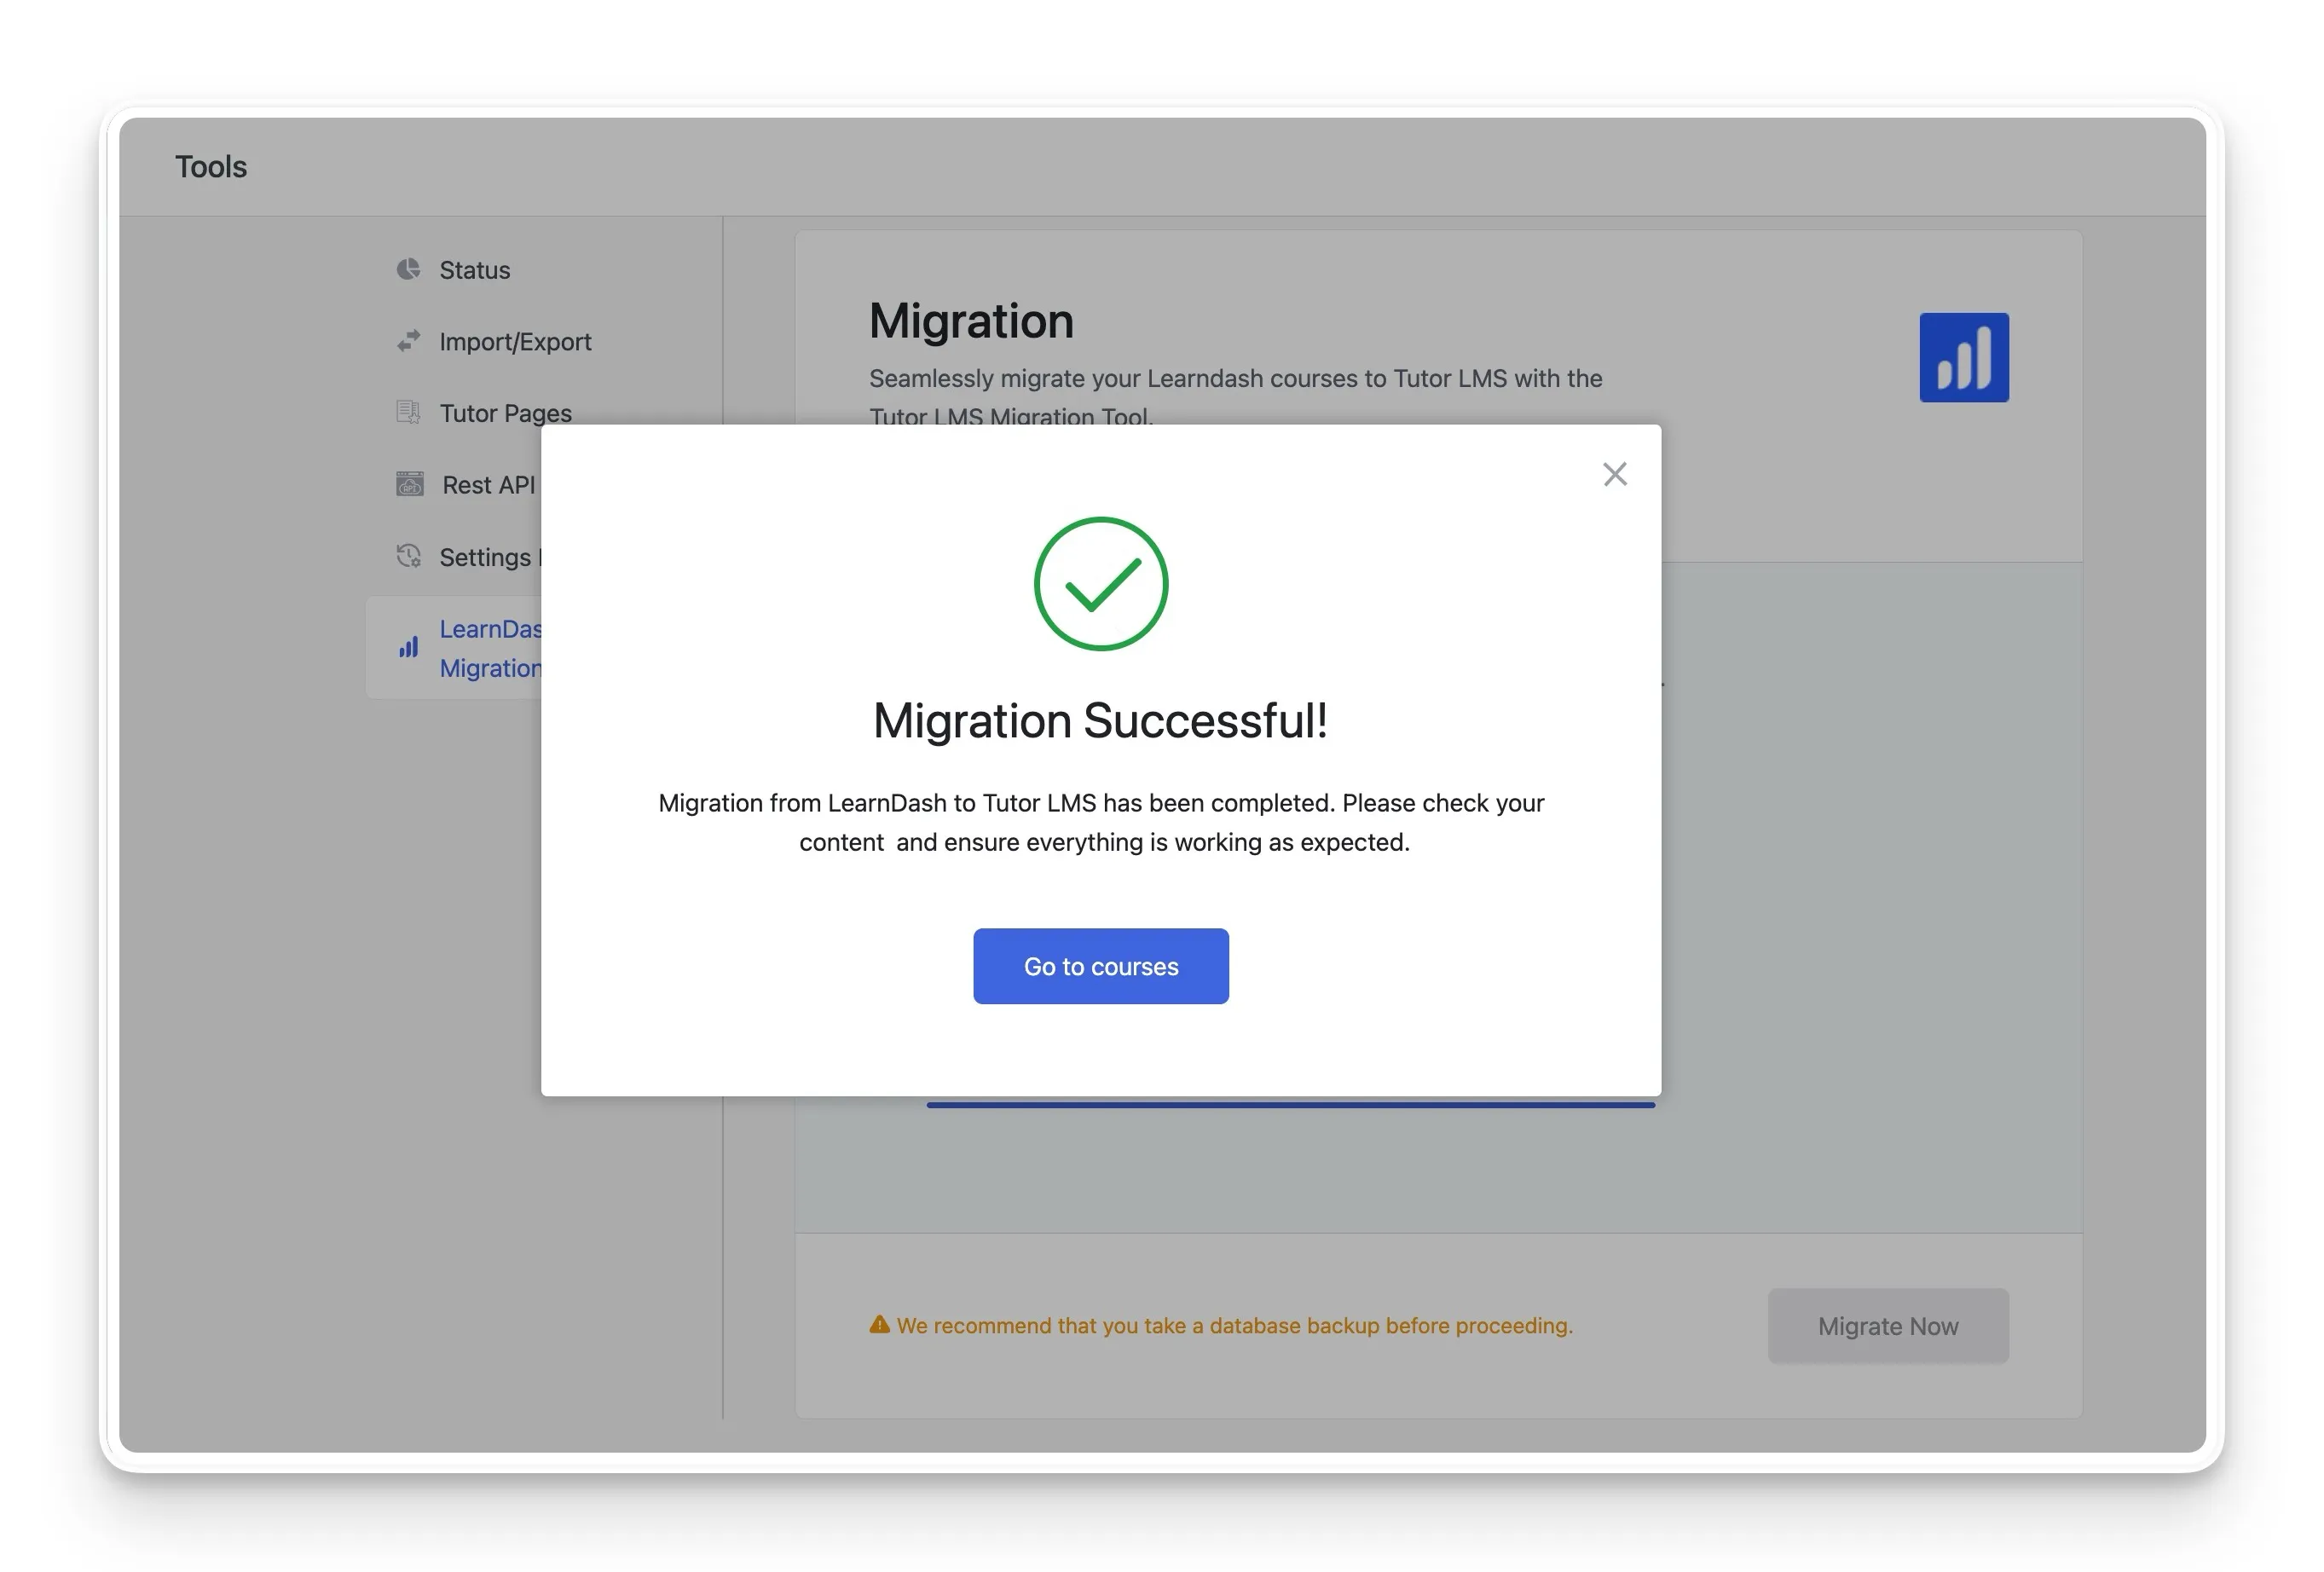
Step 4: Verify Your Migrated Content
After you see the success message, it is a good practice to check that everything has been transferred correctly. You can verify the migration by visiting the different sections within Tutor LMS. A good place to start is by checking Tutor LMS > Courses, Enrollments, and Reviews to see your newly migrated content.
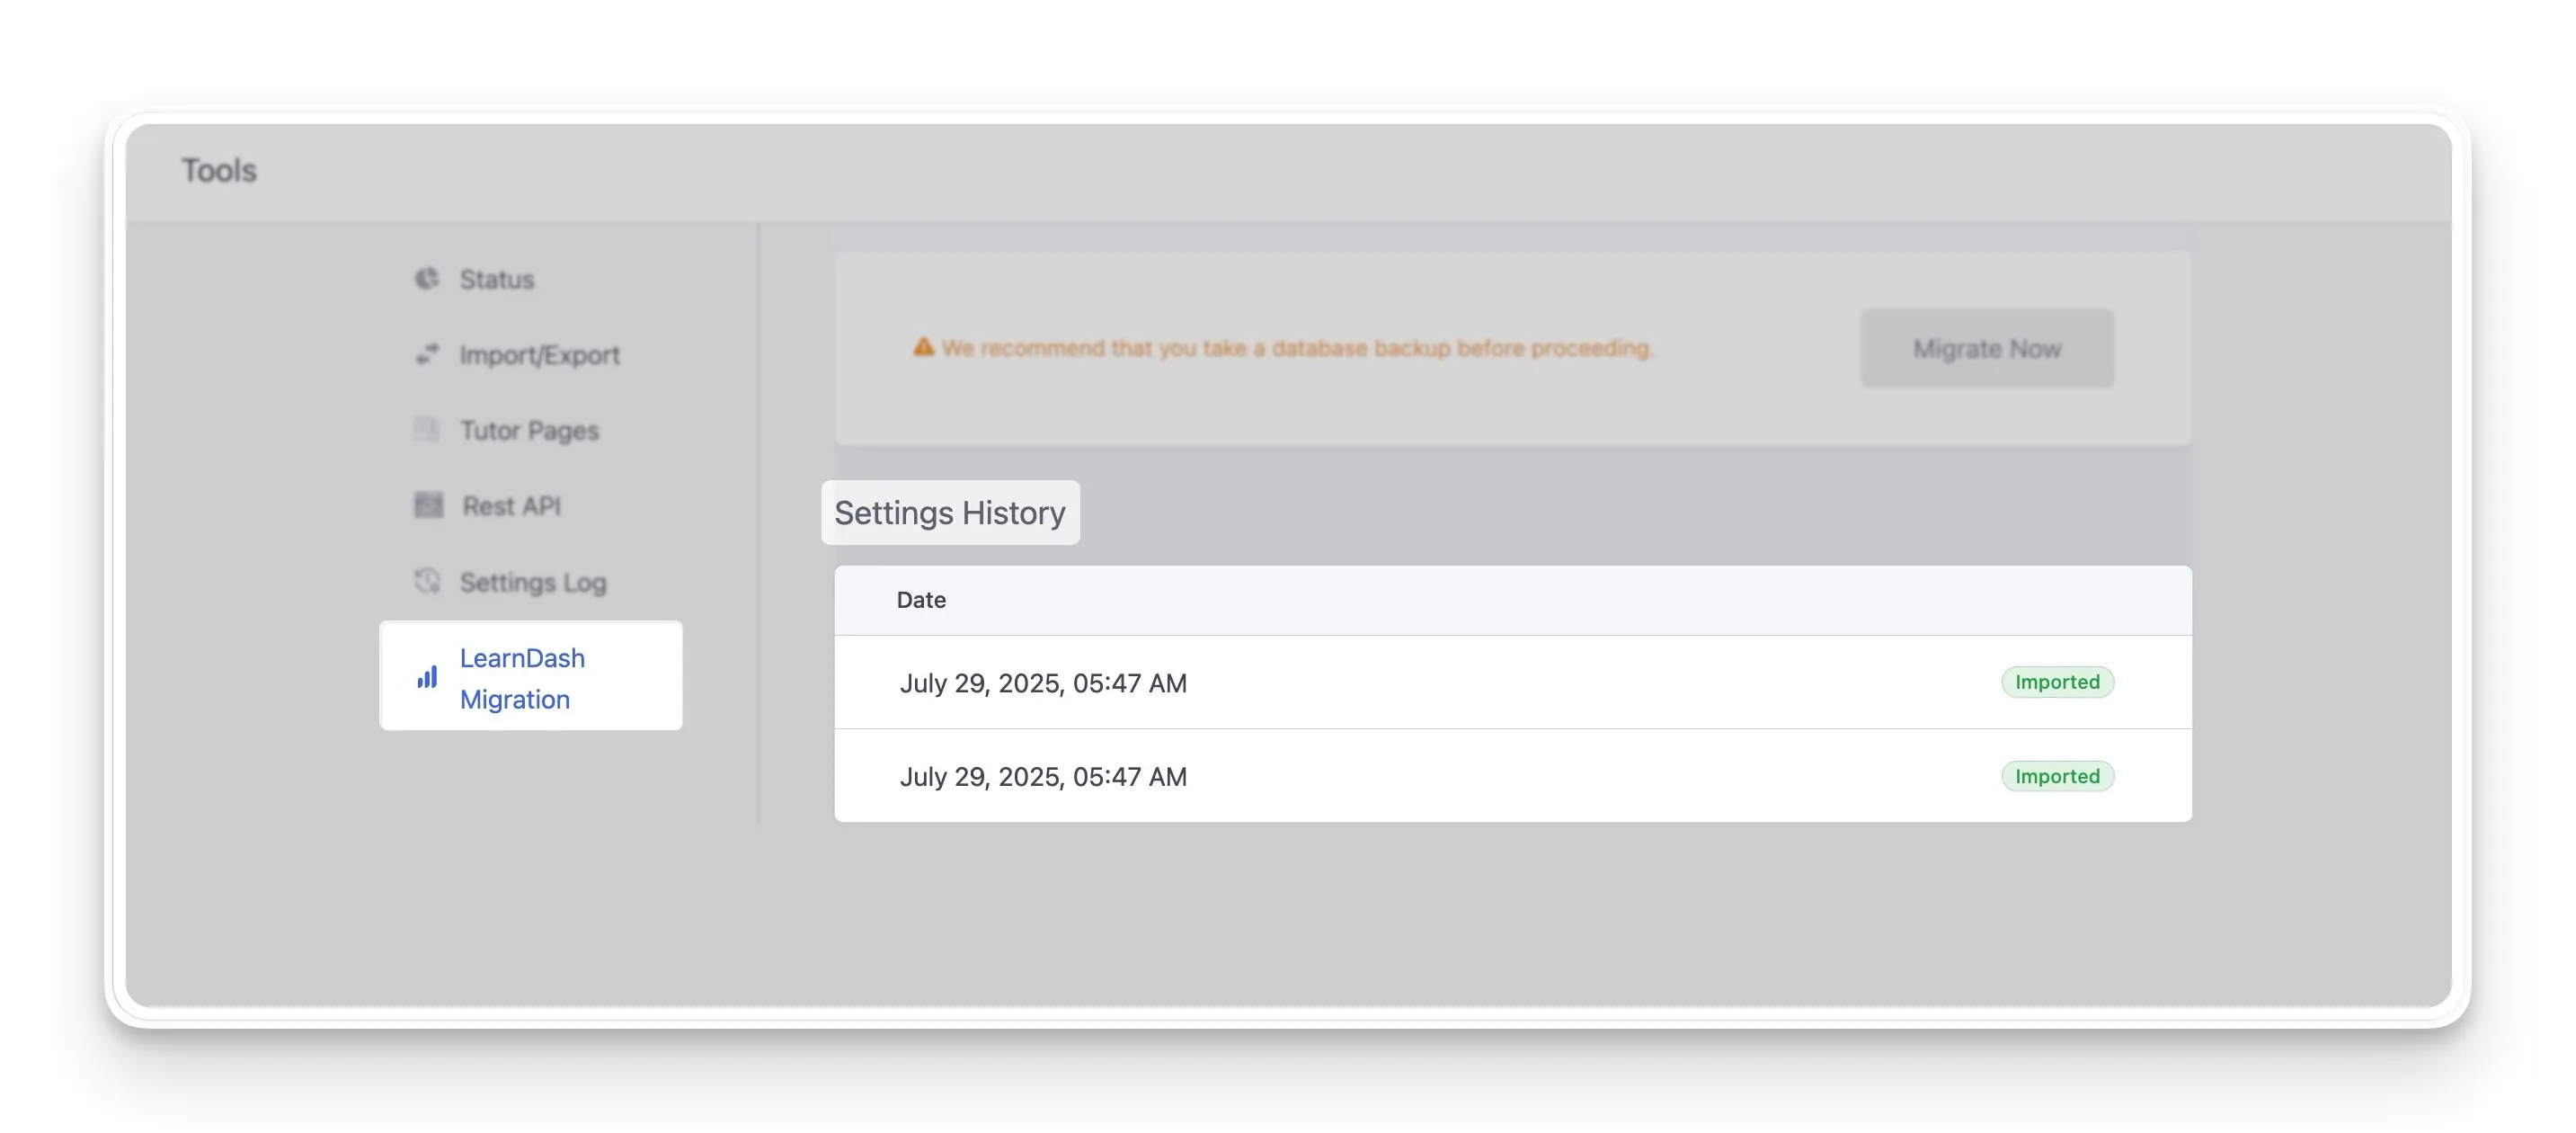
Reviewing Your Migration History
After you perform a migration, you might want a simple record of that action for your reference. The migration tool helps with this by automatically keeping a log of all related activities on your site. This feature provides a clear history of your migration events.
This log is found within the Settings History section of the tool. It is designed to give you a straightforward list of every migration-related event that has occurred. The history is generated automatically after the first event is triggered.
An Alternative Migration Method on the Horizon
The Tutor LMS Migration Tool is also being developed to include an alternative path for transferring your data. This manual method is designed for users who prefer more direct control over the process or as a potential solution if any issues arise with the automatic migration.
The process is planned to work in two simple parts. First, you will be able to export all of your LearnDash data into a single XML file. This file will serve as a complete backup and the source for the manual import. Once it is released, you will be able to take your exported XML file and upload it directly to complete the migration. This will provide another flexible and powerful way to move your content to Tutor LMS.
Your Migration is Complete: What’s Next?
Successfully completing the migration from LearnDash to Tutor LMS is a major accomplishment. All of your valuable courses, student data, and sales history now have a new home, ready for you to build upon. By following the steps and using the Tutor LMS Migration Tool, you have set a strong foundation for the future of your online school.
Now the exciting part begins: exploring what your new platform can do. This is a great time to discover the powerful features within Tutor LMS, from the advanced quiz builder to the intuitive course creation process. You can start enhancing your existing courses or begin creating new learning experiences for your students.
Should you have any questions as you get started, or if you want to learn more about specific features, our resources are always available to help. A great next step is to explore our other Tutor LMS tutorials and Documentation. For any specific queries, our support portal is an excellent place to find answers and connect with the community.

Start Using Tutor LMS Today
Ready to take your online courses to new heights? Download Tutor LMS now and enjoy a journey of eLearning excellence.