Note: This is a guest post written by Ashley Thompson. More information at the bottom.
Zoom can be a great addition to your Tutor LMS powered site, and Amelia Appointments and Events makes it easy! If you want to do a recap video session with a student or a group of students or even do an entire video lesson live with Zoom in Tutor LMS, now you can!
More than a booking plugin, Amelia integrates with your Google Calendar and Zoom. With Amelia, you can set up an appointment in one of your Tutor LMS lessons to create a zoom meeting.
Note: If you only need to create online meetings, you can do so using the Zoom or Google Meet addons of Tutor LMS.
How to Install & Configure Amelia
First of all, you need to install Amelia on your WordPress website. You can follow the step by step guide below.
- Download the file: Once you’ve purchased your Amelia plugin, download the .zip file to your computer.
- Install the plugin on your WordPress site: Open your WordPress admin panel, go to Plugins » Add new » Upload, and select the .zip file that you downloaded.

- Activate the plugin: In your WordPress admin panel, go to Plugins, find Amelia booking, and click “Activate”.
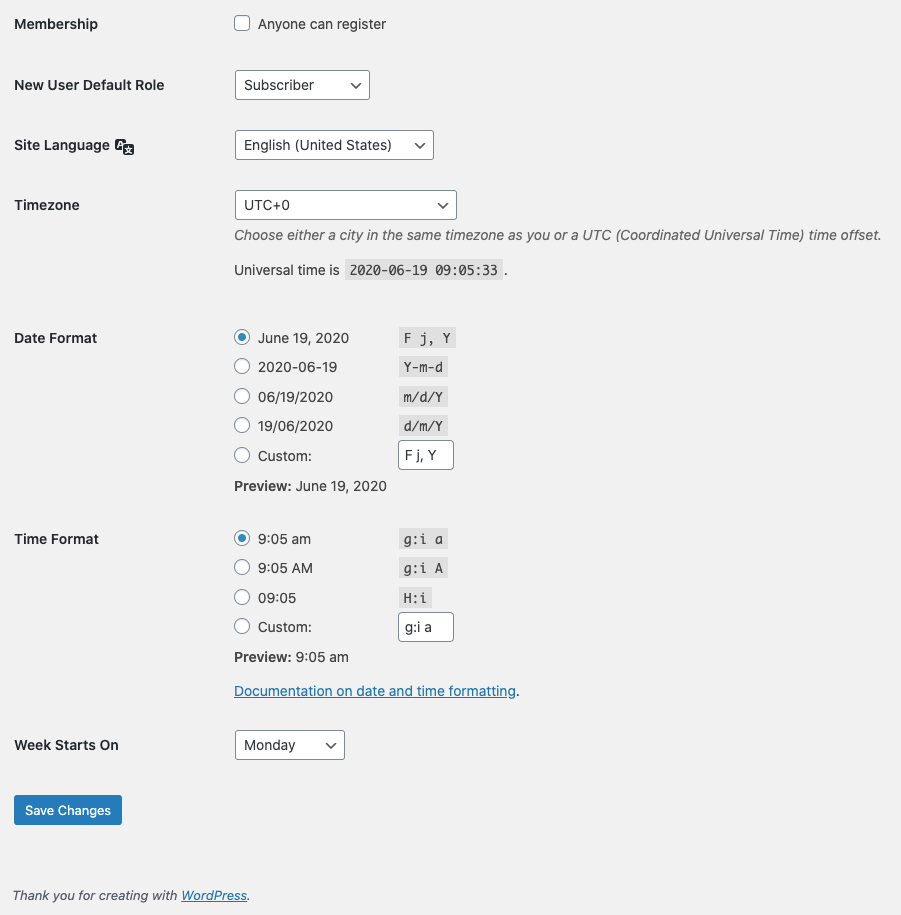
The next step is the most important and tends to get skipped over. You want to make sure your date and time are set correctly! Amelia follows the WordPress global configuration so you want to ensure everything is set the way you need it.
You can check or modify the date & time by going to Settings » General page from the WordPress admin dashboard and scrolling down to the Timezone section. Set up the “Timezone”, “Date Format”, “Time Format”, and the “Week Starts On” settings as you see appropriate for your business. After you click “Save Changes”, the defined settings will be used by Amelia booking.
Now, you can go into Amelia’s Settings and start setting up all the options. During this time, you can go to Integrations and there you will find Zoom.
Let’s Integrate Zoom!
To use Amelia and Zoom together, you will need to set up the Zoom application first so you can connect it with the Amelia plugin.
- Sign up or Sign in to Zoom – If this is your first time on Zoom, you will need to sign up by entering your email. After you have entered the email you will receive a message from Zoom to confirm your address and finish the process. Open the email and follow the link that Zoom has sent you, set up your password, and skip steps for “adding a new member” for now. After that, you will be redirected to your Zoom Profile.
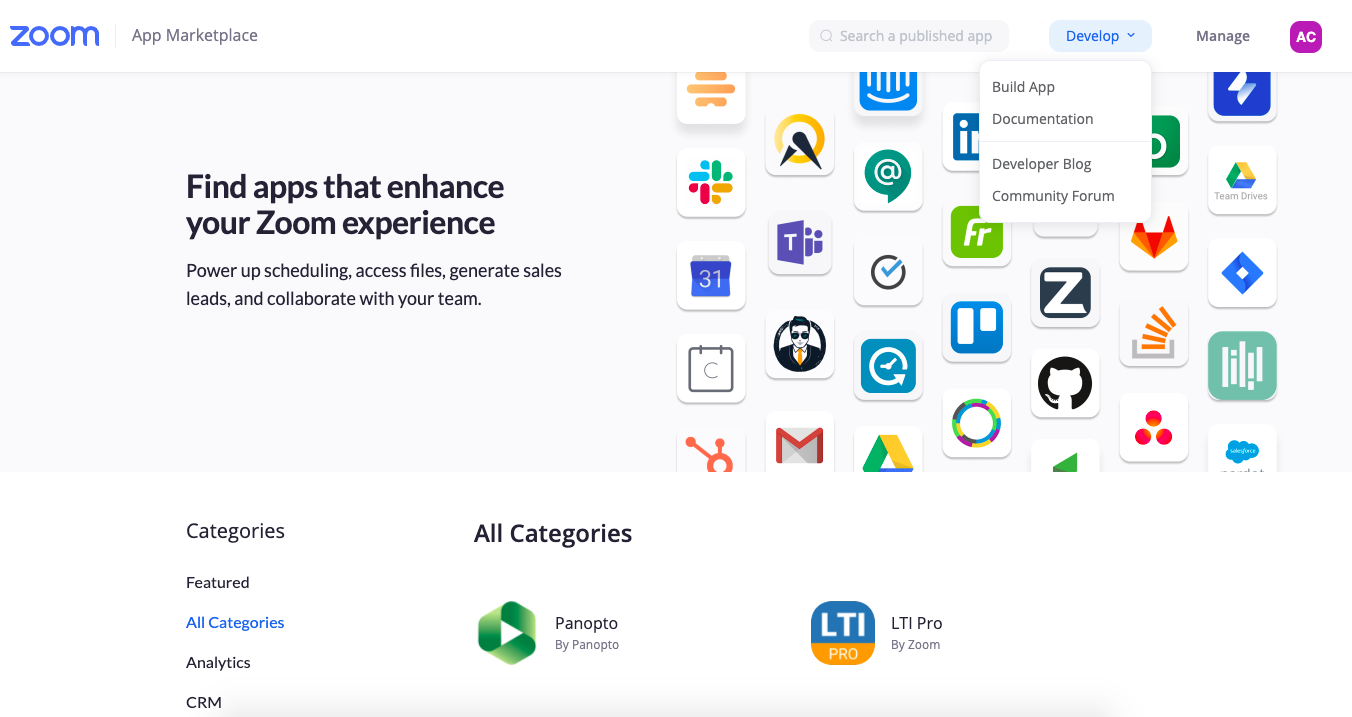
- Visit Zoom App Marketplace – Visit this link to see the Zoom App Marketplace. Once you enter the page click Sign In and enter your credentials for the account that you previously created on Zoom.
- Create your App – Once you have entered the marketplace, click on the Develop button and choose the Build App option.
- Choose your App type – On this page, you need to choose the first option JWT. Click “Create” and you will see a popup to give your App a name. Enter the name and click “Create.”
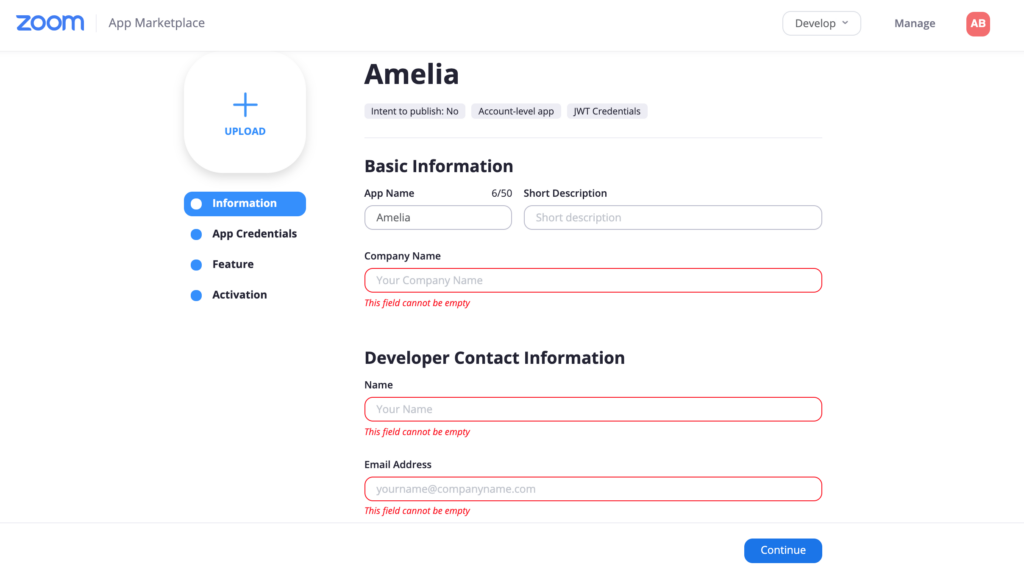
- Basic Information – Once you have added a name to your app you will be redirected to the Information page. Here you will enter just the mandatory information and you can add the rest later if you want since the rest fields are optional. In Basic Information add Company Name, and in Developer Contact Information add Name and Email address and click “Continue”.
- App Credentials – Once you have entered basic information, the App Credentials tab will open. You will need to paste this information into Amelia Settings in order to connect the plugin with your Zoom app. Click “Copy” in the “API Key” field and open Amelia Settings. On the “Settings Page” you will see “Integration Settings”, open it and choose “Zoom” (the second tab). Paste “API Key” from Zoom to “Client Key” option in the Zoom Settings.
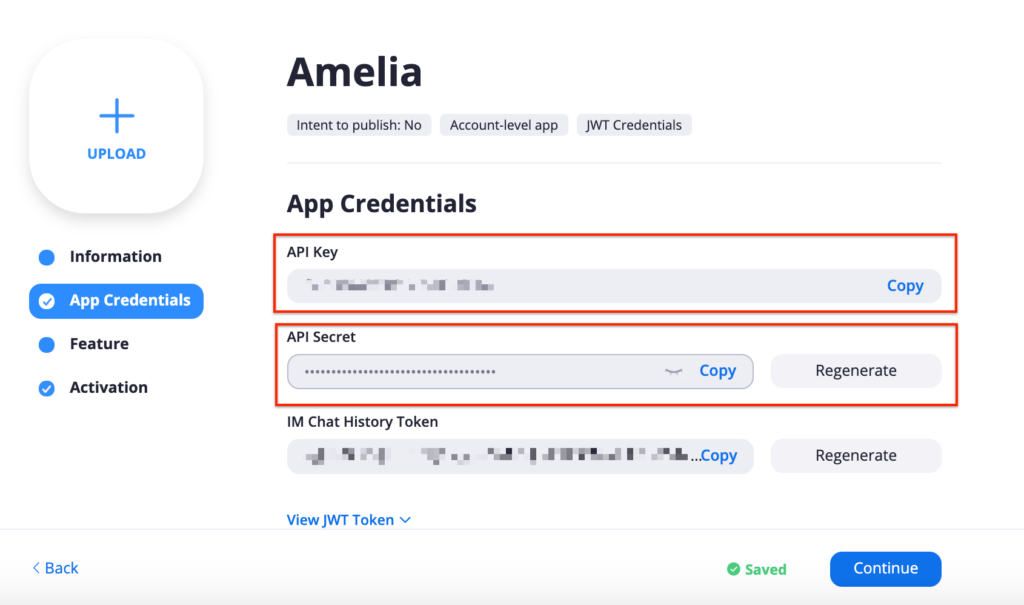
Then go back to your Zoom App, copy the “API Secret” and paste it in the “Client Secret” option in our Zoom Settings. Now click “Save” in the bottom right corner of Zoom Settings in Amelia plugin. The plugin and your Zoom application will be connected.
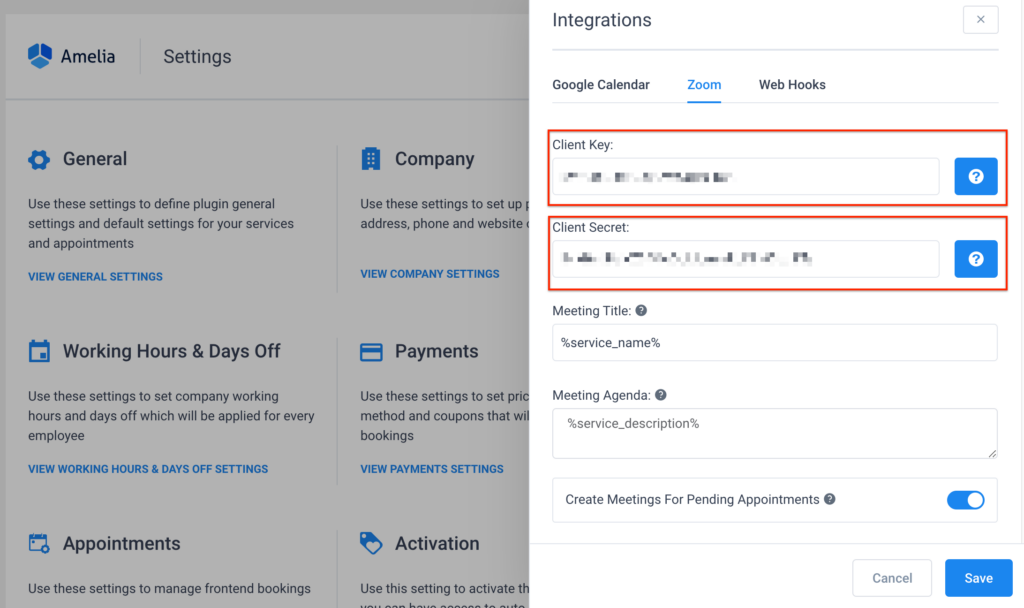
Underneath the “Client Key” and “Client Secret” in Zoom Settings you will see three other options to set:
- Meeting Title – Here you can set what you want your meeting title to be. In order to create a different meeting title each time that matches your meeting, you will need to add the placeholder from the email notifications page. In the Notifications page, open the “Show Email Placeholders” option and copy the placeholder that you want and then paste it in this field.
- Meeting Agenda – This works exactly the same as the above settings.
- Create Meetings For Pending Appointments – Here you can choose whether you want your meetings to be created for pending appointments or not. By default, this option is disabled which means that meetings will be created only for the appointments with Approved status.
Once you have those set, remember to click save! Now that you’ve set the Zoom settings, you will need to connect your employee(s)/events with zoom hosts.
To connect your employees, go to the Employees page, open Employee and you will see option “Zoom User”. Open the dropdown and you will see the user that you have created while creating the Zoom application. It is possible to connect each employee with a different zoom user so they can have separate Zoom accounts for the meetings. To set this go back to your Zoom account. Click on the “User Management” in the left sidebar and then click on the “Users”. The popup for adding users will appear.
Enter the email address in the first field and choose Basic as User Type and click “Add”. Now go back to Amelia plugin and in the Employee modal in “Zoom user” field you will see a new user for connecting. For using Zoom with an event, go to “Add Event” and you will see the same options as in employees.
NOTE: Make sure when you set up a Service, you tick the bubble so that Zoom integration is on.
Double-check Notifications! Go to the Notifications page, click on the “Show email placeholders” button and it will show all currently allowed placeholders. Scroll down to the bottom of and you will see the placeholders for Zoom. For appointments you will have two placeholders:
- %zoom_host_url% – this is the placeholder that you need to paste to employees’ appointment notifications.
- %zoom_join_url% – this is the placeholder that you need to paste to customers’ appointment notifications.
For events, once you click on one of the event booking notifications you will see four different placeholders at the bottom of the list:
- %zoom_host_url_date% – This is the placeholder that you need to paste in employees’ event notifications if you want to show the URL with a date.
- %zoom_host_url_date_time% – This is the placeholder that you need to paste in employees’ event notifications if you want to show the URL with date and time.
- %zoom_join_url_date% – This is the placeholder that you need to paste in customers’ event notifications if you want to show the URL with a date.
- %zoom_join_url_date_time% – This is the placeholder that you need to paste in customers’ event notifications if you want to show the URL with date and time.
Now that you are all set, have you created a service or event? You can make a simple service such as “One on One Course Recap”. You can even make it a group event if you’d like to do a meeting with several students at once. Make sure the zoom integration is highlighted blue. Once you’ve created your service or event, you can add it to your Tutor LMS if you choose.
Just go into your courses to create a lesson and enter the shortcode for the desired service or event; for example: [ameliacatalog service=1]. When your student reaches that part of the lesson, they will be able to “book” or “sign up” for the service or event. Because you have already set up your notifications, your student and the person assigned to the service/event will receive an email with an automatically created meeting room link! You can also find the generated link in your Amelia Appointments and Events section. You can click the appointment or “edit” and open the Zoom tab. There you will see your link and your student’s link.
Congratulations on Using Zoom with Tutor LMS!
And there you have it! I know it seems like a lot of work but once you’ve set up Amelia, it really is a breeze. Just add the shortcode in your lesson and you’re good to go! I hope you’ll enjoy this integration as much as I do!
This is a guest post written by Ashley Thompson, Owner/Operator of Thompson Traditions.
There is a more recent version of Tutor LMS that works directly with Zoom. To find out more, visit our blog and documentation to learn all about it. This post was updated on 19th October 2020 with relevant information.
Start Using Tutor LMS Today
Ready to take your online courses to new heights? Download Tutor LMS now and enjoy a journey of eLearning excellence.
