If you create and sell online courses, you know how important it is to secure all that hard work from being copied or shared illegally. Nothing is more frustrating than seeing your course content uploaded on some random website for free! But don’t worry – your online learning platform, Tutor LMS has some great built-in security features. These tools will help lock down your course content so it stays secure.
In this article, we’ll look at 7 must-enable Tutor LMS security features to keep your content secured from piracy. Having these features active will give you more control over who can view and access your learning content. With the right protections in place, you can rest easy knowing your digital courses and assets are safe from piracy. Ready to learn how to lock down your LMS? Let’s get started!
Protecting Your Content With Tutor LMS Pro
In today’s digital age, where knowledge and creativity flow freely through the internet, it’s crucial to safeguard your valuable content. Whether it’s your creative projects, educational materials, or personal work, you’ve poured time and effort into making it valuable. Just like how you lock your home to keep your belongings safe, there are essential ways to secure your digital creations.
In this section, we’ll explore how Tutor LMS empowers you to protect your content. We will delve into the tools that will enable you to defend your creations from unauthorized access, copying, and misuse. It’s all about ensuring that your hard work and ideas remain in your control:
1. Secure Against Hotlinking
What is hotlinking, you may wonder? Hotlinking is when someone tries to steal your valuable content by directly linking to those resources (images, music, videos, and documents) without your permission. Not cool!
Hotlinks gobble up your bandwidth as others use your content on their own sites. But Tutor LMS lets you defend your content.
The Tutor LMS Shield Against Hotlinking
So, how do you protect your content from these resource-hungry bandits? Tutor LMS makes it a piece of cake. Follow these steps:
- Navigate to Tutor LMS > Settings > Advanced.
- Scroll down to “Content Security.“
- Enable the “Prevent Hotlinking” option.
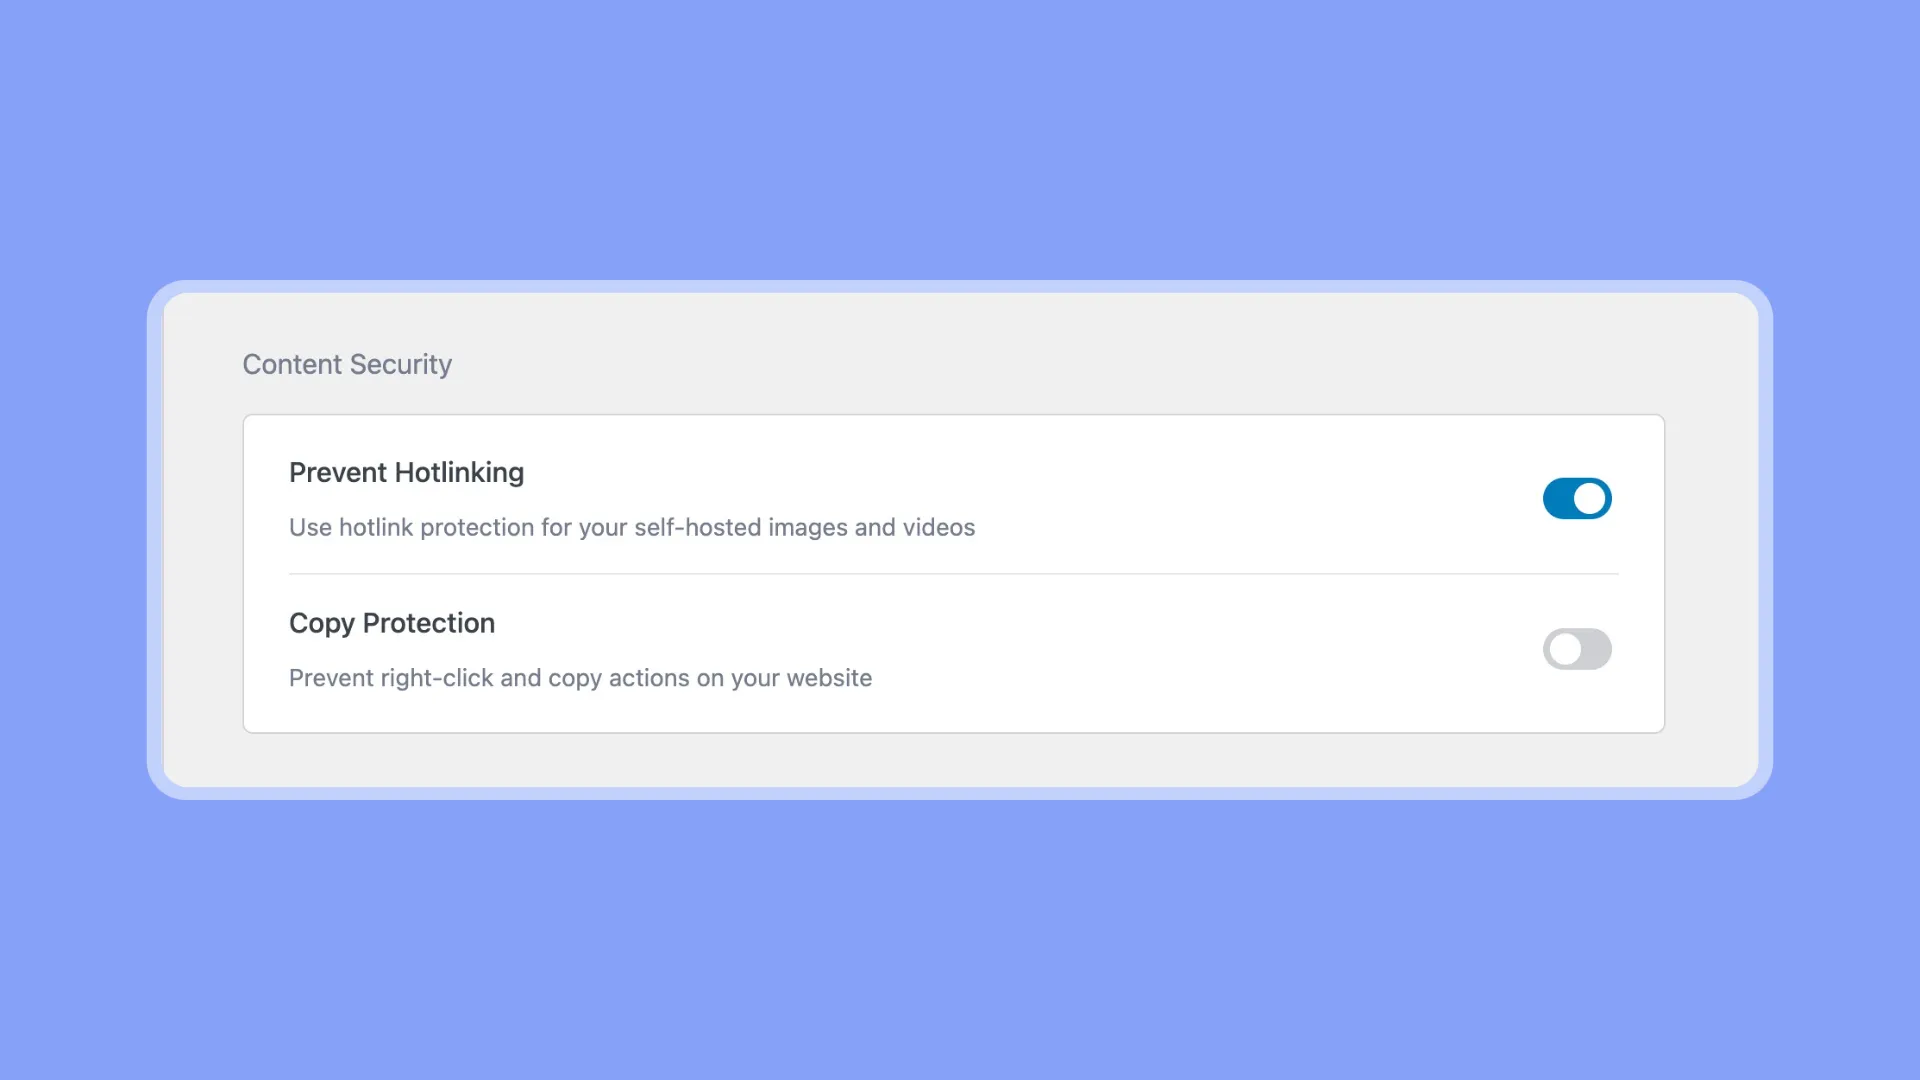
Now, any sneaky hotlinkers trying to snatch your self-hosted media will get the boot. Your bandwidth and content remain under your control.
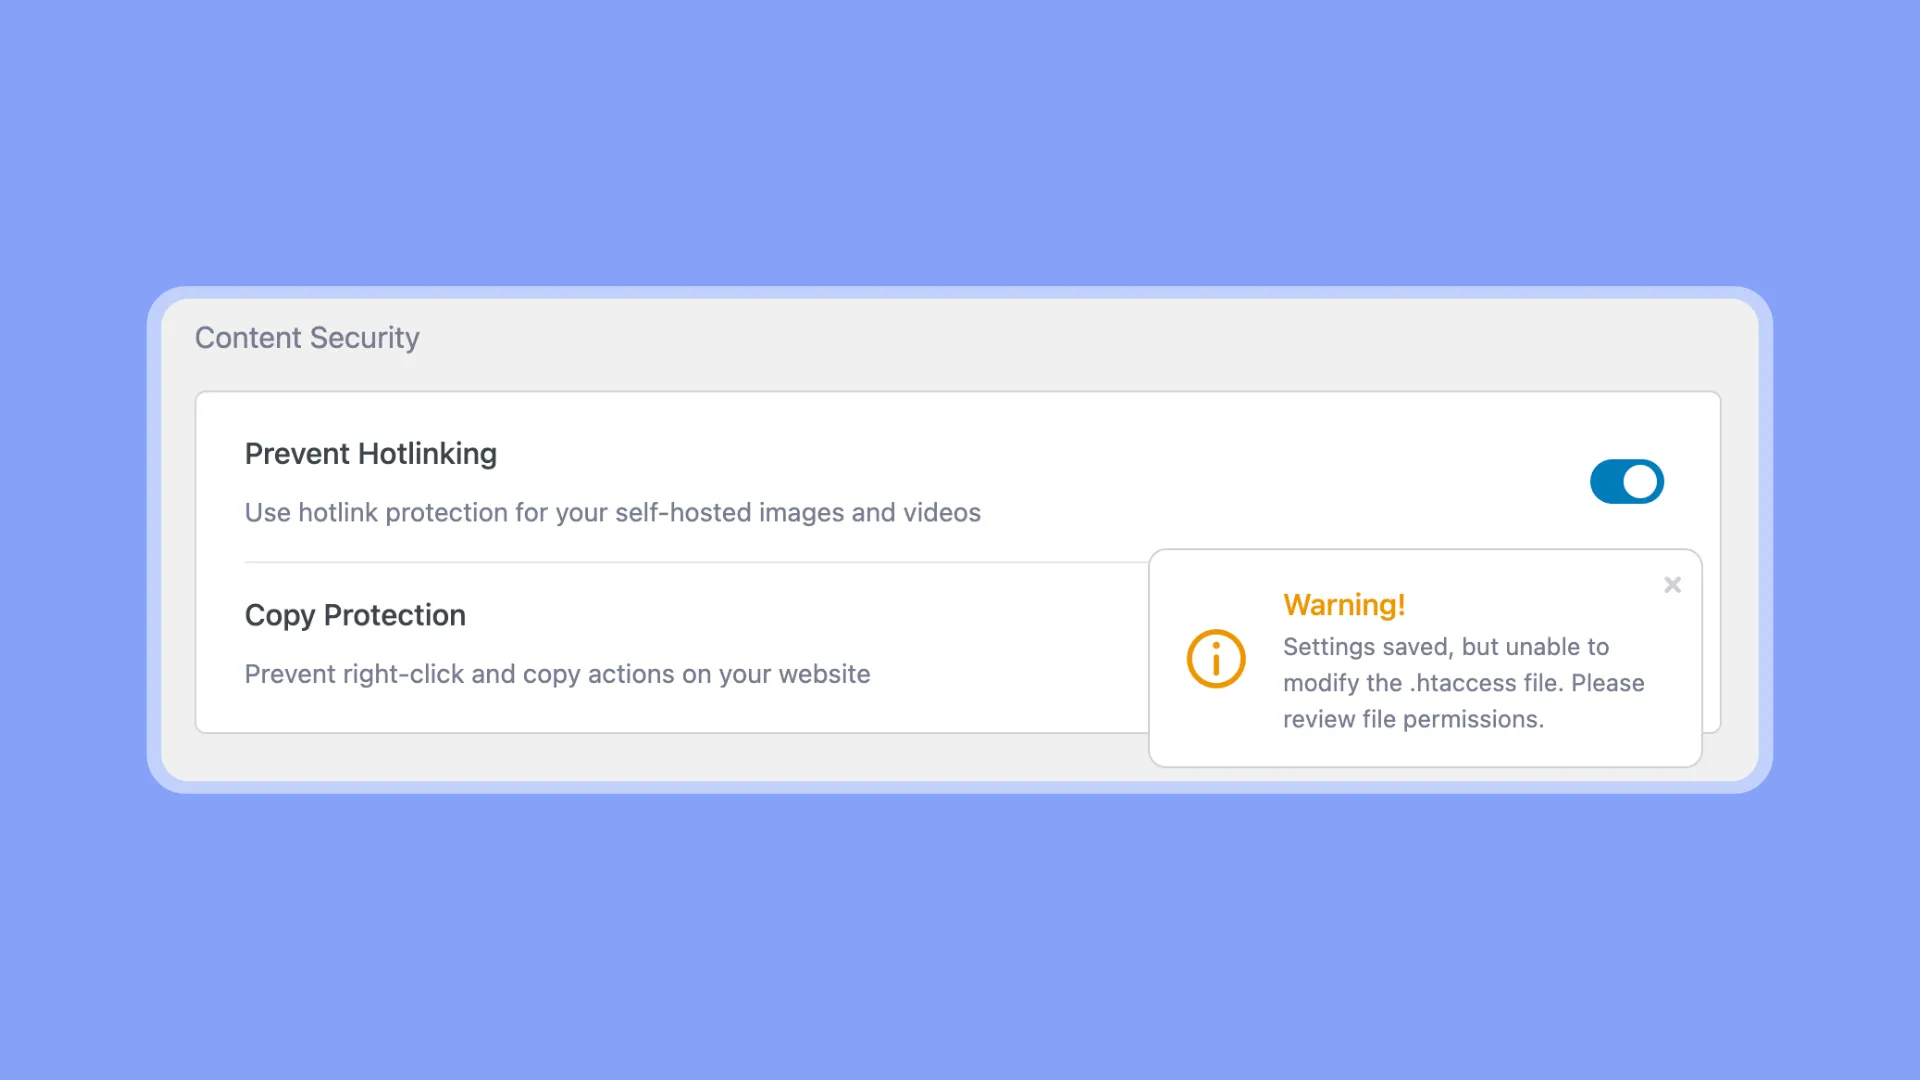
A Note for Tech-Savvy Heroes: Hotlinking works best with websites running on Apache servers. If, after hitting the “Save Changes” button, you encounter any warning message, double-check that Tutor LMS has write-access to the “.htaccess” file of your eLearning site. This ensures your security measures are working smoothly.
With your content now protected from being linked without permission, let’s see how to stop people from copying it directly from your site.
2. Stop Content Theft with Right-Click Defense
Ever had your course content copied without permission? Not fun. But you can outsmart content ninjas with Tutor LMS Pro’s right-click defense!
Disabling right-click protects your hard work. Generally, when you right-click, you usually get options like “Copy” or “Save Image.” By disabling this, you prevent anyone from easily swiping your precious work. It blocks copy + paste of your texts, images, videos, etc. Your intellectual property stays safe from theft.
Activating right-click defense is simple:
- Head to Tutor LMS Pro > Settings > Advanced.
- Scroll down to the “Content Security” section.
- Turn on the “Copy Protection” option.
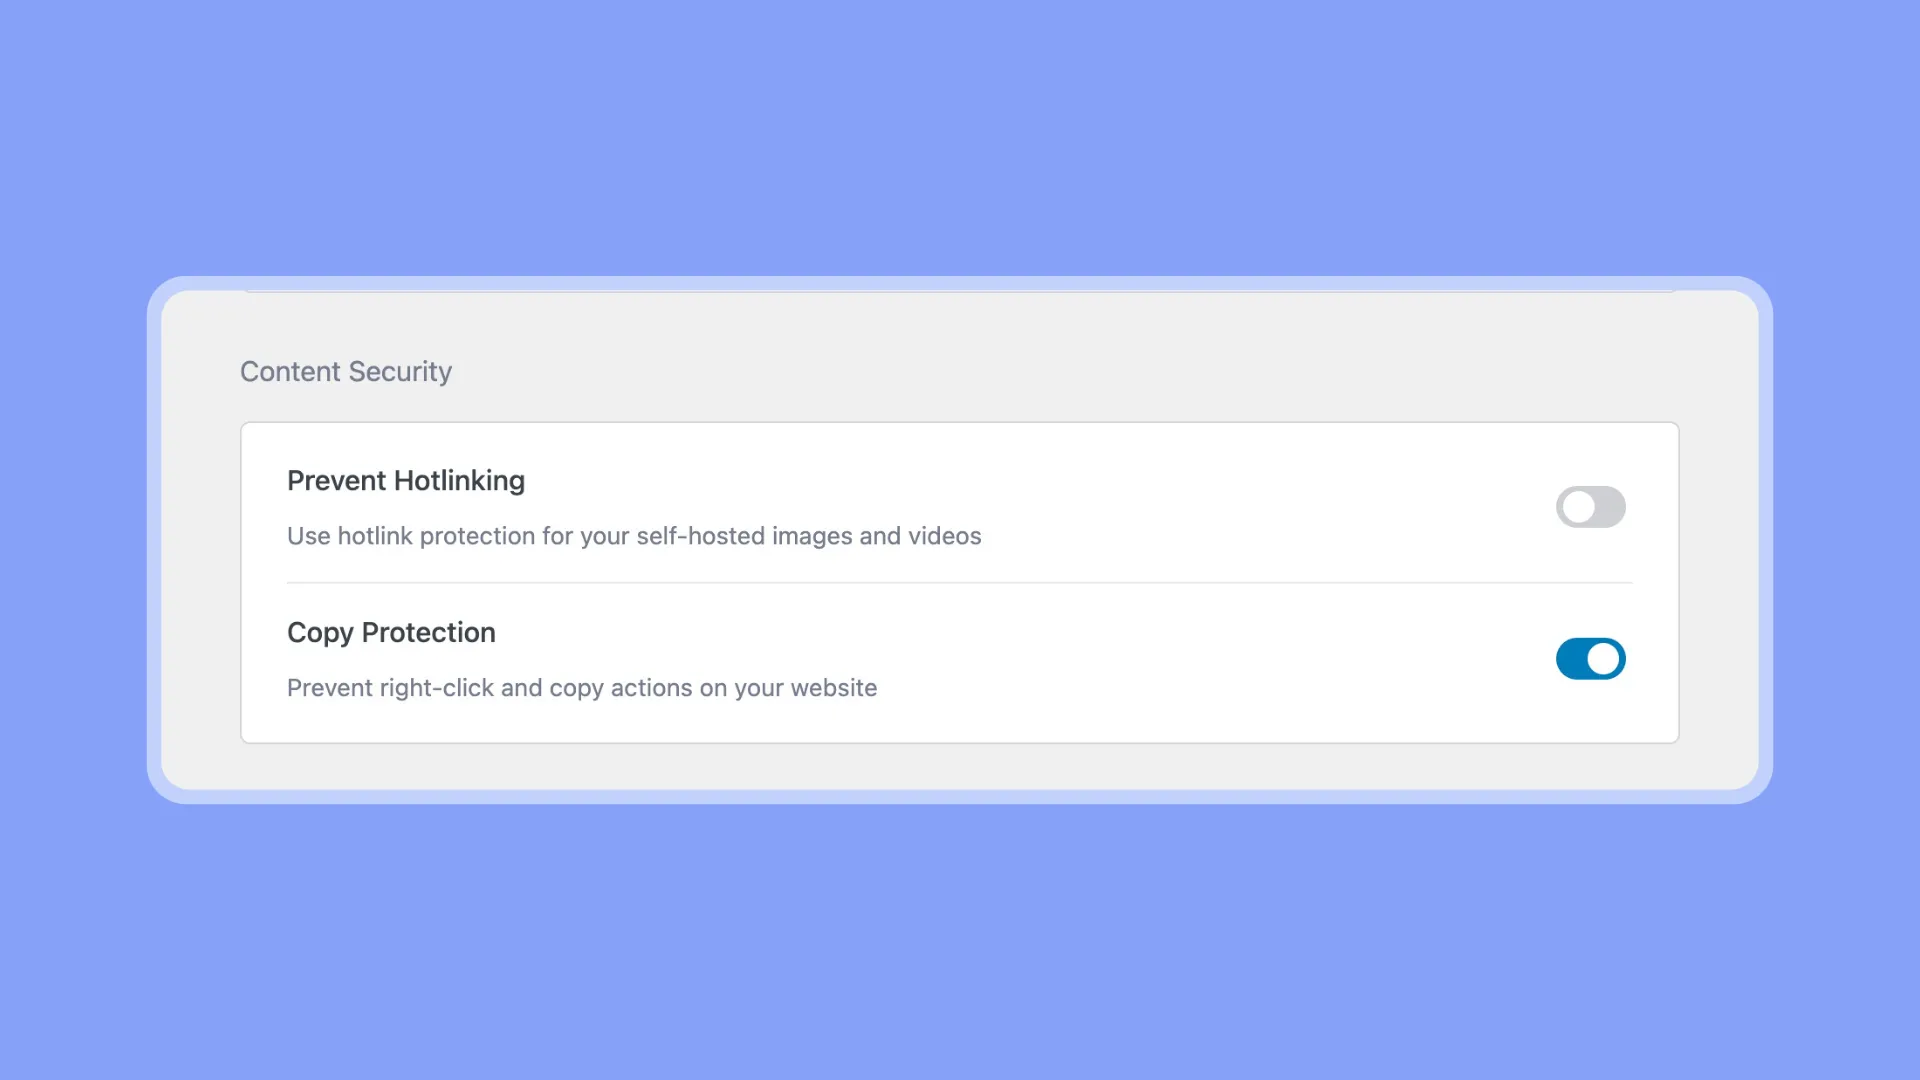
And voilà! Right-clicking is disabled across your Tutor site. You’ve just created a fortress around your content. No more unauthorized copying or saving.
Authentication and Protection
You’ve locked down your content from sneaky copycats. Nice! Now, let’s talk about fortifying login security. In this section, we’re about to uncover some powerful tools that will secure your precious content from digital threats and ensure that your eLearning platform remains a safe and trusted space.
Now, nothing wrecks a good day like an account breach. But Tutor LMS Pro has next-level authentication options so you can learn and teach stress-free:
3. Keeping Track of Your Logins
With Tutor LMS, you can conveniently access your account from different devices and browsers – like your laptop, tablet, or phone on the go. Being able to log in from multiple places is handy for getting to your courses anytime, anywhere.
But sometimes you might want to limit how many devices can be logged in at once.. This can help keep your account secure, save data usage, and avoid confusion from too many logins.
More importantly, limiting active logins is a great way to protect your course content from being accessed without your permission. For example, if someone got ahold of your login credentials, they could potentially access your Tutor LMS account and view or share your courses.Managing your active logins is a breeze in Tutor LMS. Head over to Tutor LMS Pro > Settings > Authentication. Scroll down to “Manage Active Logins” and enable “Limit Active Logins Sessions.”
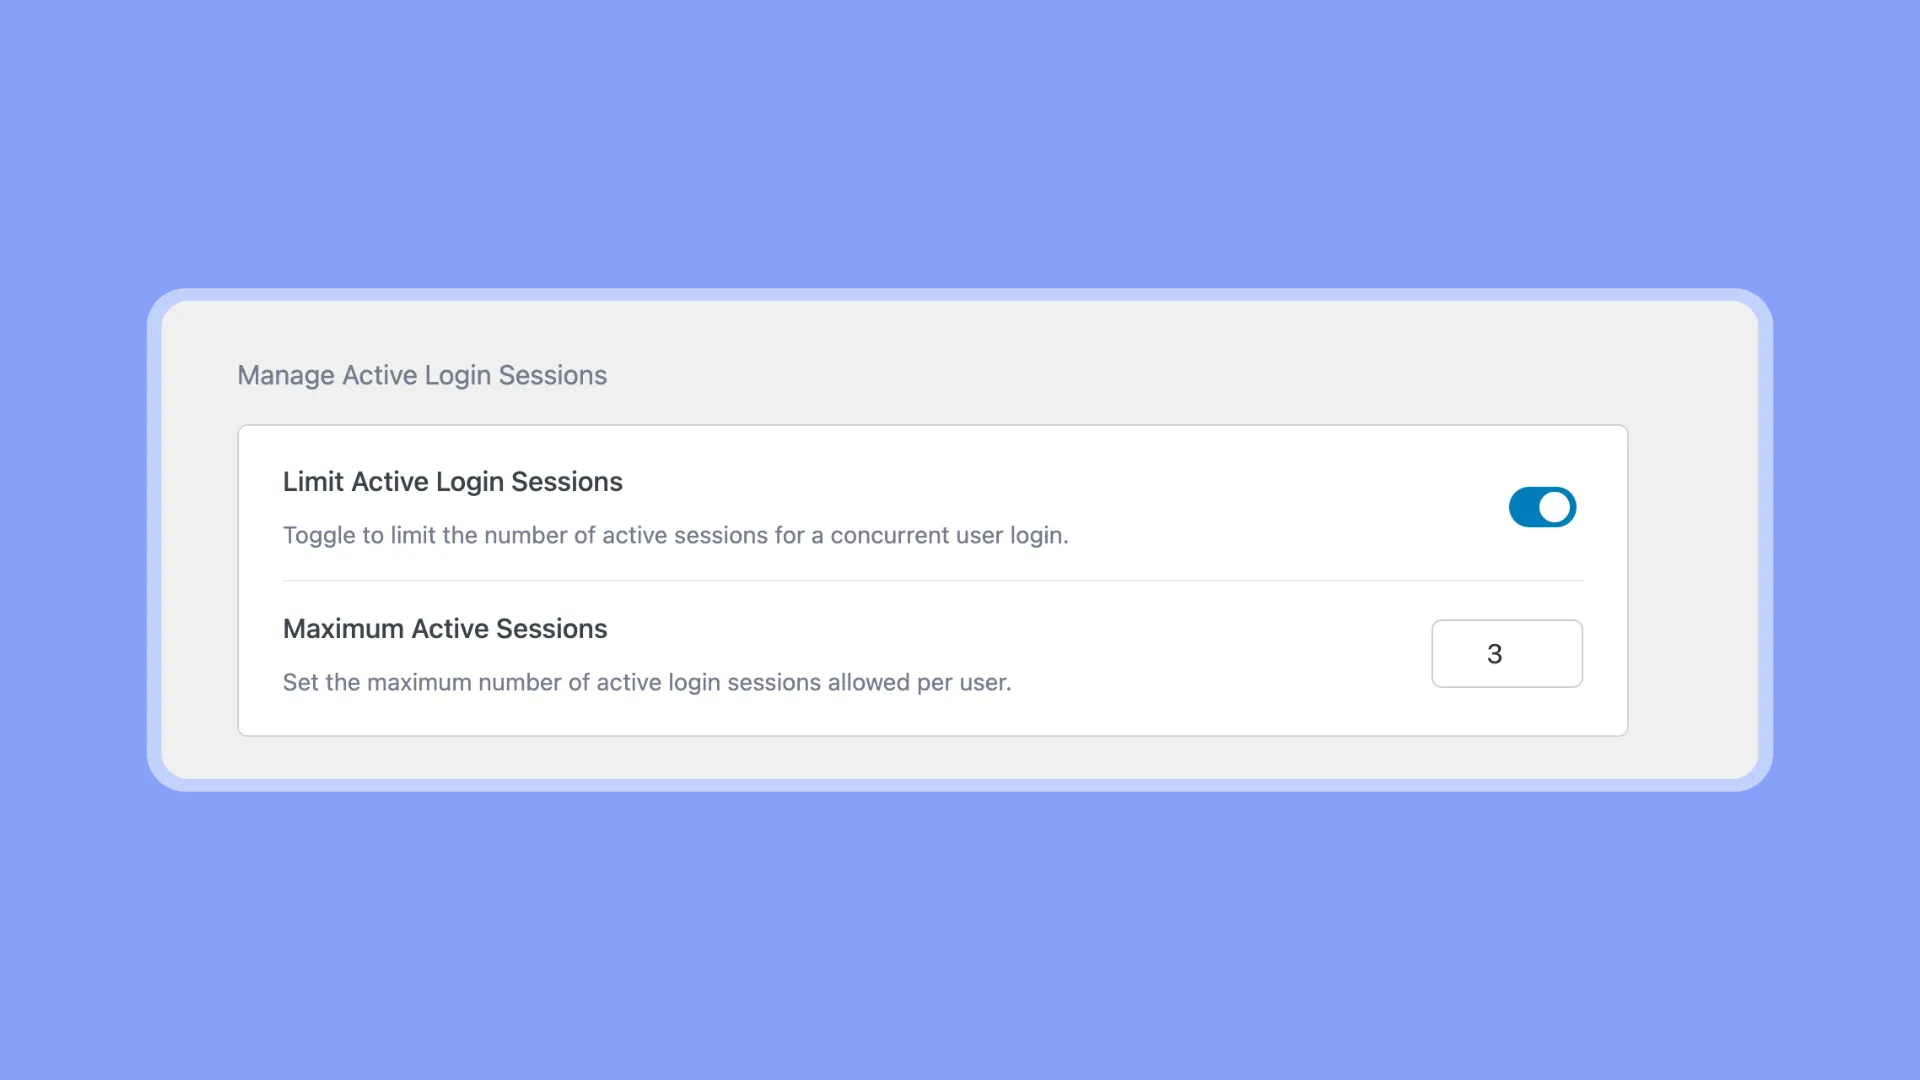
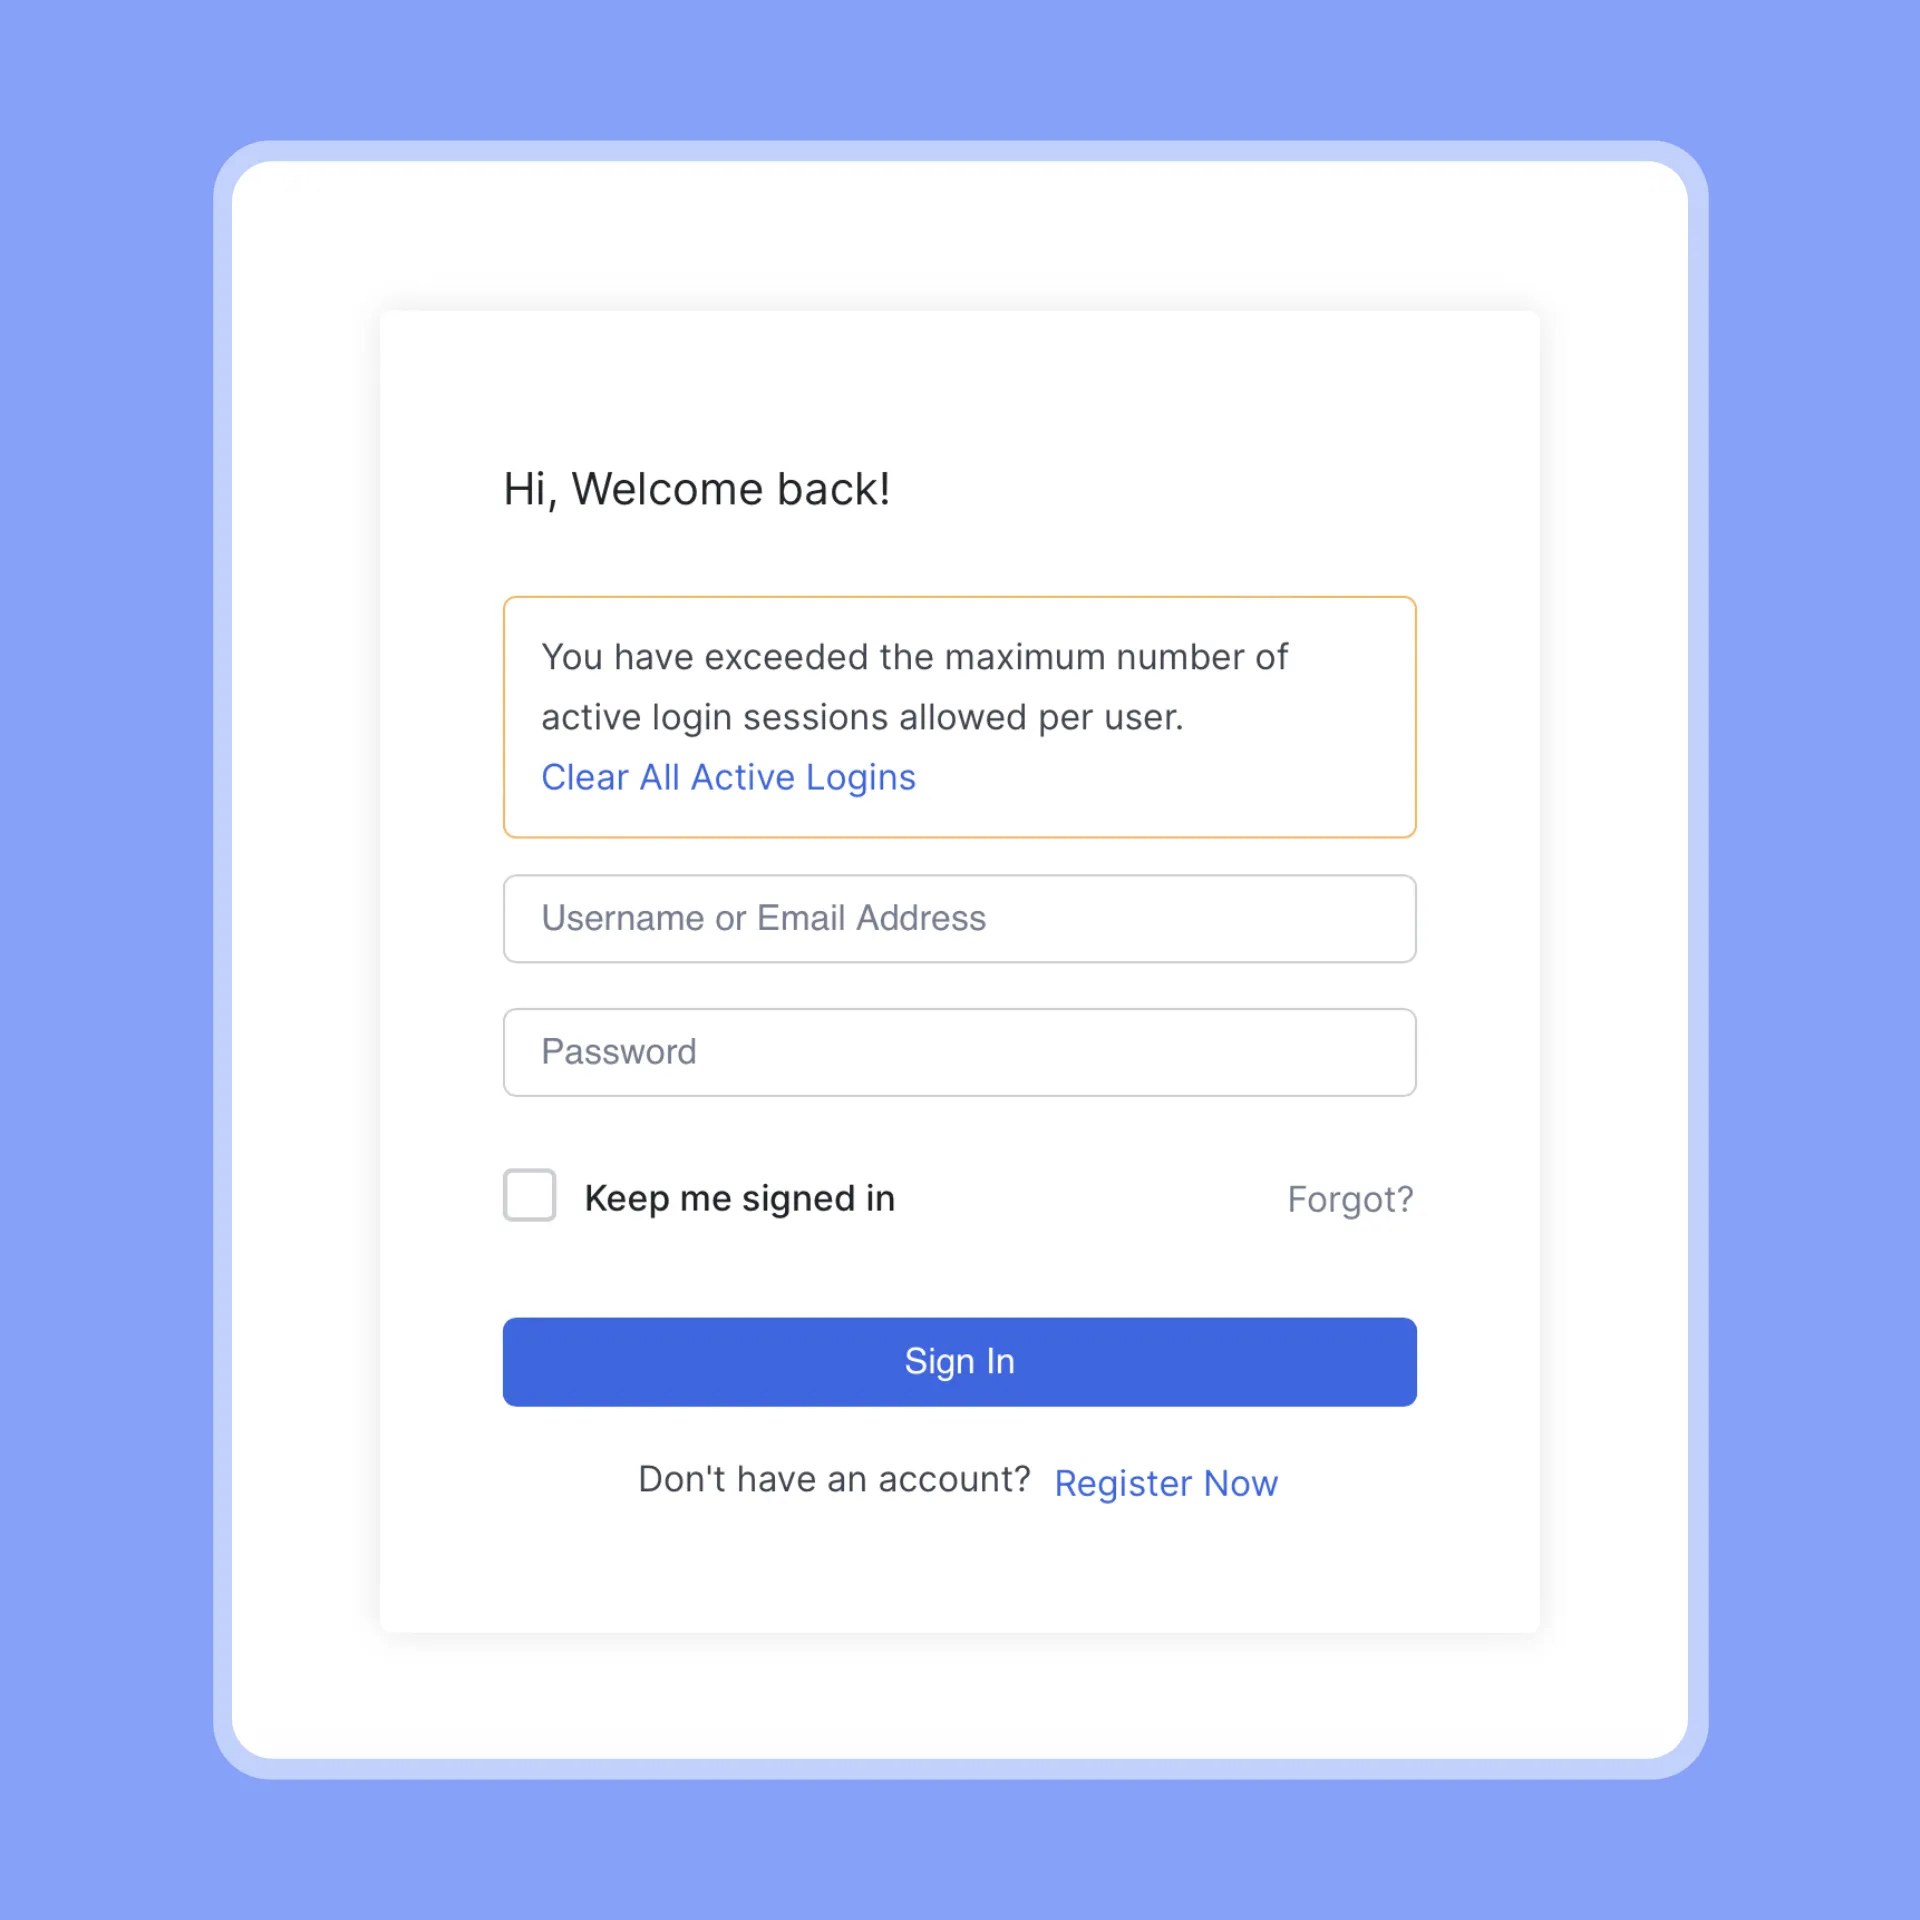
Once on, you can set the “Maximum Active Sessions” allowed per user. If a user tries to exceed the limit by logging in again, they will be blocked.
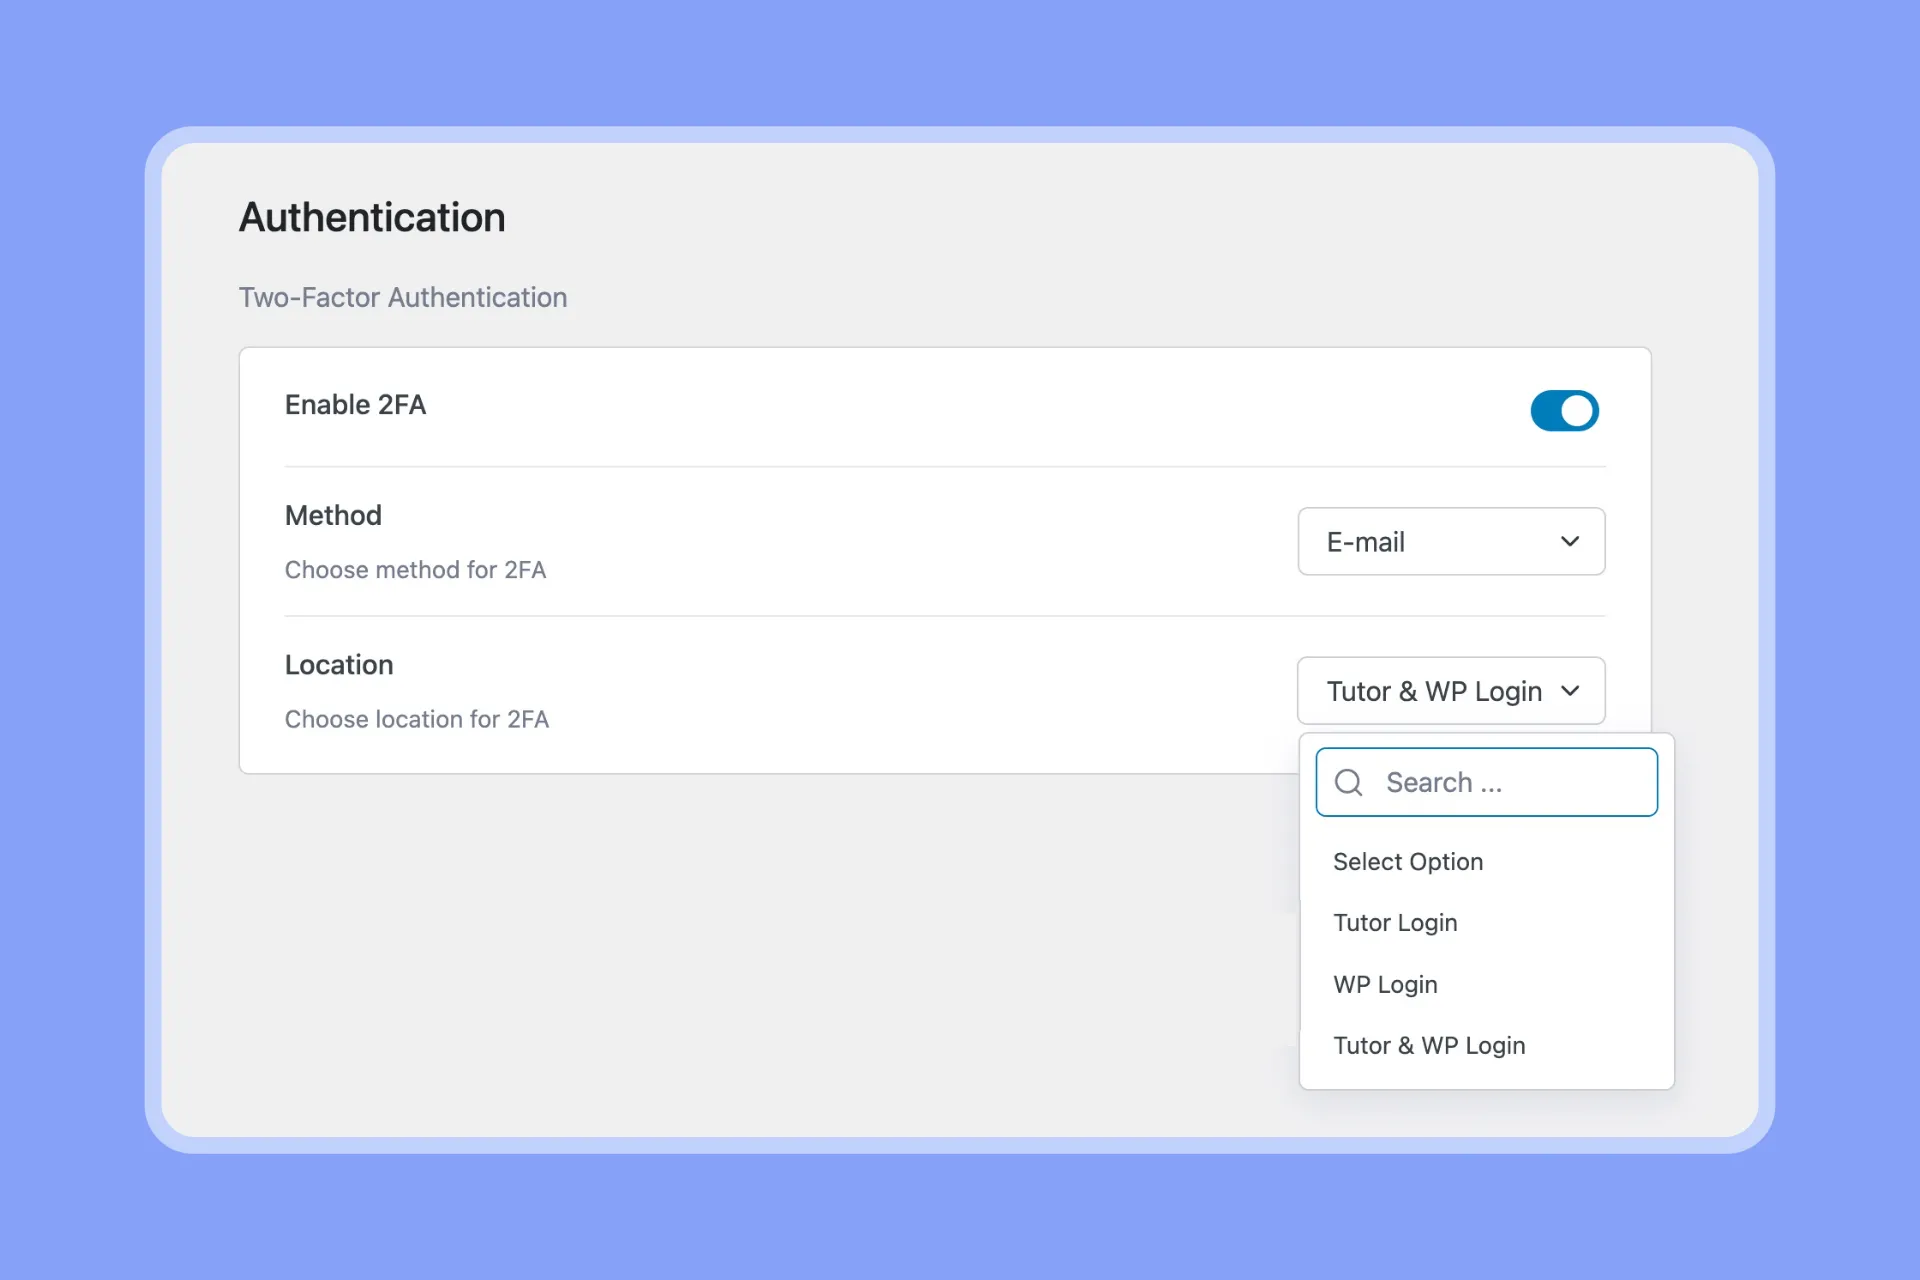
4. Strengthening Security with Two-Factor Authentication (2FA)
Two-factor authentication, or 2FA in short, is like having an extra lock on your digital door. It’s a security feature that adds a second layer of protection beyond your usual password.
Now, why is 2FA so important? Well, imagine if someone got hold of your password. Without 2FA, they could easily access your eLearning account. But with 2FA, even if they have your password, they can’t get in without that second secret code.
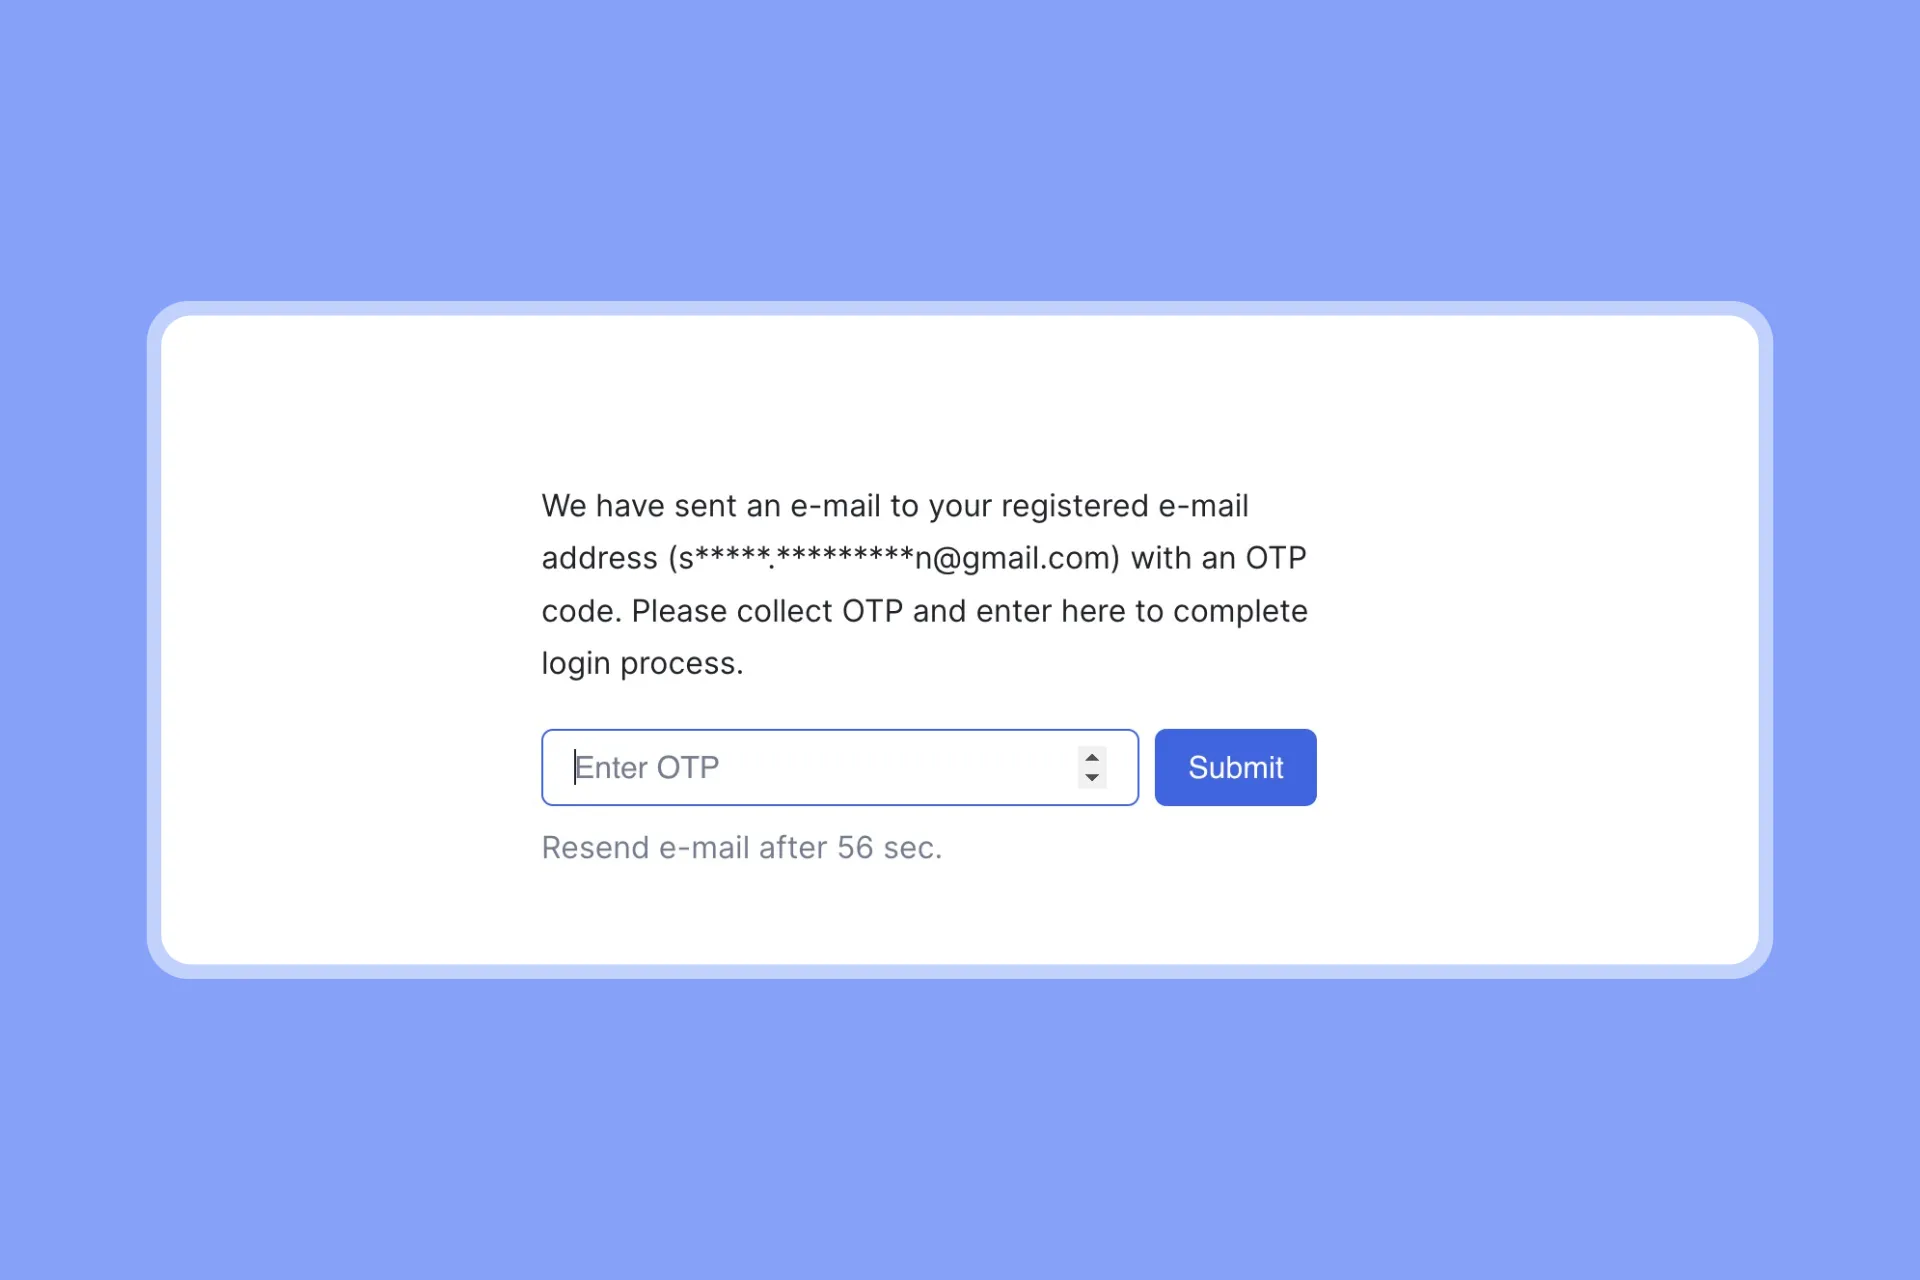
Here’s how to set up 2FA in Tutor LMS:
- Go to Tutor LMS Pro>Settings > Authentication
- Toggle on “Enable 2fa”
- Choose Email verification
- Select which level of login will trigger 2fa authentication
- Click “Save Changes” button to finalize your selection
Important: You will need to set up SMTP in WordPress for the email codes. Refer to Tutor LMS docs on configuring SMTP.
From here on, when you log in, you’ll need not just your password but also a unique code from your linked device. With 2FA in place, your eLearning experience becomes even more secure.
5. Beat the Bots with Fraud Protection
Got bots and spammers bugging your LMS site? Activate Tutor’s Fraud Protection to boot them out!
Fraud Protection adds extra verification when users sign up or log in. This stops sneaky bots from accessing your site. To enable fraud protection simply navigate to the “Authentication” tab in Tutor LMS settings and toggle “Enable Fraud Protection.”
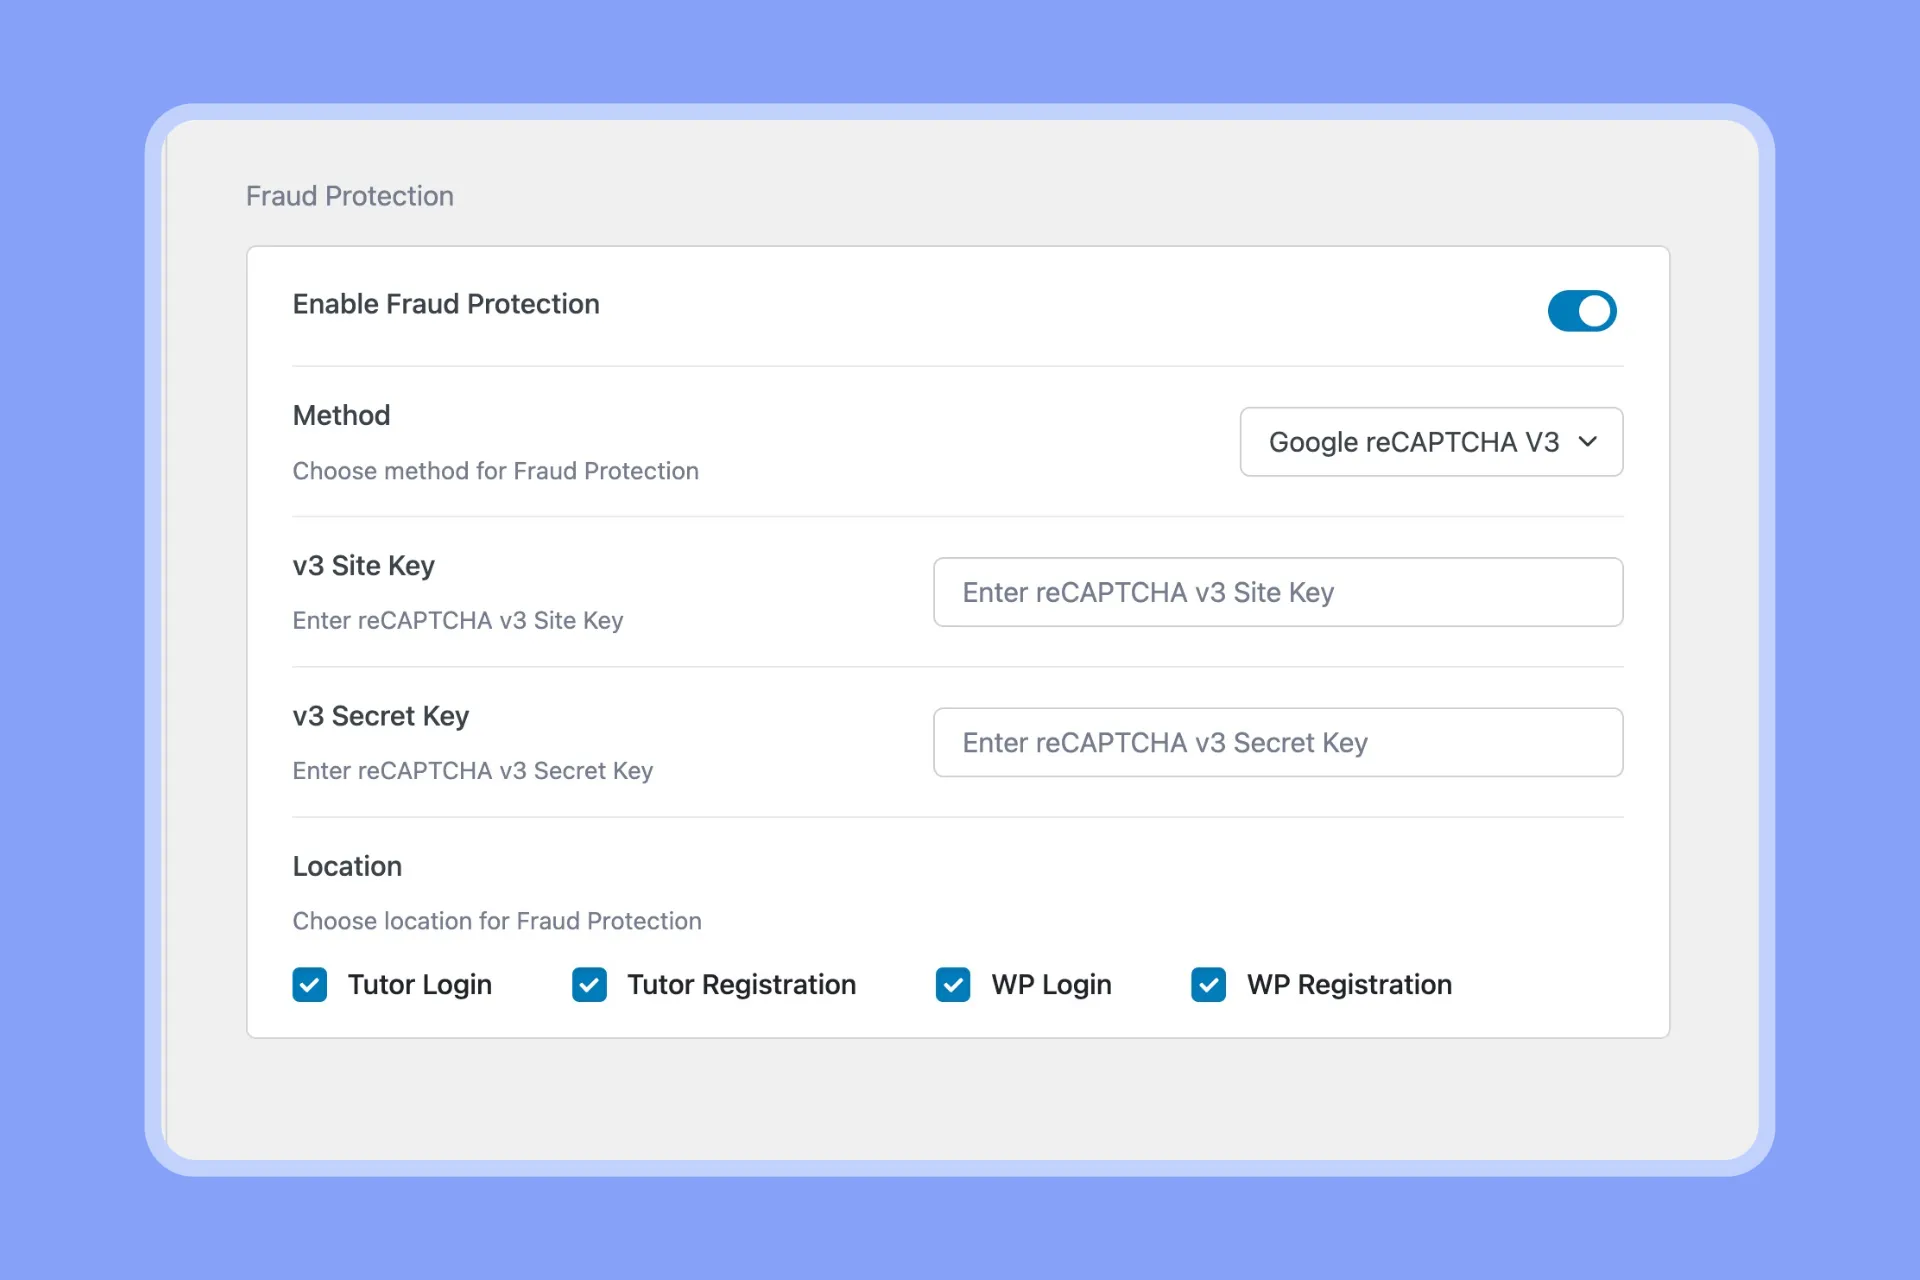
After doing so you can choose from different verification methods:
- HoneyPot – Catches bots by making them fill out hidden form fields.
- Google reCAPTCHA v2 – Users click “I’m not a robot” and pass a picture test.
- Google reCAPTCHA v3 – Runs quietly in the background and checks for suspicious behavior. reCAPTCHA v3 is very advanced and catches even the smartest bots. We recommend it!
Note: In order to completely activate reCAPTCHA, you will need to get Site and Secret keys from Google first. Check Tutor LMS documentation for how to do so.
Finally, set Fraud Protection on all or preferred locations:
- Tutor Login
- Tutor Registration
- WordPress Login
- WordPress Registration
By implementing Fraud Protection, you’re not only securing your content but also ensuring a safe and enjoyable online learning experience. Keep your digital empire secure!
6. Verify New Users with Email Authentication
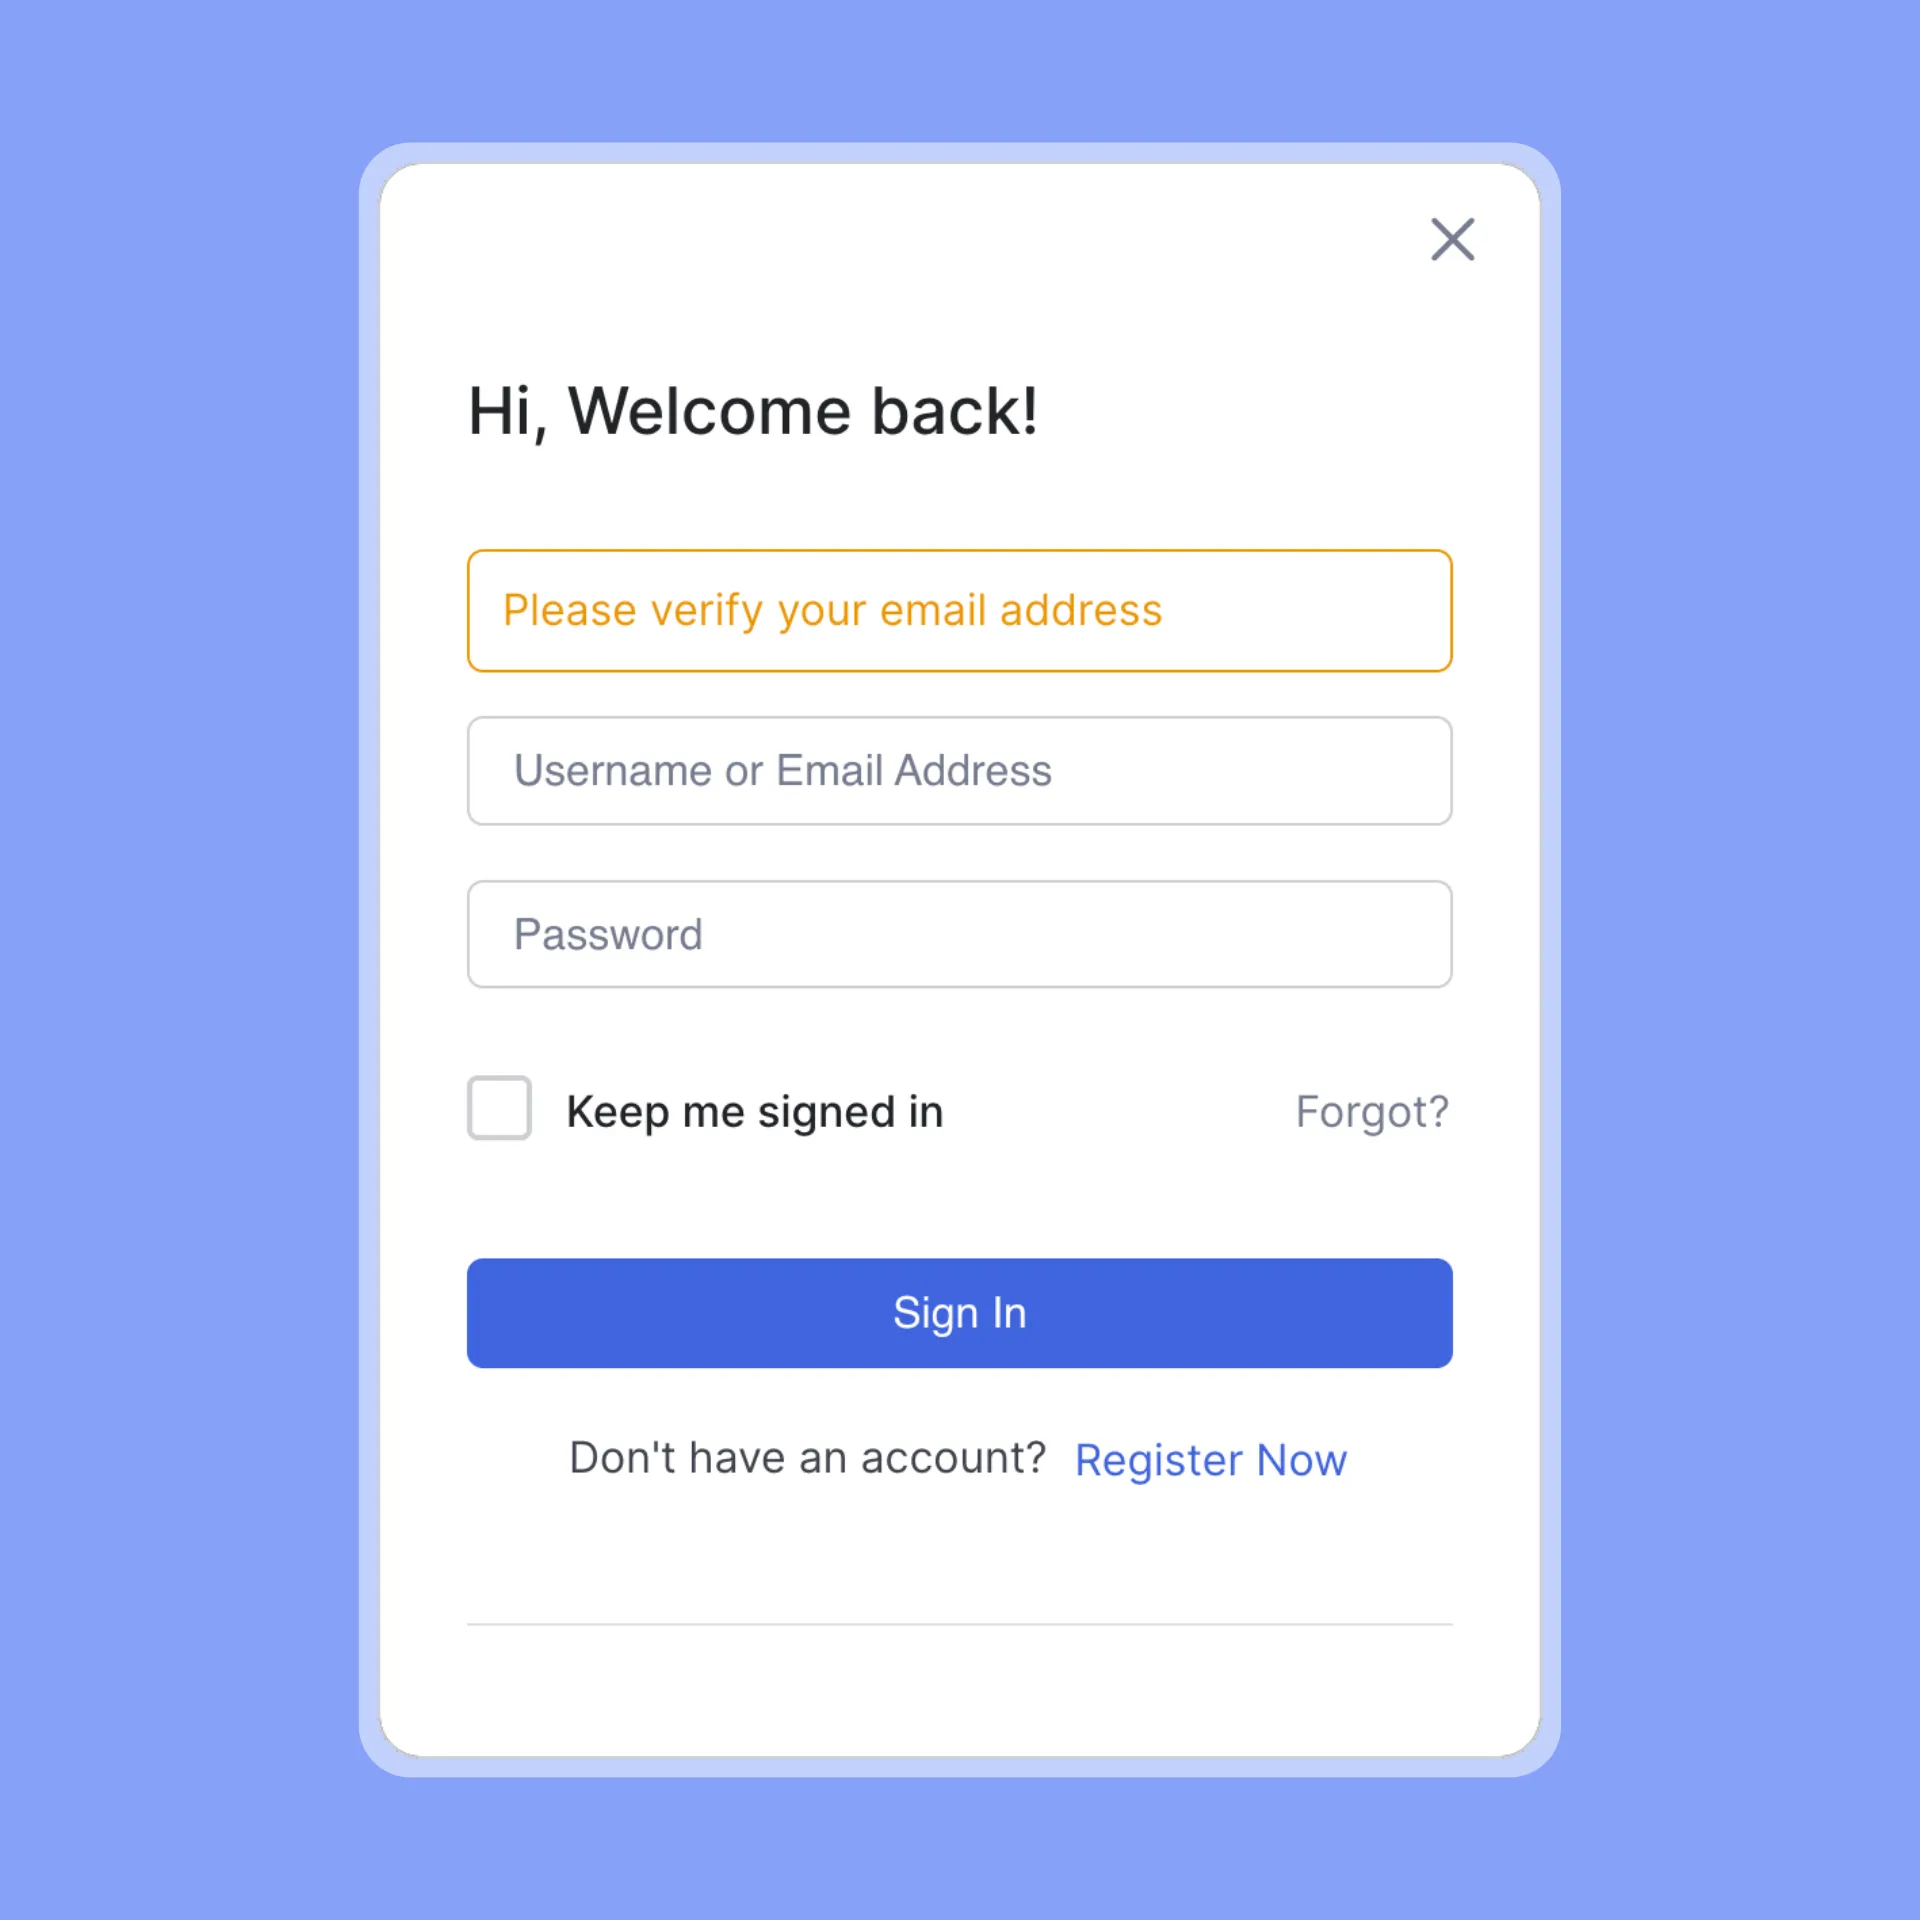
Want to add an extra layer of security for new signups? Turn on Tutor’s “Email Verification”.
With this enabled, new users must confirm their email address after registration. They will get a verification code sent to their inbox. Entering the code proves they control that email address.
This stops spammers from easily creating fake accounts on your site. It also ensures real humans are accessing your courses.
To activate Email Verification simply:
- Navigate to Tutor LMS > Settings > Authentication
- Toggle on “Email Verification”
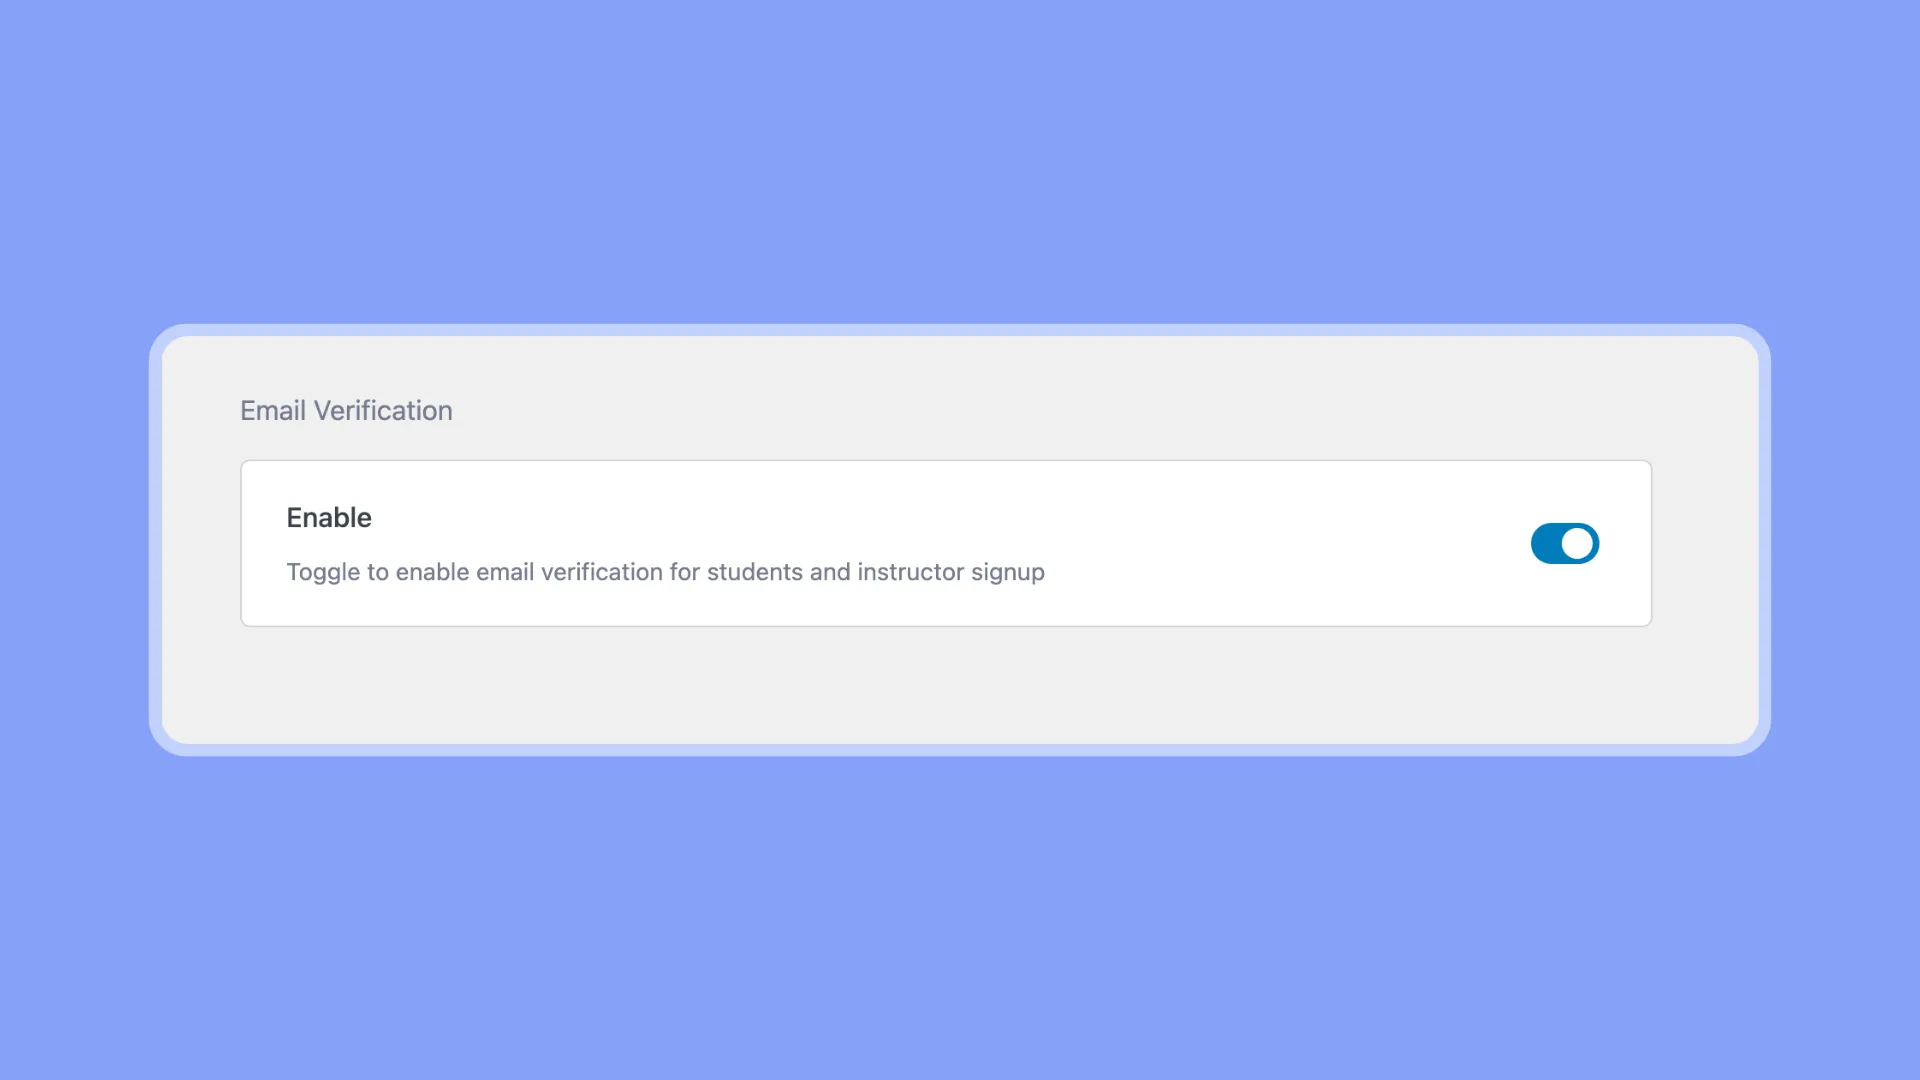
Important: For email verification to work, SMTP must be properly configured in your WordPress settings. If it’s not, users won’t get the verification emails.
Activating email verification only takes a minute. But it provides ongoing protection by vetting all new users. One more way to lock down your LMS and secure your learning community!
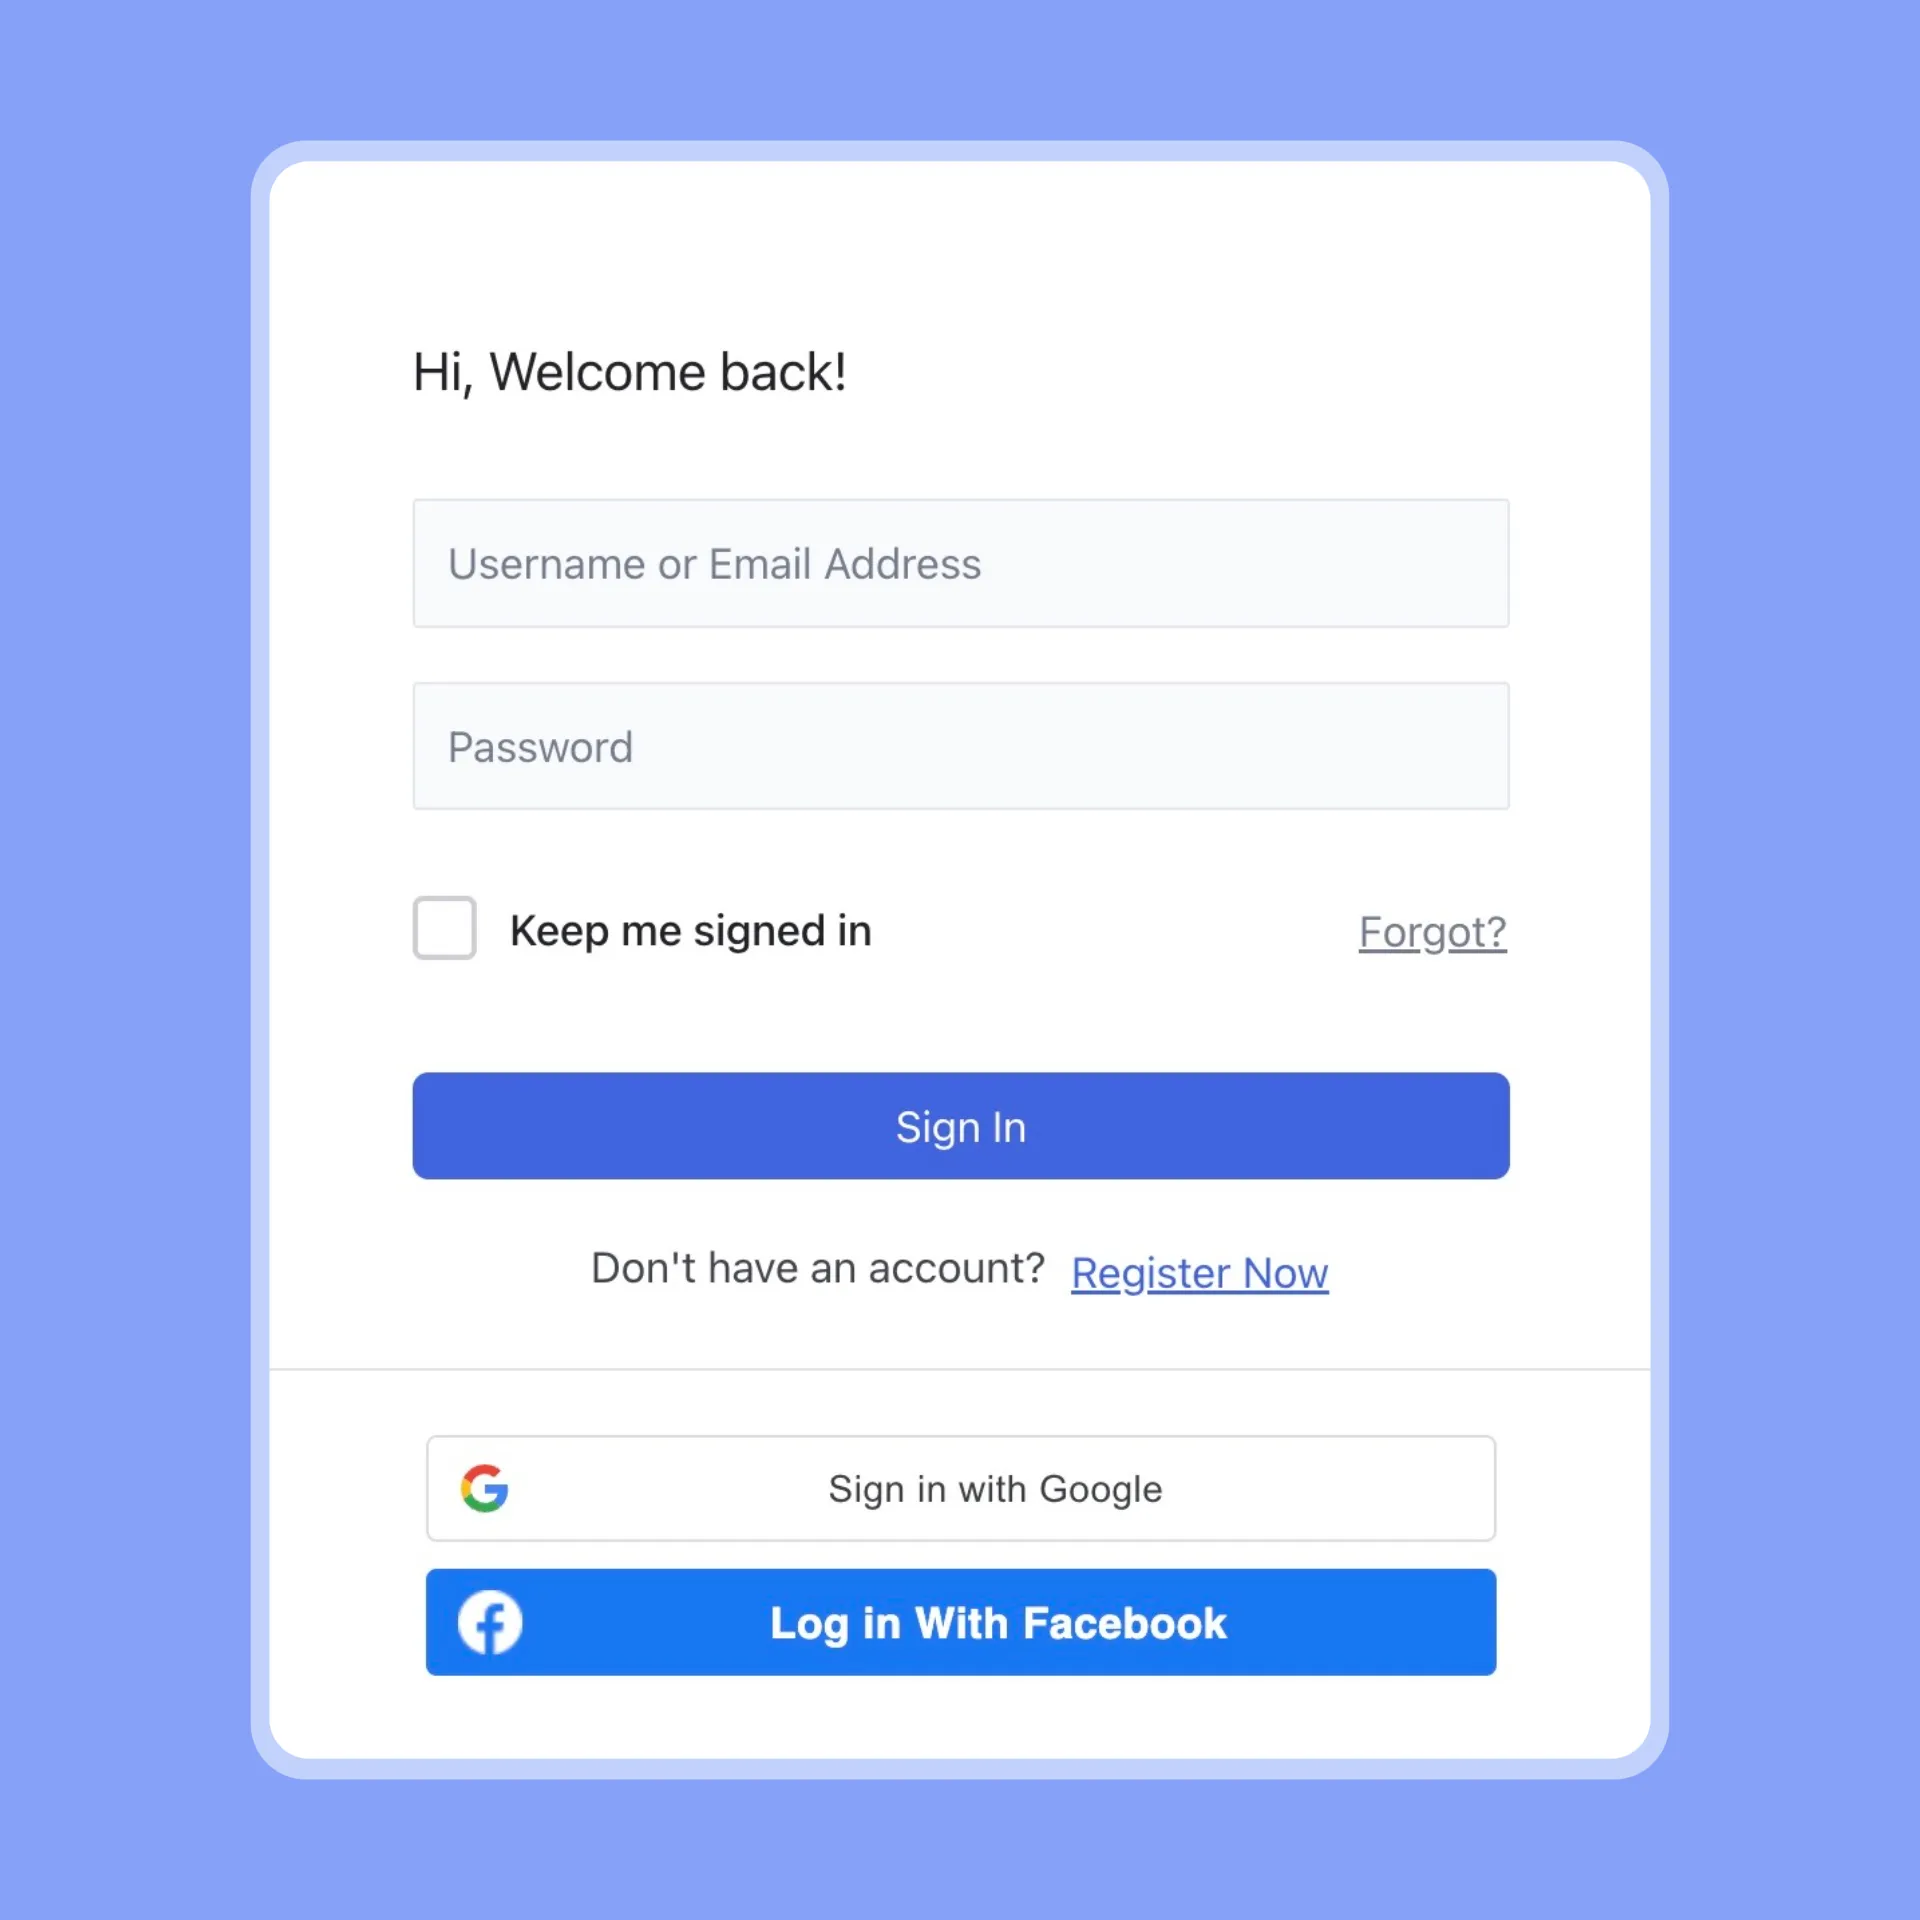
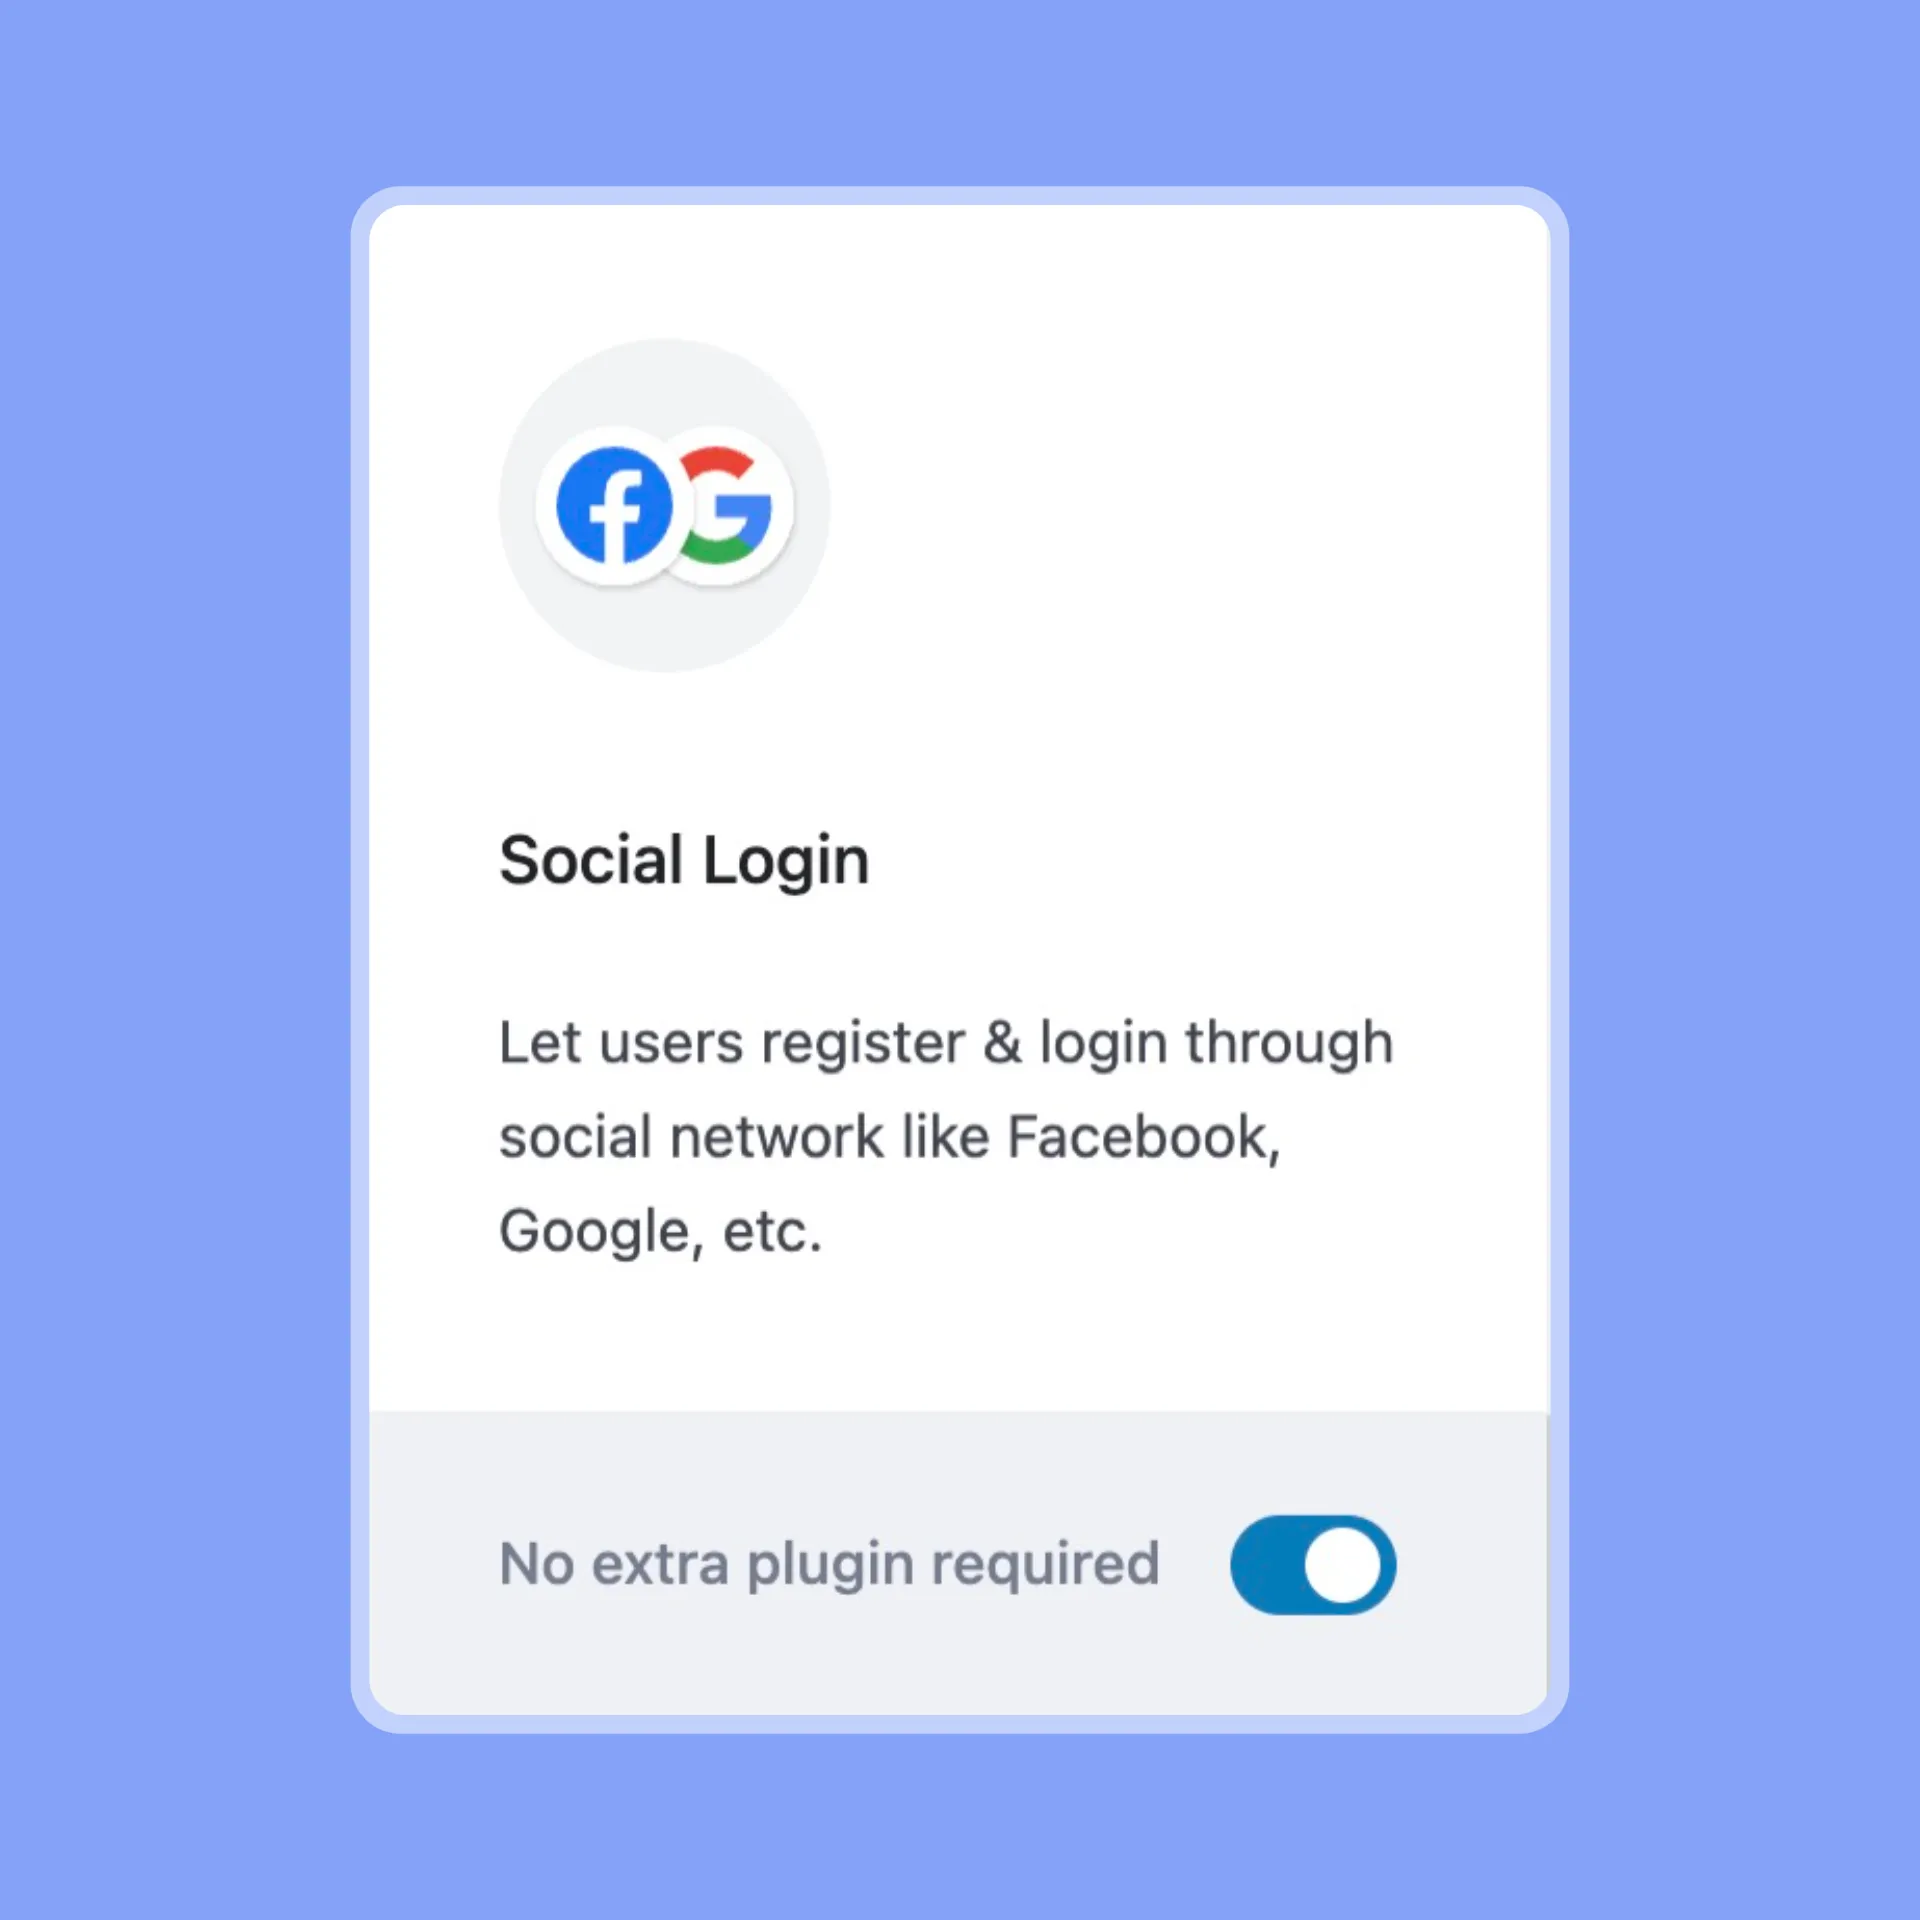
7. Streamline Login with Social Authentication
Tired of forcing your students to remember yet another username and password? Offer social login with Tutor LMS!
Social login allows users to instantly access their Tutor LMS account using their existing Facebook, Google, or Twitter credentials. No more password headaches for your students!
Enabling social login offers some great benefits:
- It’s incredibly convenient for users. With just one click, they can log in using an account they already use daily.
- Students avoid the frustration of managing multiple usernames and passwords. Their social accounts are secure and familiar.
- You can easily onboard new users right from major social networks. Expand your student community!
But social login doesn’t just offer convenience, it also helps safeguard your site’s content and integrity.
By leveraging the security of major platforms like Google and Facebook, you add an extra layer of protection beyond local passwords. Social login integrates with the same secure systems your students already trust. So students gain easy access, while you boost security. It’s a win-win!
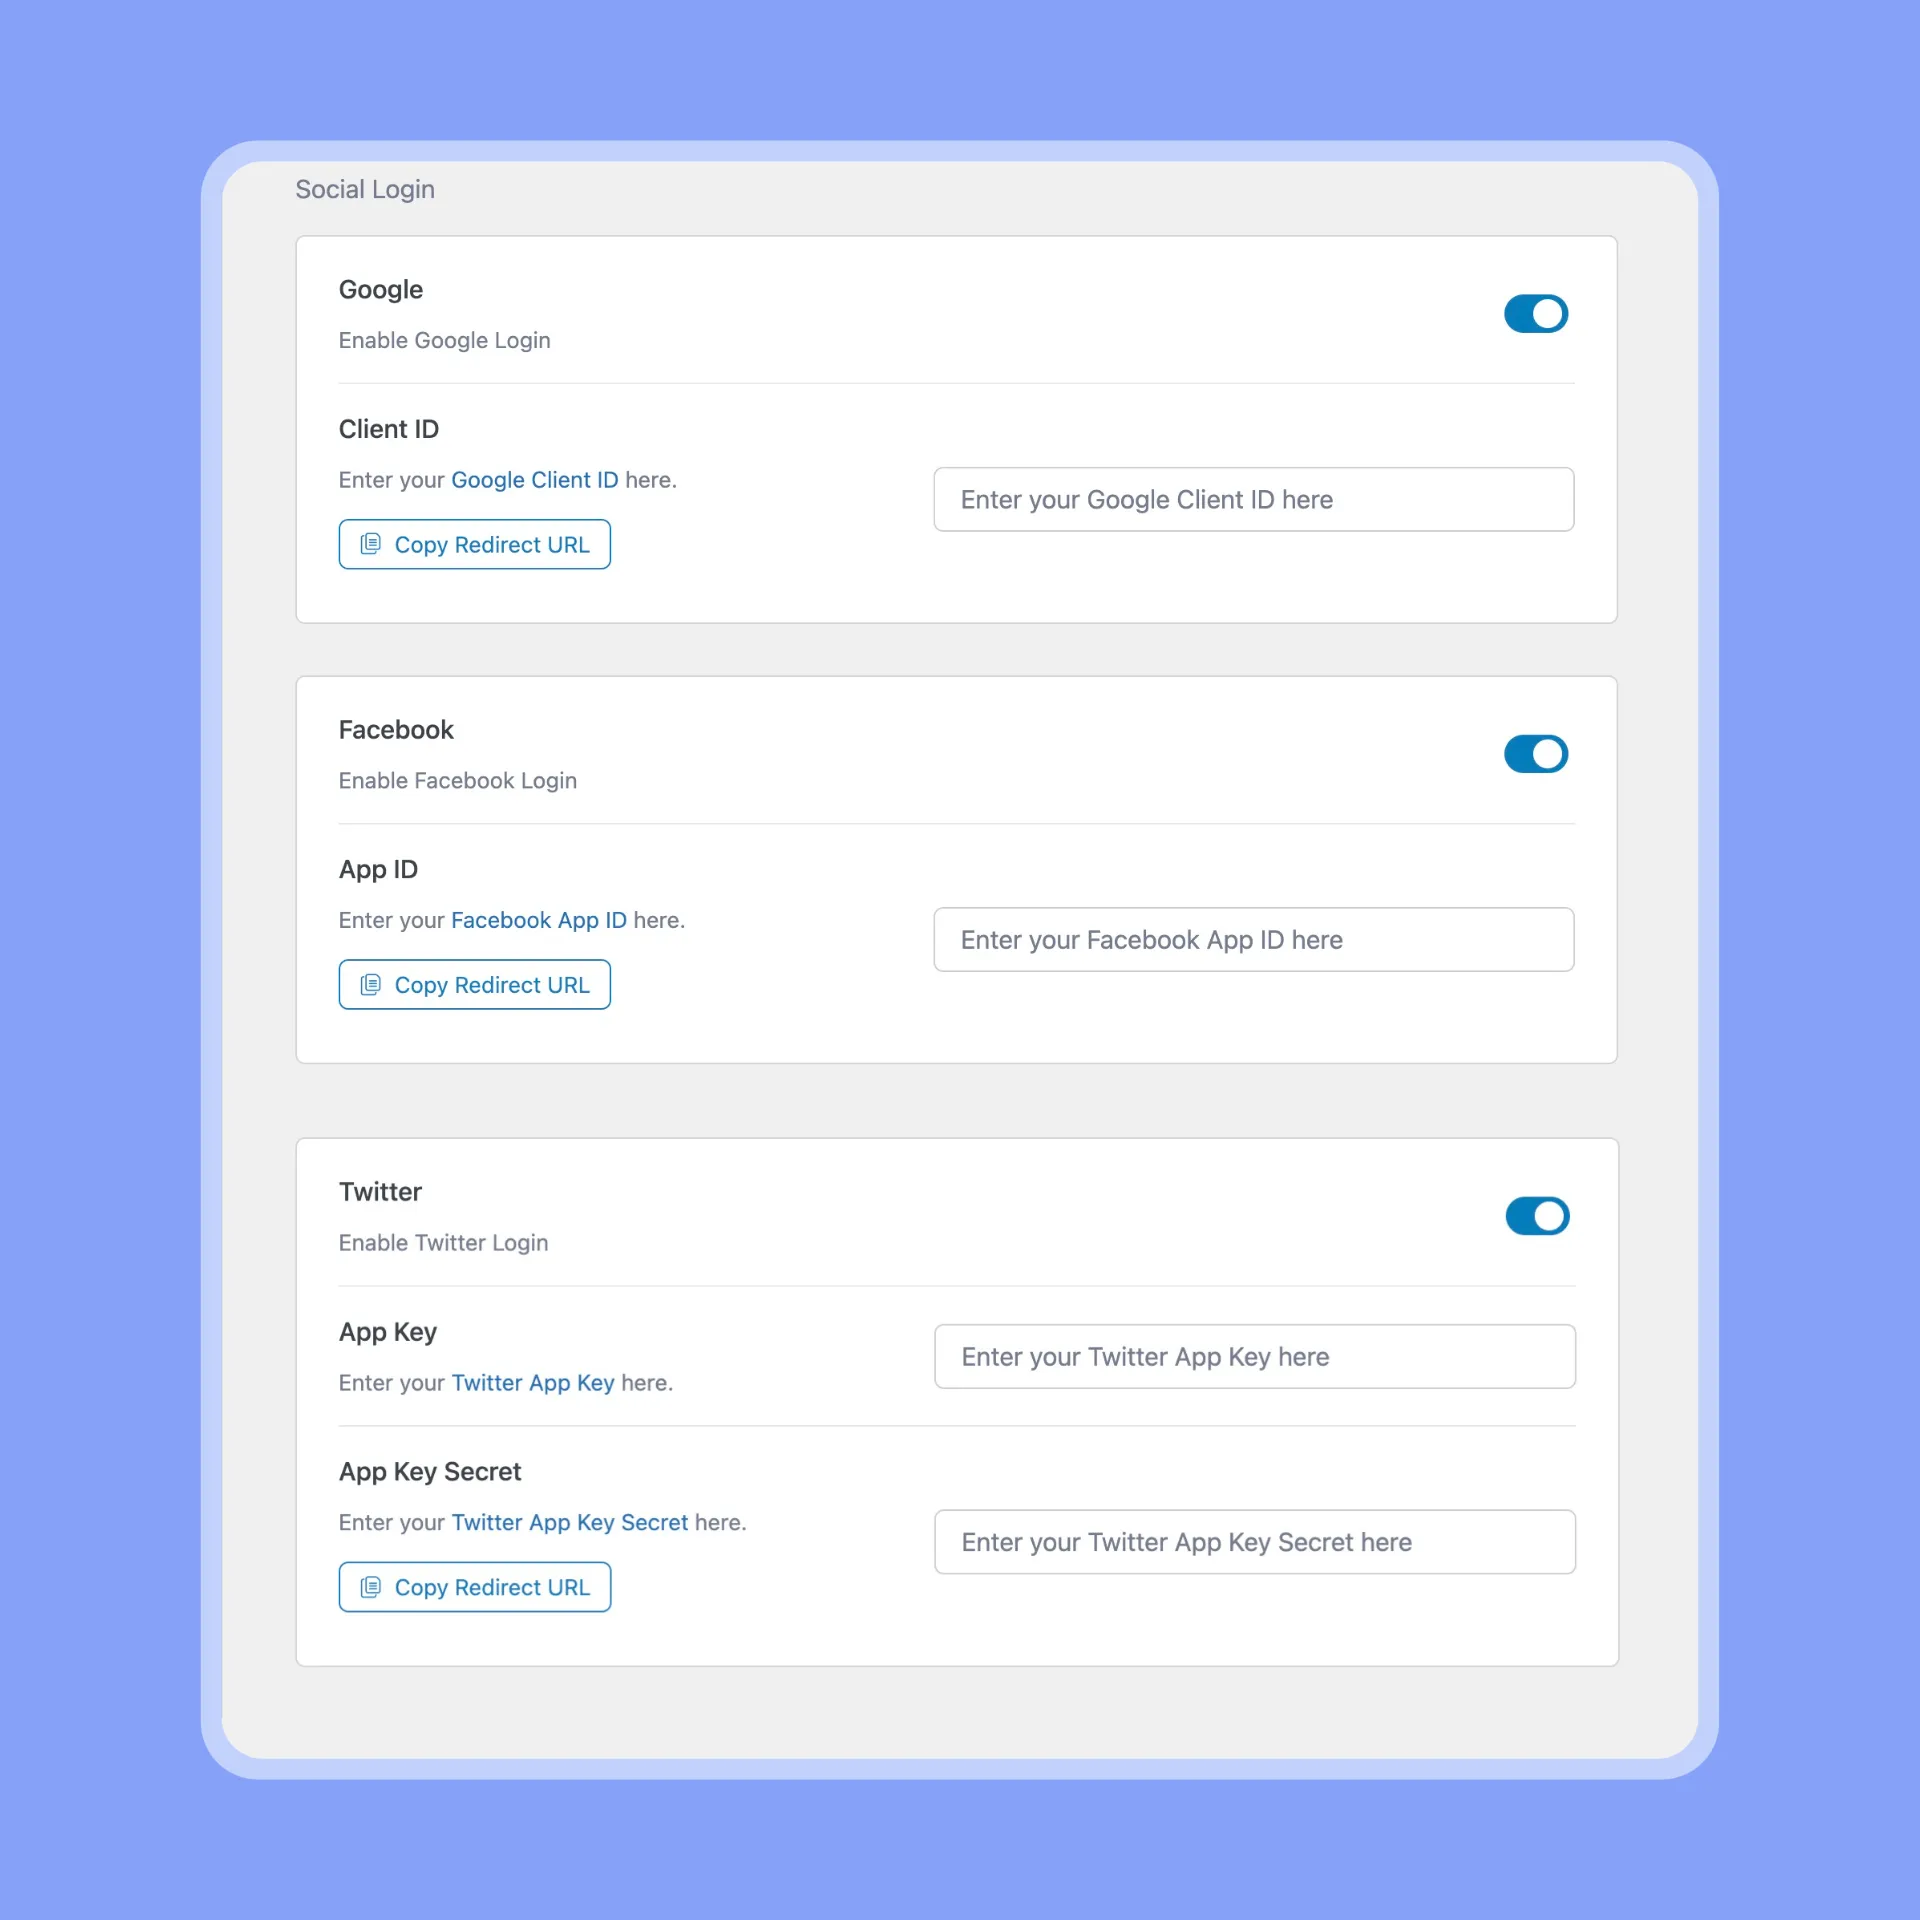
Activating social login is simple in Tutor LMS:
- First, enable the “Social Login” add-on in Tutor LMS.
- Next, navigate to Tutor LMS Pro> Settings > Authentication
- Scroll down to “Social Login” section
- In the Authentication settings, enable Social Login for Google, Facebook, and Twitter.
- Provide the required API keys or App IDs for each platform. (To learn how to obtain your API keys or App IDs, simply follow the link provided in the settings under each respective option.)
- Save your settings.
- Finally, check the login page for social login options.
Take advantage of social login to offer students stress-free access while keeping your LMS secure.
Wrapping Up
Congratulations! You’ve now equipped yourself with the knowledge and tools to fortify your Tutor LMS fortress. By implementing these robust security measures, you’re not just protecting your content—you’re safeguarding your hard work, your intellectual property, and the trust of your learners.
Remember, a secure LMS isn’t just a shield; it’s a launchpad for a thriving online learning community. So, go forth, share your knowledge with confidence, and let Tutor LMS be the guardian of your digital kingdom. Your journey to a secure and successful e-learning empire starts now!

Start Using Tutor LMS Today
Ready to take your online courses to new heights? Download Tutor LMS now and enjoy a journey of eLearning excellence.