How to Set Up Automated Invoicing for Selling Tutor LMS Courses with WooCommerce
Selling online courses with WooCommerce is convenient, but once the first sales start coming in, invoicing can quickly become a headache.
Even though courses are digital products, customers still expect proper invoices for their records, taxes, or reimbursements. Creating and sending those invoices manually might work for a few orders, but it doesn’t scale and wastes valuable time you could spend creating content or growing your audience.
That’s where automated invoicing comes in.
In this guide, we’ll walk through how to set up automated invoicing for selling online courses with WooCommerce. You’ll learn what’s required, the tools to use, and how to ensure invoices are generated and delivered automatically, so every sale is handled professionally without extra effort.
Understanding Invoicing Requirements for Digital Courses
Even though online courses are digital products, invoicing is still an important part of running a legitimate and professional business. Many course creators assume invoices are optional for digital sales, but in reality, invoicing requirements often depend on local tax laws, customer location, and business structure.
Some countries require invoices for every sale, while others mandate invoices only when a customer requests one. In regions like the EU, UK, Australia, and parts of Asia, invoices are especially important for VAT, GST, or online course taxes.
If you’re selling courses internationally, automated invoicing helps ensure you’re prepared for compliance, even if requirements change as your business grows.
What a Typical Course Invoice Must Include
Regardless of where you sell, a proper invoice for online courses should include the following details:
- Seller details: Business name, address, and contact information
- Buyer details: Customer name and, if applicable, company name and address
- Invoice number and date: A unique, sequential invoice number and issue date
- Course name: Clearly describe the product (e.g., “Advanced SEO Online Course”)
- Tax details (if applicable): Tax rate, amount, and registration numbers (VAT or GST IDs)
- Payment method: How the customer paid (credit card, PayPal, etc.)
Setting Up Automated Invoicing in WooCommerce: Step-by-Step Guide
If you want to automate invoicing for online courses in WooCommerce, choosing the right plugin is crucial. A good invoicing plugin should automatically generate invoices when a purchase is completed, deliver them as downloadable PDFs via email or customer accounts, and allow you to customize the invoice design to match your brand. It should also support multiple currencies and applicable taxes like VAT or GST, especially if you sell internationally.
Native Invoicing via Tutor LMS
Before you commit to an external plugin, it’s worth evaluating your current LMS setup. For instance, if you use the Tutor LMS Native eCommerce engine, the platform will automatically create and deliver invoices for you natively. This built-in feature is a great “all-in-one” shortcut for creators who want to keep their site lightweight and avoid the complexity of additional WooCommerce extensions.
That said, if you prefer WooCommerce, a dedicated plugin is the way to go. A great option that covers all of the above is WooCommerce PDF Invoices & Packing Slips. This plugin automatically generates invoices in PDF format and attaches them to order emails, supports customizable templates, and works with multiple currencies and tax settings. You can tailor your invoice layout and include key business details, all without manual work after setup.
For this guide, we’ll be using the WooCommerce PDF Invoices & Packing Slips plugin by WebToffee. Here’s how to set it up:
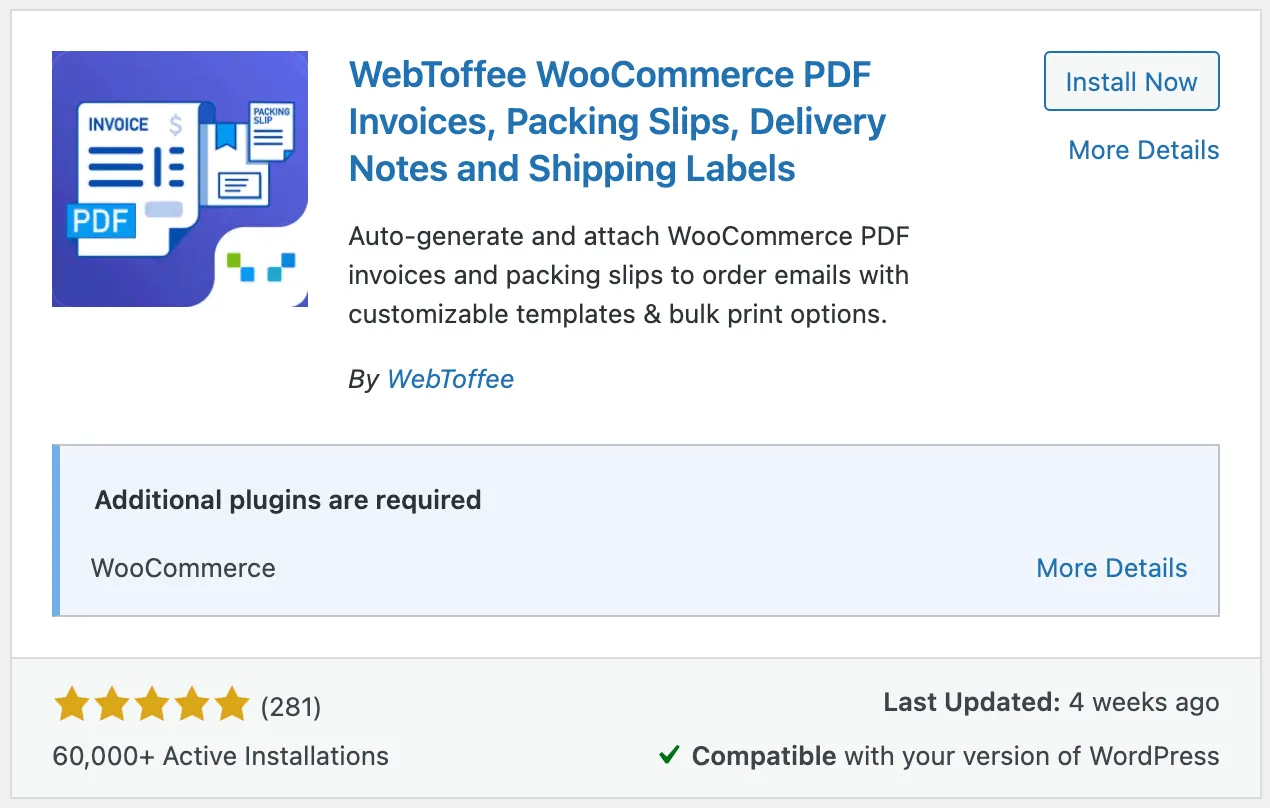
Step 1: Install and Activate the WebToffee PDF Invoice Plugin
- From your WordPress dashboard, go to Plugins > Add New.
- Search for the invoice plugin – WooCommerce PDF Invoices & Packing Slips.
- Click Install Now and then Activate.
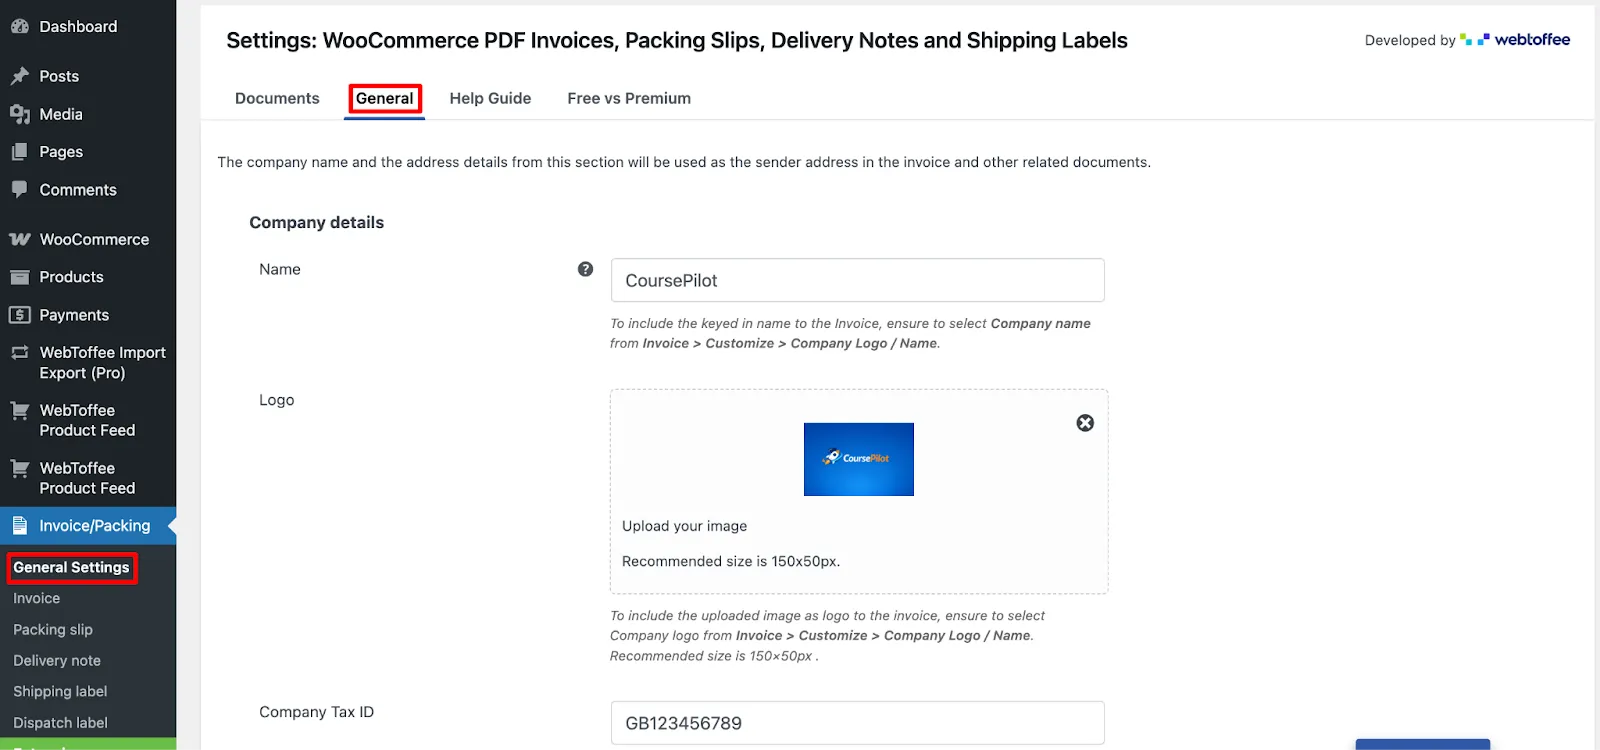
Step 2: Configure General Settings for PDF Invoices
Once you install the WooCommerce PDF Invoices & Packing Slips plugin, you’ll be prompted to enter your basic business information. If you skip this during installation, you can always configure it later from the plugin settings.
To access these options, go to Invoices/Packing > General in your WordPress dashboard.
- Start by entering your company details, such as your business name, logo, and tax identification number.
- Next, provide your business address and location, which will appear on all generated invoices and is important for tax and compliance purposes.
- Scroll down and In the Advanced options section, you can fine-tune how invoices are generated. This includes enabling RTL (right-to-left) language support if needed, selecting the PDF library used to generate invoice files, and choosing whether to display a print button on invoices and packing slips.
- Once everything is configured, click Update Settings to save your changes.
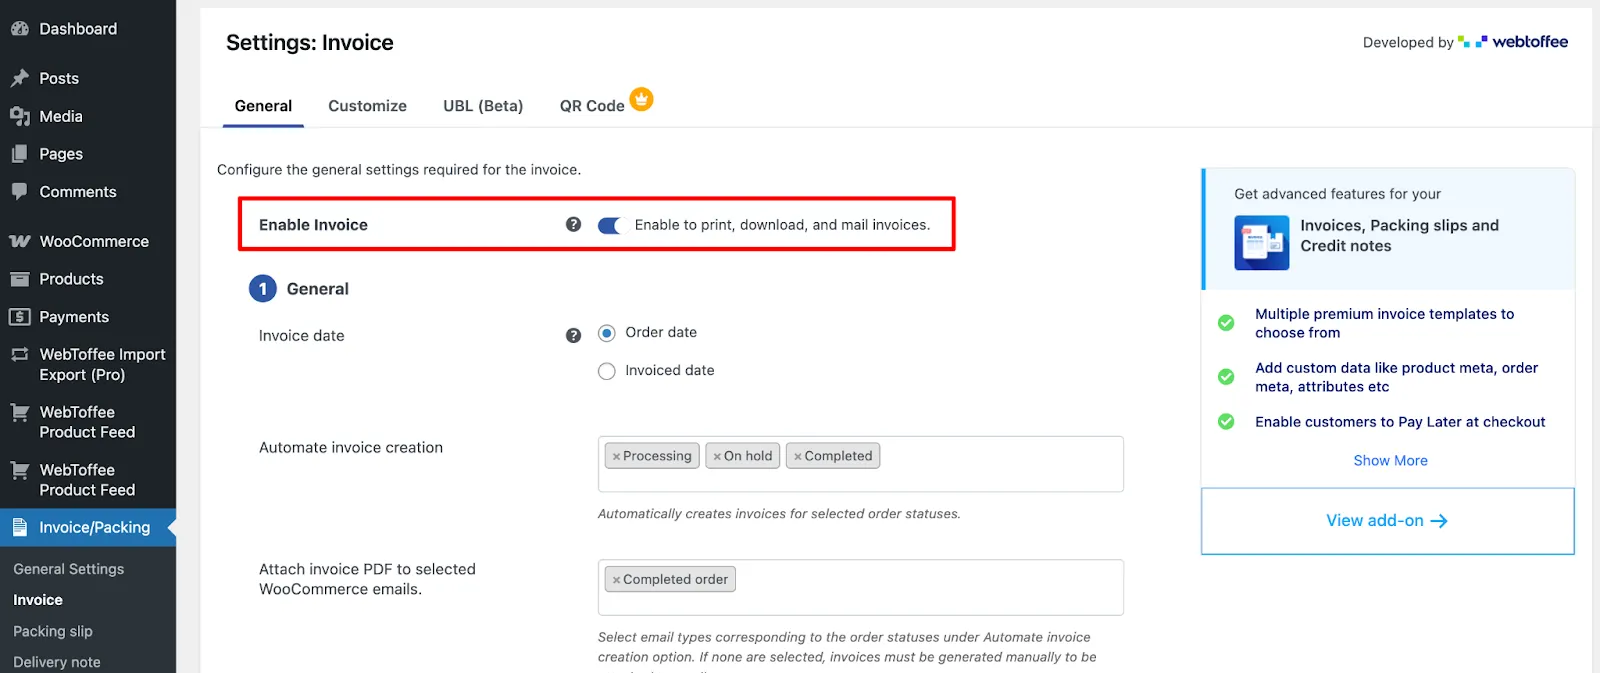
Step 3: Enable Automatic PDF Invoices for Course Orders
Next, enable invoice generation for your WooCommerce orders.
- In the Invoice settings, turn on the option to Enable Invoice and choose the invoice date format.
- Then, select the order statuses that should trigger invoice creation. Commonly Processing or Completed for online courses.
You can also choose to:
- Attach PDF invoices to admin order emails
- Attach PDF invoices to customer emails based on selected order statuses
This ensures both you and your customers automatically receive invoices without any manual steps.
Step 4: Set Up Invoice Numbering
Proper invoice numbering is essential for accounting and compliance. From the invoice settings, choose how invoice numbers should be generated. You can:
- Use a custom number format with prefixes or suffixes
- Use WooCommerce order numbers as invoice numbers
- Define the total length of the invoice number
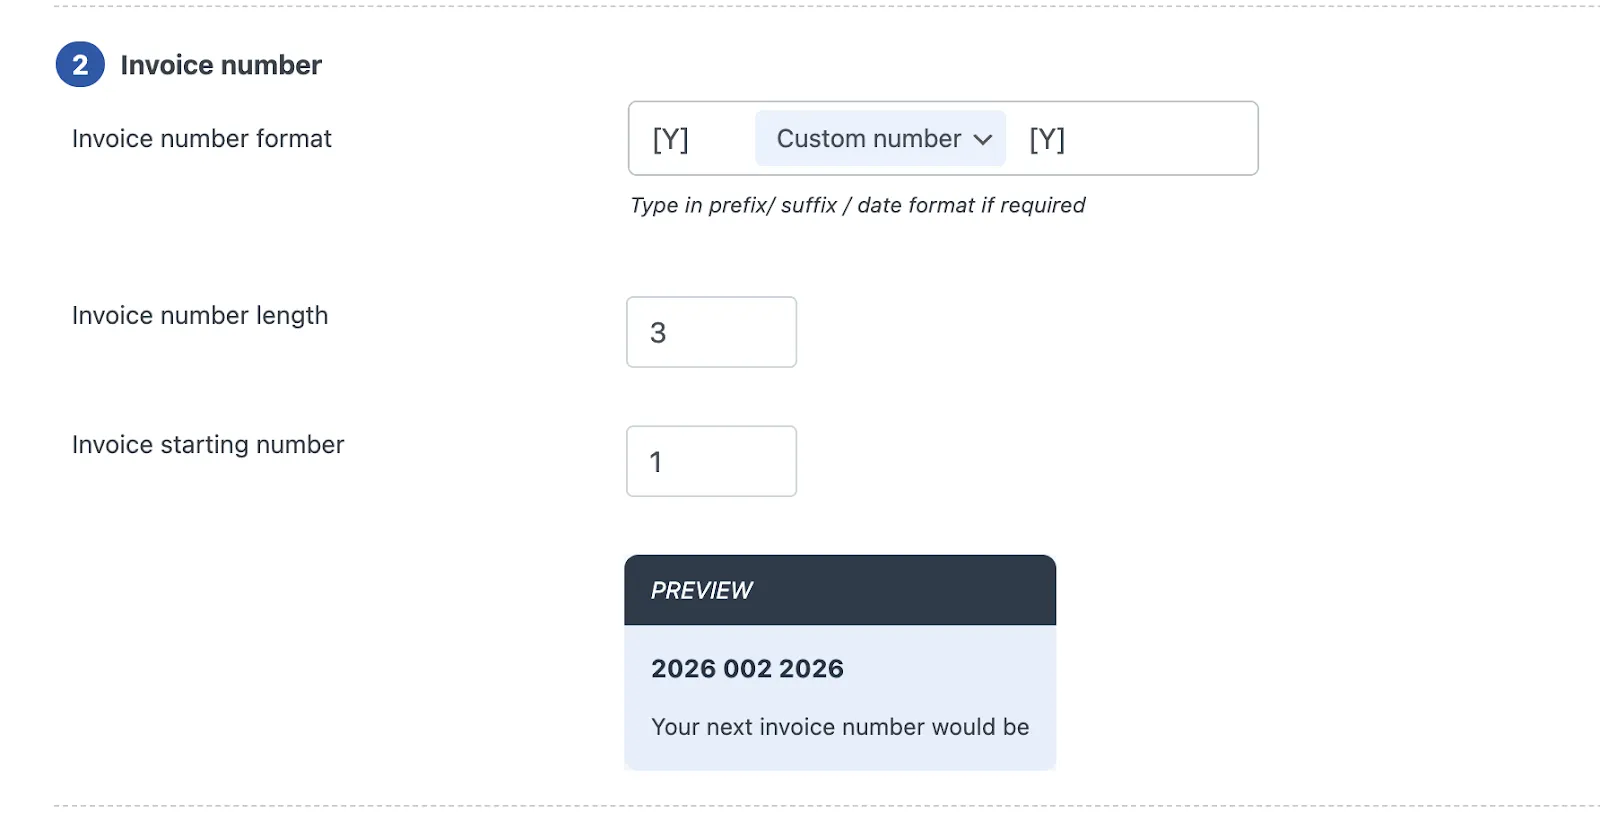
This helps keep your invoicing system organized and audit-ready.
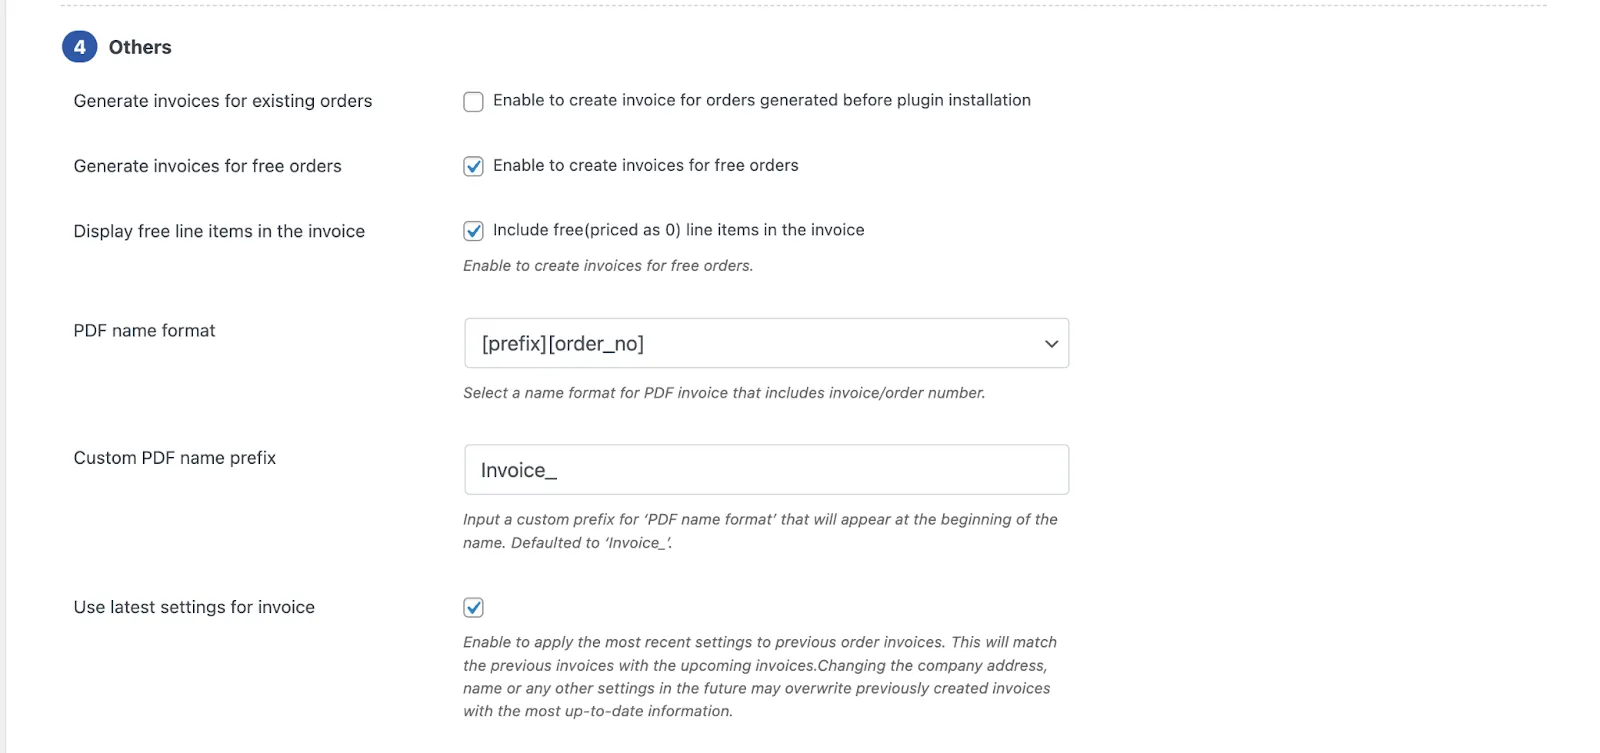
Step 5: Configure Additional Fields and Advanced Options
You can further enhance your invoices by adding additional fields, such as custom order metadata, to display extra information relevant to course sales.
Advanced options also allow you to:
- Generate invoices for free or zero-value orders
- Define a custom file name format for PDF invoices
After configuring these settings, remember to click Update Settings to apply the changes.
Step 6: Customize PDF Invoices for Online Course Sales
To customize WooCommerce invoices, go to the Customize tab in the plugin settings.
Here, you can:
- Add or remove fields from the invoice layout
- Edit text labels, colors, and font sizes
- Adjust the design to match your brand
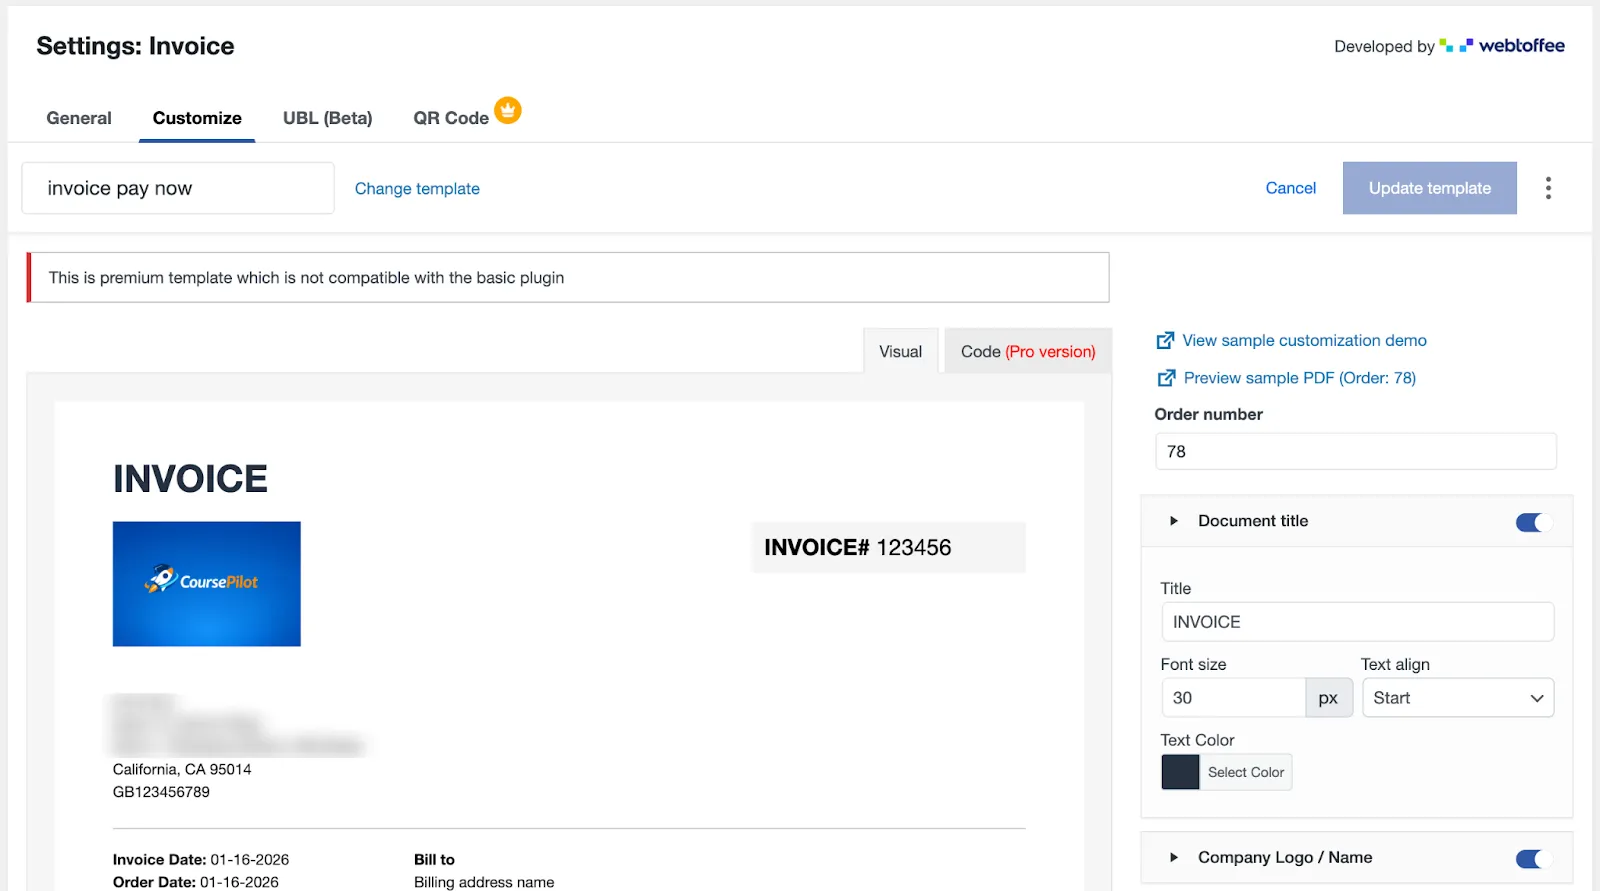
For online courses, it’s a good practice to clearly label line items as “Online Course” or “Digital Course Access” to avoid confusion.
Once done, preview a sample invoice to ensure everything looks correct. Your WooCommerce store will now automatically generate and deliver professional PDF invoices for every course sale.
The WooCommerce invoice plugin we’ve covered in this guide is available as a free plugin, making it an excellent starting point for setting up automated invoicing for online courses. As your course business grows, the WebToffee PDF Invoices and Packing Slips plugin also offers optional premium add-ons that unlock advanced features such as additional document types, deeper customization, enhanced tax handling, and bulk invoice management. This makes it easy to start simple and upgrade only when your invoicing needs become more complex.
Conclusion
Automated invoicing may seem like a small detail, but for anyone selling online courses with WooCommerce, it plays a big role in running a smooth and professional business.
By setting up automated PDF invoices, you ensure every course sale is handled consistently, without manual effort, missed invoices, or last-minute support requests. Customers get instant access to clear, well-formatted invoices for their records, while you stay organized and better prepared for accounting, taxes, and future growth.
With the right plugin and a one-time setup, invoicing becomes something you never have to think about again. Once it’s in place, you can focus on what really matters: creating great courses, growing your audience, and scaling your online education business with confidence.

Start Using Tutor LMS Today
Ready to take your online courses to new heights? Download Tutor LMS now and enjoy a journey of eLearning excellence.