How to Build a Fully-Branded Corporate Academy in WordPress (A Step-by-Step Guide)

Does your company’s training portal look a little… borrowed? When your employees see third-party logos or receive emails from a system they don’t recognize, it can subtly dilute the credibility of your valuable training content. For many organizations, the thought of building a custom-branded learning platform often brings to mind huge budgets and the need for a dedicated development team.
That landscape, however, has completely changed.
It is now entirely possible to build a corporate academy in WordPress that feels uniquely yours. By combining the flexibility of the world’s most popular website platform with the extensive user-friendly features of Tutor LMS, you can create a professional corporate training website with full control over the branding. This guide is designed to walk you through that exact process, step-by-step, showing you how to launch an academy that is 100% your brand, without needing to write a single line of code.
Why a Branded Academy Matters (And Why WordPress is the Perfect Foundation)
Before diving into the “how,” it is helpful to understand the “why.” A fully branded academy reflects your company’s identity at every touchpoint. This professional polish encourages higher completion rates because the training feels like a core part of their job, not a disconnected task.
So, how do you achieve this level of custom branding without the high costs of a custom-built system? This is where the combination of WordPress and a powerful WordPress LMS like Tutor LMS truly shines. This approach provides several key advantages for your organization.
- Complete Ownership: You own everything. The platform, your valuable training data, and your brand are all under your control.
- Cost-Effectiveness: You can avoid expensive, recurring monthly SaaS fees that often increase as you add more users. Your main cost is simply a yearly or lifetime plugin license.
- Limitless Scalability: Your academy can grow right alongside your company without worrying about extra costs per user.
Your Essential Toolkit: What You’ll Need to Get Started
Building your branded corporate academy doesn’t require a lengthy shopping list. Getting this powerful setup running is surprisingly straightforward. Having these items ready will ensure a smooth and efficient building experience.
Here is the simple toolkit for your branded corporate academy:
- A Self-Hosted WordPress Website: This serves as the foundation of your site, giving you complete freedom and control over every aspect of your academy.
- Tutor LMS Pro: While a free version is available, the Pro license is what unlocks the powerful branding, custom email, and certificate options and corporate features discussed in this guide.
- A Purpose-Built Theme: A theme like Workademy is highly recommended as it’s designed specifically for Tutor LMS and simplifies the entire design process.
- Your Brand Assets: You will also want your company logo file, primary brand color code (e.g., #0052CC), and any standard company fonts easily accessible.
The 5-Step Guide to Building Your Branded Academy
With your toolkit ready, you can now begin the exciting part of building your academy. The entire process is broken down into five manageable steps.
Step 1: Laying the Foundation
Every great structure needs a solid base. For your online academy, that foundation is the core software that will power everything. This first step involves getting the main plugins installed and activated on your WordPress site.
The installation happens in three simple phases:
- First, the free version of Tutor LMS is installed directly from your WordPress dashboard. You can find this by navigating to Plugins > Add New and searching for its name.
- Next, the Tutor LMS Pro plugin file that you purchased is uploaded. This is a .zip file that you can add by going to Plugins > Add New and selecting the “Upload Plugin” option. Activating it unlocks all the powerful professional features.
- Once activated, Tutor LMS presents a helpful Setup Wizard. Following its on-screen prompts is highly recommended.
And just like that, the technical foundation is set. The engine of your academy is now installed and ready, a process that usually takes less than 10 minutes from start to finish.
Step 2: Choosing and Activating Your Academy’s Design
The visual appearance of a WordPress site is controlled by a theme. While many themes are compatible with Tutor LMS, adapting a generic one can require more manual effort.
For a much faster path, you can use a specialized Tutor LMS theme like Workademy. The power of this theme comes from its deep integration with a powerful visual site builder called Droip, which is automatically installed alongside it. This pair works as one seamless system, giving you drag-and-drop control over your branding without any code.
Activating Droip for the first time provides a generous 90-day free trial, this is more than enough time to get familiar with the no-code builder and apply all the branding changes needed to match your company’s style.. Getting this system onto your site is very straightforward:
- Go to Tutor LMS Pro > Themes menu in your dashboard.
- Here you will find the Workademy theme. Clicking “Import” starts the installation.
- During the import, you will see an option to include “Include Tutor LMS demo courses.” Selecting this can be very helpful, as it populates your site with sample content so you can see how a finished academy will look.
Step 3: Customizing Your Academy’s Look & Feel with Visual Tools
With Workademy and the Droip builder active, you can move on to the most rewarding part: applying your company’s unique visual identity. The Droip editor is designed to make this process straightforward, allowing you to easily customize the key elements that make the platform truly yours.
Here are the essential elements you can easily modify to match your branding:
- Your Logo: Your company logo is the cornerstone of your brand. Within the Droip editor, you can click directly on the header logo to replace the placeholder. This opens a media manager where you can upload your logo file, as shown in the video. For the highest possible quality, Droip even allows you to paste SVG code directly, ensuring your logo always looks sharp and professional on any screen.
- Global Colors: Droip uses a powerful system of functionality known as Variables. In the Variables dashboard, you can define your brand’s colors by creating Color Variables. You can access the Variables dashboard from the left menu panel inside the Droip editor.
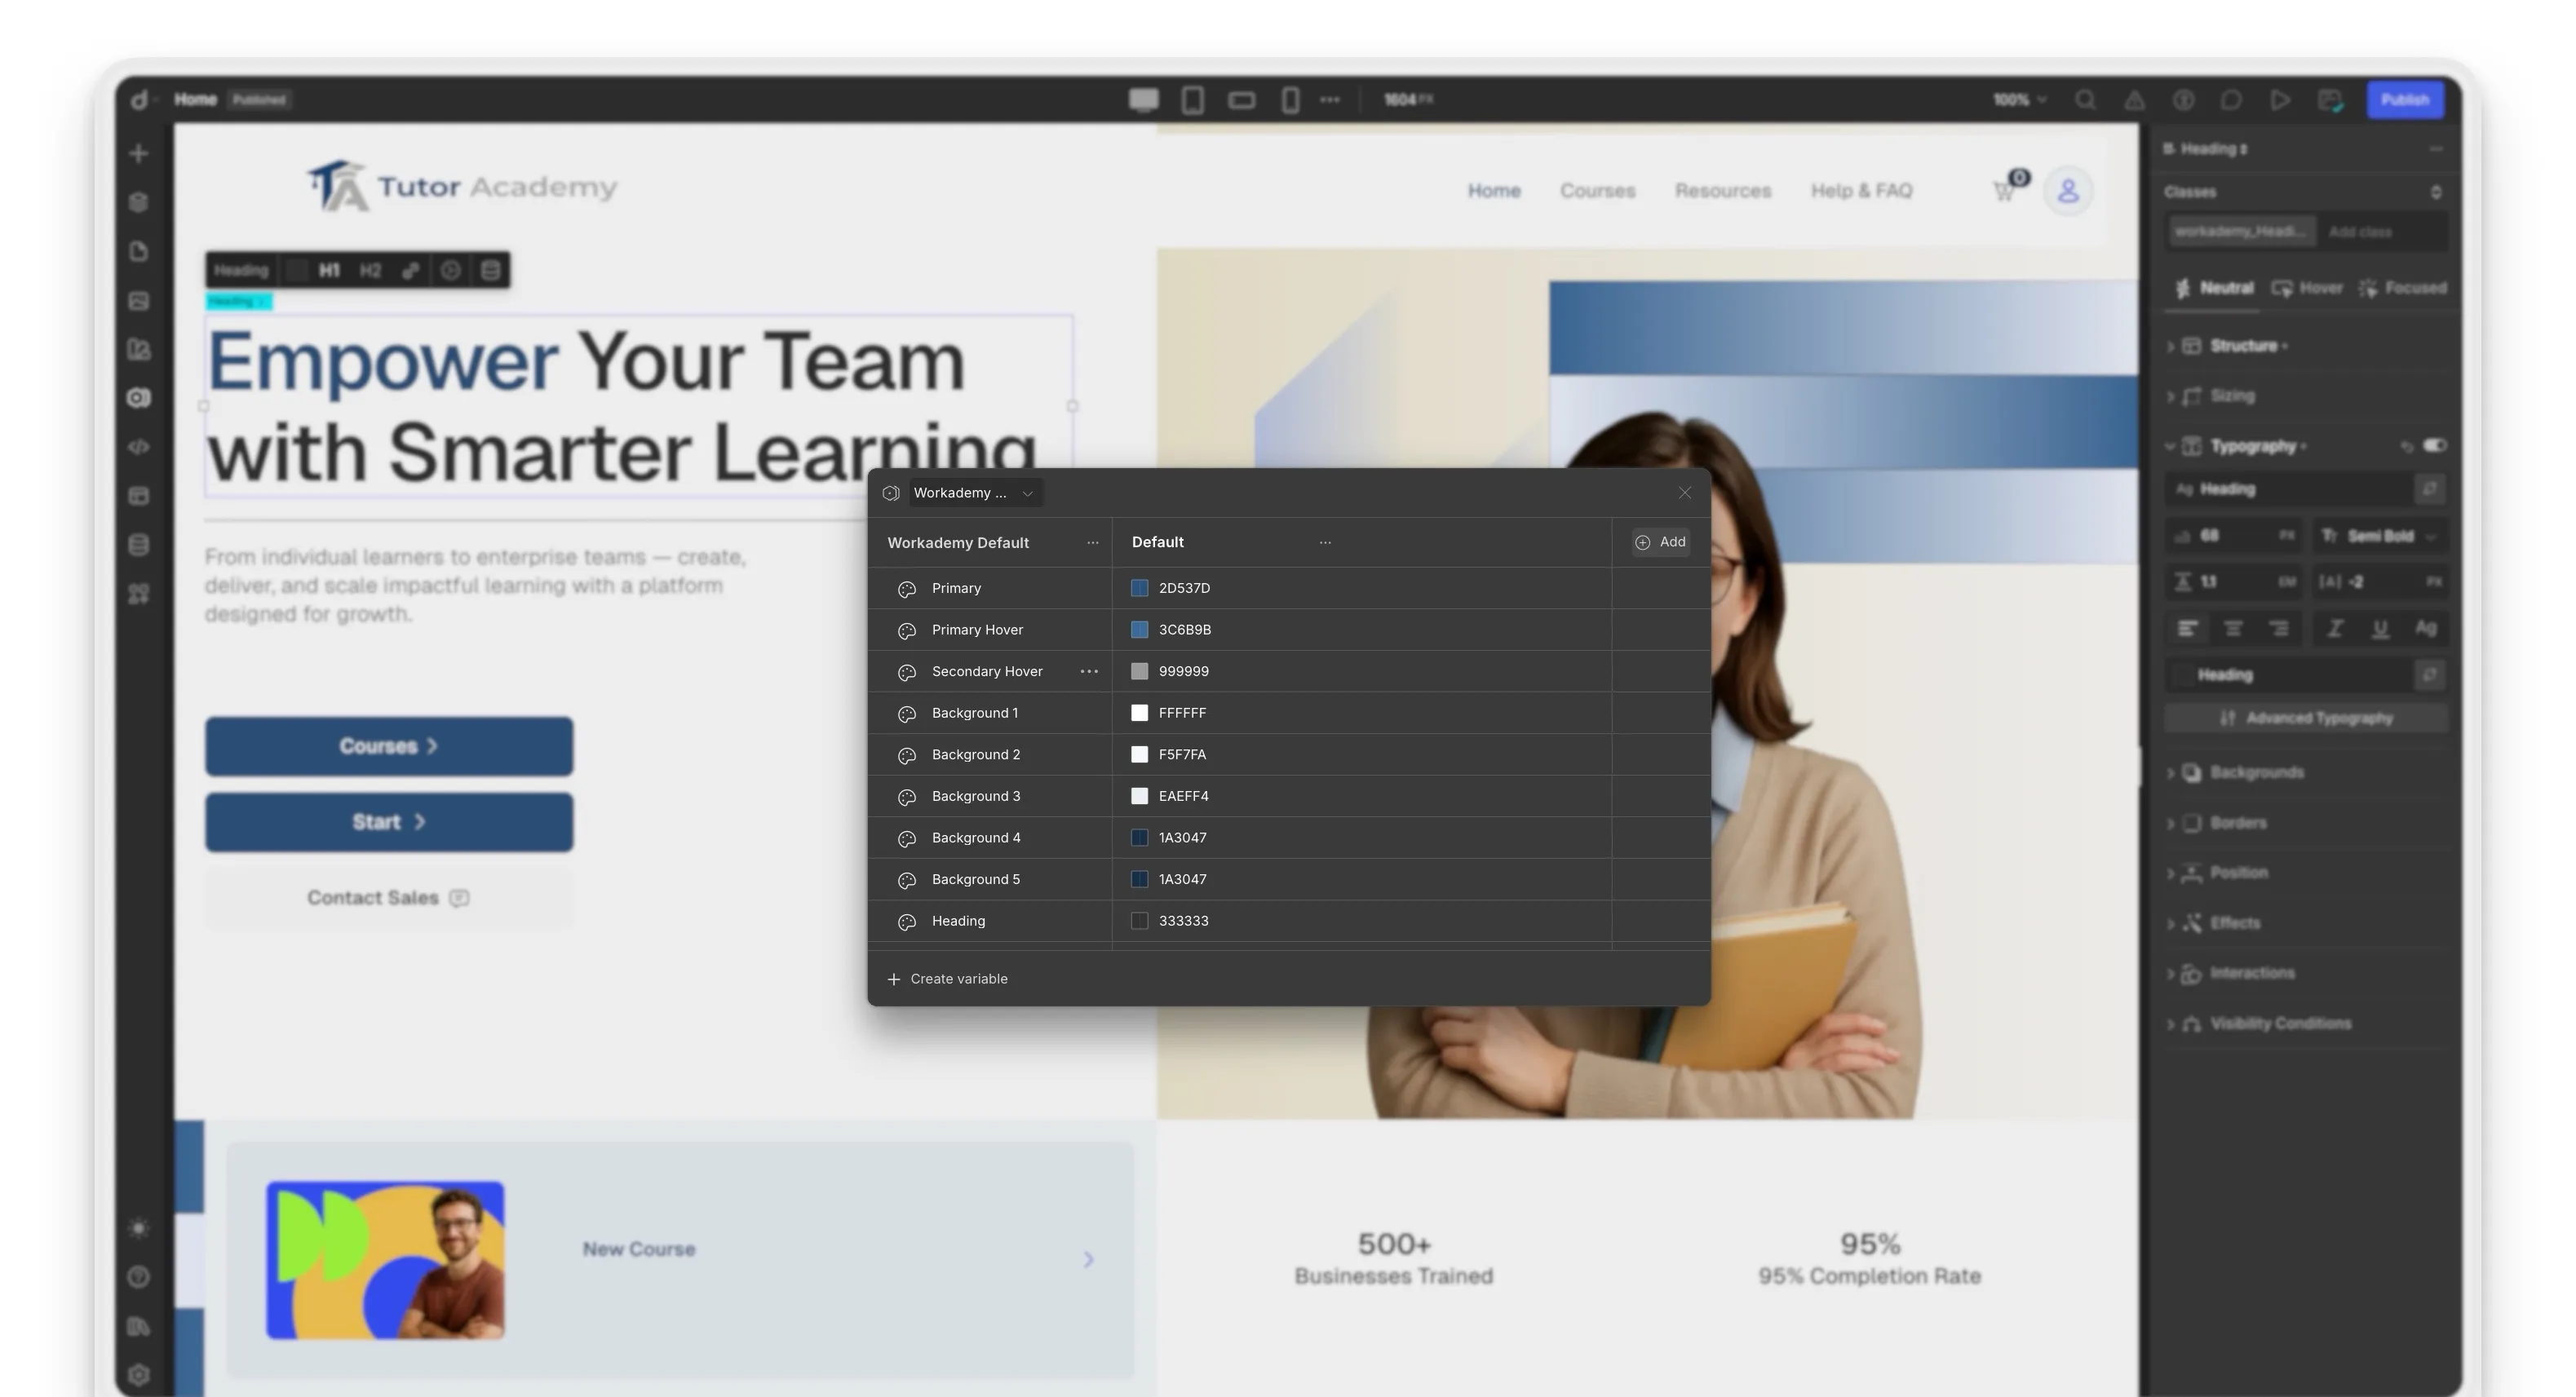
In the Variables dashboard, you can define your brand’s primary, secondary, and accent colors in one central location. Once you set these colors, they are automatically applied to buttons, links, backgrounds, and other elements across the entire academy.
- Typography: A consistent font is key to a professional look. The Variables dashboard also allows you to create Font Variables. Here you can set the specific font families for your headings and body text.
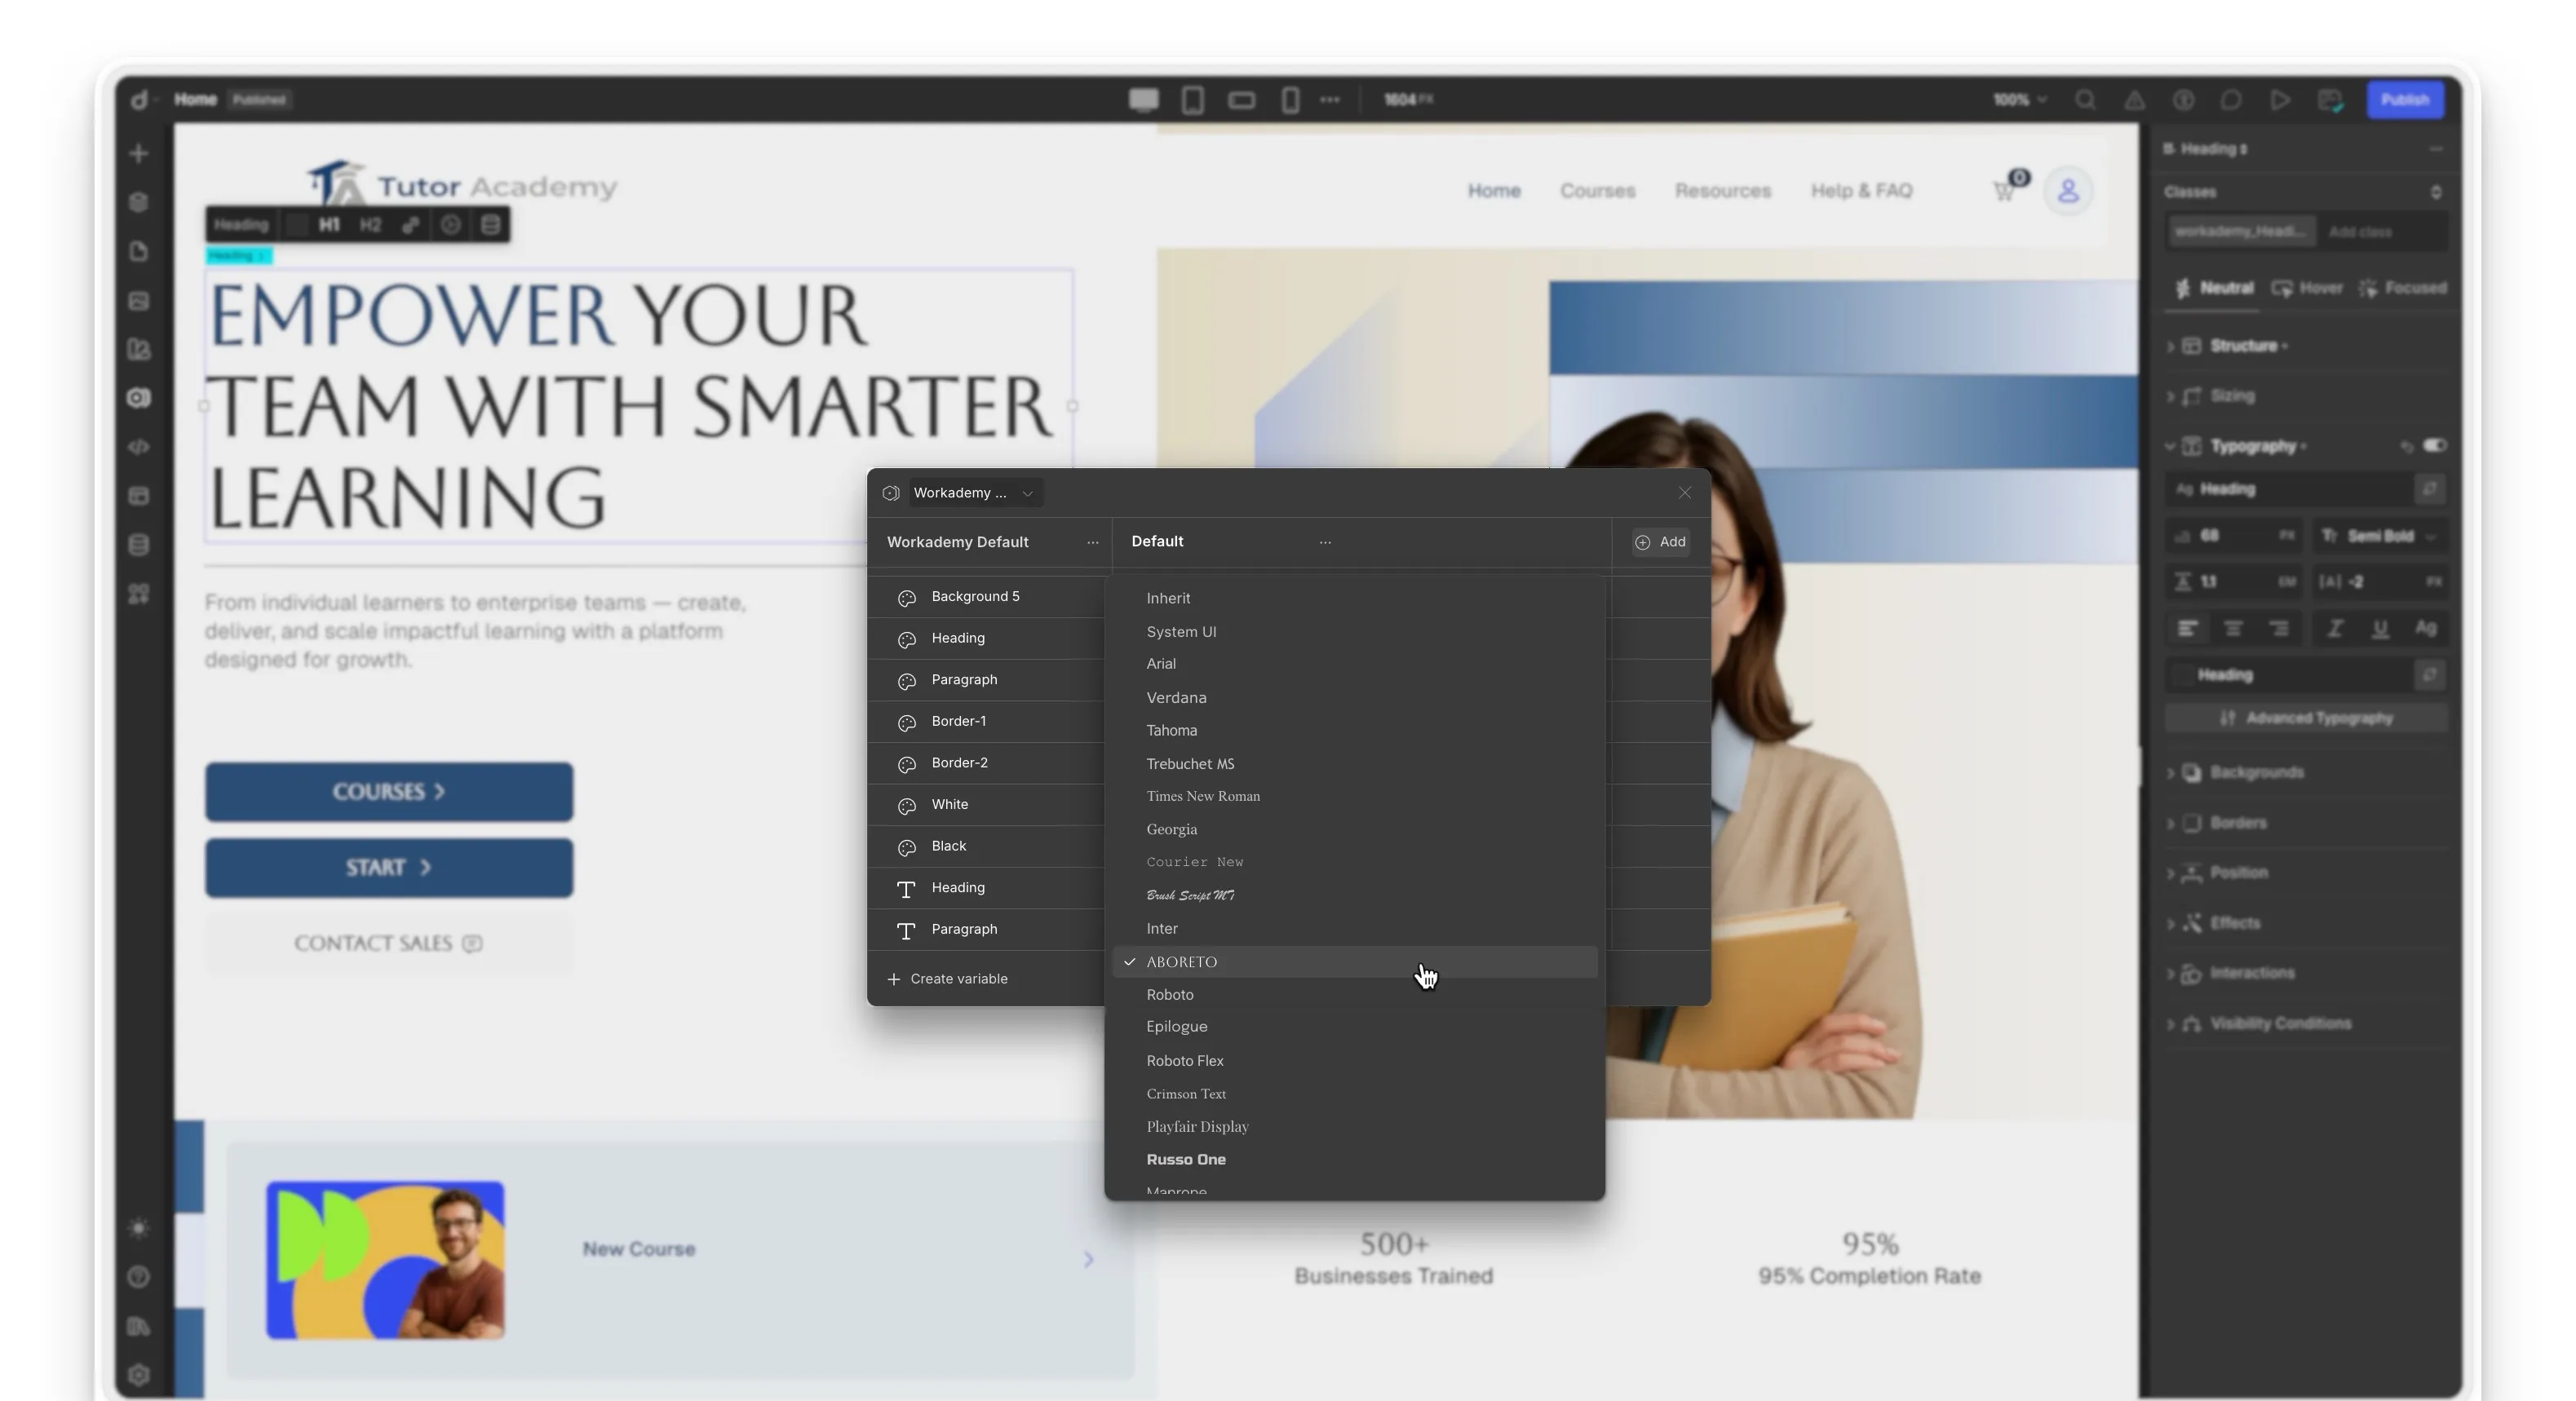
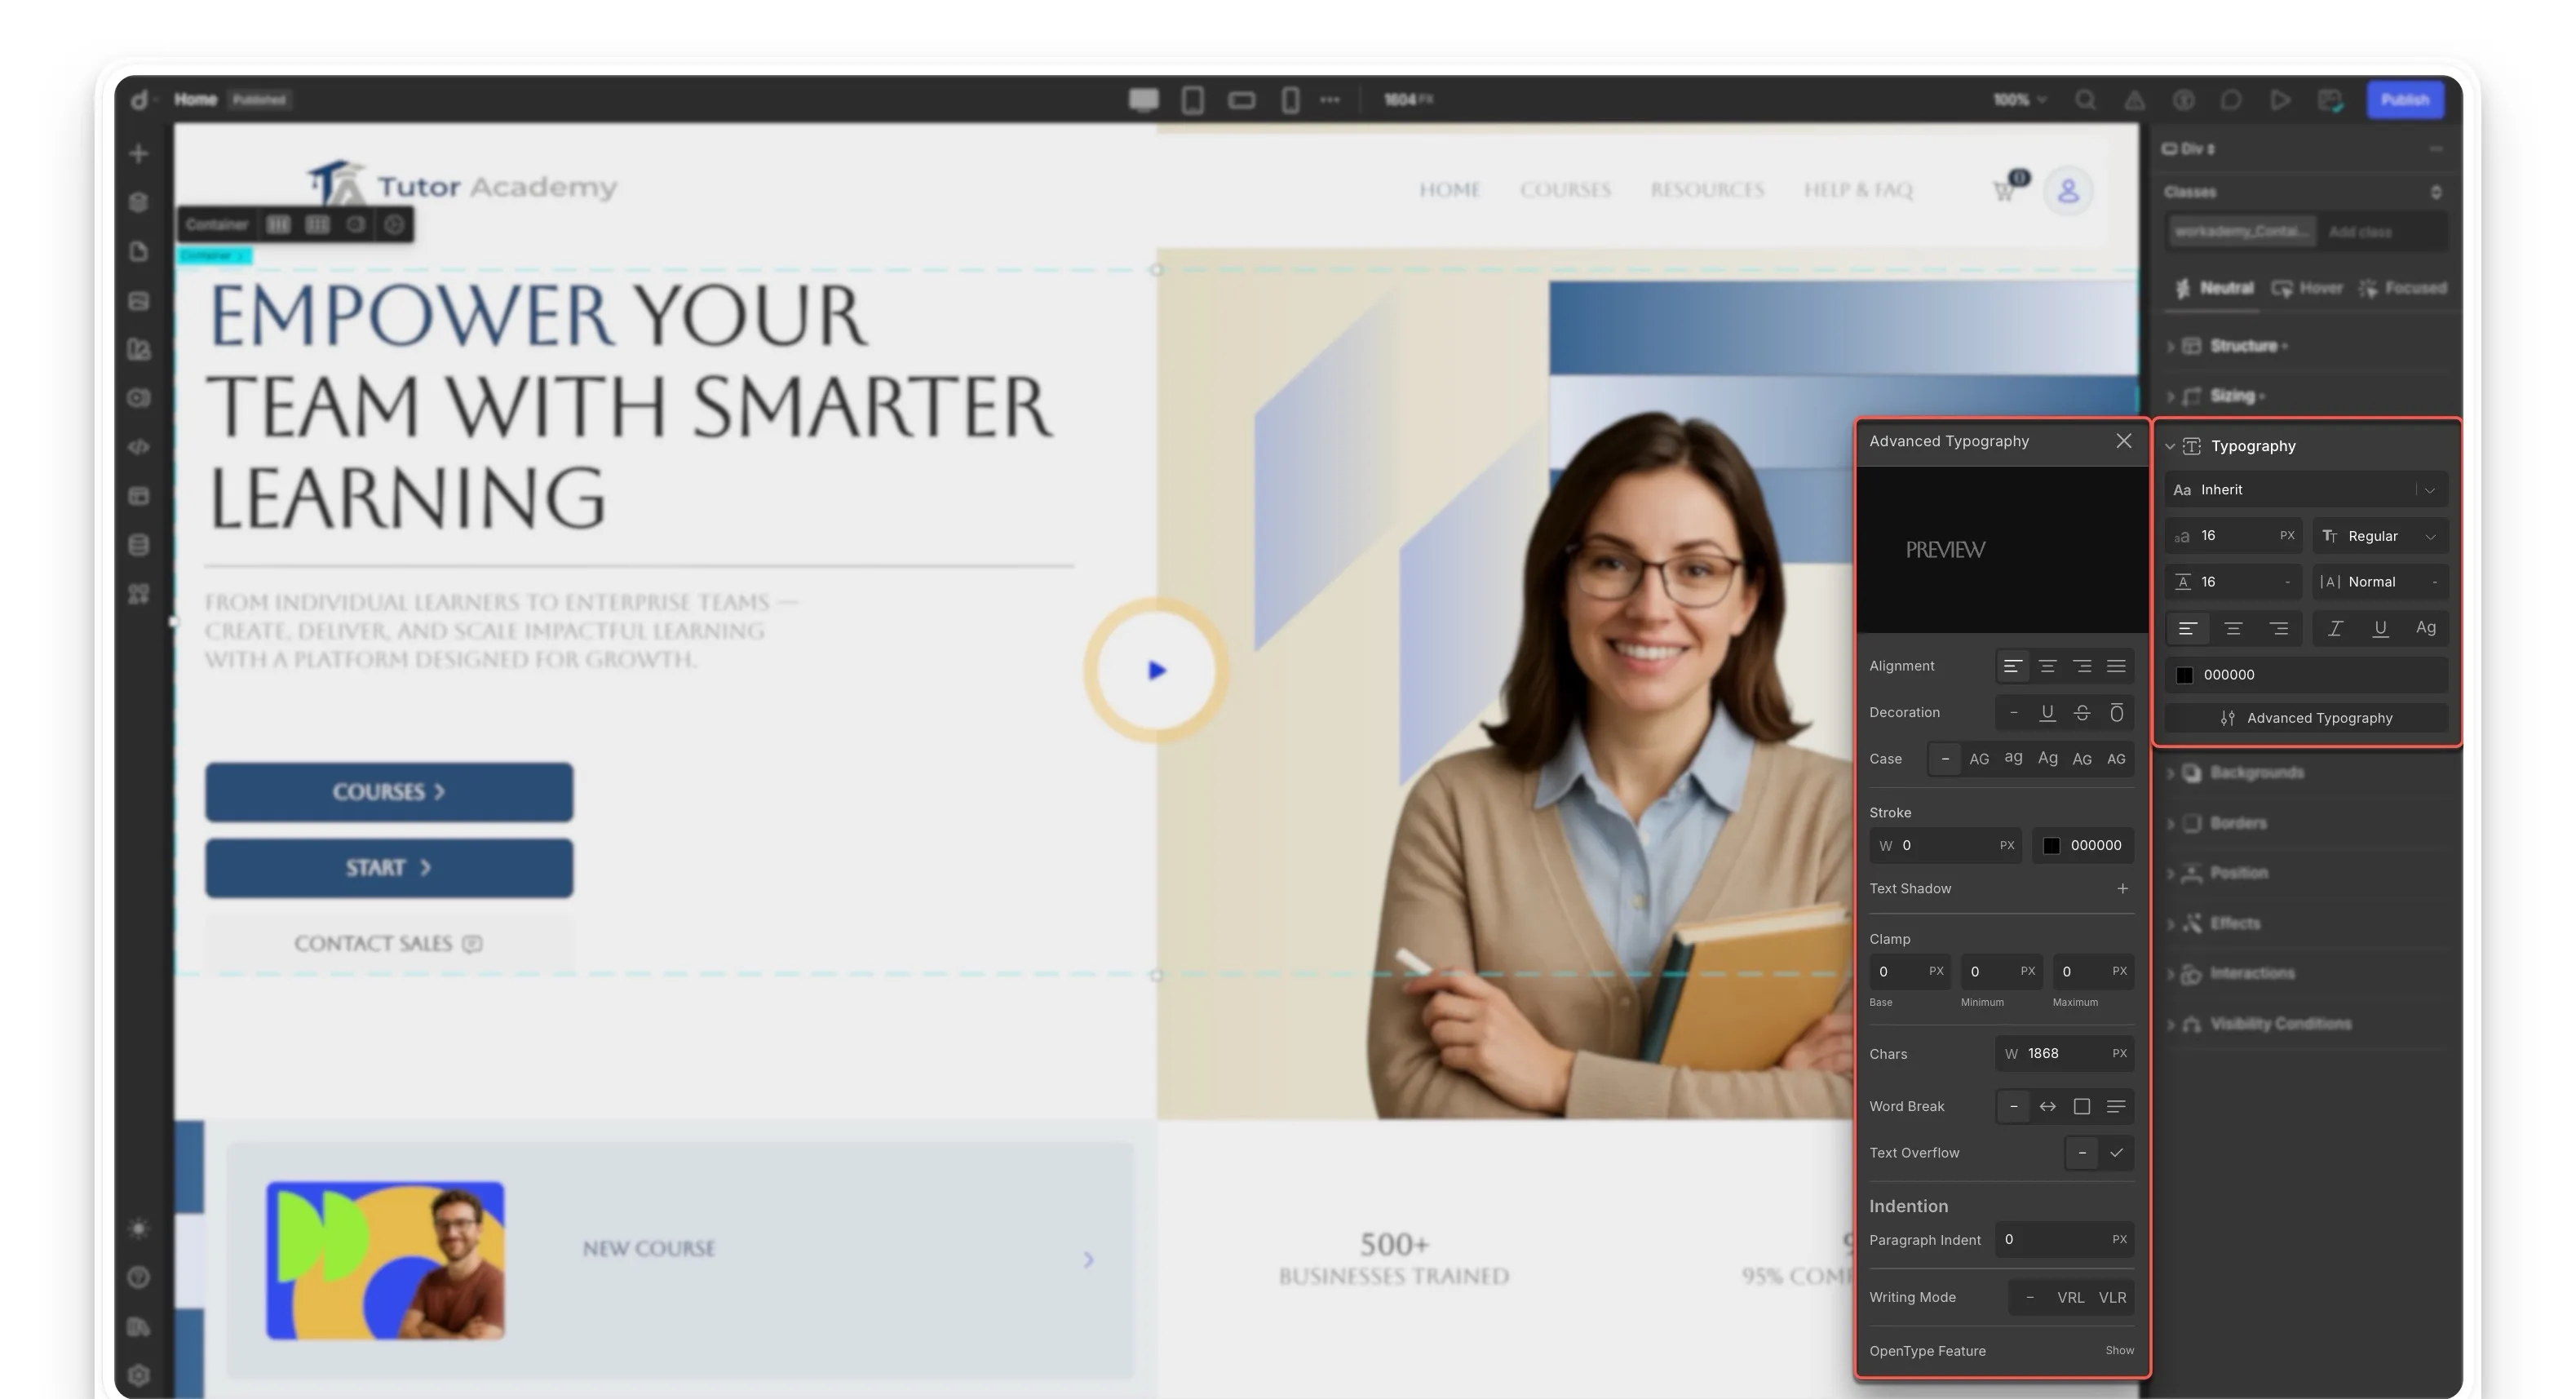
Once you select a text element on the page, you apply this variable and refine its look from the Style Panel on the right. The Typography section in this panel gives you detailed control over font size, weight (like regular or bold), color, and alignment. This combination ensures brand consistency while providing the flexibility to style text for any context.
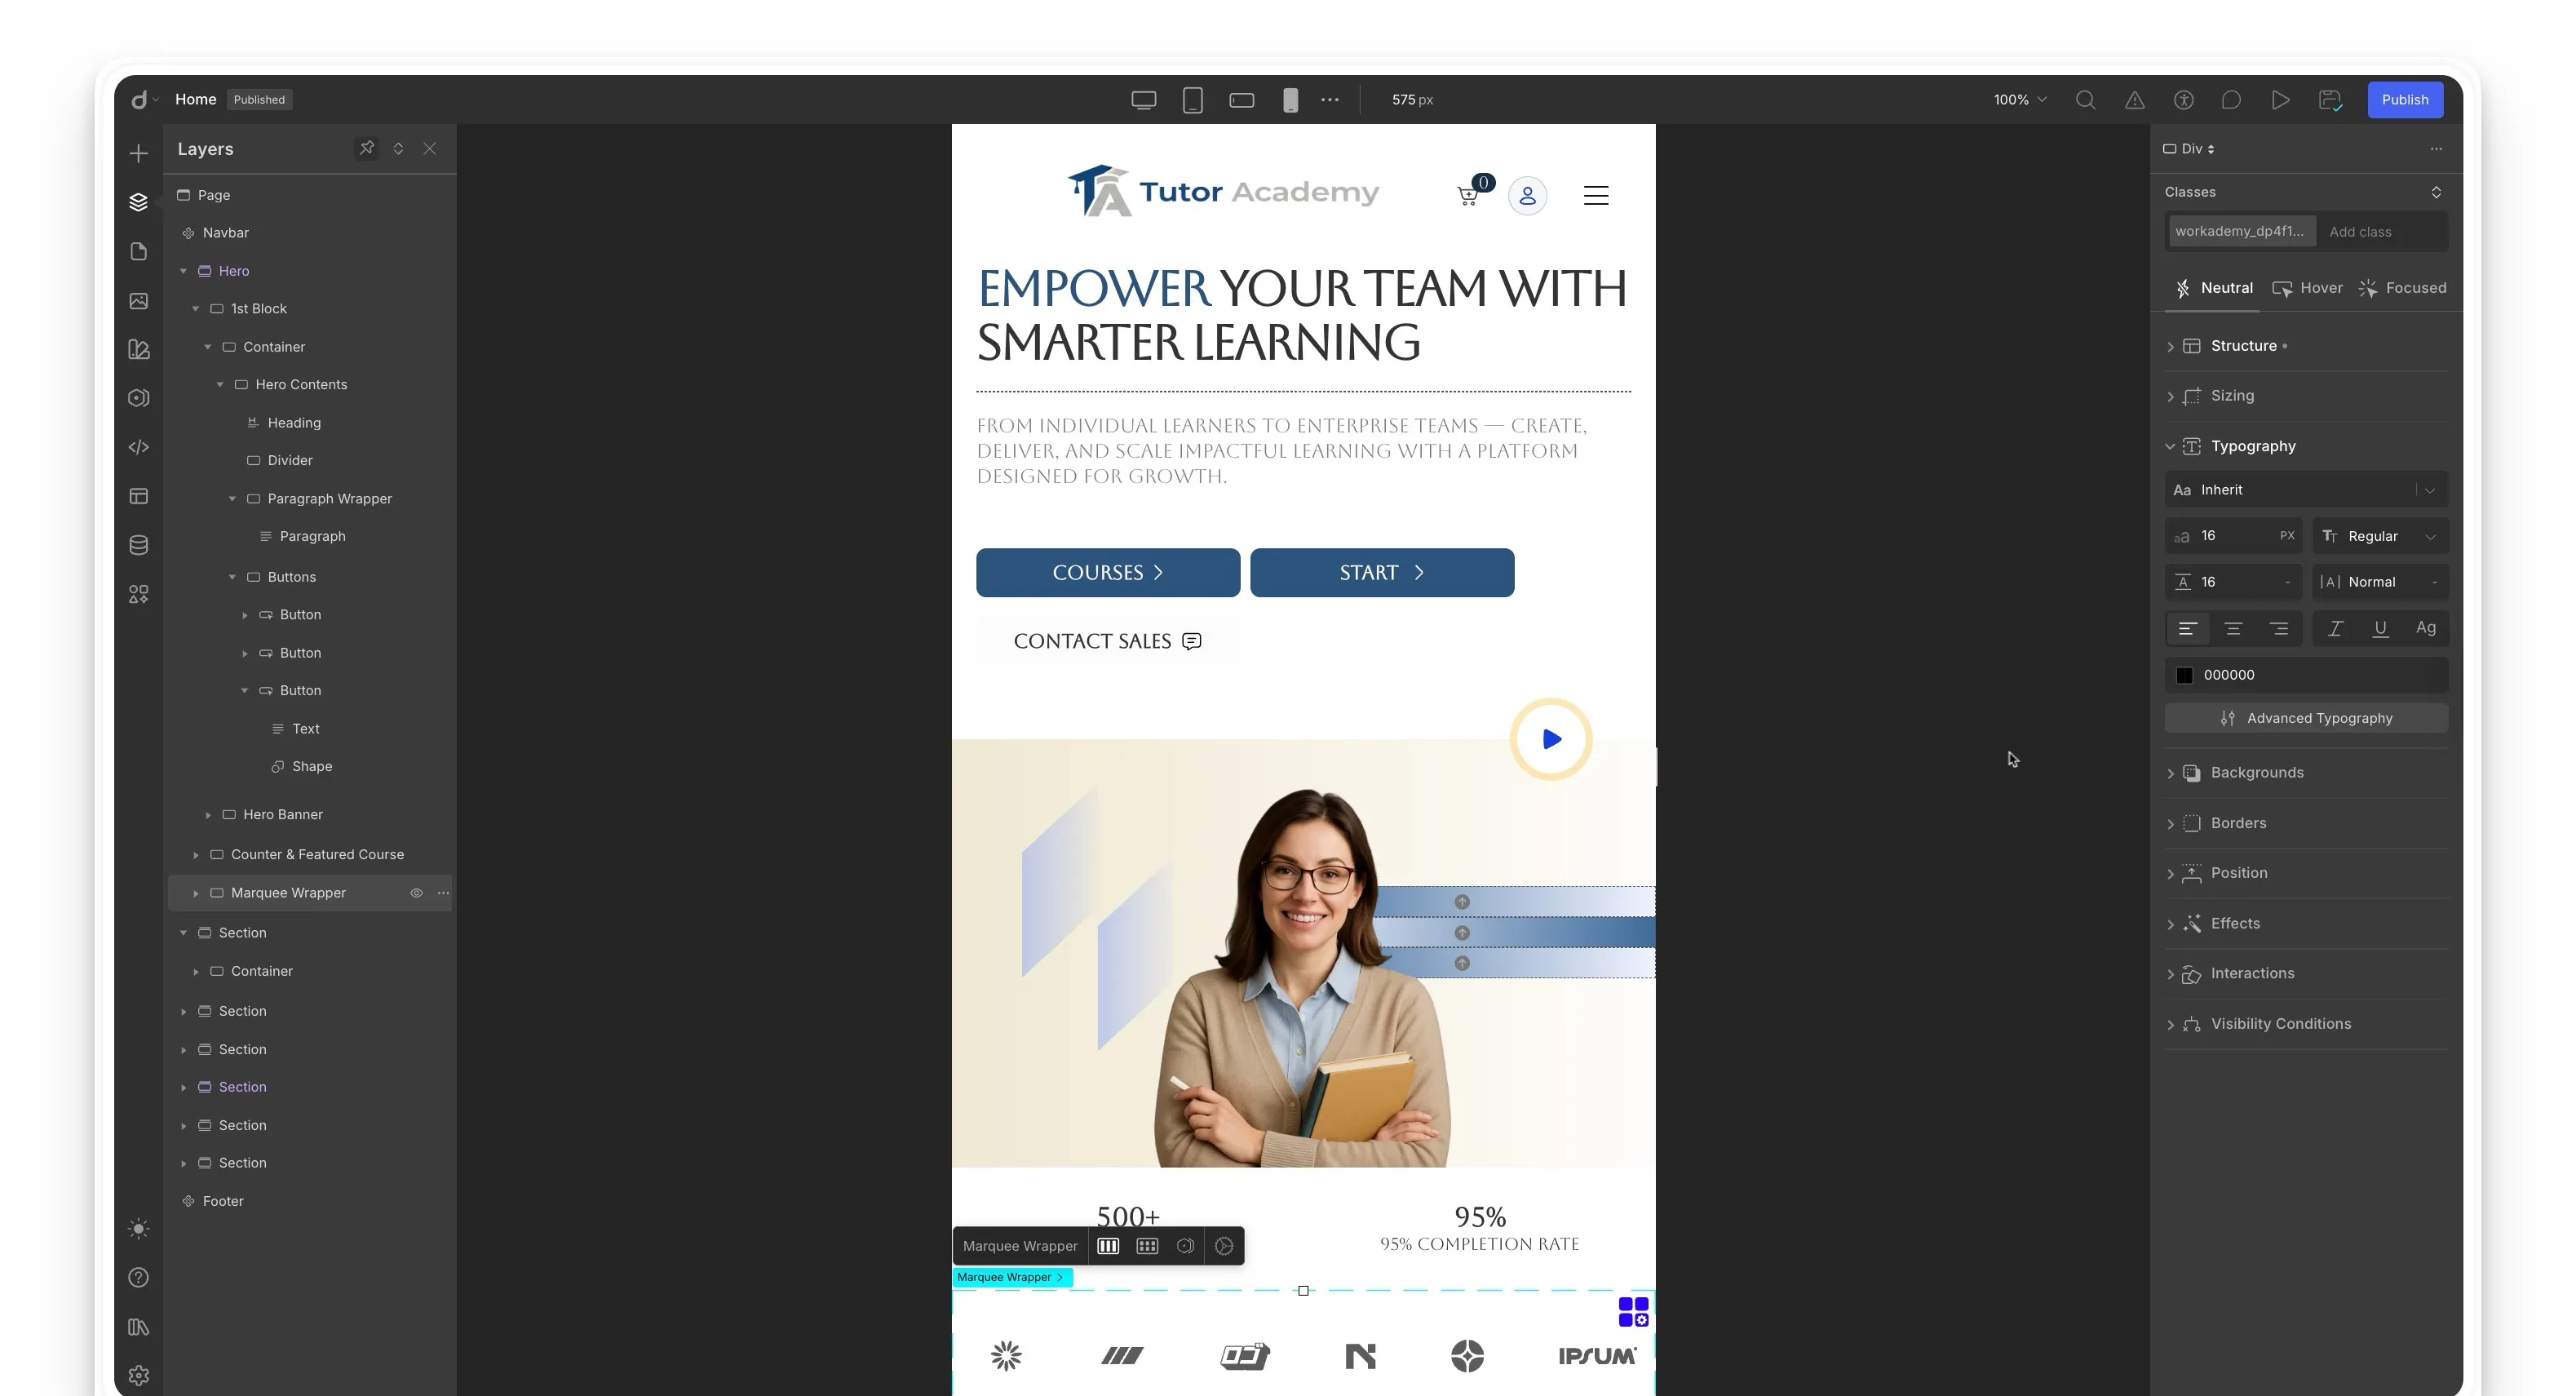
- Seamless Mobile Experience: The Droip platform is built with a mobile-first philosophy, ensuring your Academy is fully responsive and looks great on any device, from desktops to smartphones. This guarantees a consistent and high-quality learning experience for all employees, allowing them to complete their training modules seamlessly, whether they are in the office or learning on the go.
Beyond these global settings, the Droip visual builder allows you to easily modify the layout of any page. You can rearrange sections, add new content, or adjust spacing with simple drag-and-drop controls.
For a quick orientation, the Tutor LMS X Droip integration overview provides a helpful baseline. For more advanced customization, you can explore the full catalog of Tutor LMS elements available in Droip by referring to the official Tutor LMS documentation.
A Note for Users Without a Droip-Powered Theme
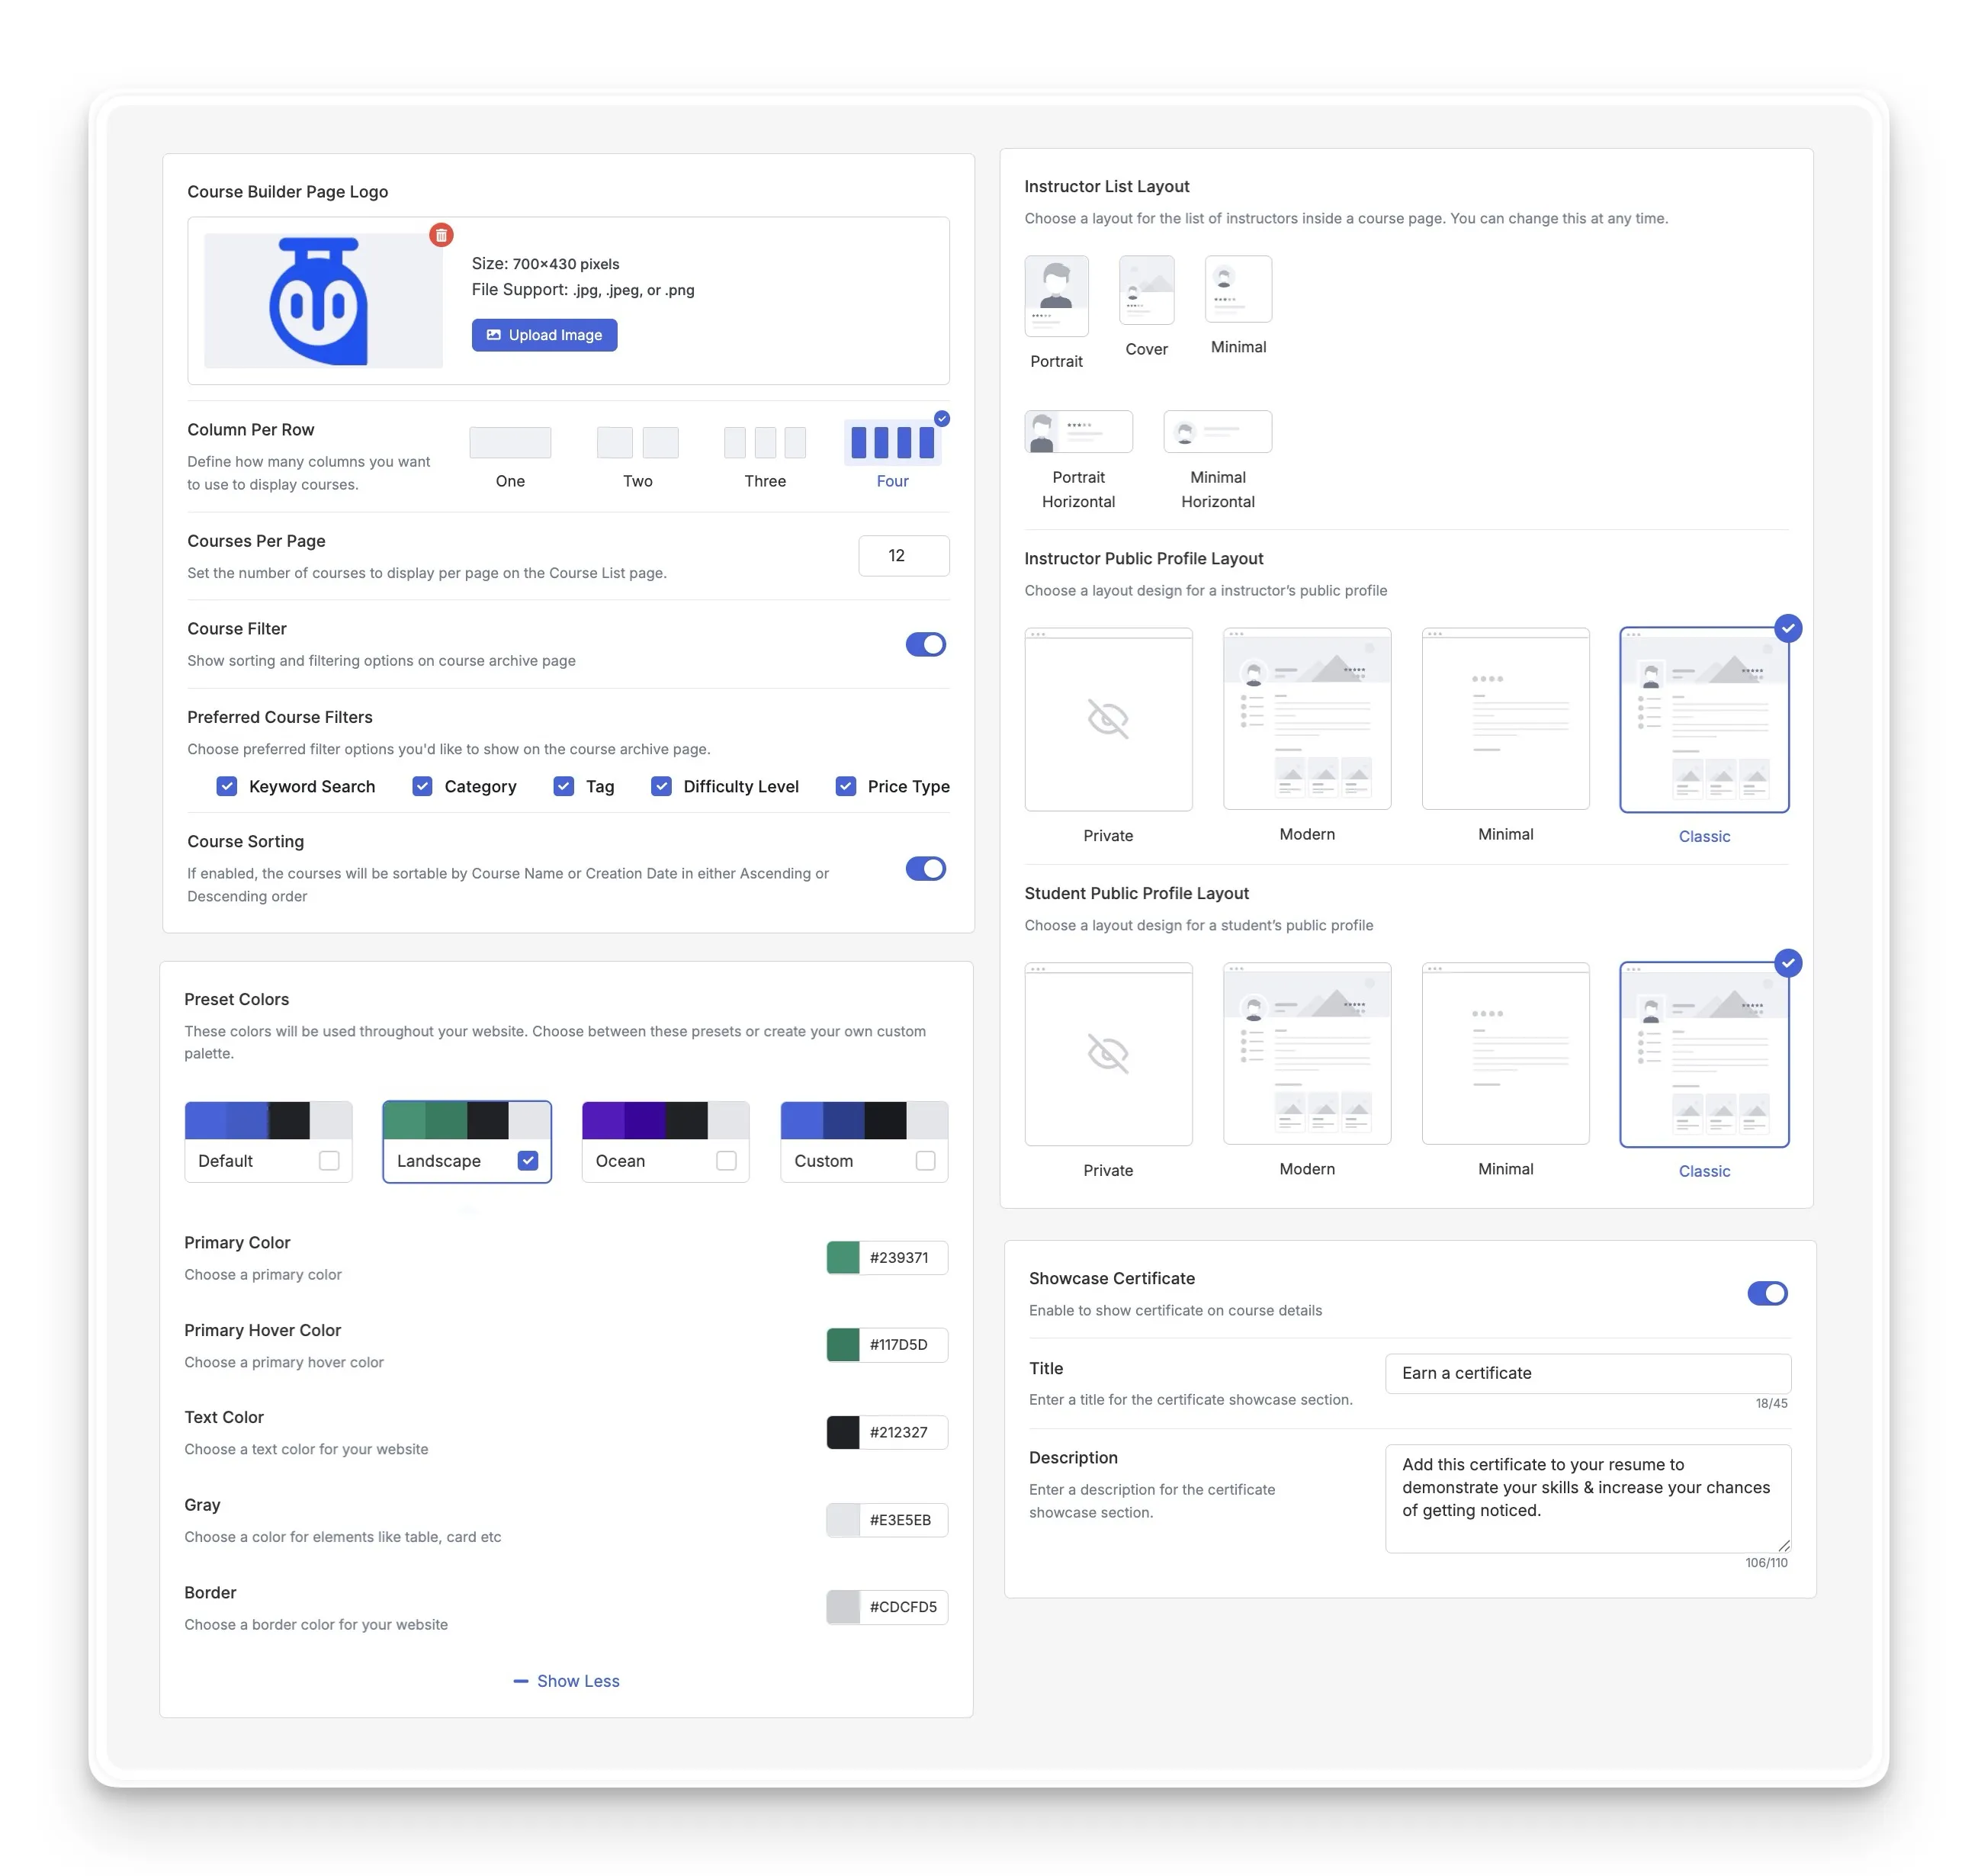
For those using a different WordPress theme, Tutor LMS has built-in design options under Tutor LMS > Settings > Design. These settings allow you to adjust course layouts, select profile styles, and apply color schemes directly to the LMS elements.
Step 4: Branding Your Emails & Certificates
A fully branded academy goes beyond just the website’s appearance. Every piece of communication your employees receive, from an enrollment email to a final course certificate, should also reflect your professional identity. This step focuses on ensuring all your automated communications are polished and on-brand.
- Designing Official Company Certificates: The Tutor LMS Pro Certificate Builder, provides a user-friendly tool for this. You can choose a template and simply upload your official company logo or seal, along with a digital signature from a manager or training head.
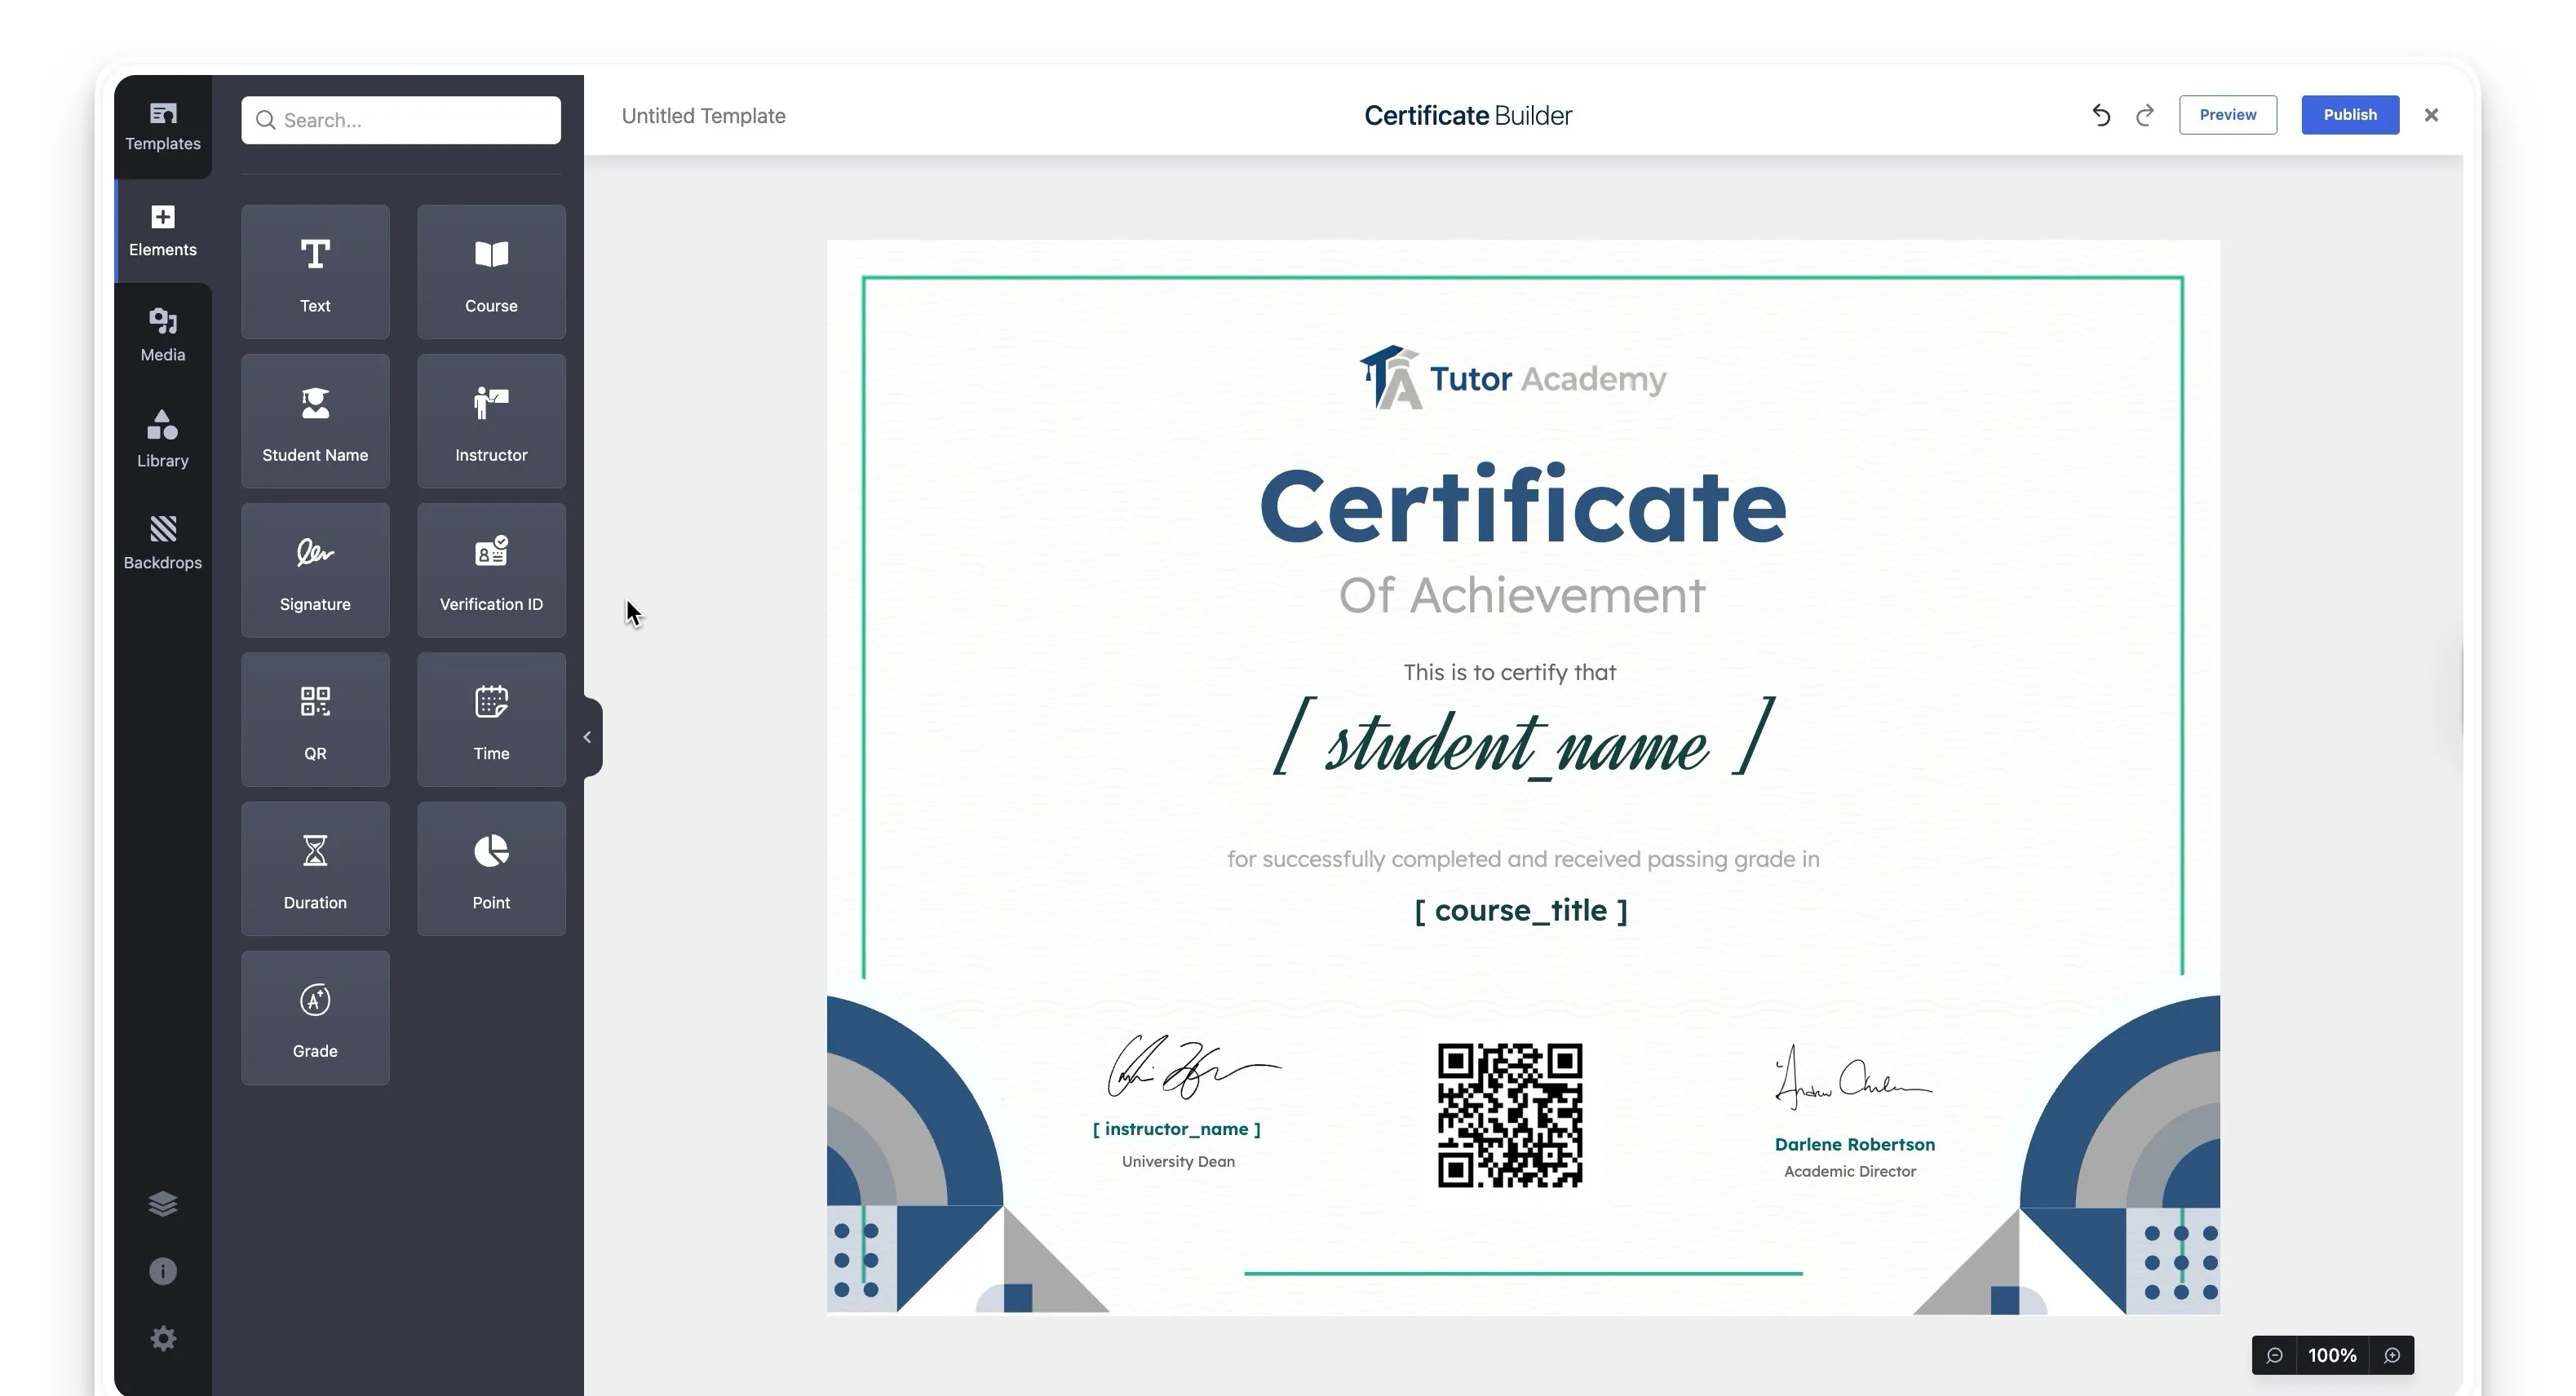
The system automatically adds the employee’s name and completion date, transforming a simple award into an official company document.
- Customizing Branded Email Notifications: Similarly, every automated email should feel like it comes directly from your organization. Tutor LMS lets you easily customize email templates for key actions.
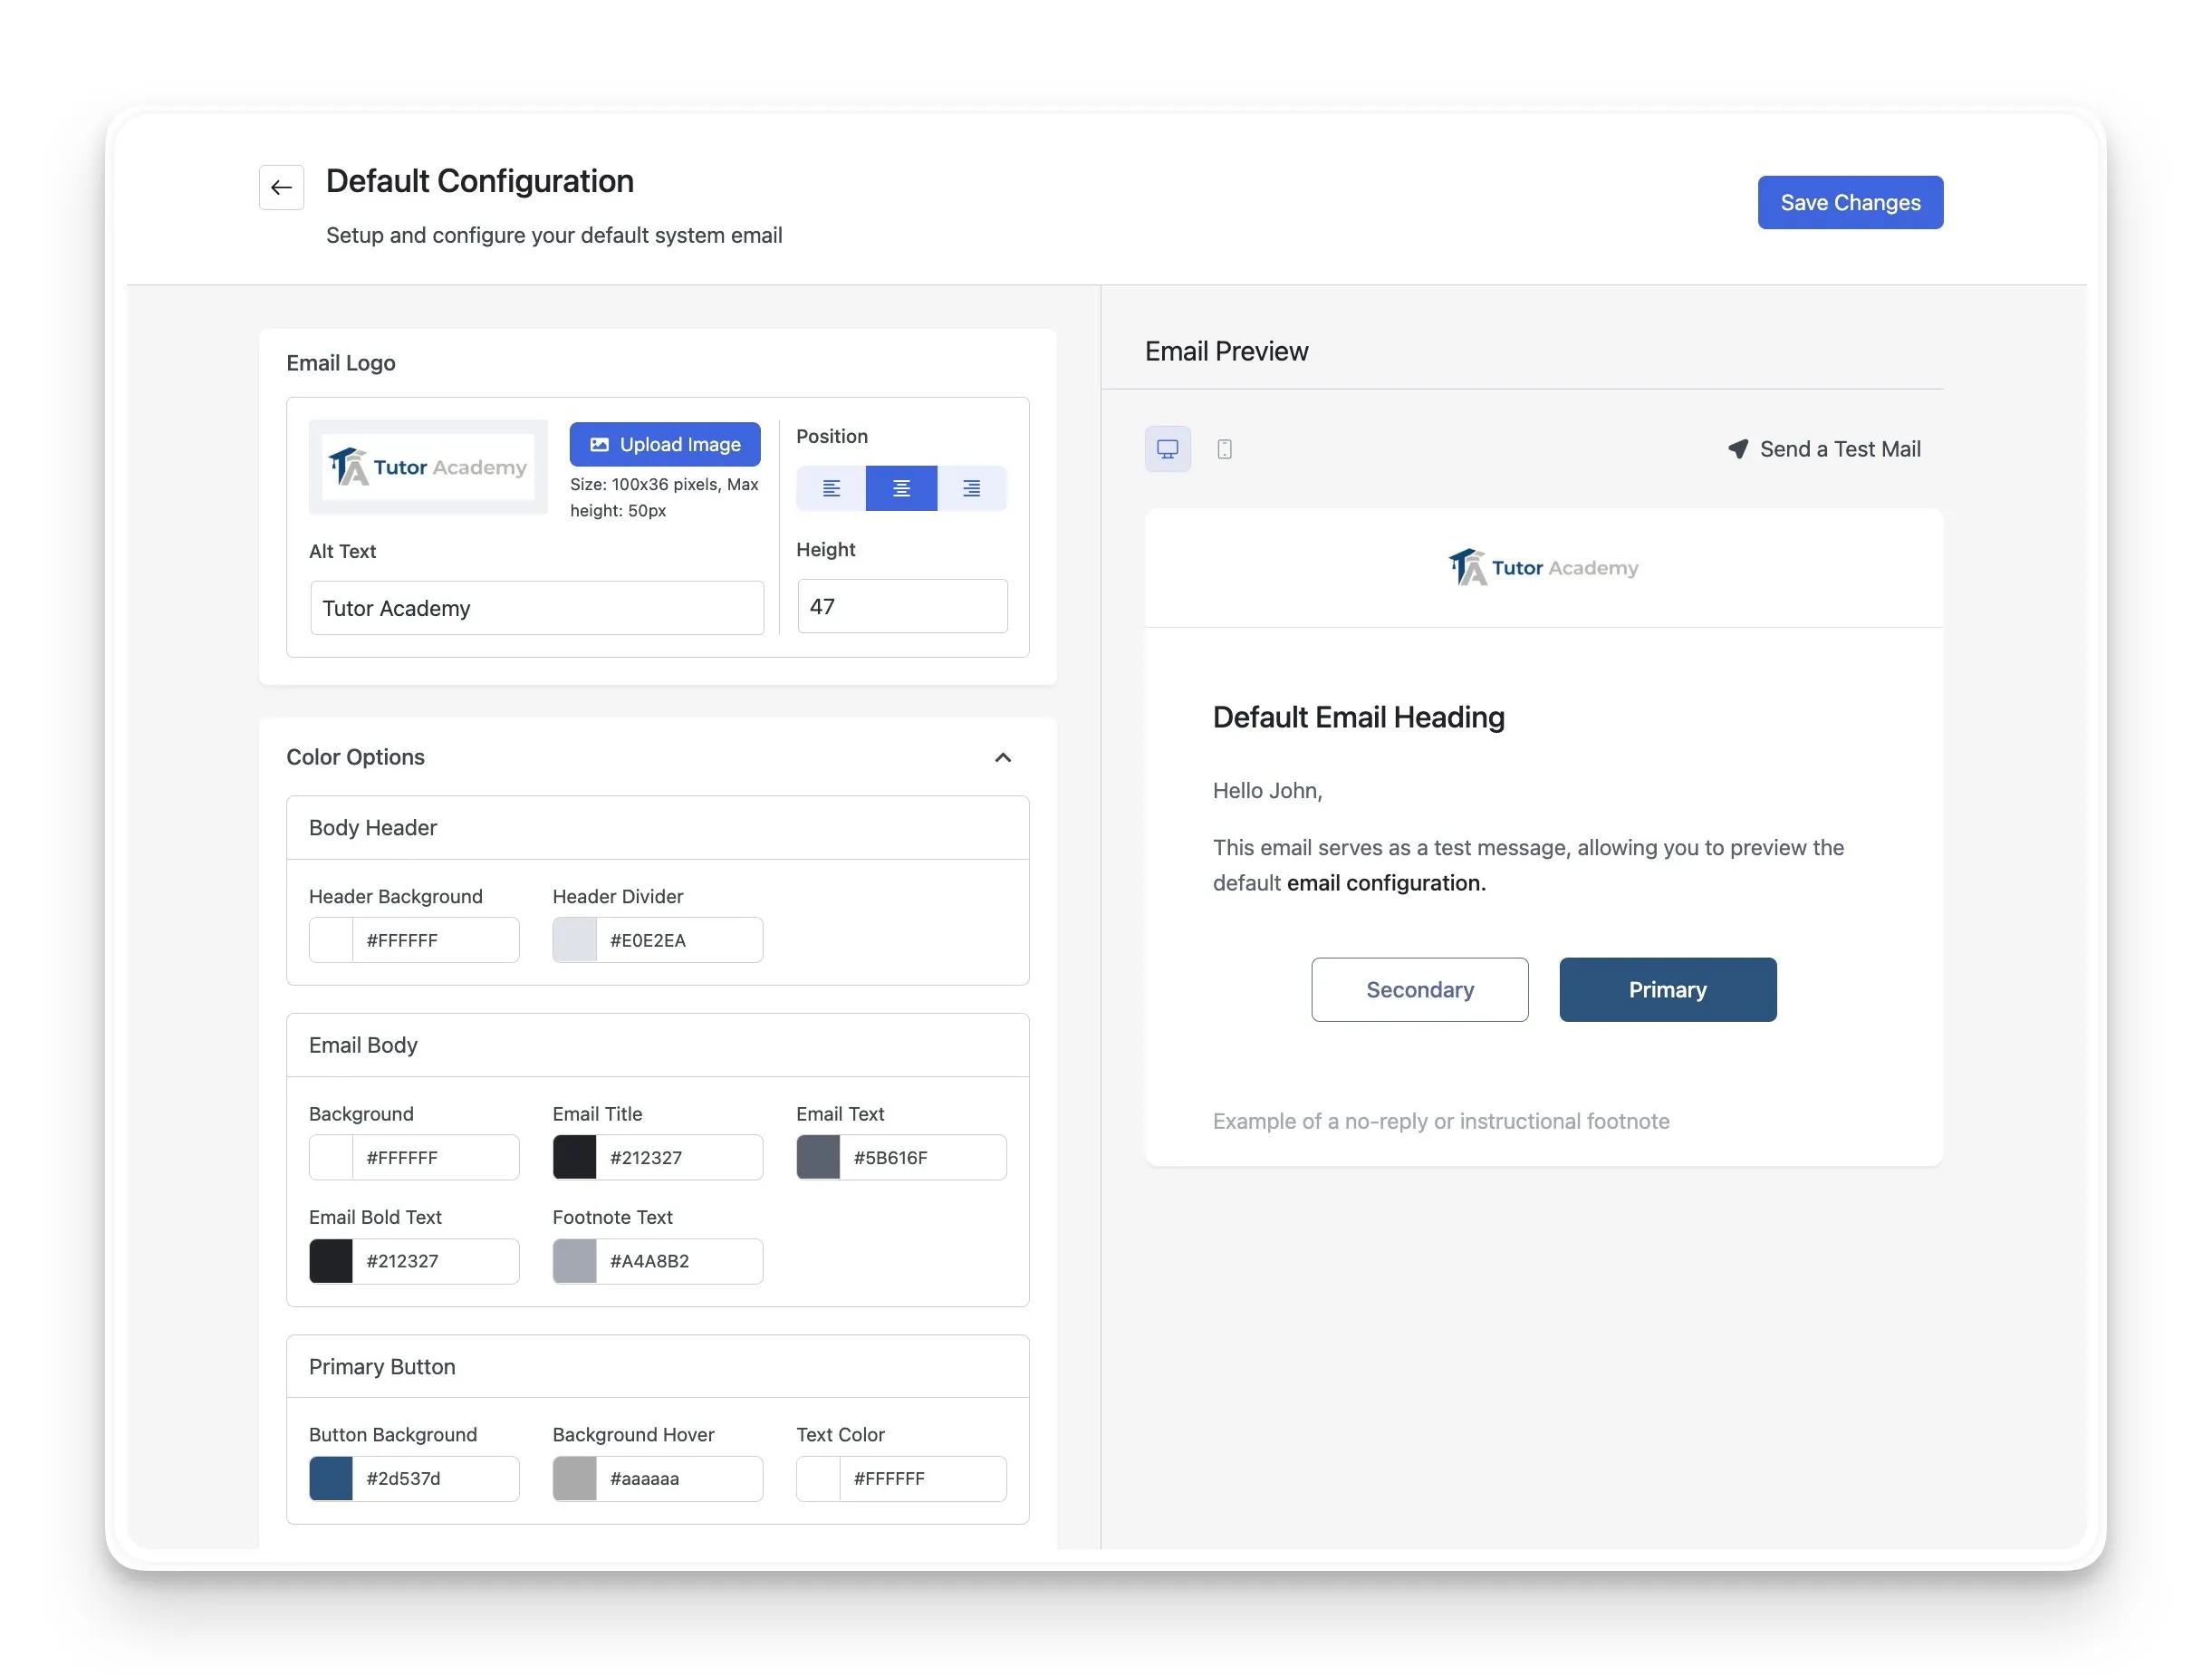
You can easily add your company logo to the email header, ensuring every communication feels official. The text of all automated emails, like enrollment confirmations and course completions, can also be customized with a personal touch by using dynamic tags.
Step 5: Adding Content, Users, and Going Live
Your branded academy is now ready for its most important components: the training content and the learners. This final step walks through creating your first module and preparing for launch.
- Creating Your First Training Module:
A great way to start is by building a pilot course, such as a “New Employee Onboarding” module. The intuitive frontend course builder is a significant advantage here, as it empowers your subject matter experts, like department heads or HR managers, to create and manage their own training content without needing technical help.
The builder provides several powerful features that are ideal for corporate training:
- Structured Learning Paths: You can use the Prerequisites for learning coherence and the Content Drip feature to release lessons on a set schedule. This is perfect for ensuring a consistent onboarding experience over an employee’s first week or month.
- Blended Learning: The builder allows for integrating Live Classes via Zoom or Google Meet. This helps you combine self-paced learning with essential live Q&A sessions or team workshops.
- Centralized Resources: It is easy to attach downloadable resources like company handbooks, policy documents, or checklists directly to any lesson, keeping all essential materials in one place.
- Performance Tracking: You can create robust assignments and advanced quizzes to track employee comprehension and ensure key learning objectives are being met before they can proceed.
- Adding and Enrolling Your Employees:
Once you have the content, your next step is to populate the academy with your team members and grant them access to their training. For a corporate environment, control and efficiency are key. Tutor LMS Pro provides a dedicated Enrollment addon that gives you precise control over this entire process.
Here are the powerful, corporate-friendly methods you can use:
- Manual Enrollment for Individuals: This method is perfect for precise, targeted assignments, such as enrolling a new hire into an onboarding course or granting a manager access to leadership training. As an administrator, you can directly enroll any user into any course.
- Bulk Enrollment for Teams: For enrolling an entire department or the whole company, the bulk enrollment feature is a massive time-saver. You can upload a simple CSV file containing a list of employees (first name, last name, and email). Tutor LMS will then intelligently:
- Enroll all the listed employees into the specified course at once.
- Automatically create new user accounts for any employees who are not already in the system.
- Send a password setup email to these new users so they can log in.
- Avoid creating duplicate accounts for existing users.
- Allowing Self-Enrollment: For optional training, you can set a module to be “free” (no payment required). This allows any logged-in employee to enroll themselves with a single click from the course page. This is ideal for building a library of professional development resources that employees can access as needed.
Build It. Brand It. Own It.
The path from a generic training portal to a fully branded corporate academy is now clearer than ever. As we have walked through, a branded learning environment is the new standard for professional, scalable training. It signals to your team that their development is a mission-critical part of your company culture, not an afterthought.
The great news is that you do not need a huge budget or a dedicated development team to achieve this. With your own WordPress site and the powerful, user-friendly tools within Tutor LMS, you have all the necessary components to create a platform that looks and feels entirely your own.
This guide has provided the blueprint to stop renting space on someone else’s platform, where your brand and data are secondary. You are now equipped to start building your own digital campus.

Start Using Tutor LMS Today
Ready to take your online courses to new heights? Download Tutor LMS now and enjoy a journey of eLearning excellence.