
The eLearning boom is undeniable. Whether you are an individual aiming to share your expertise or an organization looking to train employees, having a robust Learning Management System (LMS) is key. But a great LMS needs a reliable host. That’s where Kinsta comes in.
Kinsta, a premium managed WordPress hosting provider, is engineered for speed, security, and scalability – the essential ingredients for a successful online learning platform. In this guide, we will walk you through hosting your LMS site on Kinsta, using the popular Tutor LMS, a top WordPress plugin as our example. So let’s get started!
Why Choose Kinsta for Your LMS Site?
Choosing the right hosting provider is crucial for any website, but it’s especially important for Learning Management Systems (LMS) platforms. Your LMS site needs speed, security, and scalability to meet student demands. Kinsta checks all these boxes with impressive features:
- Blazing-Fast Performance: Have you ever waited for a page to load? Not with Kinsta! Their core infrastructure is based on Google Cloud’s Premium Tier network and the fastest C2 and C3D machines. Plus, they provide an enterprise-level Cloudflare integration by default. Additionally, their server-level caching acts like a shortcut for your website’s data, ensuring quick page loads even with many students online.
- Ready to Grow with You: Imagine one of your online courses suddenly goes viral., Great, right? But can your website handle the sudden influx of students? With Kinsta, it absolutely can! Their infrastructure is heavily optimized for handling traffic spikes and simultaneous requests.
- Fort Knox-Level Security: Let’s face it, the internet can be quite chaotic. But Kinsta has your back. They are constantly monitoring for security threats, like digital watchdogs. They also have firewalls to block unwanted visitors, perform regular uptime checks, provide daily backups, and have a Malware Security Pledge (malware removal).
- Help is Just a Click Away: Stuck on something? No worries, Kinsta’s support team is top-notch. They’re WordPress wizards, available 24/7/365 to answer your questions or troubleshoot any hiccups. And they’re not just knowledgeable, they’re also lightning fast.
- Custom-built dashboard: Unlike many providers who use cPanel, Kinsta offers an in-house-built dashboard, which comes with numerous features to help your daily site management and development workflows. These include IP-blocking, redirects, ionCube loader, WordPress debugging, a powerful REST API tool, Application Performance Monitoring, and even a tool for local WordPress development (DevKinsta).
- Tailor-Made for LMS Sites: Kinsta doesn’t just host websites, they understand the unique needs of LMS platforms. They offer special caching tricks to make your courses run smoothly. They also play well with popular WordPress LMS plugins like Tutor LMS. It’s like they’ve designed their whole platform with you in mind!
Step-by-Step Guide to Hosting Your LMS Site on Kinsta
Alright, so you’re ready to dive into the world of Kinsta and give your LMS the home it deserves. Excellent choice! Getting started with Kinsta for your LMS site is easy. Here’s a step-by-step guide to help you along the way:
Step 1: Choosing Your Kinsta Plan
So, how do you find the perfect plan for your LMS site? Well, start by taking a good look at your online school’s needs:
- How much traffic are you expecting? Are you just starting off with a few students, or do you have a large following eager to enroll?
- How complex are your courses? Are these just text-based courses, or do they include videos, quizzes, and other interactive elements?
- Do you anticipate your LMS growing rapidly? It’s best to select a plan that can allow future expansion rather than having to switch later.
It’s crucial to think about these questions before diving into a plan. Why? Because the more features and resources a plan offers, the pricier it gets. Let’s dive into the actual pricing plans Kinsta has in store.
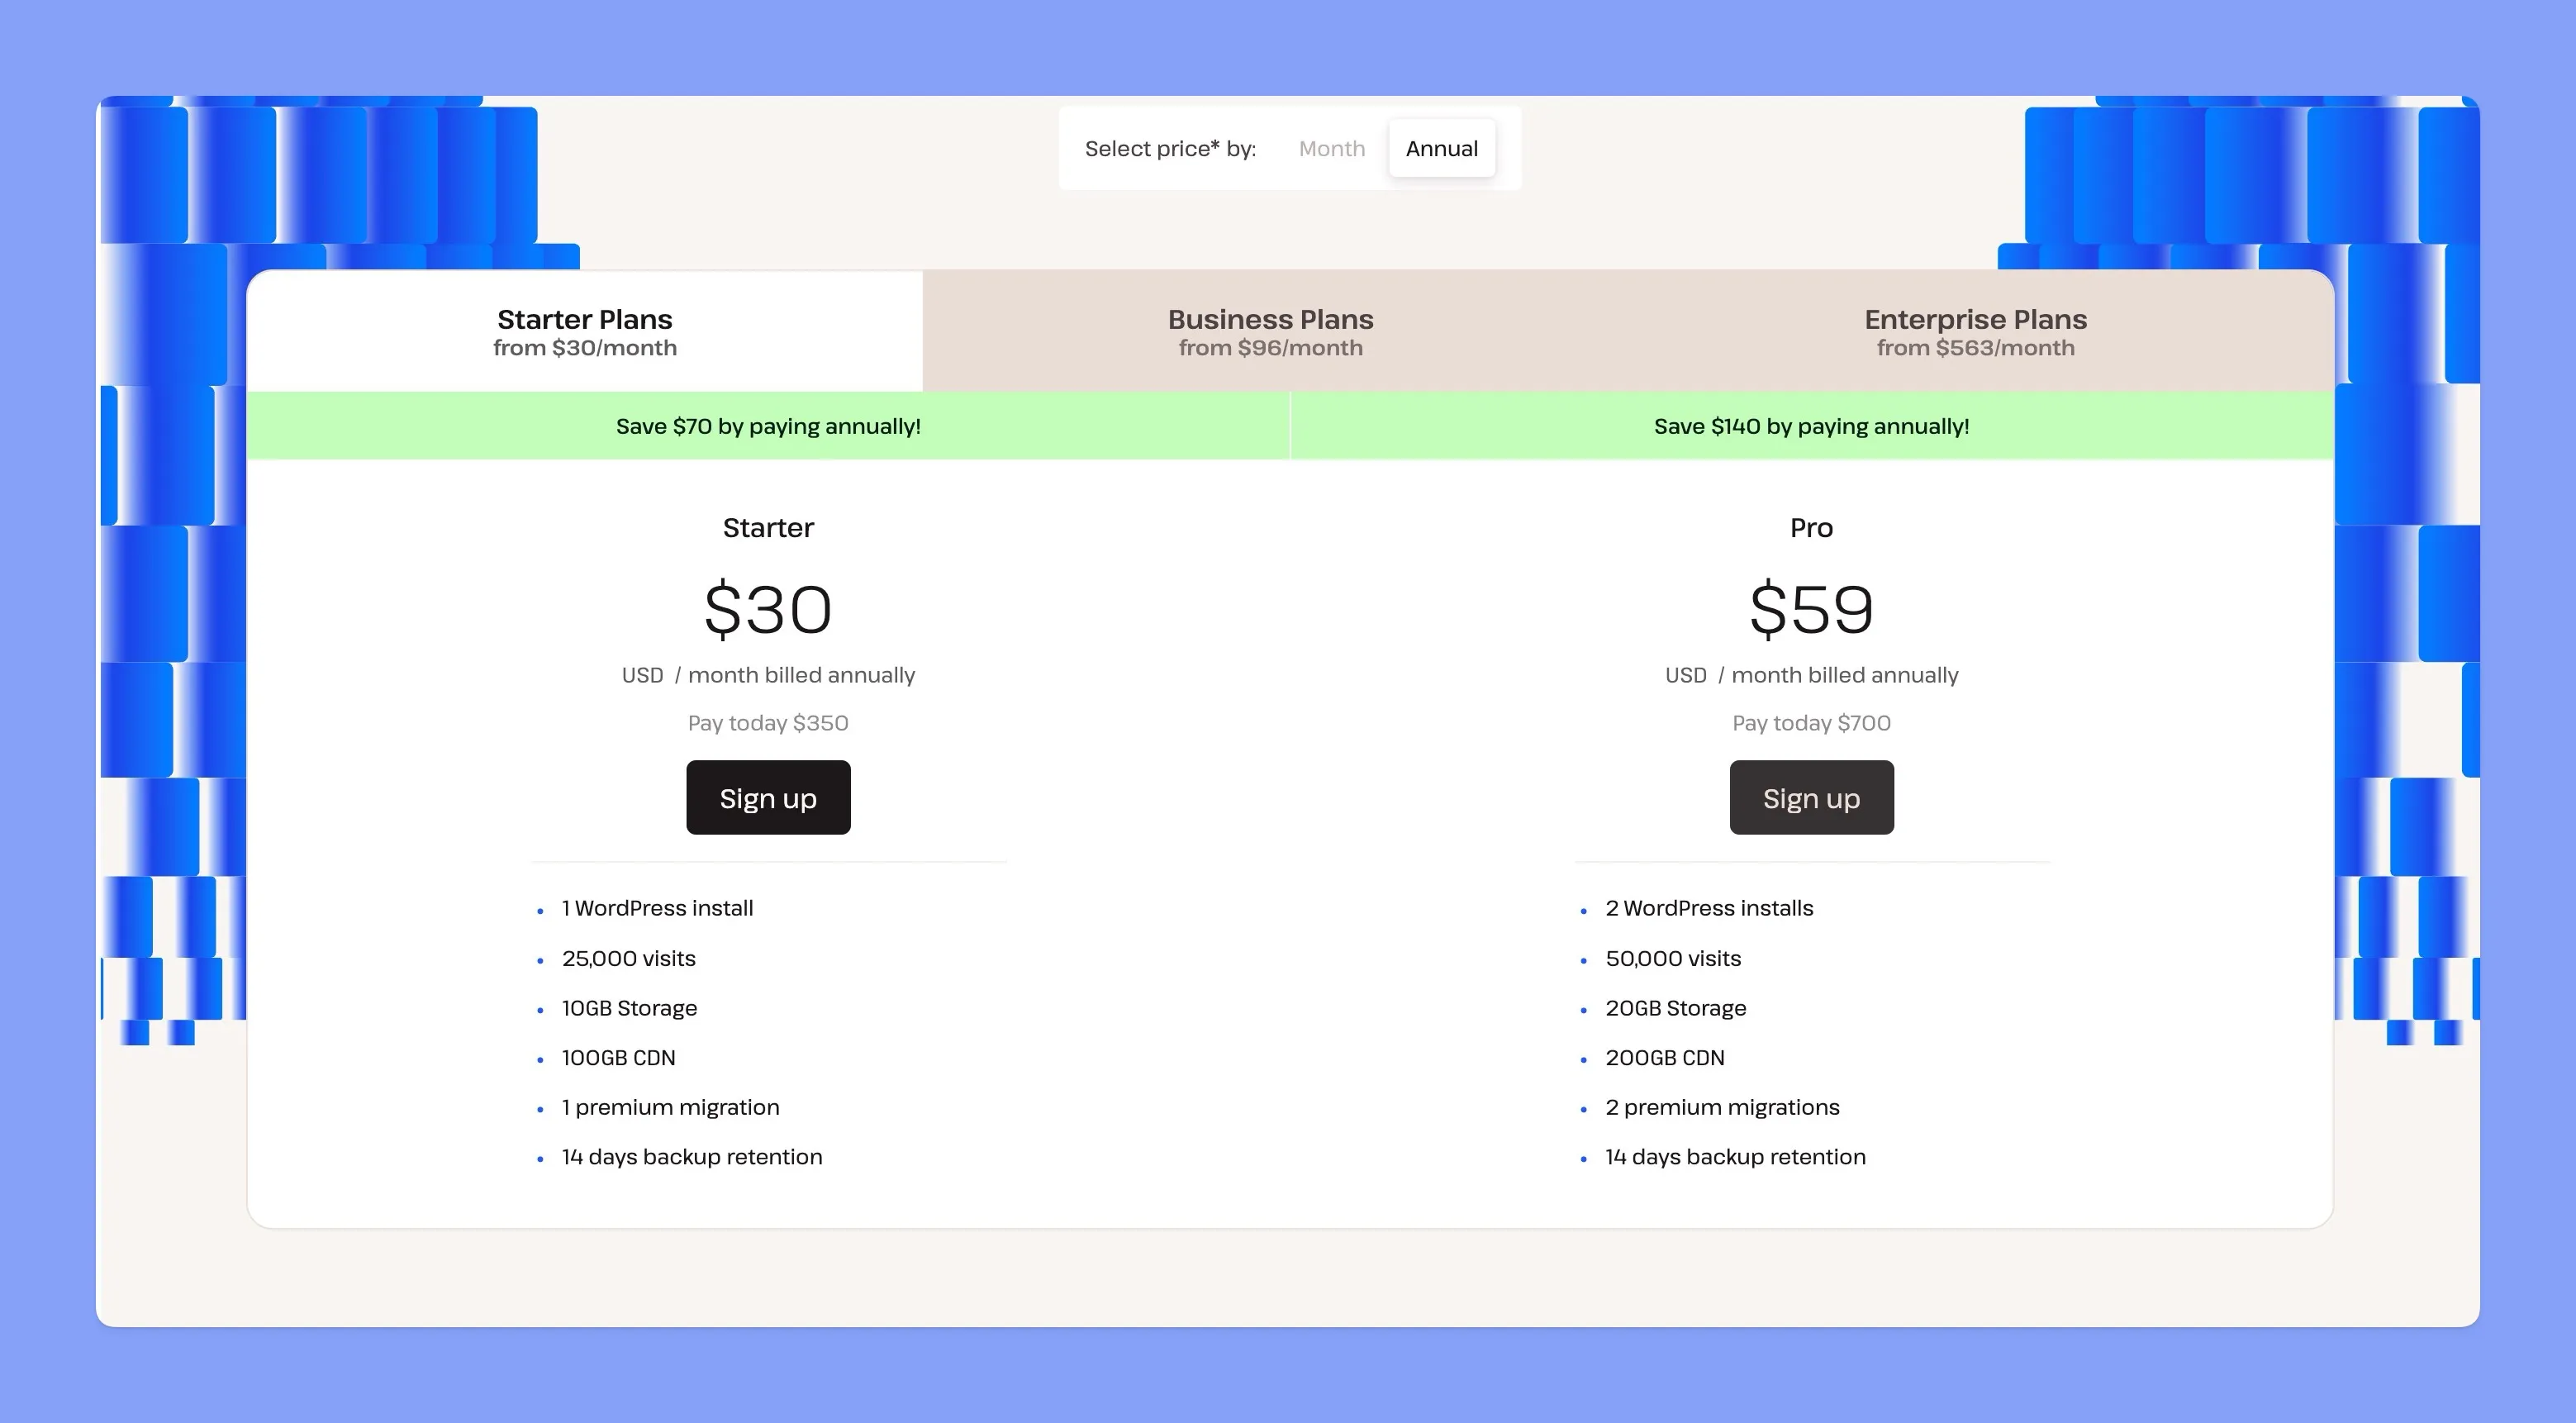
Kinsta’s Pricing Plans
Kinsta offers a range of plans, each catering to different requirements. Let’s take a quick look at the different plans they offer:
- Starter: This plan is ideal for those who are just getting started with their LMS site. It includes everything you need to get it up and running.
- Pro: If you’re expecting some growth, this plan provides more resources to keep your LMS running smoothly.
- Business: This plan is a popular choice for established LMSs with a decent amount of traffic and resource needs and more PHP workers to help handle an increased number of simultaneous requests.
- Enterprise: Designed for the big leagues, this package focuses on power and performance for large-scale LMSs.
To help you make an informed decision, Kinsta has a handy pricing page where you can compare the different plans and see which one is the best fit for you. They also offer single-site plans for single WordPress installations with increased resource needs.
Once you’ve got a good grasp of your LMS needs and the different Kinsta plans, you will be ready to choose the perfect one and move on to the next exciting step of signing up for your Kinsta account!
Step 2: Signing Up for a Kinsta Account
Now that you have sized up your LMS needs and picked the perfect Kinsta plan, it’s time to make it official and sign up for your very own Kinsta account. To create your Kinsta account follow these steps:
- Signup for your selected plan: Since you have already chosen your plan, simply click the “Sign Up” button underneath it.
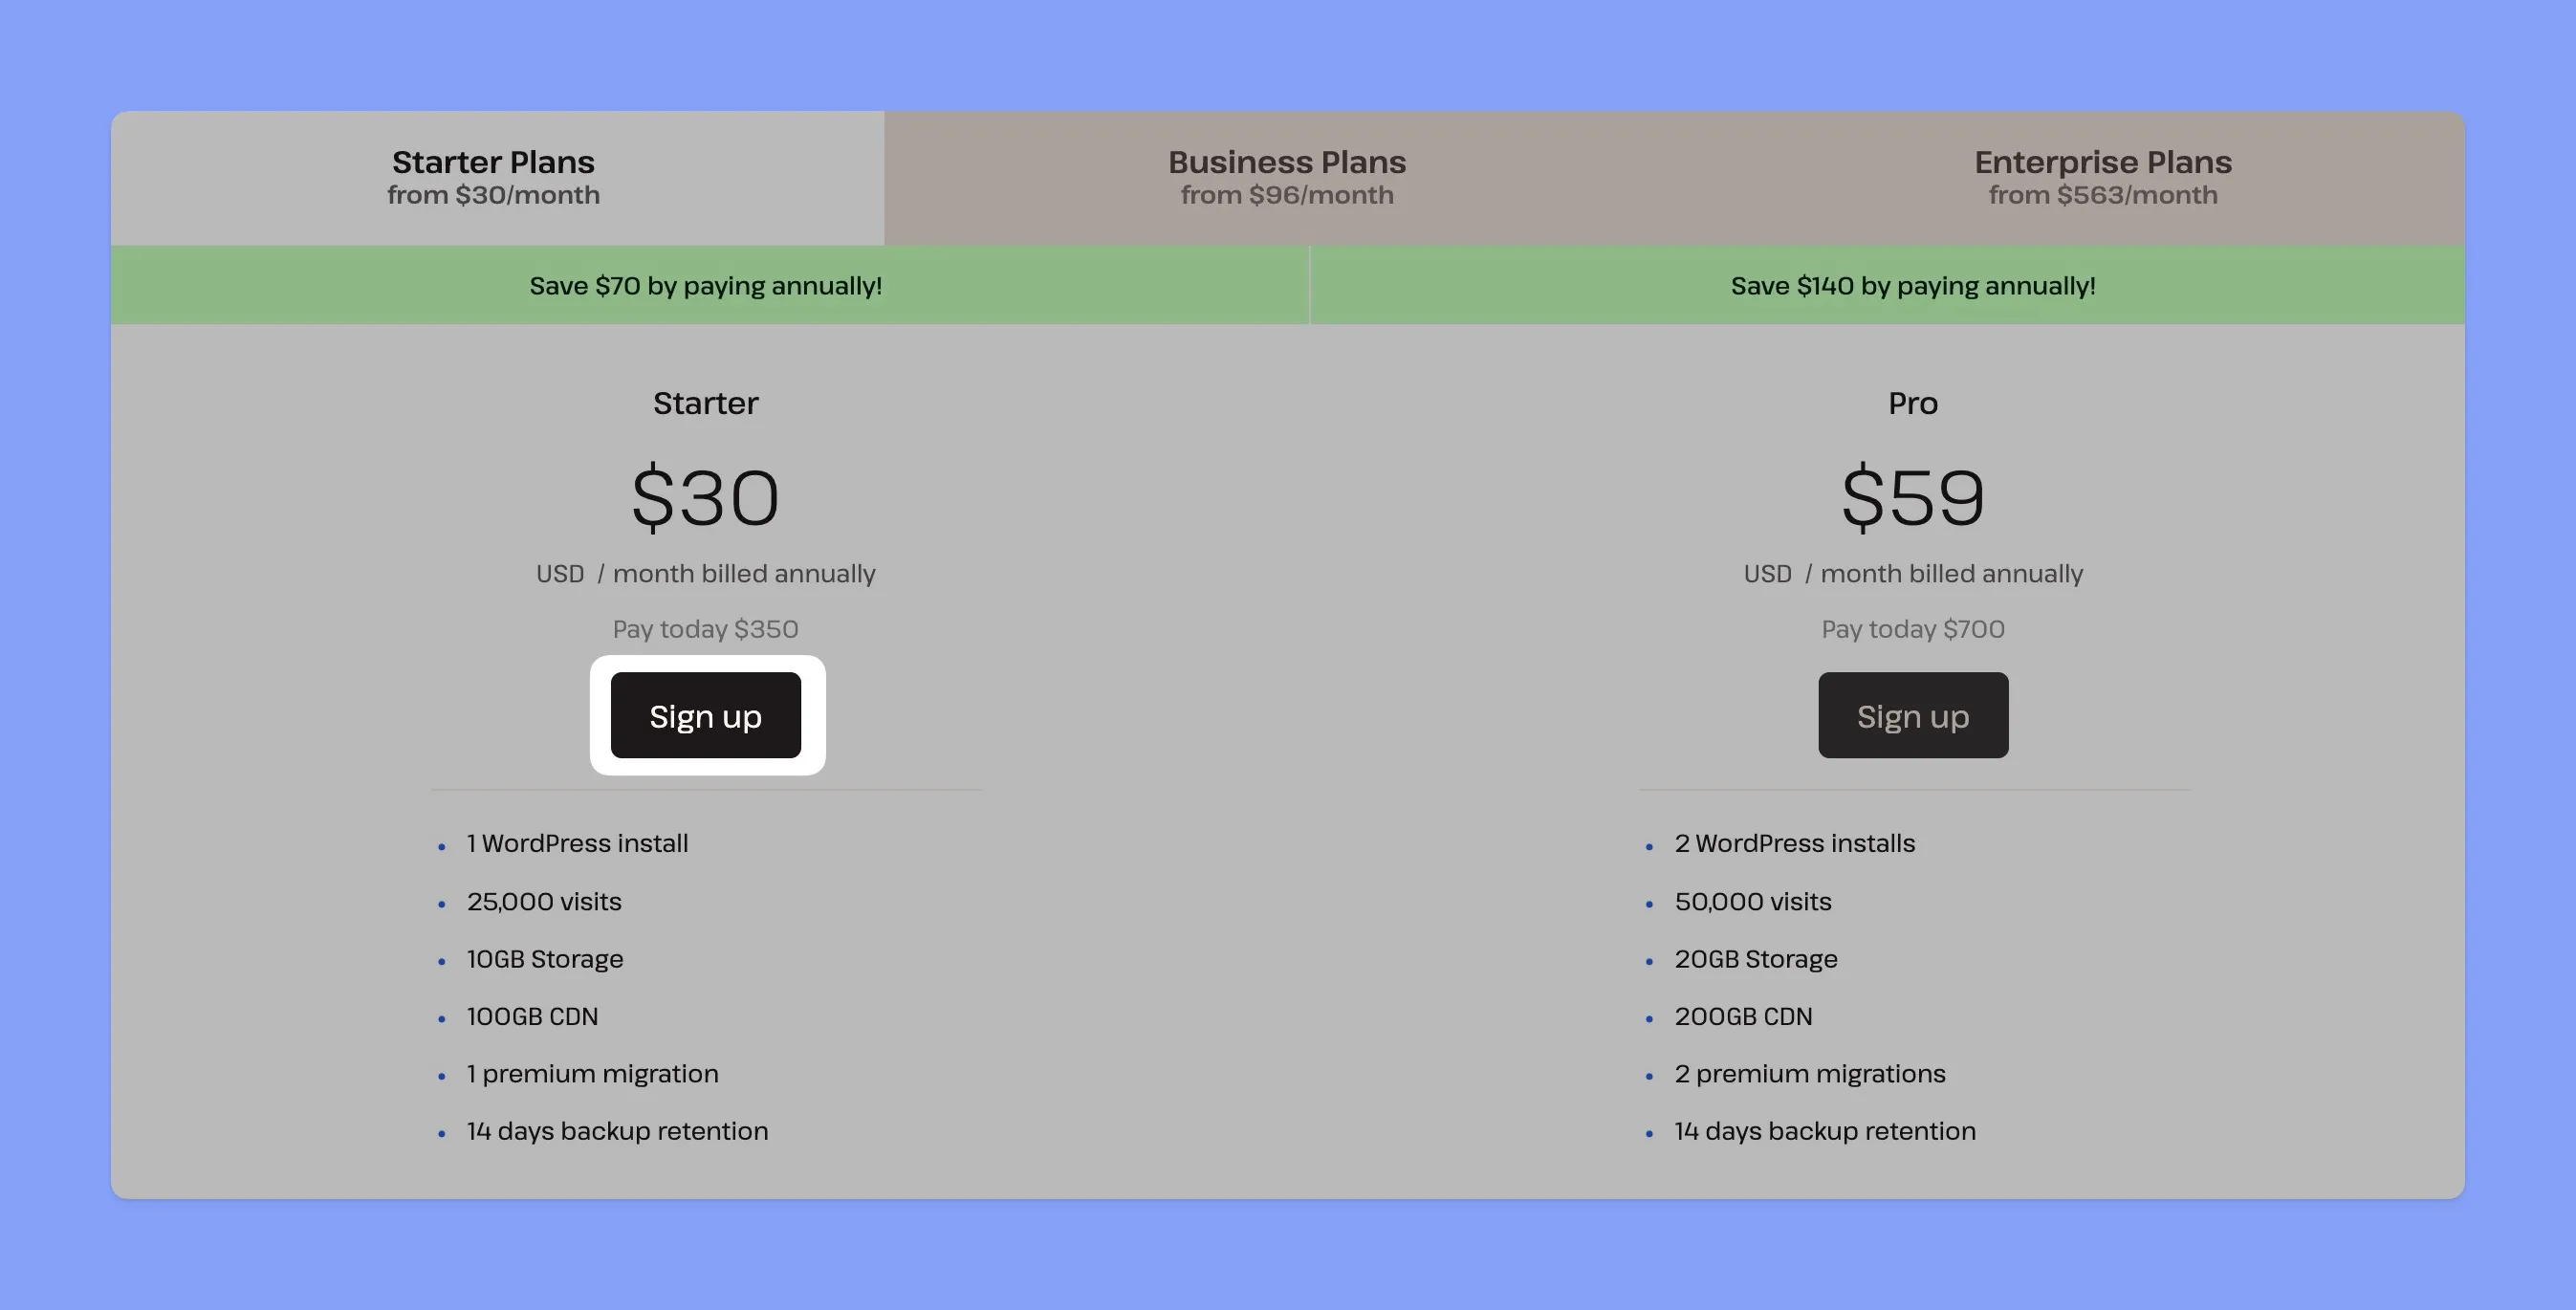
- Fill out the form: Kinsta will ask you for some basic information, like your name, email address, and a password. Make sure you use a strong password that you won’t forget. After filling in your details, click “Continue.”
- Payment details: Next, you’ll need to provide your billing information. Kinsta gives you the option to bill either as a company or an individual, so choose whichever fits your situation. Then, just enter your card details. Once everything looks good, click “Continue.”
- Start Using Kinsta: After confirming, your account will be created, and you will receive a welcome email from Kinsta. You can now log in to your new account and start setting up your LMS site.
Step 3: Setting Up Your WordPress Site
Alright, your Kinsta account is ready, so let’s bring your WordPress site to life! Kinsta’s famous one-click installation makes this part a piece of cake. No tech wizardry required, just a few simple clicks.
- After you sign up, you will receive a welcome email with a link to your MyKinsta dashboard, which is your control center for everything Kinsta.
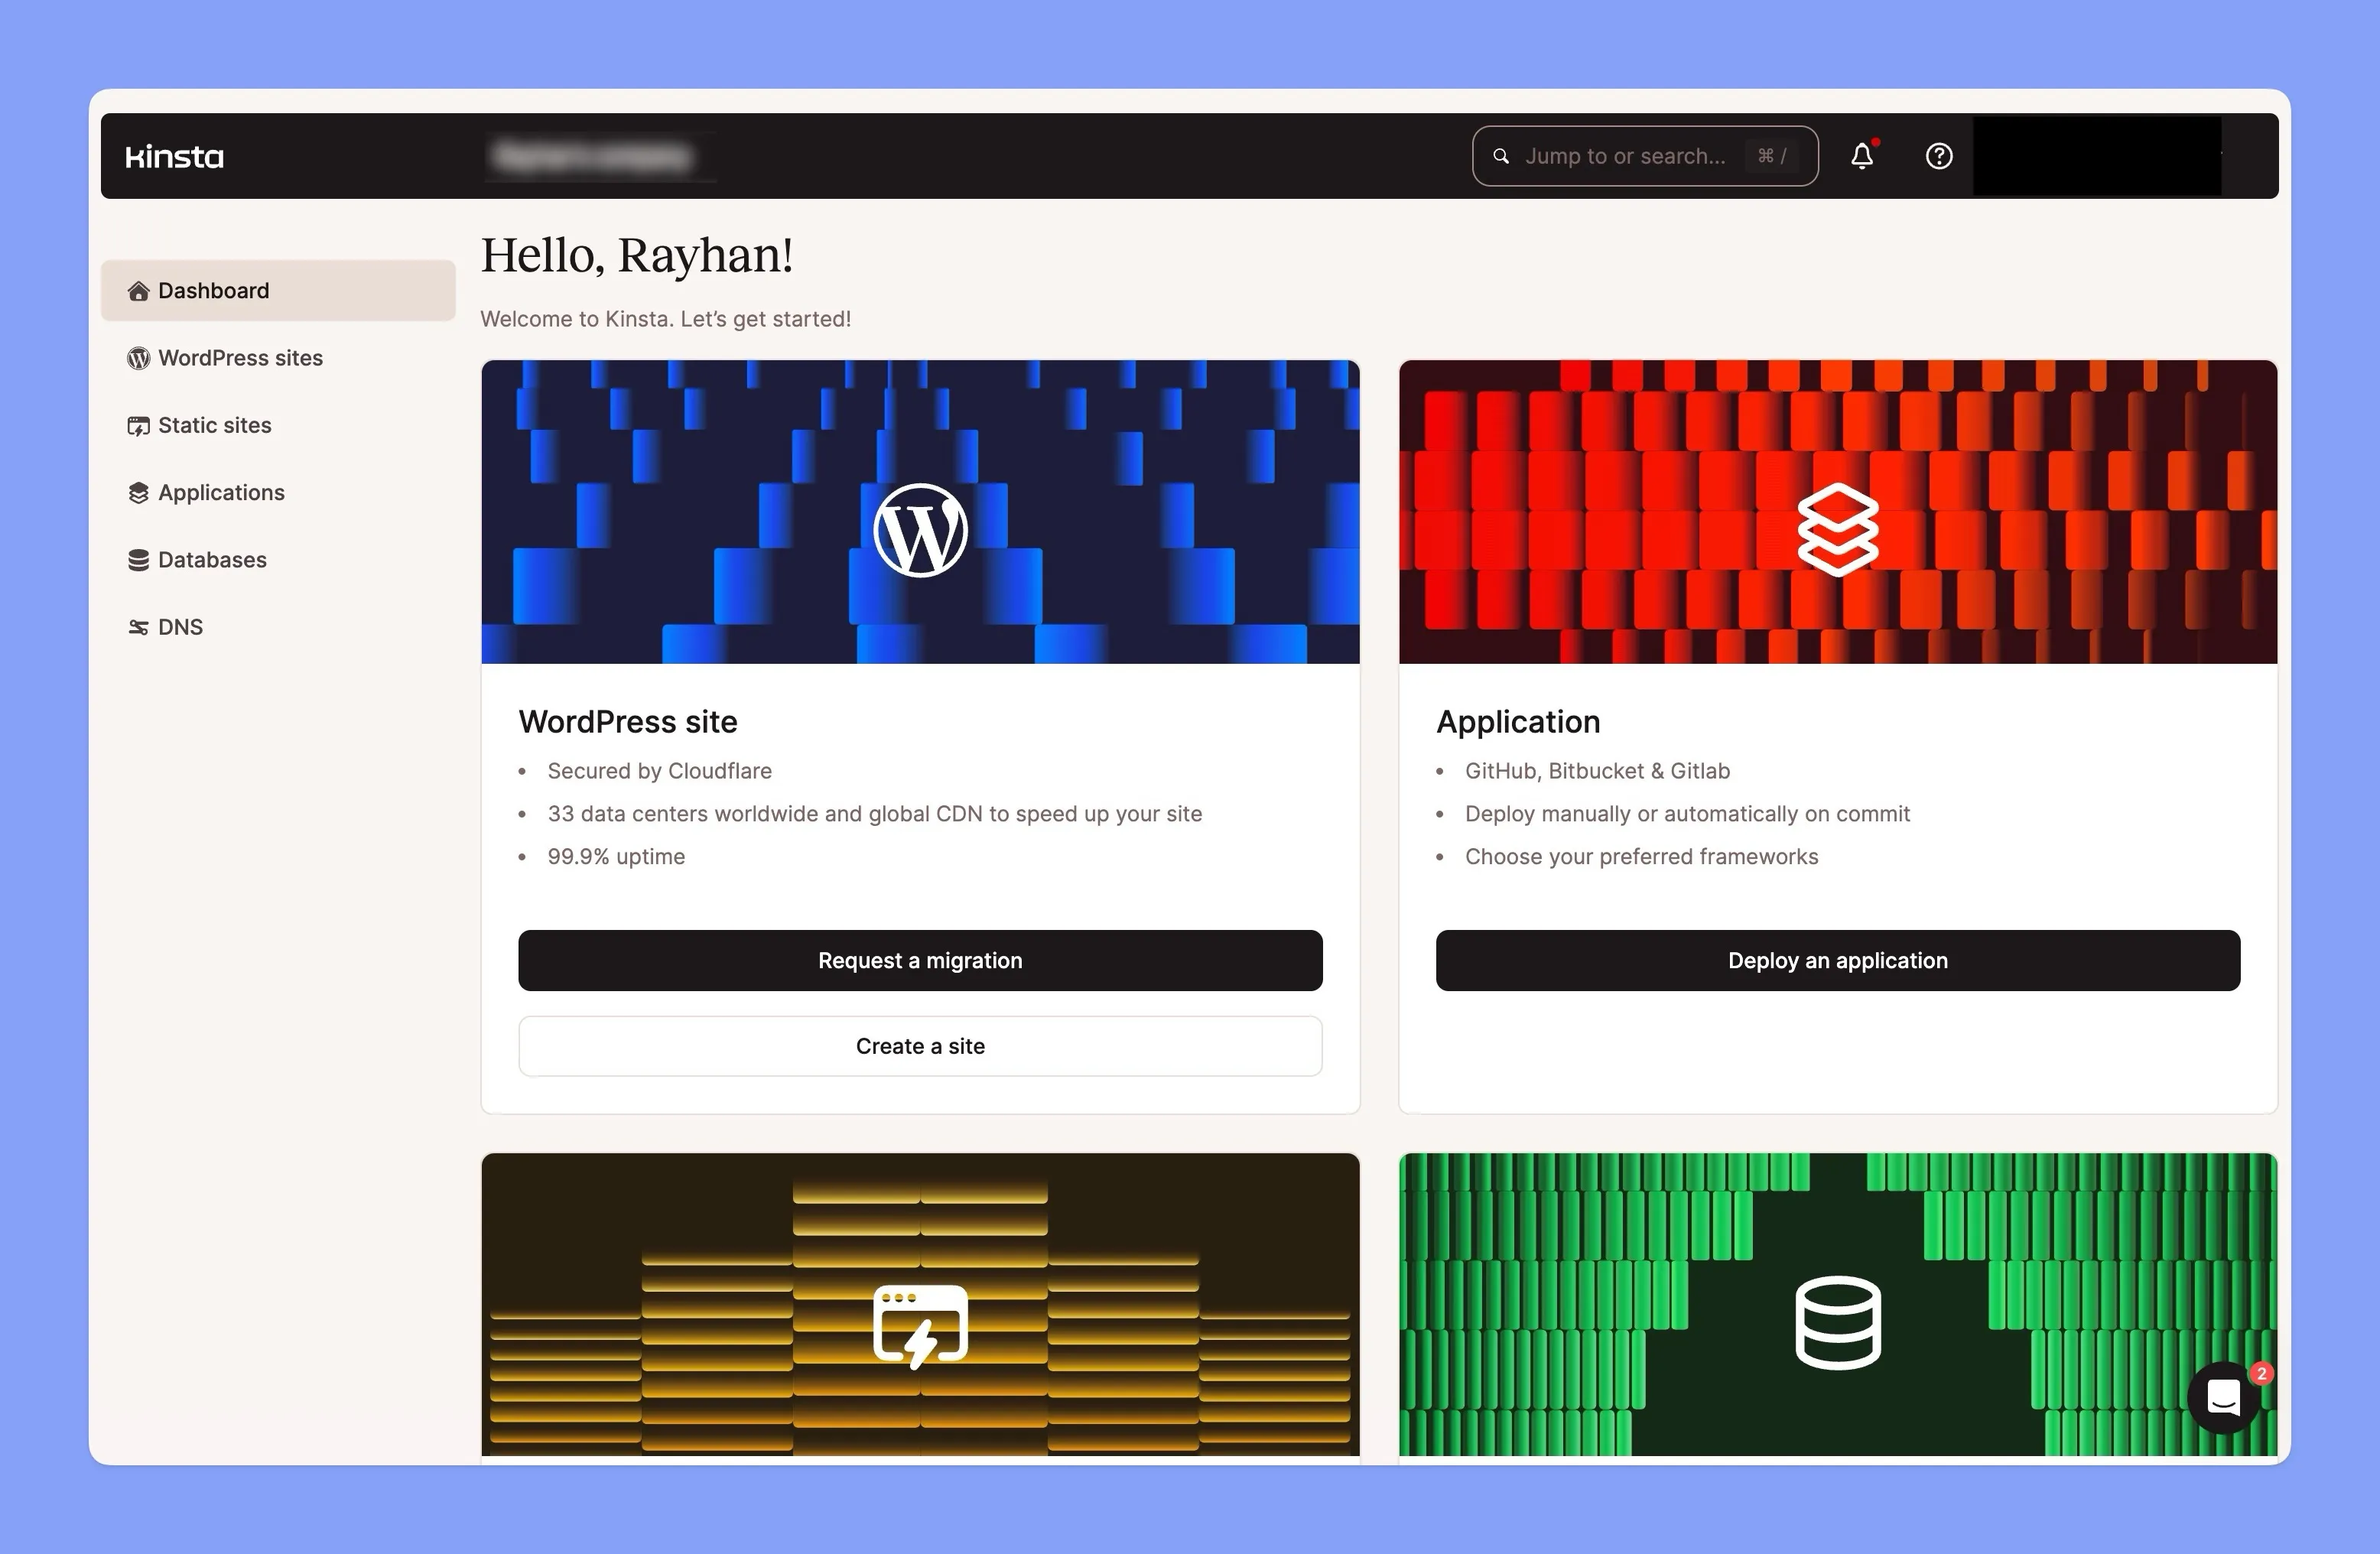
- In your MyKinsta dashboard, look for the “Create a Site” button and click on it.

- Next, you’ll see a few options. Go ahead and choose the “Install WordPress” option unless you are moving an existing site over (we will cover that a bit later).

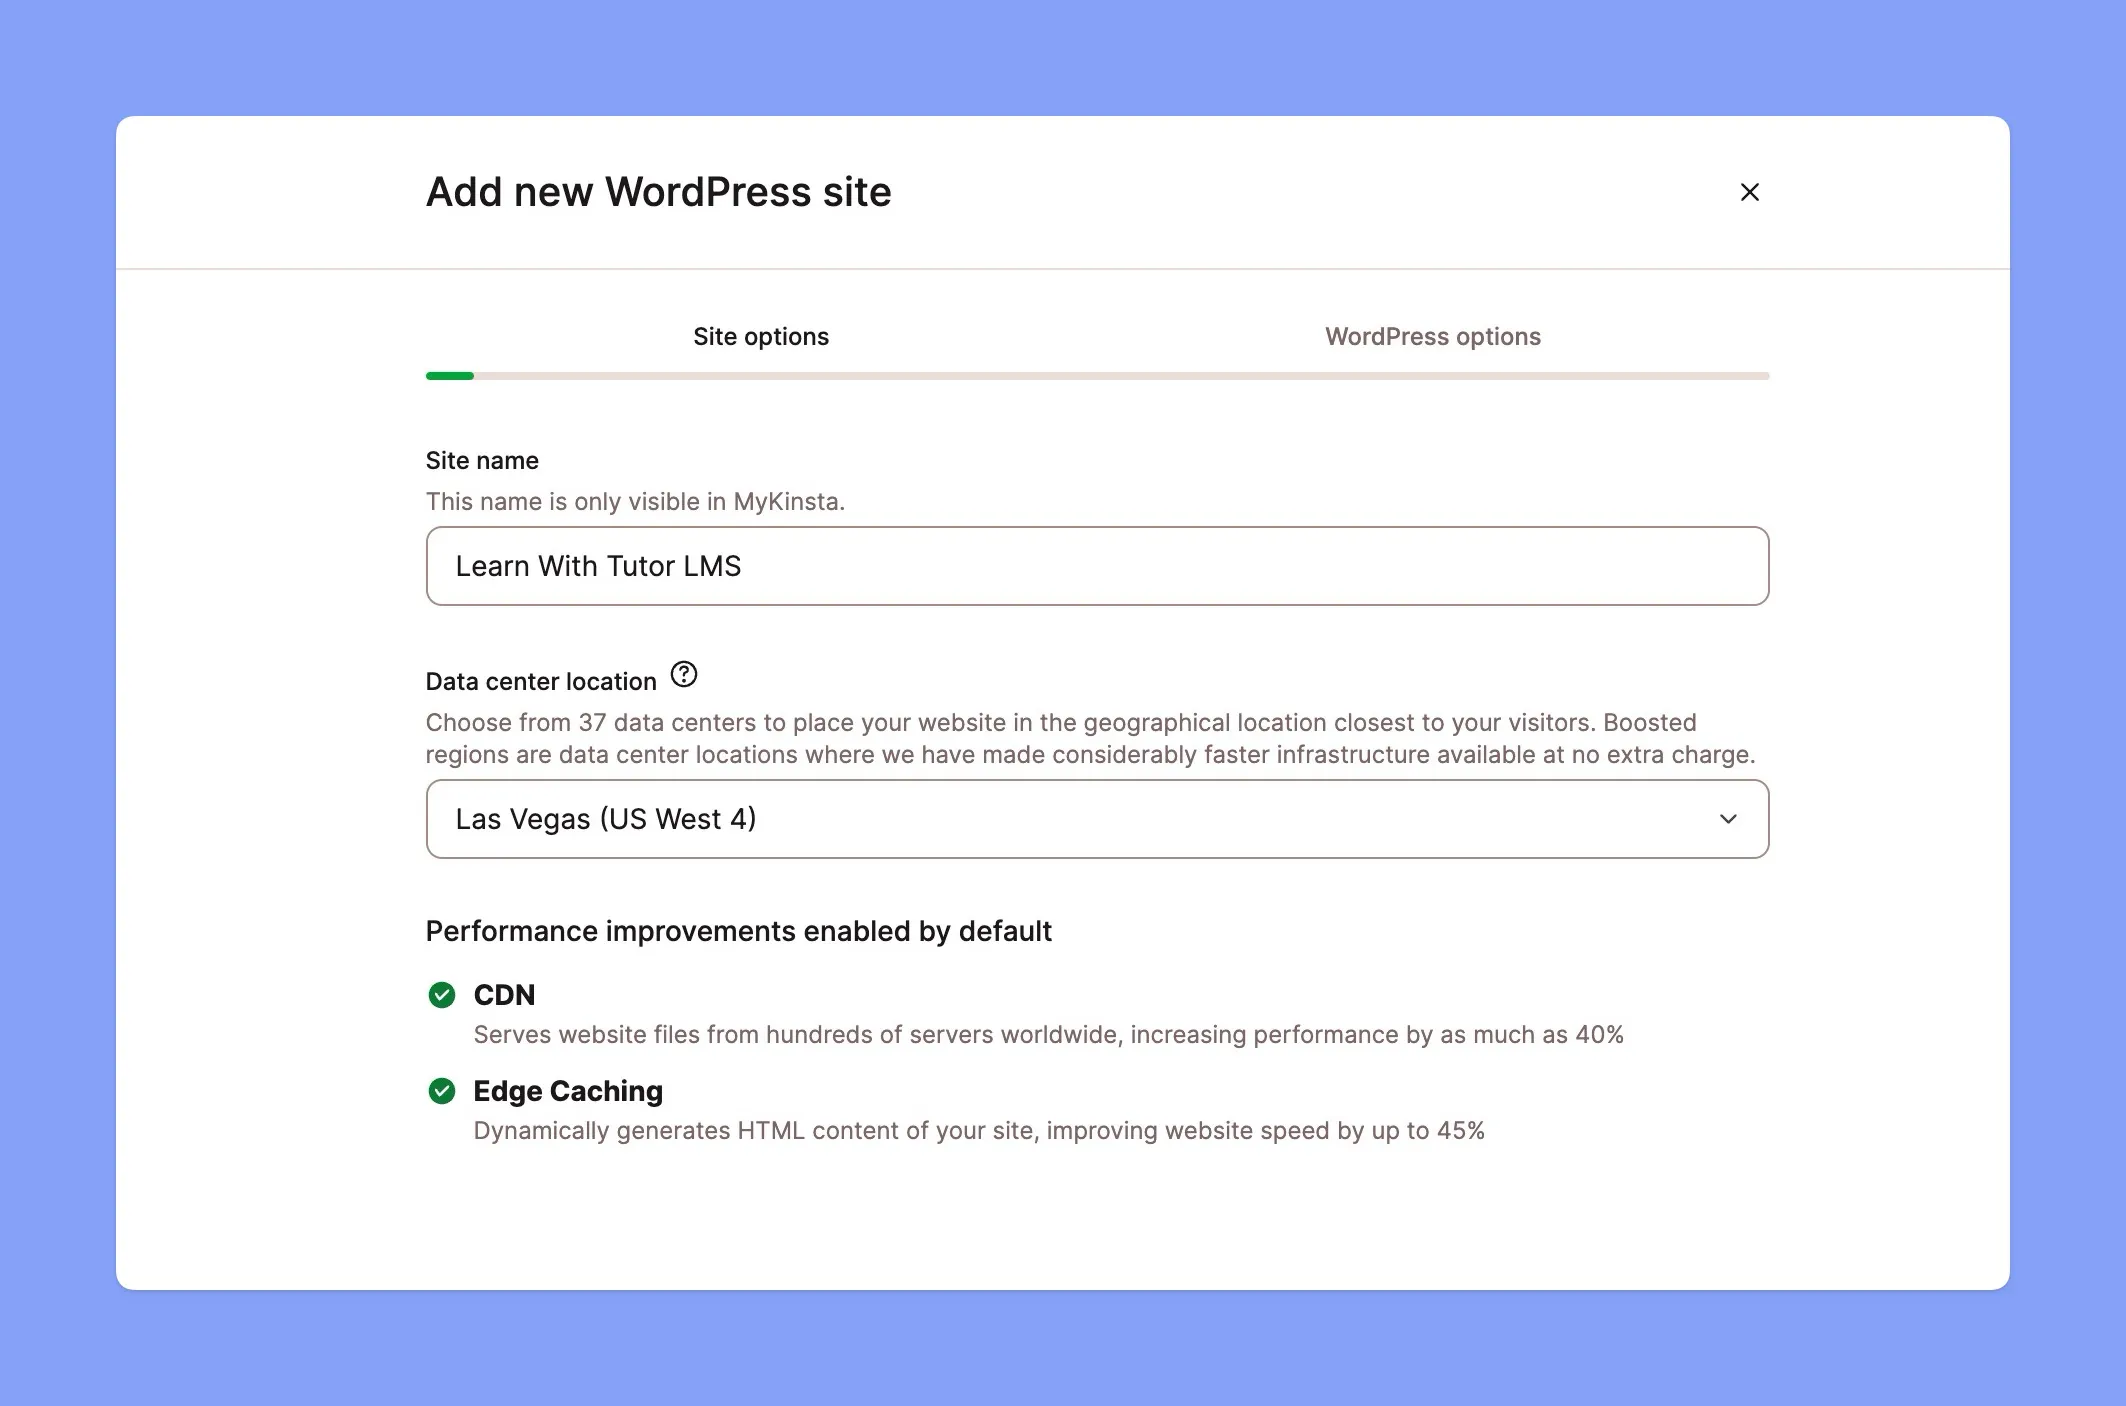
- So up next is the “Site Options” window. Here you have to select the following:
- Site Name: Give your site a name. This can be changed later, so don’t stress too much.
- Data Center Location: Choose where you want your site’s data to live. Pick the one closest to your audience for the fastest loading speeds.
Click “Continue” to advance.
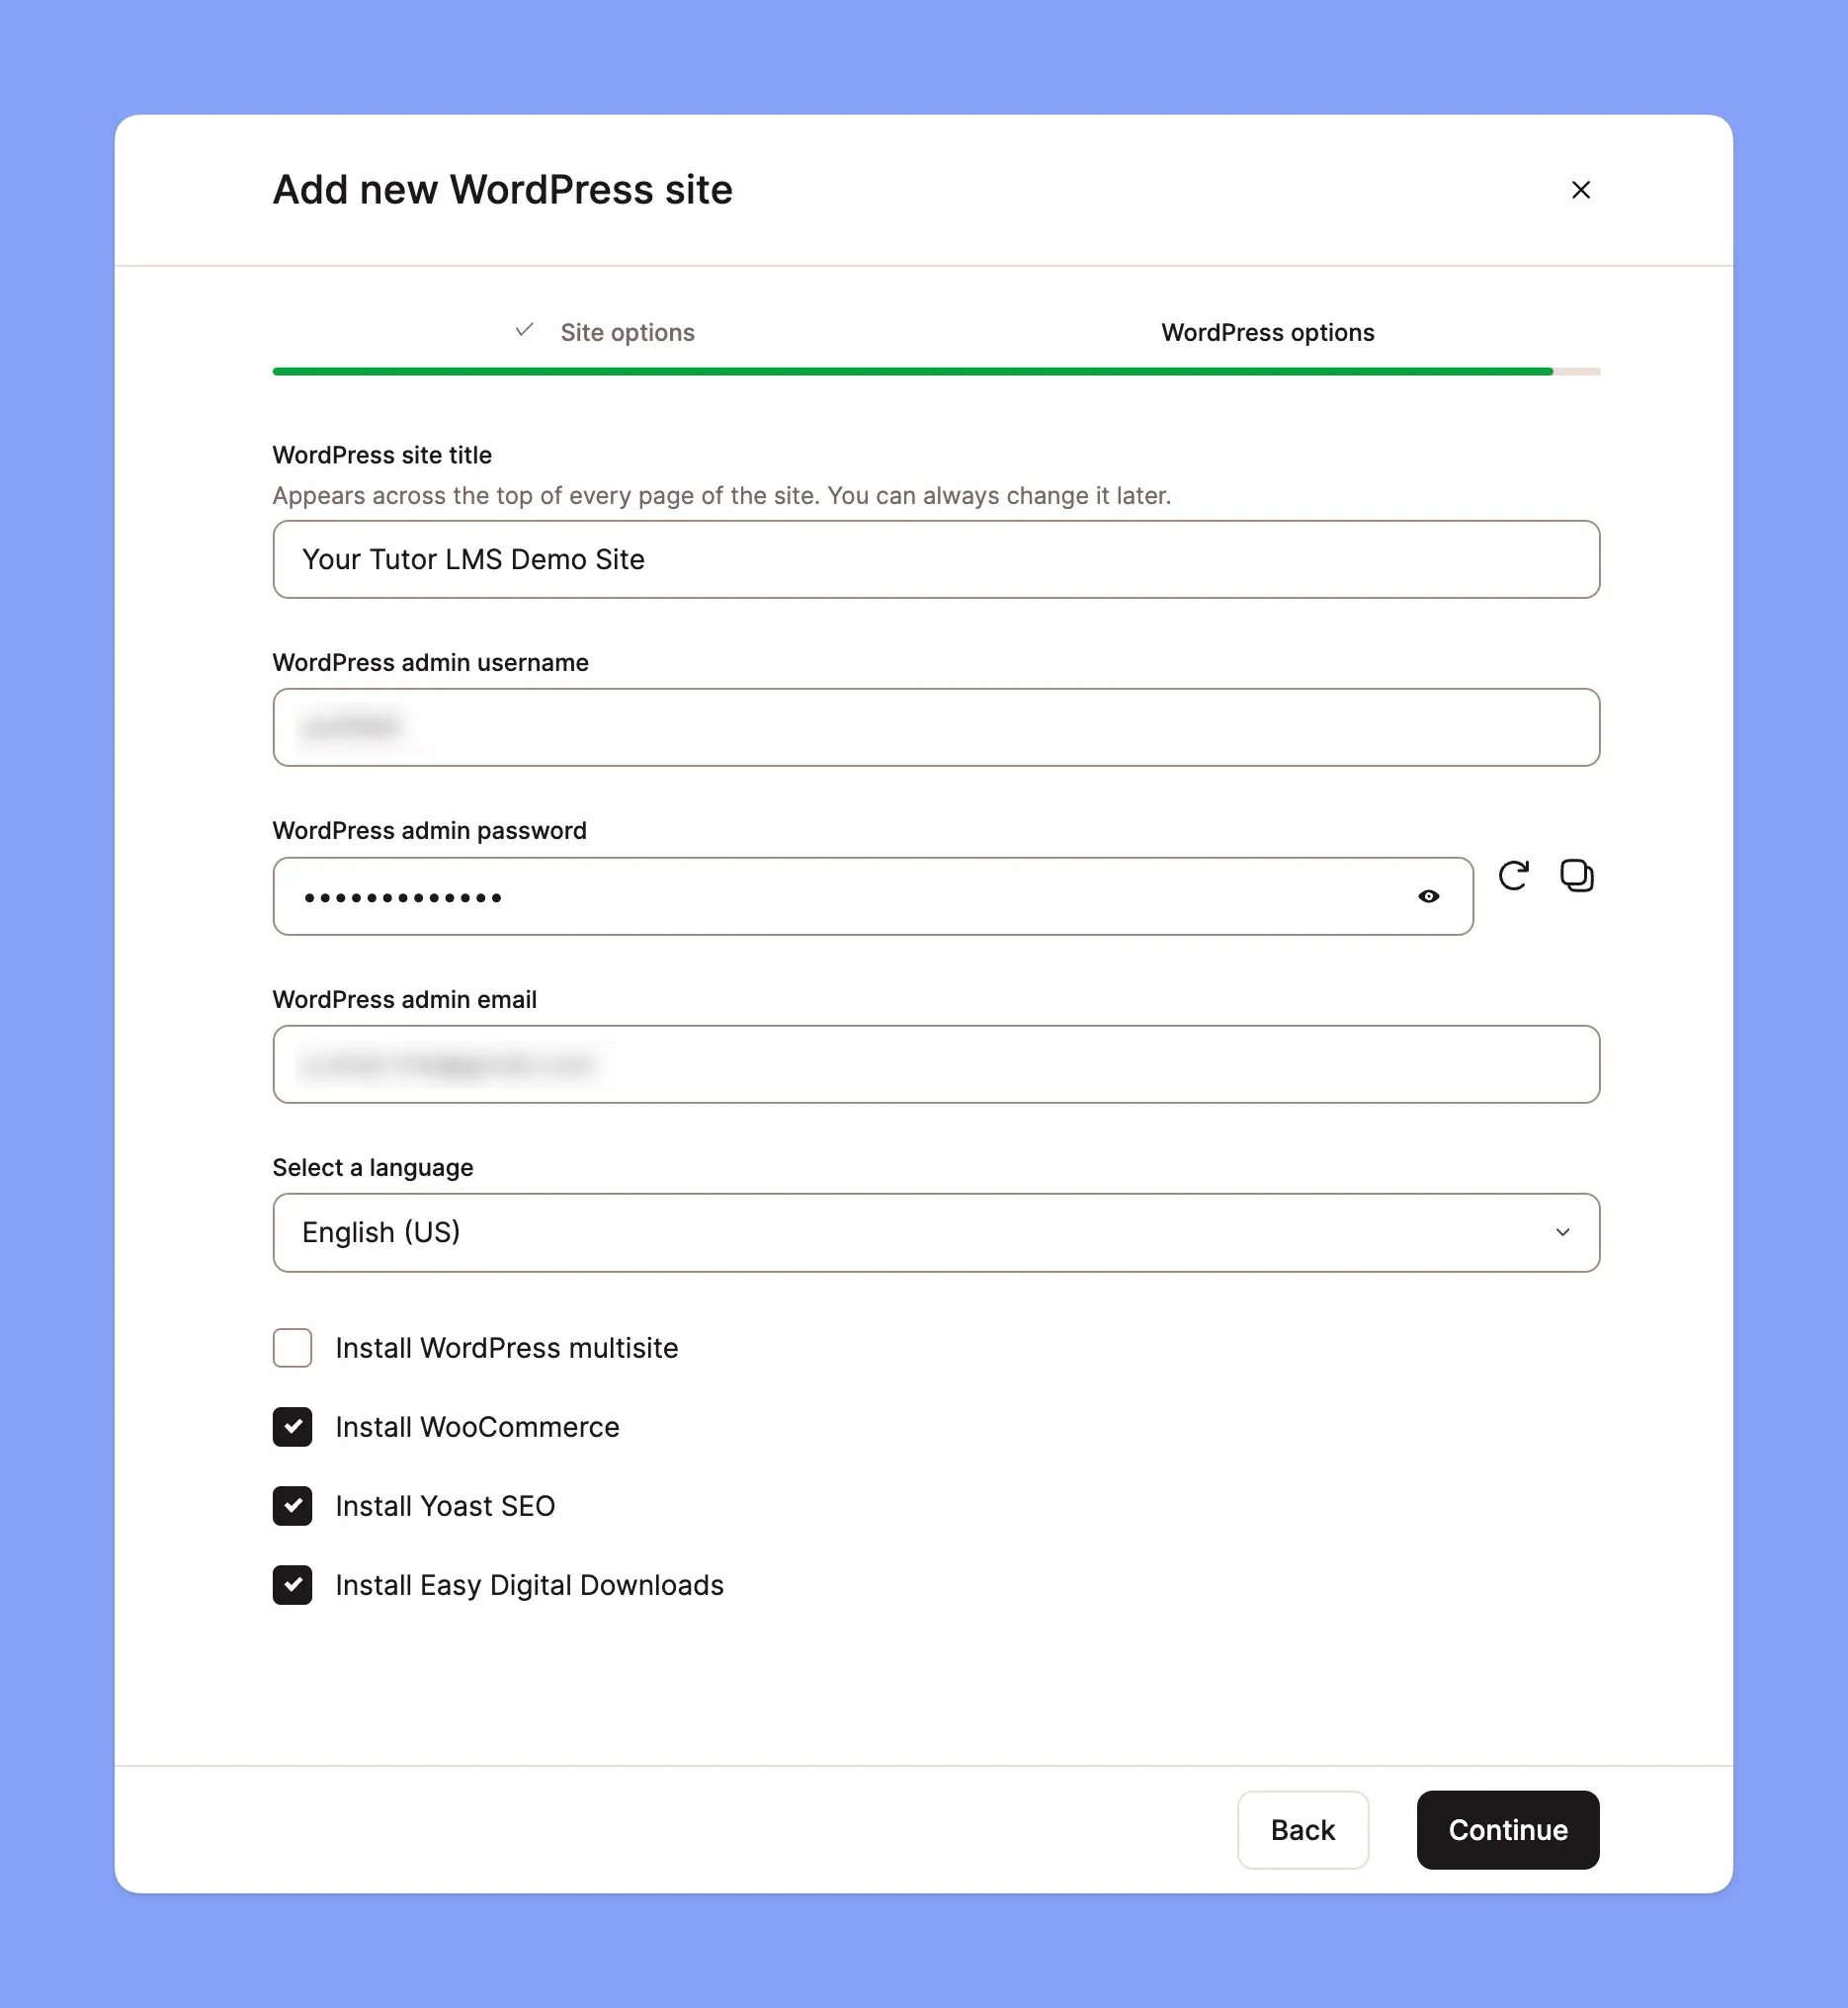
- Next, is the “WordPress Options” section. Here’s where you provide the:
- Site Title: This is the name your students will see, so make it memorable and relevant to your courses.
- Admin Username & Password: Choose a secure username and password (don’t use “admin” or “password,” please!).
Kinsta also lets you easily install some very useful tools along with WordPress itself. You have the options to install:
- WordPress Multisite
- WooCommerce
- Yoast SEO
- Easy Digital Downloads
Once you’ve made your selections, just click “Continue,” and Kinsta will work its magic. Before you know it, you’ll have a shiny new WordPress site all ready to be customized.
And voilá, you have now created your WordPress website in Kinsta. Proceed by clicking the “Manage Domain” button once it pops up.
But what if you already have an LMS site somewhere else?
No worries! Kinsta has you covered there too. They offer a handy migration service, where their experts take care of moving your site for you.
For a detailed walkthrough of the migration process, head over to Kinsta’s migration documentation page. They have all the information you need to make the move smoothly.
Now that you’ve got WordPress up and running, you’re ready to transform your Kinsta site into a full-fledged learning powerhouse!
Step 4: Installing and Configuring Your Tutor LMS Plugin
Welcome to the heart of your LMS site! Here, we will install and configure Tutor LMS. We will use Tutor LMS as our example because it’s user-friendly, feature-rich, and perfect for both beginners and advanced users. Let’s get started!
Installing the LMS Plugin
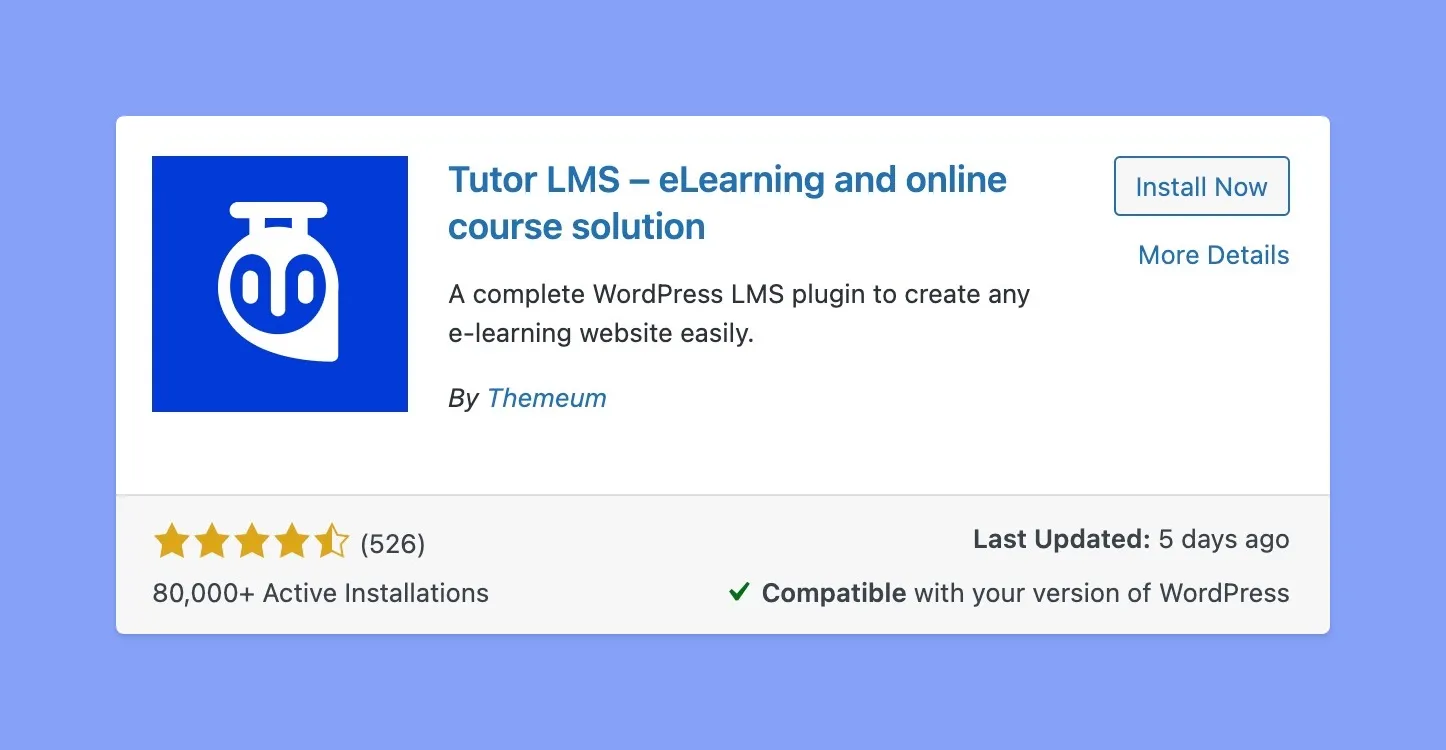
First things first, let’s get Tutor LMS onto your WordPress site.
- Install Tutor LMS:
- Log in to your WordPress dashboard.
- Navigate to Plugins > Add New.
- In the search bar, type “Tutor LMS“.
- Click “Install Now” on the Tutor LMS plugin.
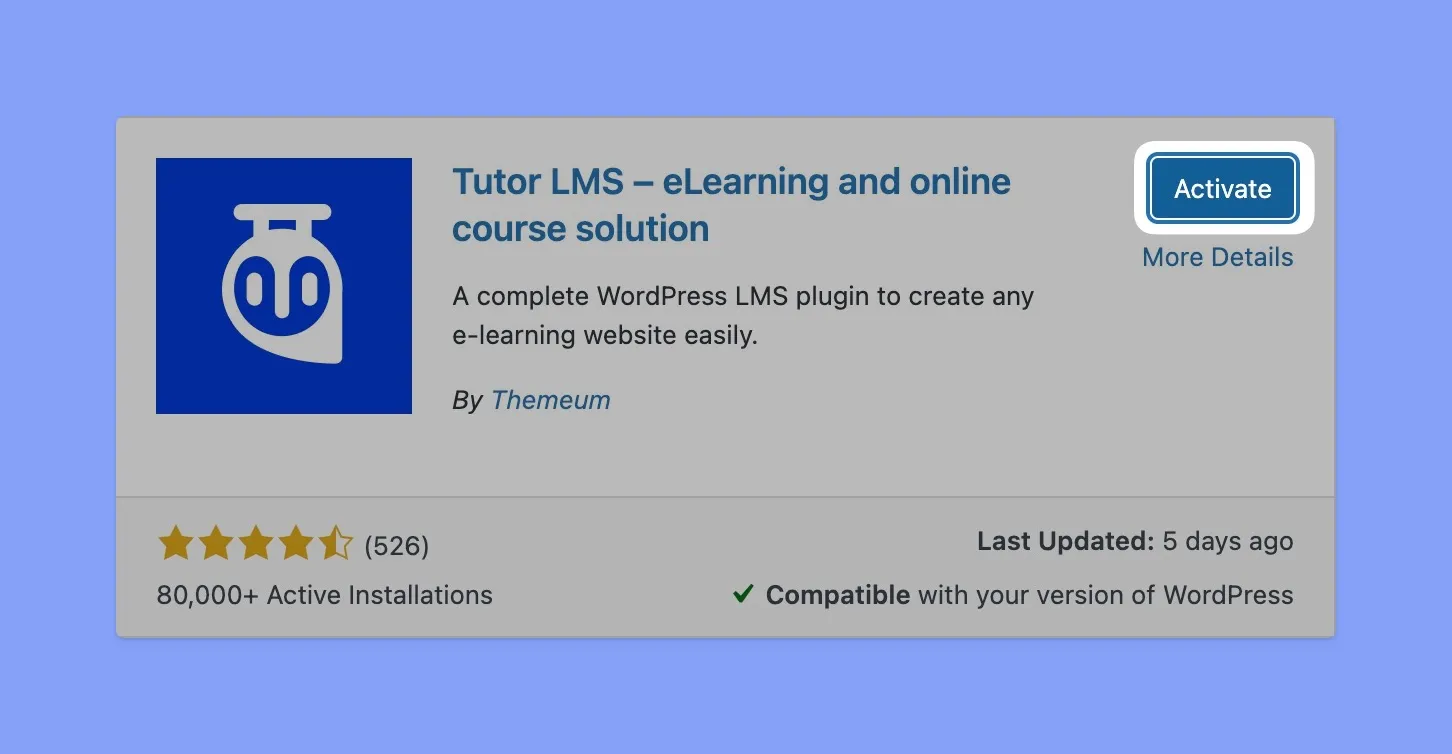
After installation, hit “Activate”.
- Uploading the Plugin Manually (For Pro Version):
- Download the Tutor LMS Pro plugin from the official website.
- In your WordPress dashboard, go to Plugins > Add New > Upload Plugin.
- Choose the downloaded zip file, then click “Install Now.”
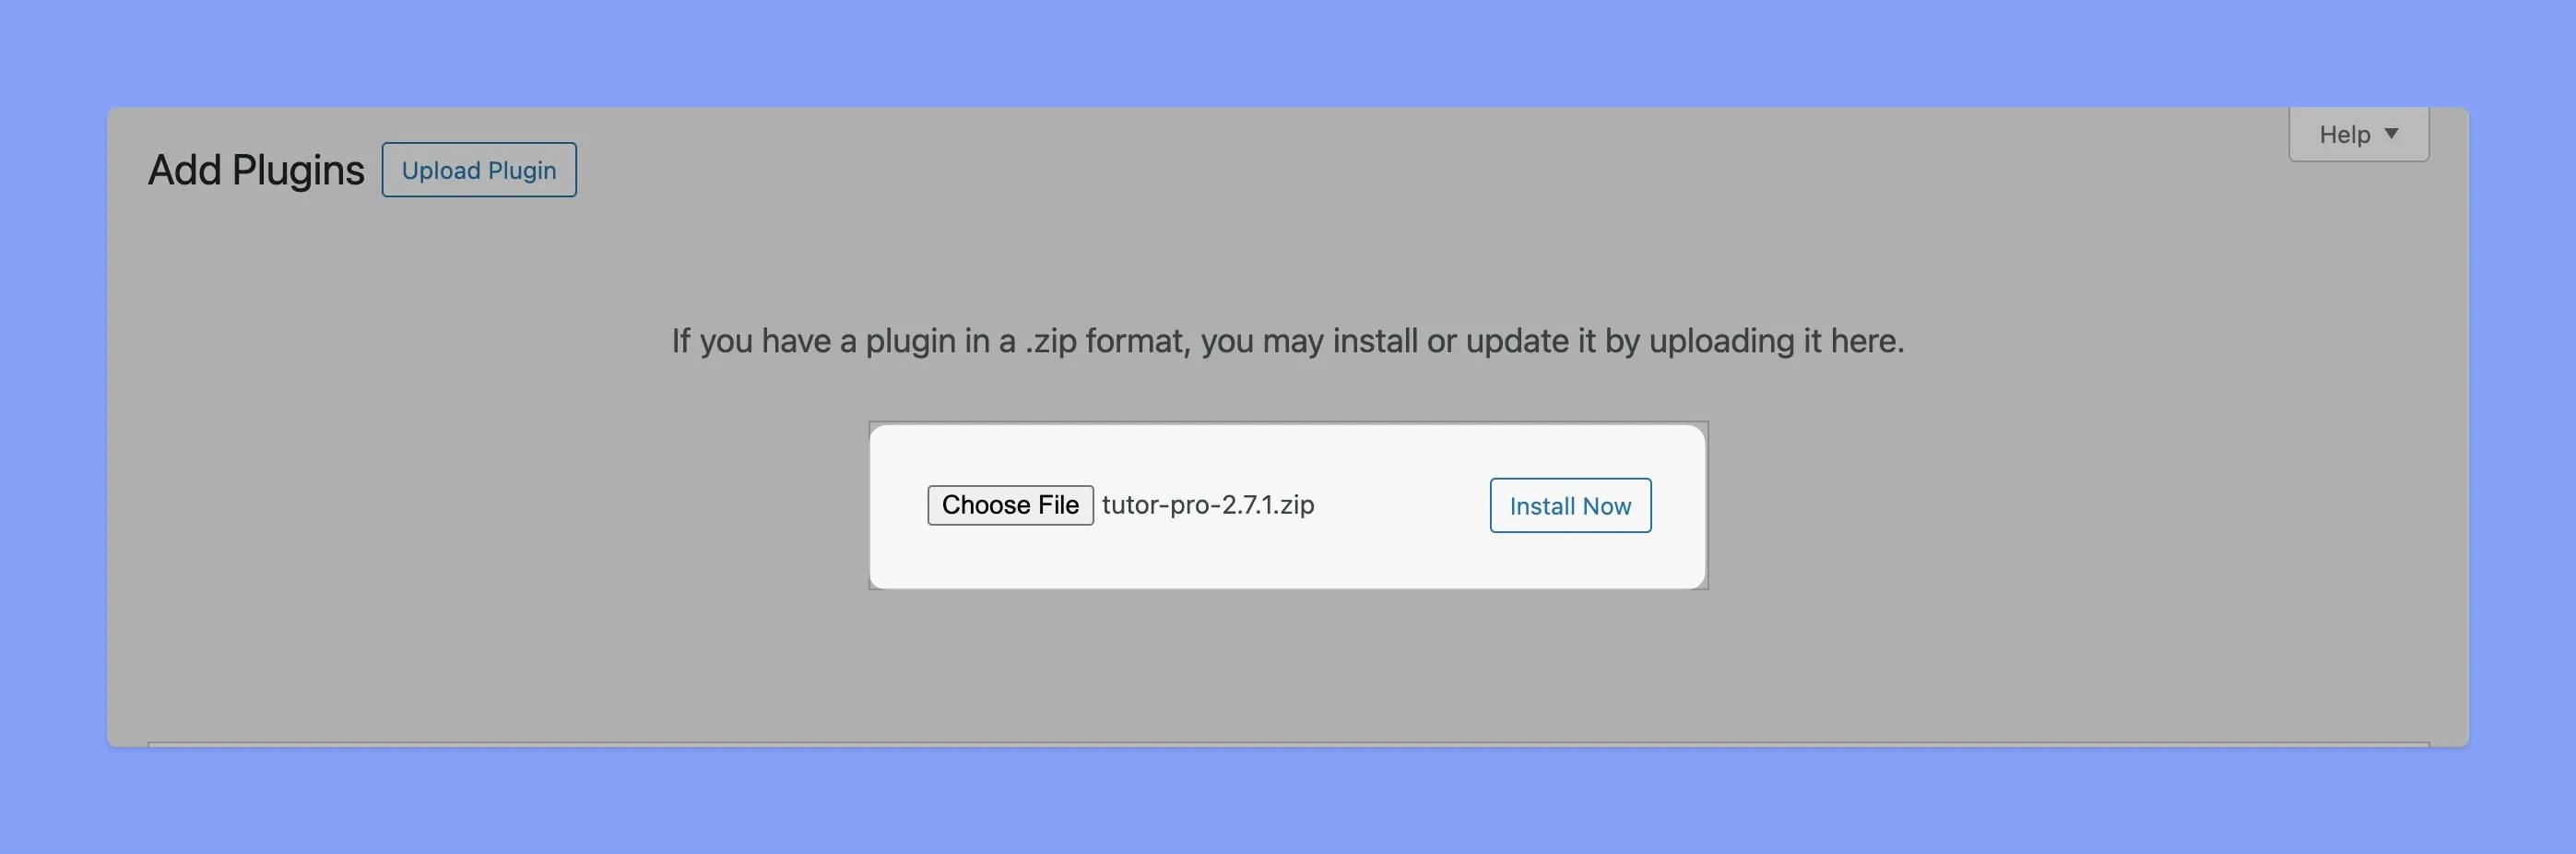
- After the upload completes, click the “Activate Plugin” button.
For detailed instructions on installing the Free and Pro versions along with activating your Pro license, check the Tutor LMS installation guide.
Also, If you are curious about the specific features that come with Tutor LMS’s free and pro versions, check out this handy article. It will help you decide which version is right for your needs.
Step 5: Customizing Your Tutor LMS Site on Kinsta
Okay, your WordPress site is live on Kinsta, and you have Tutor LMS installed. Now, let’s get creative and turn it into a learning haven that reflects your unique personality.
Picking the Perfect LMS Site Theme
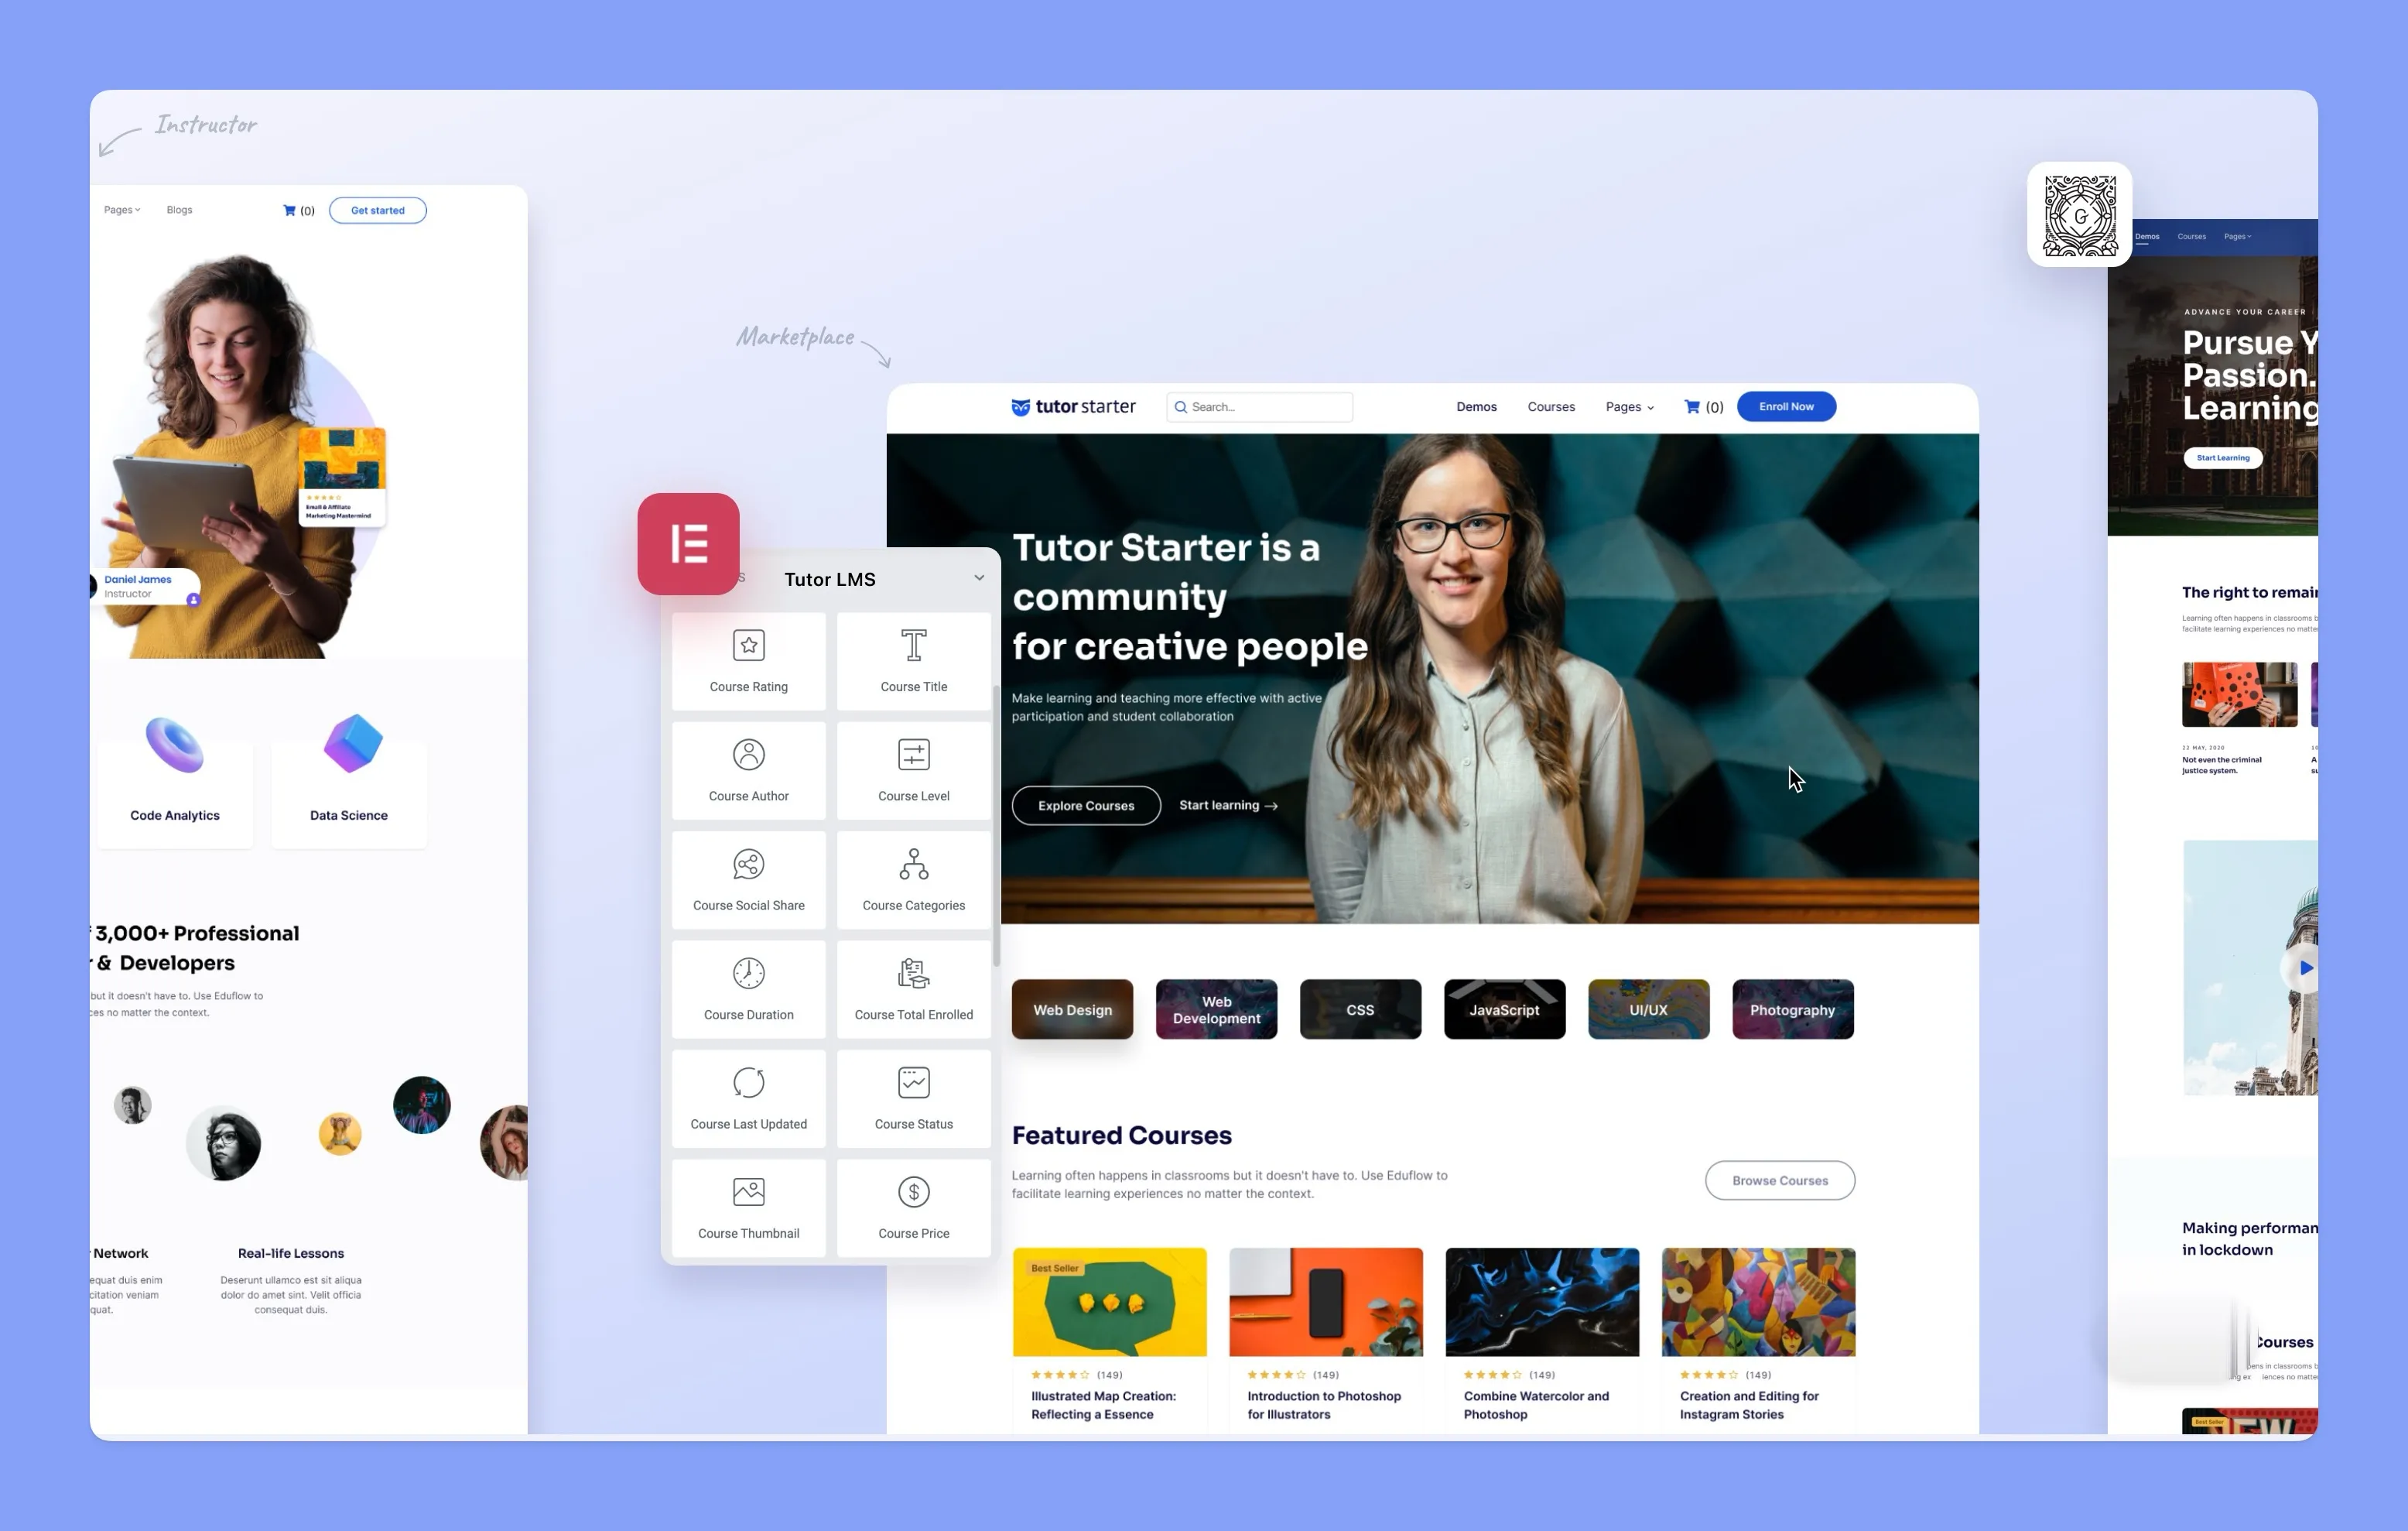
Your LMS site’s theme is like the outfit it wears. It should be stylish and functional. For our Tutor LMS site, we’ll focus on the Tutor Starter theme. This theme is highly customized for Tutor LMS, designed to showcase your courses in all their glory. Plus, it’s easy to customize and packed with options to make it truly yours.
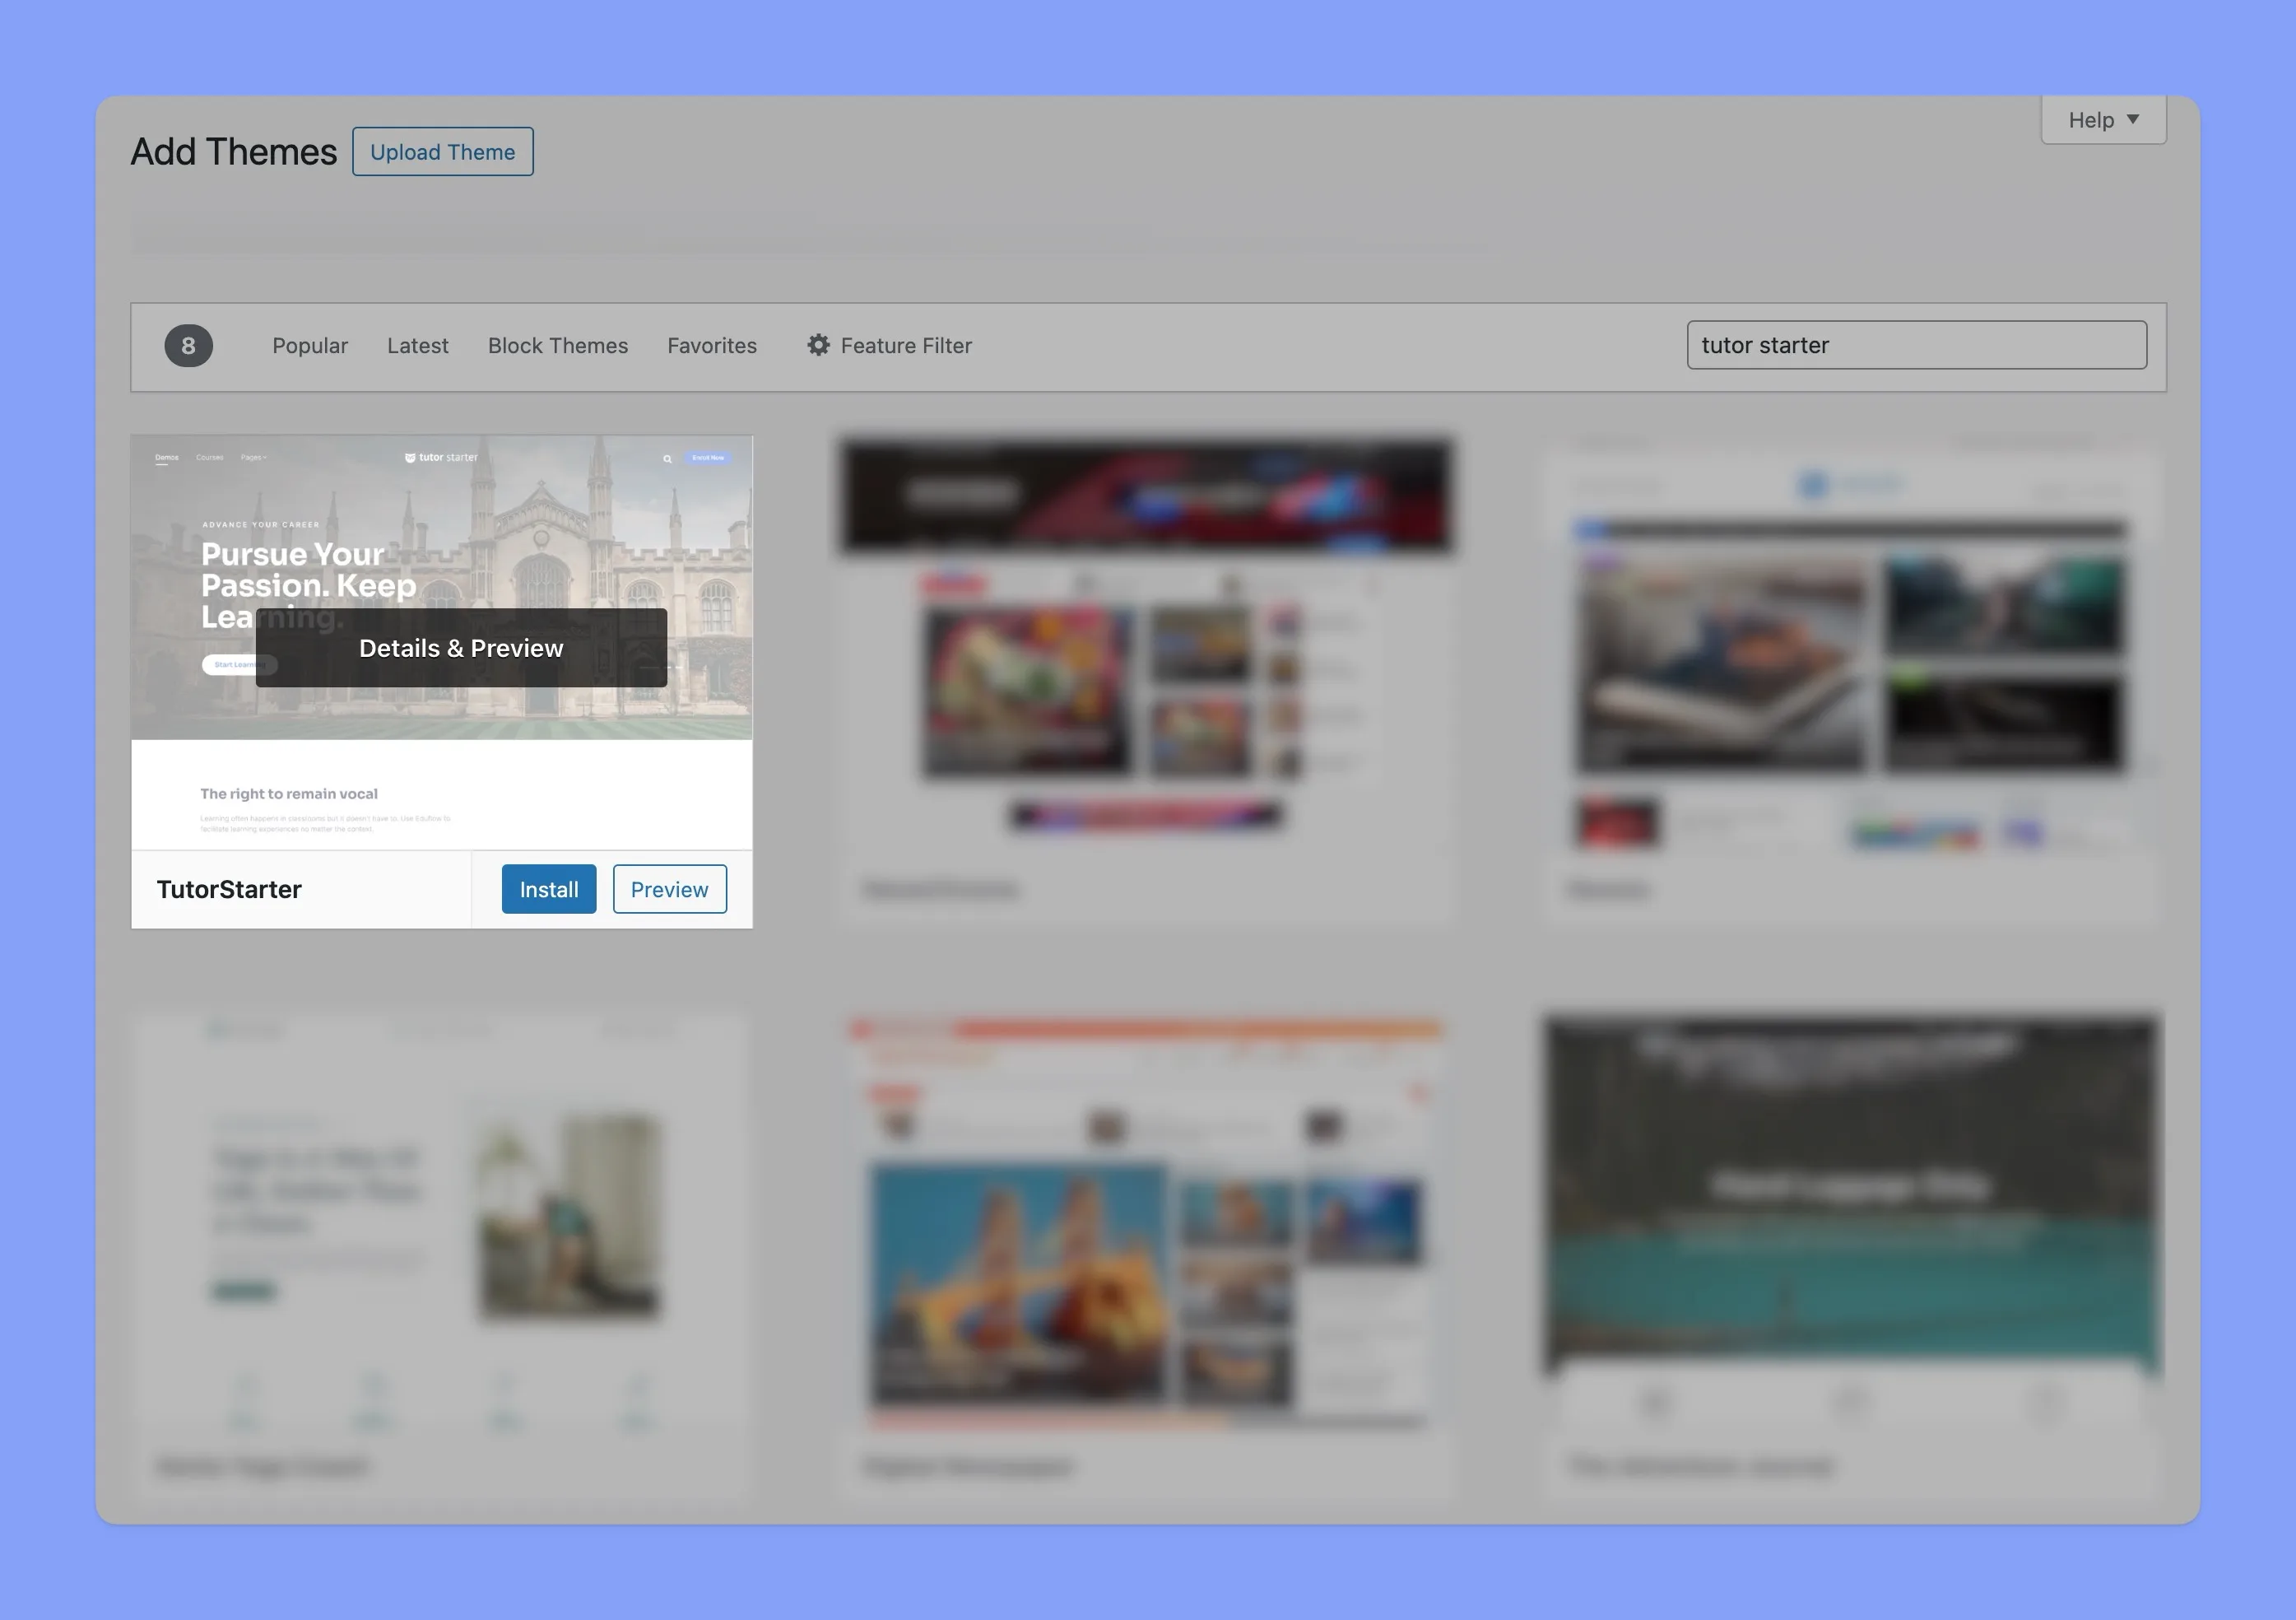
- Selecting and Installing Tutor Starter Theme:
- Log in to your WordPress dashboard.
- Navigate to Appearance > Themes > Add New.
- In the search bar, type “Tutor Starter.”
- Click Install, then Activate.
The Tutor Starter theme provides a clean and professional look, which enhances the learning experience for your students. Plus, it’s fully responsive, so your courses look great on any device.
If you want to explore more about WordPress LMS themes, like what to look for, or how to really make them match your brand, check out our in-depth article. It has all the details you need to help you choose, install, and customize to create a killer LMS site that not only looks great but also helps your business thrive.
Step 6: Optimizing Performance
Your Tutor LMS site is live on Kinsta. Great job! Now, let’s optimize it to ensure a seamless learning experience. A fast, reliable site keeps students happy and engaged. Let’s use Kinsta’s built-in features to boost your site’s performance.
Utilizing Kinsta’s Built-in Features:
Kinsta comes packed with a bunch of tools designed to enhance your LMS site’s performance. Let’s explore how to use them to your advantage:
Leveraging CDN (Content Delivery Network):
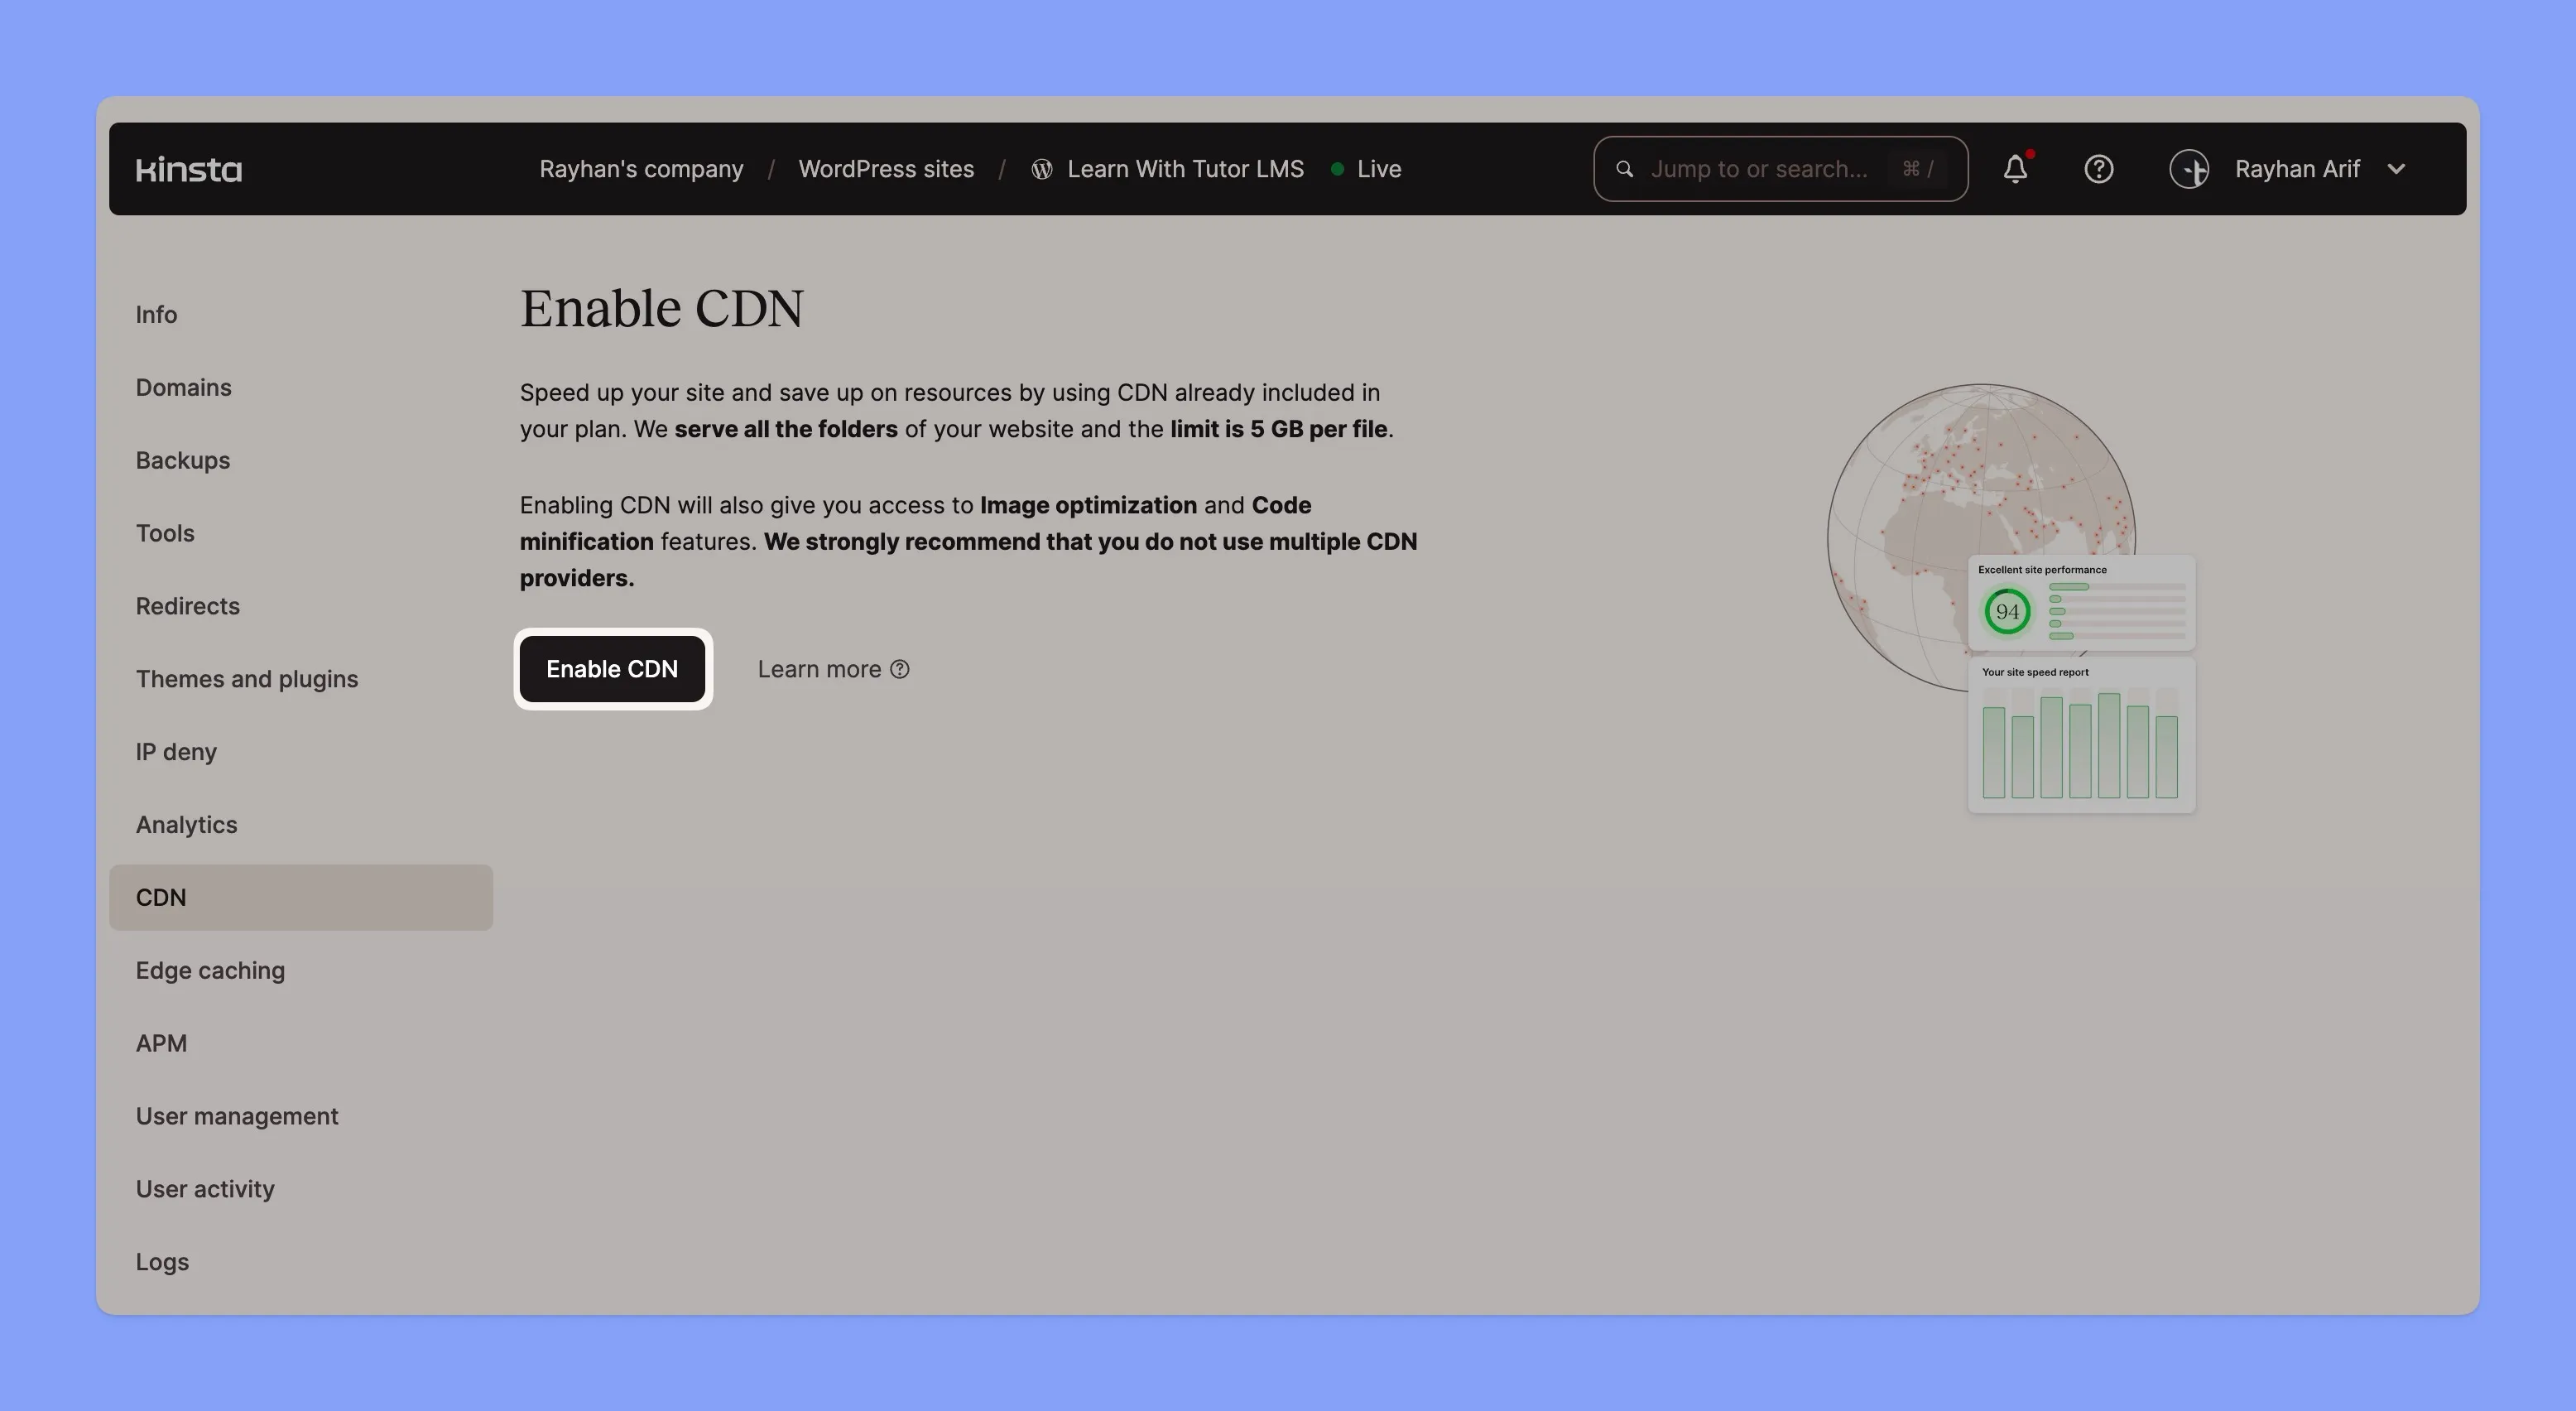
Kinsta’s CDN powered by Cloudflare and offers a network of 260+ locations worldwide.. Each server stores copies of your site’s static files like images and videos. This ensures quick loading times for students, no matter which part of the world they reside in. To enable CDN, go to “WordPress Sites,” then “CDN,” and click “Enable CDN.”
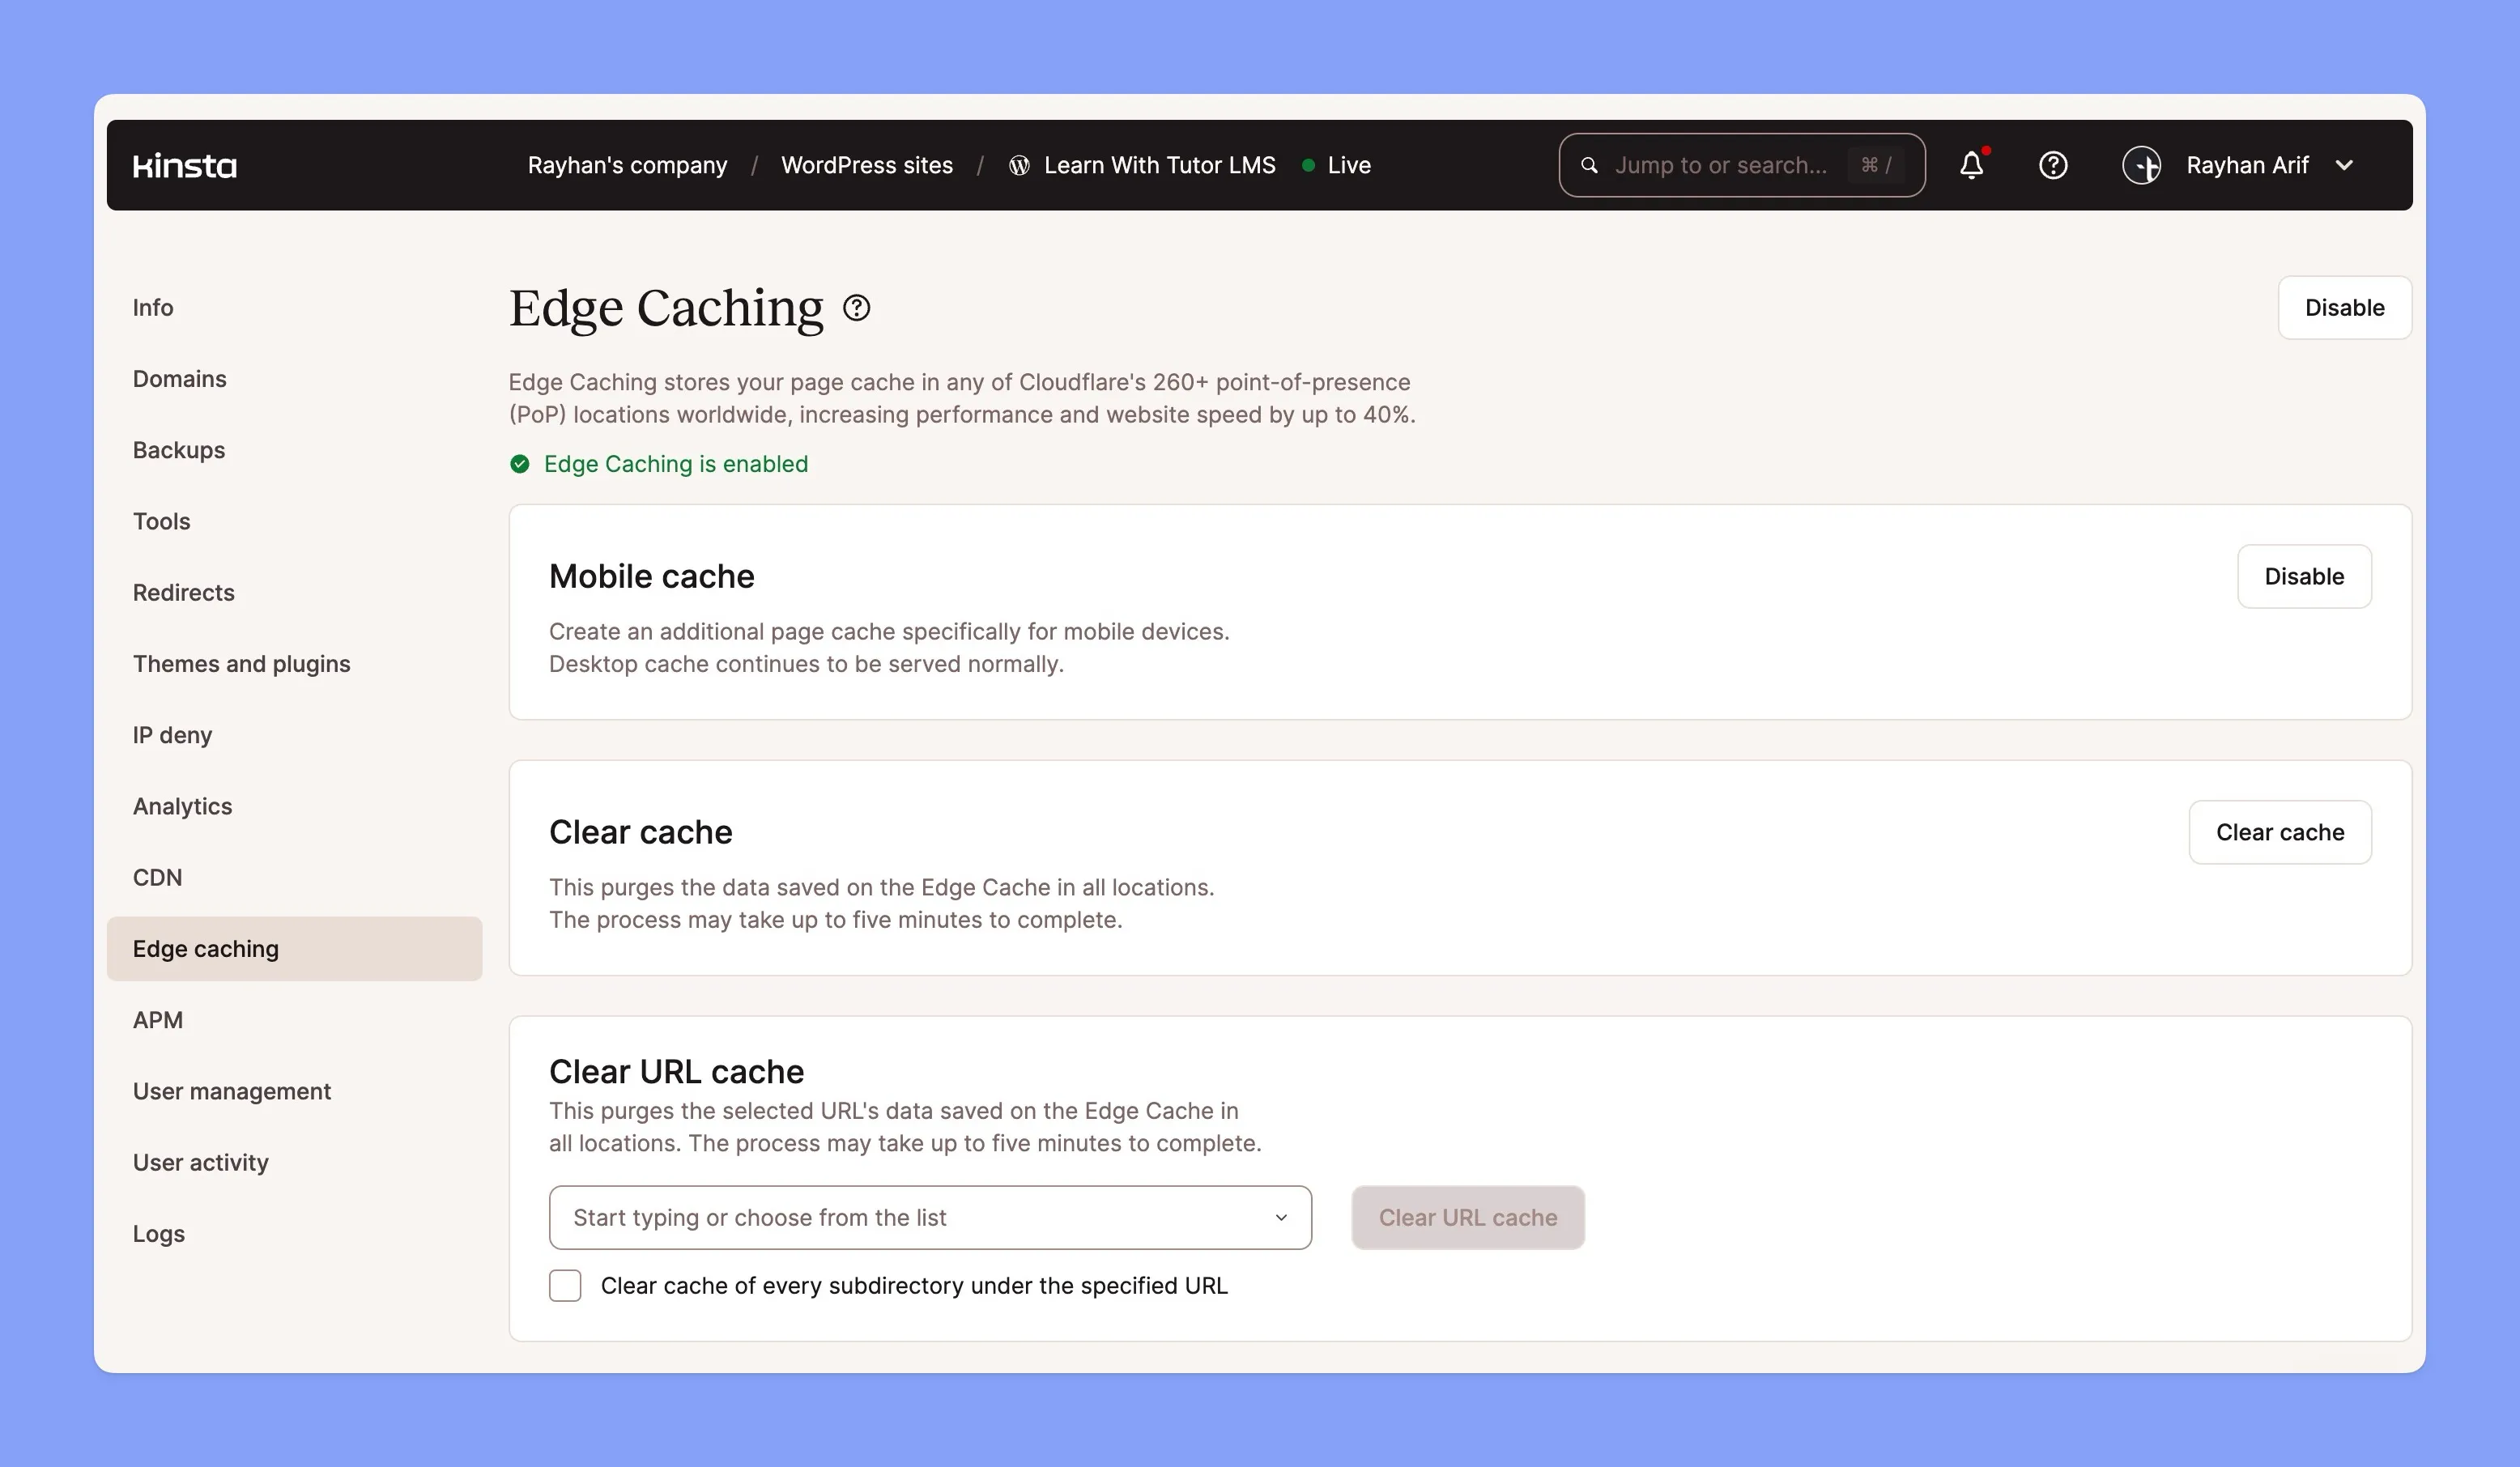
Enable Edge Caching:
Edge caching stores dynamic content globally, speeding up page loads. Enable it in your MyKinsta dashboard by selecting your site and turning on the Edge Caching feature. For a smooth experience for all students, also remember to enable it for mobile devices.
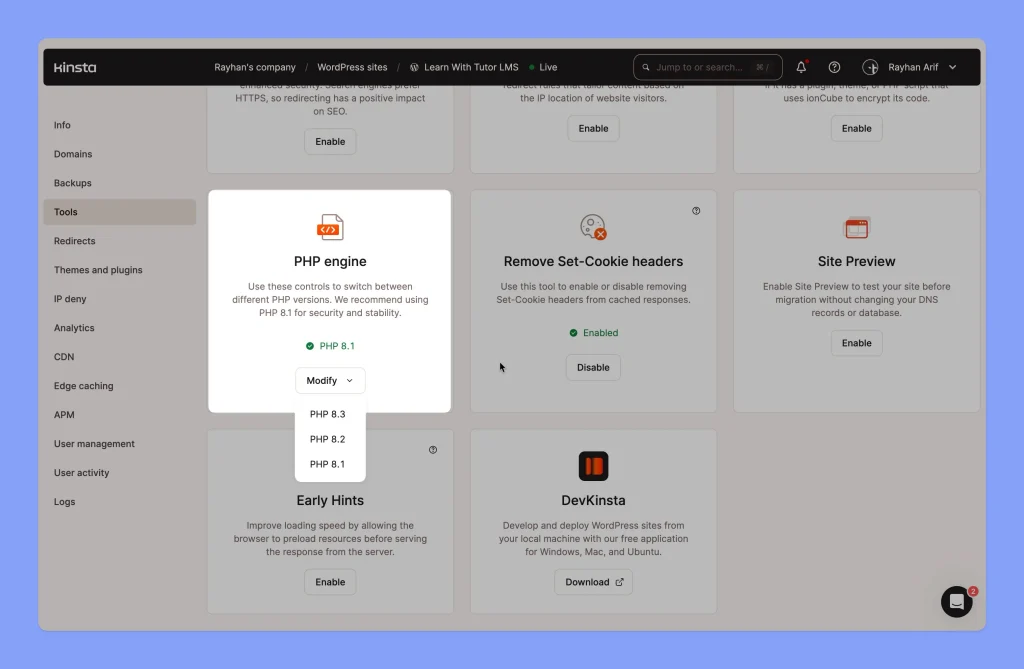
Switch to the Latest PHP Version:
PHP is the engine behind WordPress, and like any engine, newer versions run better. Switching to the latest PHP version can significantly boost your site’s performance. Kinsta makes this easy, plus they always support the latest PHP versions.. In your MyKinsta dashboard, go to the “Tools” section, find the “PHP Engine” option, and select the latest version. This simple change can make your site faster and more secure.
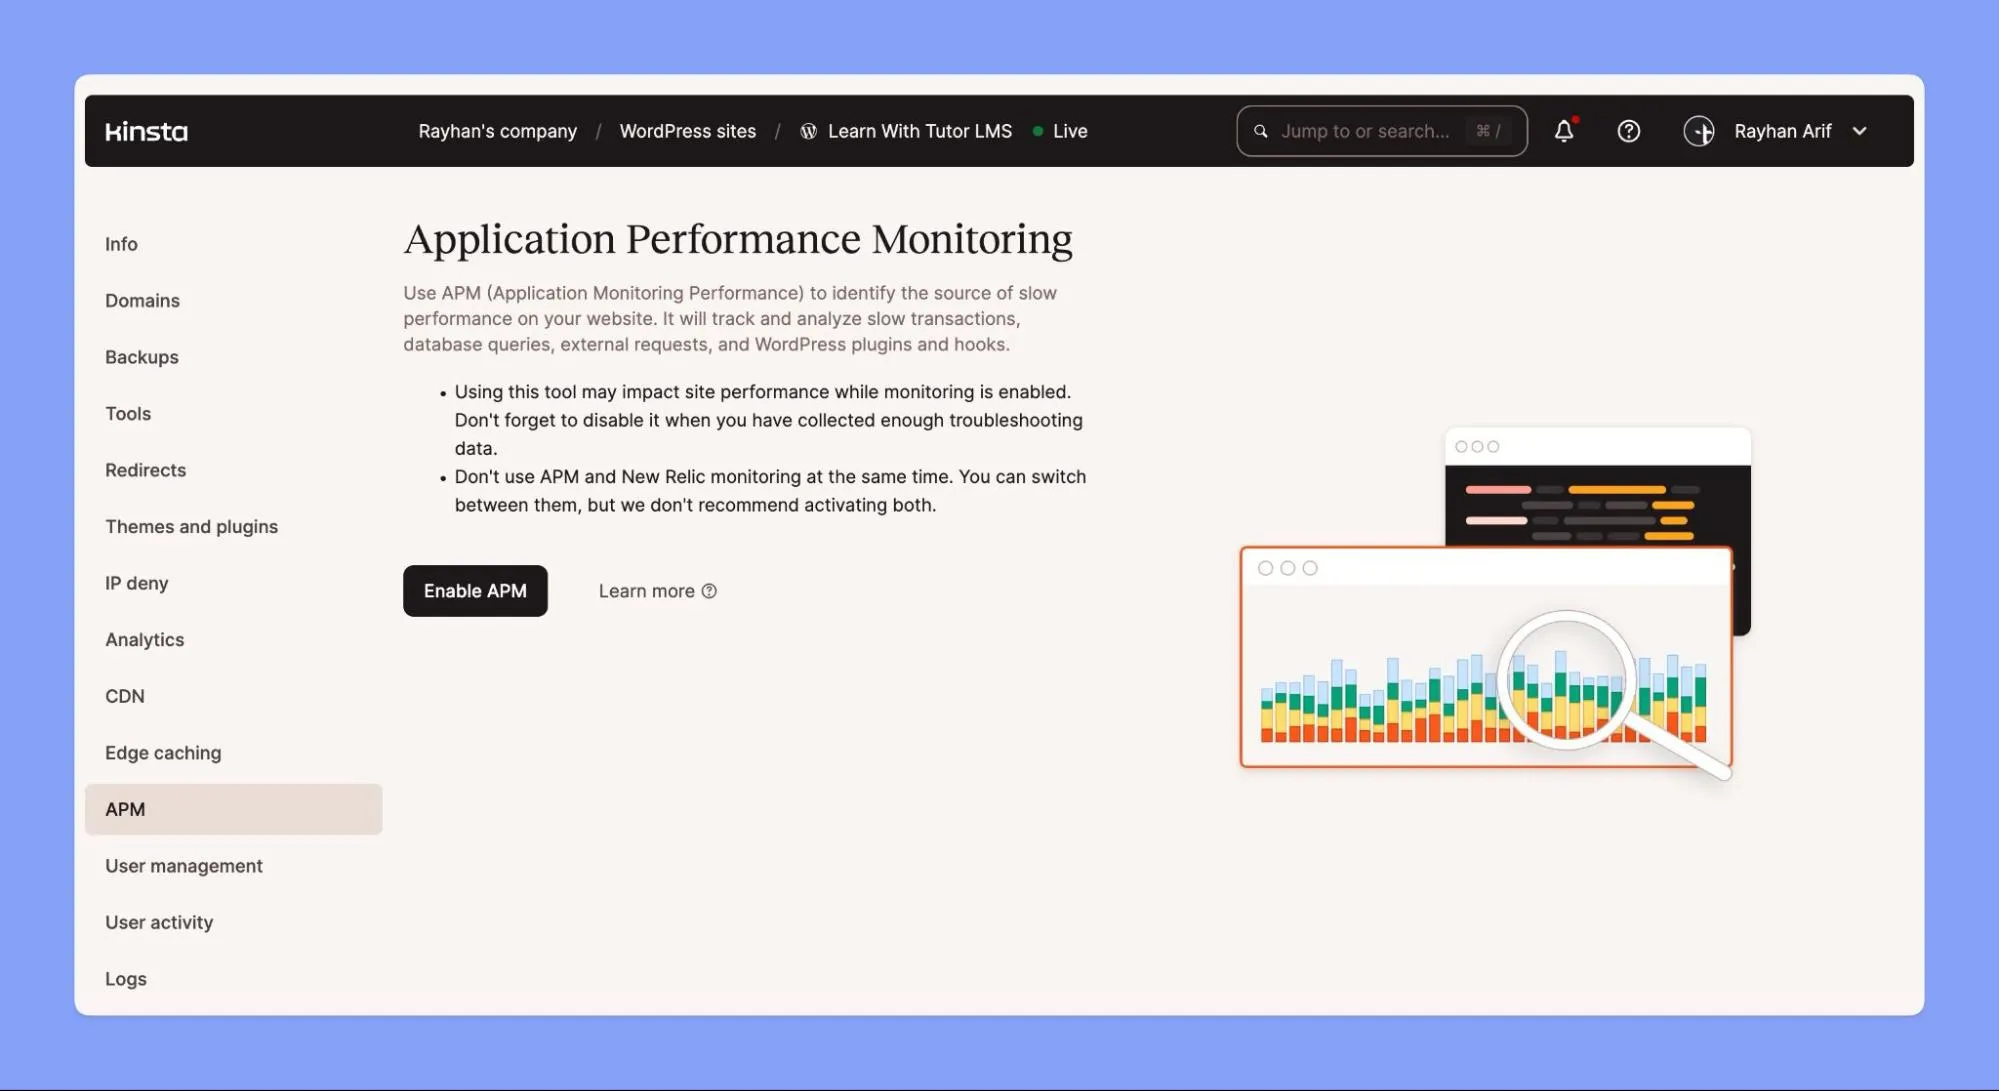
Application Performance Monitoring (APM) Tool:
Kinsta APM is a custom-designed performance monitoring tool exclusively for WordPress sites. It peeks behind the scenes, to identify performance bottlenecks. Whether it’s a resource-hungry plugin or a database hiccup, Kinsta APM has your back.
To activate the “APM” tool, head to your MyKinsta dashboard and toggle it on. This way, you can identify and fix issues before they become problems, keeping your site speedy and reliable.
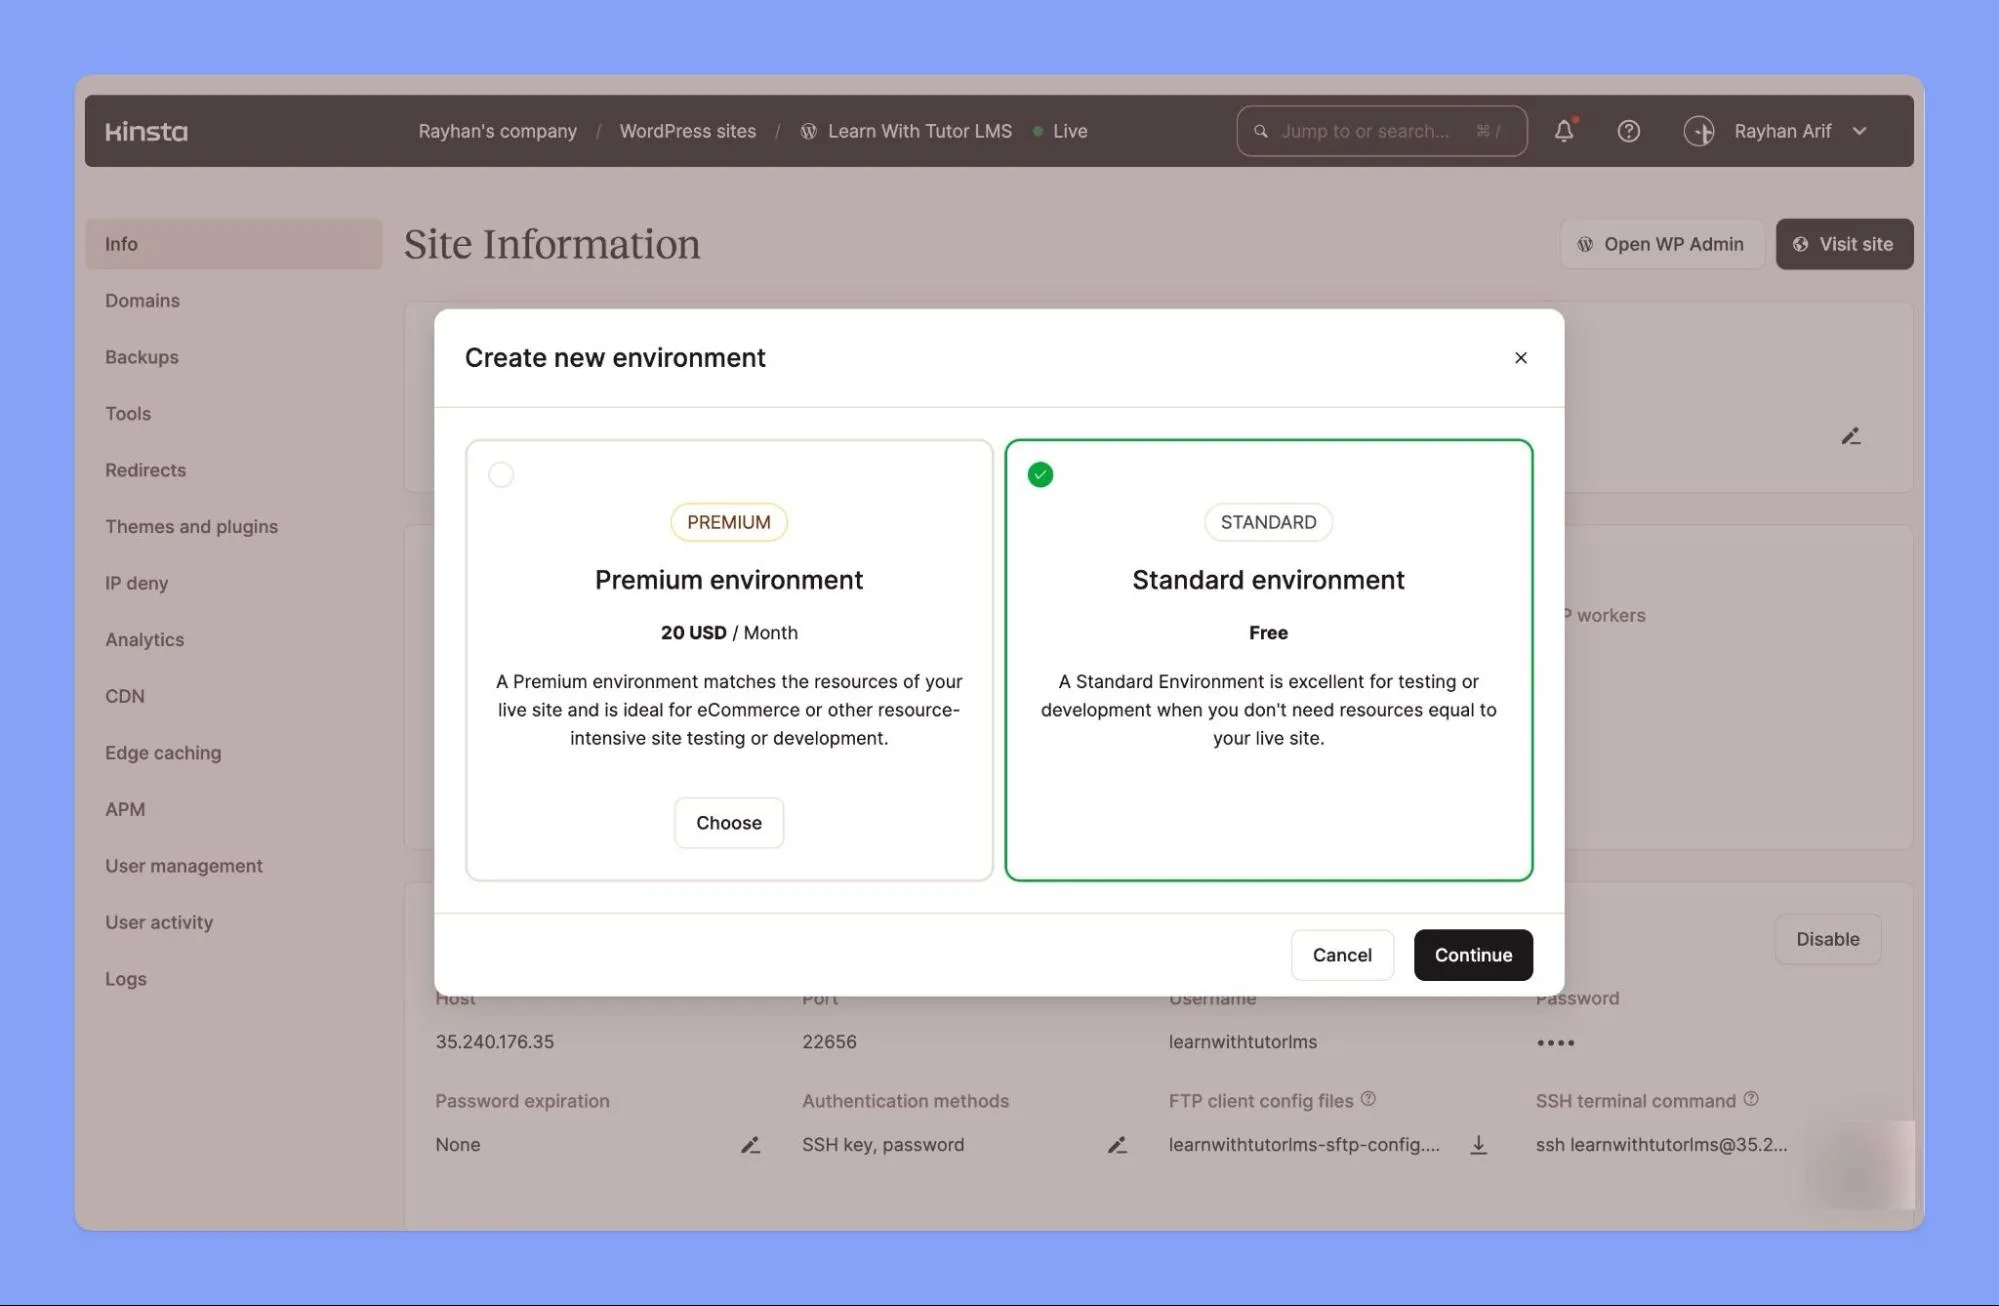
Use a Staging Environment:
Before making big changes to your live site, test them in a staging environment. Kinsta offers staging environments where you can tweak, test, and tinker without affecting your live site. Once everything looks good, you can push the changes live with a single click. This helps you avoid downtime and ensures your site stays up and running smoothly.
Setting Up SSL for Secure Connections:
Security is crucial, especially for an LMS where students trust you with their personal information. SSL (Secure Sockets Layer) encrypts the data exchanged between your site and your students, keeping it safe from prying eyes.
Kinsta offers free wildcard SSL certificates via Cloudflare Let’s Encrypt. When you add your domain, it automatically gets secured.
Note: You must have a live domain for the SSL to work. if you need additional help in setting up your DNS and Domain please contact Kinsta support or view their documentation.

Redis Cache Add-on (Optional):
For even more speed, consider enabling Redis object caching. Redis stores frequently accessed data in memory, so your site can retrieve it quickly without repeatedly querying the database. This can make your site snappier, especially if you have lots of interactive elements. To enable Redis Caching, just contact the Kinsta support team and request to have Redis added to your site.
Step 7: Add your domain
Finally, to give your site a memorable name and address, add a custom domain. After your site is deployed, you’ll receive a temporary domain. To replace it with your own, navigate to “Domains” within your Kinsta dashboard and click “Add domain.”
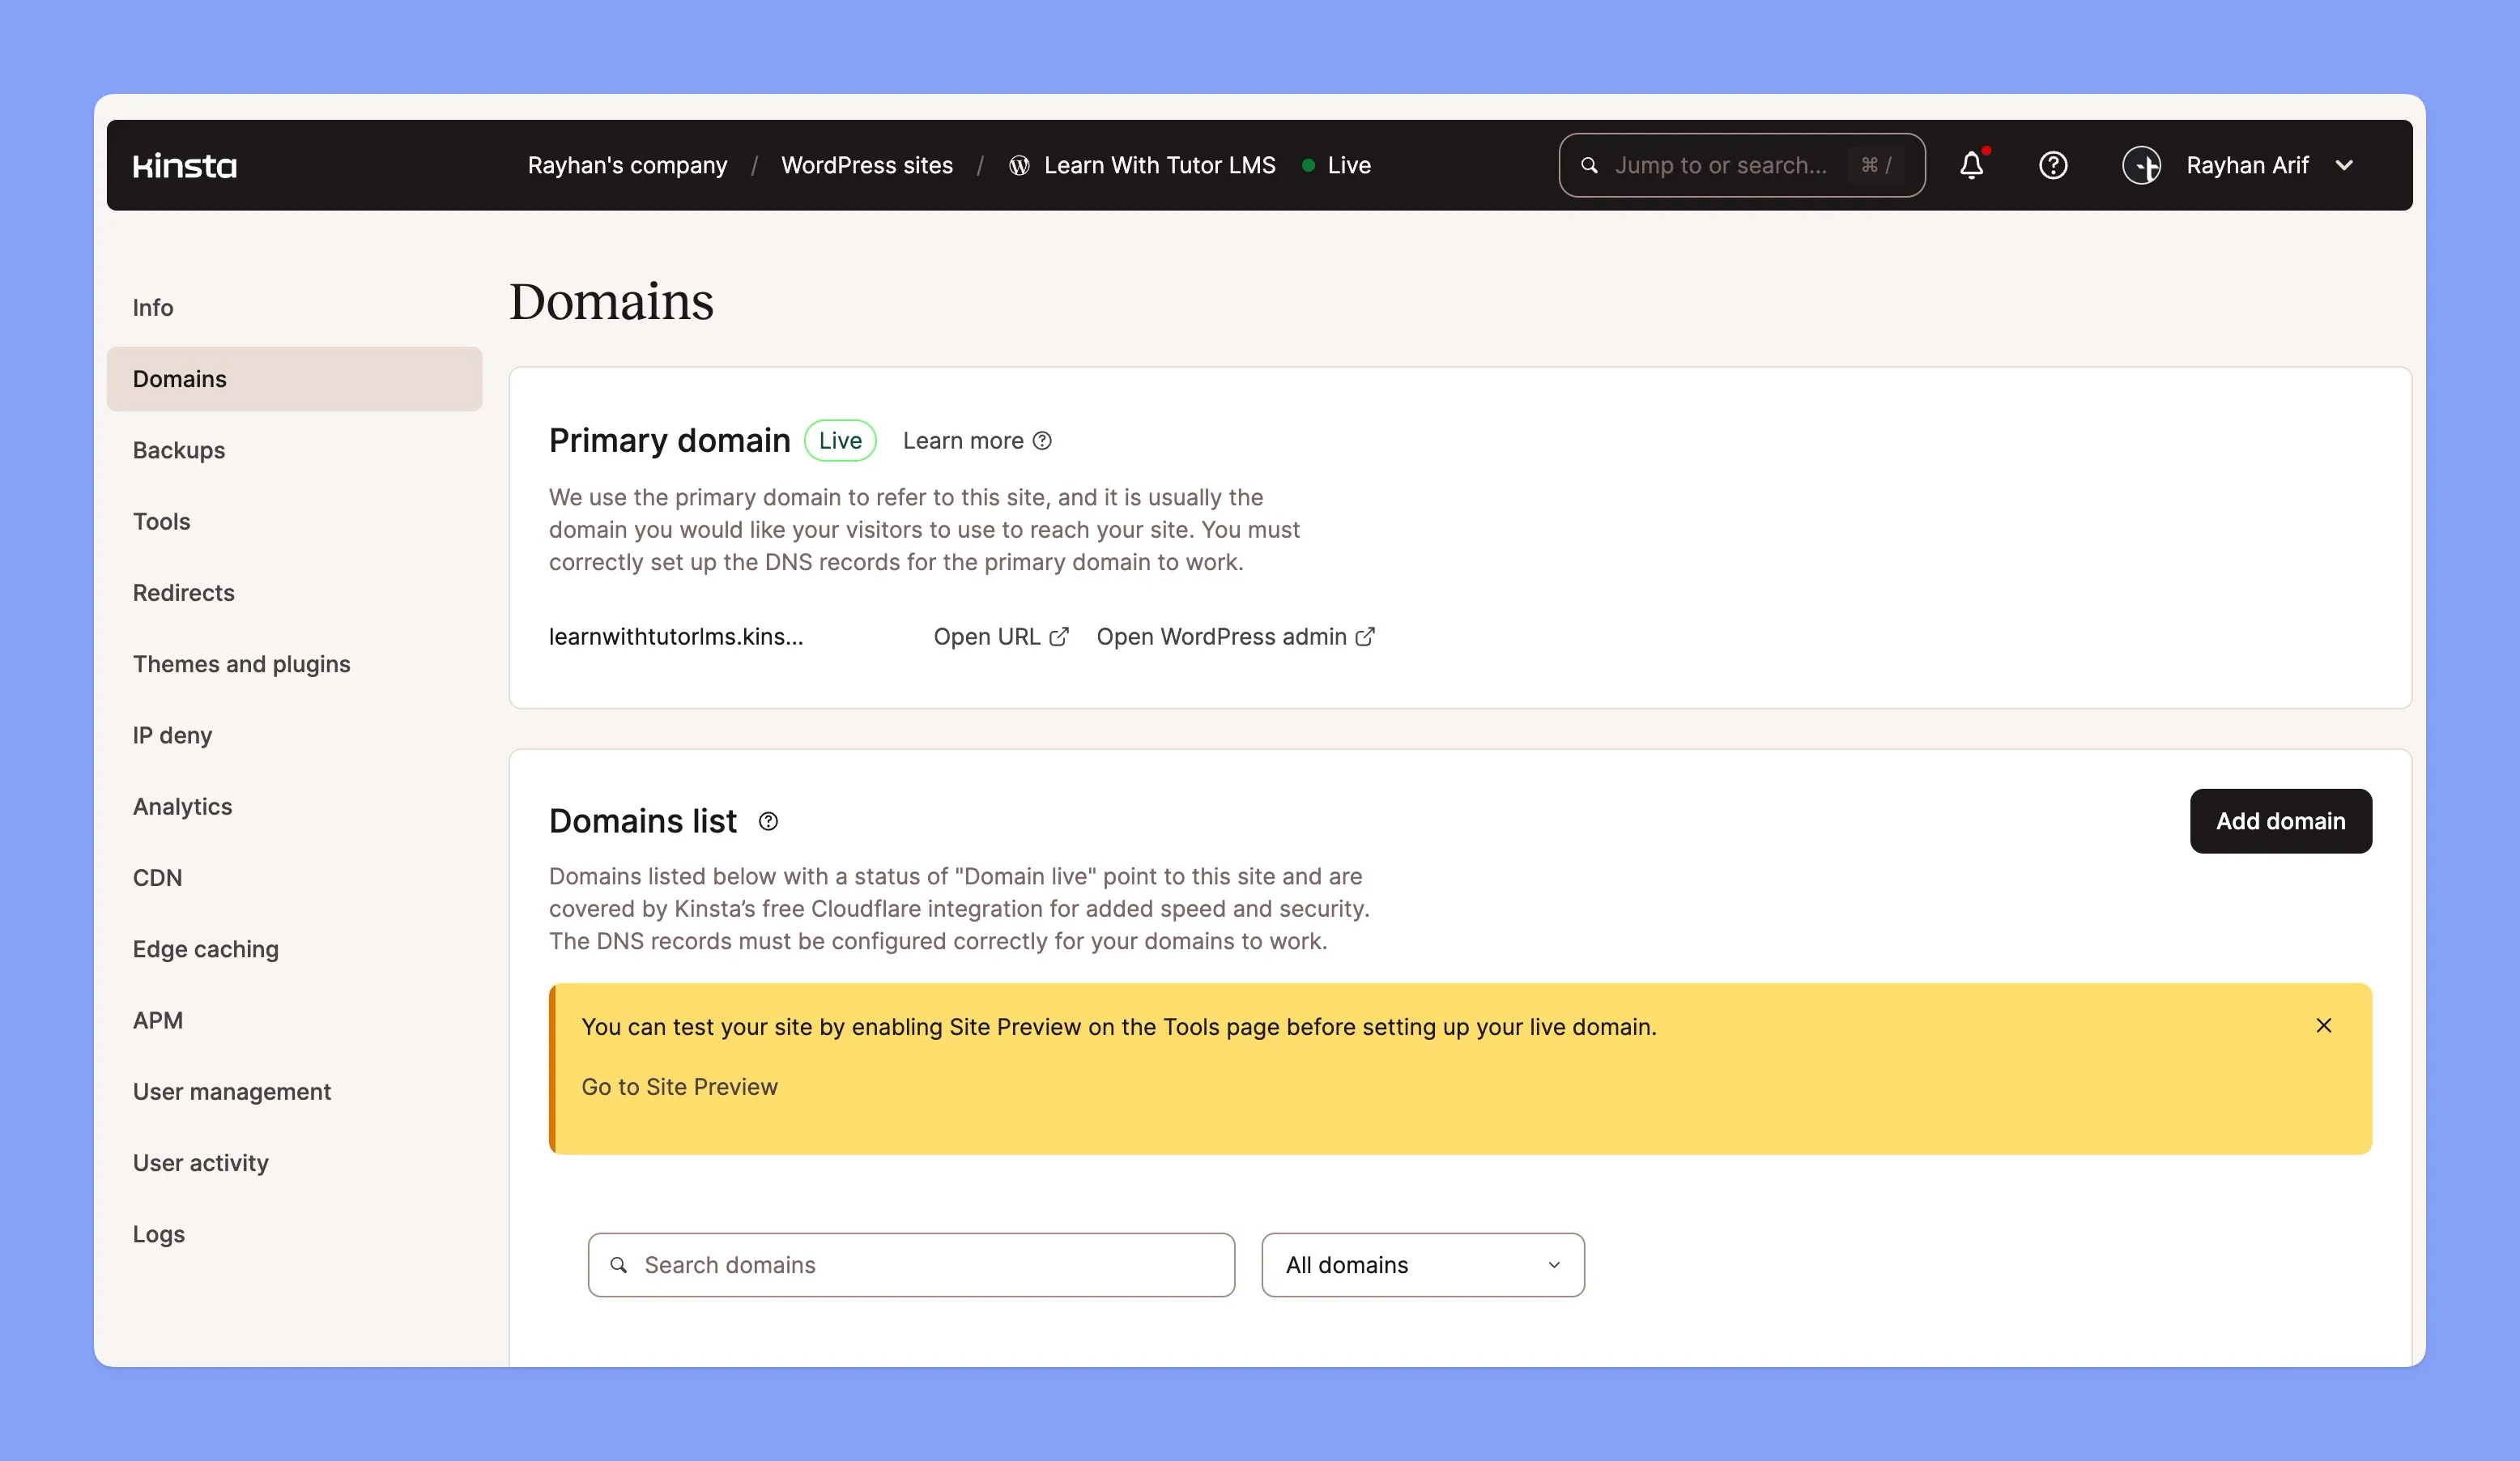
Once verified, you can set your custom domain as the primary one for your site. For detailed instructions on managing domains, refer to Kinsta’s documentation for more details.
Wrapping Up
Hosting your LMS site on Kinsta is a smart move. With its blazing-fast performance, strong security, and easy scalability, Kinsta provides everything you need for a smooth and successful online learning platform. In fact, Tutor LMS and Kinsta are the perfect hosting combination for your online courses, ensuring a seamless and enjoyable experience for both you and your students.
Consider adding a custom domain to give your site a memorable name and address. This will make your site look more professional and help students find you easily.
But don’t stop there! Kinsta offers a whole bunch of other features to make your site even better. For example, you can take advantage of Kinsta’s powerful features like “Image Optimization,” which automatically converts PNG, GIF, and JPEG images to the WebP format to improve website speed and performance.

Start Using Tutor LMS Today
Ready to take your online courses to new heights? Download Tutor LMS now and enjoy a journey of eLearning excellence.