Mastering Communication in Tutor LMS: A Guide to Notifications and Email Alerts

As an eLearning professional, you know how easy it is to feel like you’re drowning in a sea of courses, students, and assignments. It can be hard to keep track of everything, let alone staying connected with your learners and make sure they’re getting the information they need. Luckily, you have Tutor LMS, a leading WordPress LMS plugin to make it easy to connect with learners.
This handy guide demonstrates how to use the notification and email feature of Tutor LMS. You’ll learn how to customize notifications to match course updates and student progress. We will also explore setting up email alerts that summarize recent notifications. The goal is to provide bite-sized, actionable updates that keep students engaged.
By the end, you’ll be ready to use notifications and email as communication power tools. Your learners will stay on top of important announcements and feel more connected to your courses. Let’s get started!
How Tutor LMS’s Communication Features Can Help Streamline eLearning Workflow
Tutor LMS isn’t just about creating killer online courses. It’s also your communication wingman. With smart notifications, you can share important updates and keep students engaged. Let’s dive into how these tools supercharge your eLearning workflow:
- Automation is Your Friend: Forget about sending individual emails for every little thing. Tutor LMS does the heavy lifting. It automatically sends those enrollment confirmations, congratulatory messages, and even gentle reminders for deadlines.
- Time Saved, Time Learned: Important info pops up right on your dashboard. No more endlessly searching for updates. Tutor LMS collects everything you need to know so you can focus on teaching and learning.
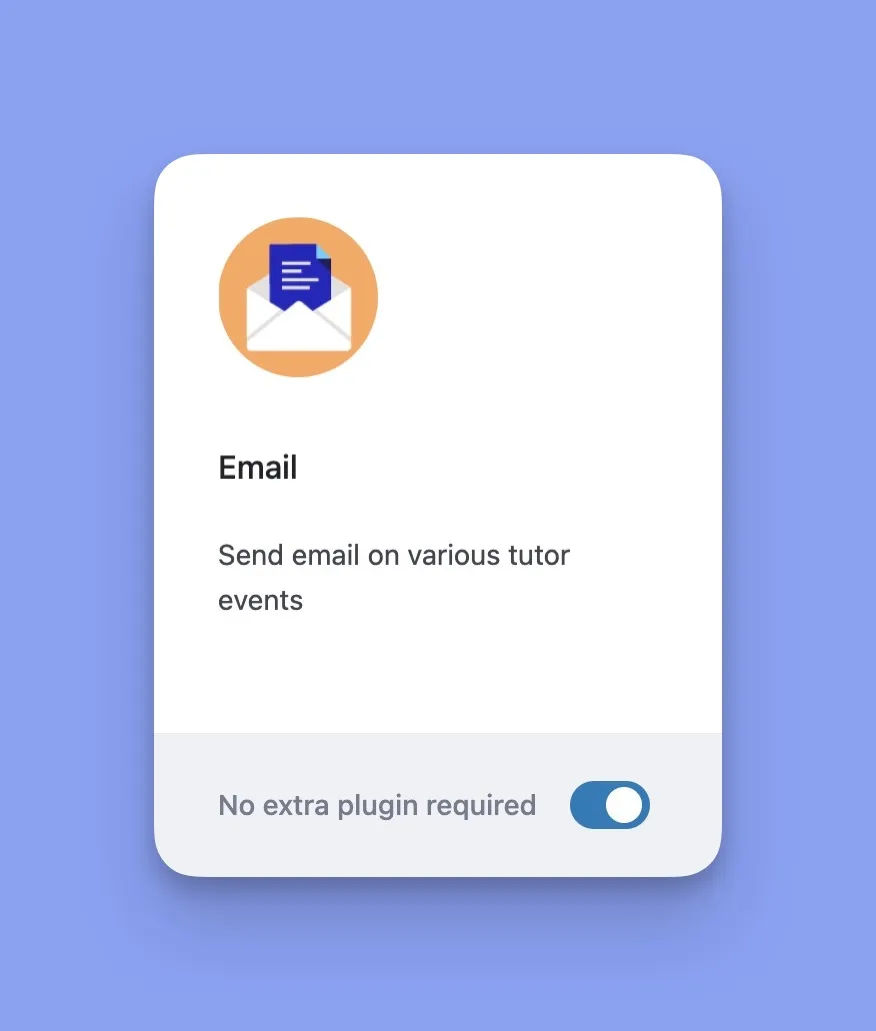
- Email Notifications Keep You in the Loop: Email is still a big deal for eLearning communication. Tutor LMS takes care of sending all those important messages – enrollment confirmations, grades, the works! Students get what they need, right in their inbox.
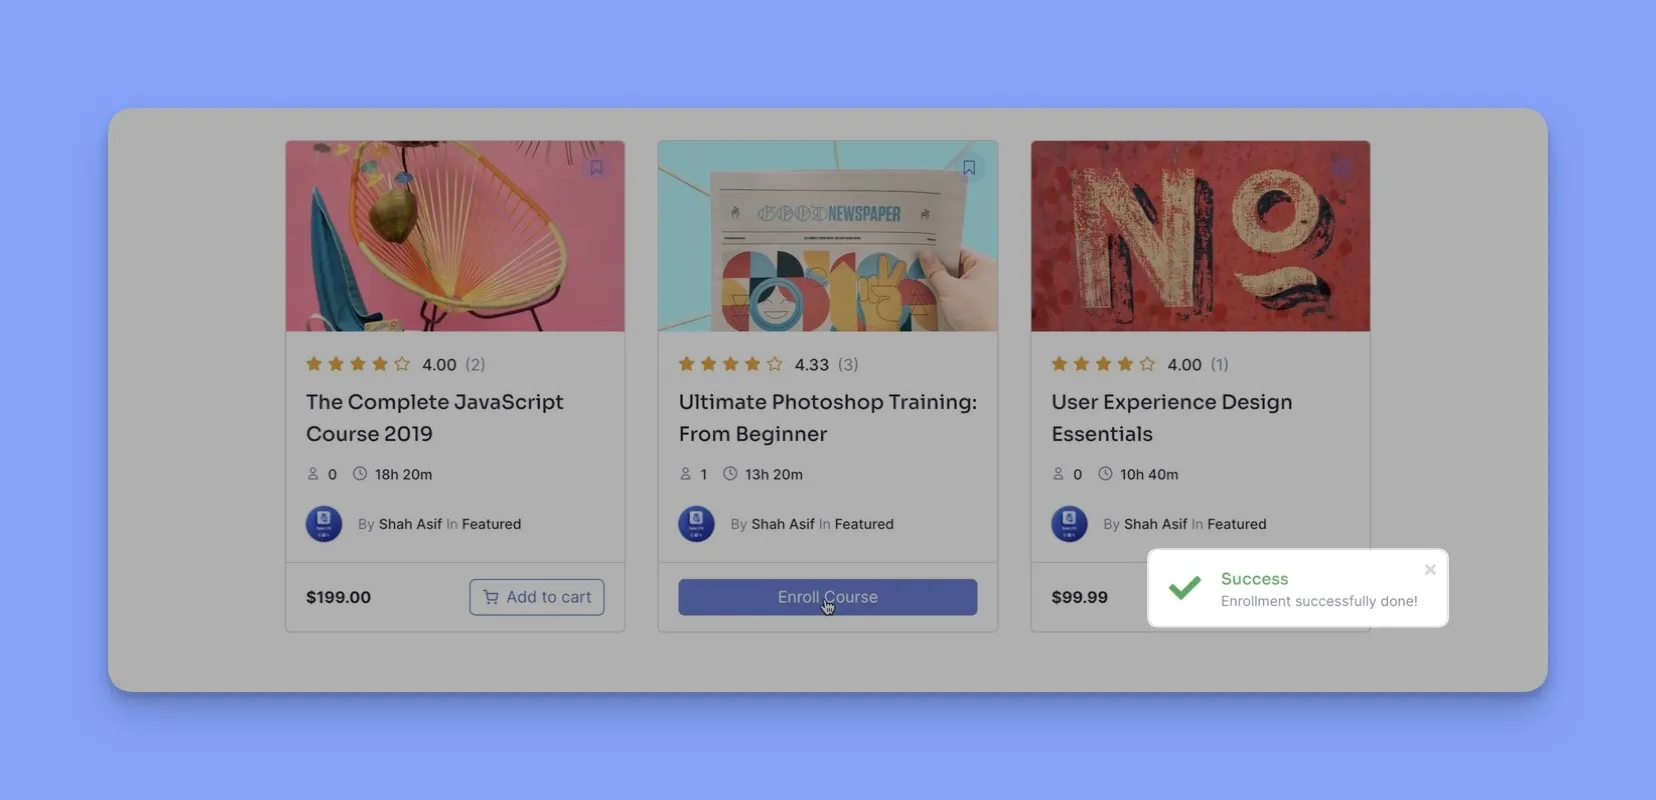
- Get Students Involved: Notifications are like little nudges to participate. Students get a heads-up when a new discussion starts, a quiz pops up, or a deadline looms. These reminders can be the spark that keeps them engaged.
Getting Started With Tutor LMS Notification Feature
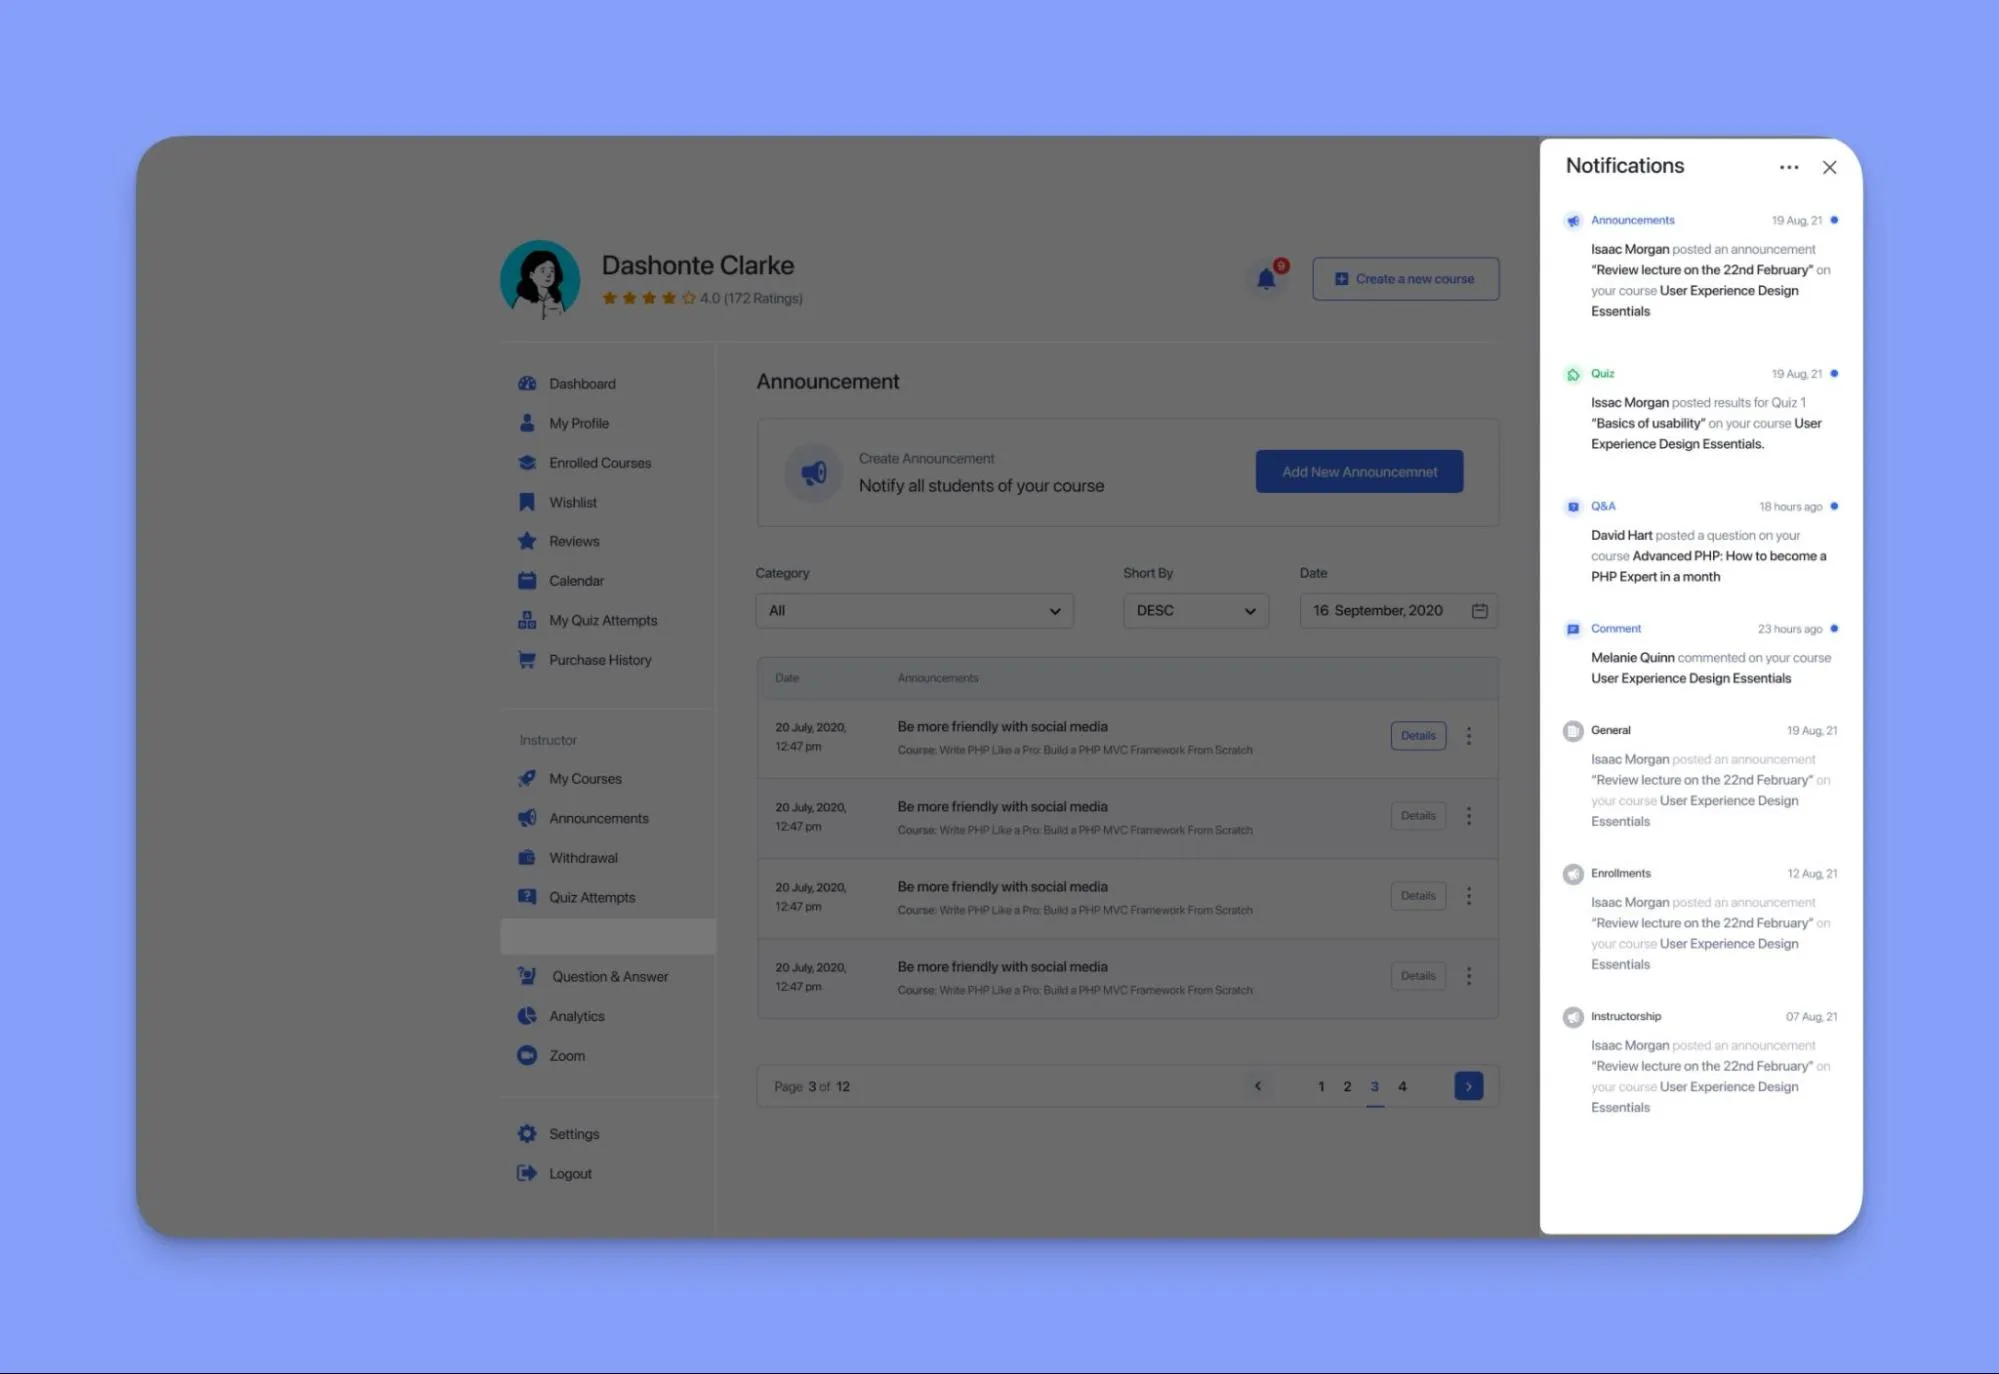
Staying on top of course updates is crucial for both online instructors and students. But with many moving parts, it’s easy to miss key notifications. Luckily, The notification panel aggregates these updates, making it convenient for users to stay informed.
Alright, buckle up! Let’s dive into the world of Tutor LMS notifications and discover how they can help your classes engage!
Types of Notifications In Tutor LMS
The notification feature in Tutor LMS allows you to send and receive notifications in two ways:
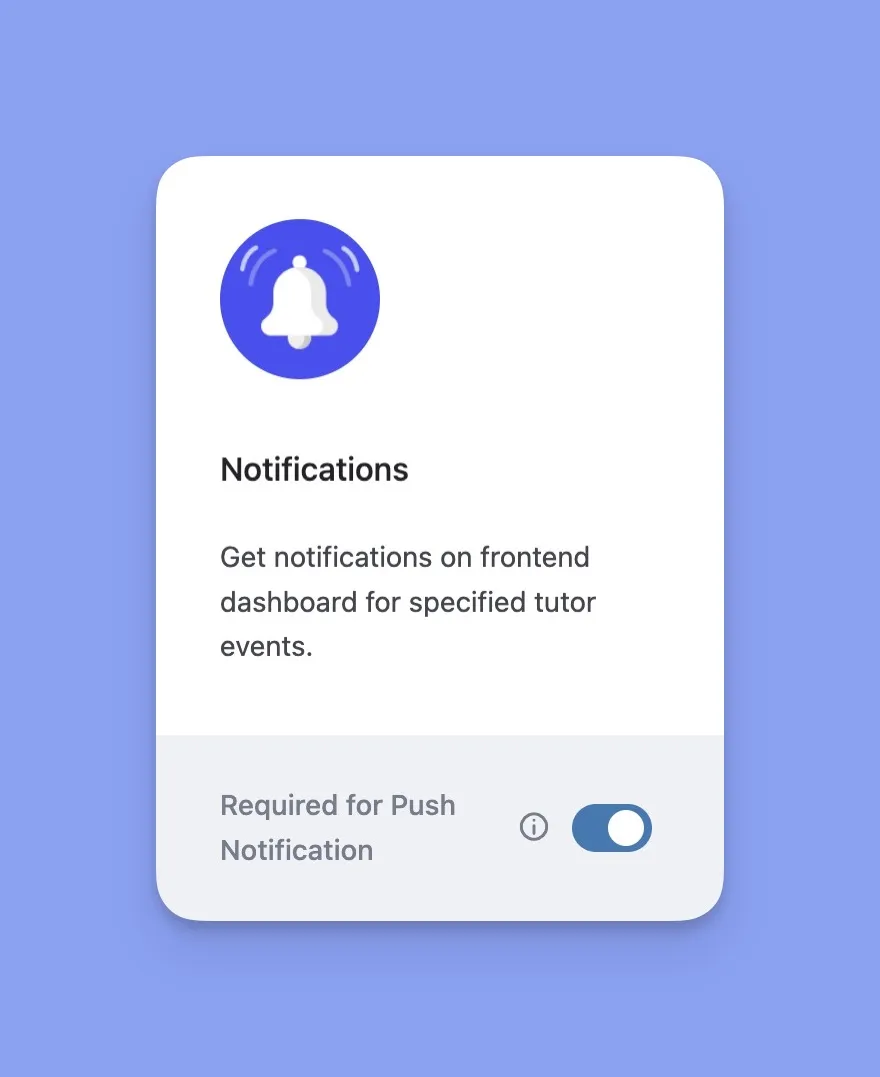
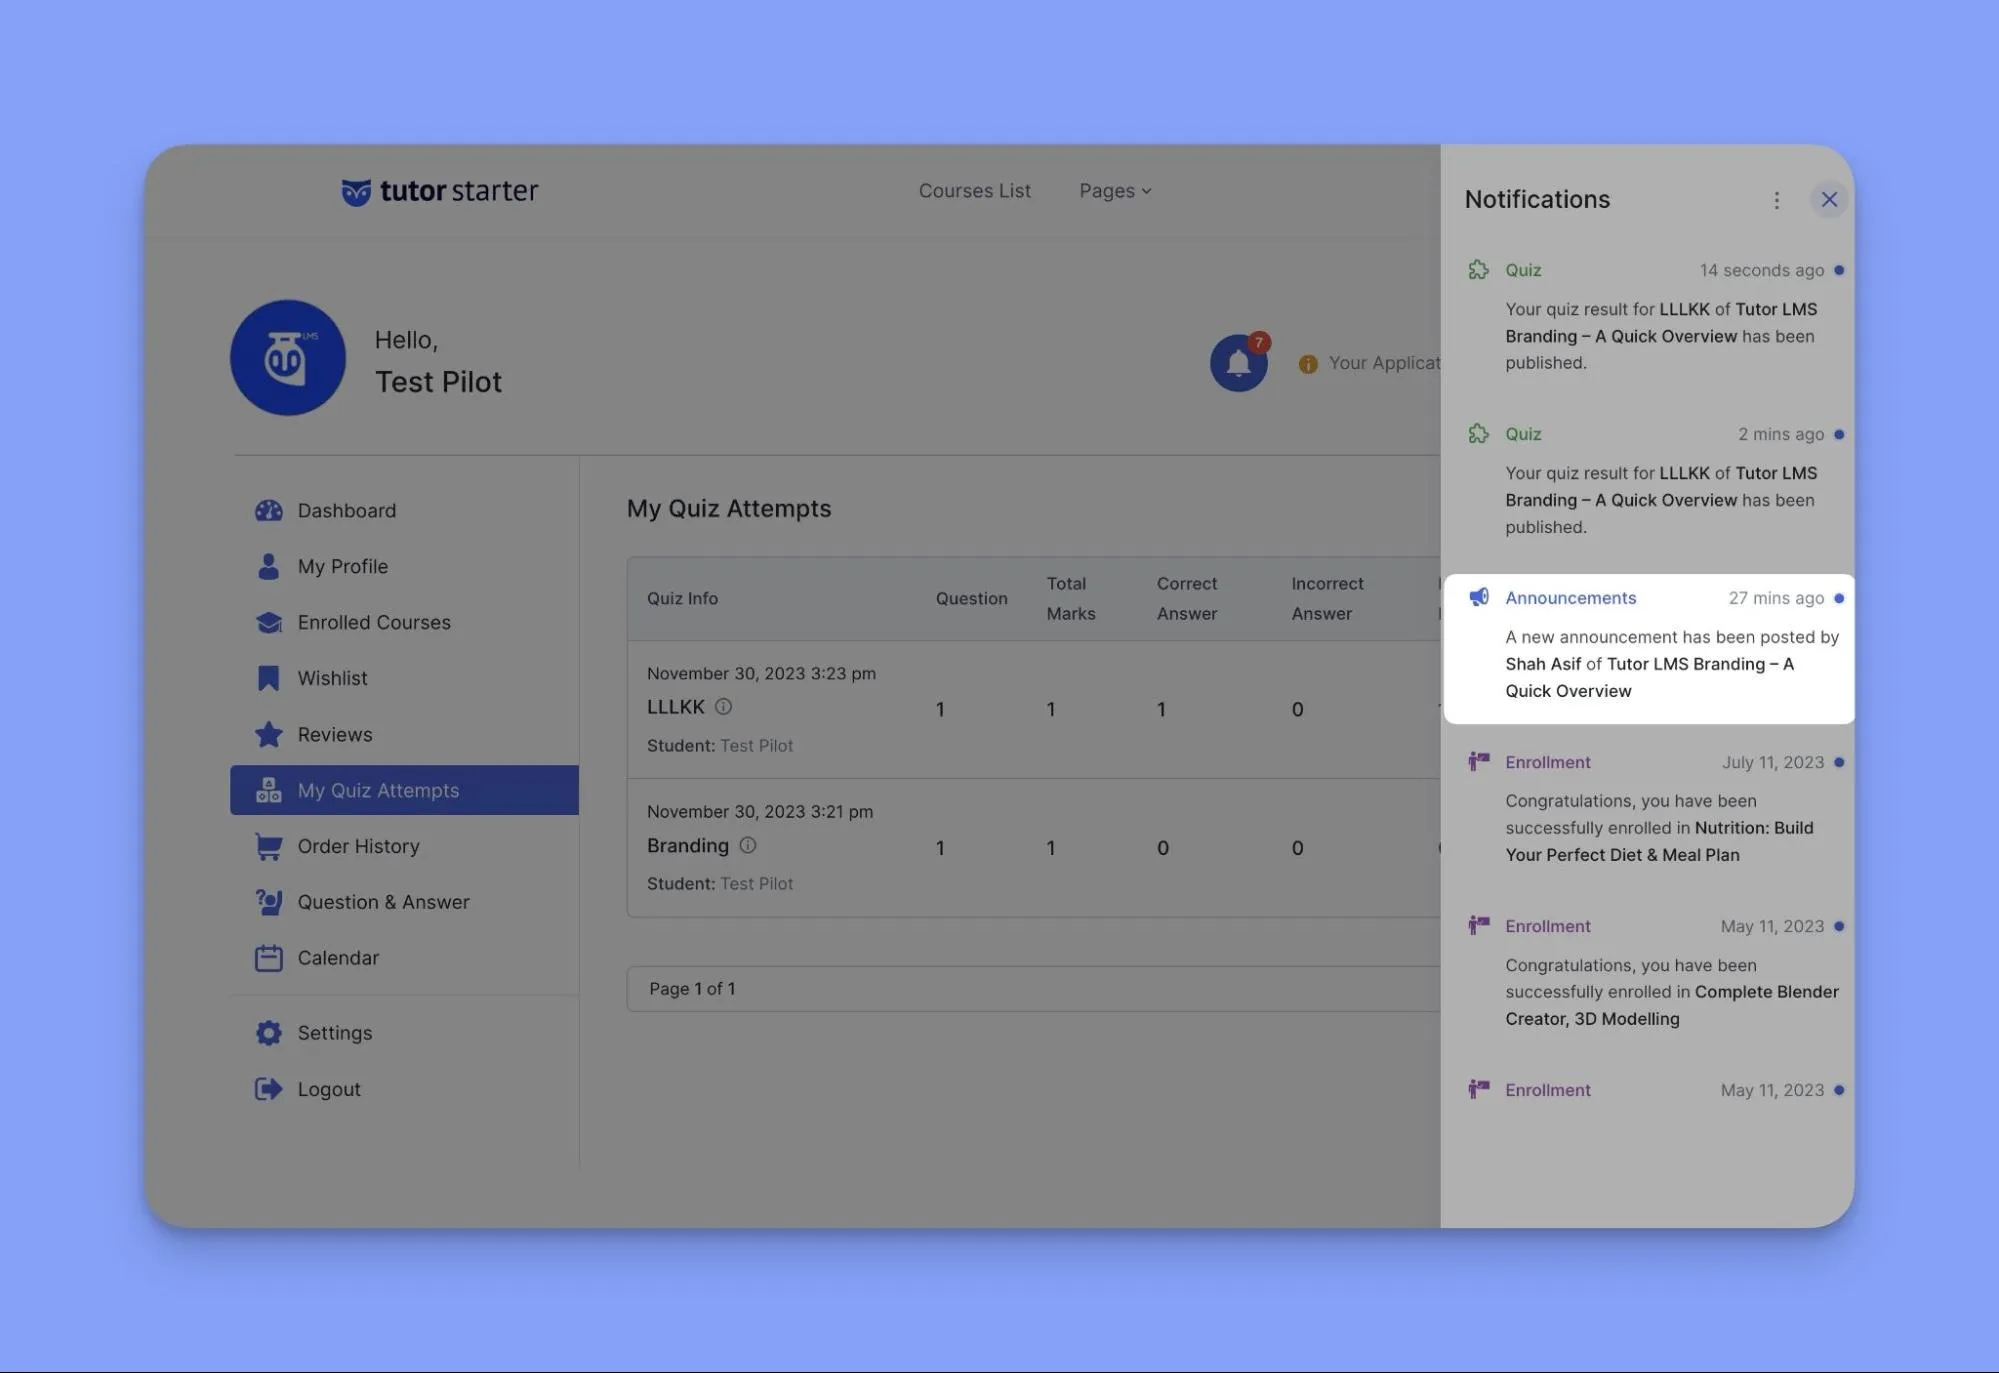
- Onsite bell notifications: The onsite bell notification is visible on the top right corner of your site when you are logged in.
- Browser push notifications: The browser push notification appears on the bottom right corner of your browser screen, even when you are not on the site. This guarantees that you’re kept informed of any urgent or important notifications related to your course delivery.
How to Enable & Configure the Notification Settings in Tutor LMS
Enabling Tutor LMS’s notification features is very simple. Simply follow these steps:
- Navigate to WP Admin > Tutor LMS Pro > Add-ons and enable the “Notifications” add-on.
- To configure the notification settings for your site, go to WP Admin > Tutor LMS Pro > Settings > Notifications.
Here, you will find a list of notification types that you can enable or disable for each user role. You can also choose whether to send an “Onsite” bell notification, a browser toast “Push notification,” or both.
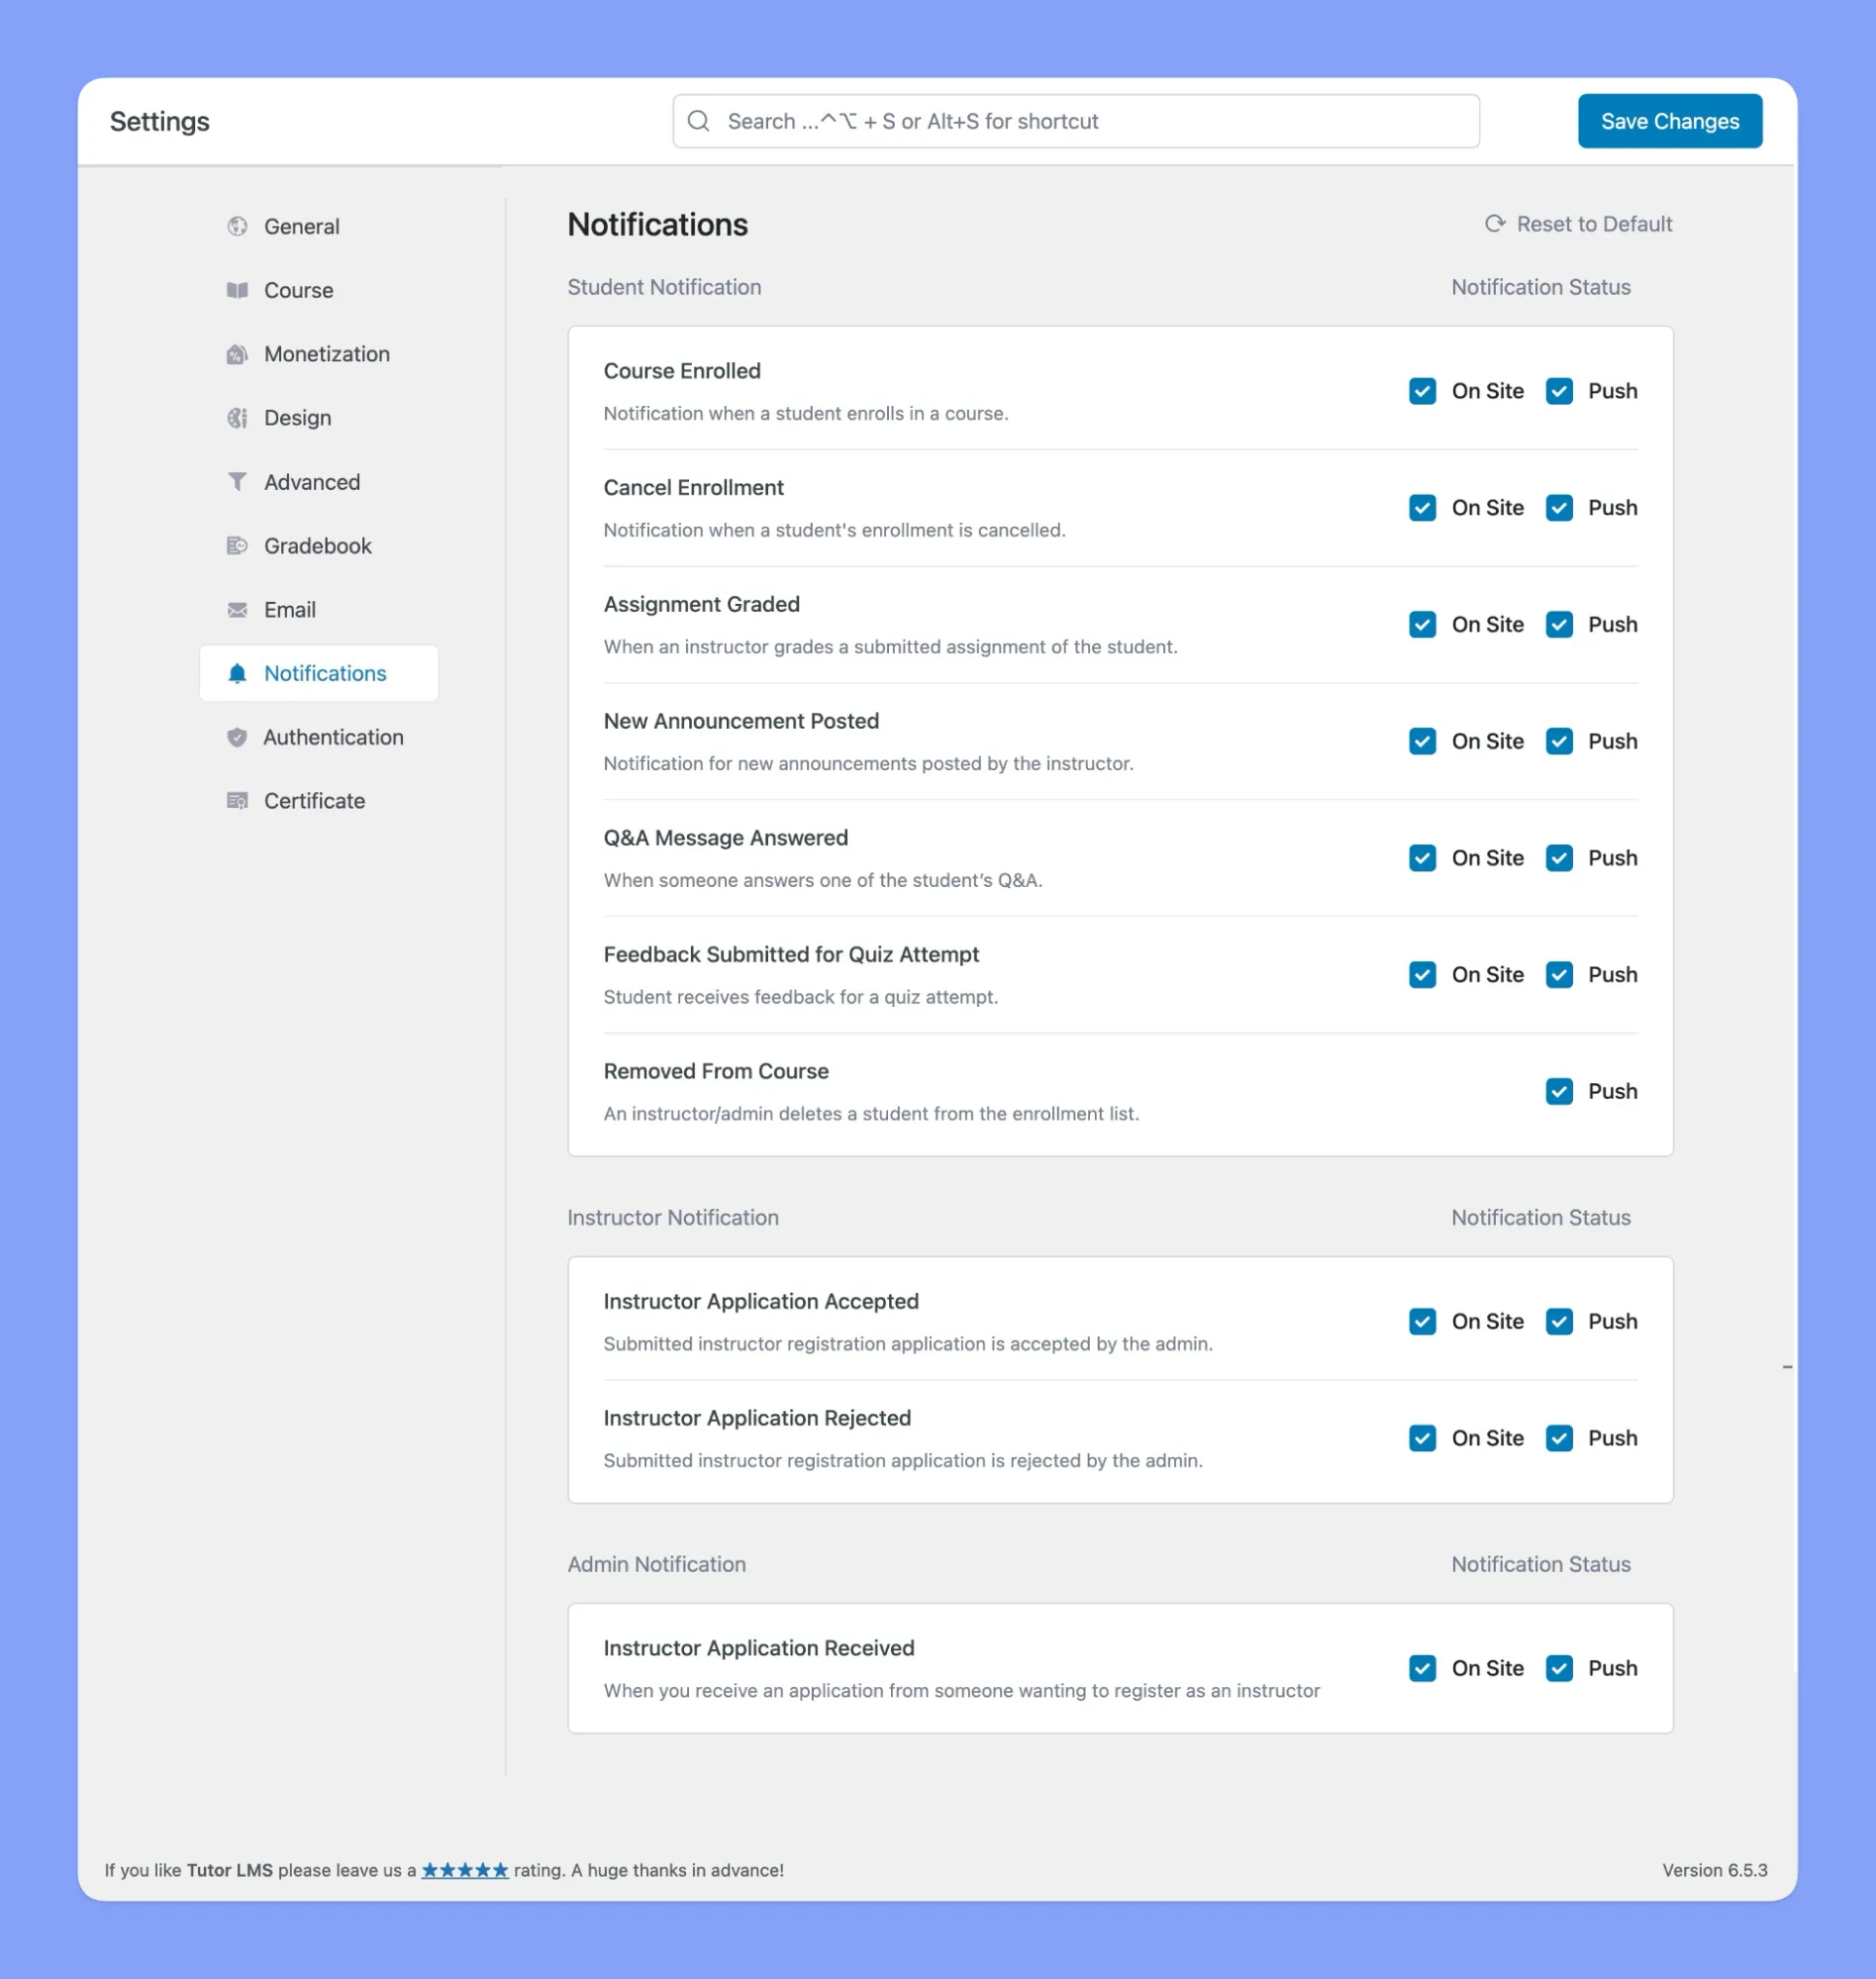
- Don’t forget to finalize your choices by clicking the “Save Changes” button.
Broadcasting Updates With Announcements
Now that you know the basics of setting up notifications in Tutor LMS, let’s explore announcements for sharing important updates. Announcements make it quick and easy to announce key info to your entire class.
With just a few clicks, you can announce things like:
- Changed assignment due dates
- New lecture resources
- Upcoming exams
- And much more
Announcements get shown on the course homepage, so students see them right away.
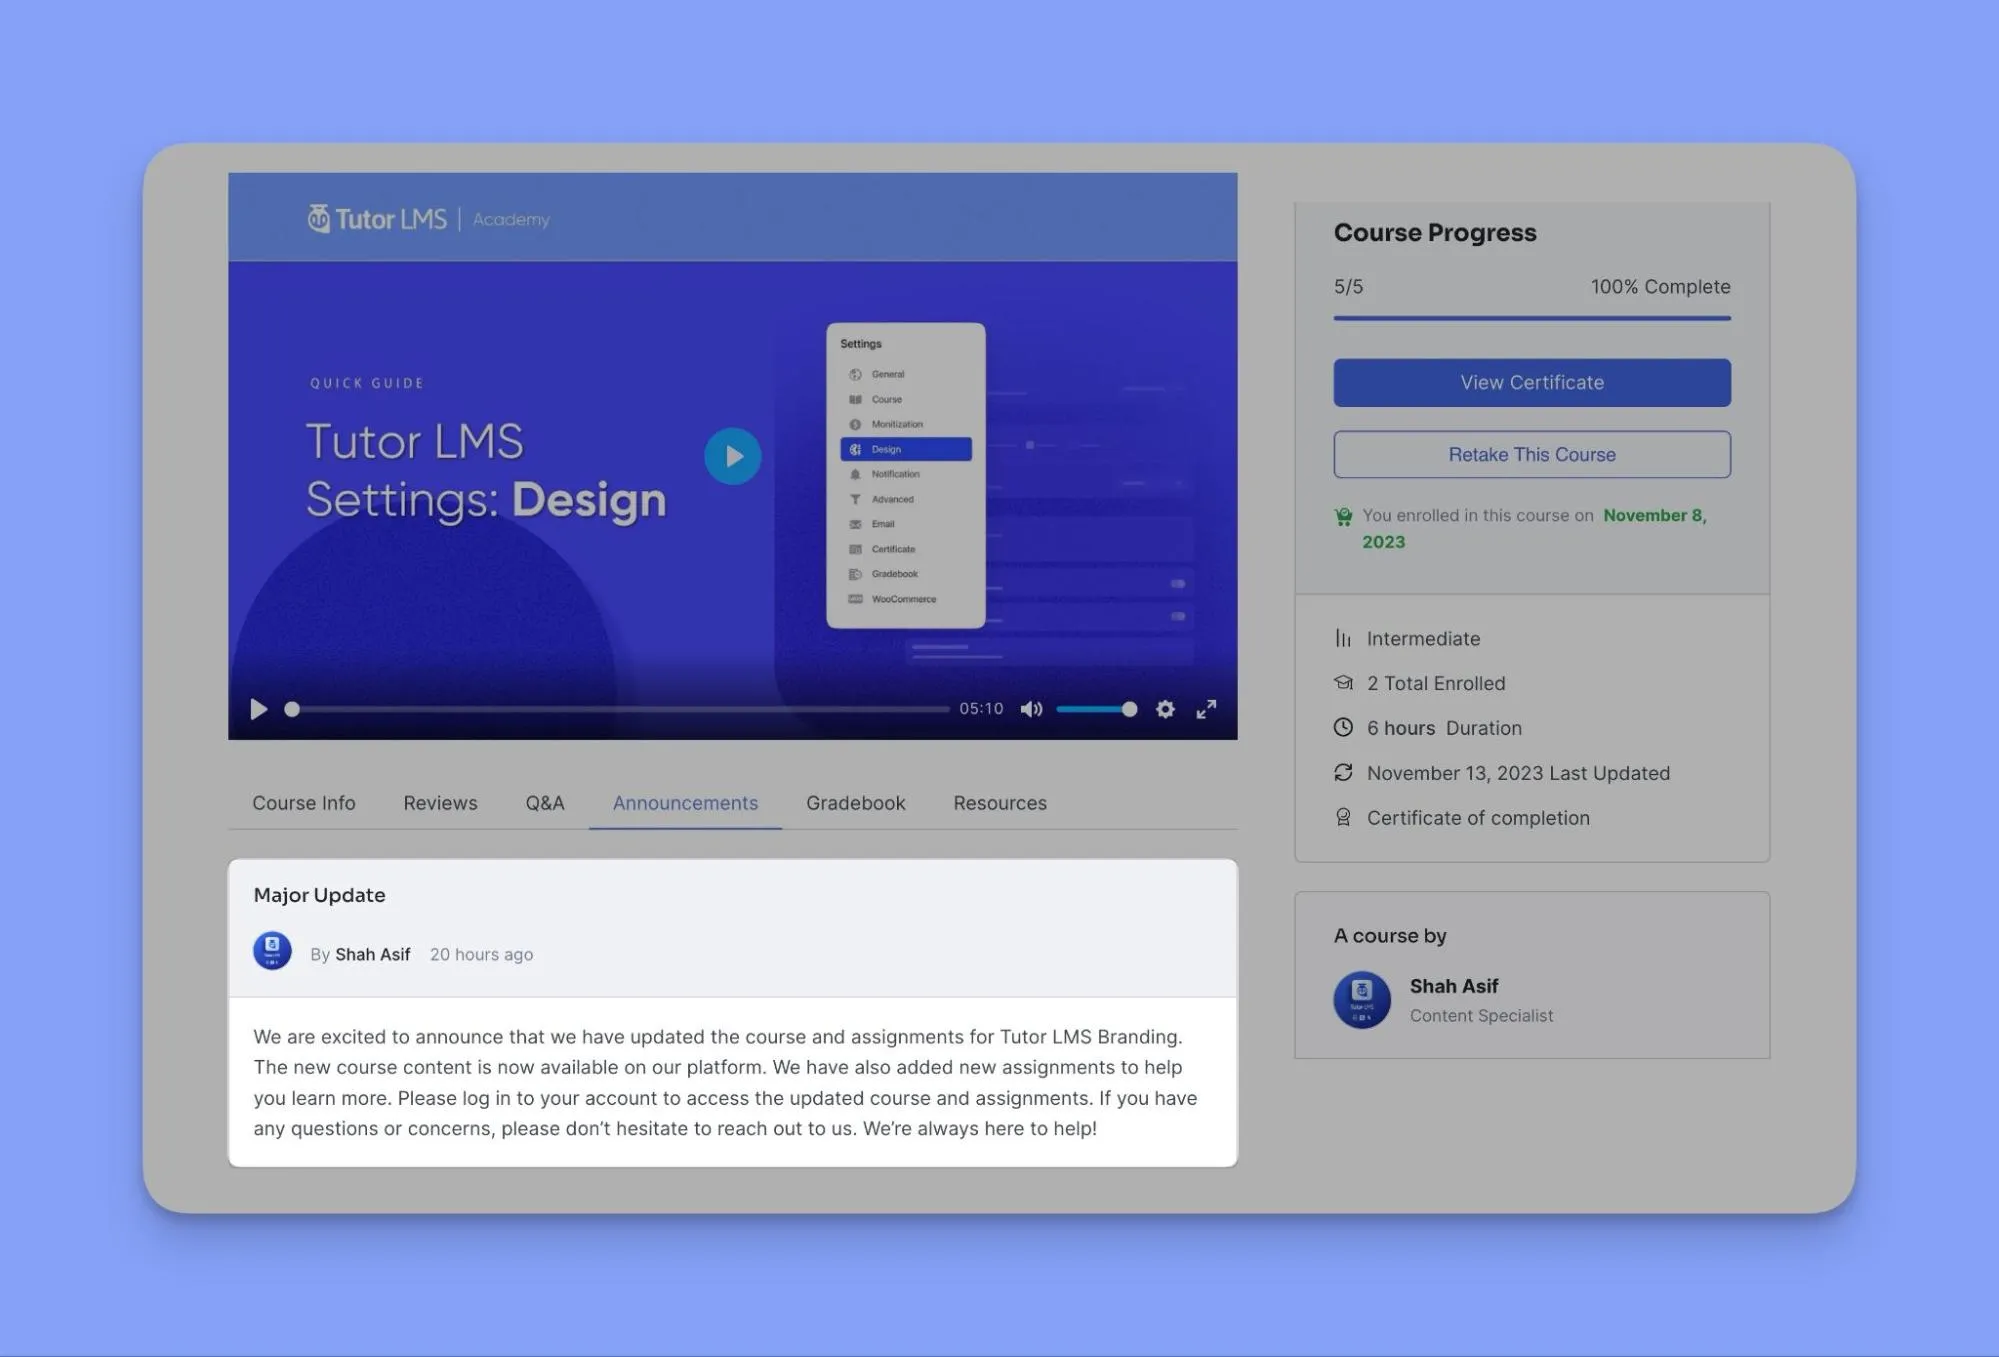
Announcements also show up in our onsite bell notifications panel.
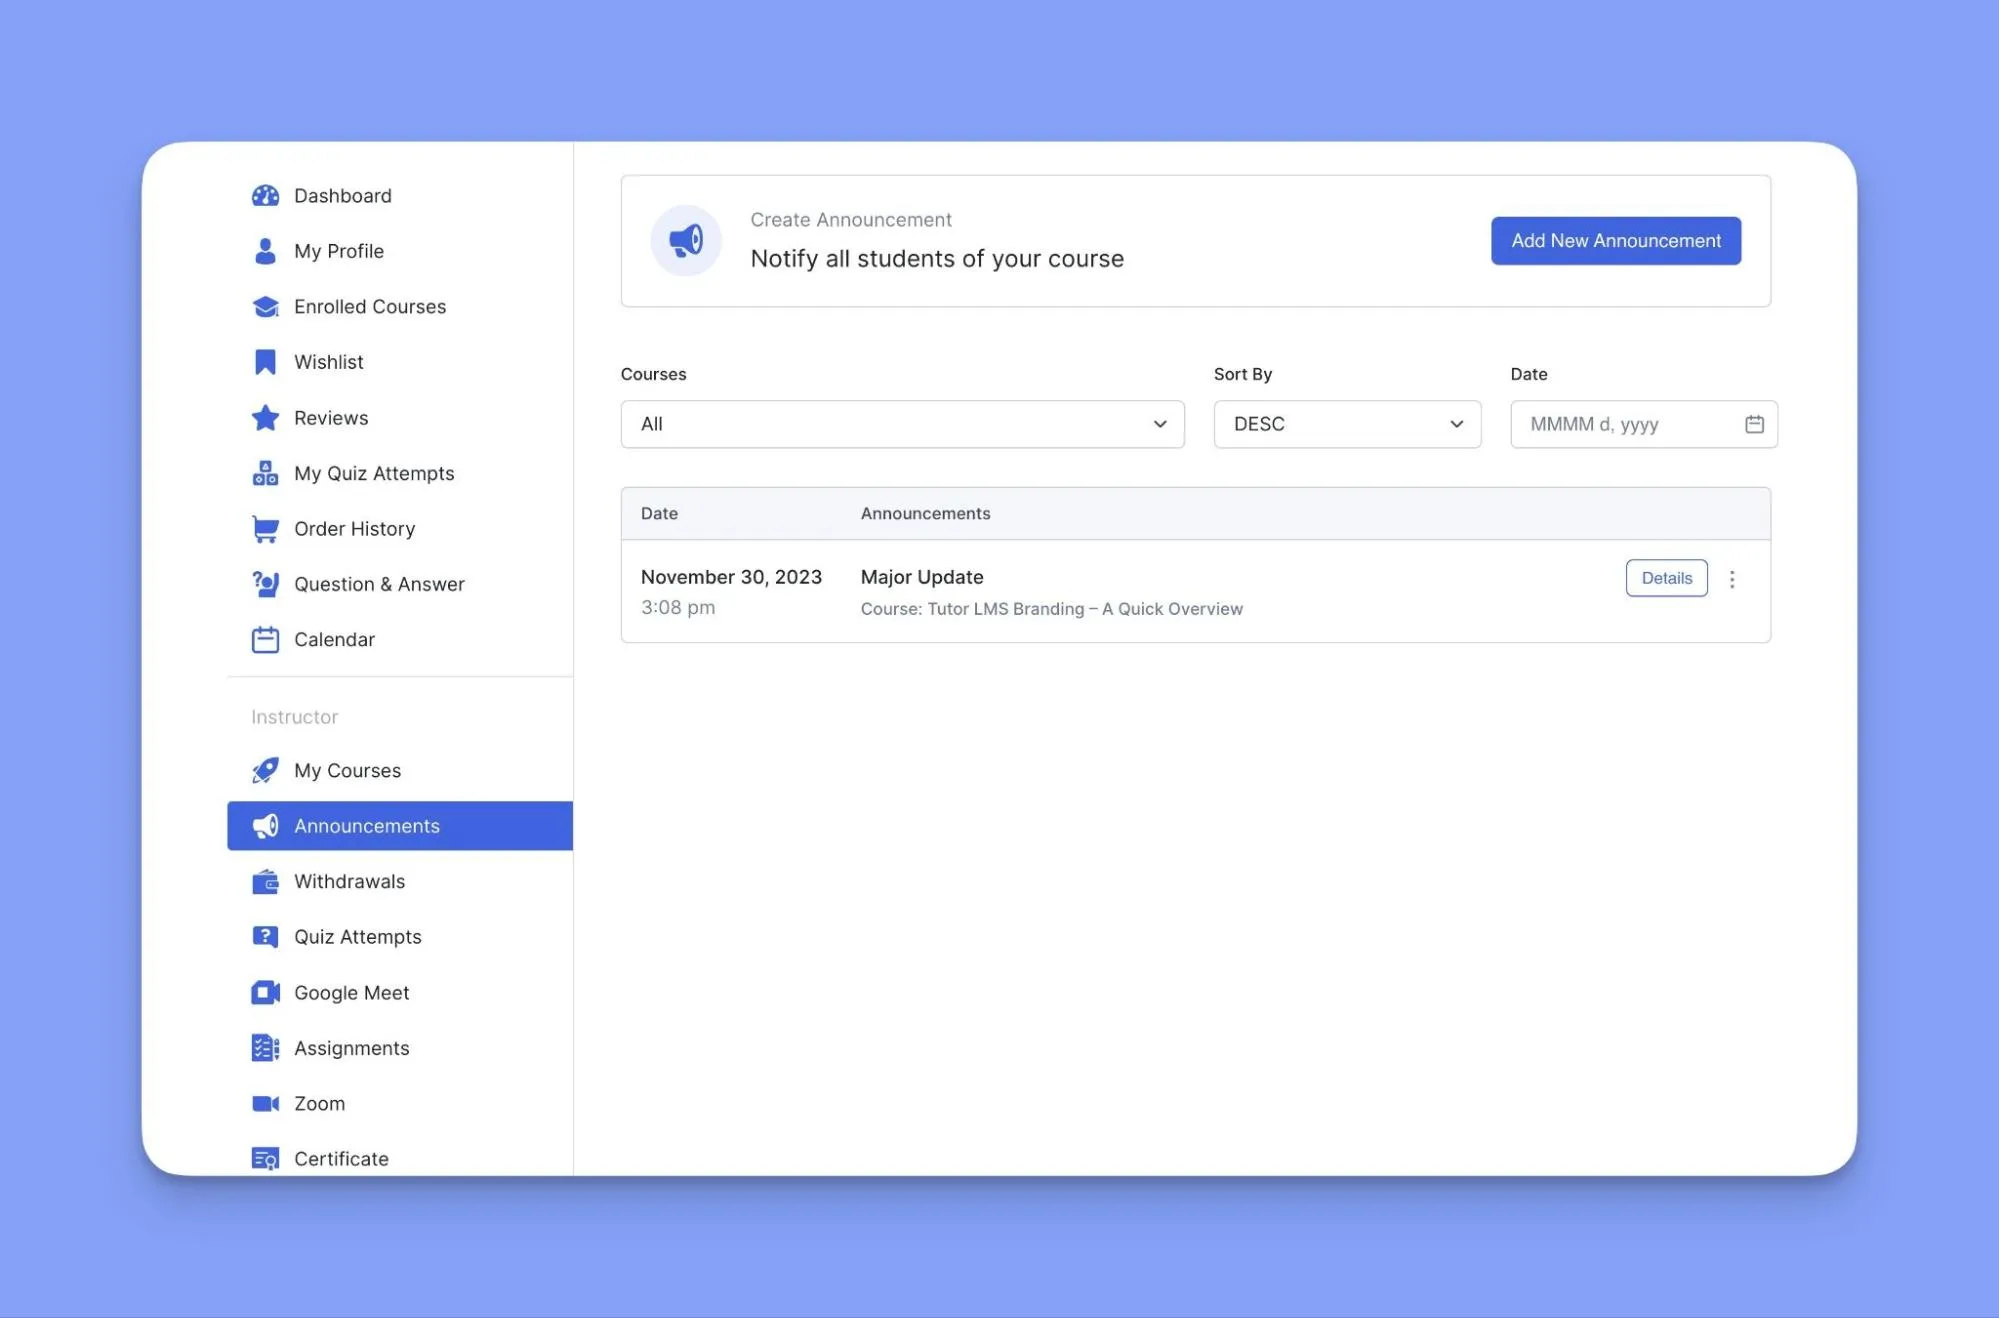
Creating New Announcements
From the Tutor LMS Announcements menu, you can create, view, manage, or delete any of your announcements. This feature is enabled by default and is very useful for Instructors as it lets you announce important information so that their students are all notified in one go.
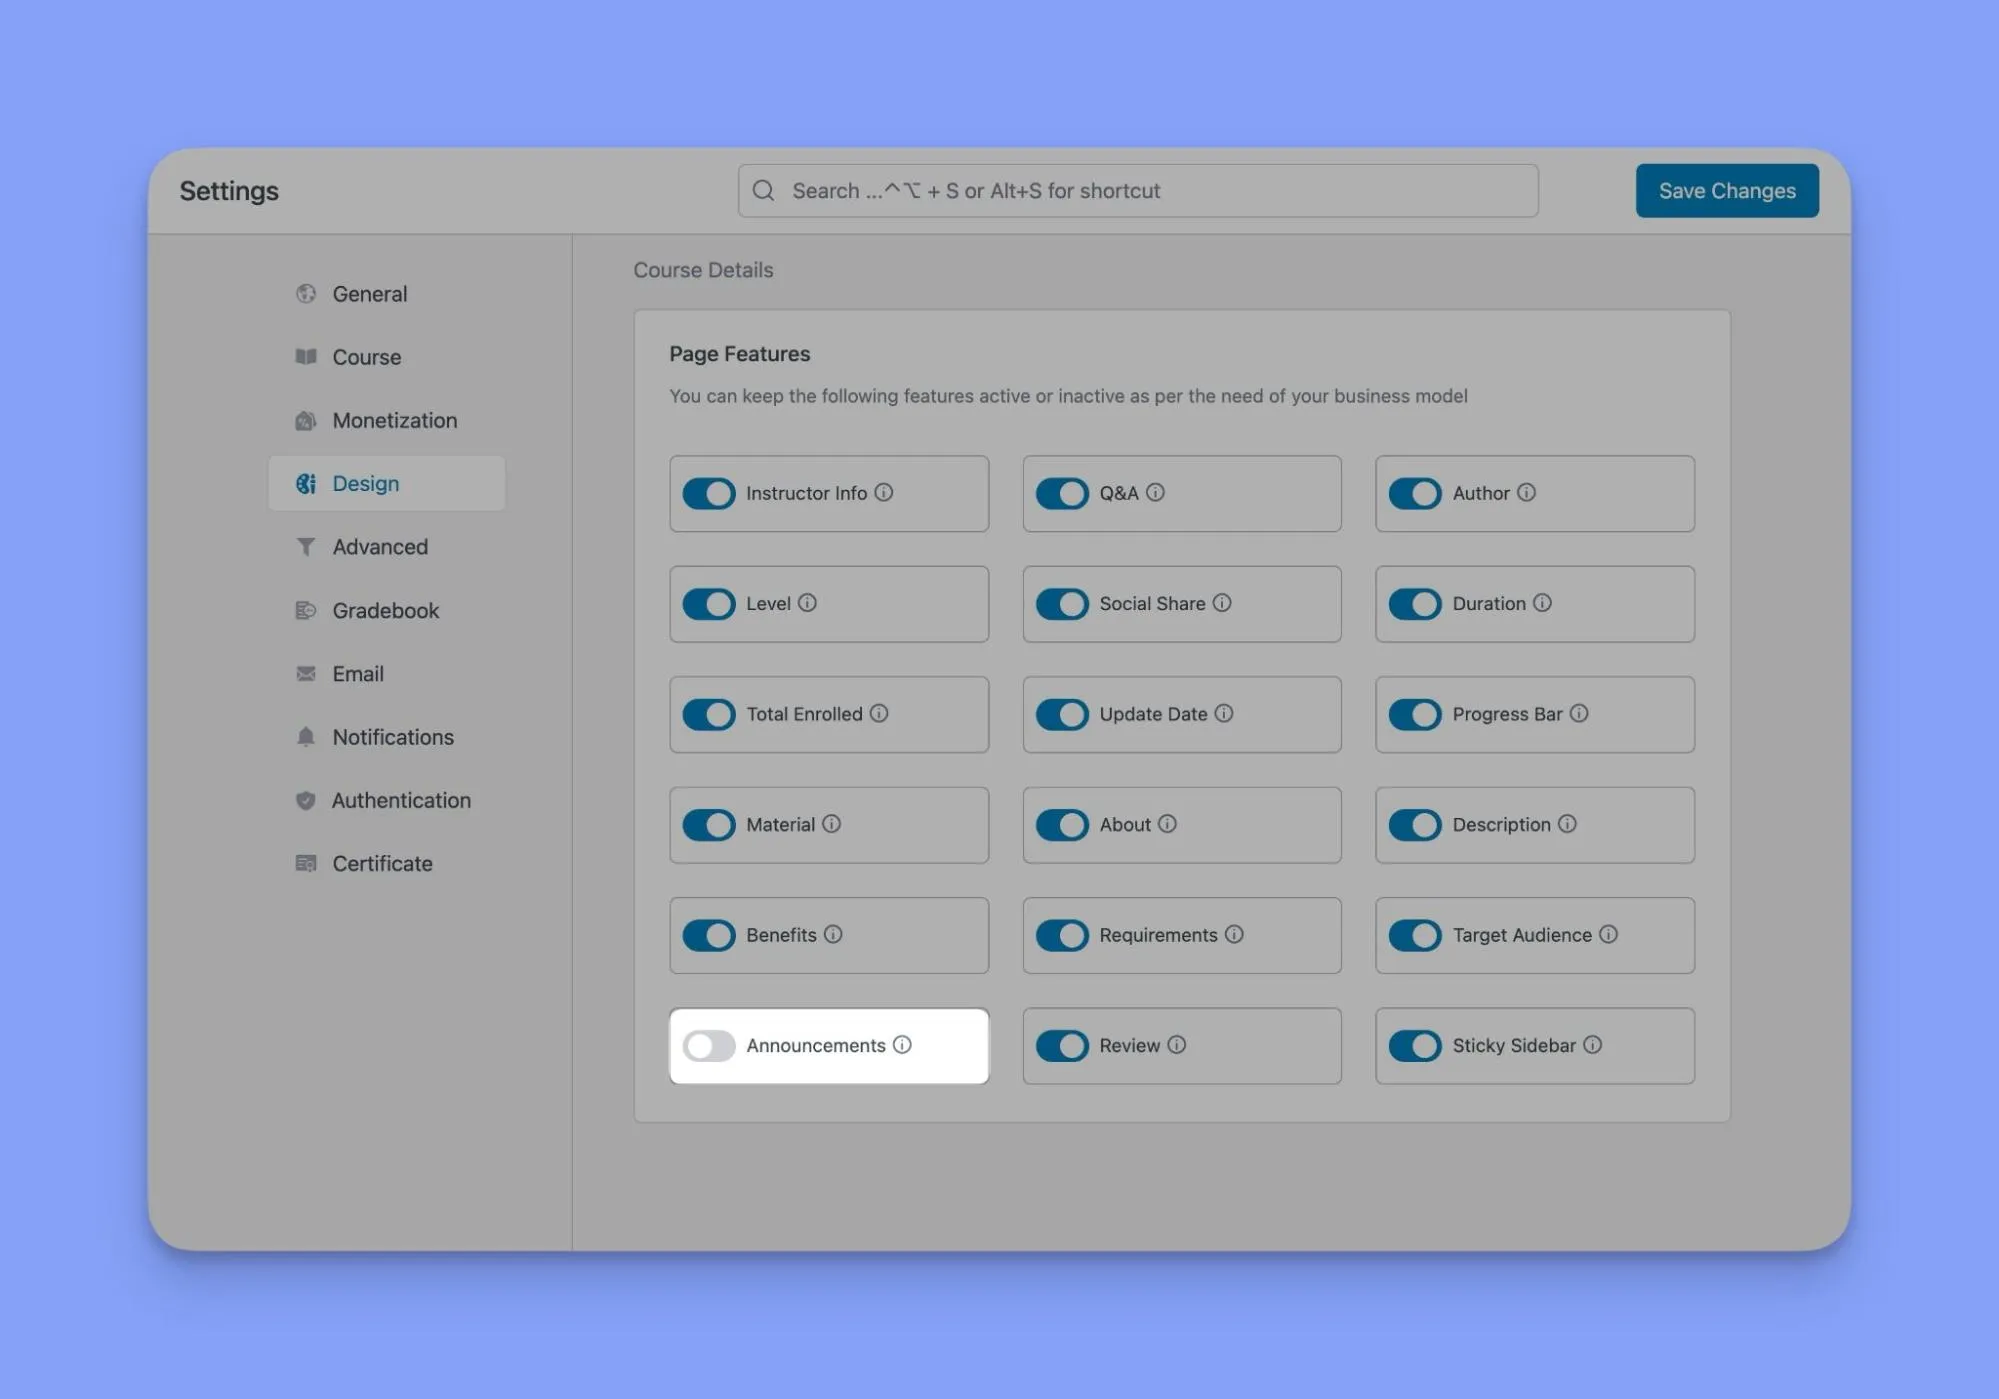
Tip: In case you don’t want to use this feature, you can easily hide the Announcement tab from the Course Details Page by going to WP Admin > Tutor LMS > Design and disabling Announcements under the “Page Features” section. This won’t remove the menu or existing announcements from the backend, so you can reenable it anytime.
Lets take a quick look on how to easily create and share your announcements in Tutor LMS:
- Navigate to Tutor LMS>Dashboard>Announcement and click on the “Add New Announcement” button.
- On the popup window, do the following:
- Select the relevant course from the dropdown list.
- Set an “Announcement Title“.
- Then, add your announcement details inside the “Summary” field.
- And finally, click on “Publish“, and you should see it appear on the Announcement list.

All your announcements are kept neatly stacked in the “Announcements panel,” where you can later delete, edit, and search using various filters.
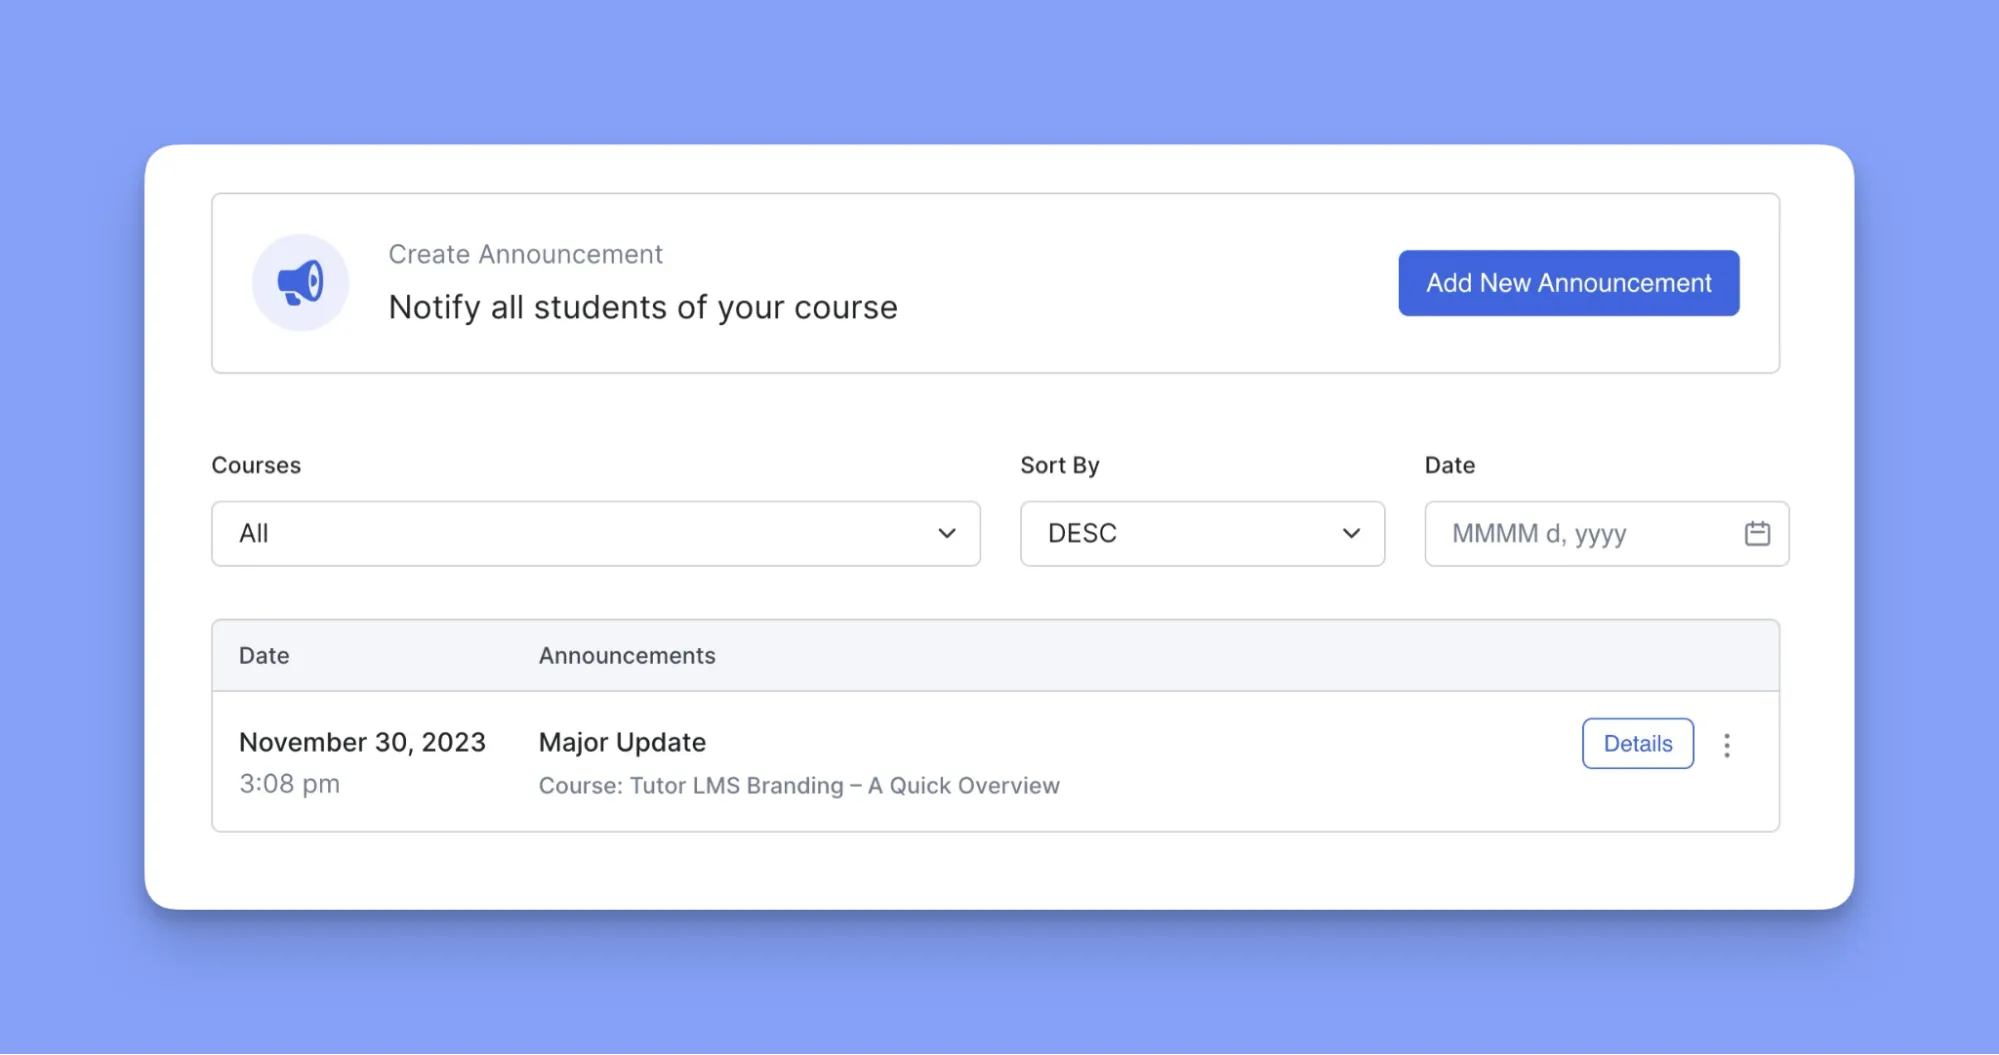
- Click the “Details” button to view the full text again. Or use the menu button (︙) to edit or remove an announcement later on.
Remember, announcements help classes flow smoothly by allowing quick broadcasts of key updates. They perfectly complement Tutor LMS notifications to keep students informed.
Maximizing User Engagement via Email Alerts in Tutor LMS
Effective communication is key to a successful online learning experience. Tutor’s email alert system ensures that students, teachers, and admins stay informed about important events, even when they’re not actively logged into the platform.
This automated email notification tool sends timely alerts triggered by various platform activities. Some examples of these triggers include:
- Students receive automated emails for:
- Enrollment confirmations
- Assignment grading notices
- Reminder to Inactive Students
- Quiz attempt feedback
- Course completion confirmations
- And much more!
- Instructors get notified about the following:
- New student enrollments
- Lesson and quiz completions
- New Q&A questions
- Student withdrawals
- Plus, other class activity
- And more!
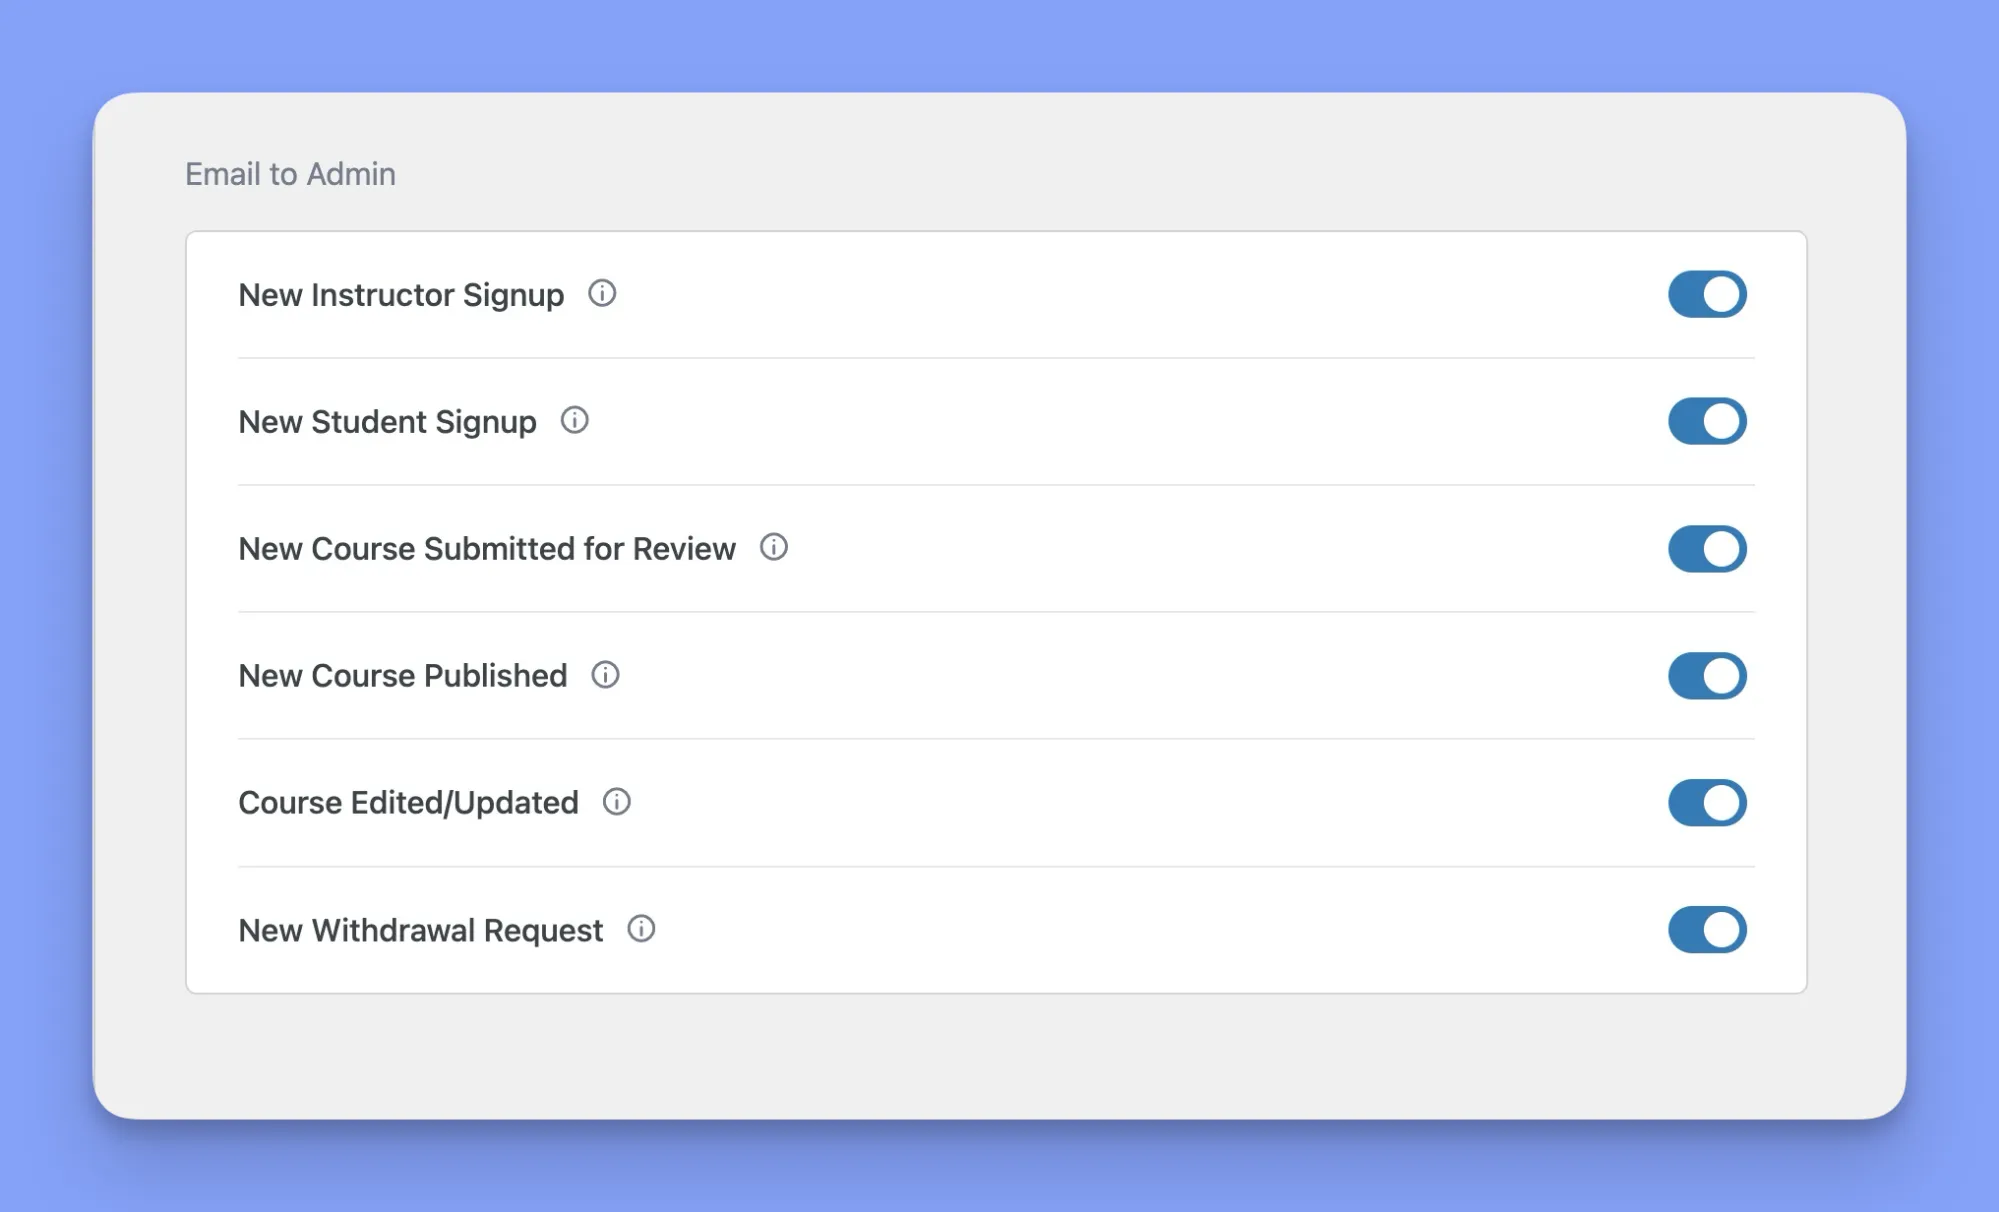
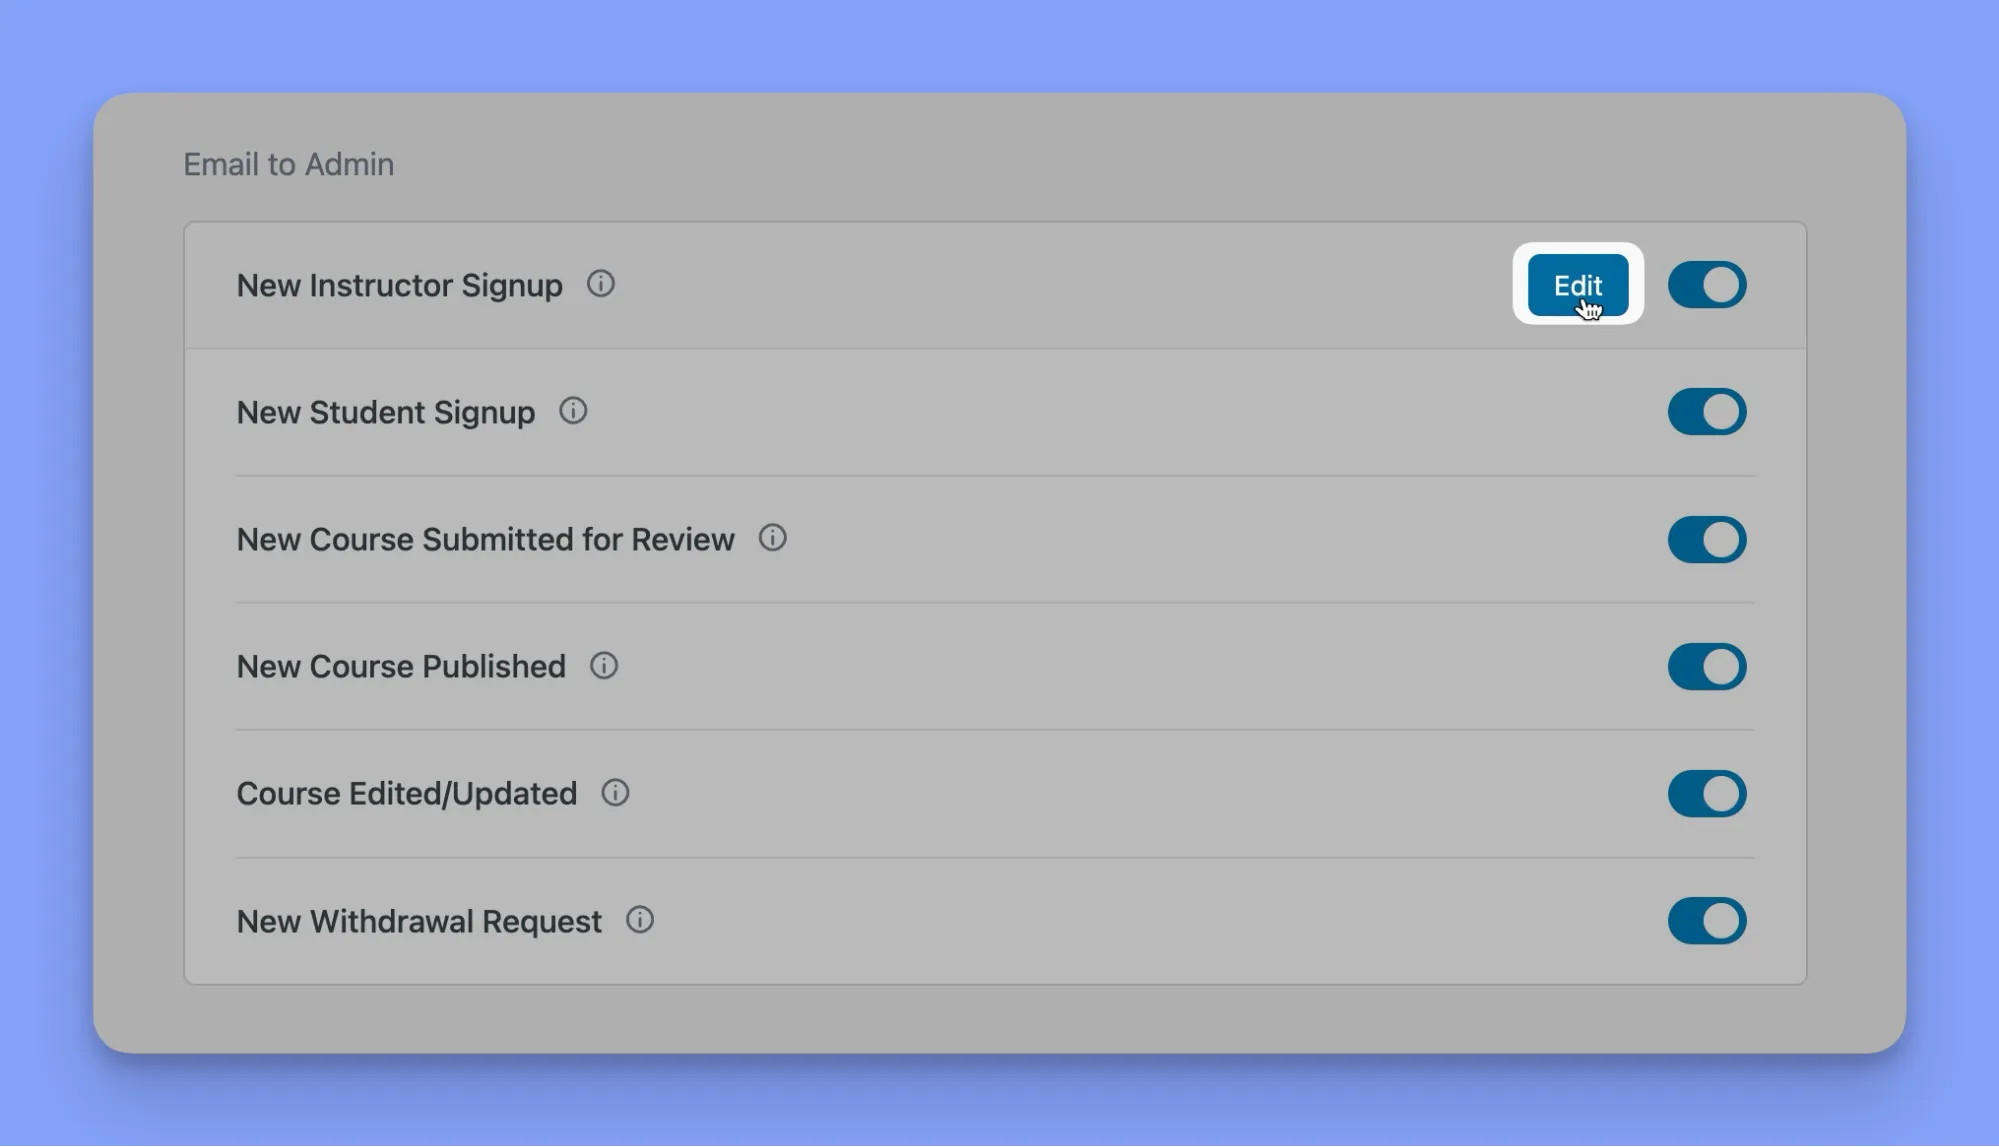
- Admins stay updated on the following:
- Instructor and student signups
- Courses submitted for review
- Edits to existing courses
- Withdrawal requests
- And other management alerts
With 37 preset email trigger options, Tutor LMS offers unmatched flexibility to target relevant users. Alert timing helps strategically nudge activities like assignments, course progression, and much more.
Setting Up Tutor LMS Email Alert Feature
Before you can use the email notification feature, you need to enable the corresponding add-on in Tutor LMS. To do this, simply go to WP Admin > Tutor LMS Pro > Add-ons and click on the toggle under “Email” to activate it.
That’s it! You have now enabled the add-on and are ready to configure it for your site.
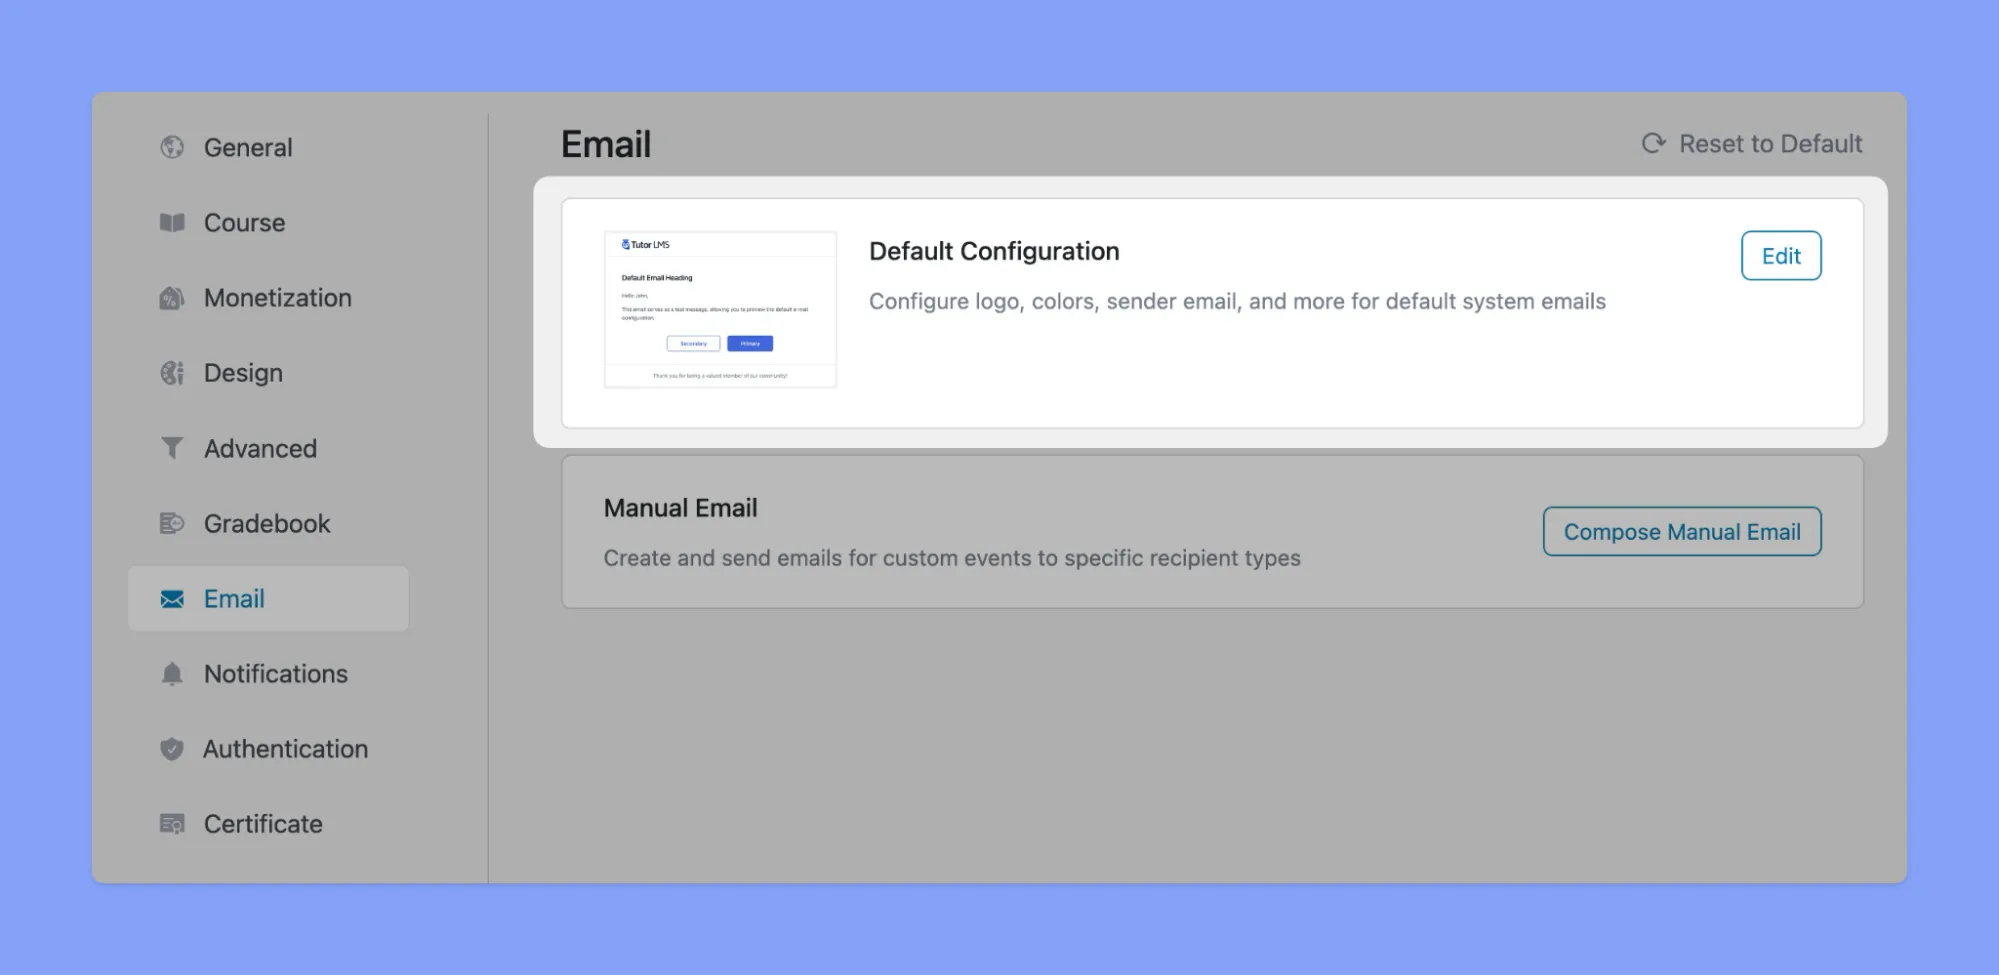
How to Configure the Email Alert Settings
Once you have enabled the add-on, you can configure the email notification settings for your site. To do this, go to WP Admin > Tutor LMS Pro > Settings > Email. Here, you will find a list of email triggers you can turn on or off for each user role, including admins, instructors, and students.
How to Make Your Email Alerts Stand Out with Tutor LMS Pro
If sending plain or template email notifications no longer suffices, you should ensure that your email alerts are professional, visually engaging, and compelling to your audience. You want to catch your user’s attention, convey your message clearly, and inspire them to take action.
That’s why Tutor LMS also gives you the option to customize your email templates for each email notification type. Let’s take a closer look at how you can modify each trigger to your personal liking.
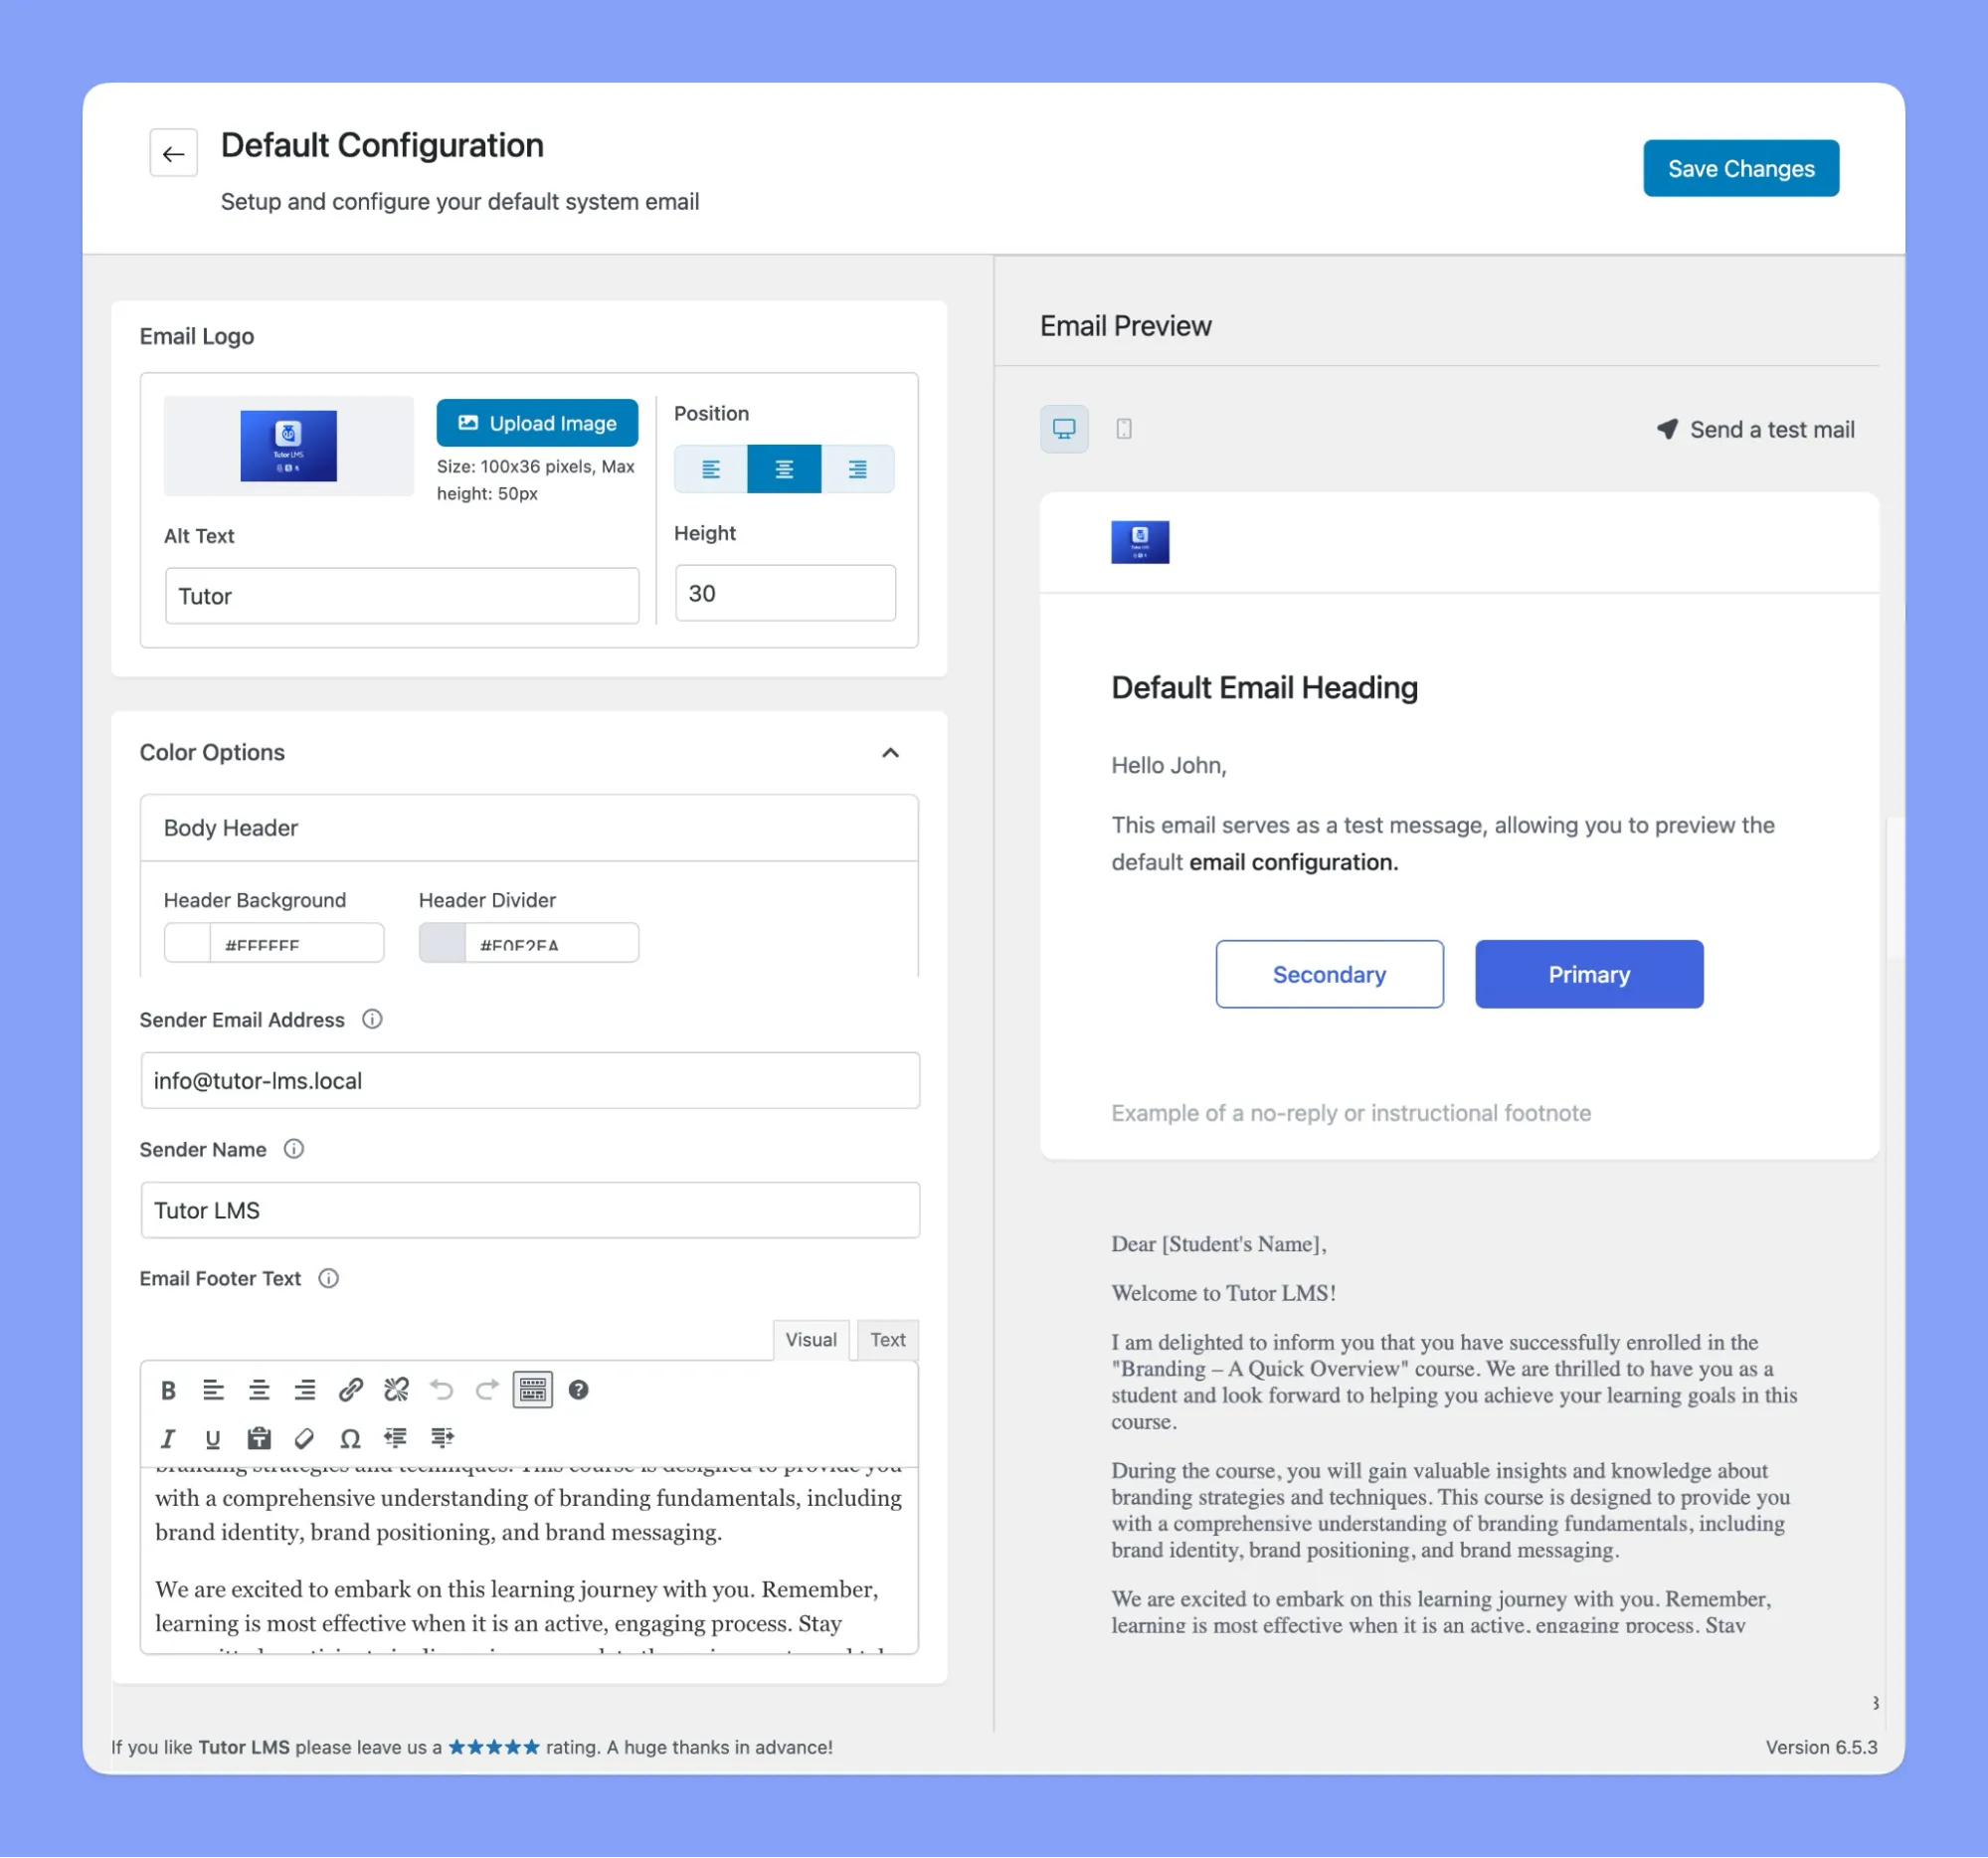
Customize System Emails for Brand Consistency
Tutor offers extensive options for customizing the default email template so all system notifications represent your branding and style! The “Default Configurations” section lets you dial in the look and feel users see.
Utilize the platform to upload your logo, adjusting its size and placement within the emails. Further, define a color palette that extends across critical elements like the header, buttons, and footer, ensuring a cohesive and branded appearance.
Additionally, you can also personalize sender details, such as the name and email address, for a personal touch in each automated communication.
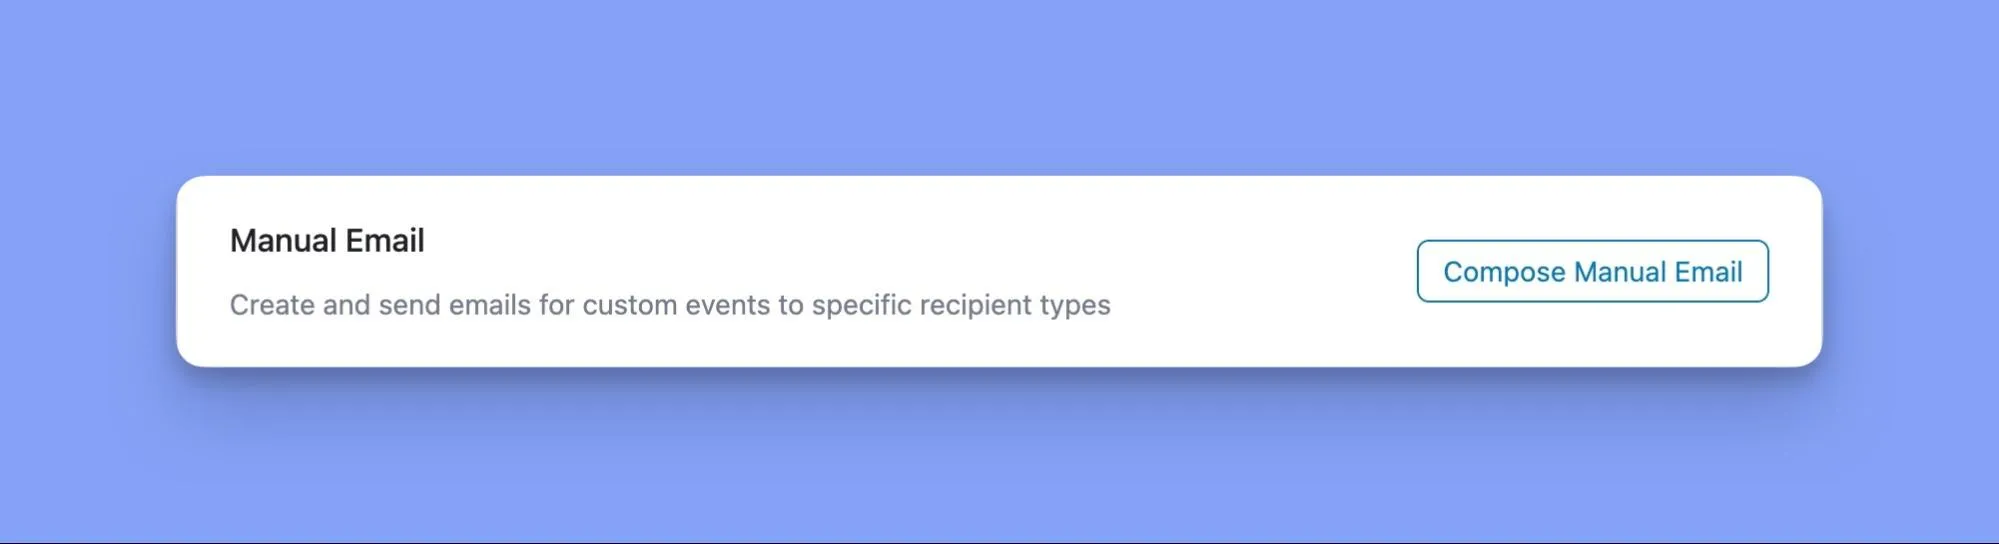
Craft Targeted Custom Manual Emails in Tutor LMS
While the “Default Configuration” controls recurring notifications, Tutor also provides an exceptional manual email tool for unique events or specific groups. Just follow these steps when you need to reach users about a custom event:
1. Start Composing a Manual Email:
Navigate to Settings > Email > ManualEmail section and click the “Compose Manual Email” button.
2. Choose Your Recipients:
Select the desired recipient group from the dropdown menu for who should receive the custom email. Tutor LMS gives you over 10 “Receiver Type” to choose from.
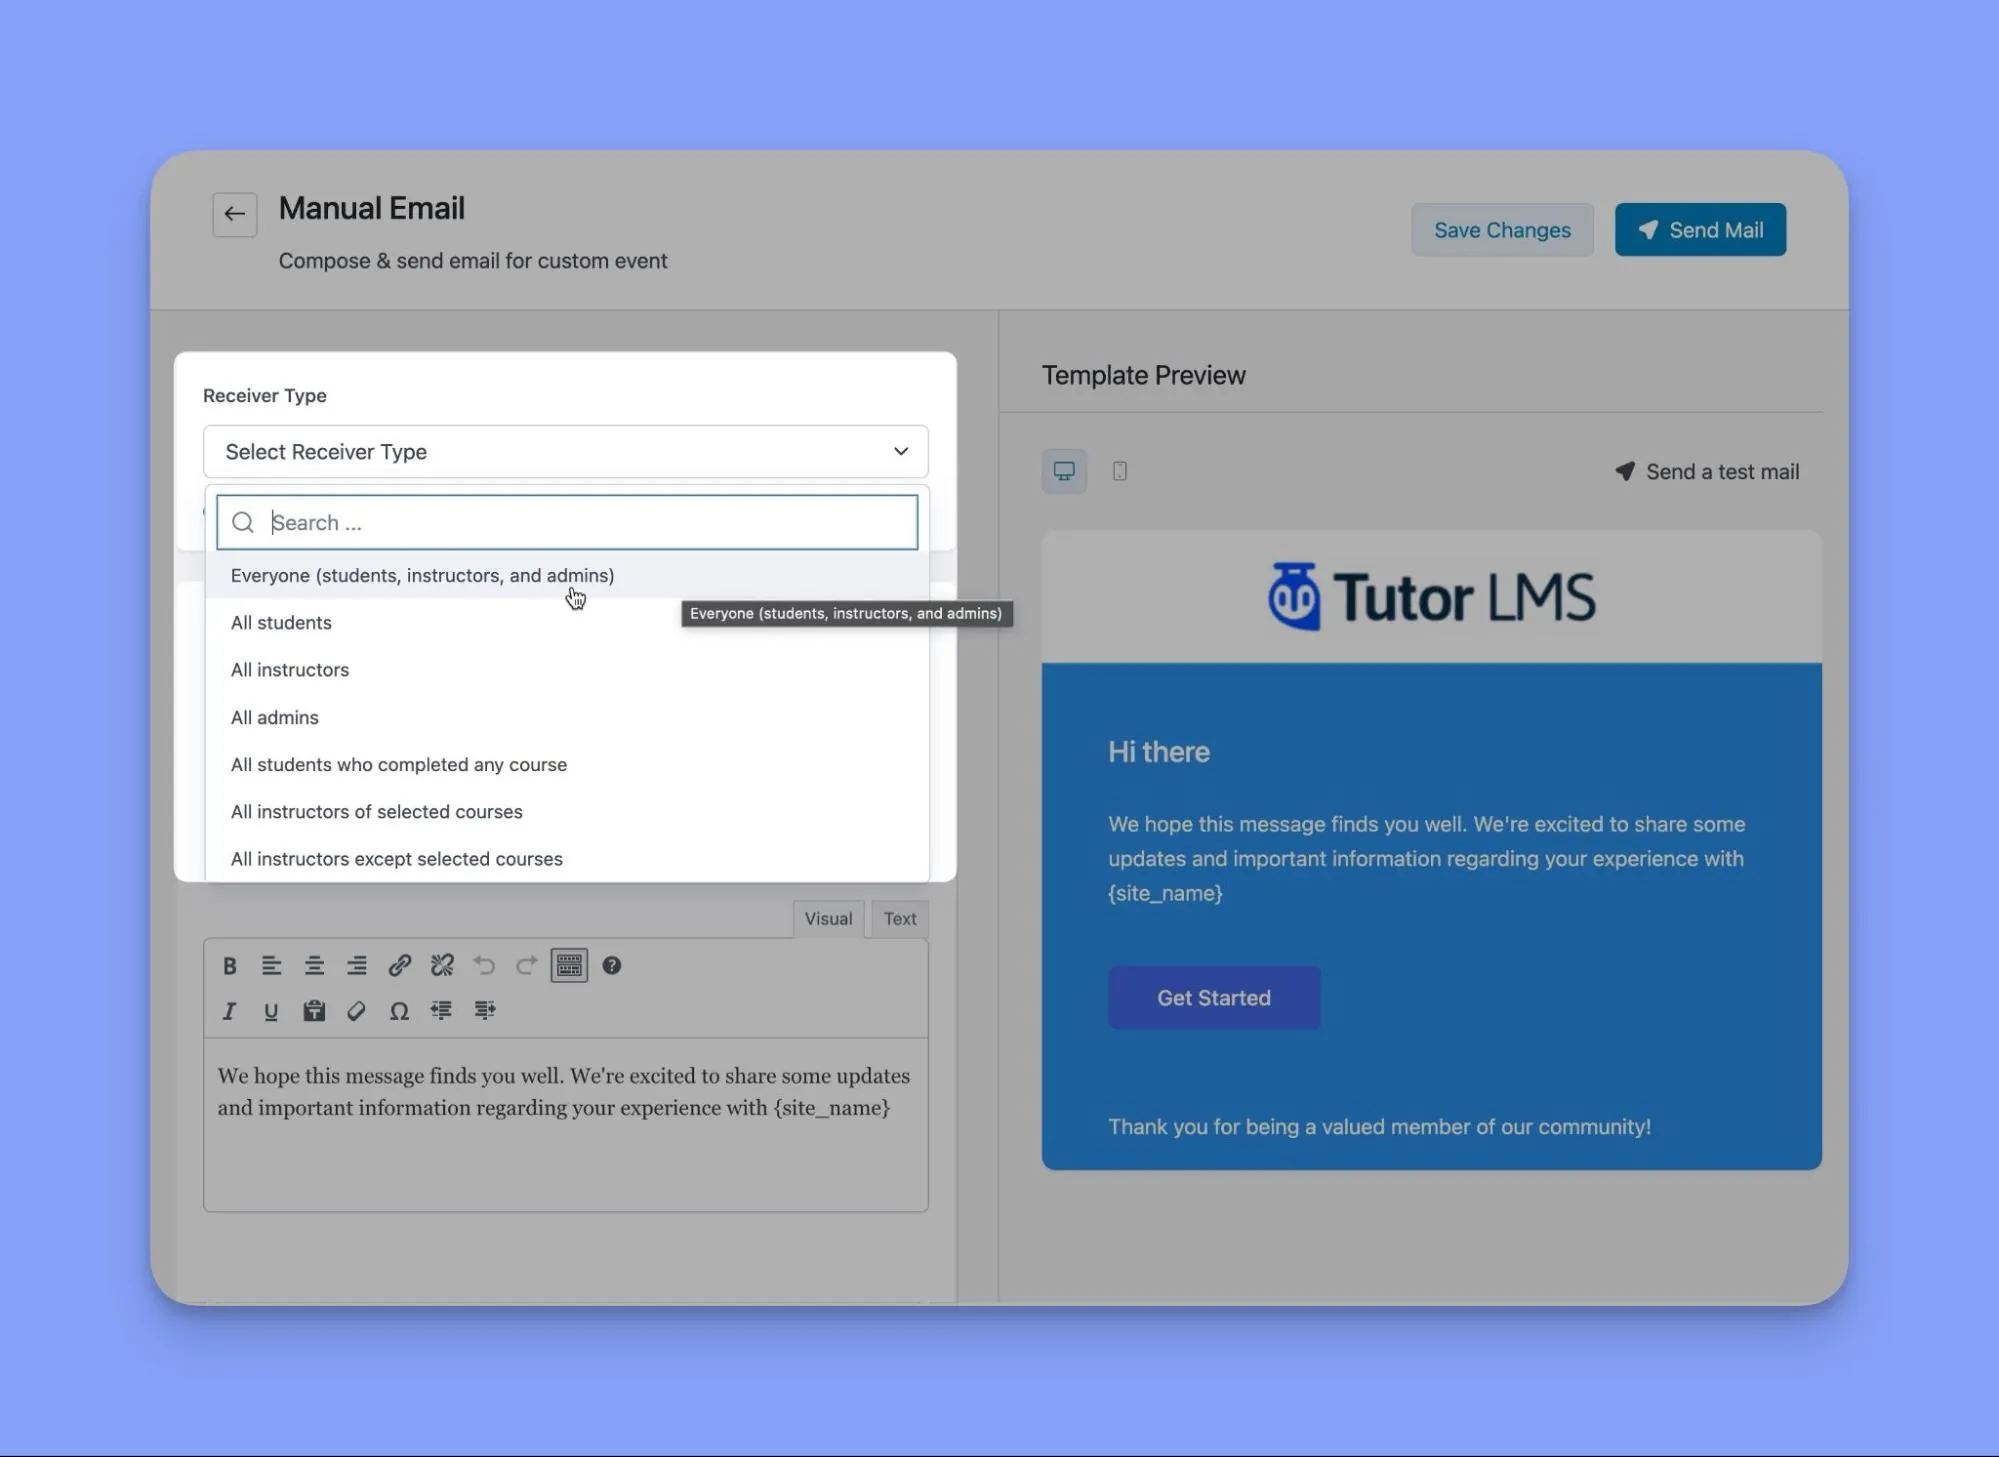
3. Craft a Compelling Email :
Craft compelling subject lines and content that conveys your message. Include stylized branding colors and elements for consistency.
The flexibility to customize and send special emails on the fly makes informing users about unique situations a breeze. Manual mailing provides the option to tailor both messaging and recipients to each circumstance.
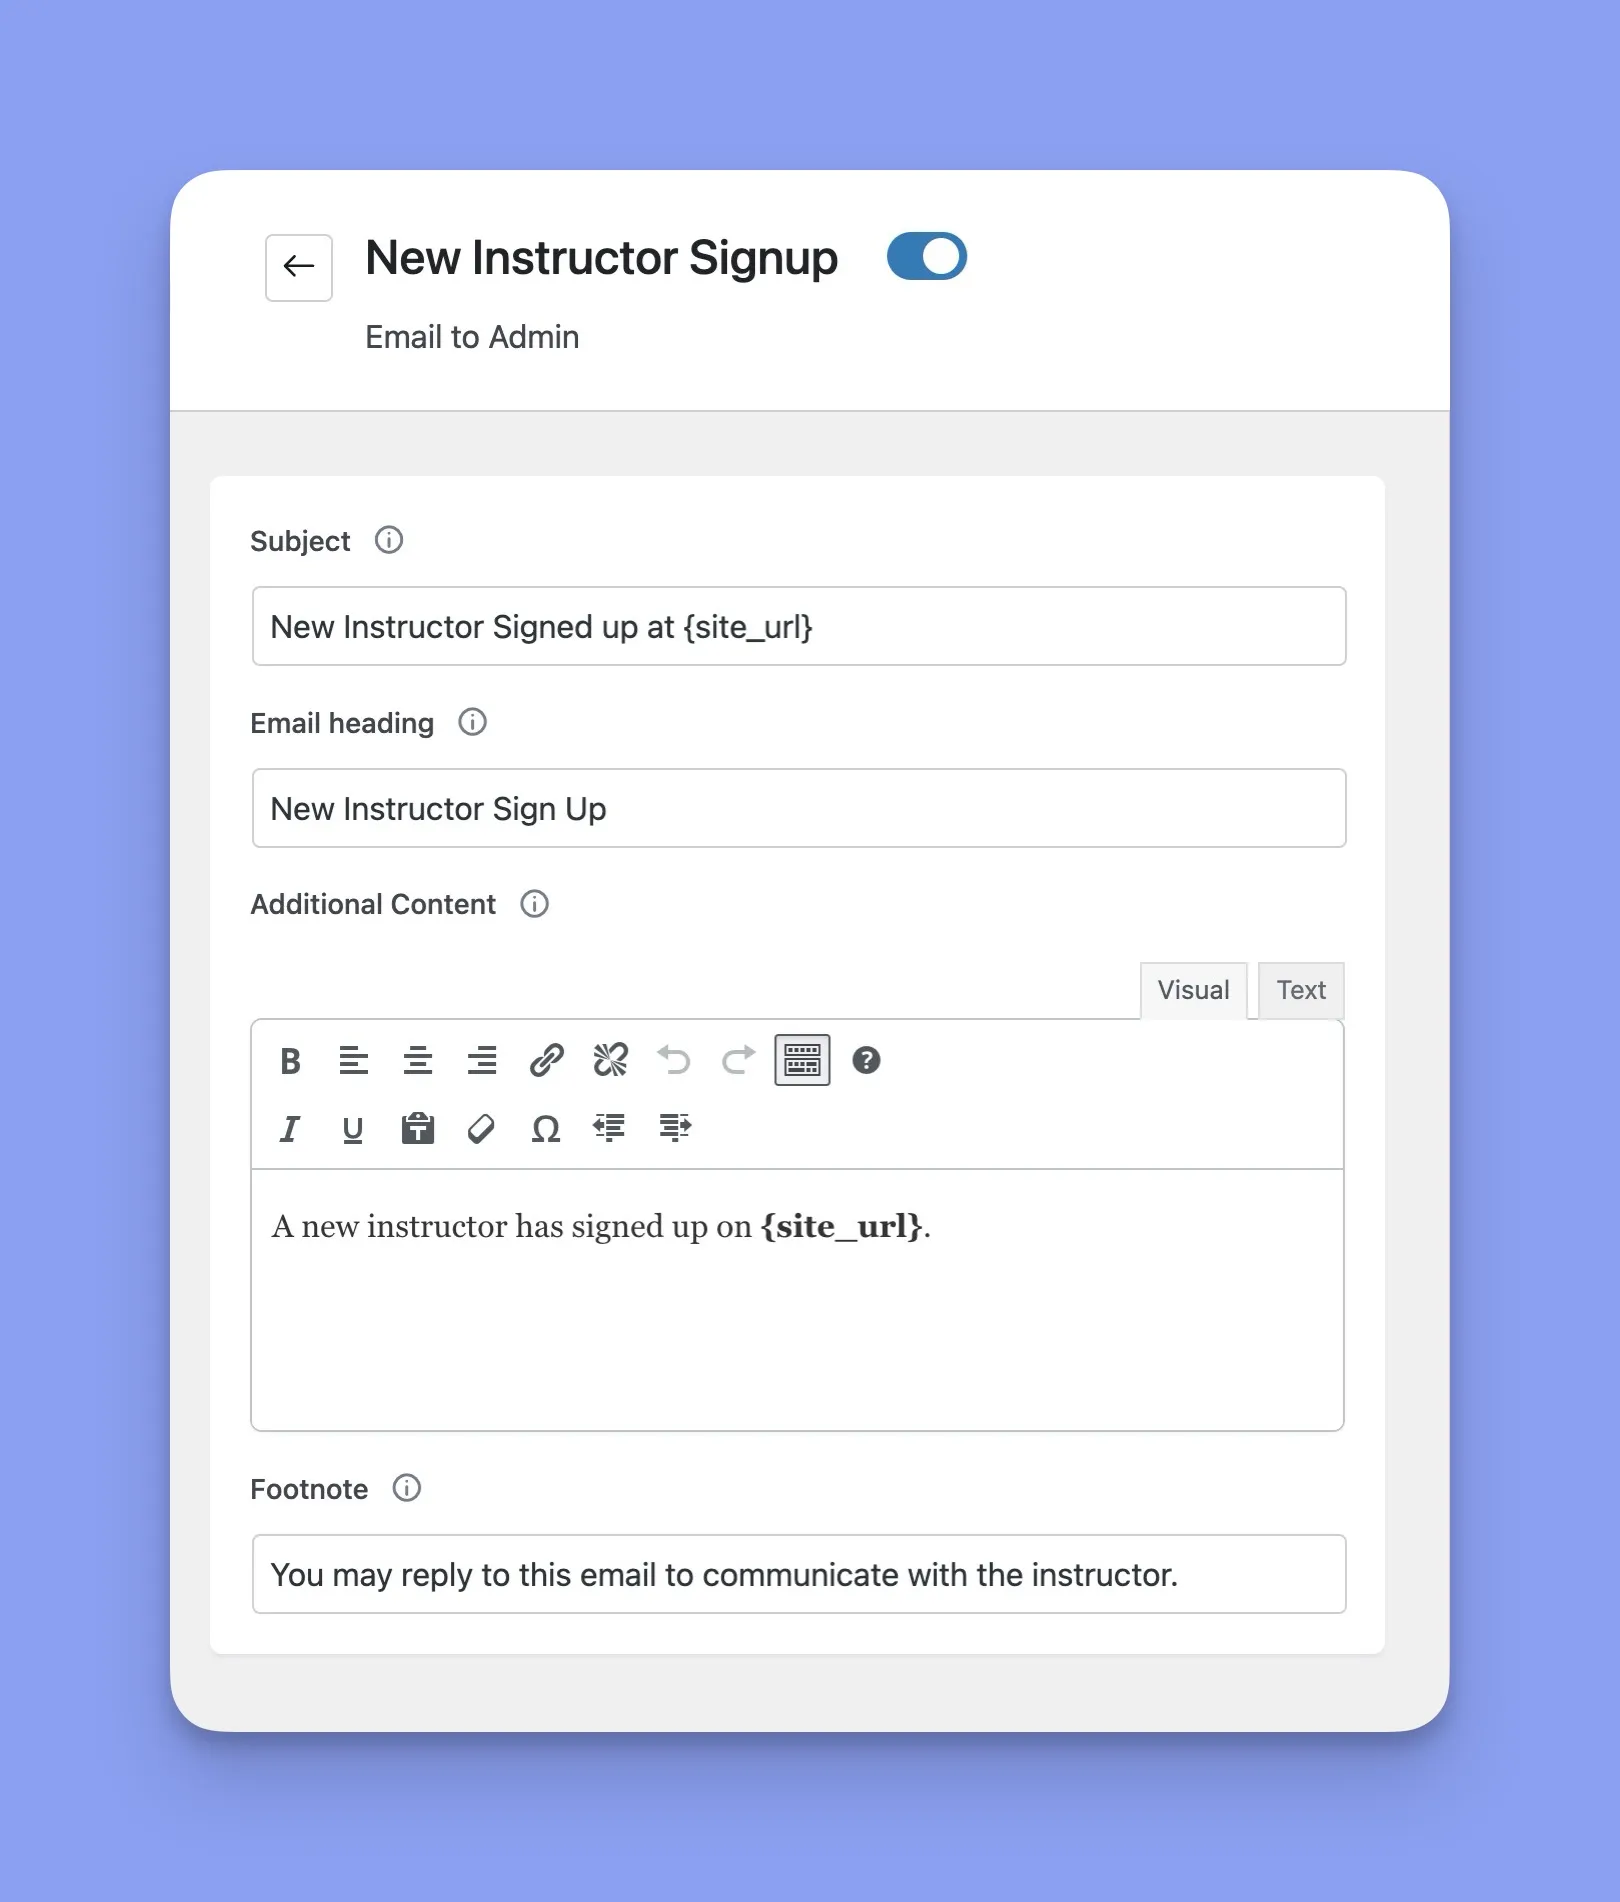
Customize Every Automated Email Trigger Template
The customizing doesn’t stop there! Tutor LMS also allows editing of every automated email template trigger to match brand voice and aesthetics. To do so, just follow these steps:
1. From your WordPress Tutor LMS admin dashboard, click on Settings > Email to view triggers.
2. Find and hover over the notification email you wish to customize, then click the adjacent “Edit” button. This opens the template editor.
3. To achieve your desired messaging, edit the template content, such as the subject line, heading, and body content.
4. View how changes appear in the template preview pane. Send a test email to confirm styling renders as expected before saving changes.
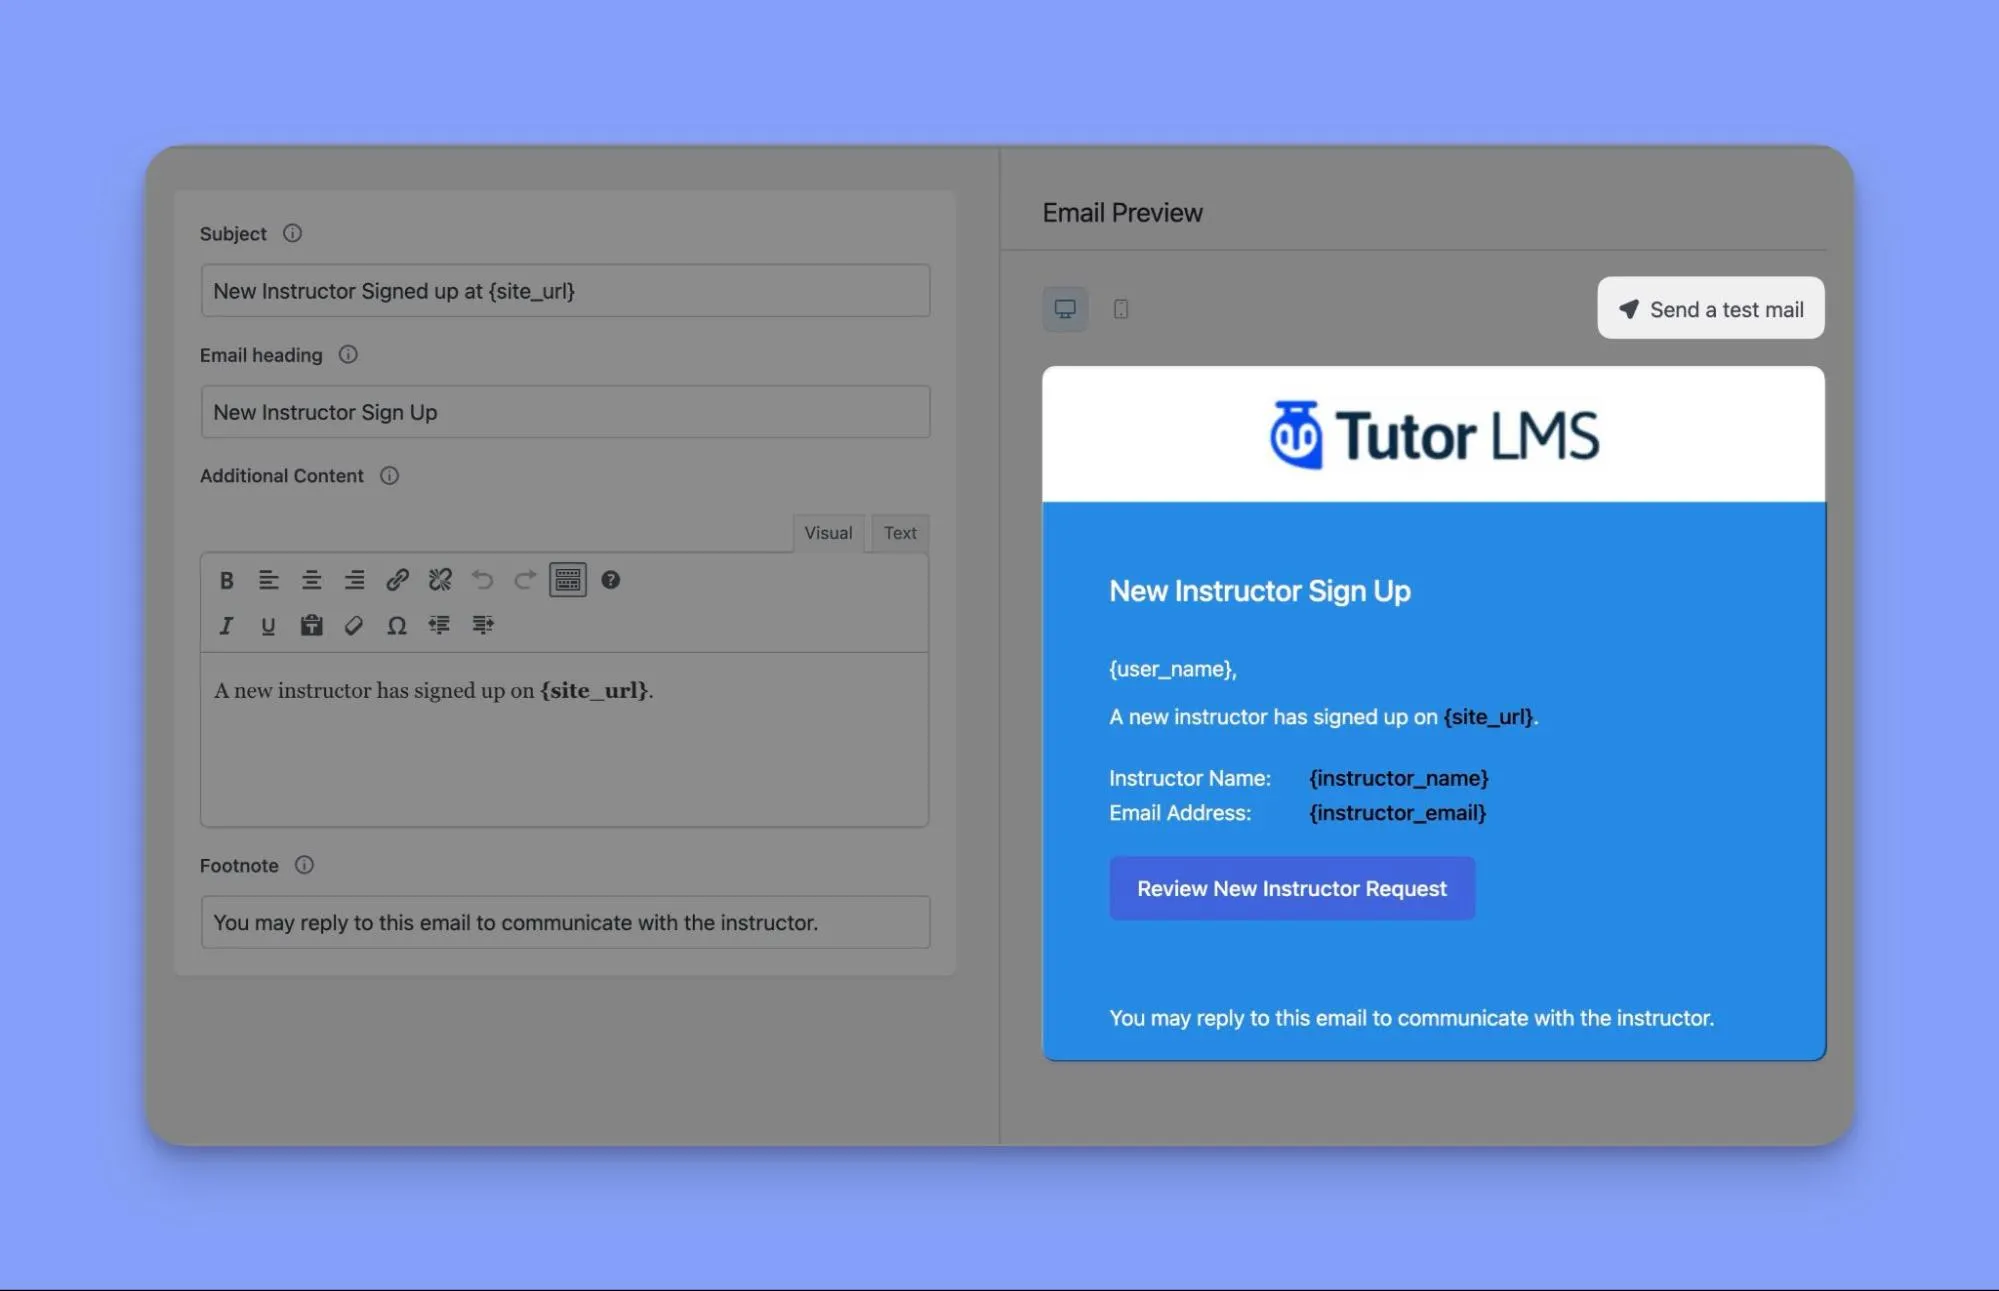
6. Once satisfied, click the “Save Changes” button to update the trigger notification template.
These basic steps allow for a fully customized email notification trigger matching your tutoring business or course.
How to Streamline Email Delivery in Tutor LMS
The email notification engine in Tutor LMS works behind the scenes to ensure updates are sent to learners right on time. Optimizing a few key settings helps messages flow smoothly:
1. Go to Email Settings:
From your Tutor LMS dashboard, open the Email Settings menu.
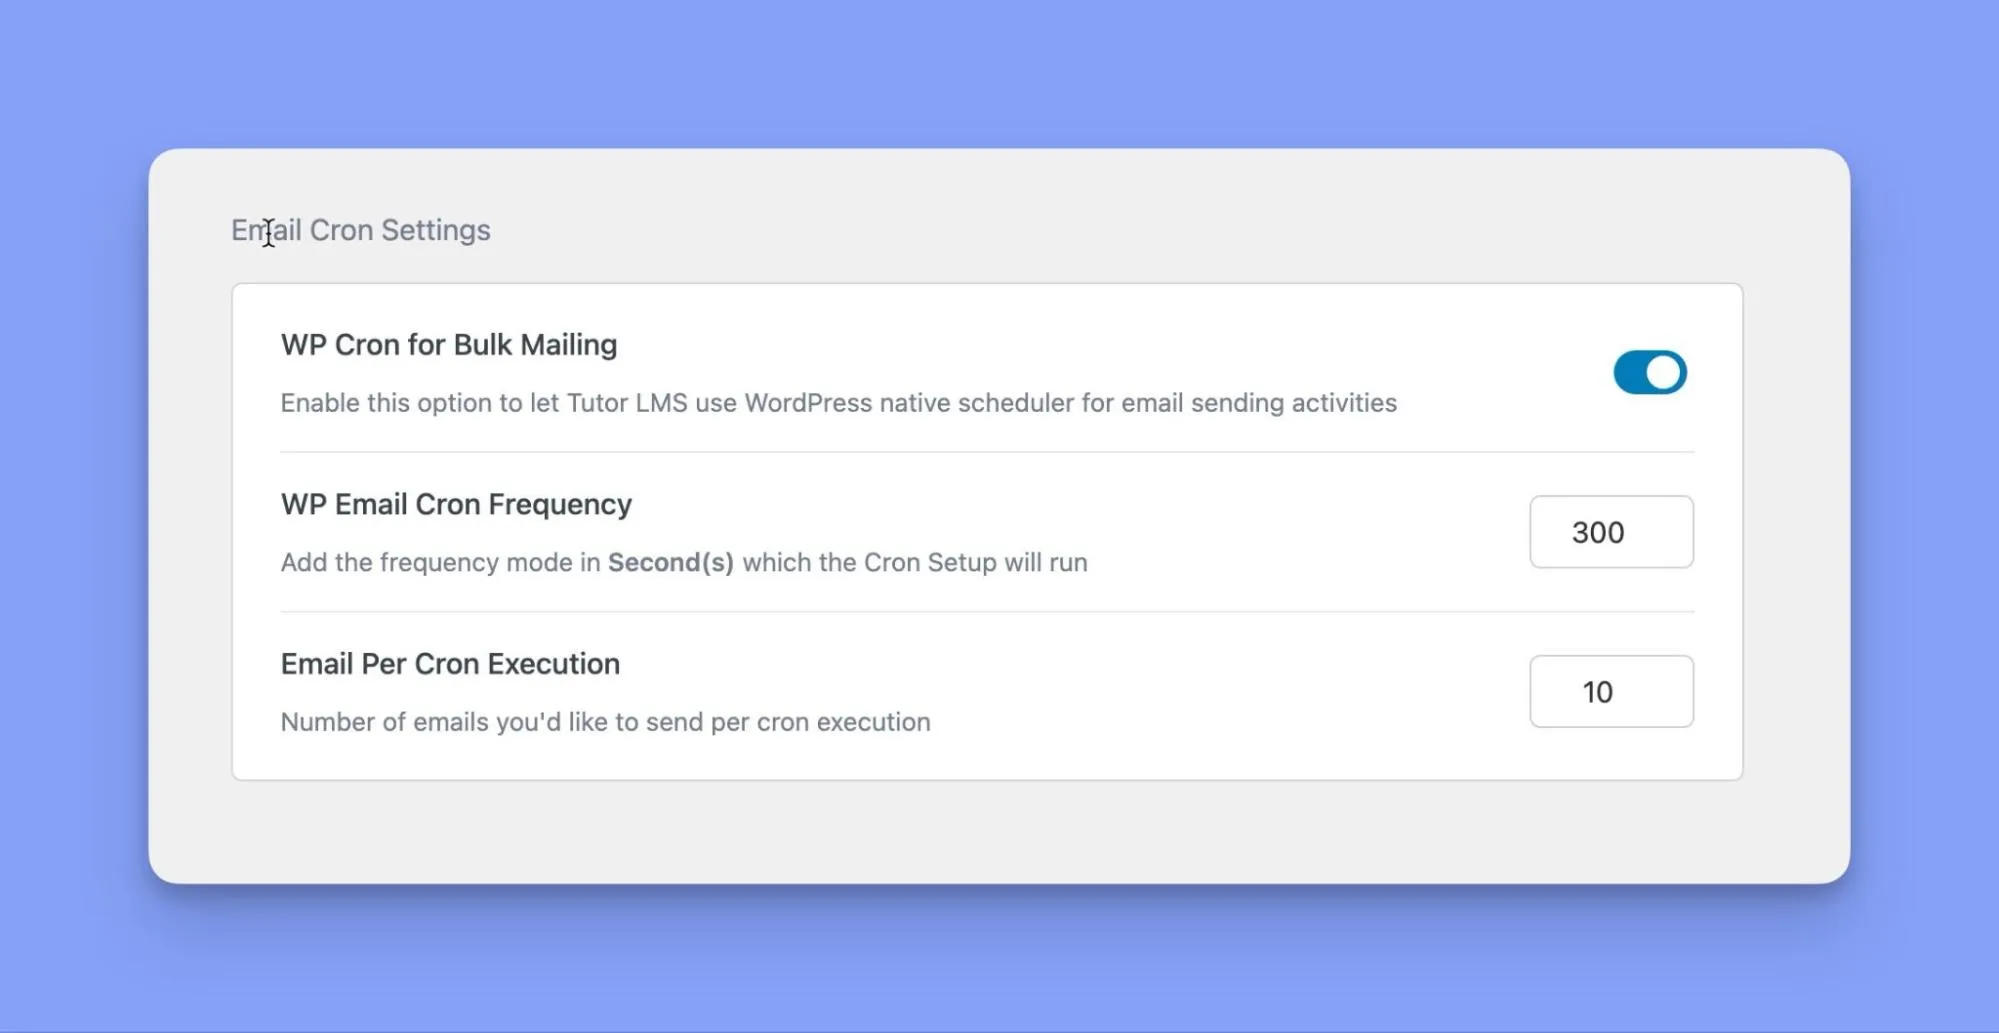
2. Check “WP Cron for Bulk Mailing”:
This feature allows Tutor LMS to schedule sending emails using WordPress’s built-in task scheduler for greater reliability.
3. Set the Delivery Frequency:
Determine how often you want Tutor LMS to dispatch emails. For example, you may want an interval of 10 minutes (600 seconds) between every email.
4. Control Batch Size:
With this option, you can configure the email amount per batch. The recommended batch size is 50-100 will prevent overloading. Smaller batches also help prevent hitting usage quotas.
Warning: It is vital that the cron frequency and batch size are compatible with email account limits. Otherwise, the hosting provider may suspend the account.
Tweaking the cron job controls, using a dedicated server, and confirming compatible capacity prevents bottlenecks. This means notifications are always deployed on time through Tutor LMS.
Best Practices for Creating Impactful Notifications in Tutor LMS
Automated emails and alerts are a powerful way to drive learner participation in Tutor LMS courses. But there is an art to using notifications effectively. Follow these key best practices for best results:
- Be timely: Timing is everything with notifications. Make sure alerts hit inboxes when students need that reminder or prompt to log in. For example, set new assignment alerts to be sent early in the week.
- Be specific: Vague or boring subjects will get ignored. Share specific details in alert summaries. “Quiz 2 Grades Posted,” not just “New Grades.”
- Be selective: Resist over-communicating. Use notifications for time-sensitive info students really need to know and avoid bombarding inboxes.
- Be consistent: Once you determine alert types and frequency that work, stick to the pattern. Sporadic, unpredictable notifications may frustrate learners.
- Test and tweak: Change triggers and frequency based on user feedback and course demands. See what notification types actually stimulate engagement.
This balance of timely, valuable, and consistent communications optimizes information reception. When students trust in the value of your notifications, engagement will reflect that across your Tutor LMS courses.
Wrapping Up
Effective communication is the bedrock of a thriving eLearning platform. With Tutor LMS and its dynamic notification and email alert features, you have the power to captivate, inform, and ignite your learner’s passion like never before. Stay connected, keep them in the loop, and fuel their passion for learning every step of the way.
So why wait? Dive into the world of Tutor LMS today and discover how these incredible notification features can revolutionize your eLearning platform.

Table of Contents
- How Tutor LMS’s Communication Features Can Help Streamline eLearning Workflow
- Getting Started With Tutor LMS Notification Feature
- Broadcasting Updates With Announcements
- Maximizing User Engagement via Email Alerts in Tutor LMS
- How to Make Your Email Alerts Stand Out with Tutor LMS Pro
- Craft Targeted Custom Manual Emails in Tutor LMS
- Best Practices for Creating Impactful Notifications in Tutor LMS
- Wrapping Up
Start Using Tutor LMS Today
Ready to take your online courses to new heights? Download Tutor LMS now and enjoy a journey of eLearning excellence.