Have you ever held your breath while moving your eLearning site to a new home? That feeling of uncertainty during a website migration is stressful. You worry about your valuable courses and wonder if your settings will transfer correctly. It’s not just about moving data; it’s about protecting the platform you’ve worked so hard to build.
We understand these challenges completely. That’s why we’re thrilled to introduce the new all-in-one Import/Export toolkit that lets you easily and safely transfer data between Tutor LMS–powered sites. Whether you’re planning a site migration, need reliable course backups, want to maintain settings version control, or require a clean settings reset, Tutor LMS handles it all from a single, intuitive dashboard.
What’s Included in the New Import/Export Toolkit?
So, what’s inside this powerful new Tutor LMS toolkit? The primary data transfer functions are waiting for you in your WordPress dashboard under Tutor LMS Pro > Tools > Import/Export. We built this toolkit on two core ideas: effortless data portability and your complete peace of mind.
First, it gives you the power to export courses and all their related data. This core feature packages your essential materials into a single, clean .json file for easy transfer. This includes your:
- Courses, Lessons, and Quizzes
- Assignments
- Course Bundles
- Global Tutor LMS Settings
- Media Files (Including all course attachments)
For better oversight, we have also added a “History” section, which acts as an audit trail for all your import and export activities.
But that’s only half the story. Beyond direct import/export, Tutor LMS also offers advanced settings management, now conveniently grouped under the new “Settings Log” tab (found at Tutor LMS Pro > Tools > Settings Log). This new section is your command center for your site’s operational history and settings integrity, housing:
- Settings History: Your time machine for creating and restoring “snapshots” of your Tutor LMS settings.
- Dedicated Settings Export: A quick way to export only your current Tutor LMS settings.
- The Reset Option: A “fresh start” button to reset Tutor LMS settings to their defaults.
Let’s jump right in and see this toolkit in action on your Tutor LMS site.
Part 1: Migrating Your Tutor LMS Site with Import/Export
Whether you’re performing a full site migration or just moving a few courses, the process is the same. We’ll start with the first and most important step: getting your data out safely.
A. Step-by-Step: How to Export Your Tutor LMS Data
This process is designed to be simple and give you full control. Just follow these steps, and you’ll have a complete backup of your hard work in minutes.
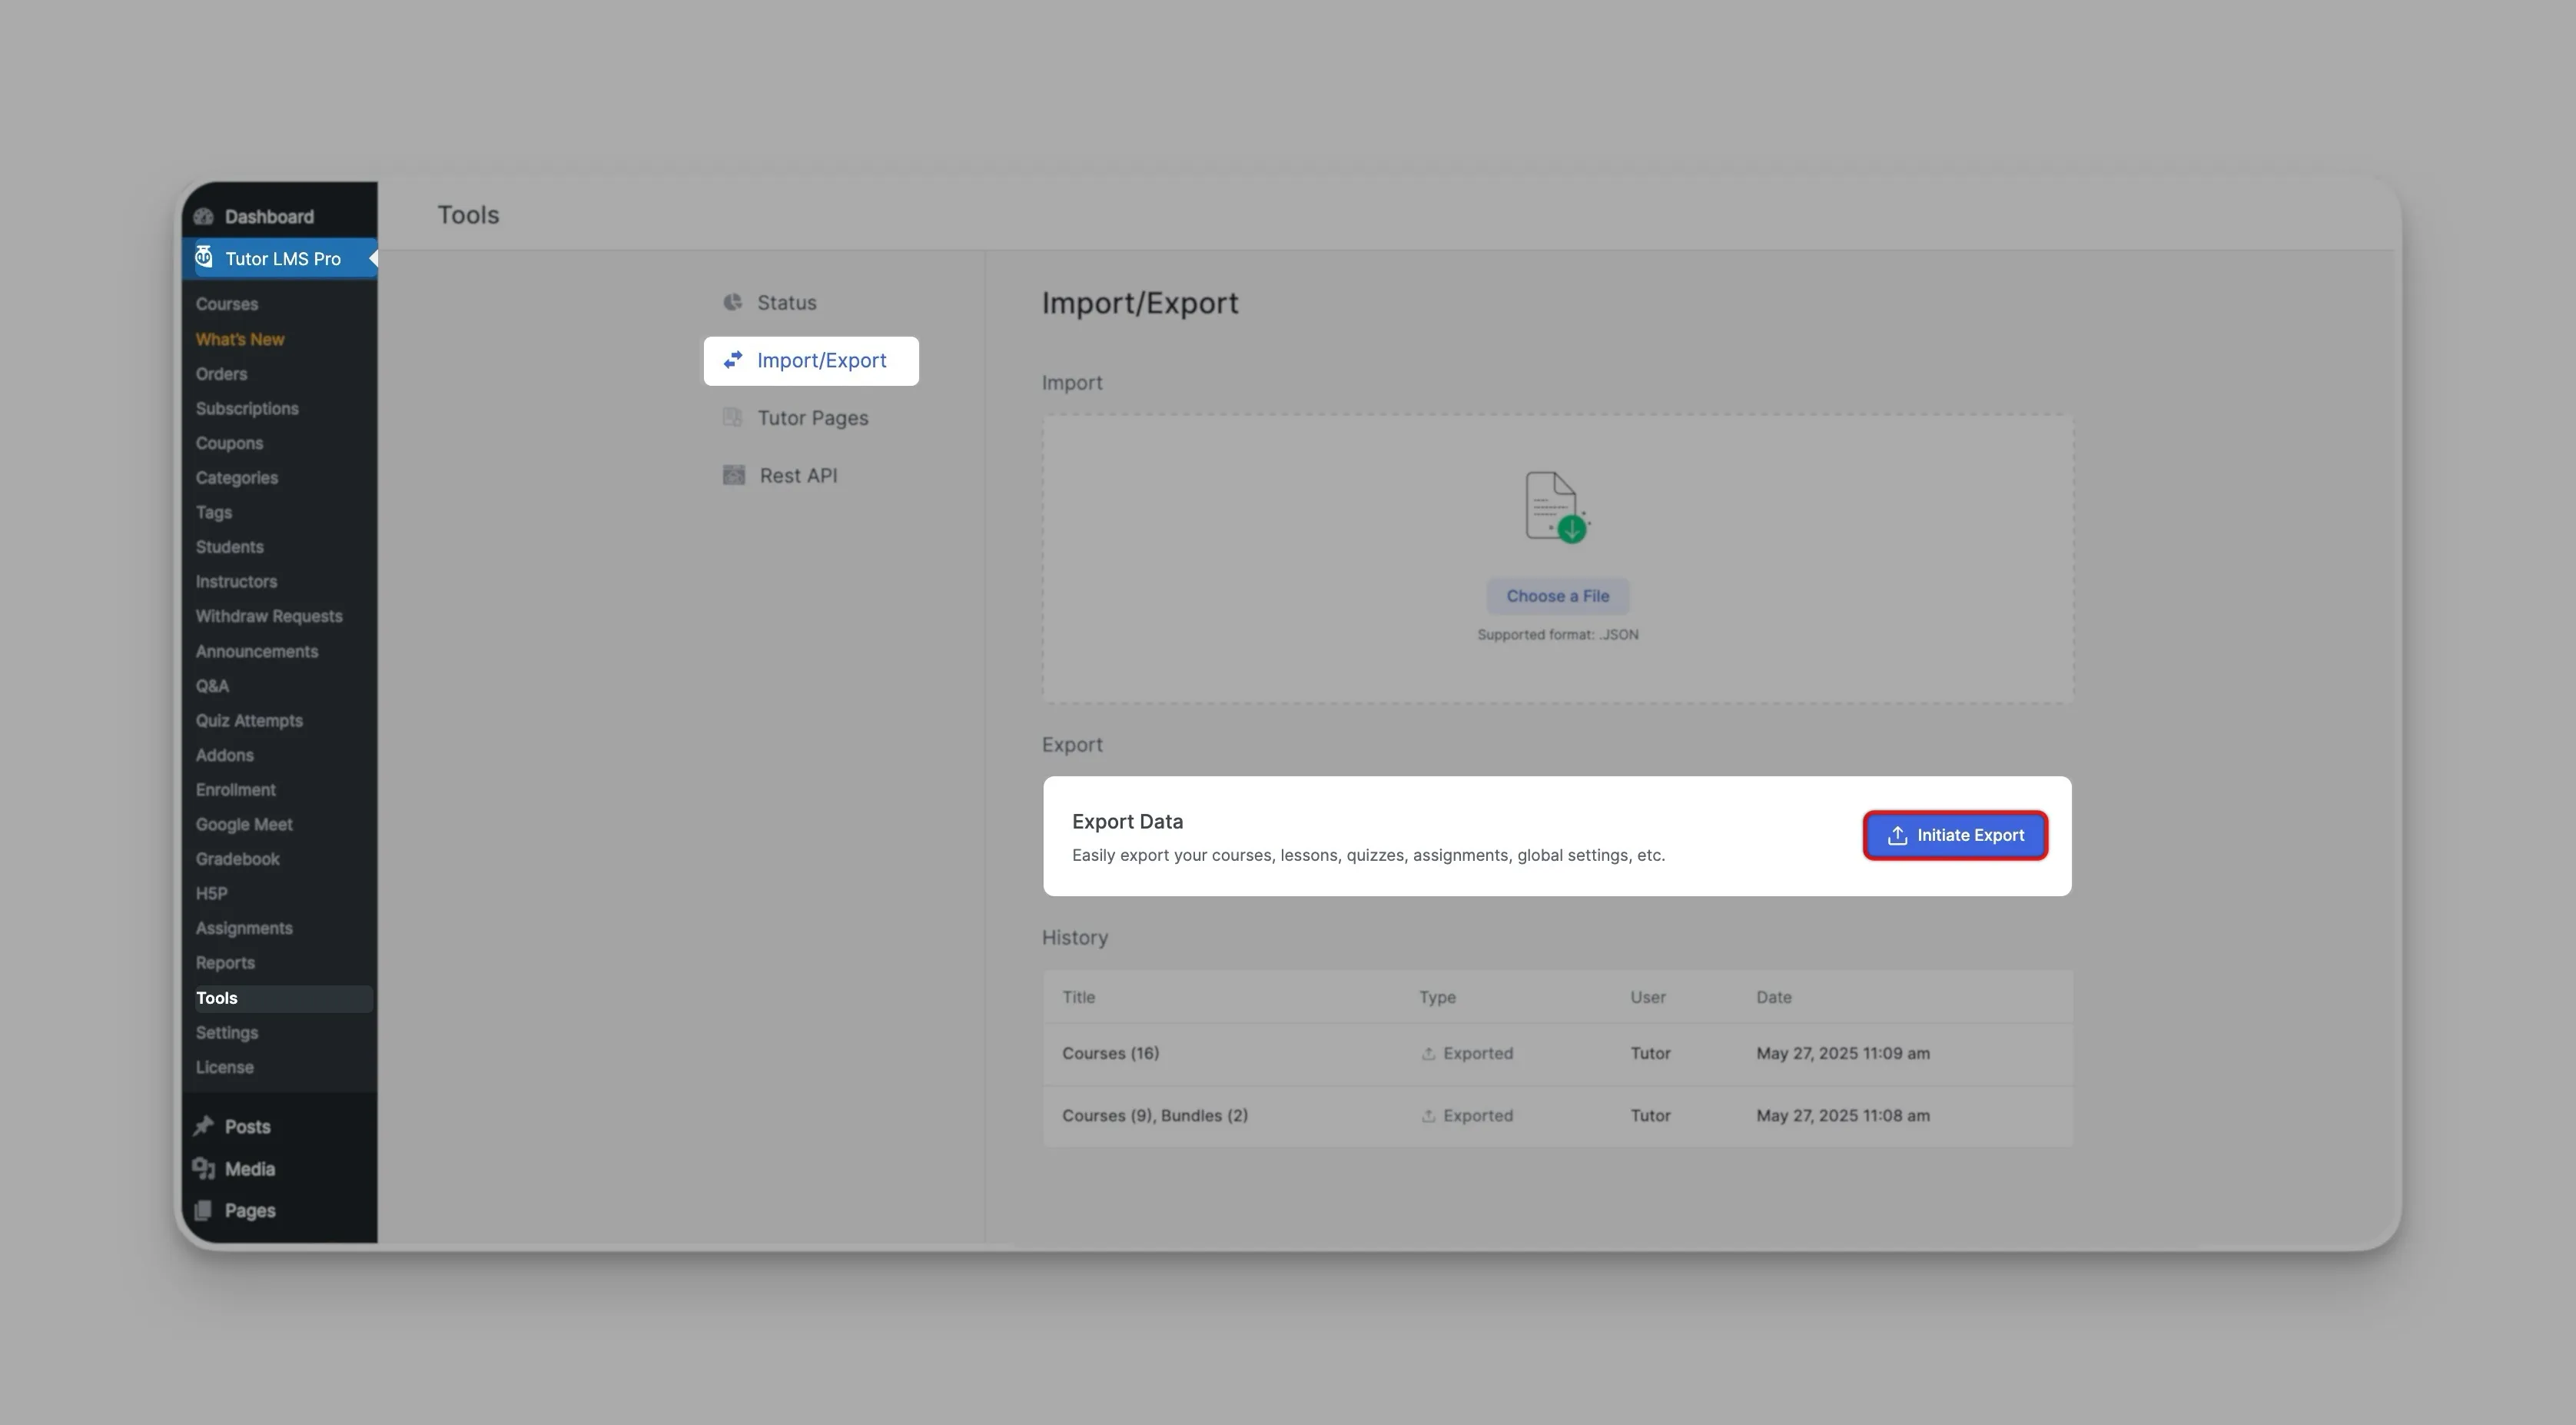
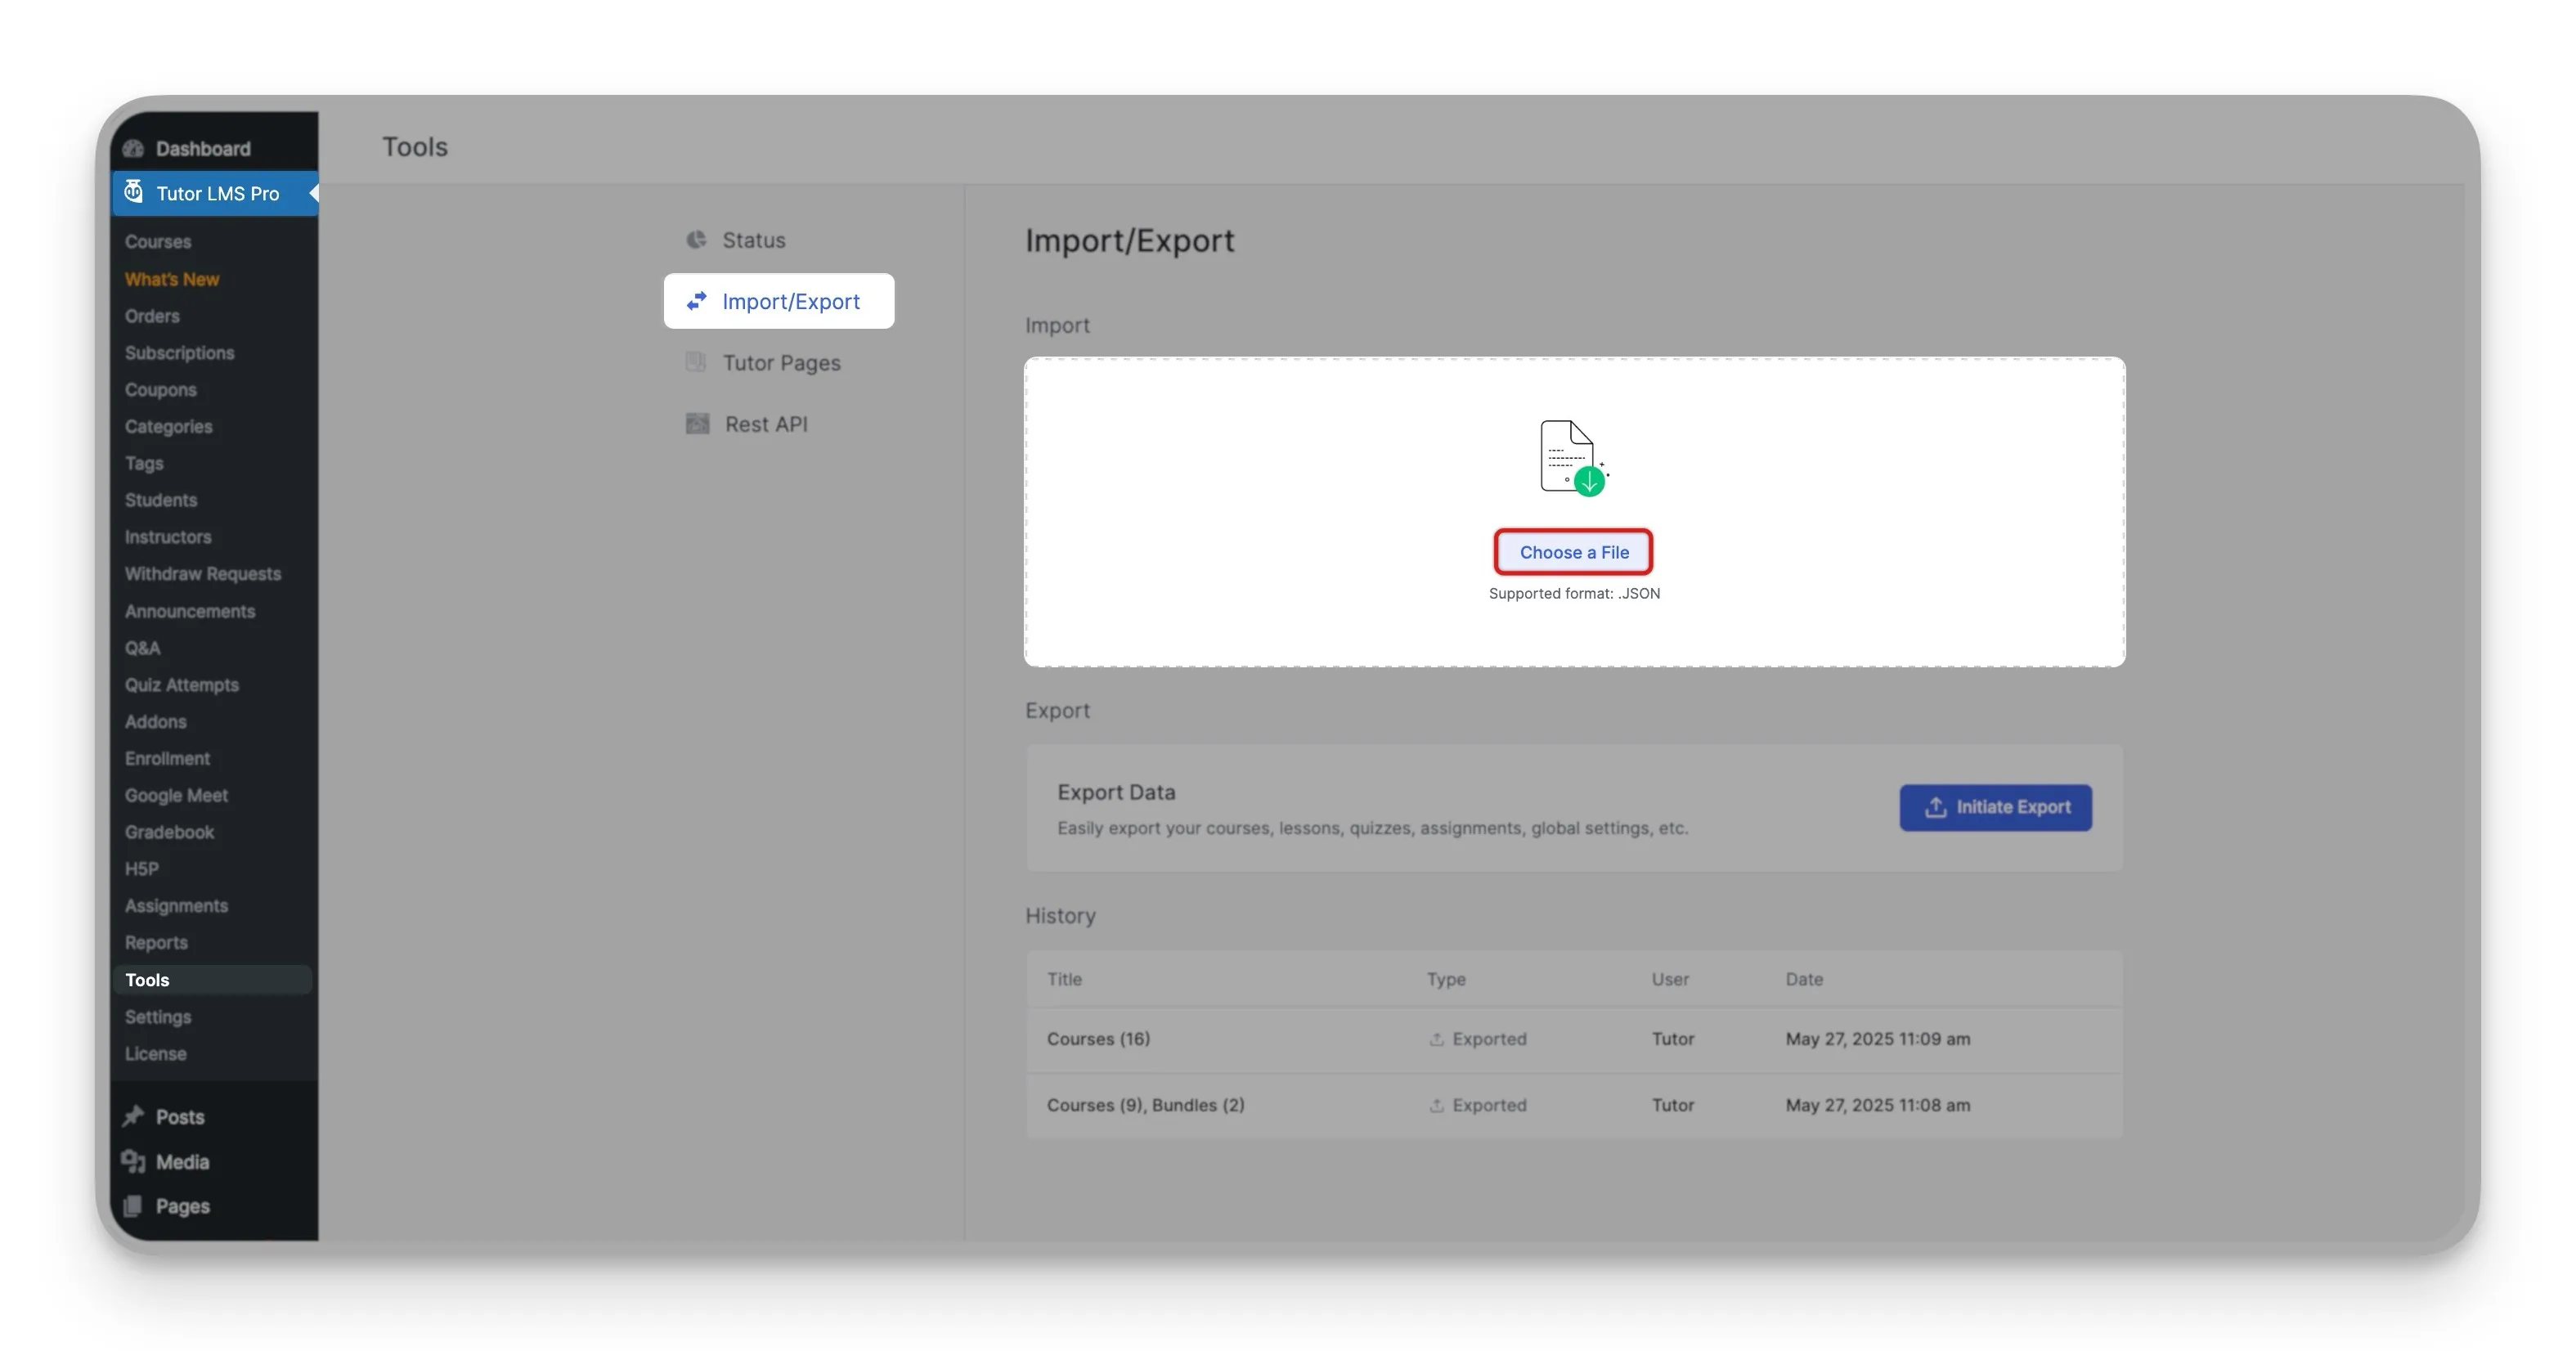
- Navigate to the Toolkit: First, head to your WordPress dashboard and go to Tutor LMS Pro > Tools, then click on the Import/Export tab.
- Open the Exporter: You’ll see a section for “Export.” Click the blue “Initiate Export” button. This will open the Tutor LMS Exporter window.
- Choose Exactly What to Export: This is where you get granular control. You’ll see a list of checkboxes for your Courses, Lessons, Quizzes, Assignments, Bundles, and Settings.

- Besides the main checkboxes, you can click “Select Specific Courses” or “Select Specific Bundles” to hand-pick only the content you want to export. Don’t worry if you change your mind; you can edit these selections later.
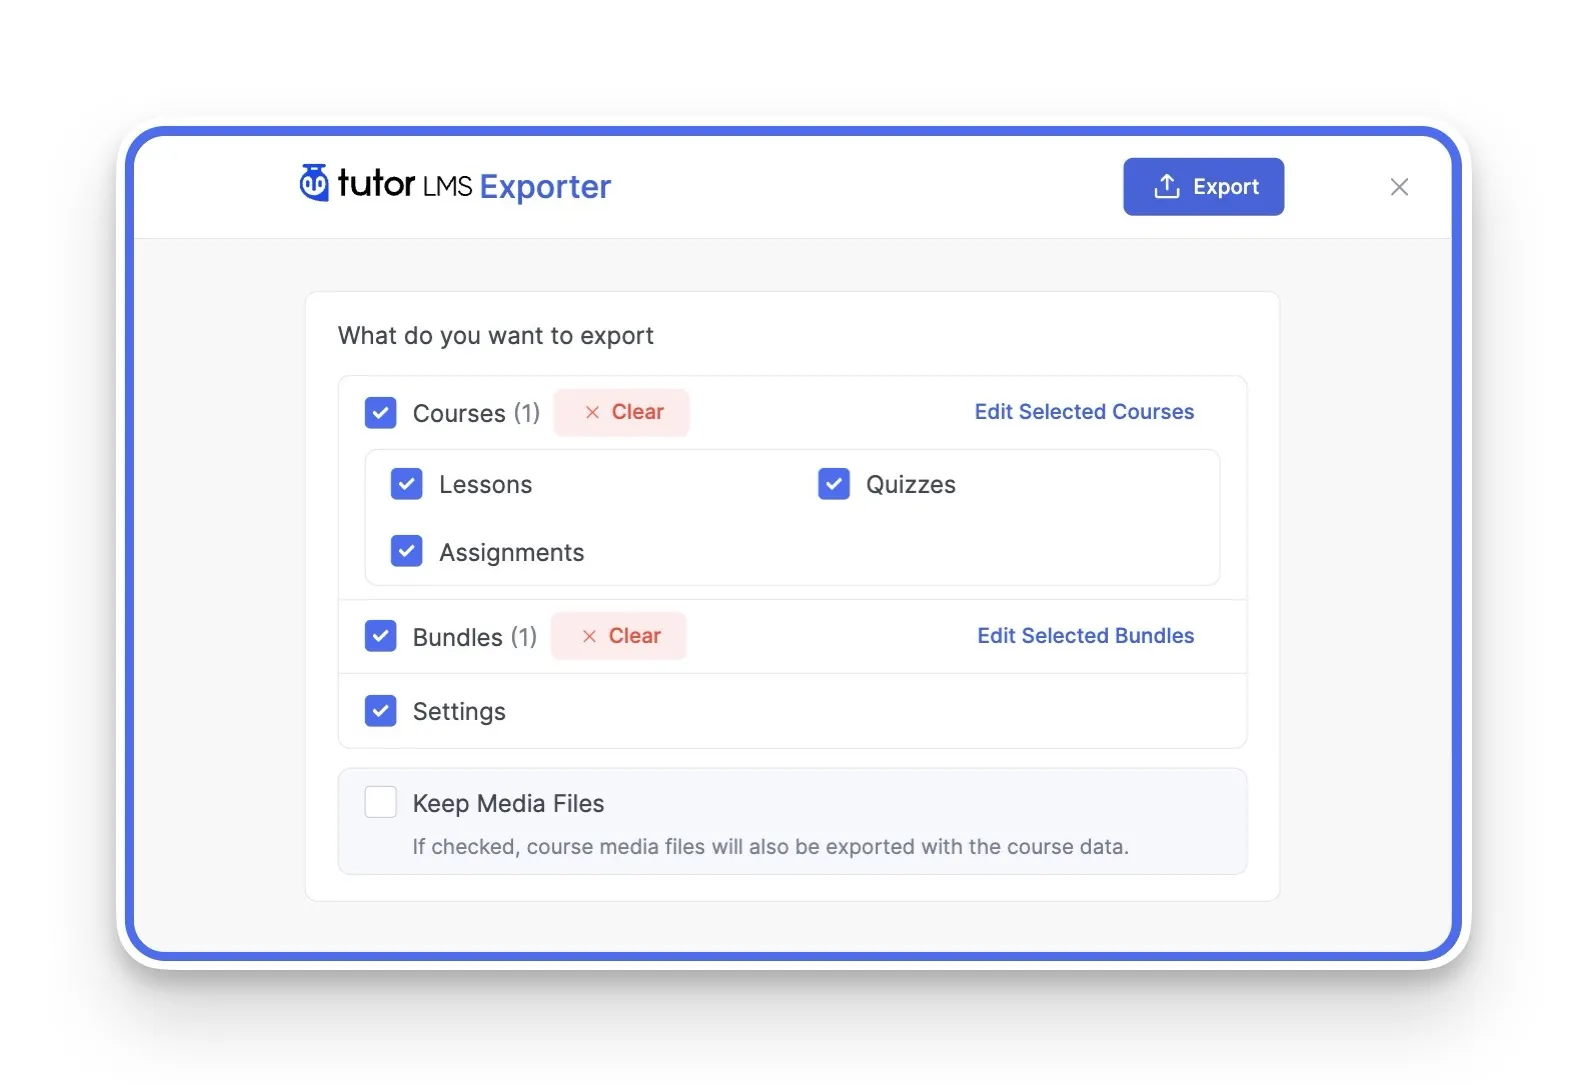
- Also, ticking the “Settings” option saves a snapshot of your current Tutor LMS settings directly into the export file.
Crucial Tip: Be sure to check the “Keep Media Files” option. This ensures that all your images, videos, documents, and any course attachments are included in the transfer.
- Start Exporting: Once you’ve made your selections, click the “Export” button on the top right to initiate the process.
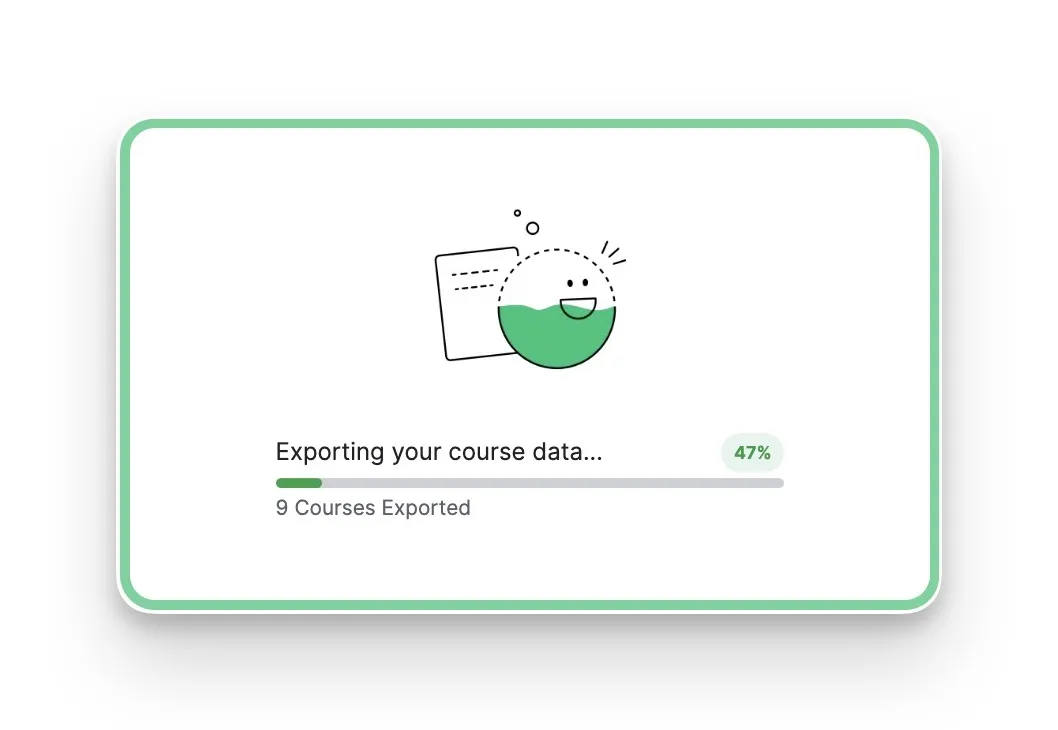
- Download Your Data File: A confirmation window will pop up, saying “Your Data is Ready to Download!”. Simply click “Download” to save the .json data file to your computer.
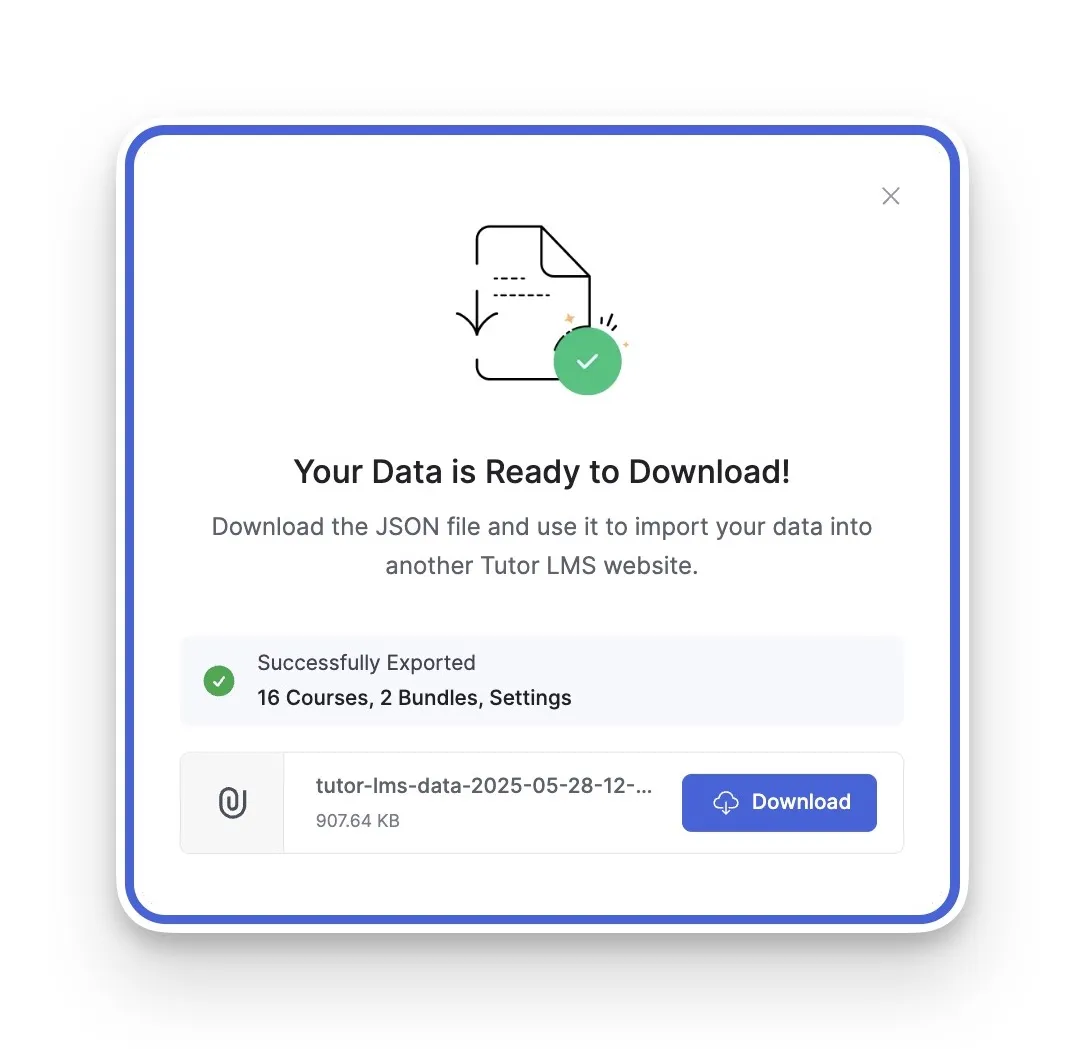
And that’s it! You now have a single, portable file containing all your chosen content, ready for the next step.
B. Step-by-Step: How to Import Your Tutor LMS Data
With your export file ready, you’re just a few clicks away from completing your safe Tutor LMS data migration. This process is just as simple as the export.
A Quick Note Before You Import: For a seamless migration, please ensure your new site has the exact same Tutor LMS addons enabled as this original site. This crucial step helps guarantee that all of your specific data finds its correct place when you import it.
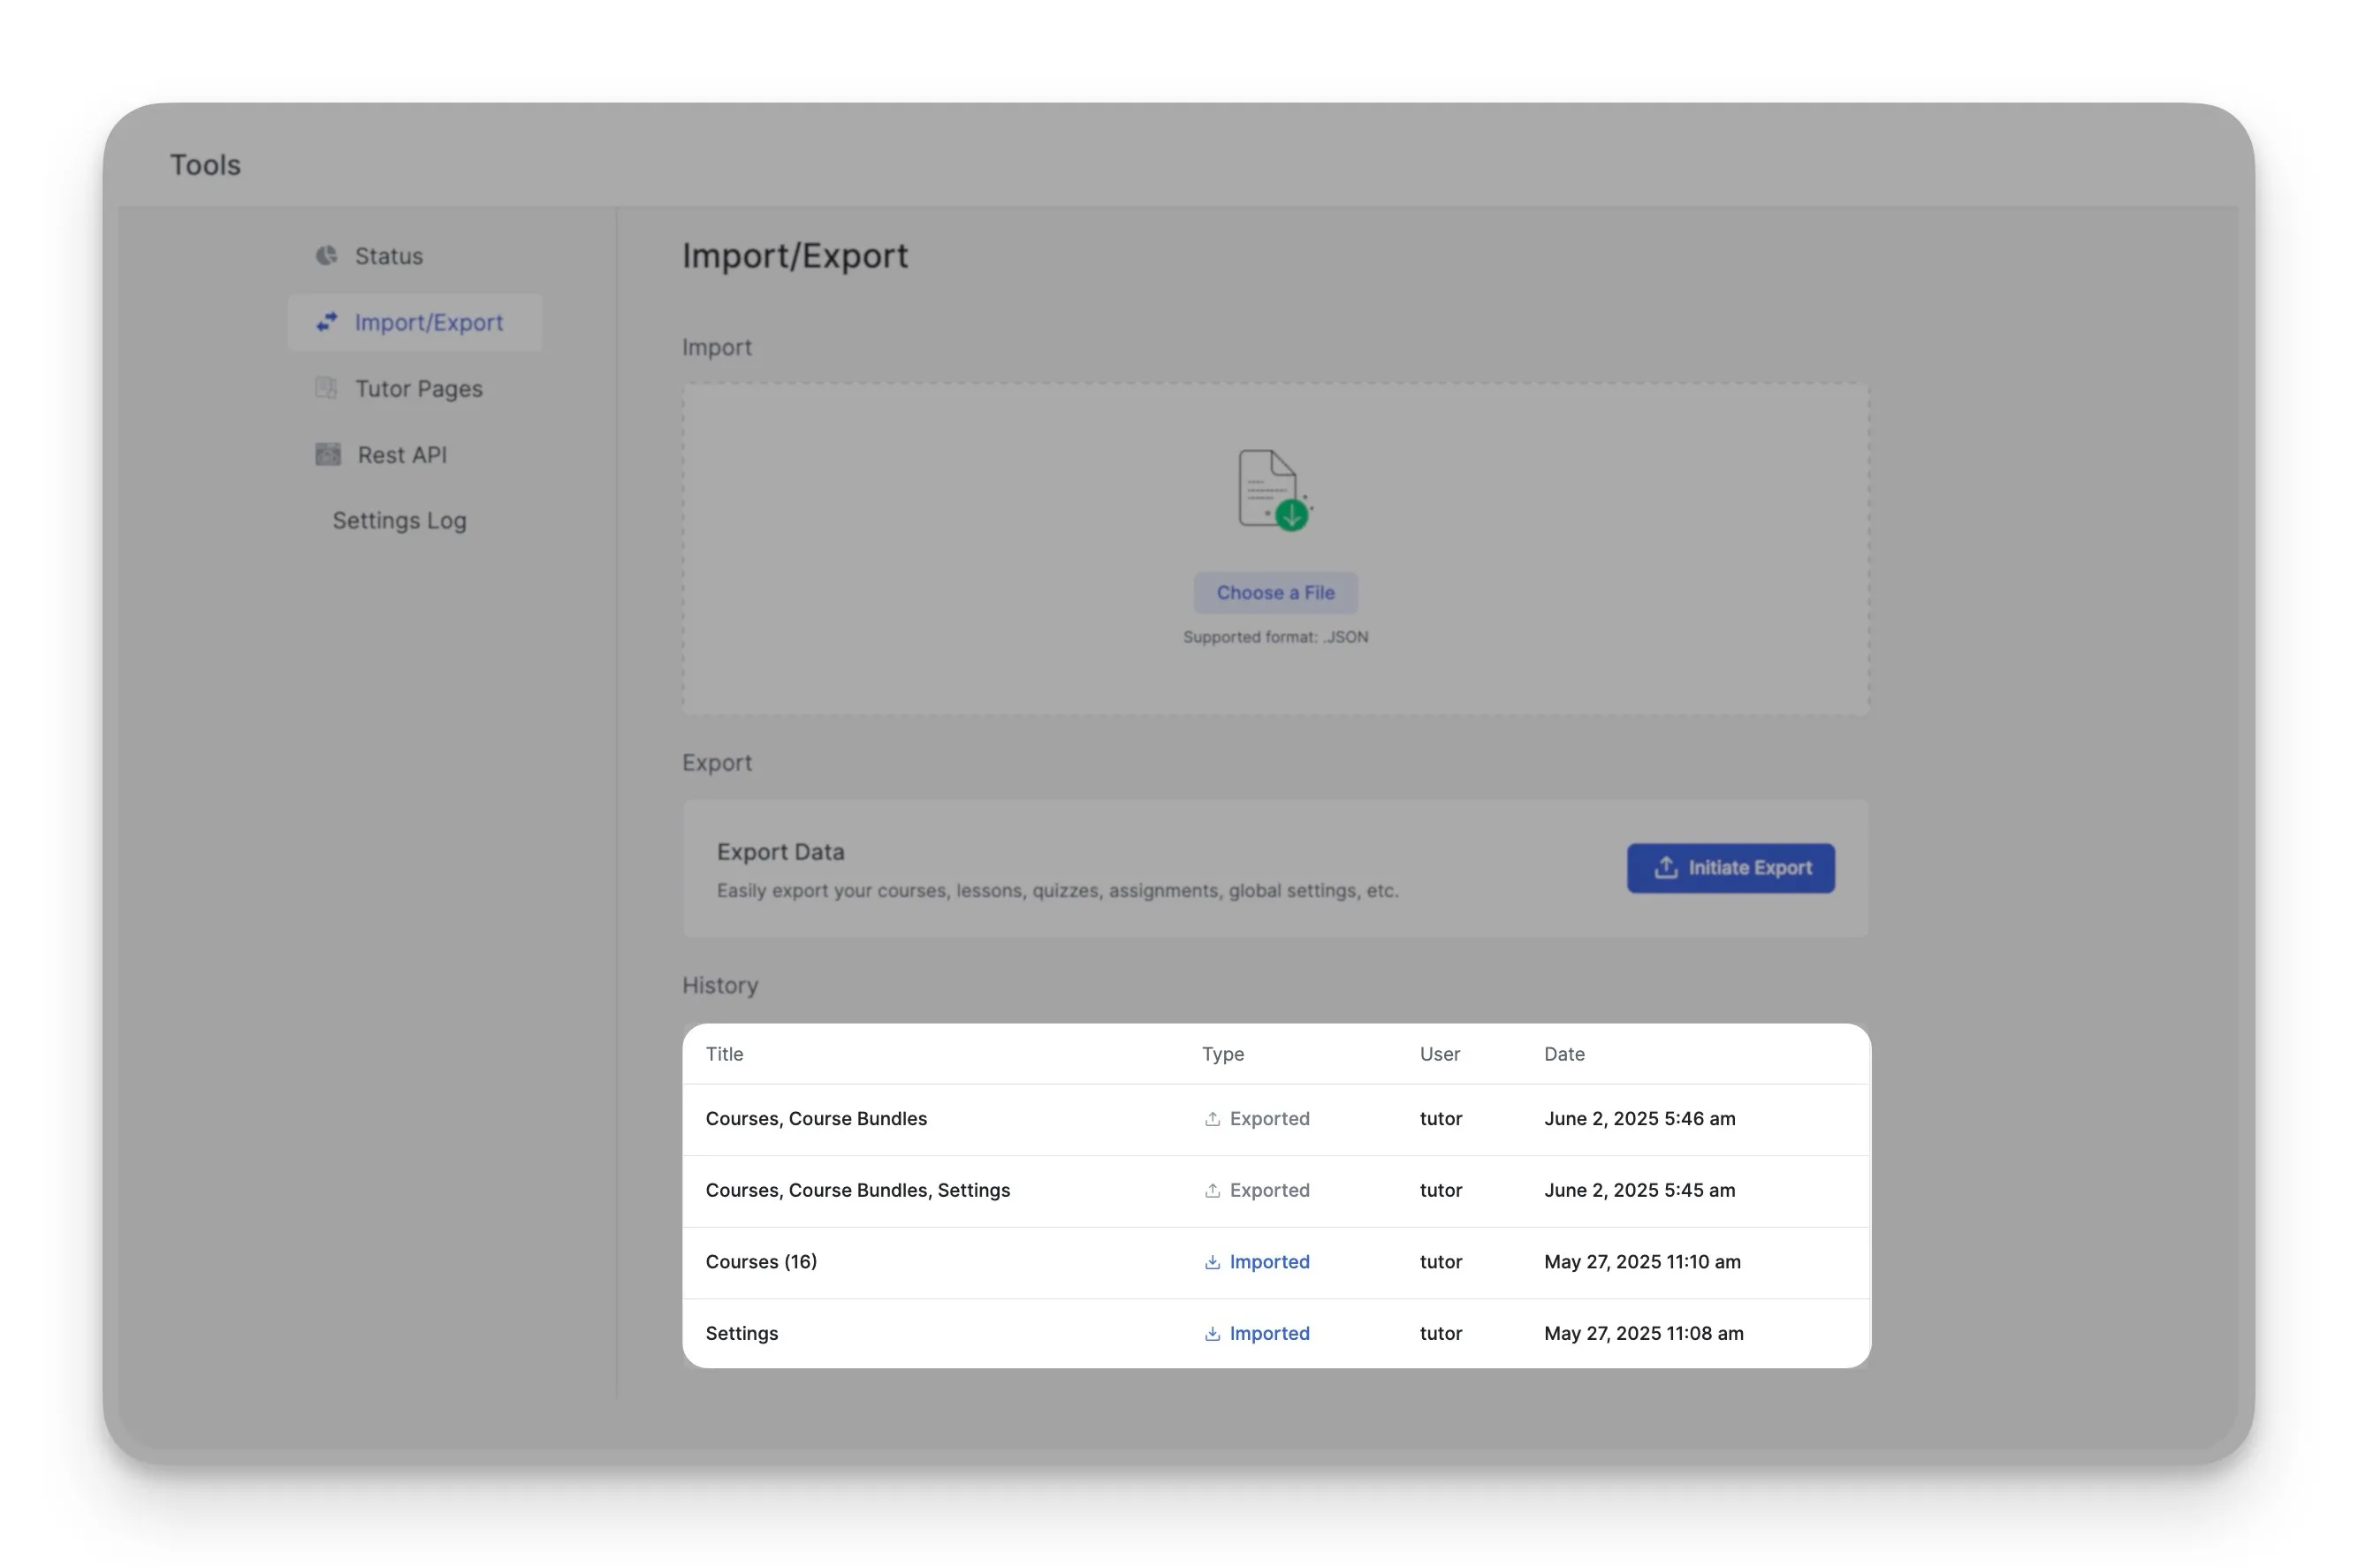
- Navigate and Upload Your File: On your new Tutor LMS site, go to the same Tutor LMS Pro > Tools > Import/Export page. This time, click the “Choose a File” button and select the .json file you just downloaded.
- Heed the Critical Warning: Once the file is selected, a pop-up will appear. It contains a very important message: “WARNING! This will overwrite all existing settings…”. This is a crucial safeguard to prevent accidental data loss. It confirms you want the settings from your old site to apply to this new one.
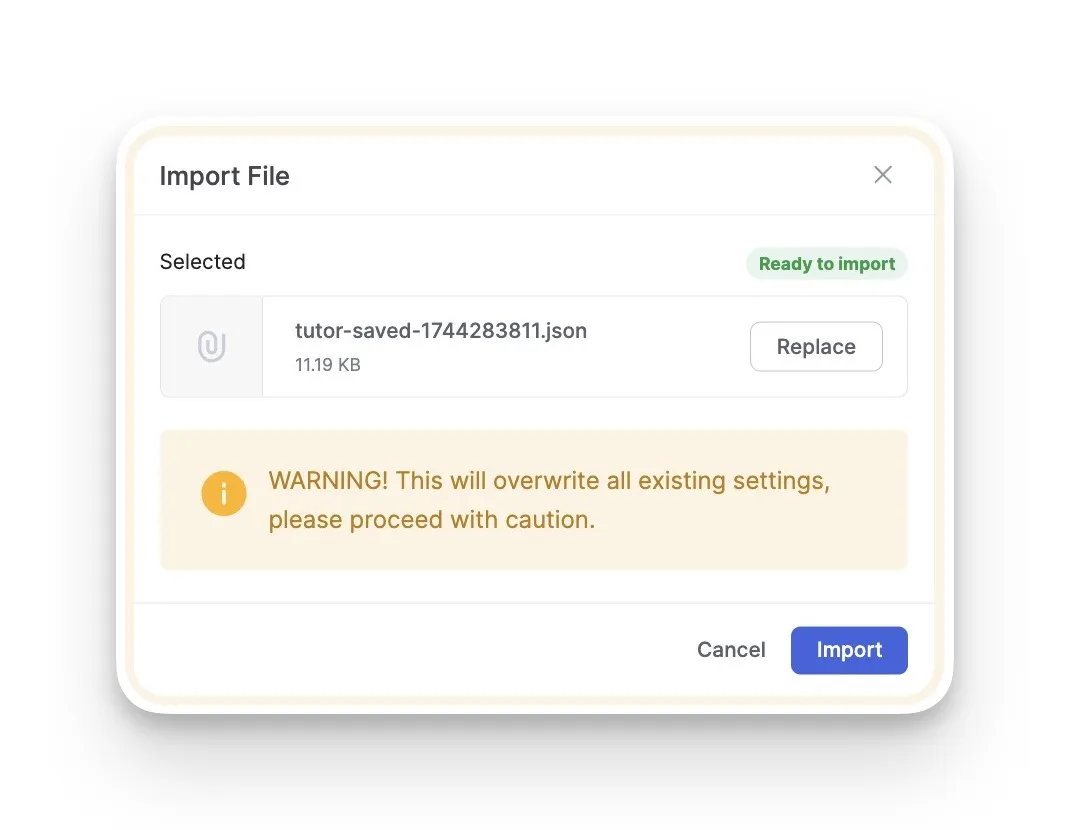
- Begin the Import: Once you’re ready, click the “Import” button to proceed. You’ll see an “Importing…” progress bar, so you know the system is working to import your Tutor LMS courses and data.
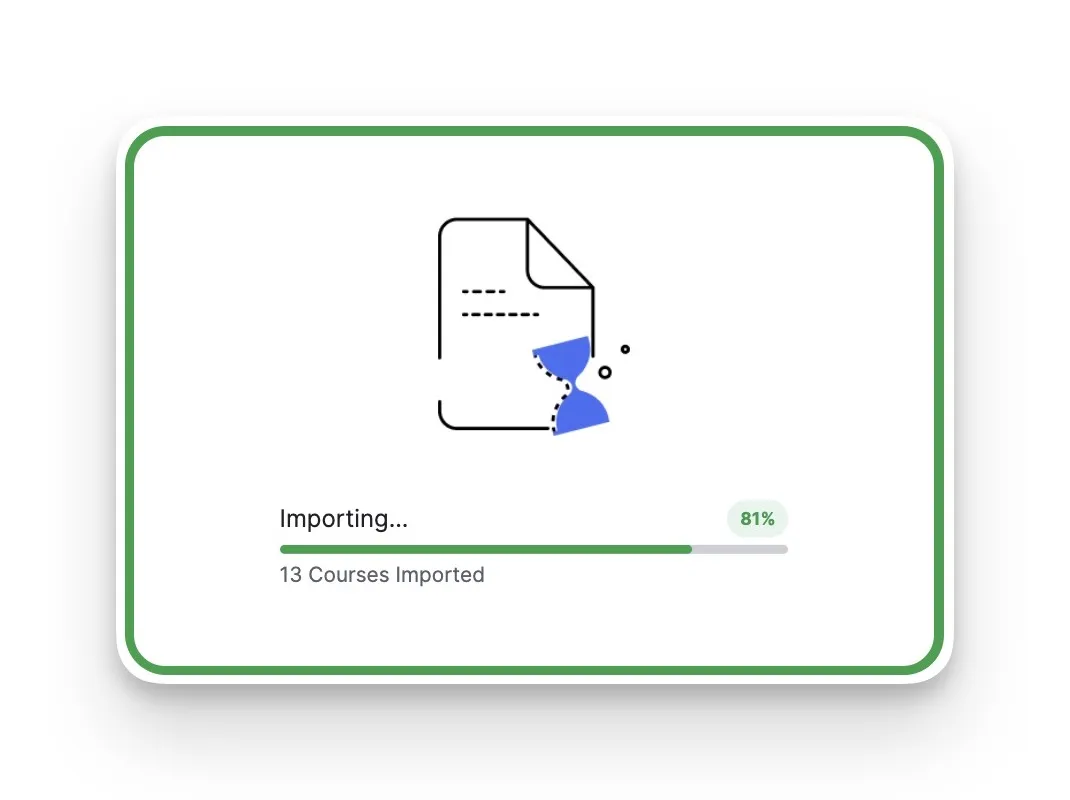
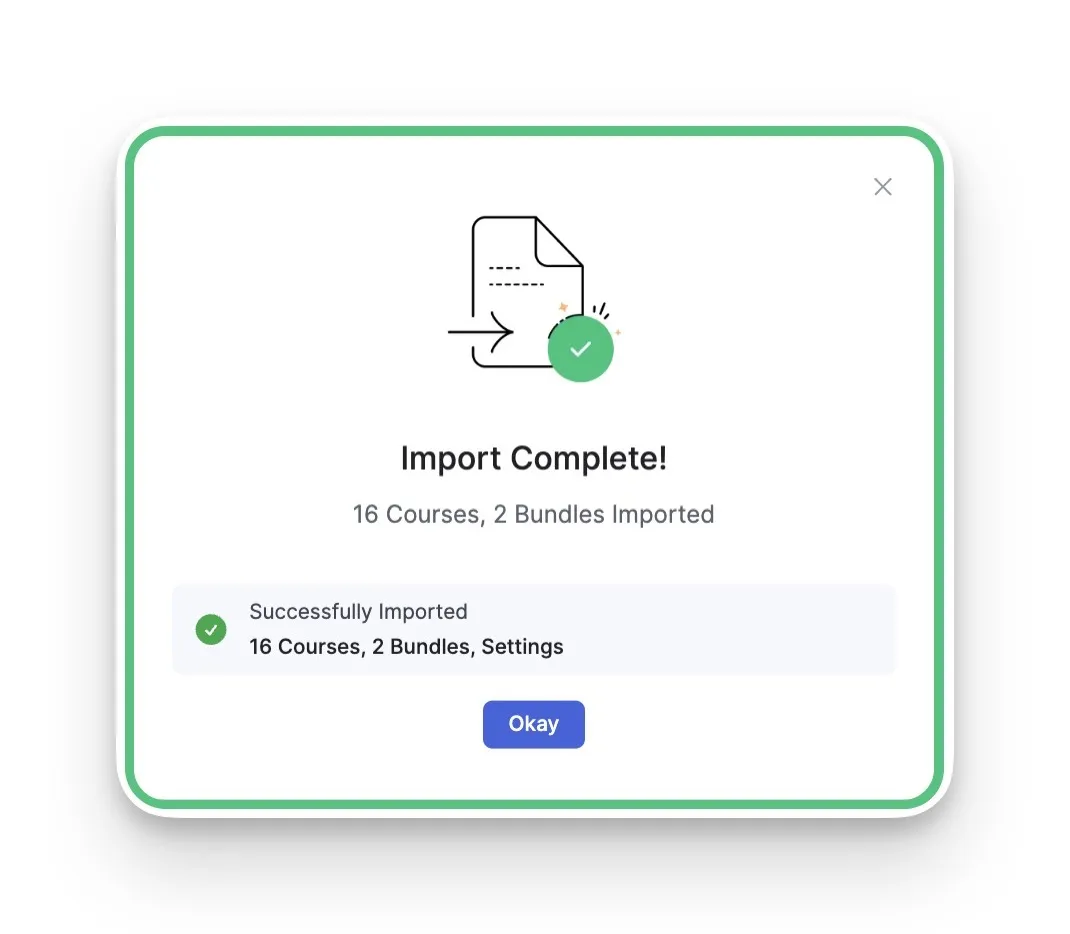
- Confirm Completion: In just a moment, a final “Import Complete!” message will appear. That’s it! Your content, media, and settings have been successfully moved to their new home.
Part 2: Advanced Settings and History Management
Now that you’ve mastered the basics, let’s explore the features that separate casual users from power users. These tools turn your Tutor LMS import/export experience from a simple data transfer into a complete management system.
A. The History Log: Your Audit Trail
The History Log is your platform’s memory bank. Every time someone performs an import or export action, this log captures the details. It’s a simple but powerful activity log on the Import/Export page that acts as your official audit trail.
For every action, it automatically records:
- The type of action (e.g., “Exported Data”)
- Which user performed it
- The exact date and time
This log is essential for security and for tracking changes, especially if you have multiple administrators working on your site.
B. Settings History & Dedicated Settings Export: Your Configuration Control Center
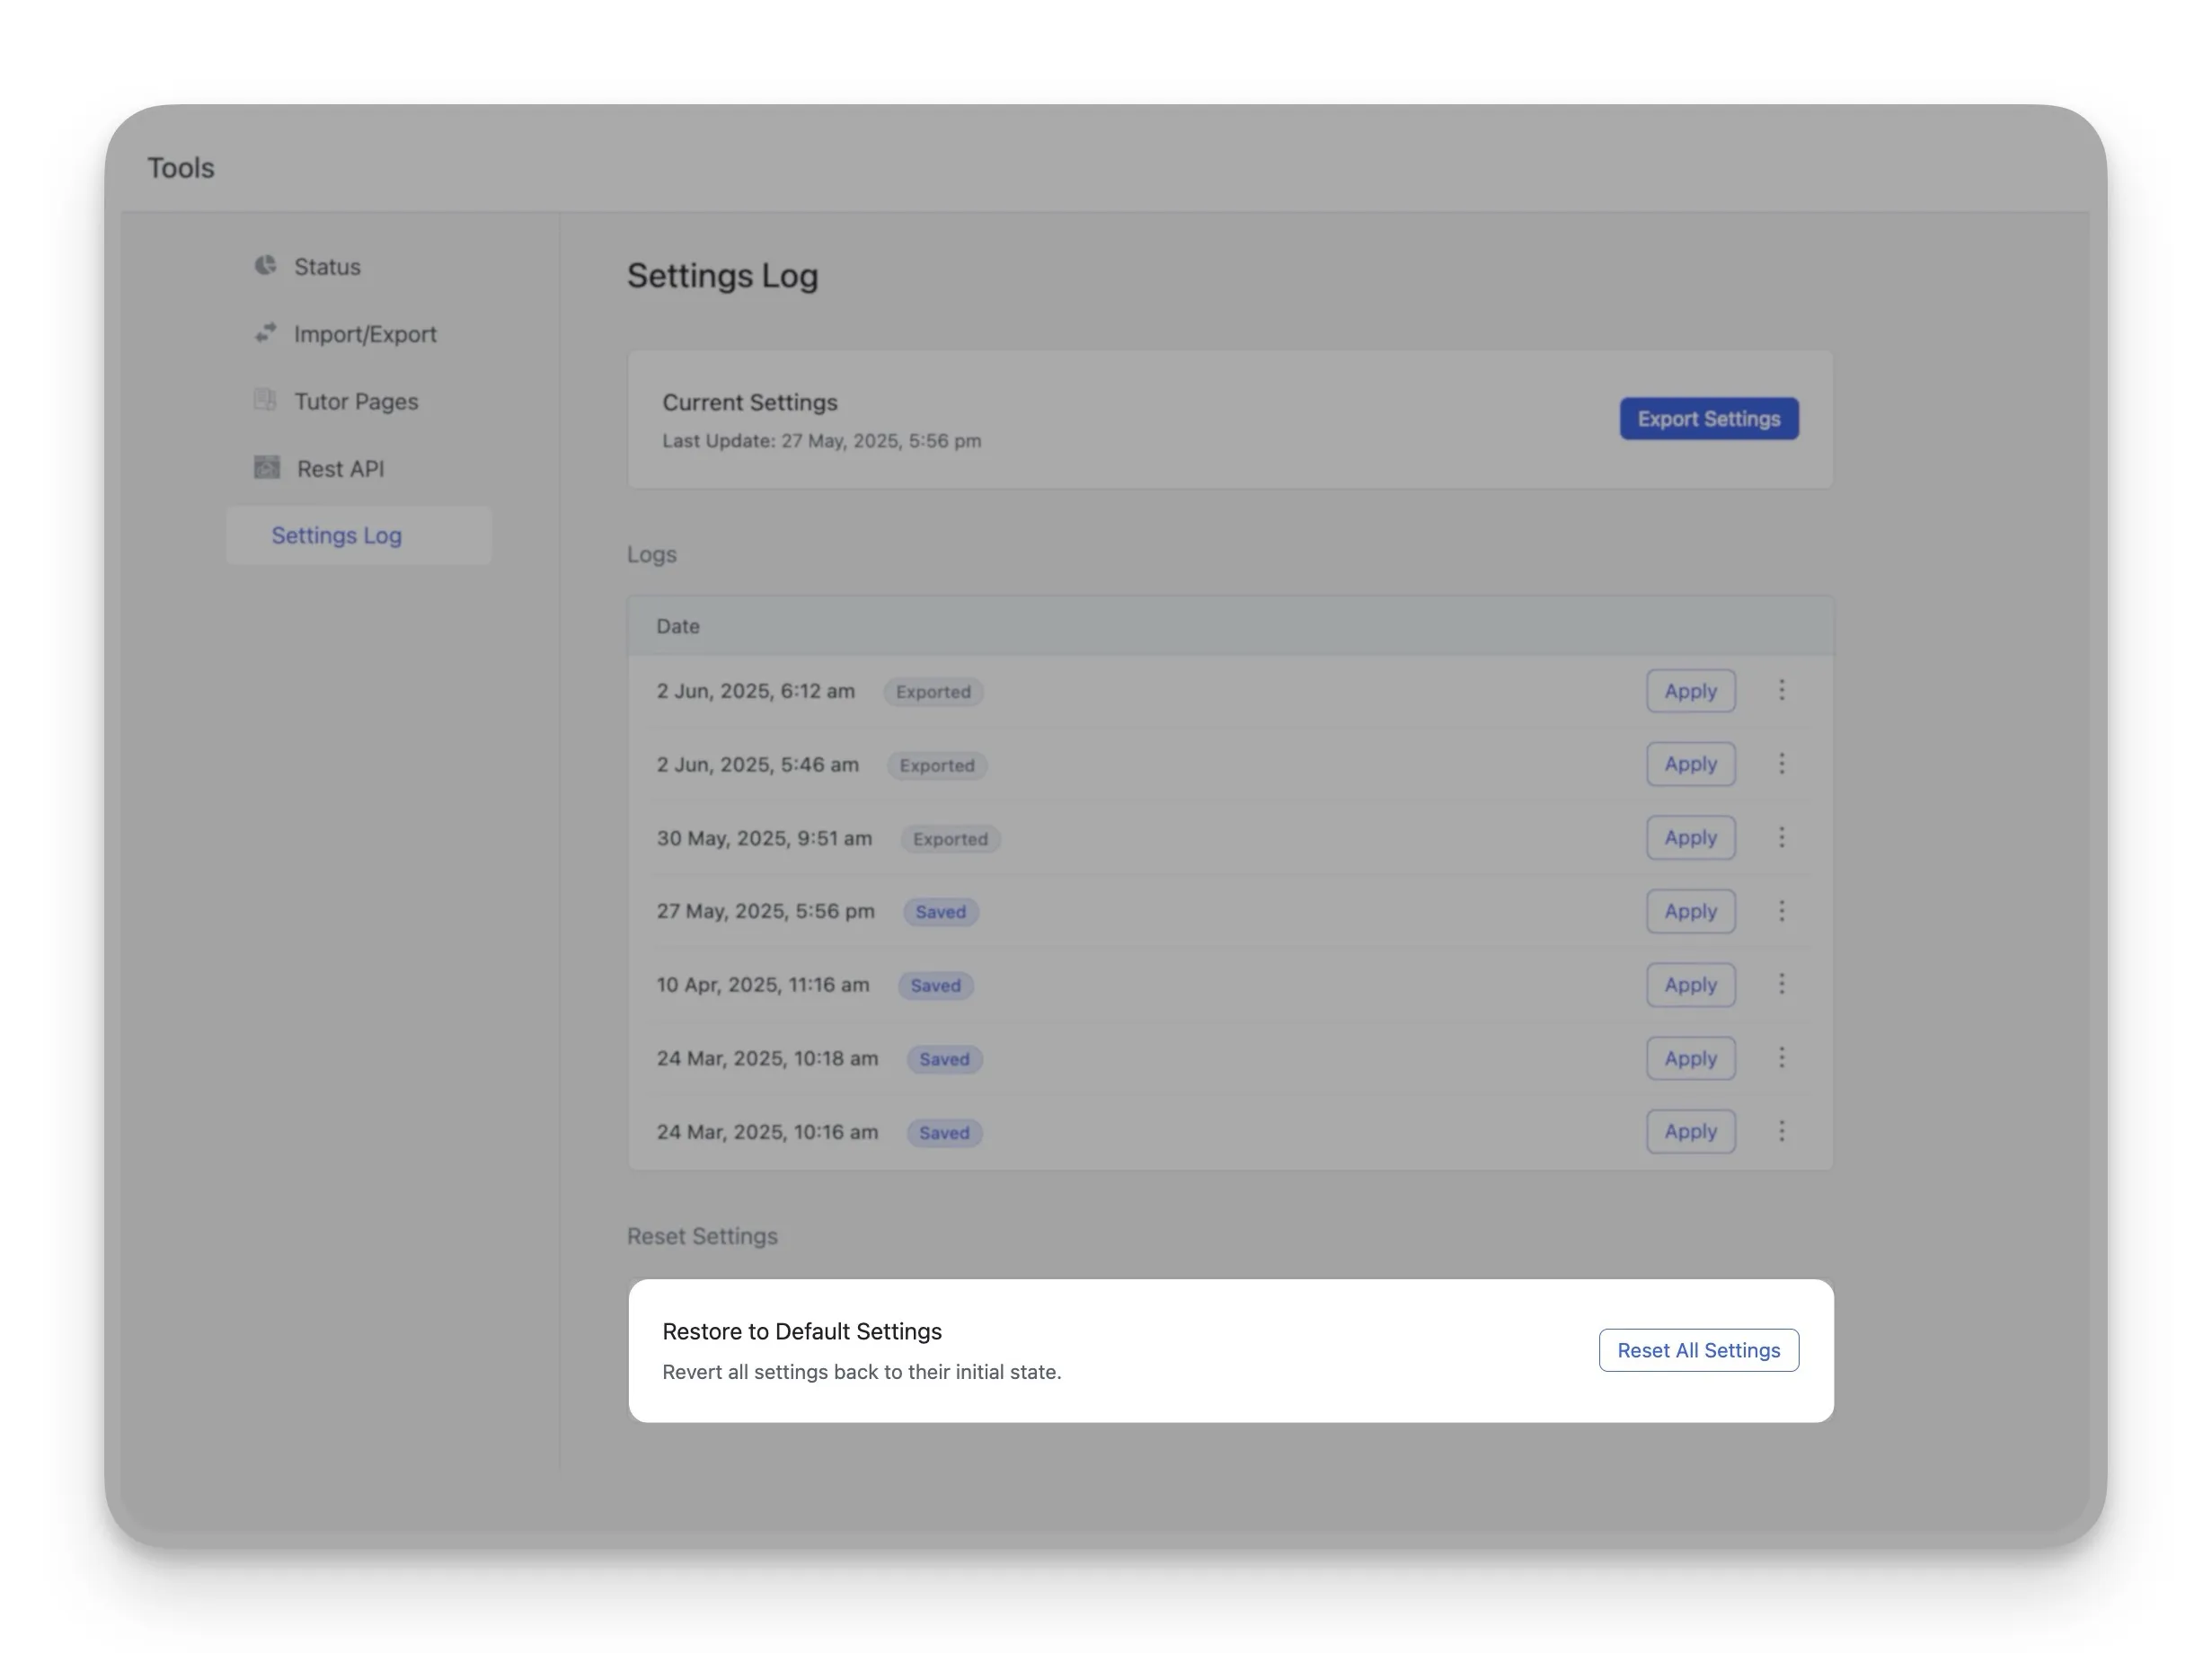
Meet what might be the most underrated feature in the Import/Export toolkit, the “Logs” section in the Settings Log tab. This is your insurance policy against configuration disasters.
Quickly Export Current Settings
Right at the top of this section, you’ll see an “Export Settings” button. If you only want to backup your current Tutor LMS settings without exporting all your course data, this is the button for you. It provides a quick and focused way to save your setup.
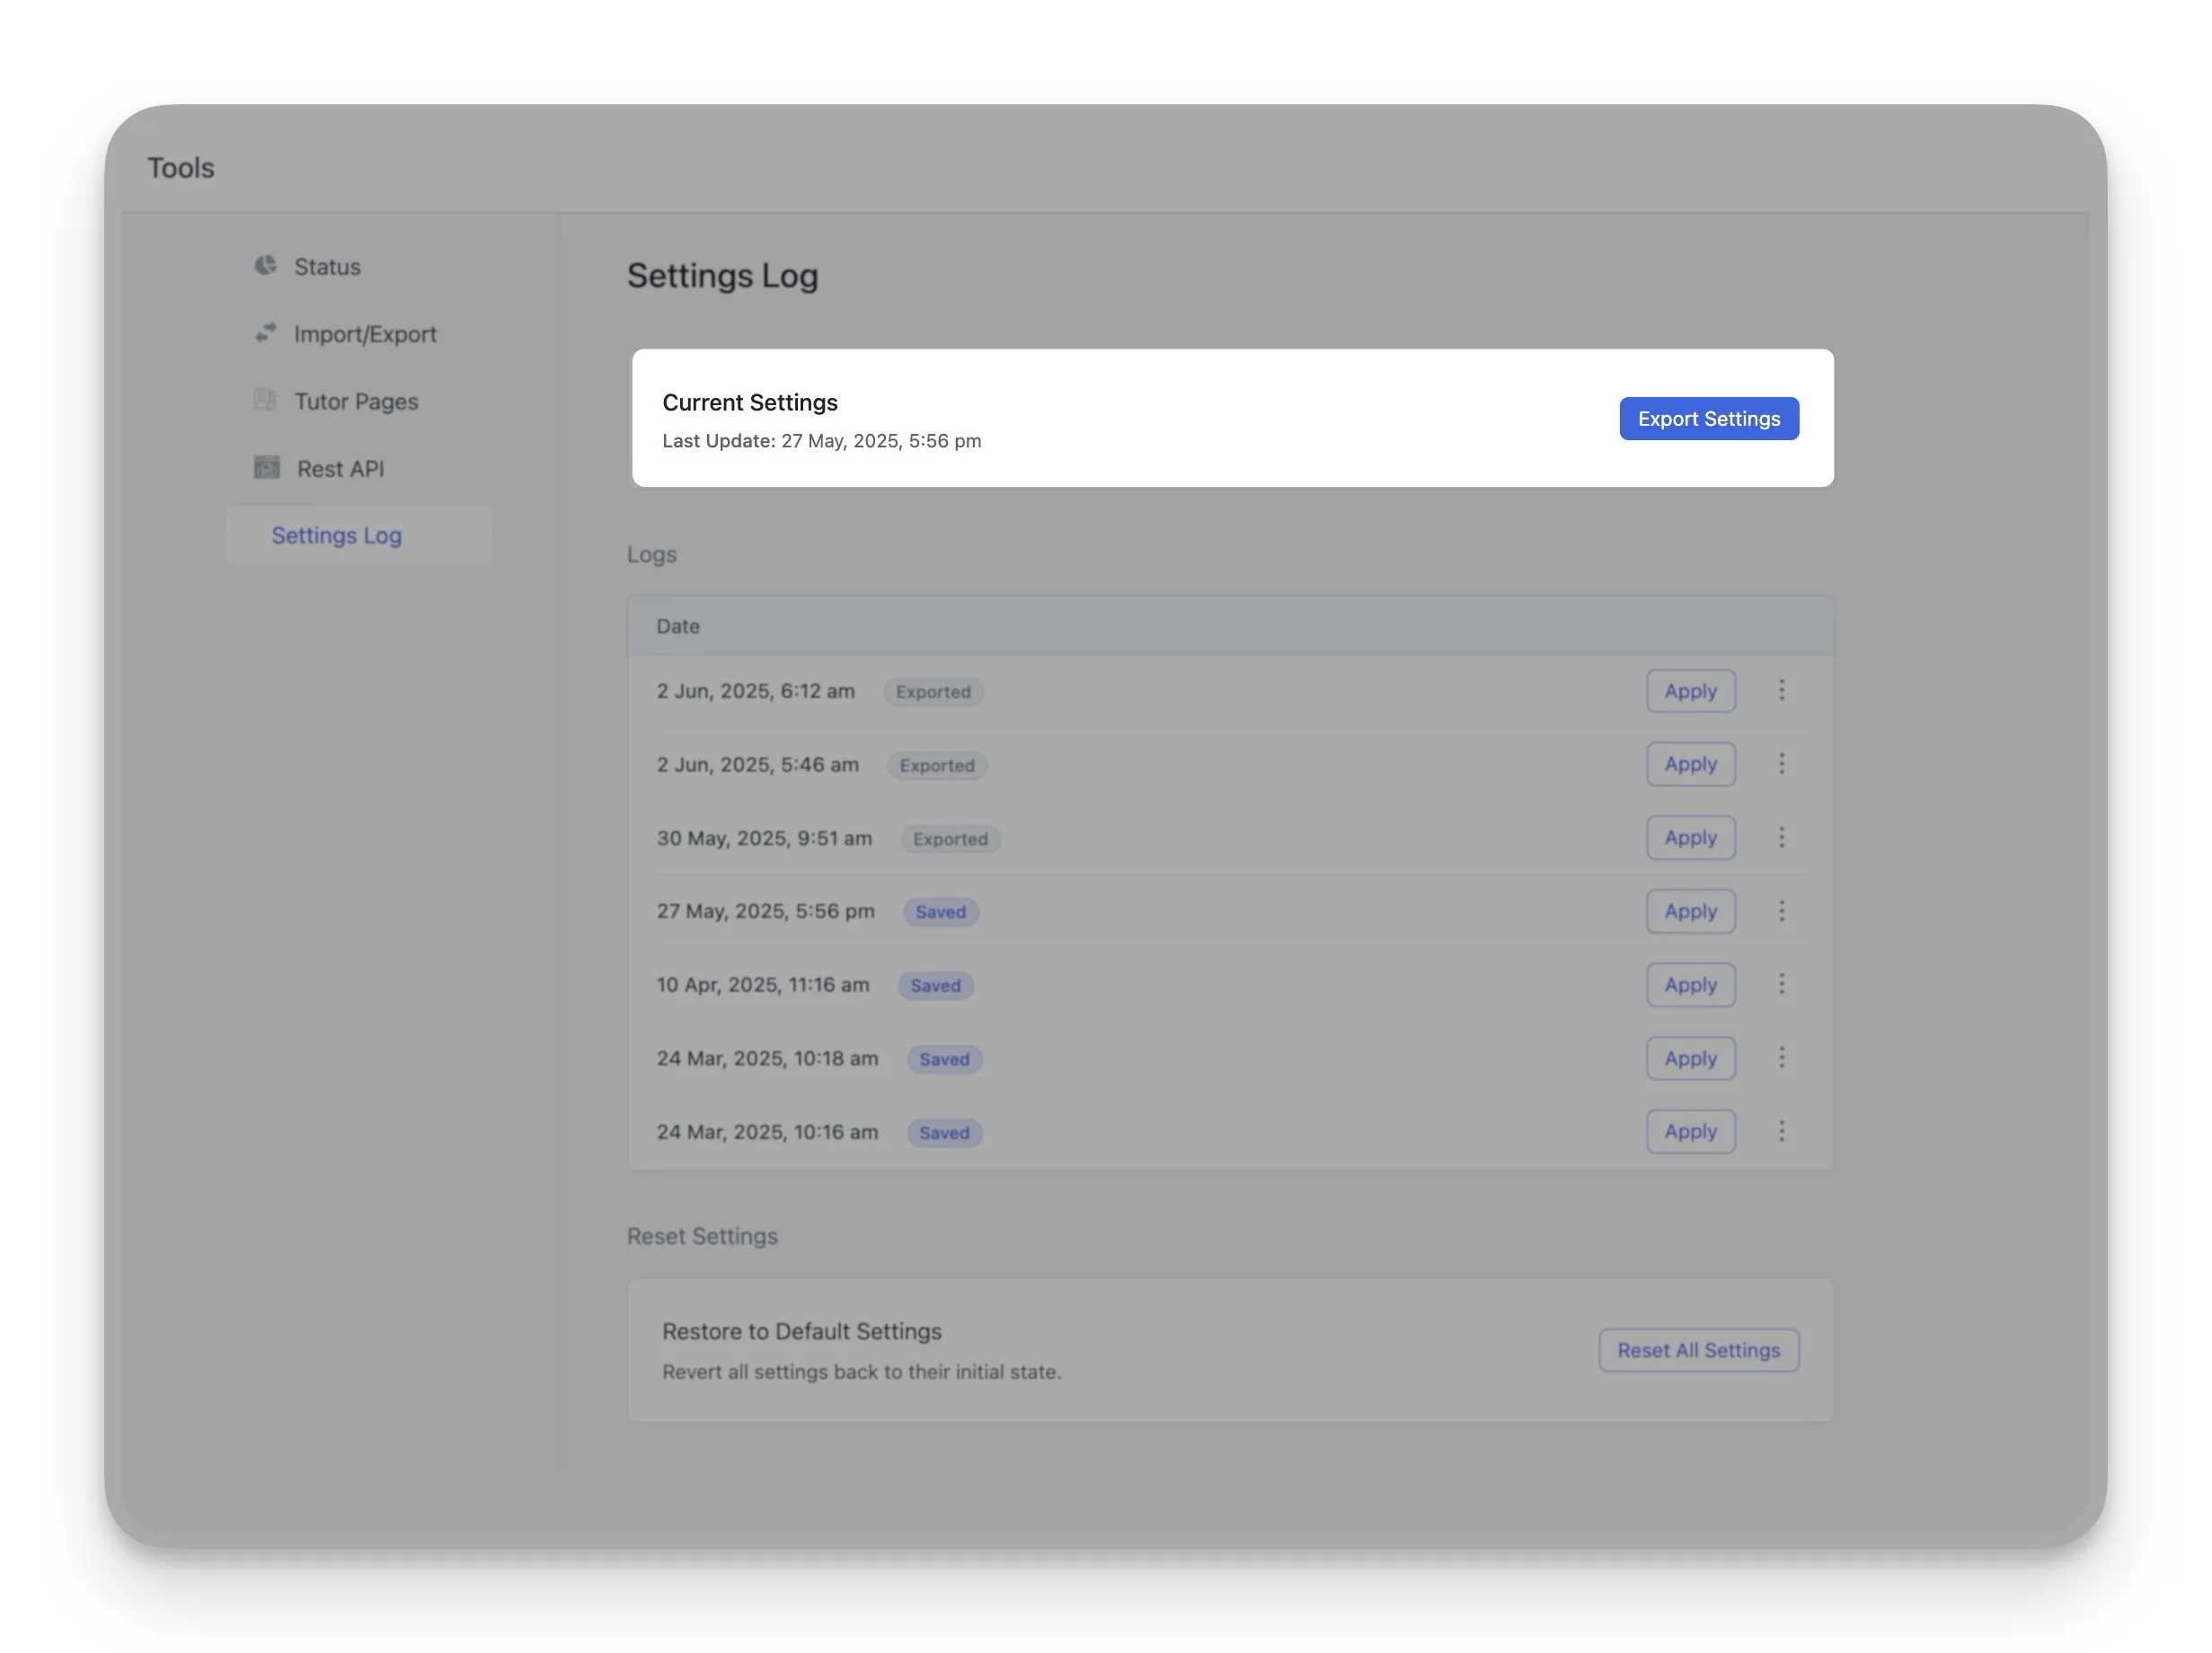
How Settings “Logs” Work
Every time you (or any administrator) saves changes in your Tutor LMS settings, the system automatically creates a versioned snapshot of your entire configuration. This builds a complete version history of your setup. Each snapshot in your history is more than just a record; it’s an interactive tool. Here’s what you can do with any saved version:
- Instantly Revert with a Single Click: If you make a mistake or simply want to go back to a previous configuration, find the timestamp you need in the list and click the “Apply” button. This performs a one-click settings restore, instantly reverting your site’s Tutor LMS settings back to that exact state.
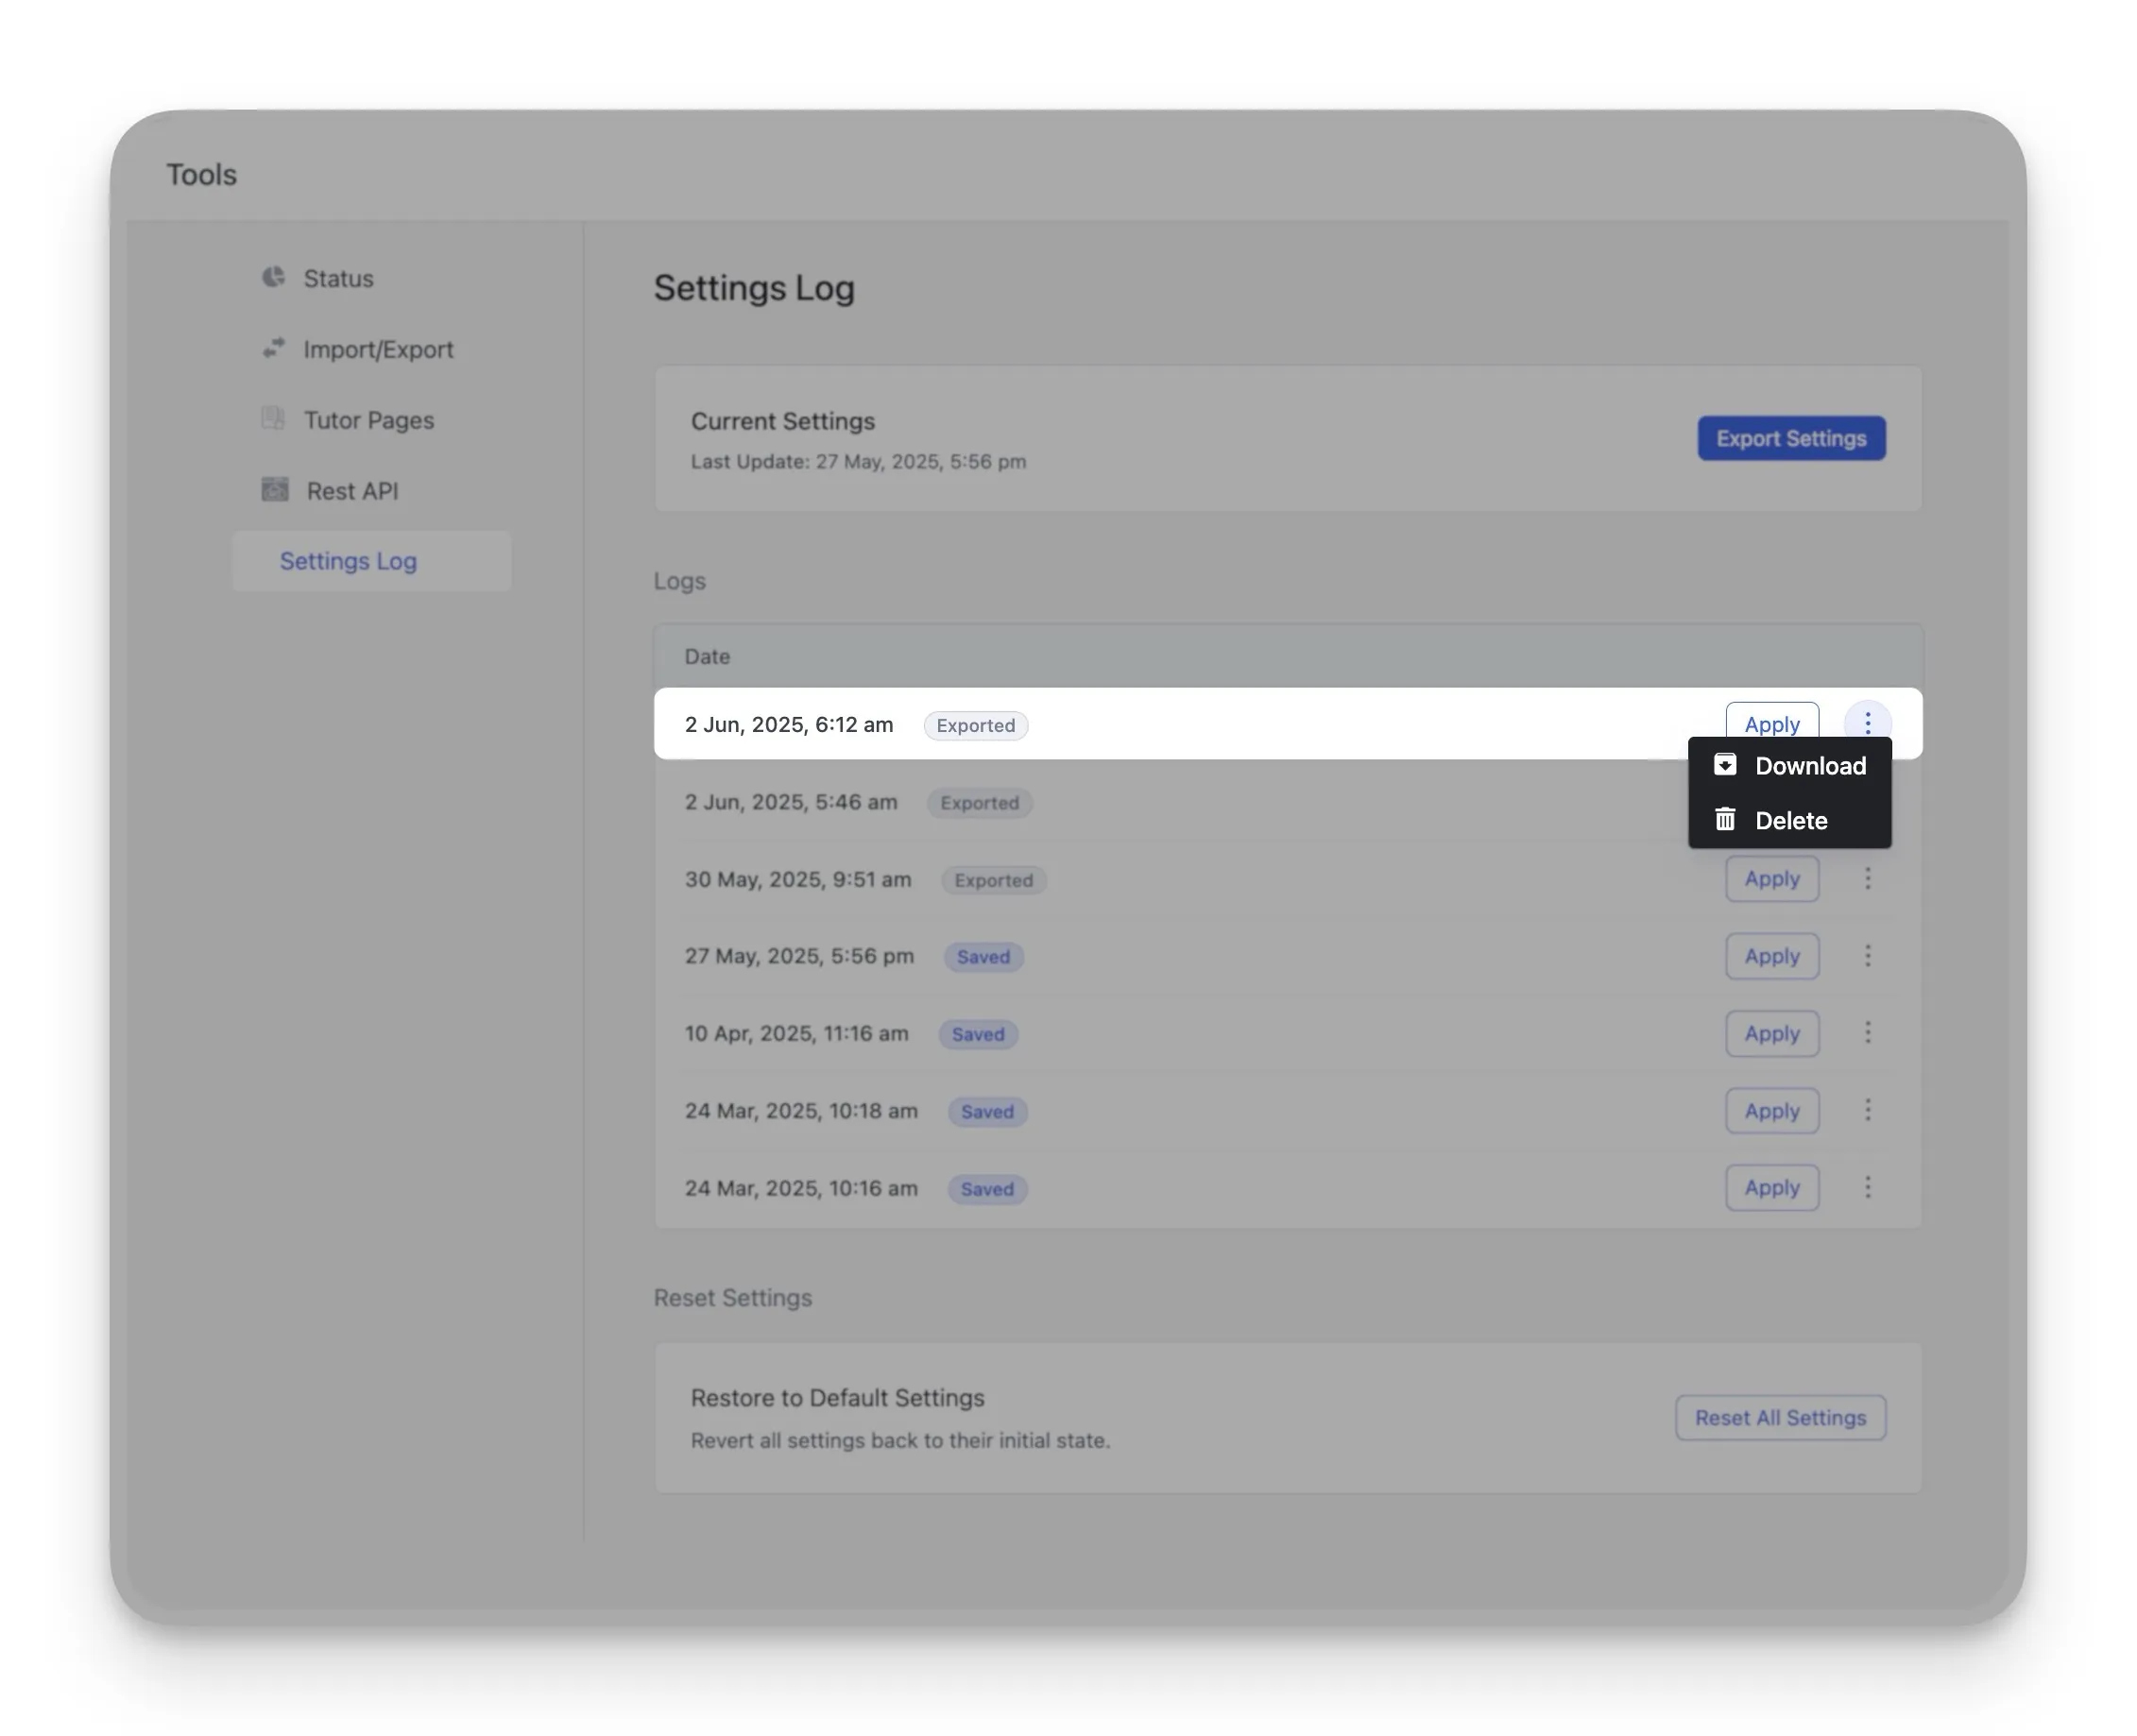
- Download a Snapshot for Backup or Cloning: Next to “Apply,” clicking the hamburger menu icon, you’ll see a “Download” option. Clicking this saves that specific settings snapshot as a .json file on your computer.
This is incredibly useful for two reasons:
- You can create a manual settings backup for secure offline storage.
- Or you can export the settings from one site and then import them into another. It’s the perfect way to replicate a setup across multiple platforms.
C. Reset Settings: The Clean Slate
Sometimes, you don’t want to go back to a previous state; you want a completely fresh start. For those moments, there is the “Reset Everything to Default” section. This is your ultimate clean slate button.
Clicking “Reset All Settings” acts as a factory reset, but only for Tutor LMS. It will instantly revert all of your configurations back to their original, out-of-the-box default settings. This is incredibly useful if you need to troubleshoot a deep-seated issue or begin a site redevelopment from a truly blank canvas.
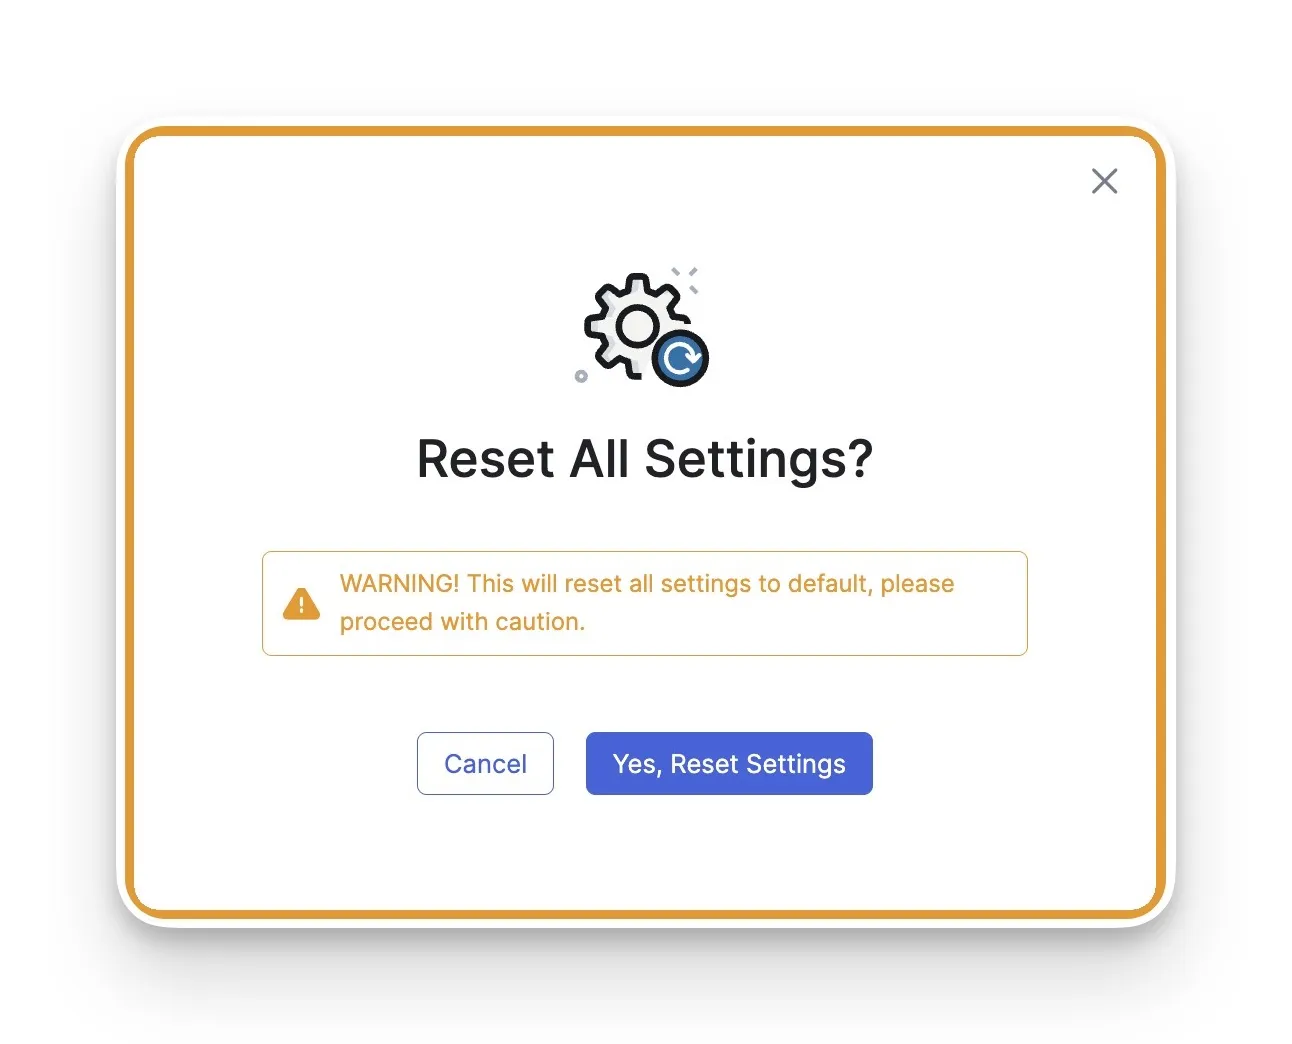
A Word of Caution: Please use this feature carefully, as the action is permanent. Make sure you have a recent snapshot saved in your Settings Log. That way, even after a reset, you still have a backup plan you can restore from if needed.
Conclusion: A New Standard for LMS Management
The new Tutor LMS Import/Export toolkit truly sets a new standard for how you manage your eLearning platform. It delivers a complete solution built on three core pillars: seamless migration with the Import/Export tool, robust version control via the Settings History, and powerful safety nets like the settings Log and full Reset option.
This means less risk, less time wasted, and more confident control for everyone, from solo instructors to large agencies. So, update your Tutor LMS to the latest version today. Explore these powerful new tools, and take full command of your site like never before.

Start Using Tutor LMS Today
Ready to take your online courses to new heights? Download Tutor LMS now and enjoy a journey of eLearning excellence.