That first sale notification feels incredible, doesn’t it? It’s the moment your passion project becomes a real business. But soon after the celebration, a new thought often creeps in: “Wait, how do I handle the taxes for this?” If you’ve ever felt a little lost managing the financial side of selling courses online, you’re definitely not alone.
Proper online course tax management can seem complex, but getting it right is a key part of building a sustainable and professional eLearning business. It’s about more than just compliance; it’s about having the financial clarity to grow with confidence. This is precisely why the Tutor LMS tax controls were developed to give you powerful tools right where you need them.
This article is your complete guide to mastering these new features. We will walk through every setting within the Tutor LMS native eCommerce system, showing you how to configure taxes for your unique business needs.
Getting Started: Enabling Tutor LMS Native eCommerce
Before you can begin setting up taxes, the first step is to ensure the Tutor LMS native eCommerce system is active. Activating the built-in eCommerce engine is the key that unlocks all the powerful financial tools, including the new tax controls for your courses.
The process is quite straightforward. You can get this done in just a few clicks from your dashboard.
- From your WordPress dashboard, navigate to Tutor LMS > Settings.
- Once in the settings area, you will want to select the Monetization tab.
- Here, you will find the eCommerce Engine option. From its dropdown menu, you should select Native to activate the built-in Tutor LMS eCommerce functionality.
- A final click on the ‘Save Settings’ button will lock in your choice.
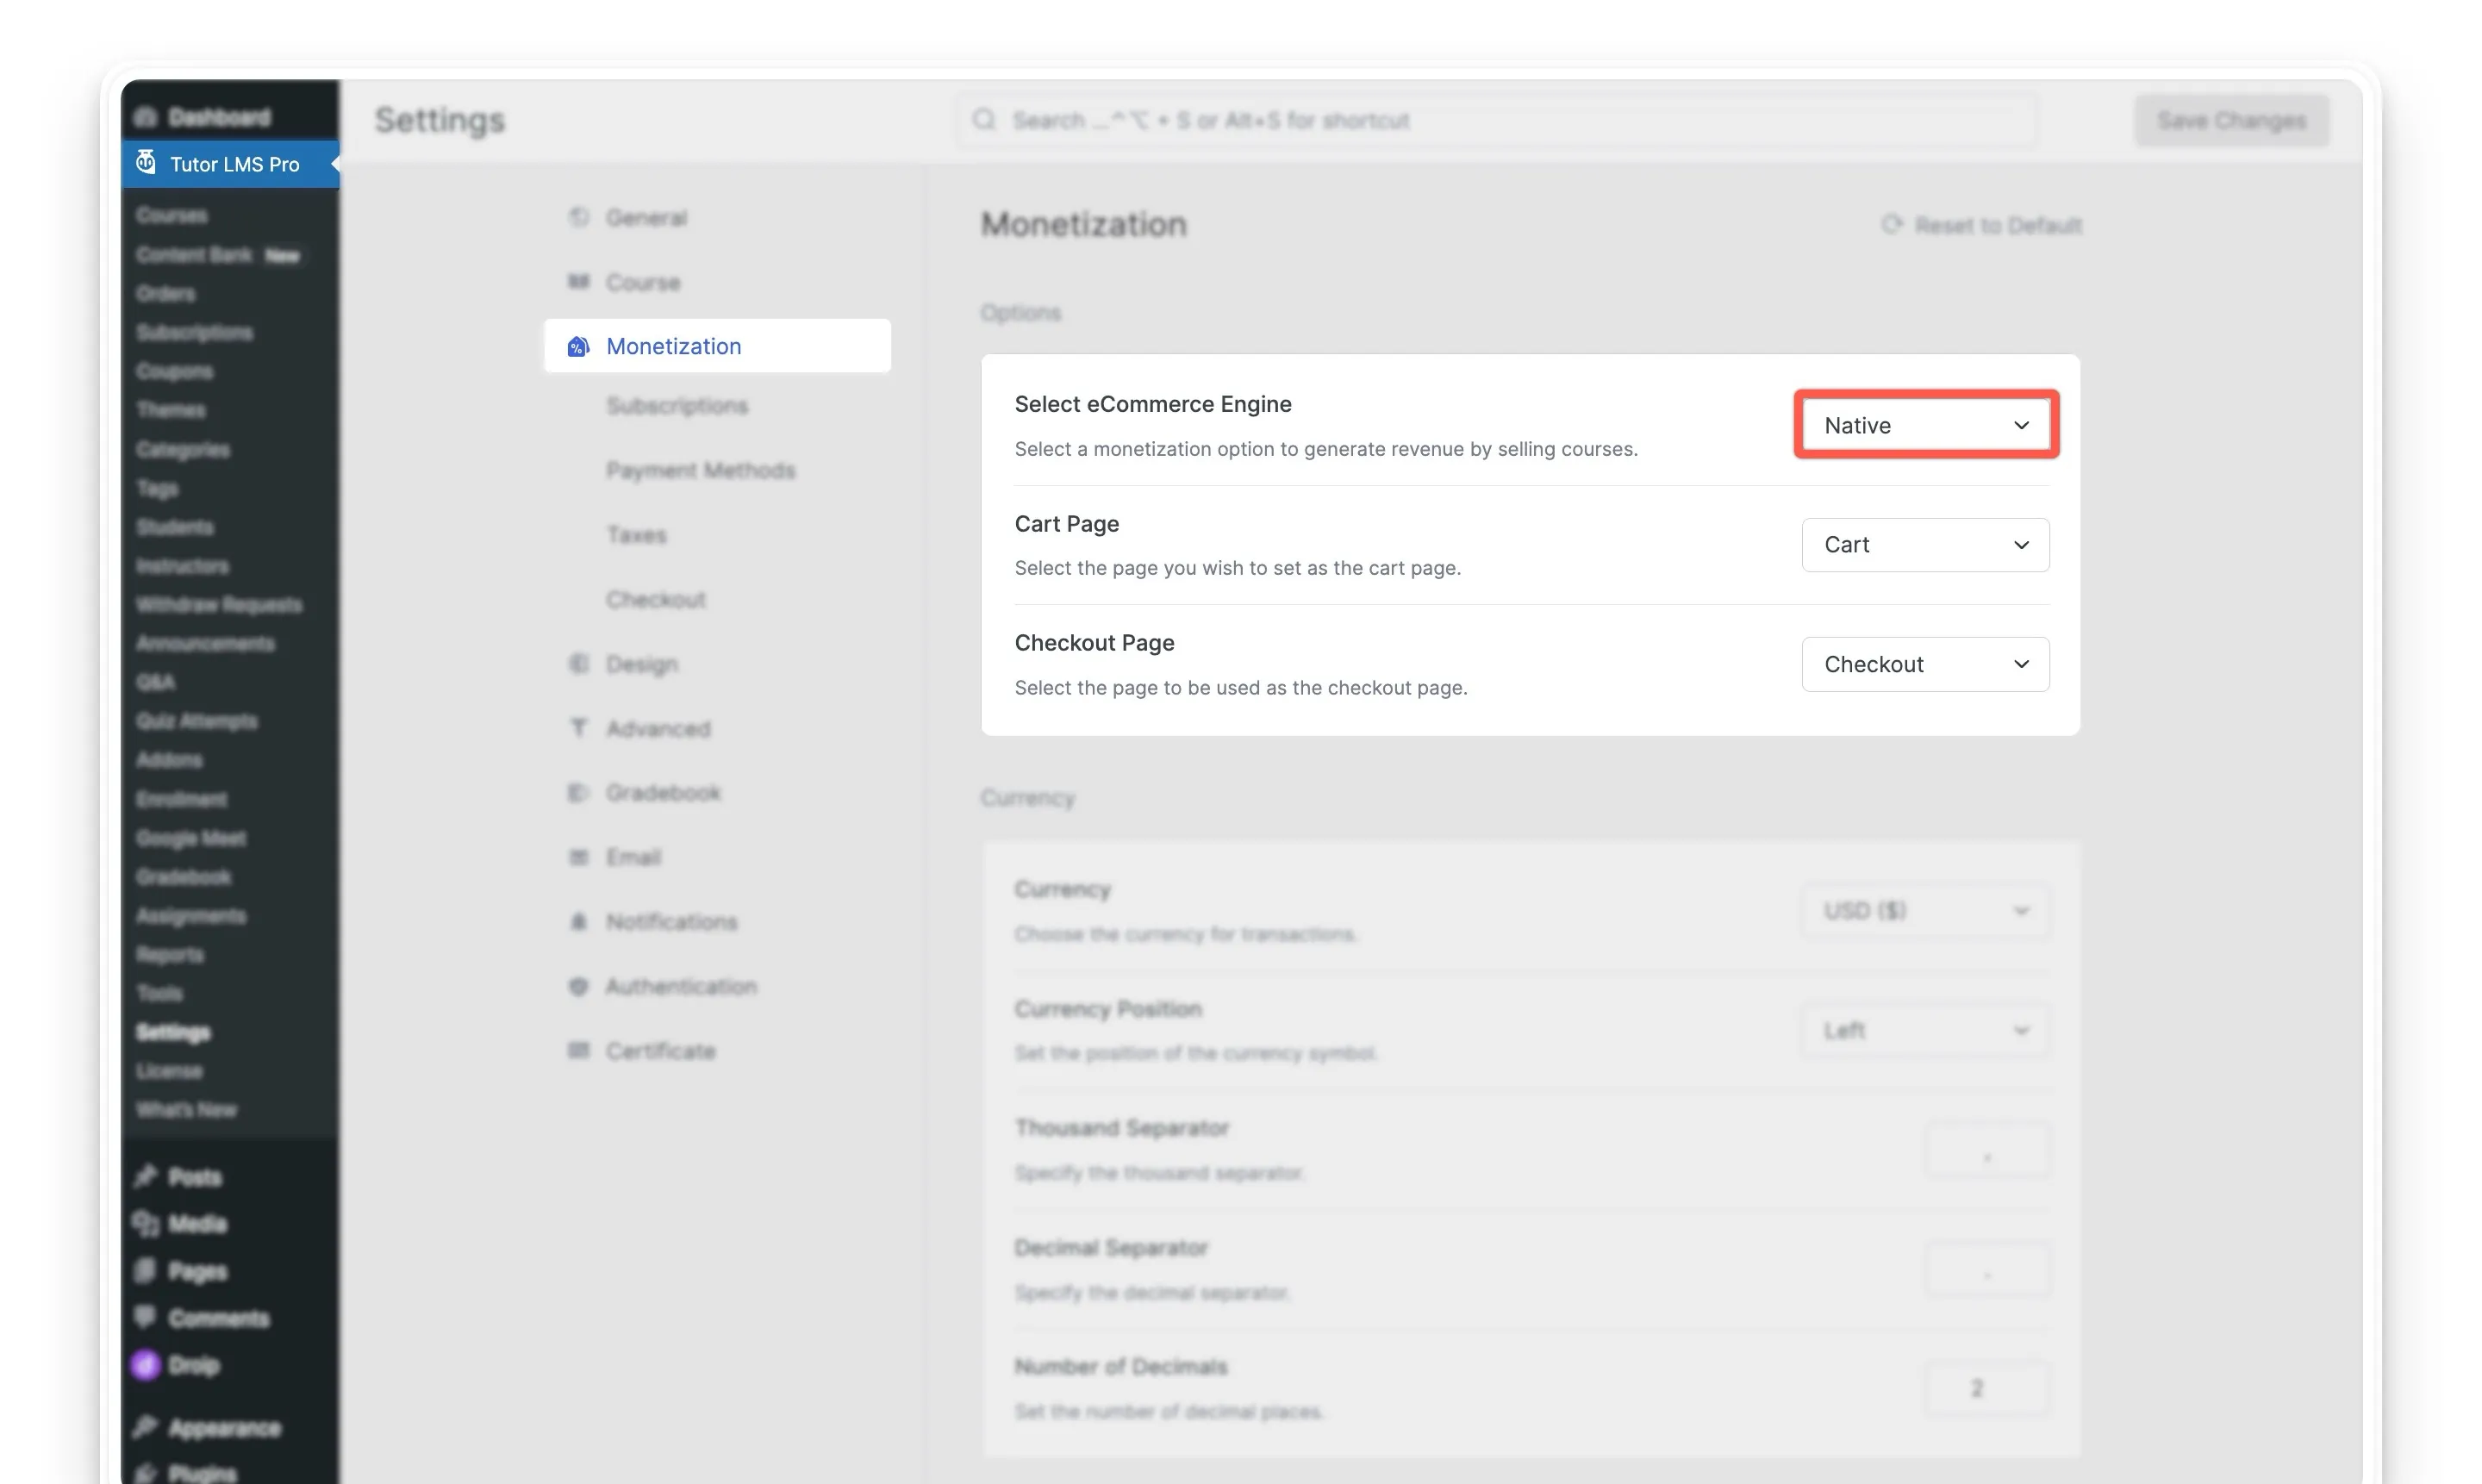
After you save these changes, a new ‘Taxes’ tab will appear right under your monetization settings. With that done, you are now ready to begin configuring your specific tax rules.
A Guide to Configuring Regional Tax Rates
Now that you’ve enabled the native eCommerce engine, it’s time to tackle the core of your Tutor LMS tax settings: the regional rates. When you’re selling courses online to a global audience, you’ll find that tax requirements can change based on your location. Setting up regional tax rates ensures you’re collecting the correct amount from everyone, every time.
This system gives you precise control over how taxes are applied, making your eLearning tax management much simpler.
Setting Up Your First Tax Region
The process involves telling Tutor LMS which locations to apply tax to and what the rate should be.
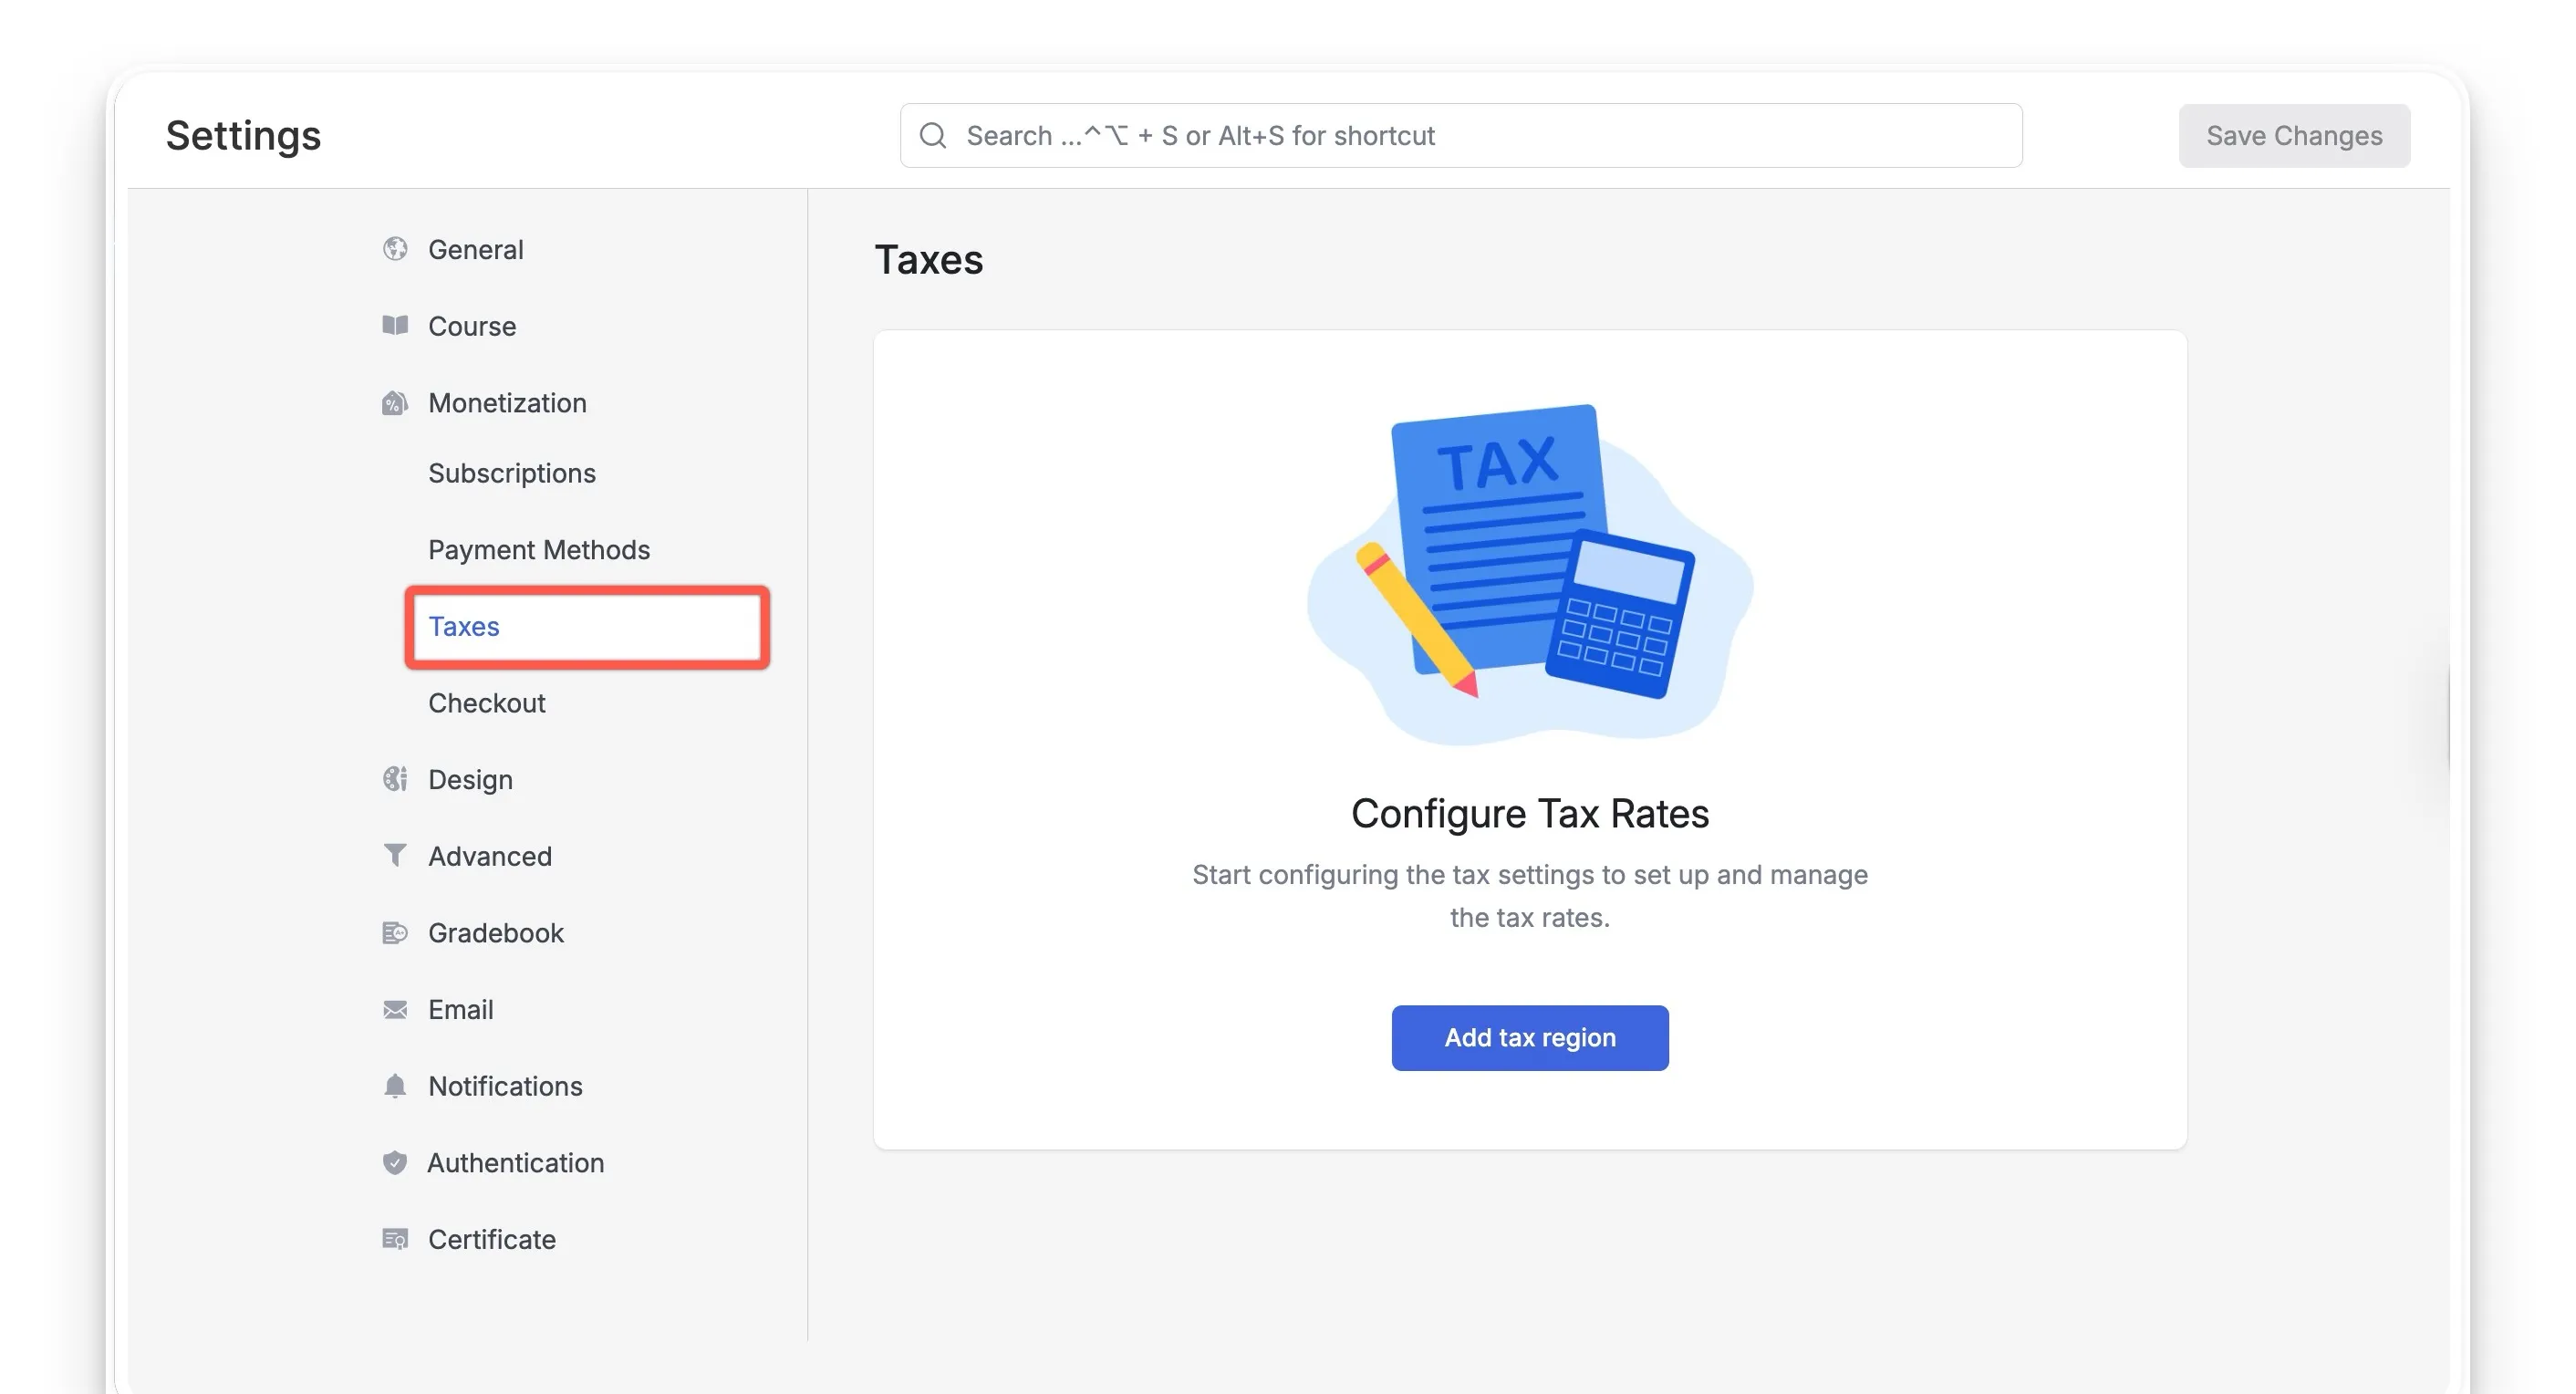
- Navigate to the Taxes Tab:
Your starting point is the new ‘Taxes’ tab, which you can now find by going to your WordPress dashboard and then to Tutor LMS > Settings > Taxes.
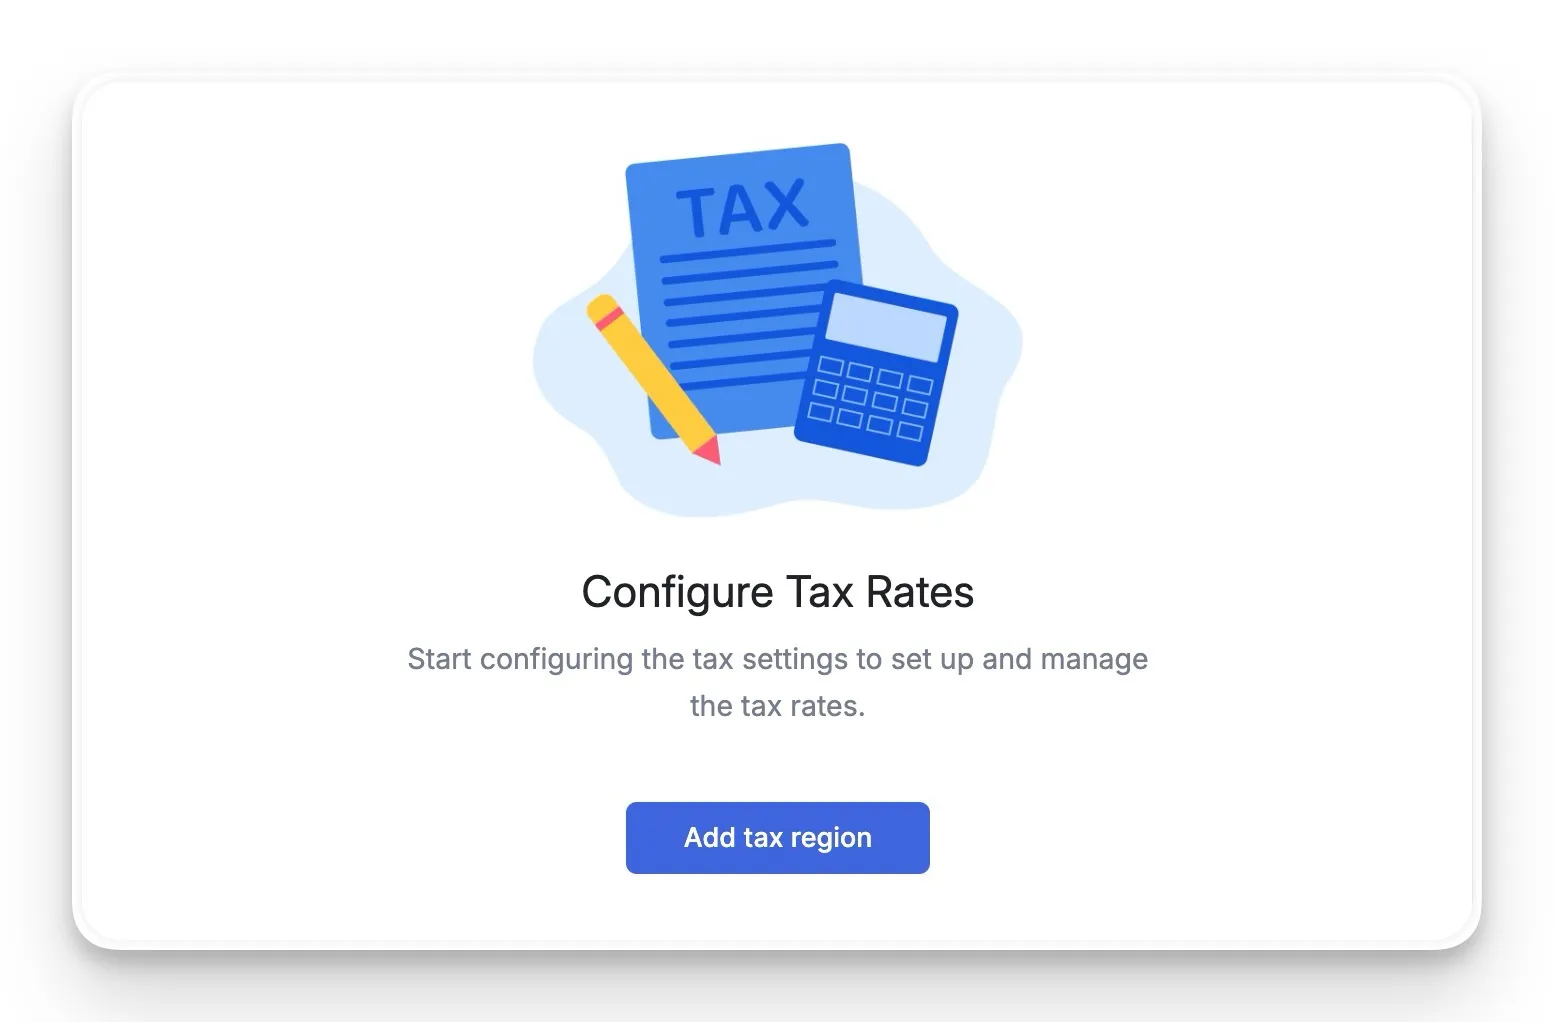
- Add a New Tax Region:
To begin, you’ll select the ‘Add tax region‘ button. This action opens up the settings where you can define a new location for tax collection.
- Select a Country or Specific Provinces:
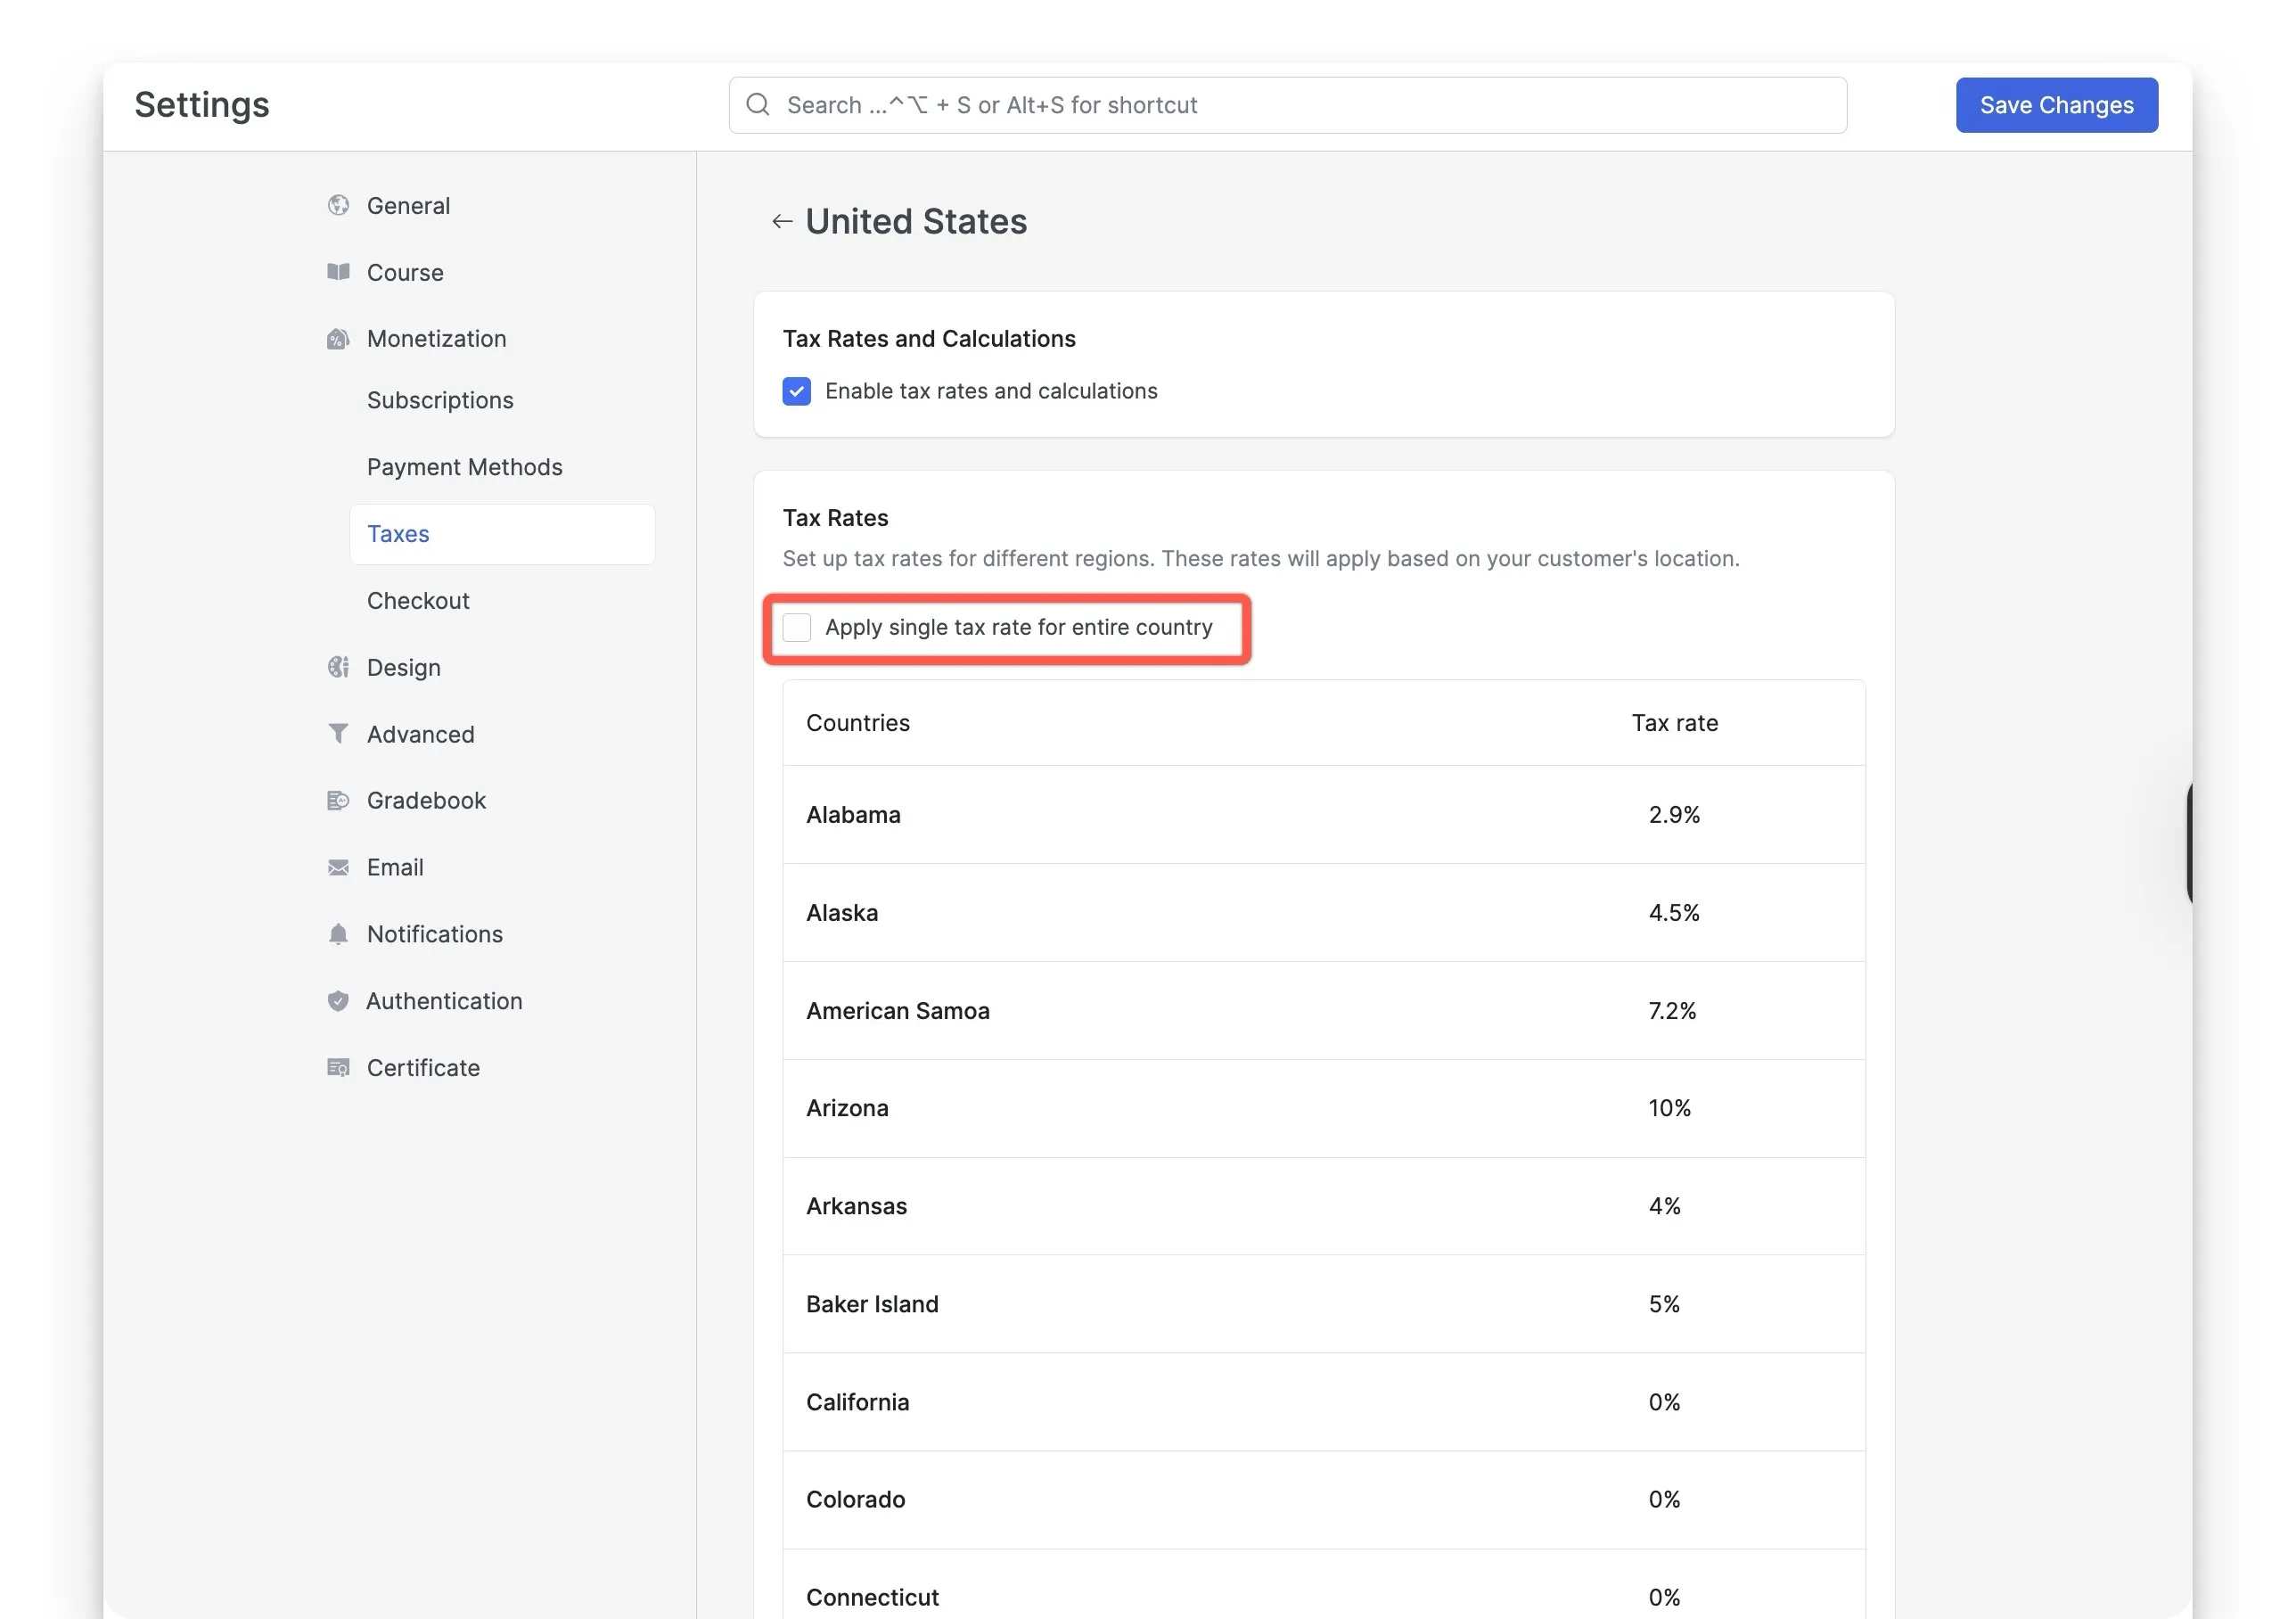
Now, you can select an entire country to apply a tax rate to. Alternatively, if you need more specific control, you can leave the country field and instead select individual states or provinces within that country. This flexibility is key, as tax laws can vary significantly even within the same nation.
- Set the Tax Percentage:
Once a region is added to your list, you can edit its tax percentage by clicking the ‘Edit’ button. This rate is what Tutor LMS will use for the Tutor LMS checkout tax calculation for students who purchase from that specific area. By default, it’s set to 0%.
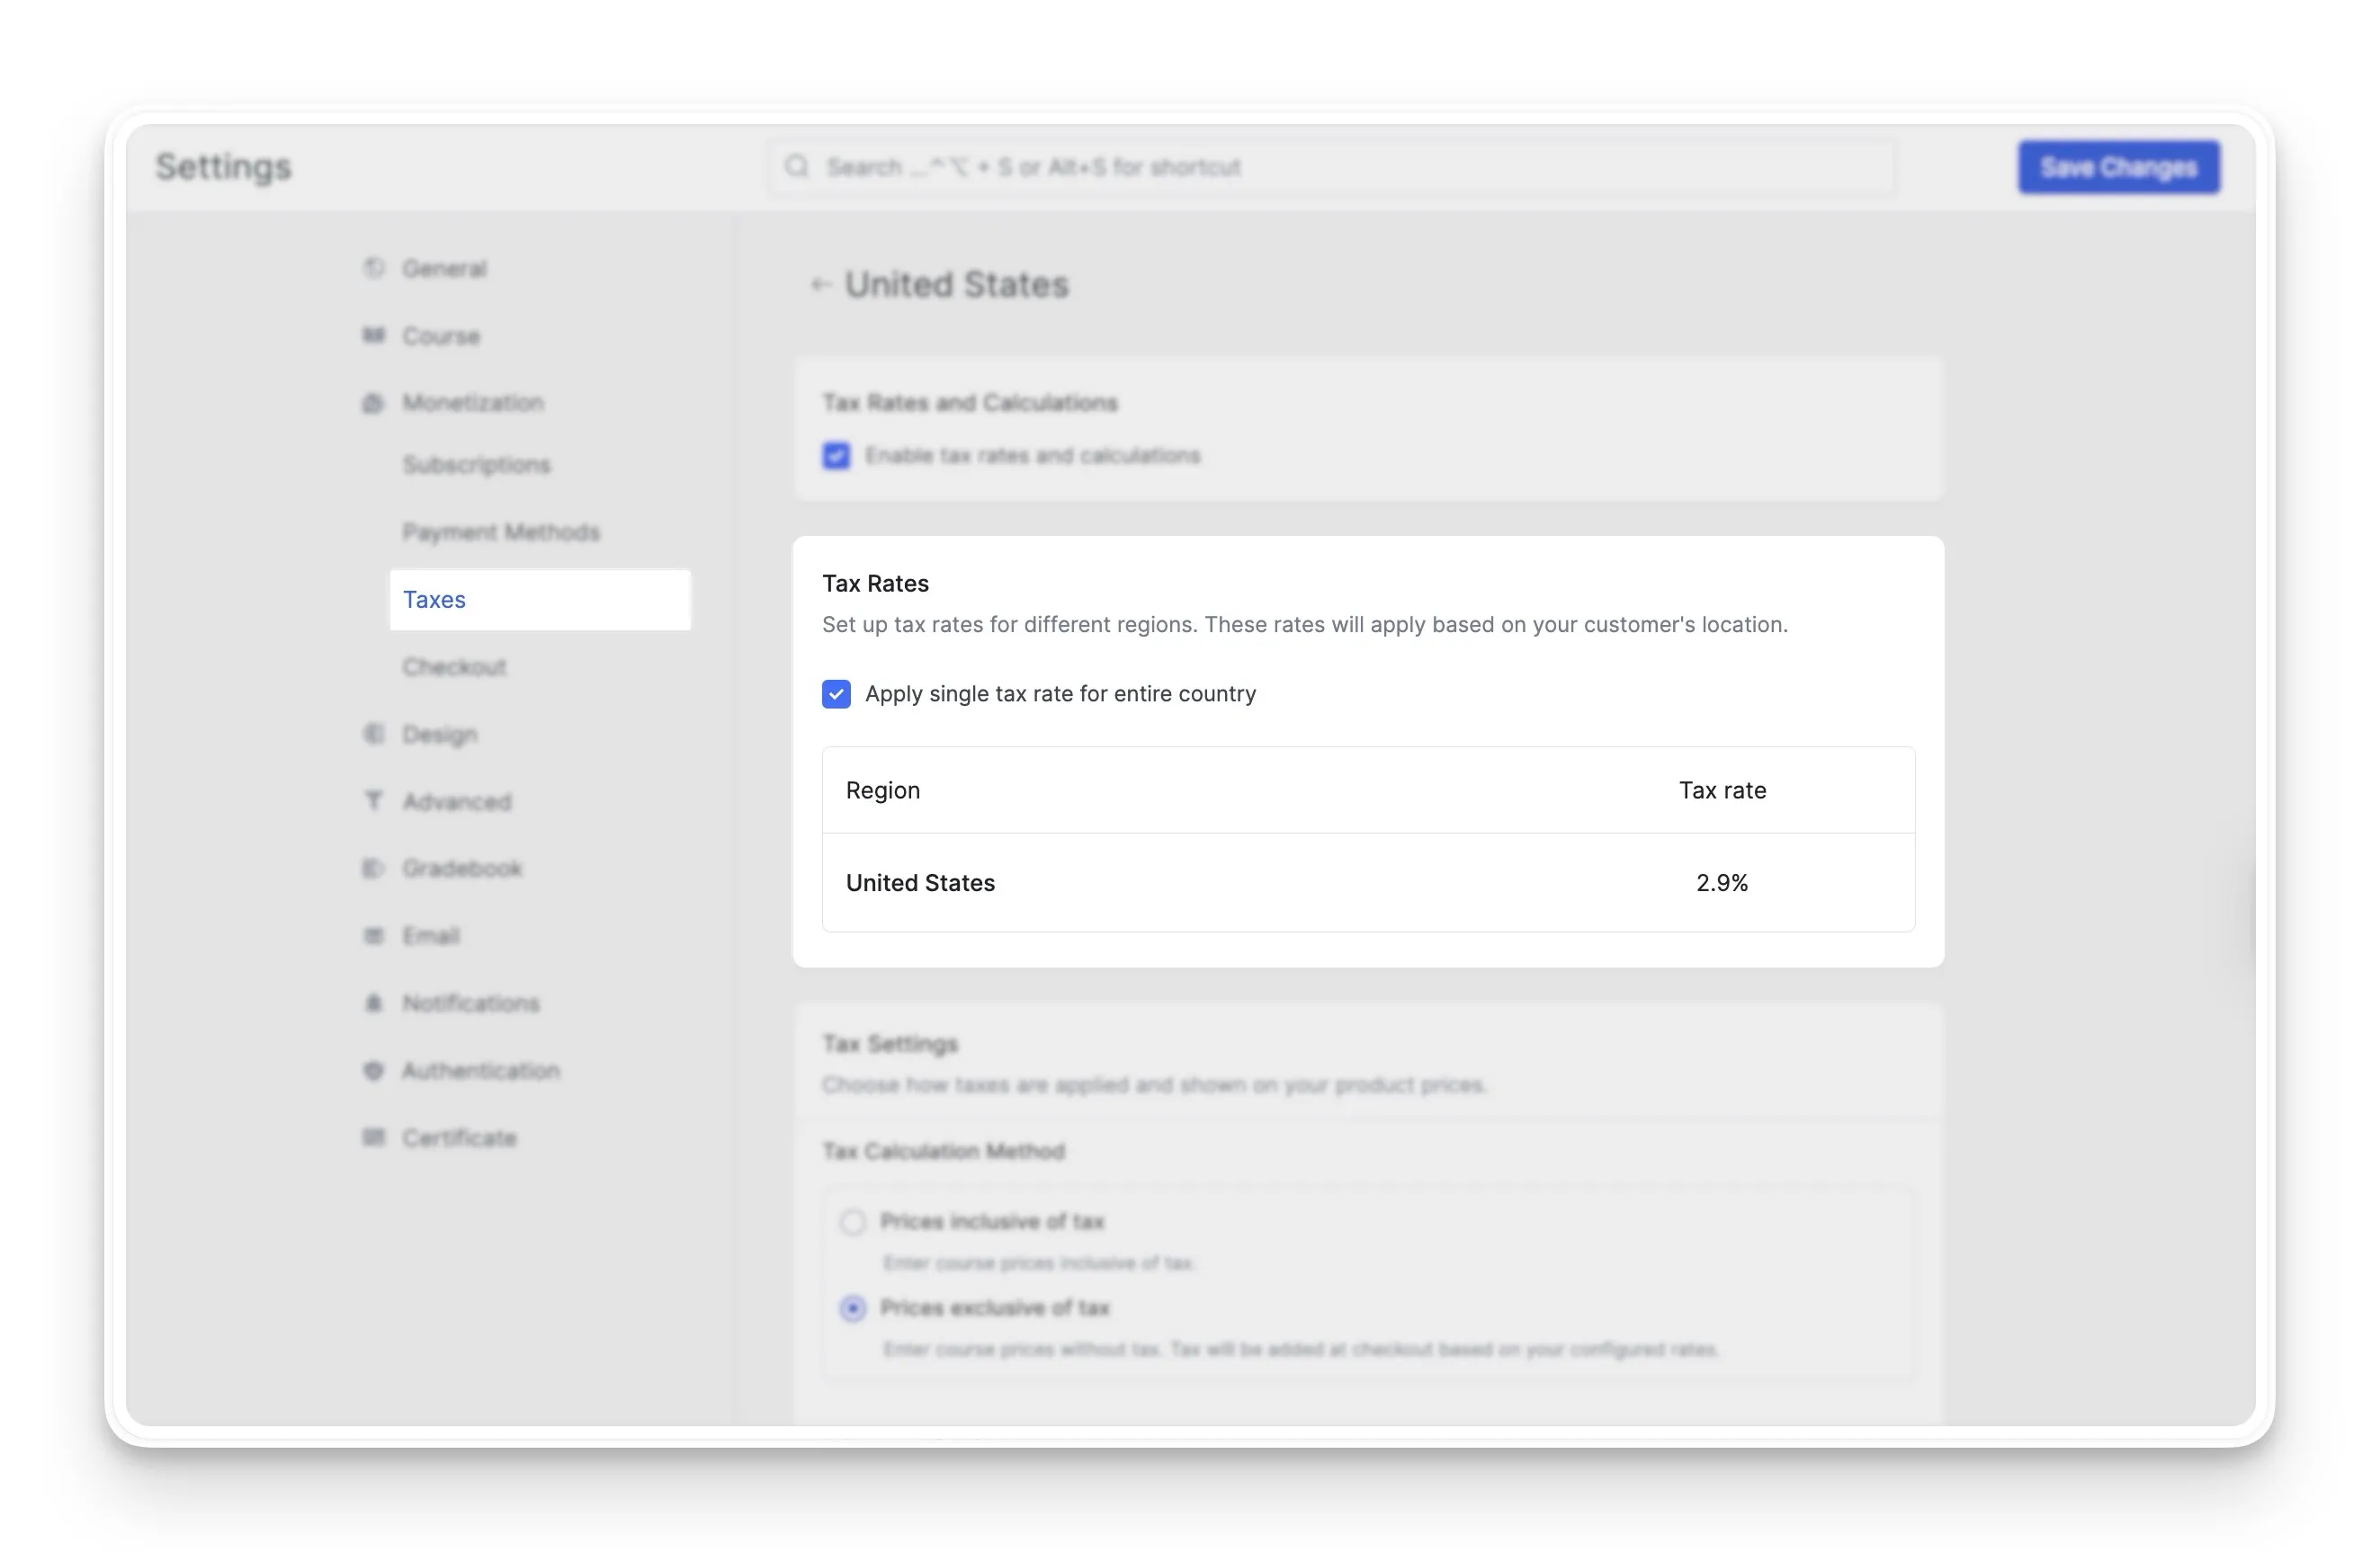
- Apply a Single Country-Wide Rate (Optional):
For situations where the tax is uniform across an entire nation, there’s a helpful shortcut. You can select the ‘Apply single tax rate for the entire country‘ box. This convenient option applies one rate everywhere in that country, simplifying your setup considerably.
By setting up these regional rates, you’ve built the foundation for how to add tax to course prices accurately and automatically. While Tutor LMS makes the technical setup easy, it’s always a great idea to check with a local tax authority to ensure you’re using the correct percentages for your business.
Understanding Global Tax Settings
After setting your regional rates, the next step is deciding how your students will see those taxes. The Tutor LMS global tax settings control the presentation of your prices. This choice can significantly impact your students’ checkout experience and their perception of your pricing.
You have two main approaches for how prices and taxes are displayed on your site:
Option 1: “Prices inclusive of tax”
This approach is all about upfront clarity. When you choose this setting, the price a student sees on your course page is the final amount they will pay. There are no surprises at the end, which can lead to a smoother checkout process and build trust with your learners.
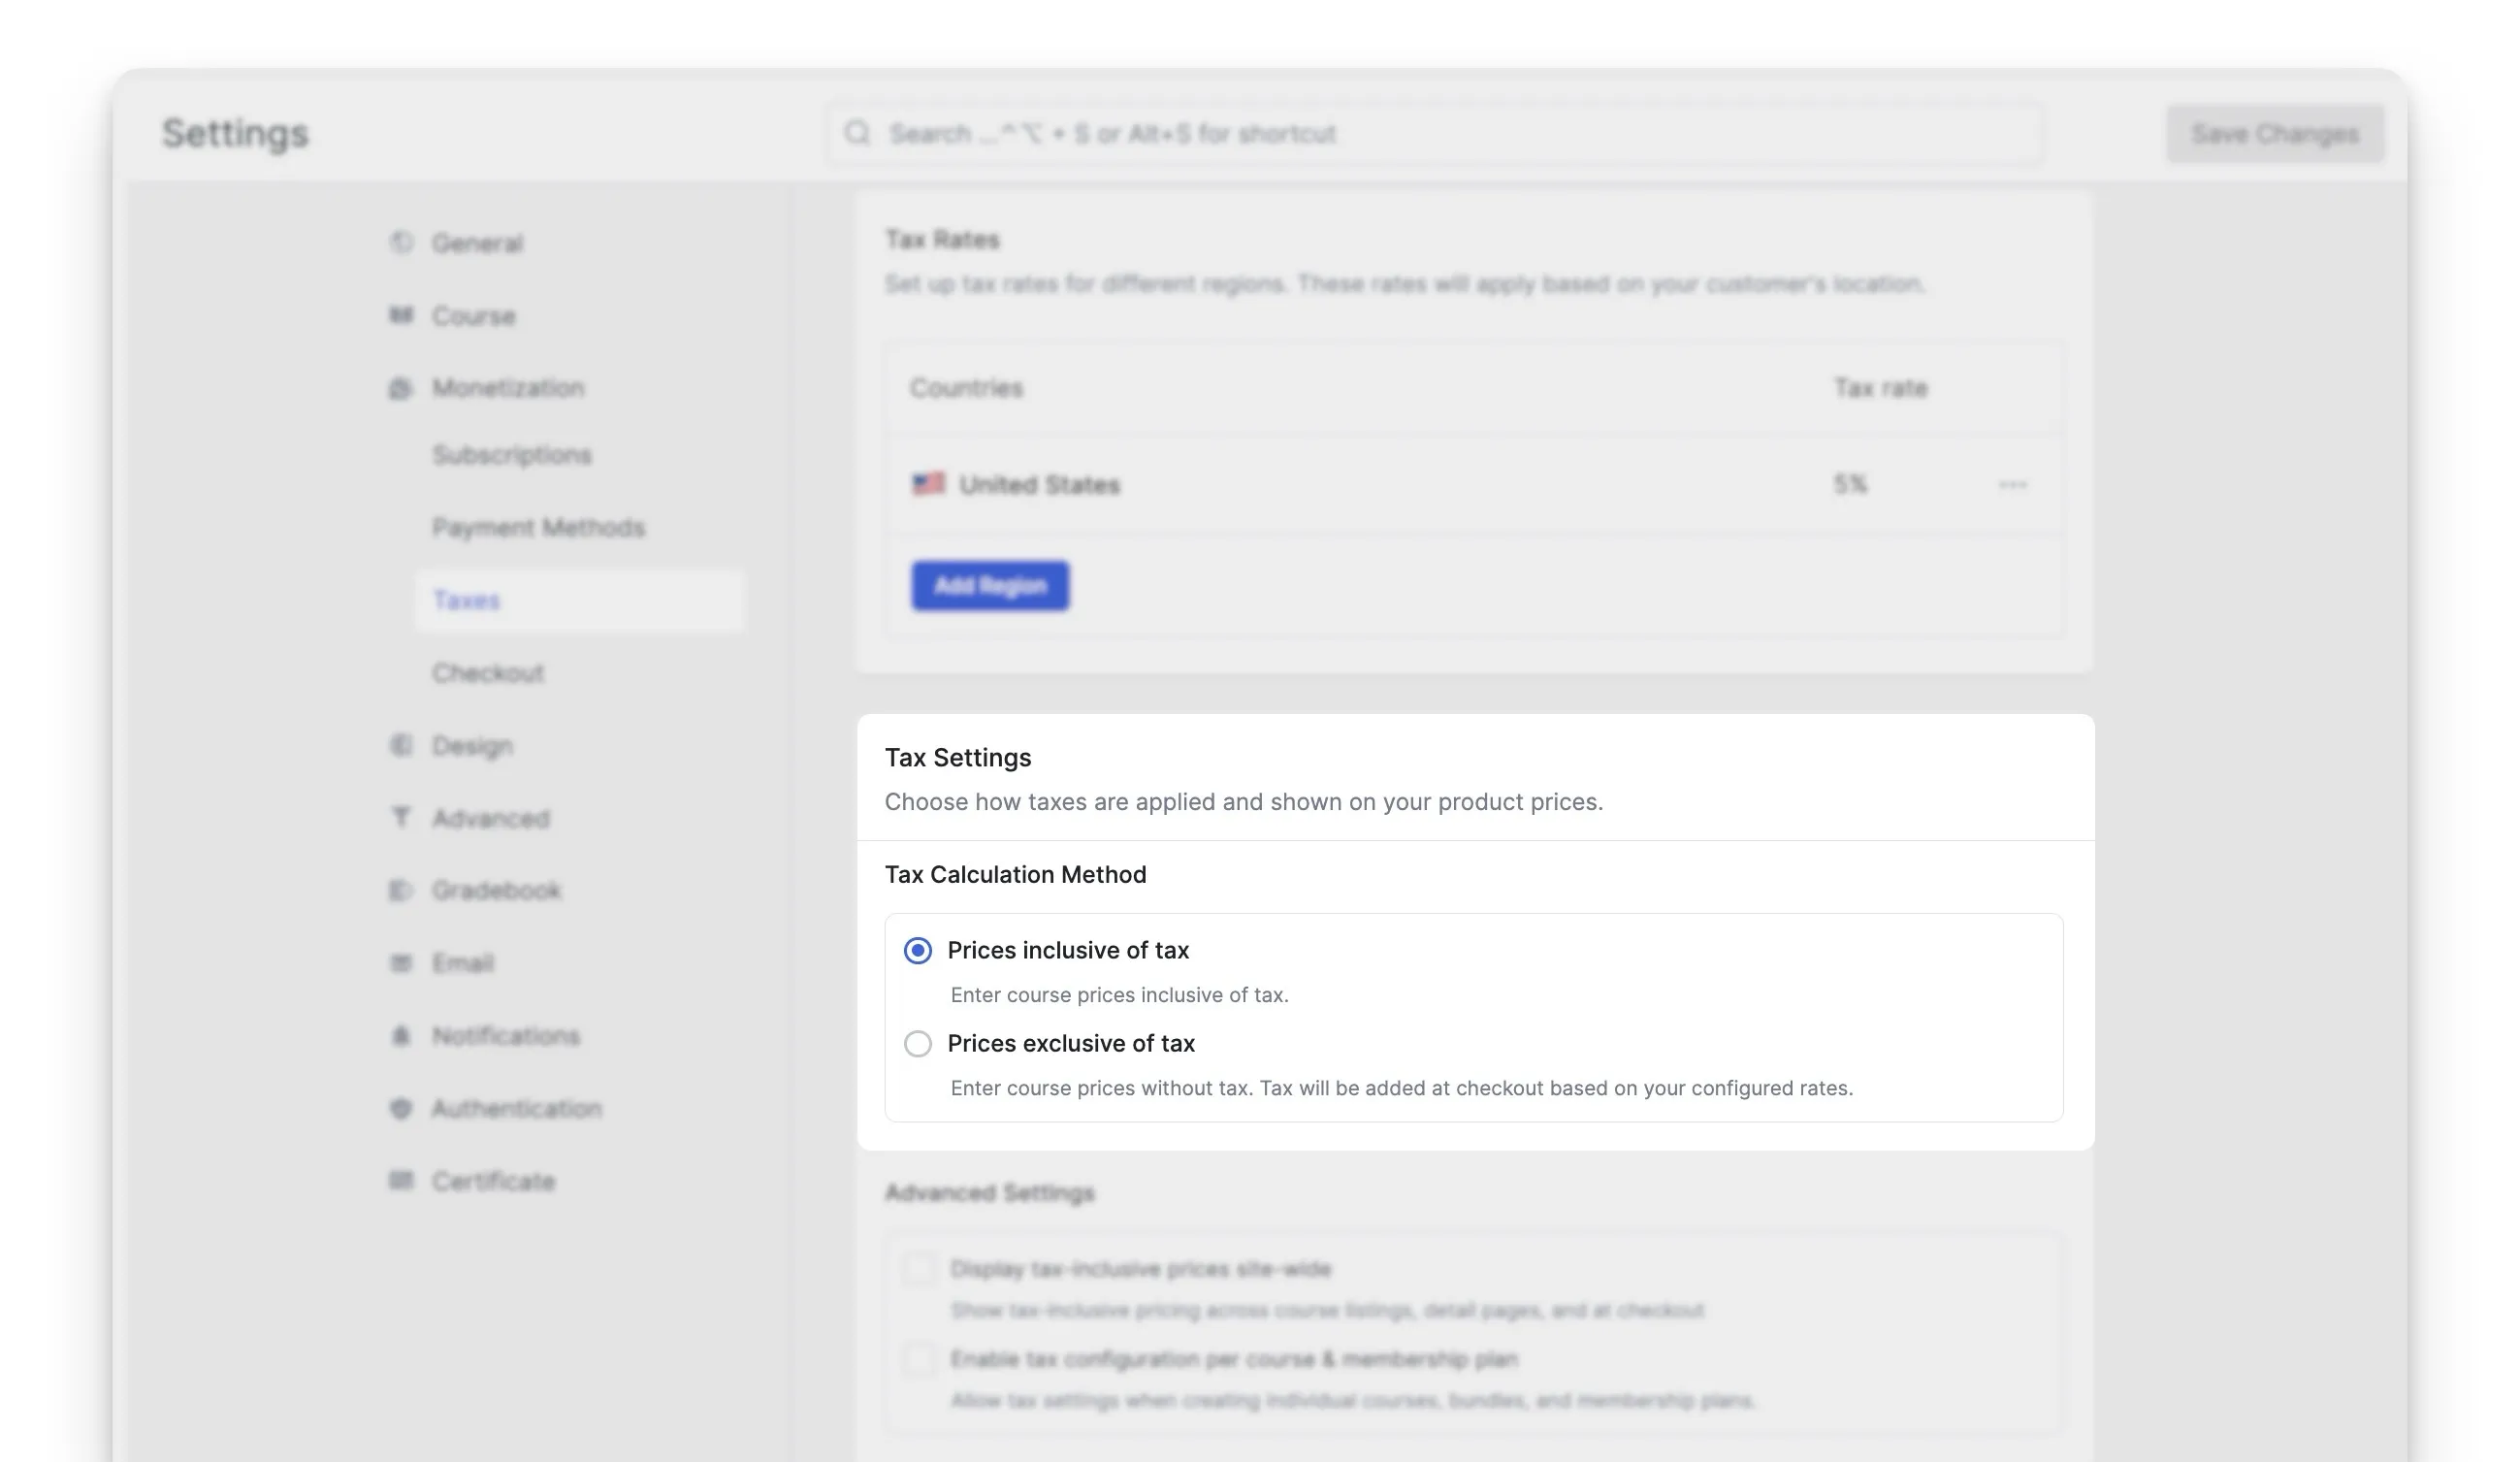
Important: With this setting, the price you enter for the course must be the final, total amount. For example, if your base price of the course is $90 and the tax is 10%, you need to set the course price as $99 directly. The system will not add the tax for you.
This tax-inclusive pricing model is standard in many parts of the world, like the EU and Australia, where customers expect the listed price to be the total price for digital products.
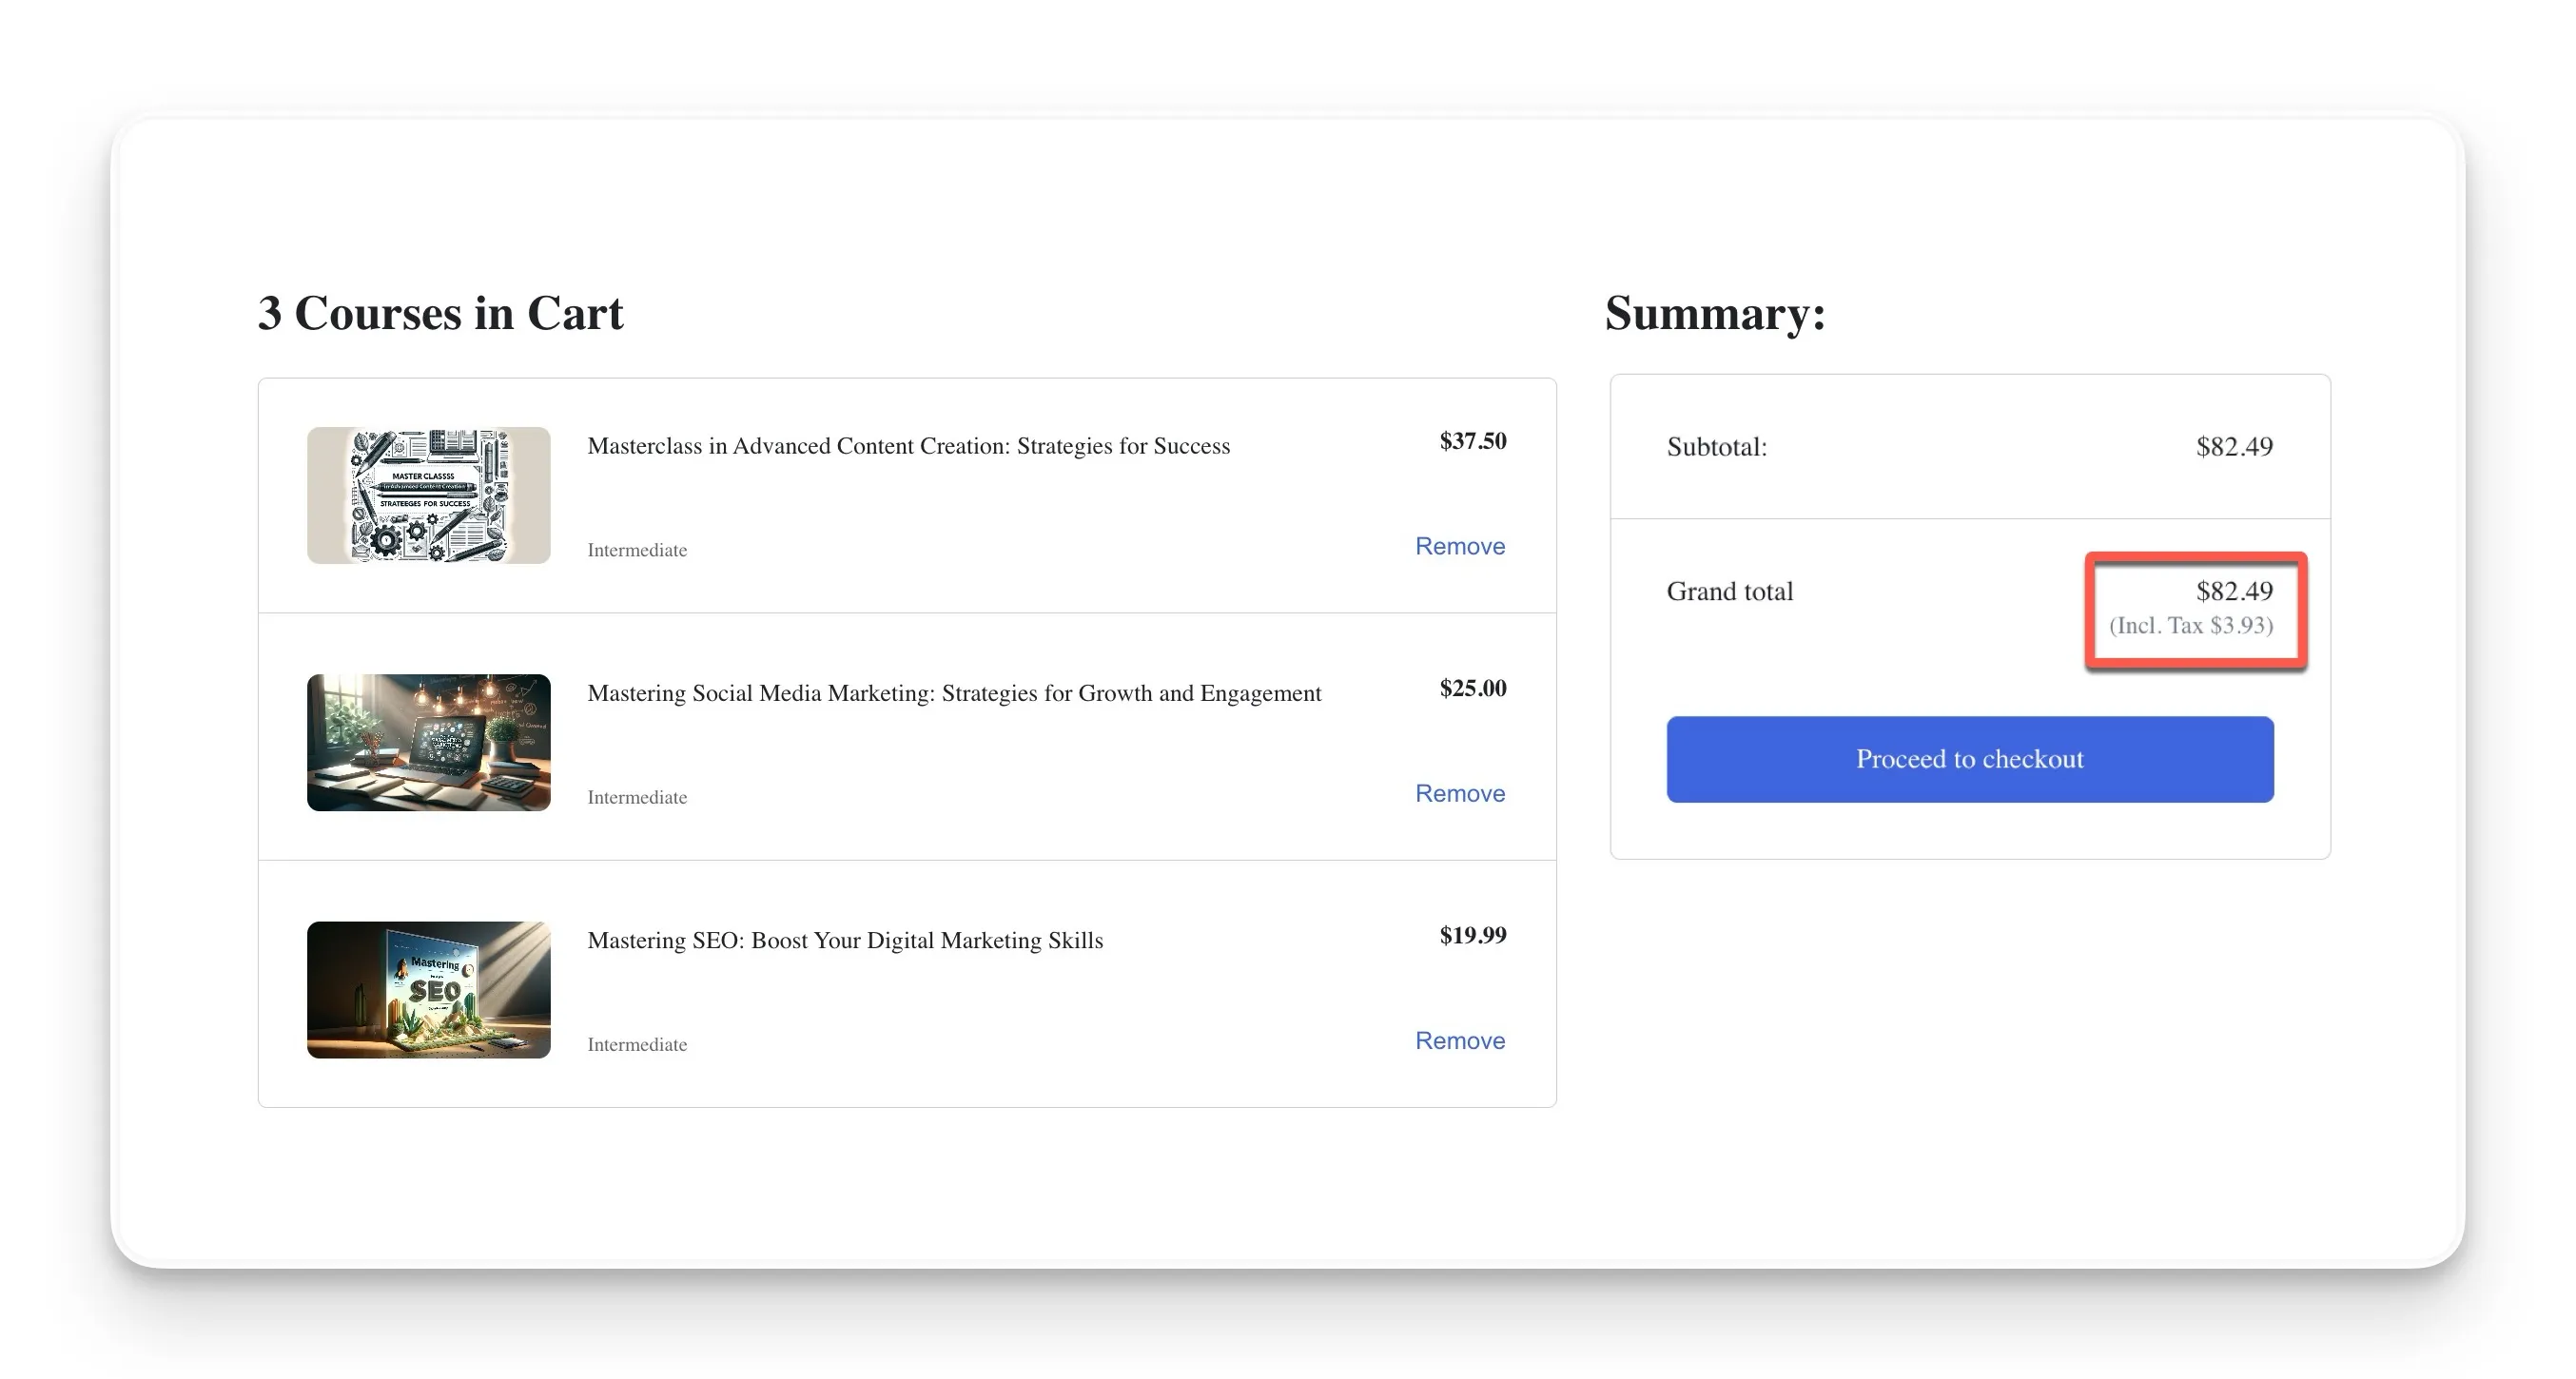
Option 2: “Tax calculated and displayed on the checkout page”
With this setting, the tax is added on at the final step. Your course pages will show the pre-tax price, and the final checkout tax calculation happens once the student proceeds to pay.
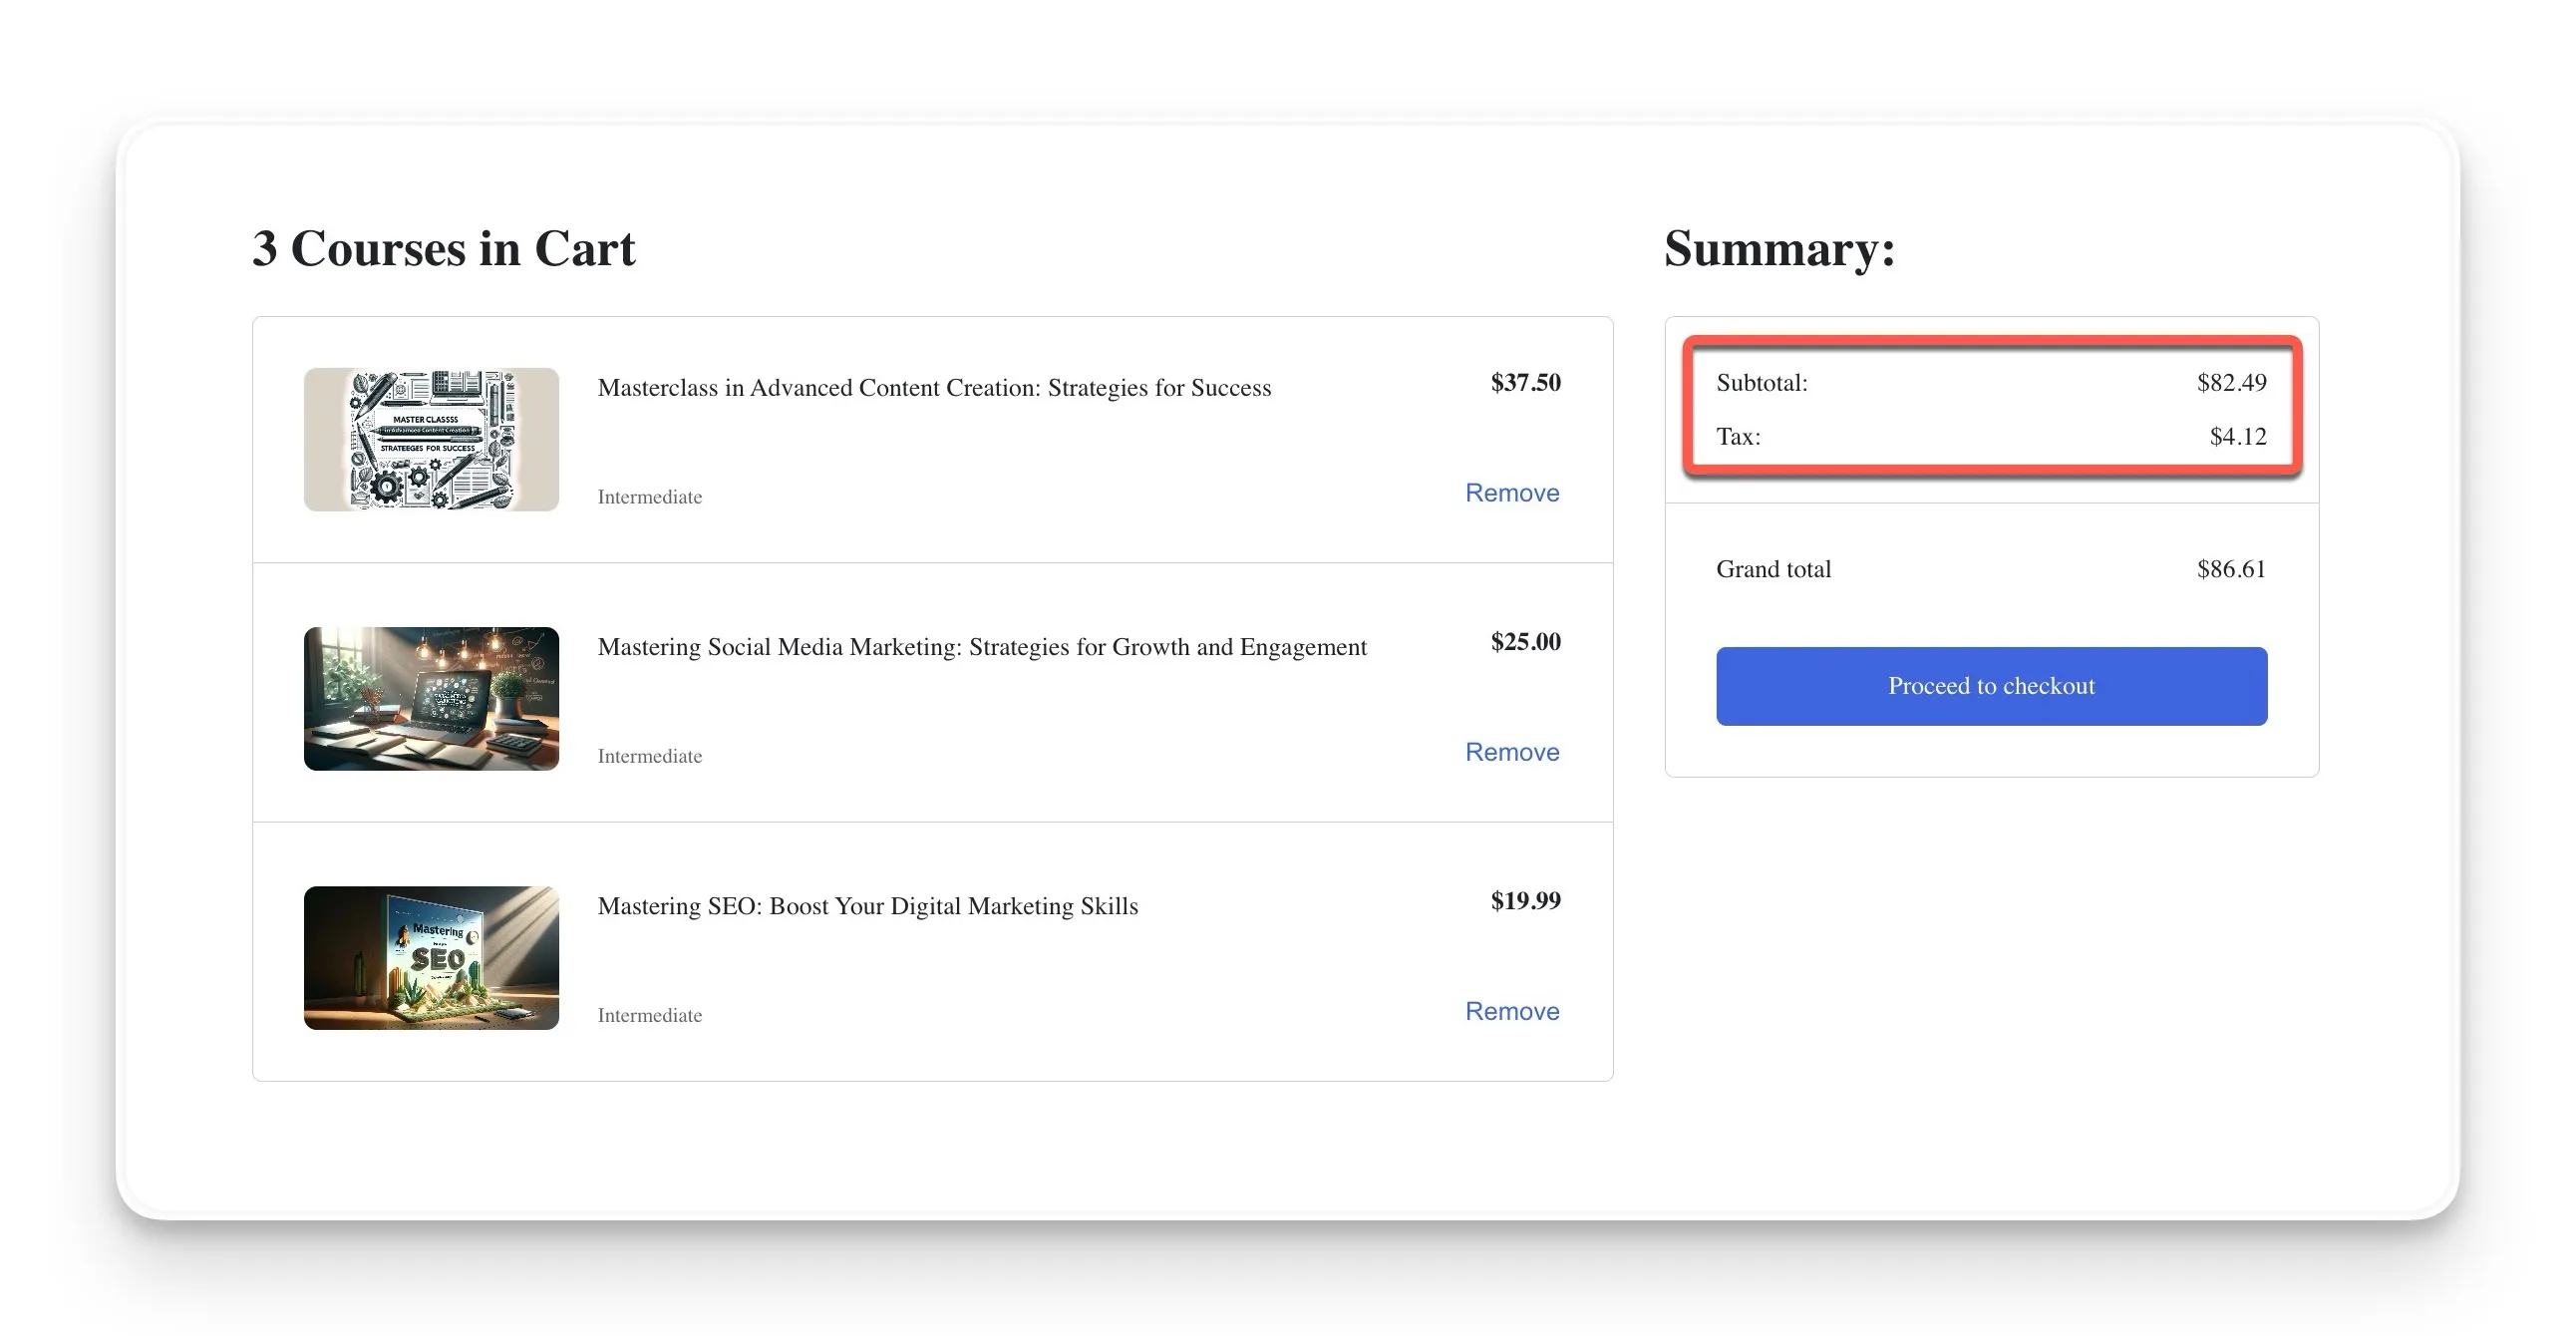
The main benefit is that your initial course prices may appear lower. However, some customers might experience “sticker shock” when they see the final total after tax is added.
Advanced Tax Controls for Granular Management
Once you’ve set your general rules, the advanced Tutor LMS tax controls allow you to get even more precise. These settings are designed for course creators who need extra flexibility for their business model or who sell to a diverse global audience. This is where you get really fine-grained control over your eLearning tax management.
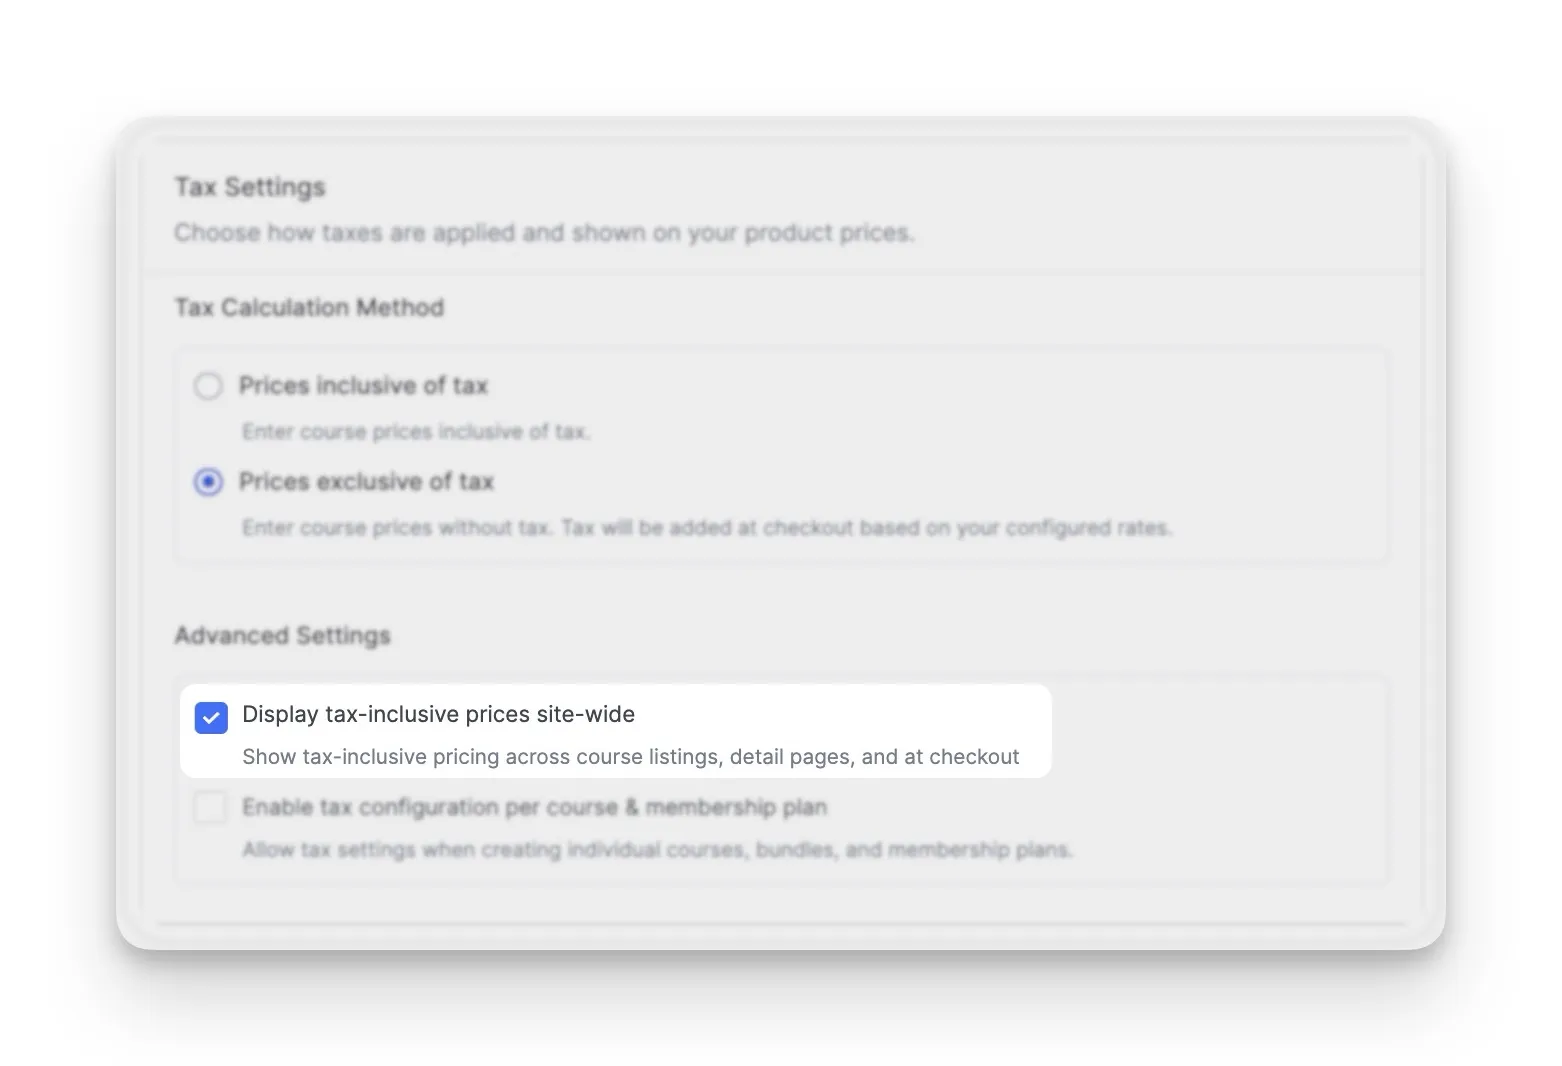
Display Tax-Inclusive Prices Site-wide
This first feature takes transparency to the next level. When you enable it, your tax-inclusive pricing is shown everywhere on your site. On course listing pages, in search results, and on the course details page. From the moment a student sees your course, they see the final price.
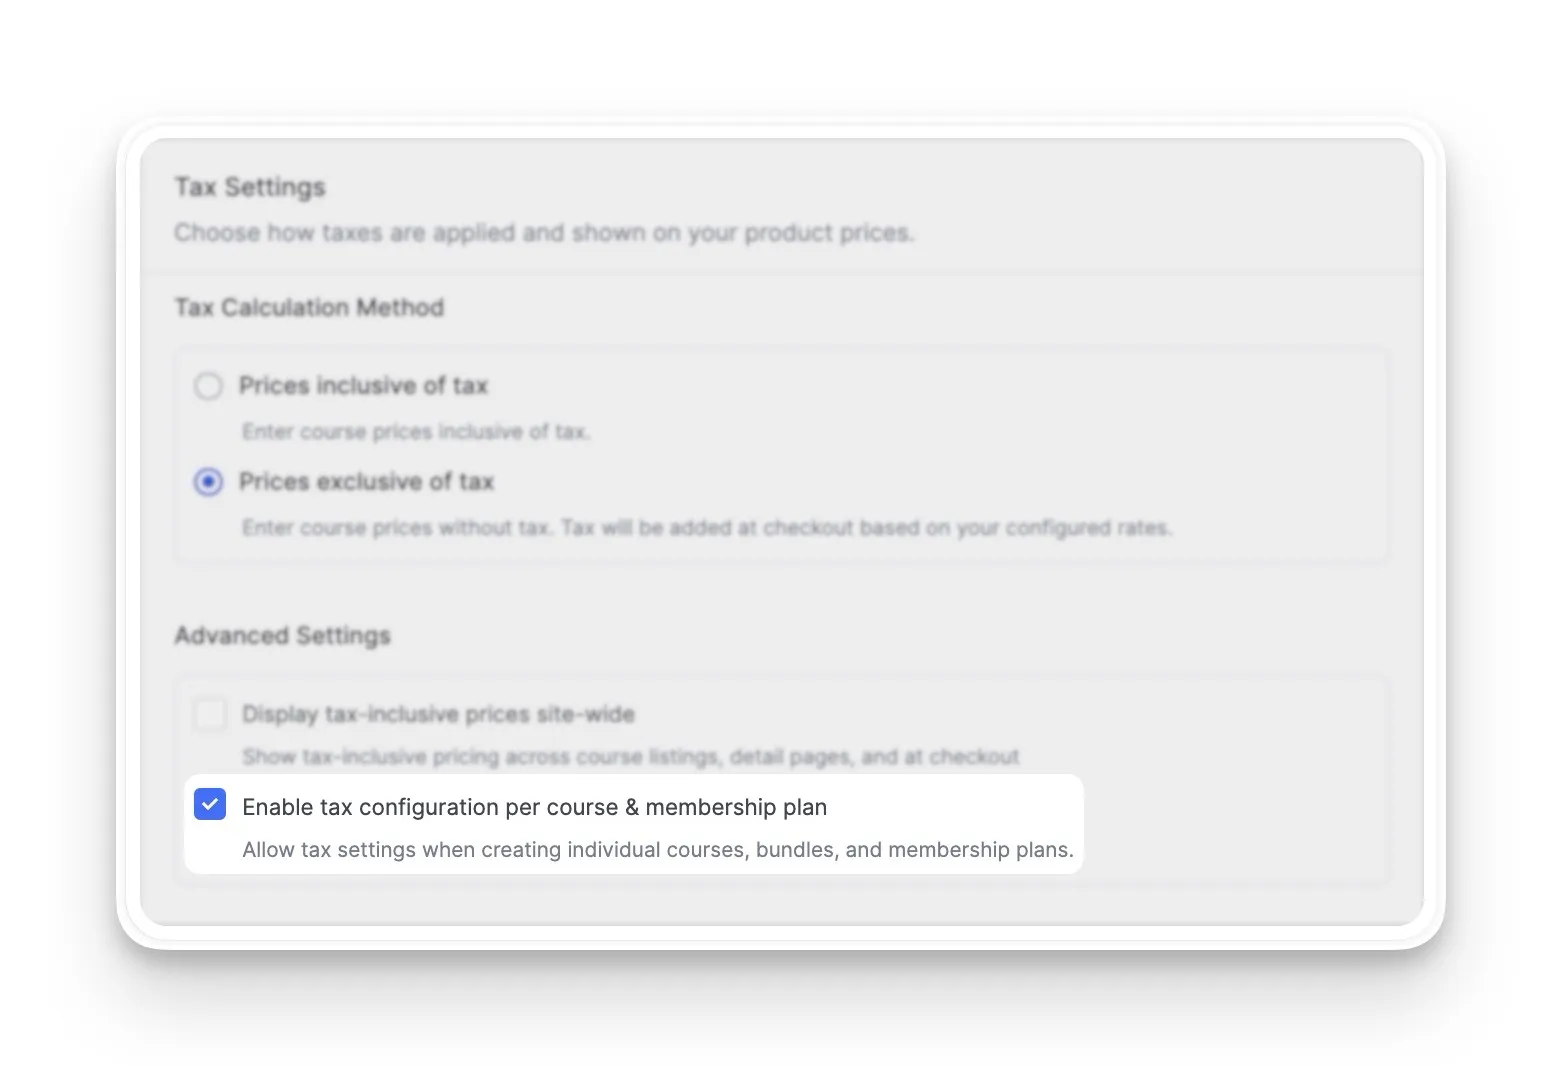
Enable Tax Configuration per Course & Membership Plan
This is one of the most powerful features for managing your finances. Enabling Tutor LMS per-course tax configuration gives you the freedom to decide tax rules for each course/course bundle or subscription plan individually. This is incredibly useful in several common situations:
- You offer both taxable and tax-exempt courses. You might have a premium, taxable course alongside a free or non-profit workshop that shouldn’t have tax applied.
- You sell globally. You might have a specific course that has different tax implications in one country versus another, and this allows you to manage that.
- You have complex subscription plans. This setting lets you control whether tax should be applied to the recurring payments of a specific membership plan.
Applying Tax Settings in the Course Builder
After you enable the per-course setting, you’ll find new options directly in the course builder when you create or edit a course. Here is how you can access and use them:
- Your first step is to navigate to Tutor LMS > Courses and either create a new course or edit an existing one.
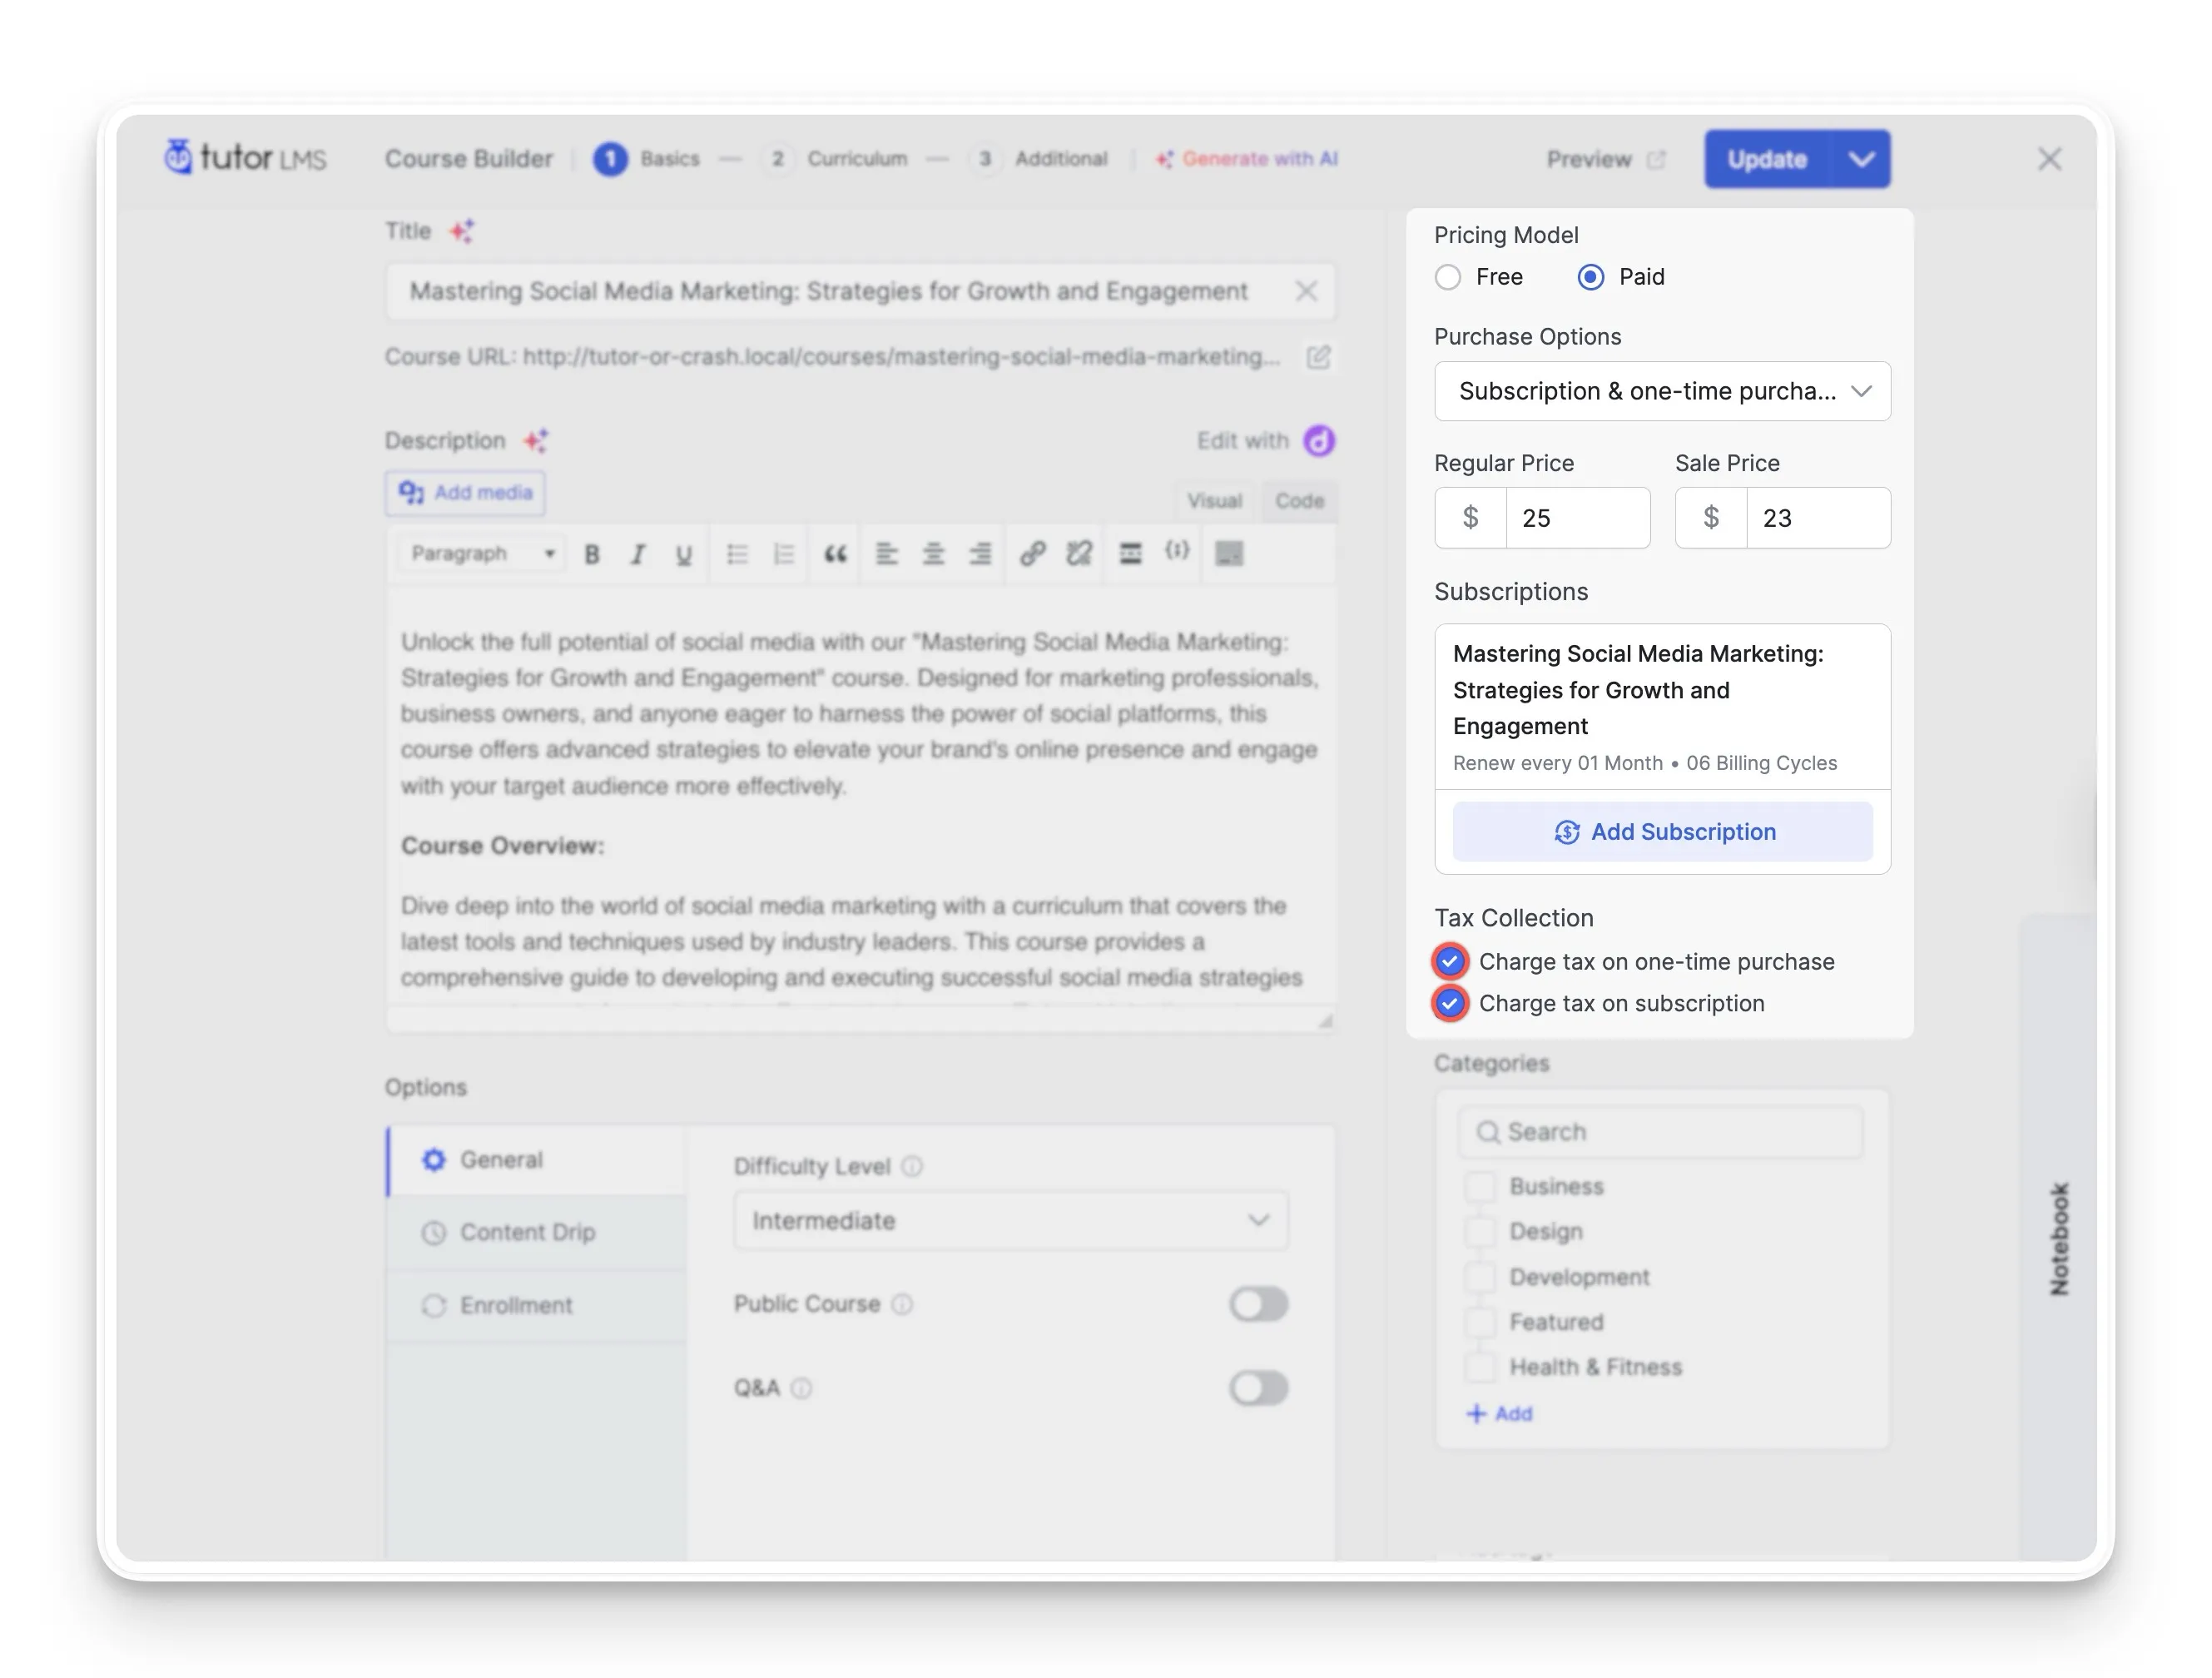
- In the Course Builder interface, you’ll find the Pricing section in the right-hand panel.
- A new heading named Tax Collection will be visible. Underneath it, you will see specific checkbox.
- Here, you can choose whether to apply tax to a one-time purchase and/or to the subscription payments. These options will only appear if the course has a price and is not set to ‘Free’.
This level of control ensures that your tax strategy can be as simple or as detailed as your business requires.
How Tax, Coupons, and Orders Work Together
Your tax settings don’t exist in a bubble. They are smartly integrated into the entire Tutor LMS eCommerce system to create a seamless workflow. Let’s take a quick tour of how taxes, coupons, and orders all work together automatically.
Coupons and Tax Calculations
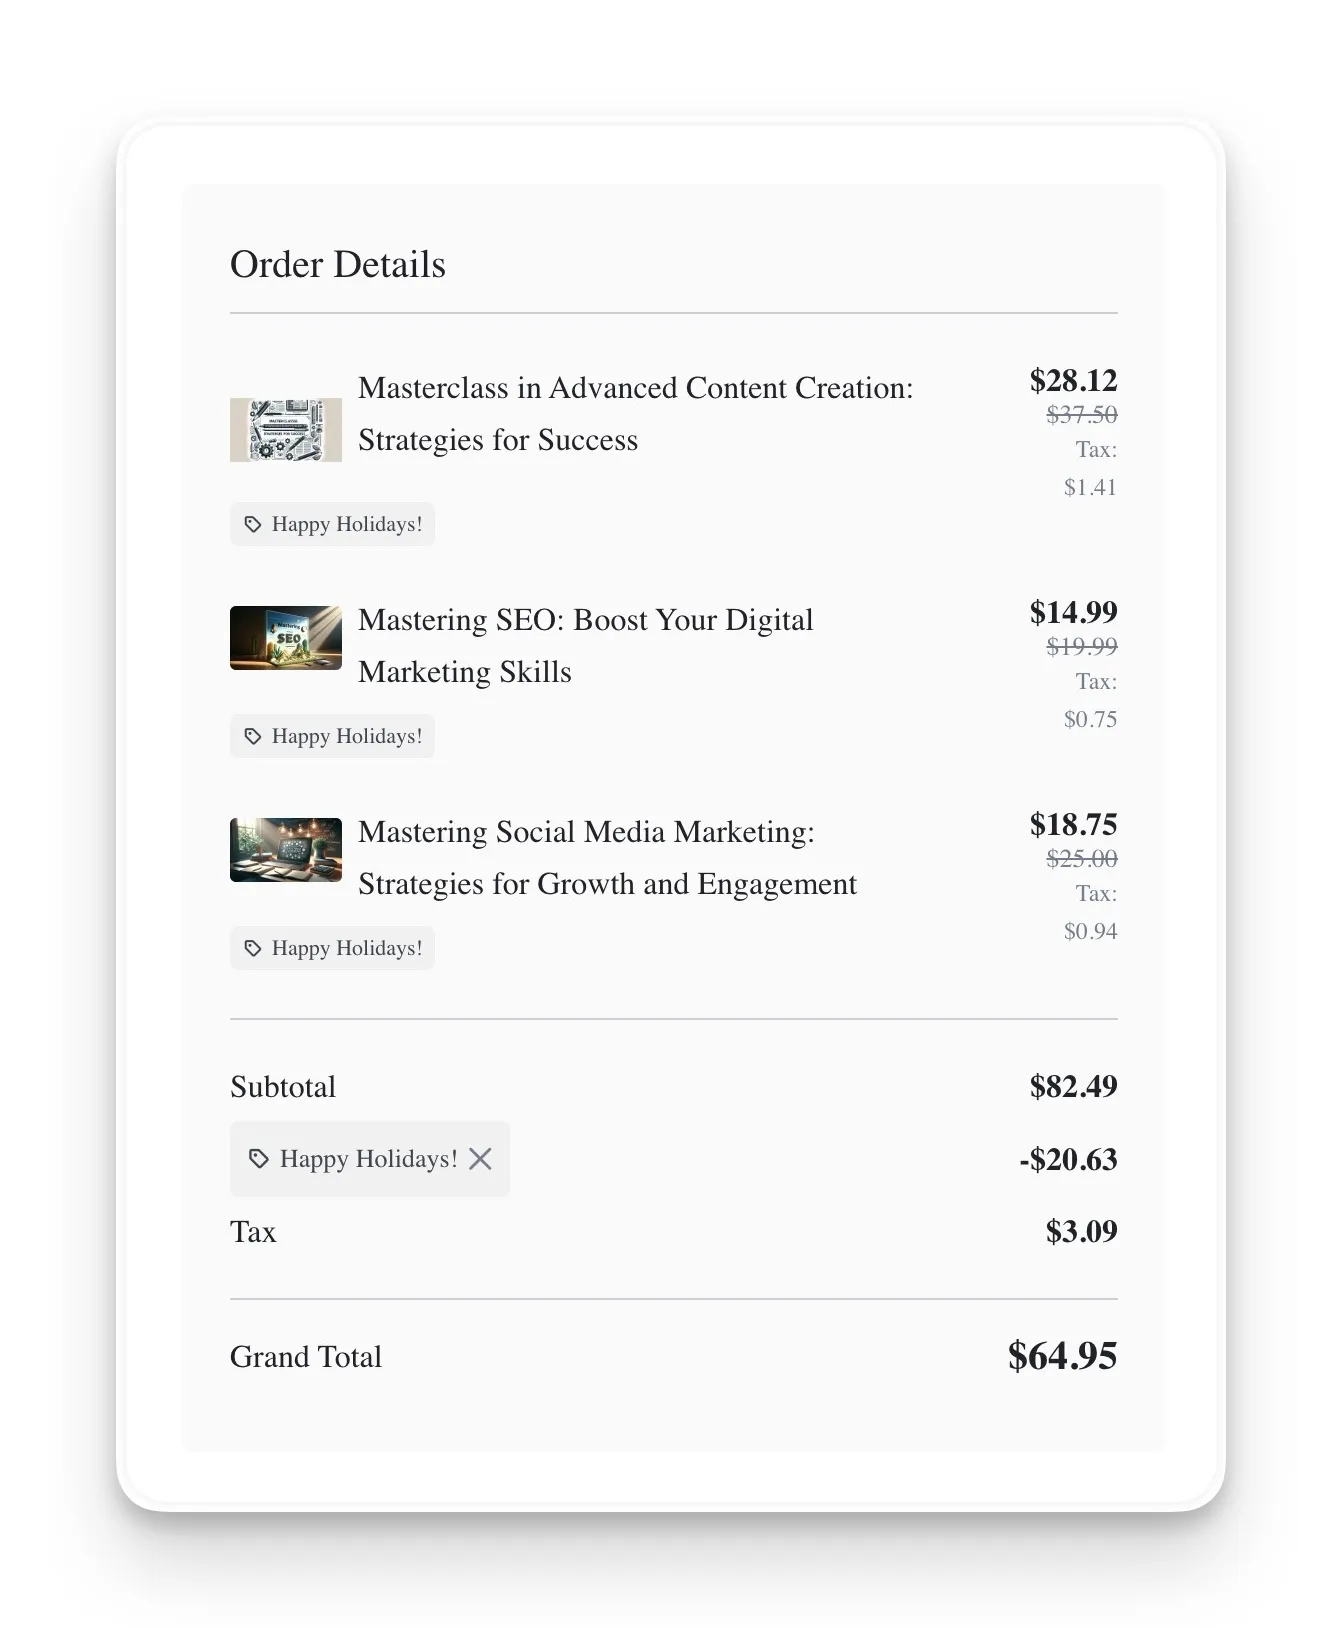
You may be wondering how discounts affect taxes. Tutor handles this in a logical and standard way. When a student applies a coupon code at checkout, the discount is taken from the course price first. The tax is then calculated based on the new, lower price. This ensures fairness for your student, as they only pay tax on the amount they actually spend.
Tax Information in Orders
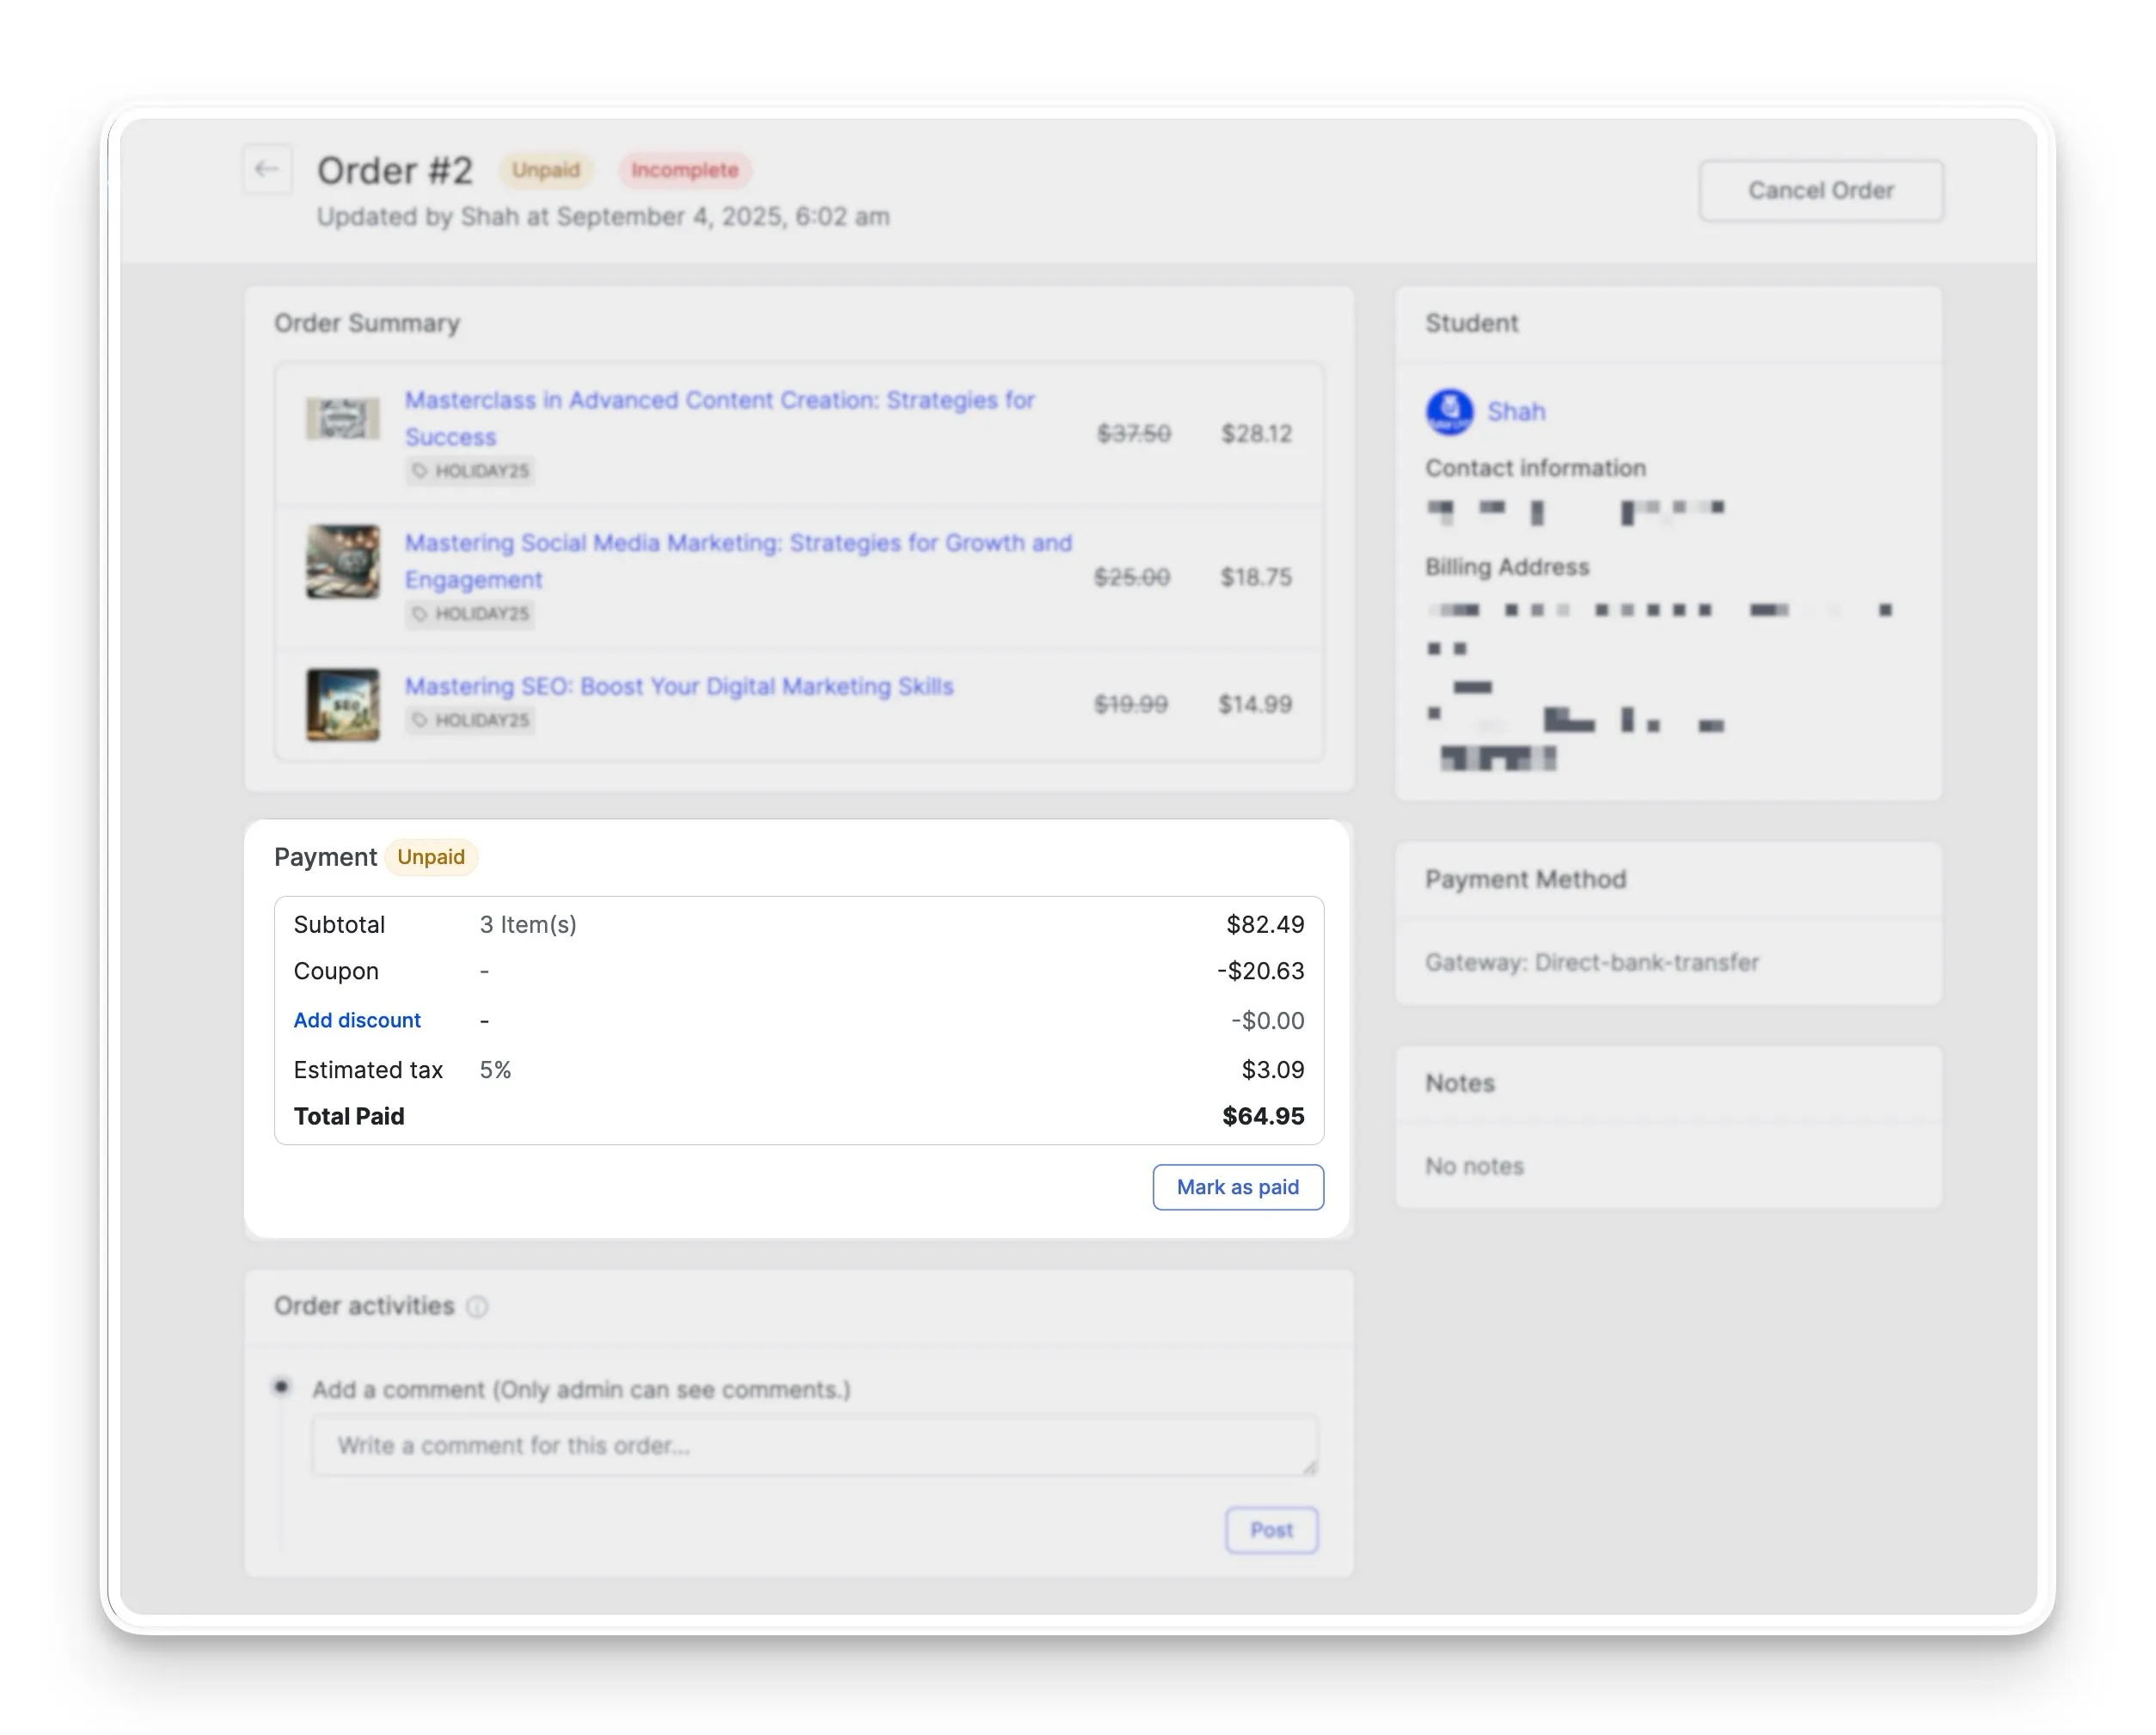
Clear financial data is essential for your records. Within the Orders section of Tutor LMS, each transaction is broken down in detail. For every sale, you will be able to see the original price, the discount applied, the precise amount of tax collected, and the final total. Your students see this same transparent breakdown in their account dashboard and in their email receipts, so there is no confusion.
A Note on Using WooCommerce for Your Tax Setup
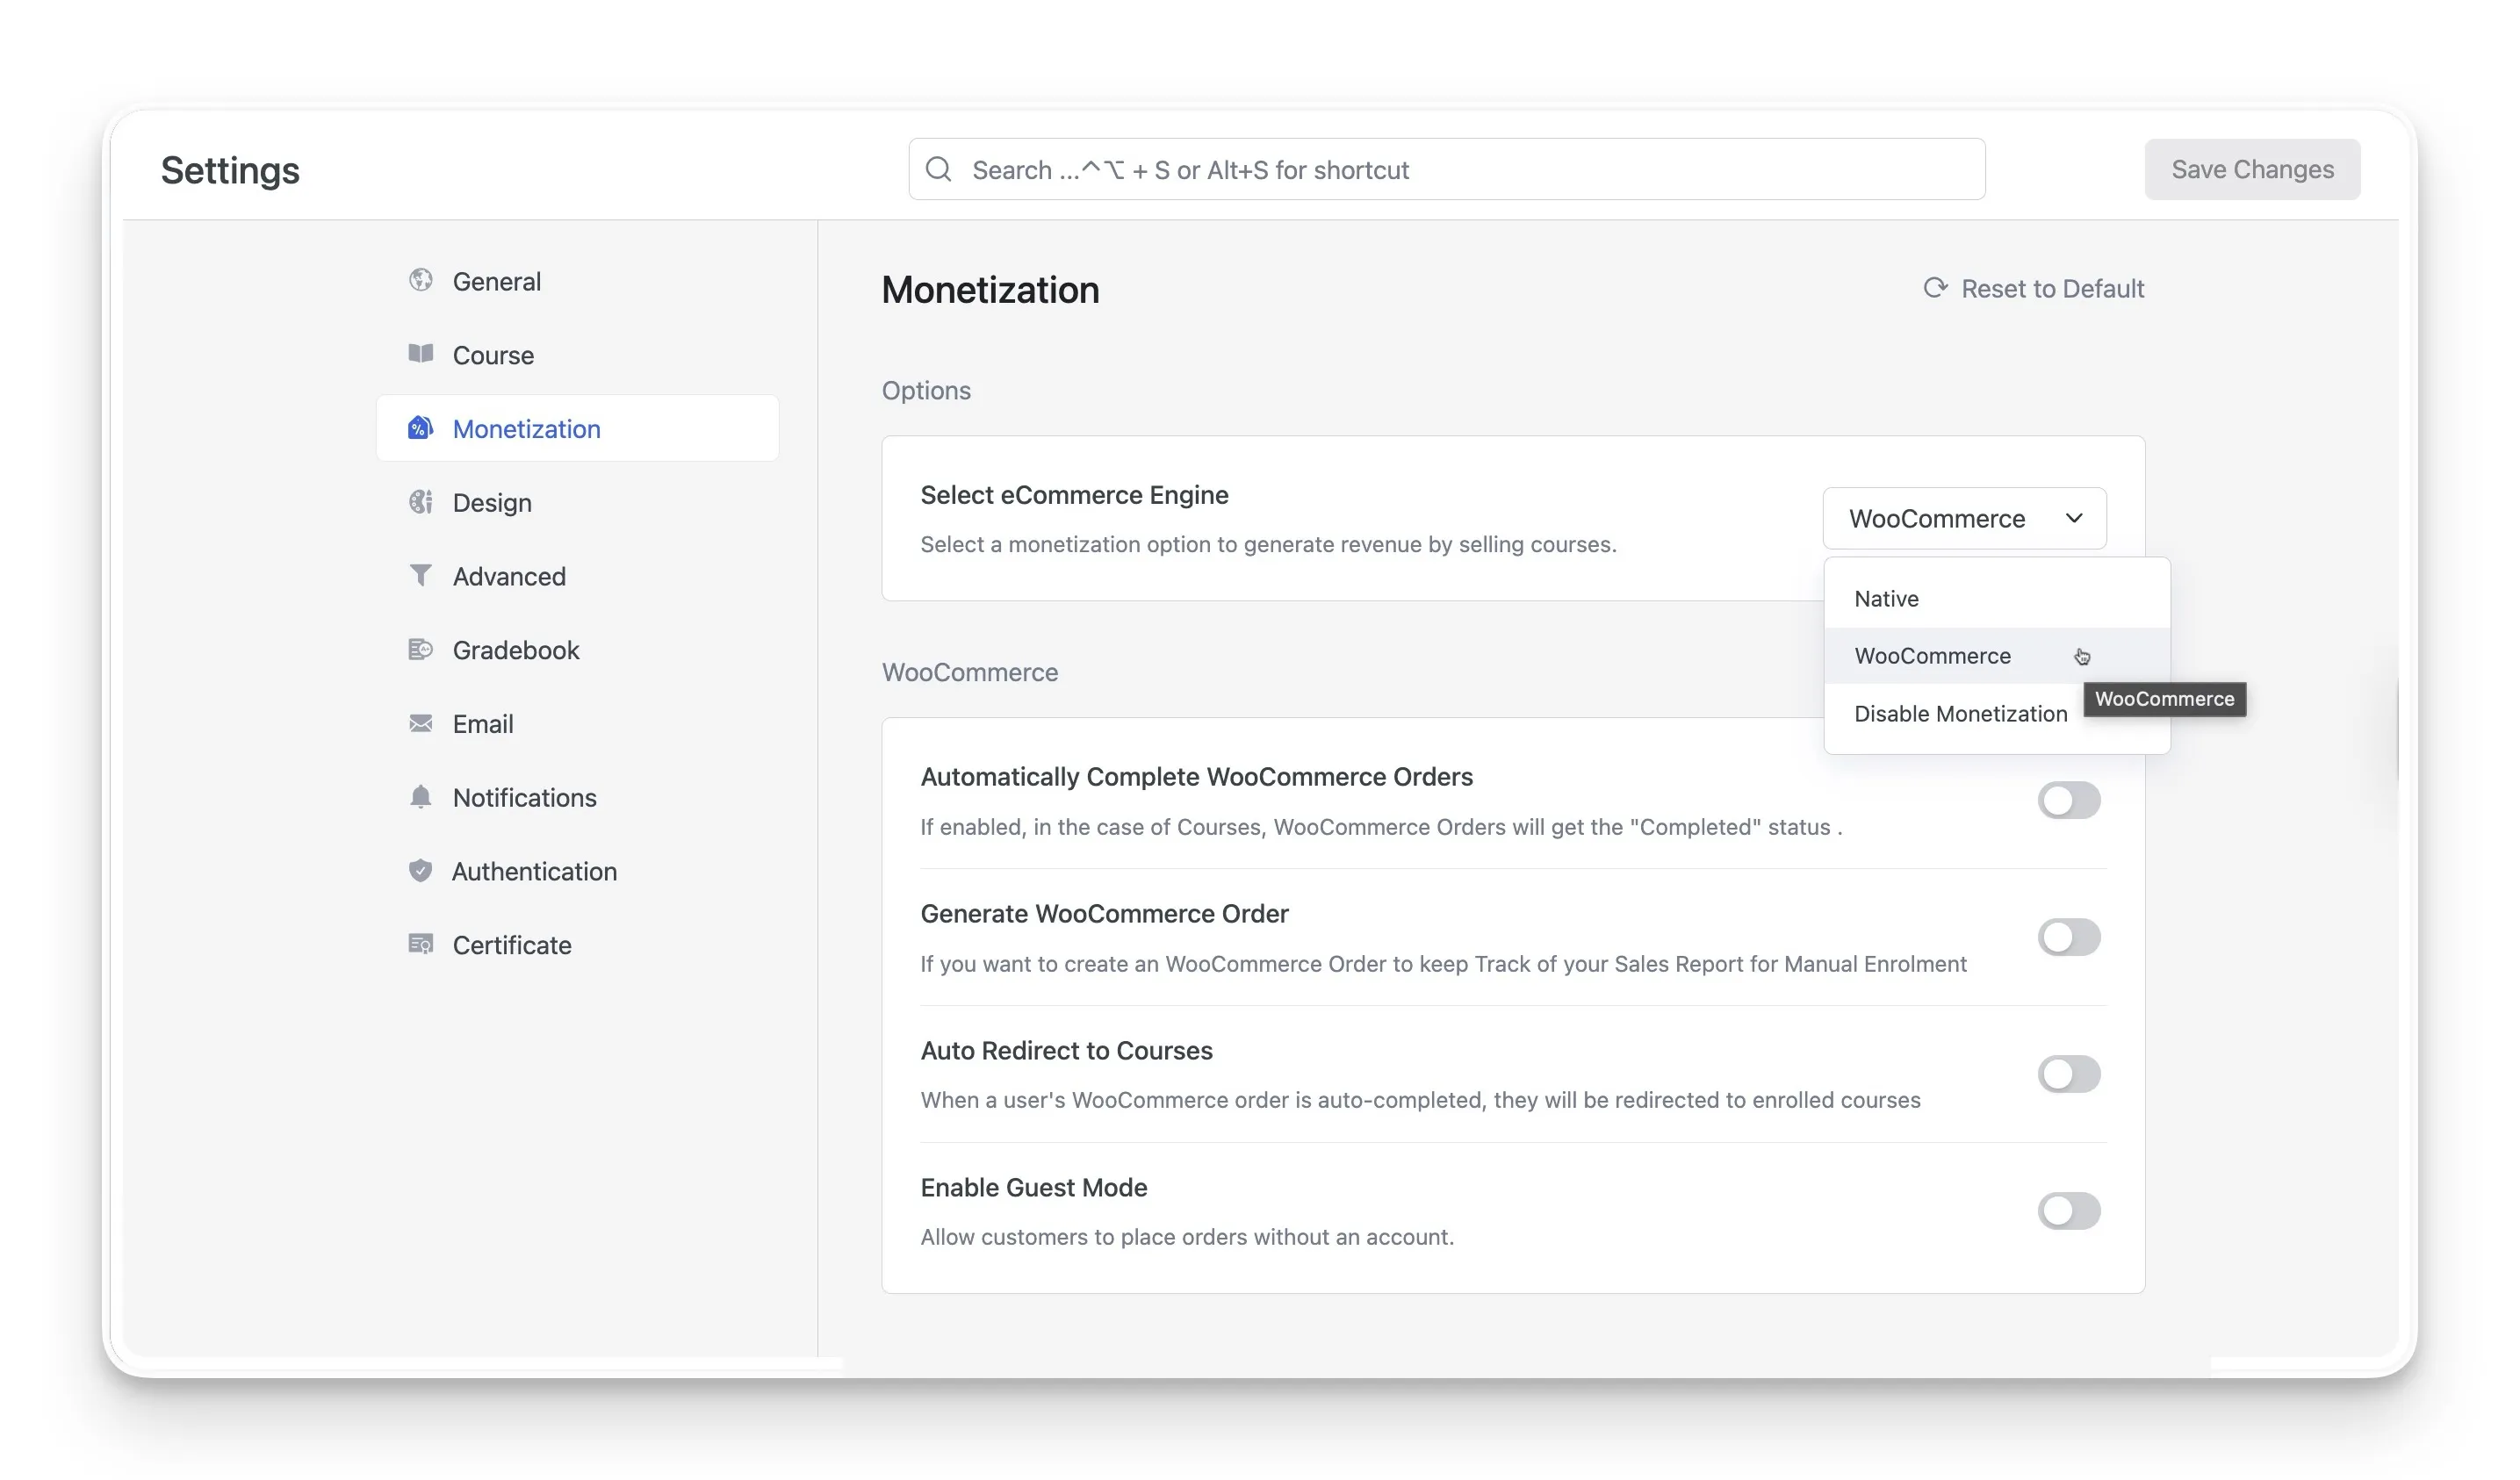
While the Tutor LMS native eCommerce engine is powerful and convenient, some course creators might already have an extensive store set up with WooCommerce. If your using WooCommerce as its eCommerce engine, your tax setup process will be a little different.
When you select WooCommerce for your Tutor LMS monetization, the tax management is handled entirely within WooCommerce’s own settings, not within Tutor LMS. WooCommerce has its own system for taxes, which is great for stores that sell a variety of products beyond online courses.
To configure your taxes in this case, you will need to:
- Navigate to WooCommerce > Settings> General in your WordPress dashboard.
- Scroll down and select the Enable Taxes and Tax Calculations checkbox.
- click Save changes
- From here, you can set up tax rates, tax classes, and all other tax-related options according to your needs.
If you’d like to dive deeper into all the options available, WooCommerce provides a very detailed guide on setting up taxes in WooCommerce.
Monetize with Confidence
The new Tutor LMS tax controls are more than just a feature; they are a significant step toward simplifying your life as a course creator. From setting flexible regional and global rates to managing taxes on a per-course basis, you now have a powerful financial toolkit built right into your dashboard.
This automation empowers you to manage your Tutor LMS monetization with greater confidence and professionalism. Now you have the knowledge to handle the financial side of selling courses online. It’s a great time to explore these features in your Tutor LMS settings and take another confident step in growing your successful eLearning business.
Table of Contents
Start Using Tutor LMS Today
Ready to take your online courses to new heights? Download Tutor LMS now and enjoy a journey of eLearning excellence.
