
Finding student enrollment for your online courses a bit tricky? If you’re using WordPress to host your eLearning platform, you probably know it can take up a lot of valuable time. It’s a common challenge many course creators face.
You might be wrestling with manual data entry, trying to keep track of payments accurately, or figuring out how to manage course access for different student groups. It’s easy for errors to slip into the enrollment process, causing headaches for both you and your learners. This is where having the right tools makes a huge difference.
This is where Tutor LMS, a leading WordPress LMS solution, comes in. It’s designed specifically to tackle these issues. In this guide, we’ll walk you through exactly how Tutor LMS’s enrollment features help you simplify student enrollment. Our goal is to show you how easy student management LMS can be, making the entire process much smoother and more efficient.
First Step: Activating the Enrollment Addon
First things first, to use these helpful enrollment features, you’ll need to enable the Tutor LMS Enrollment Addon. Keep in mind this handy tool is included with Tutor LMS Pro.
Switching it on is straightforward. Head over to your WordPress admin area and navigate to WP Admin > Tutor LMS Pro > Addons. Find Enrollment in the list of available addons and simply toggle it to the enabled state.
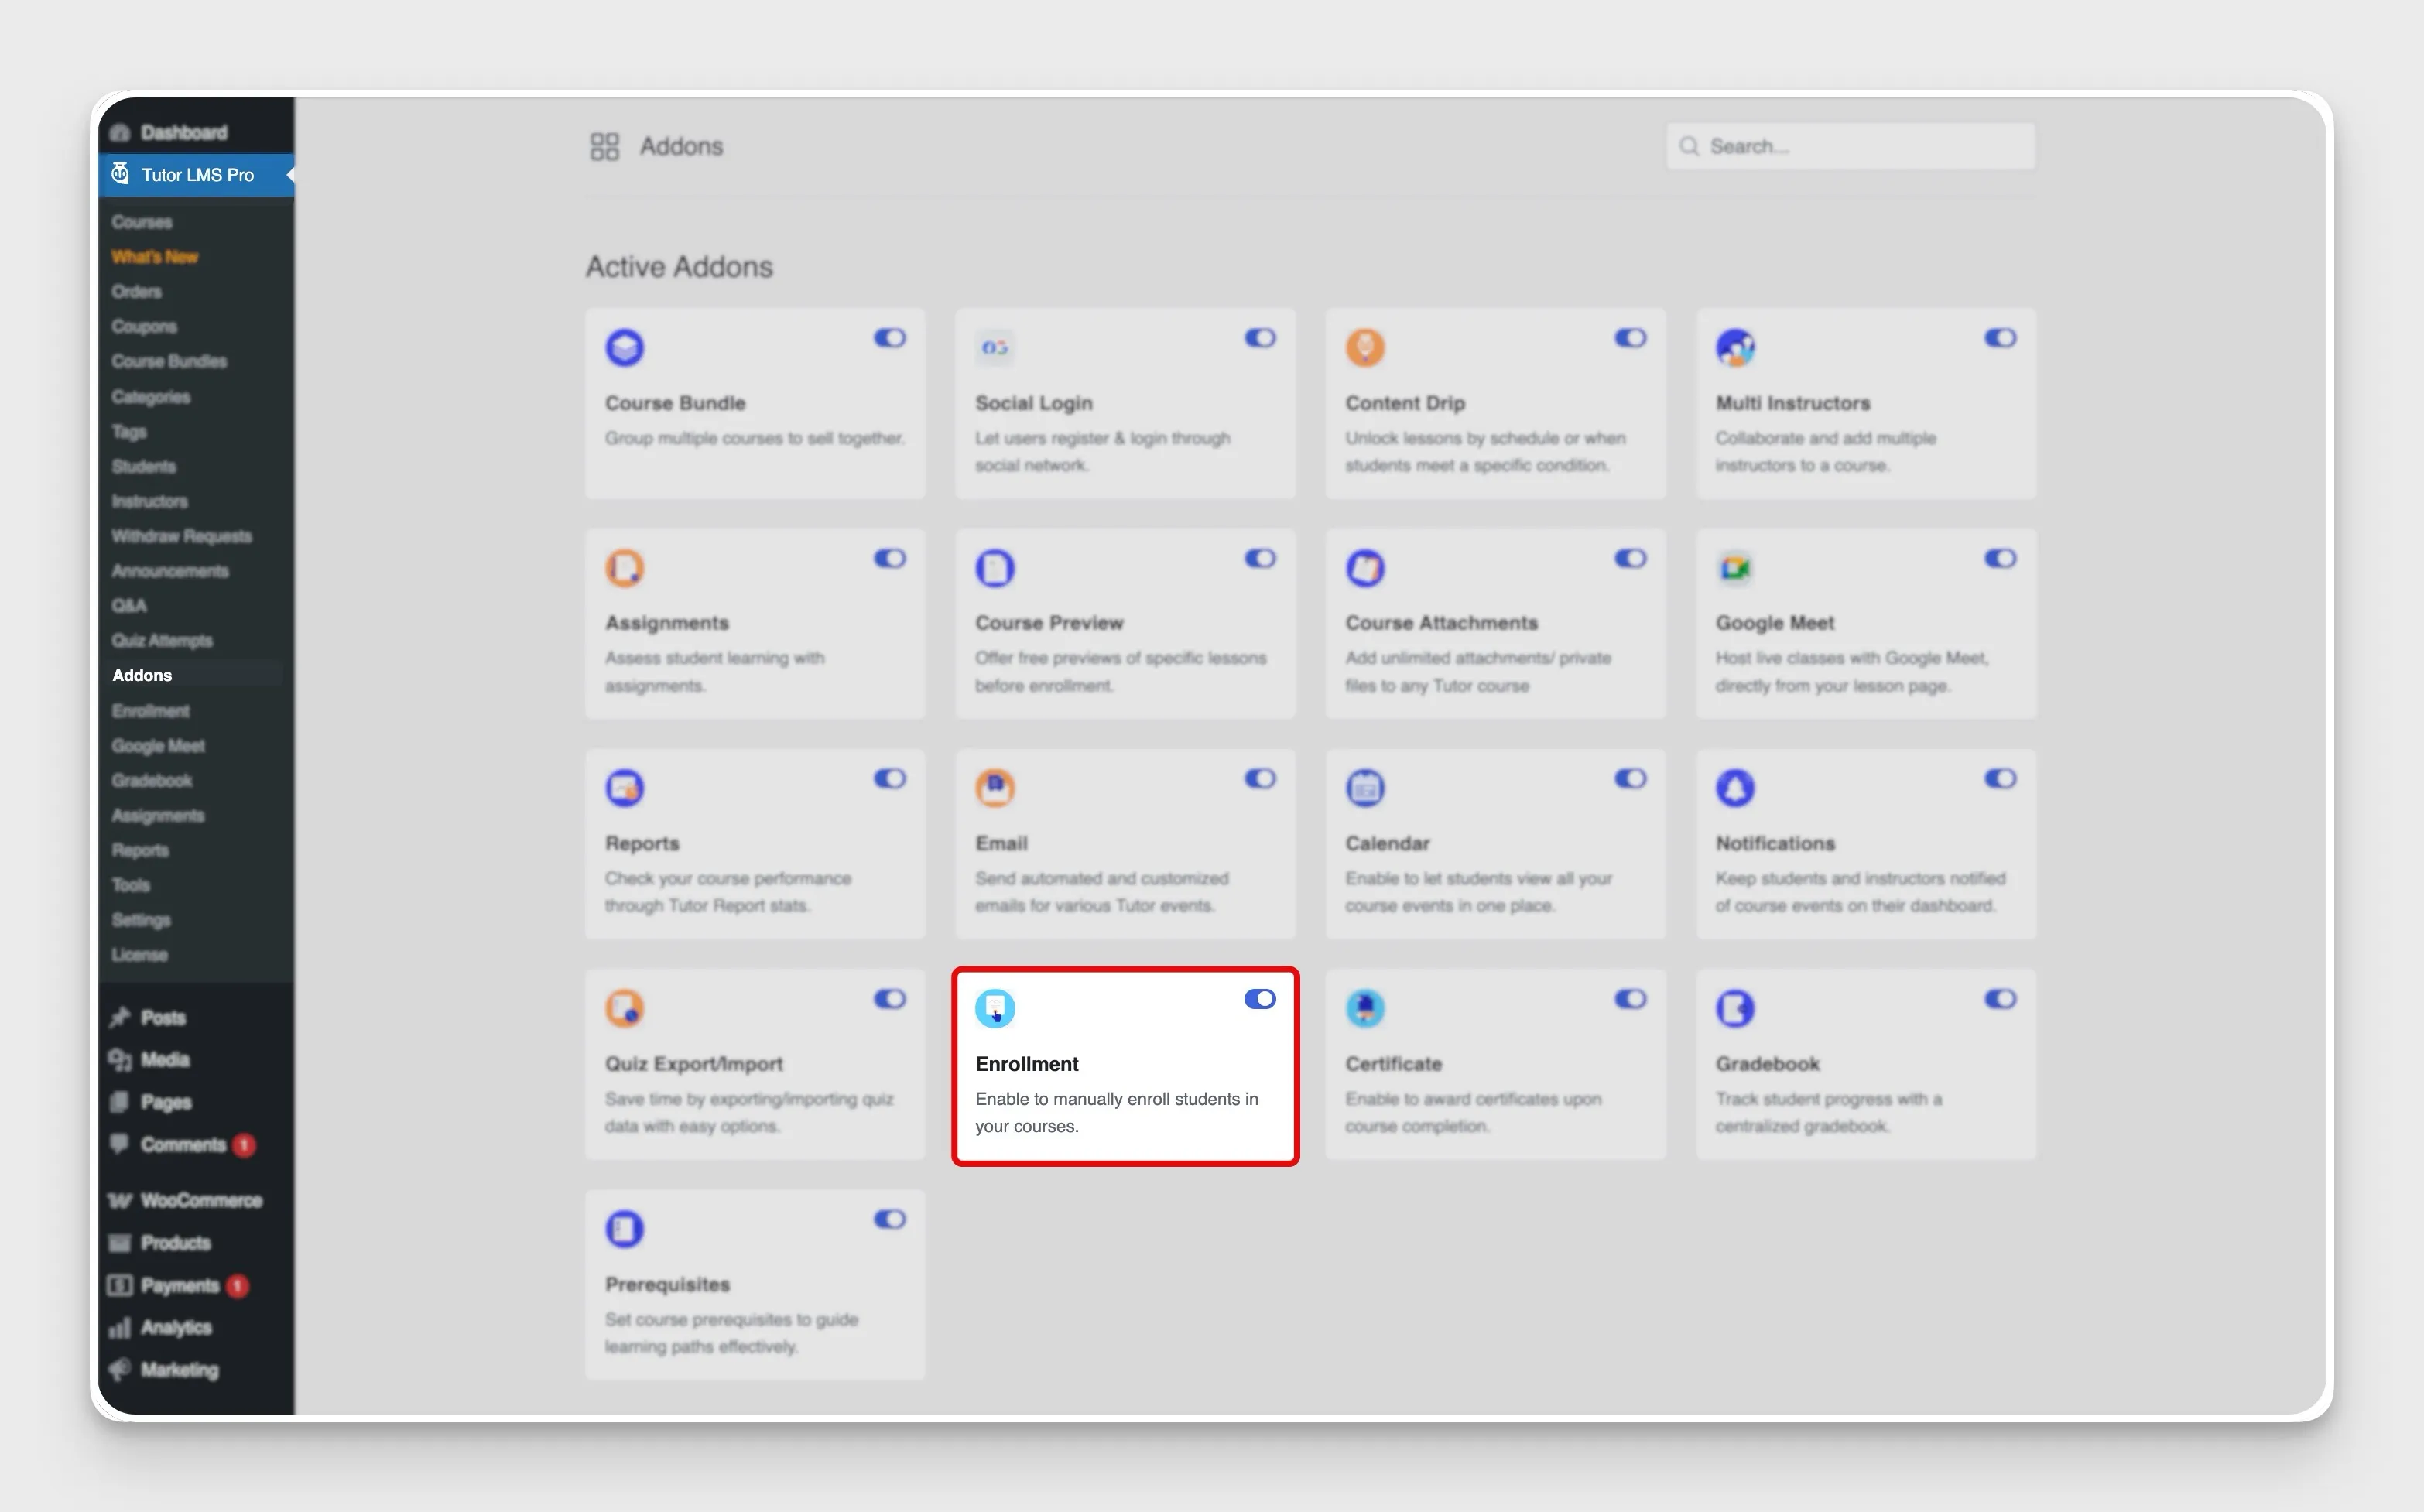
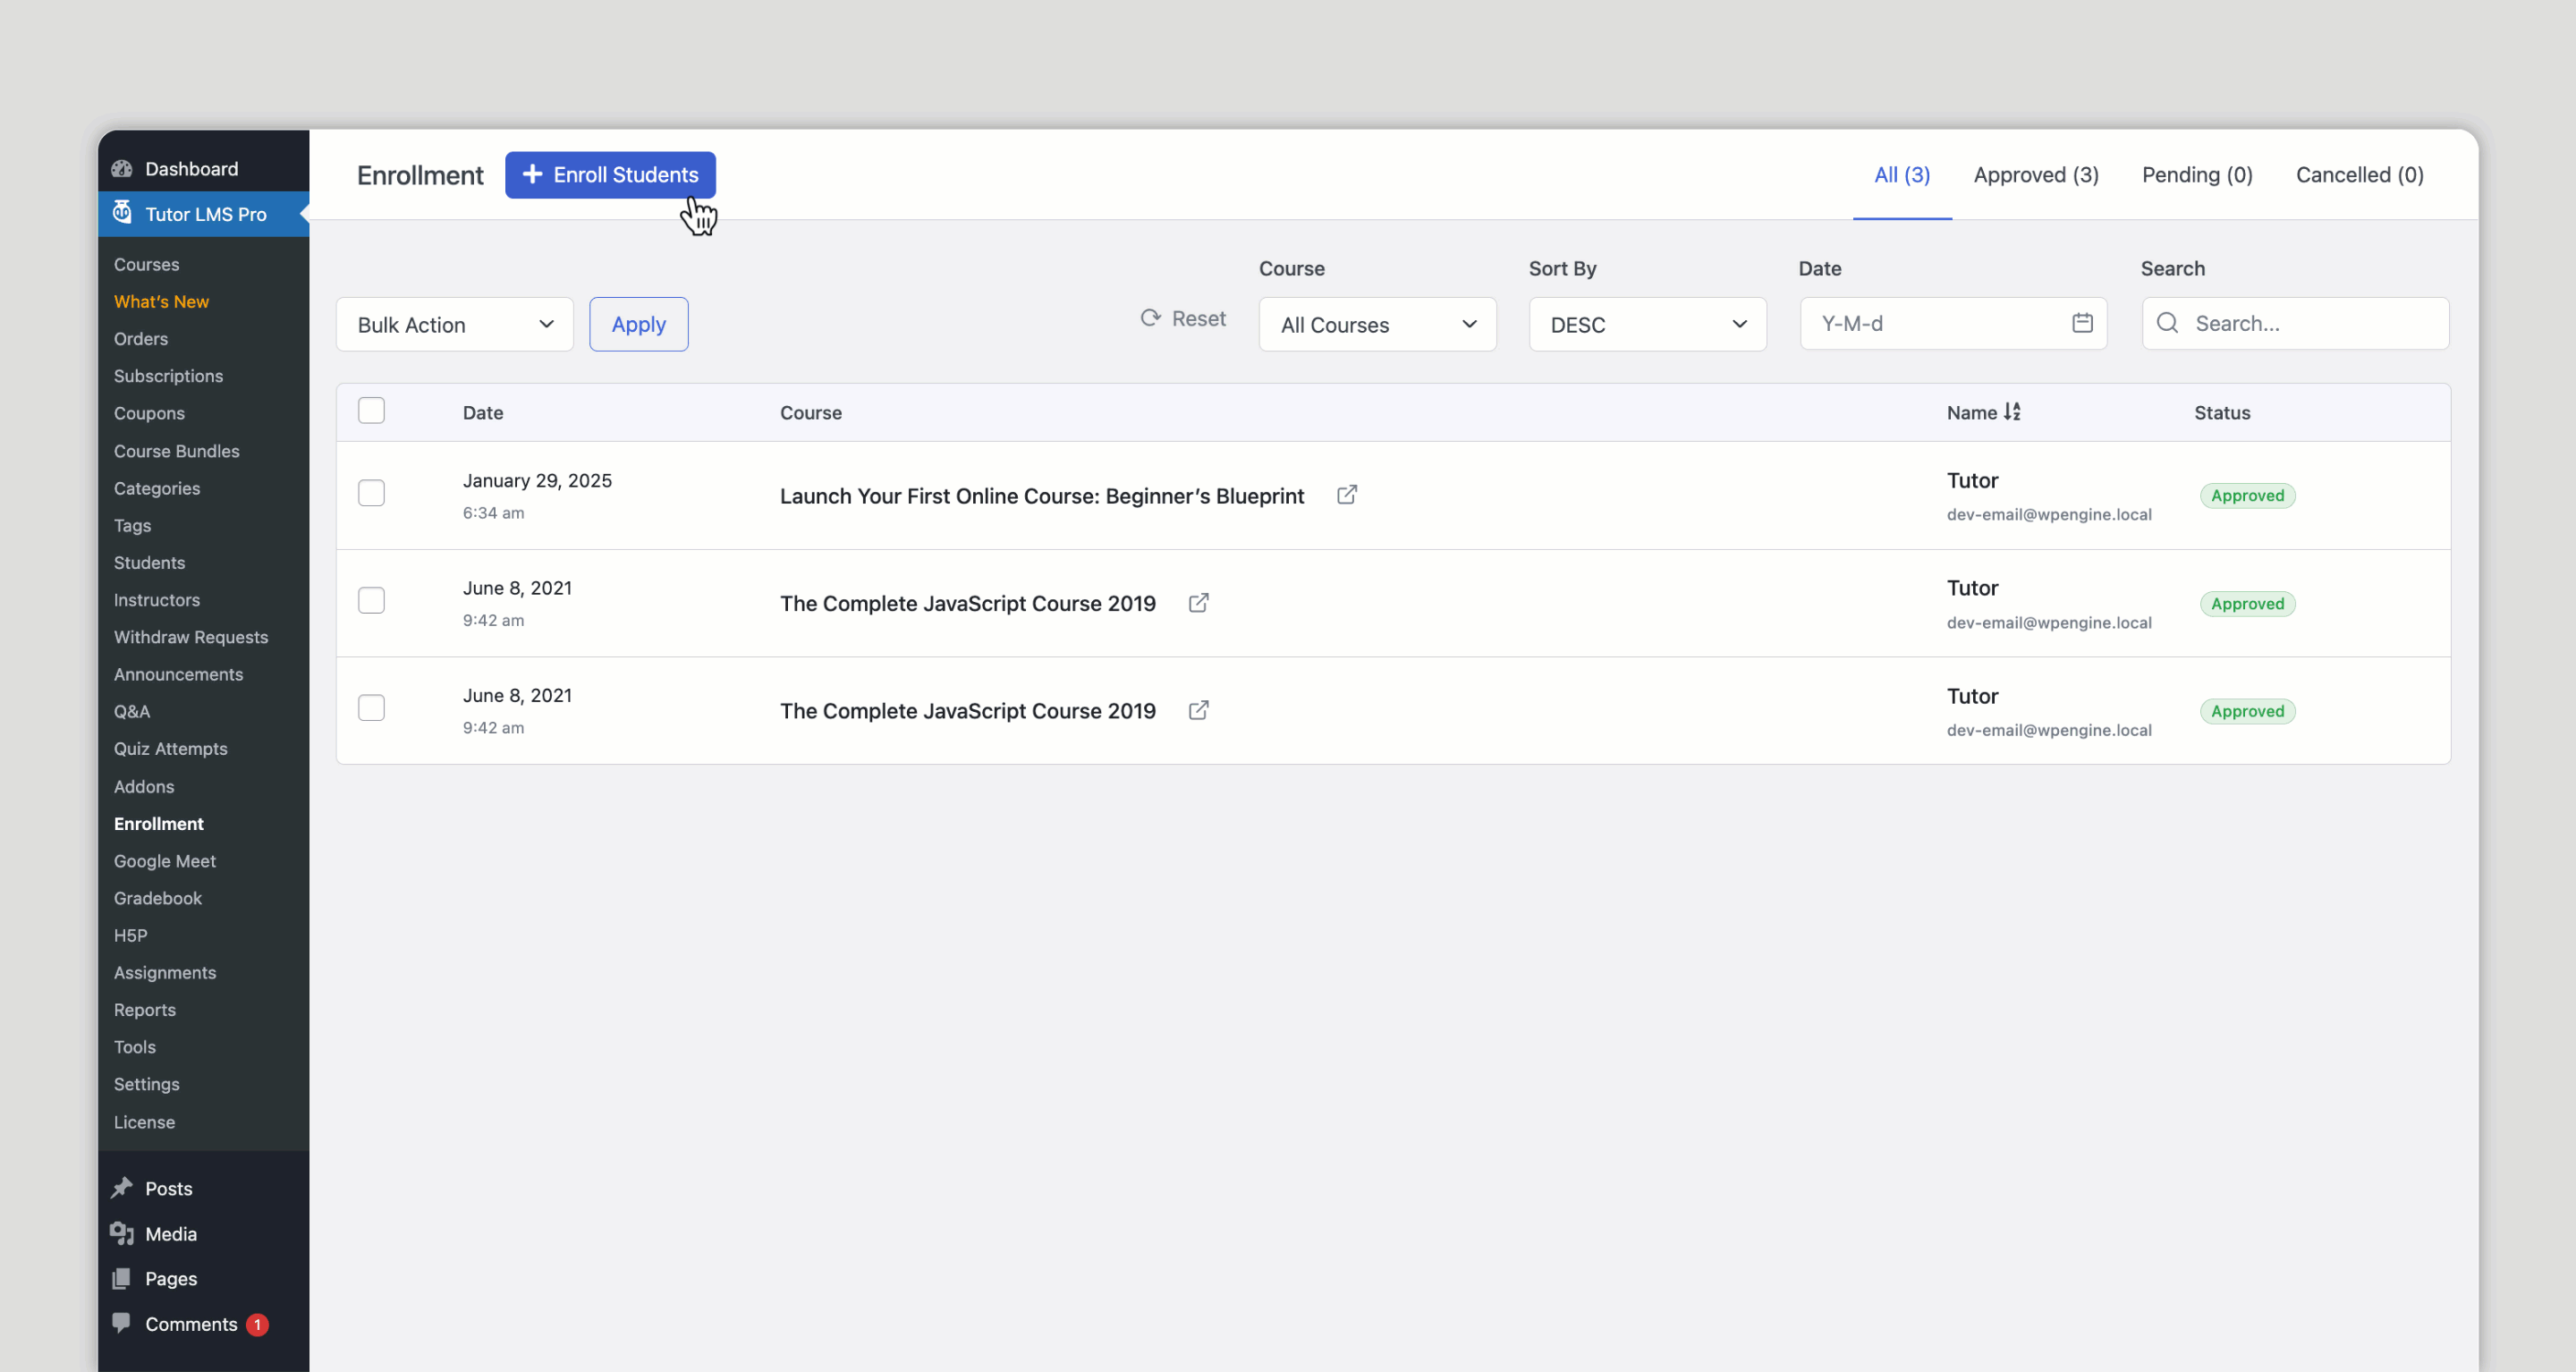
After enabling, you might need to reload the page. You should then see a new “Enrollment” menu item appear right under Tutor LMS. This new section becomes your central hub for easy student management in Tutor LMS.
Manual Enrollment: Adding Students Individually
Sometimes, you need a more hands-on approach to managing who accesses your courses. Tutor LMS’s Manual Enrollment feature gives you exact control over who can join specific courses without going through the standard registration process.
This feature proves invaluable when you need to:
- Quickly onboard new team members to training courses
- Provide complimentary access to select customers
- Grant course access to contest winners or special guests
- Manage small cohort-based learning groups
It’s often the easiest way to add students to your courses when you’re not dealing with large numbers. It gives you precise control over student access.
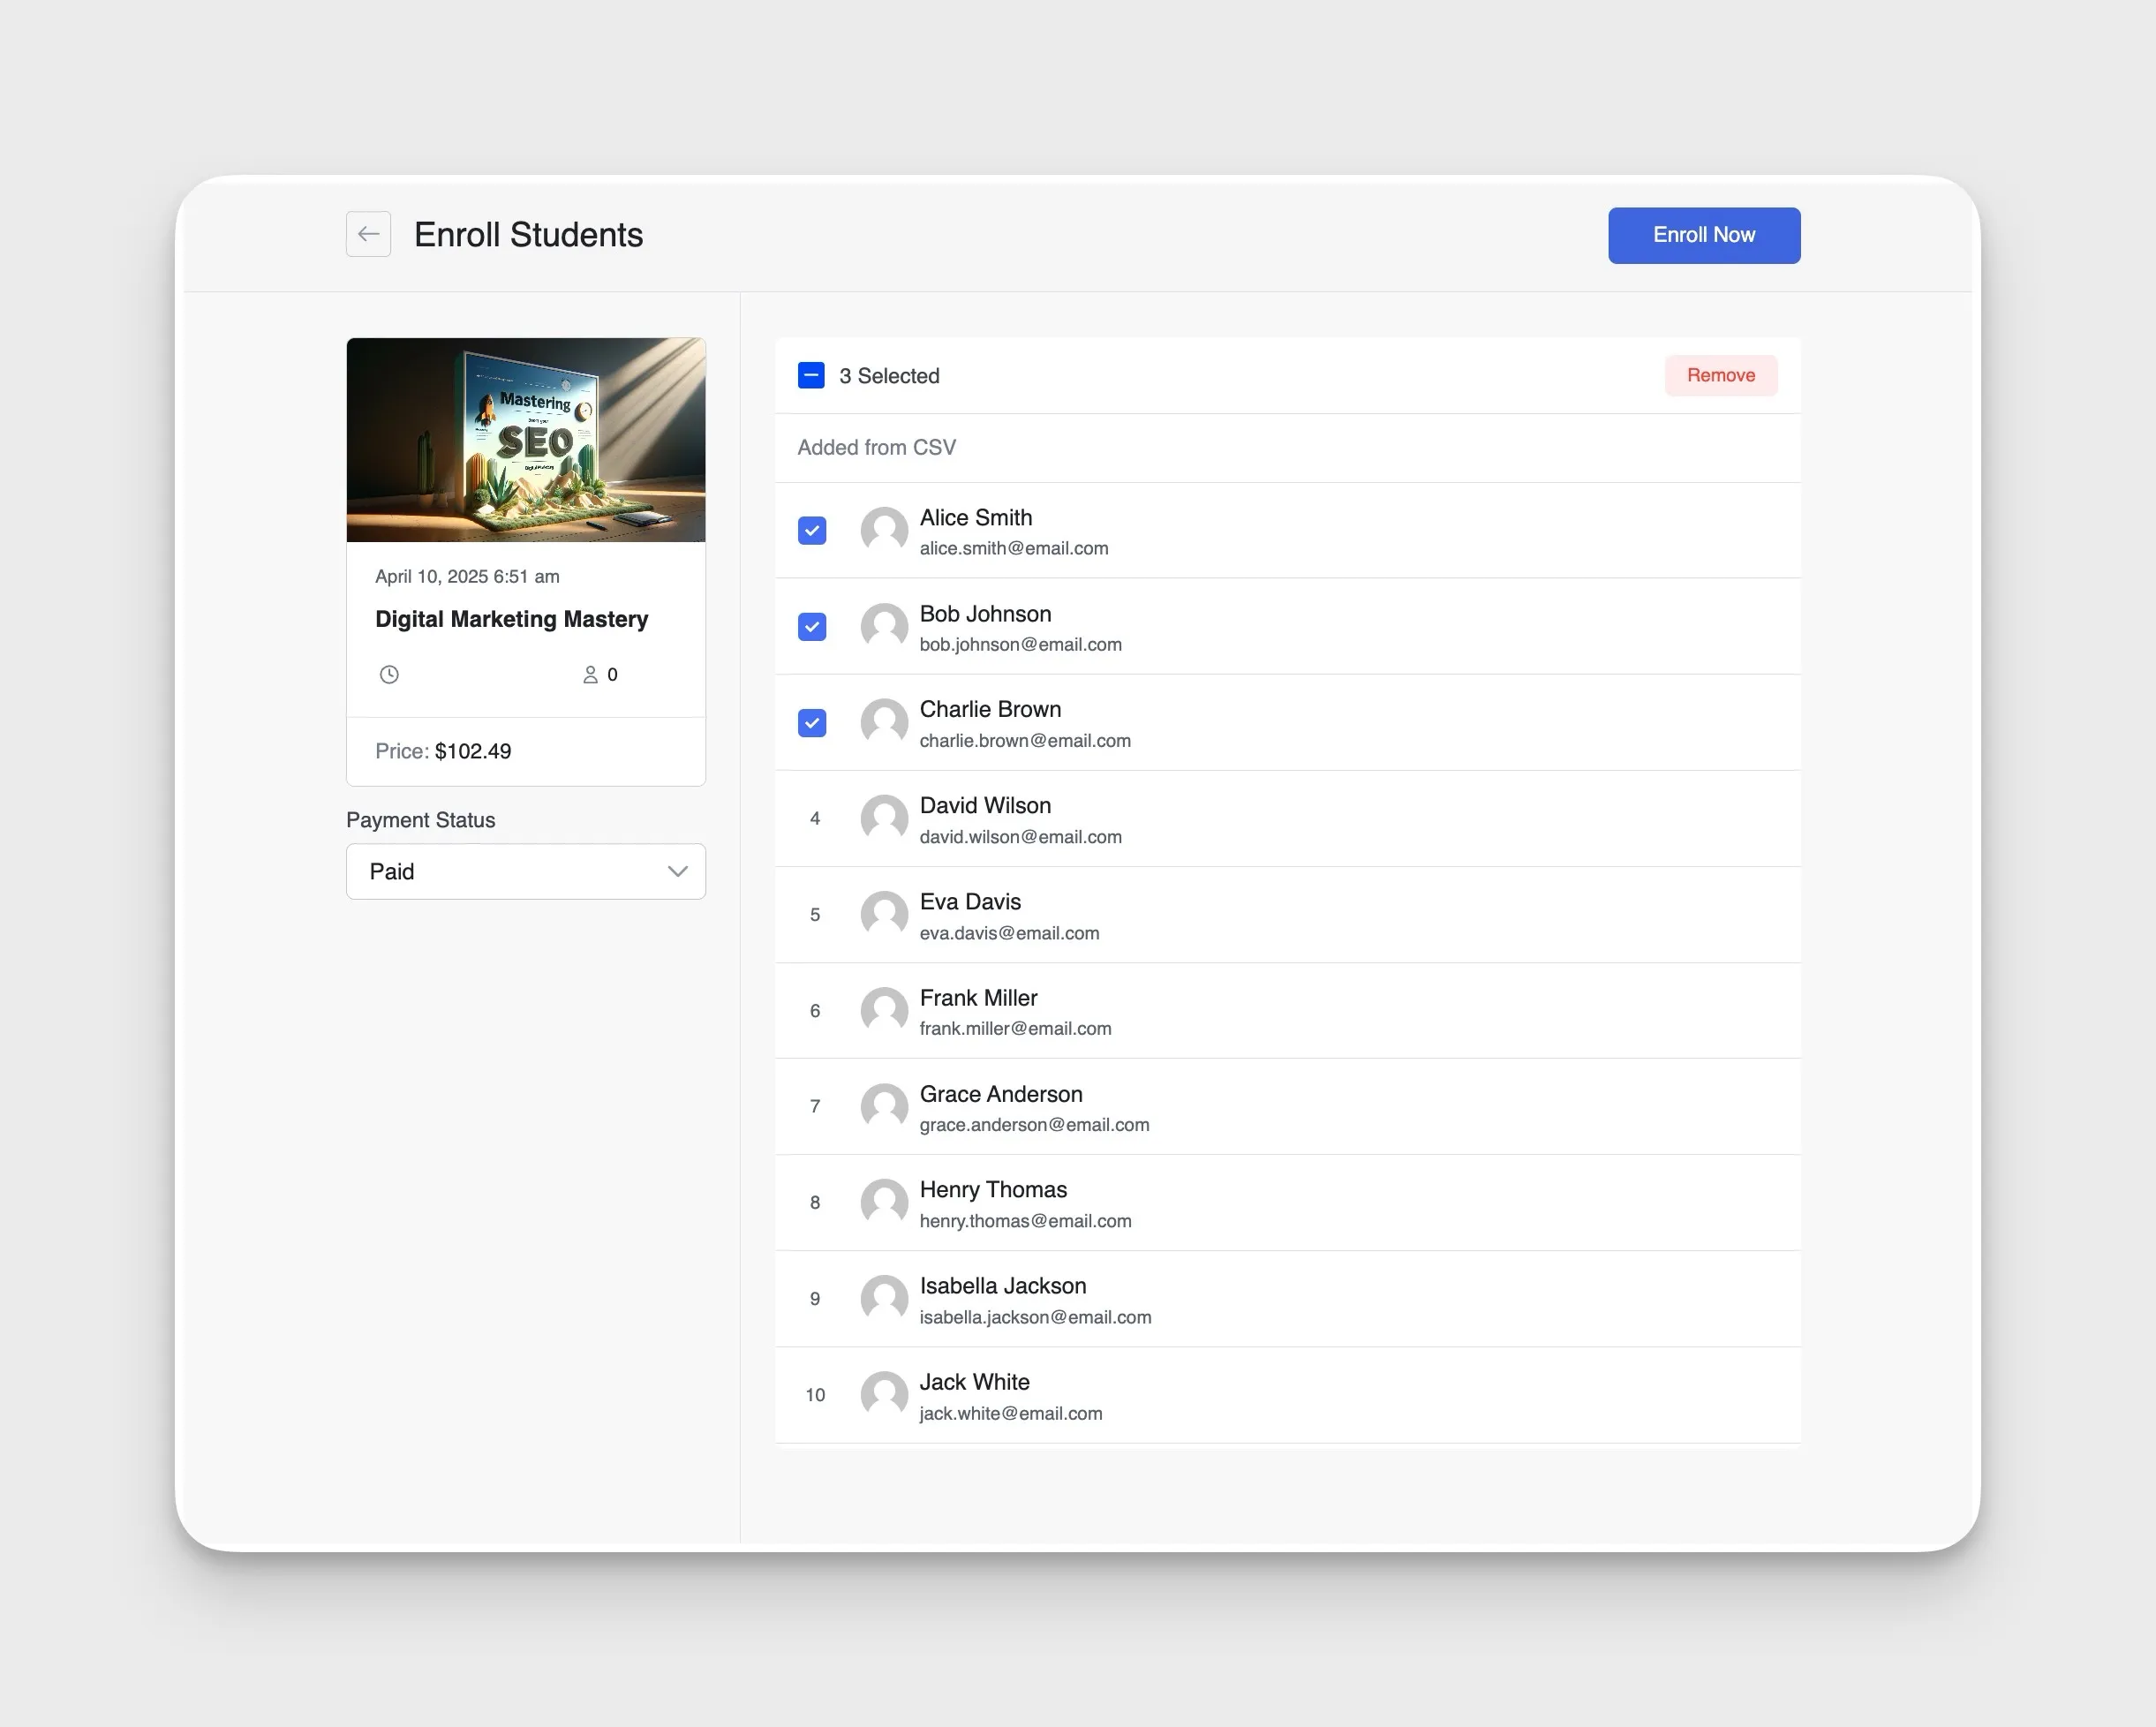
Here’s how to manually enroll students in Tutor LMS, step by step:
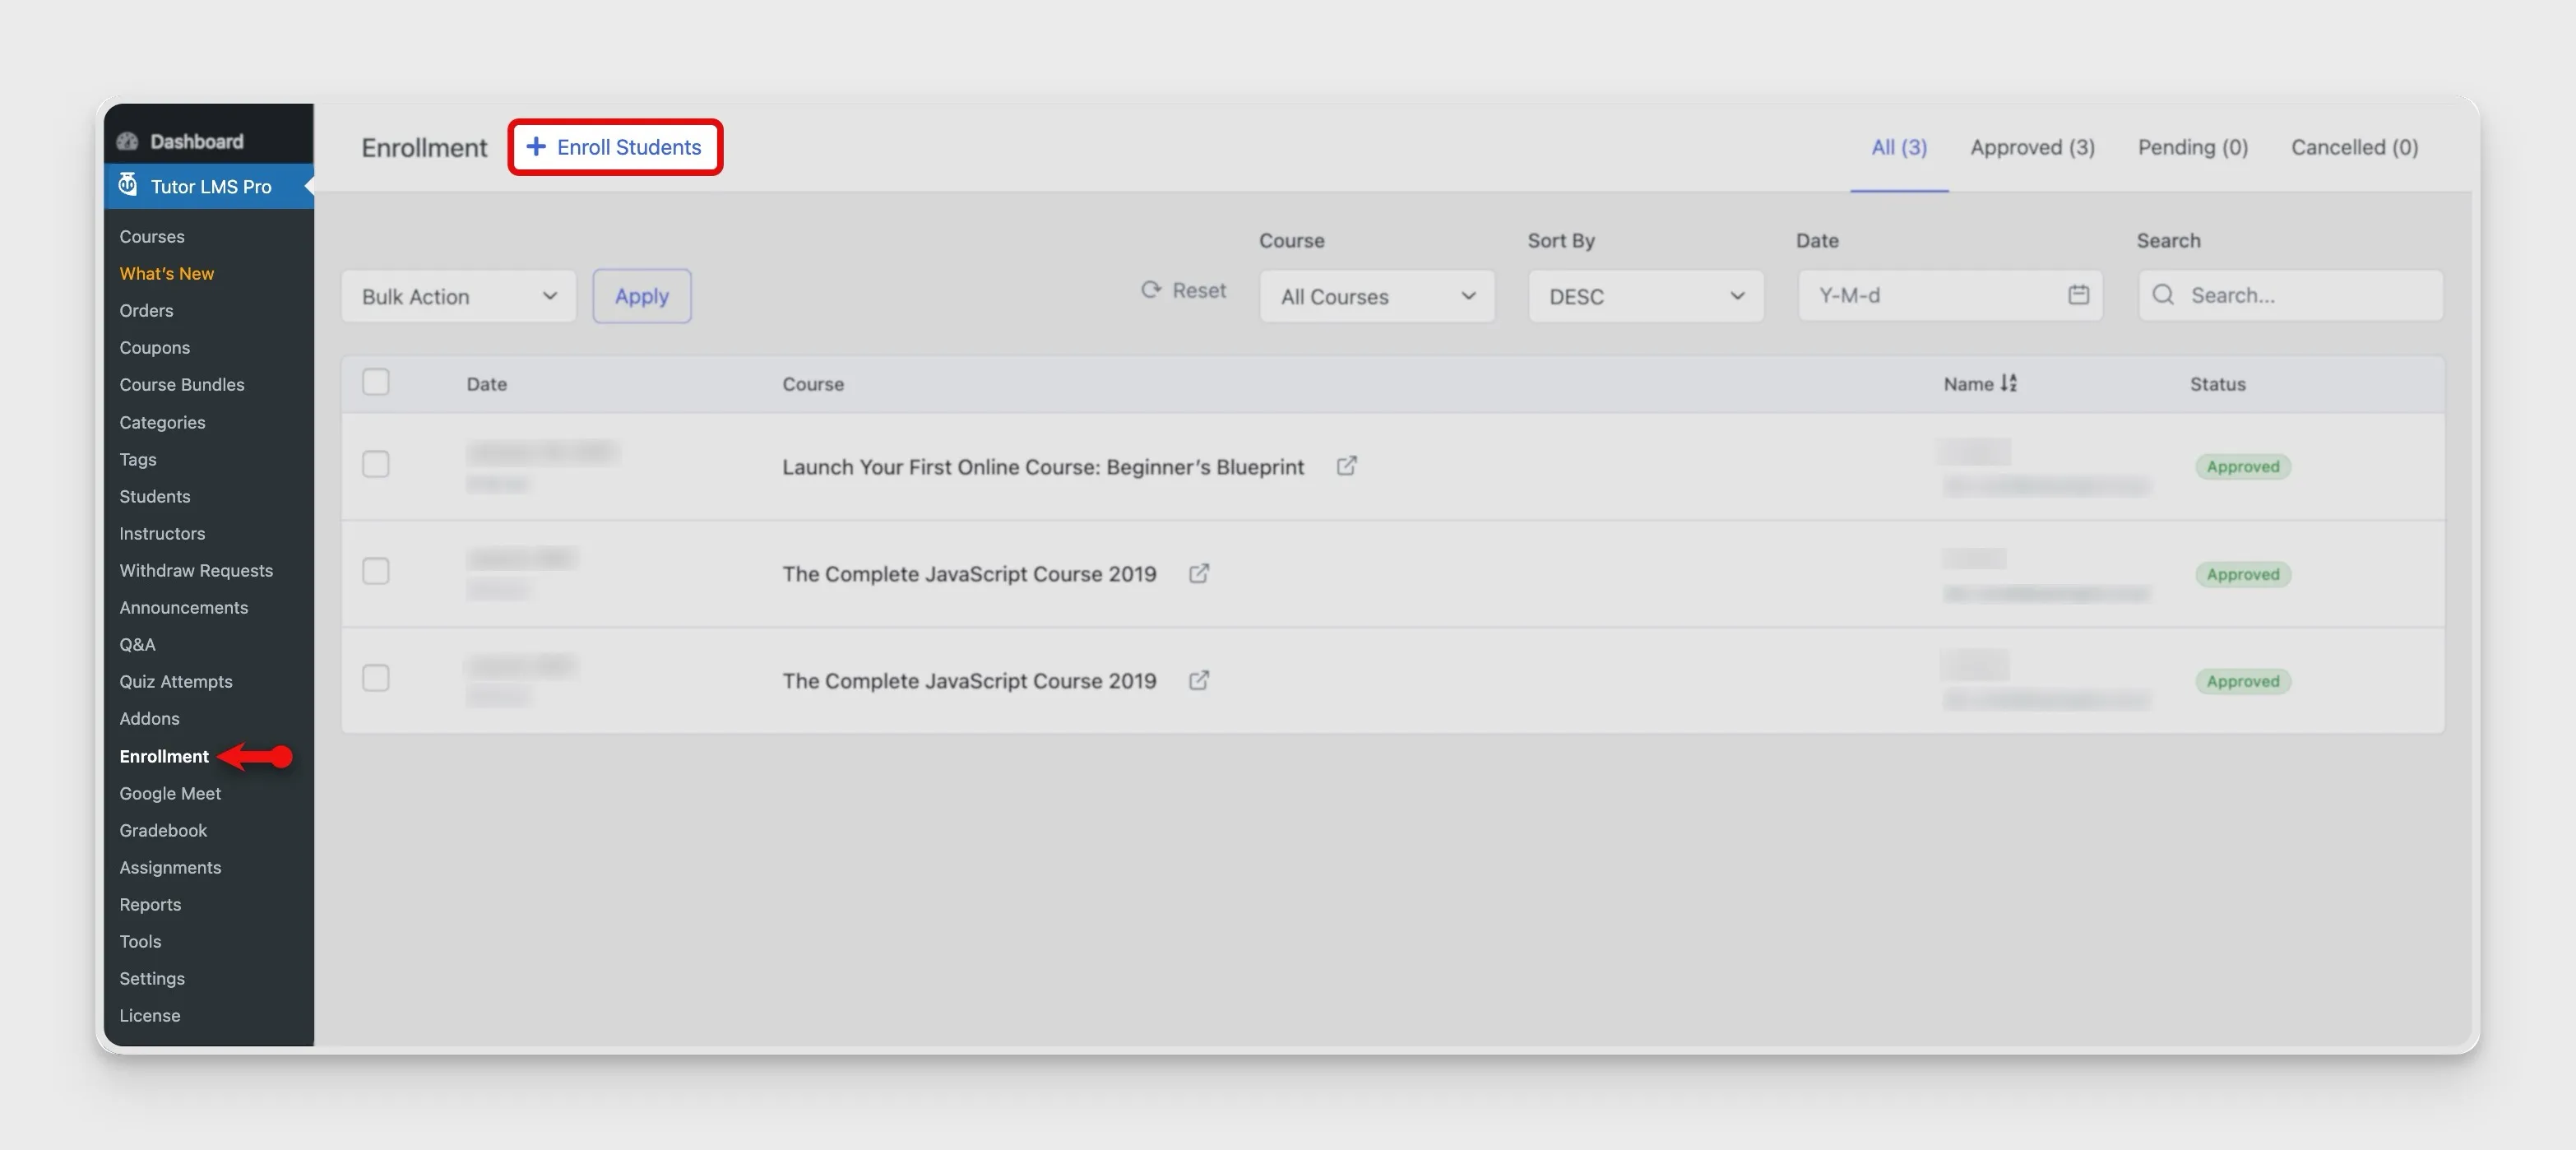
- Access the Enrollment Section: First, head to that new “Enrollment” menu item located under Tutor LMS in your WordPress admin dashboard.
- Initiate Student Enrollment: Look for and click the Enroll Students button. You’ll find it near the top of the page.
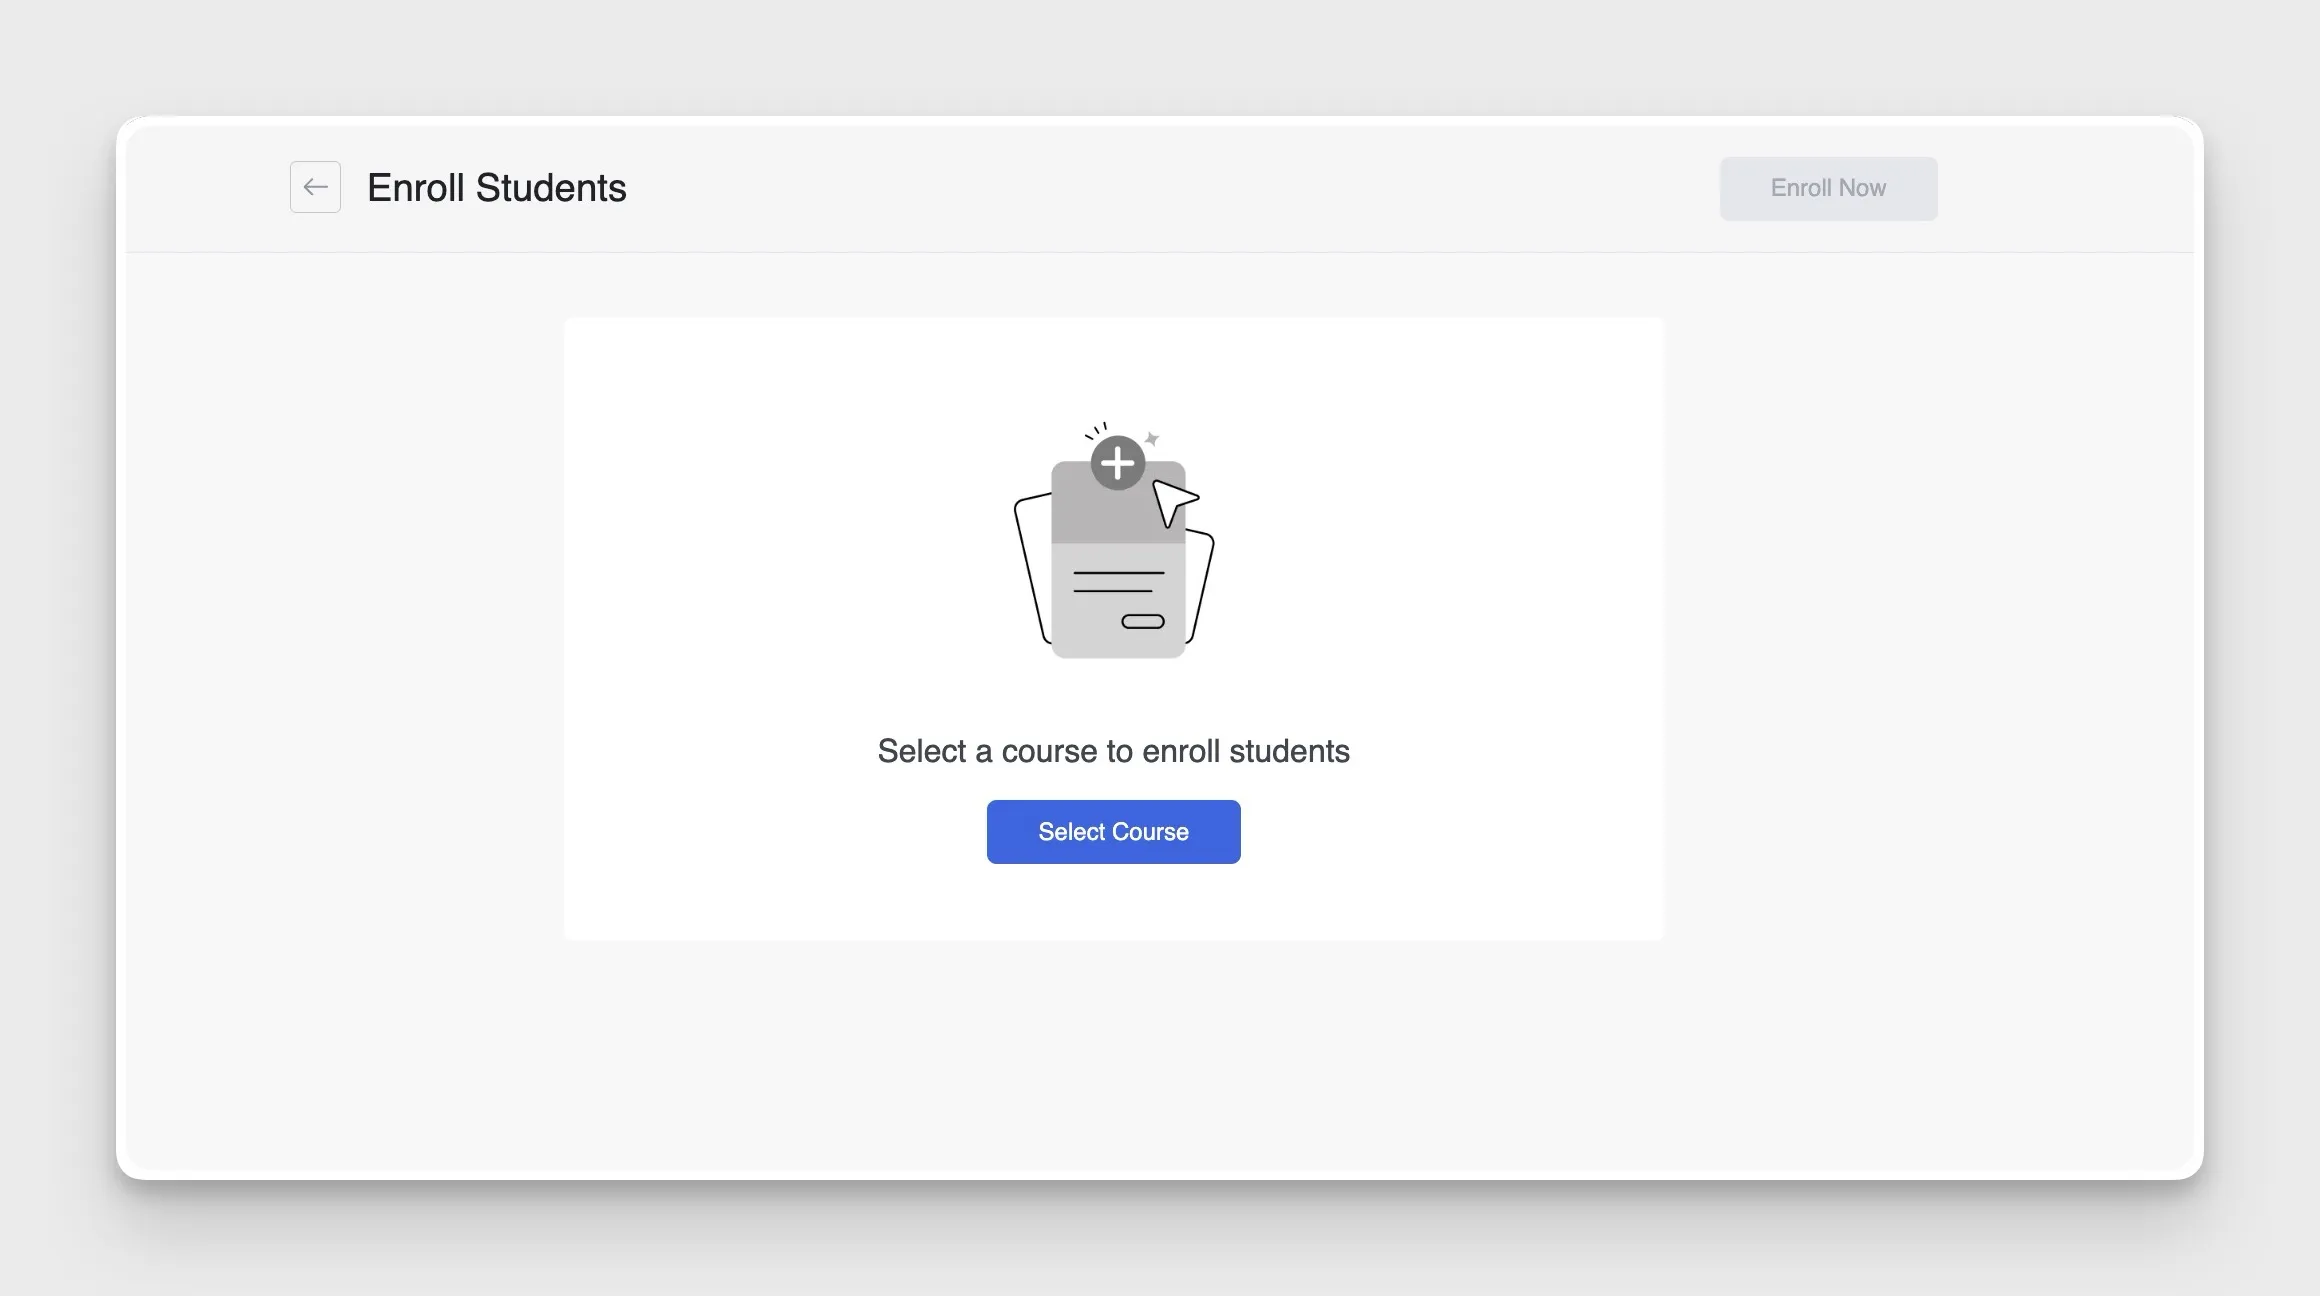
- Select Your Course: Next, you need to choose the specific Tutor LMS course you want to enroll the student in from the list provided.
- Select Students: Now, find the student (or multiple students) you wish to enroll. You can use the search bar to locate them quickly or simply scroll through your user list. Check the box next to their name(s).
- Set Payment Status: This step is crucial, especially for paid courses or memberships. Set the Tutor LMS payment status from the dropdown menu to:
- Paid: if the student has already paid, or if the course is free.
- Unpaid: if you need them to complete payment before gaining full access. They’ll be enrolled provisionally until payment is confirmed.
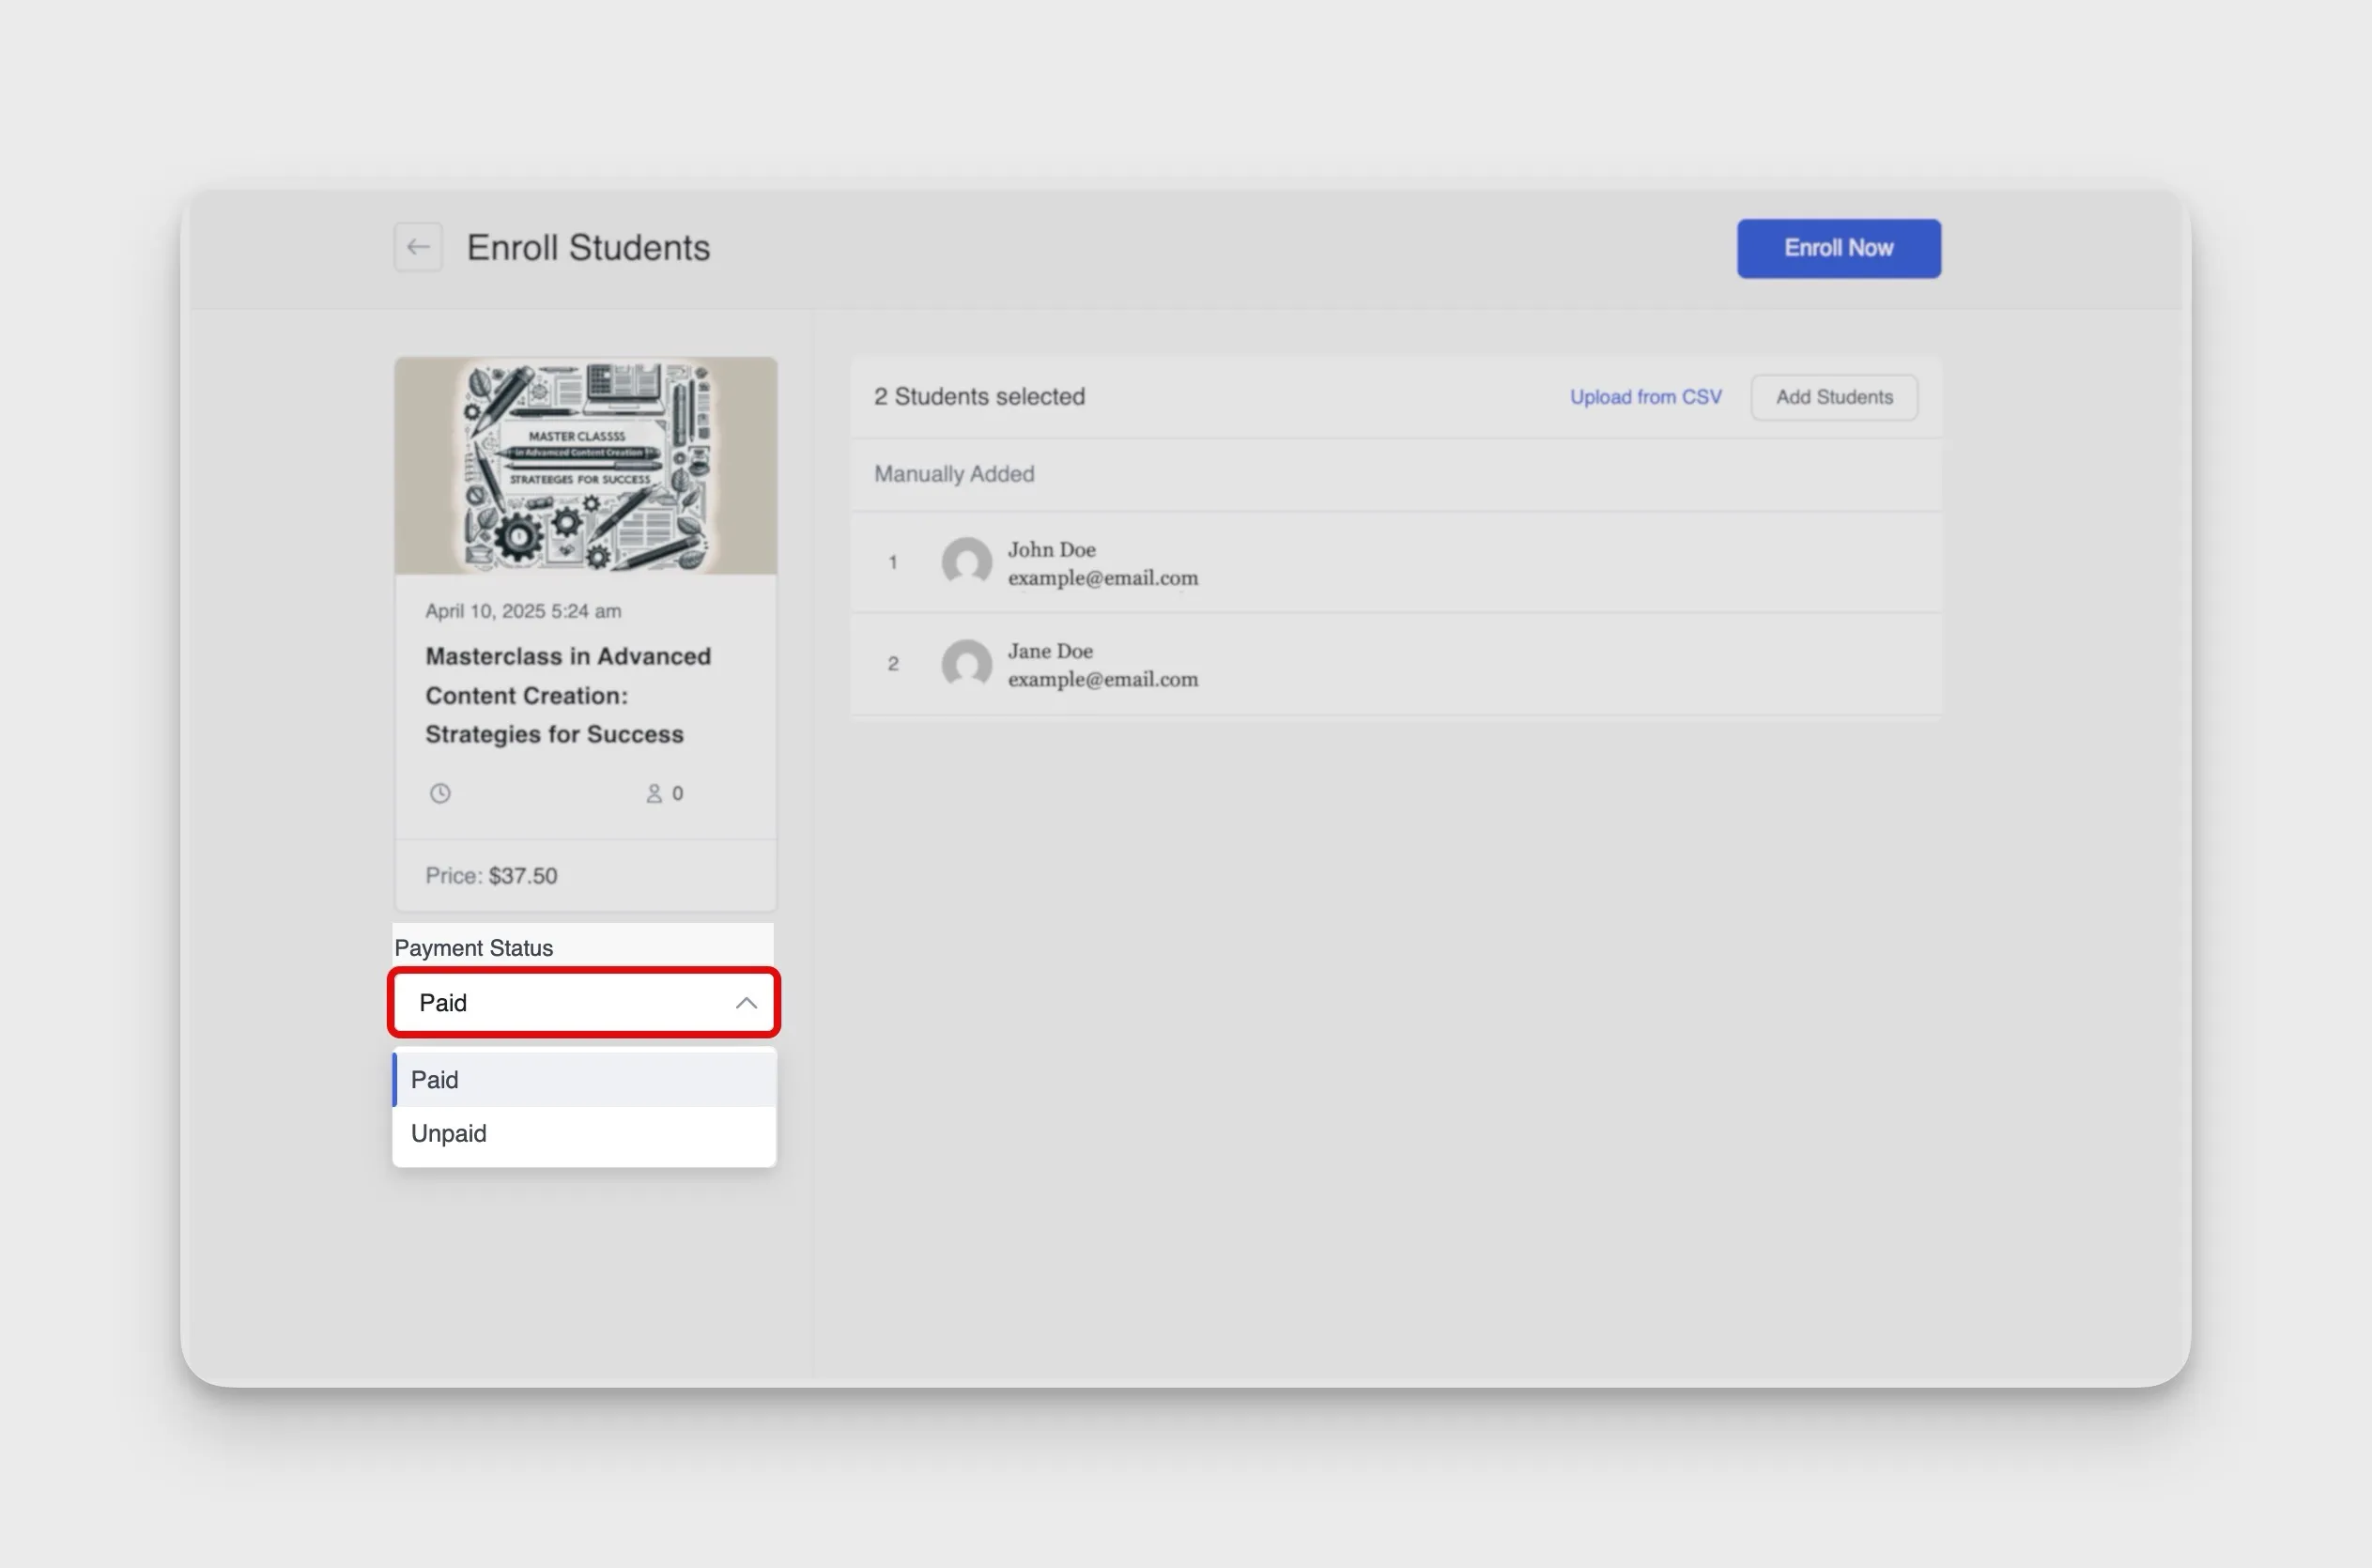
- Finalize Enrollment: Click the Enroll Now button to complete the process.
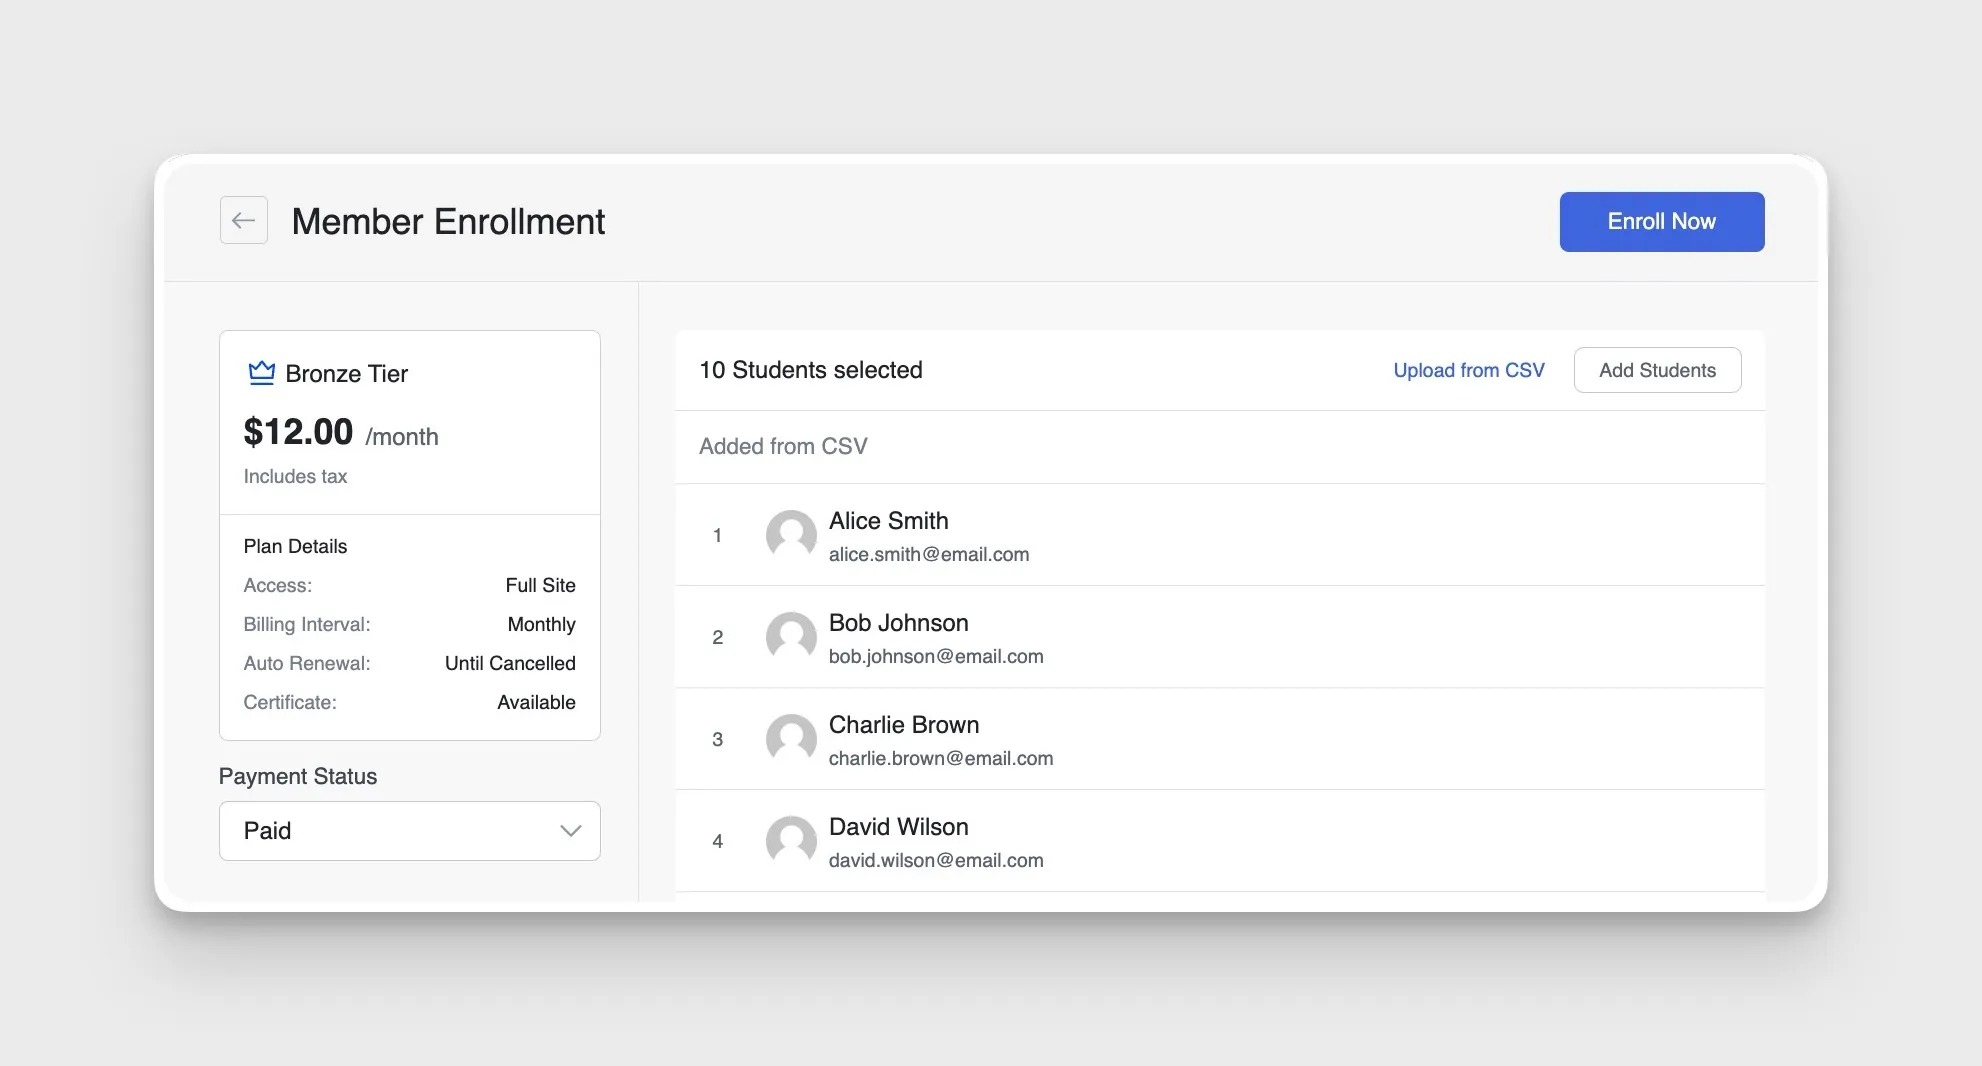
For those using Tutor LMS membership plans, the manual enrollment process offers even more flexibility. When your platform is configured in Membership-only mode, you can directly enroll students into specific membership tiers rather than individual courses.
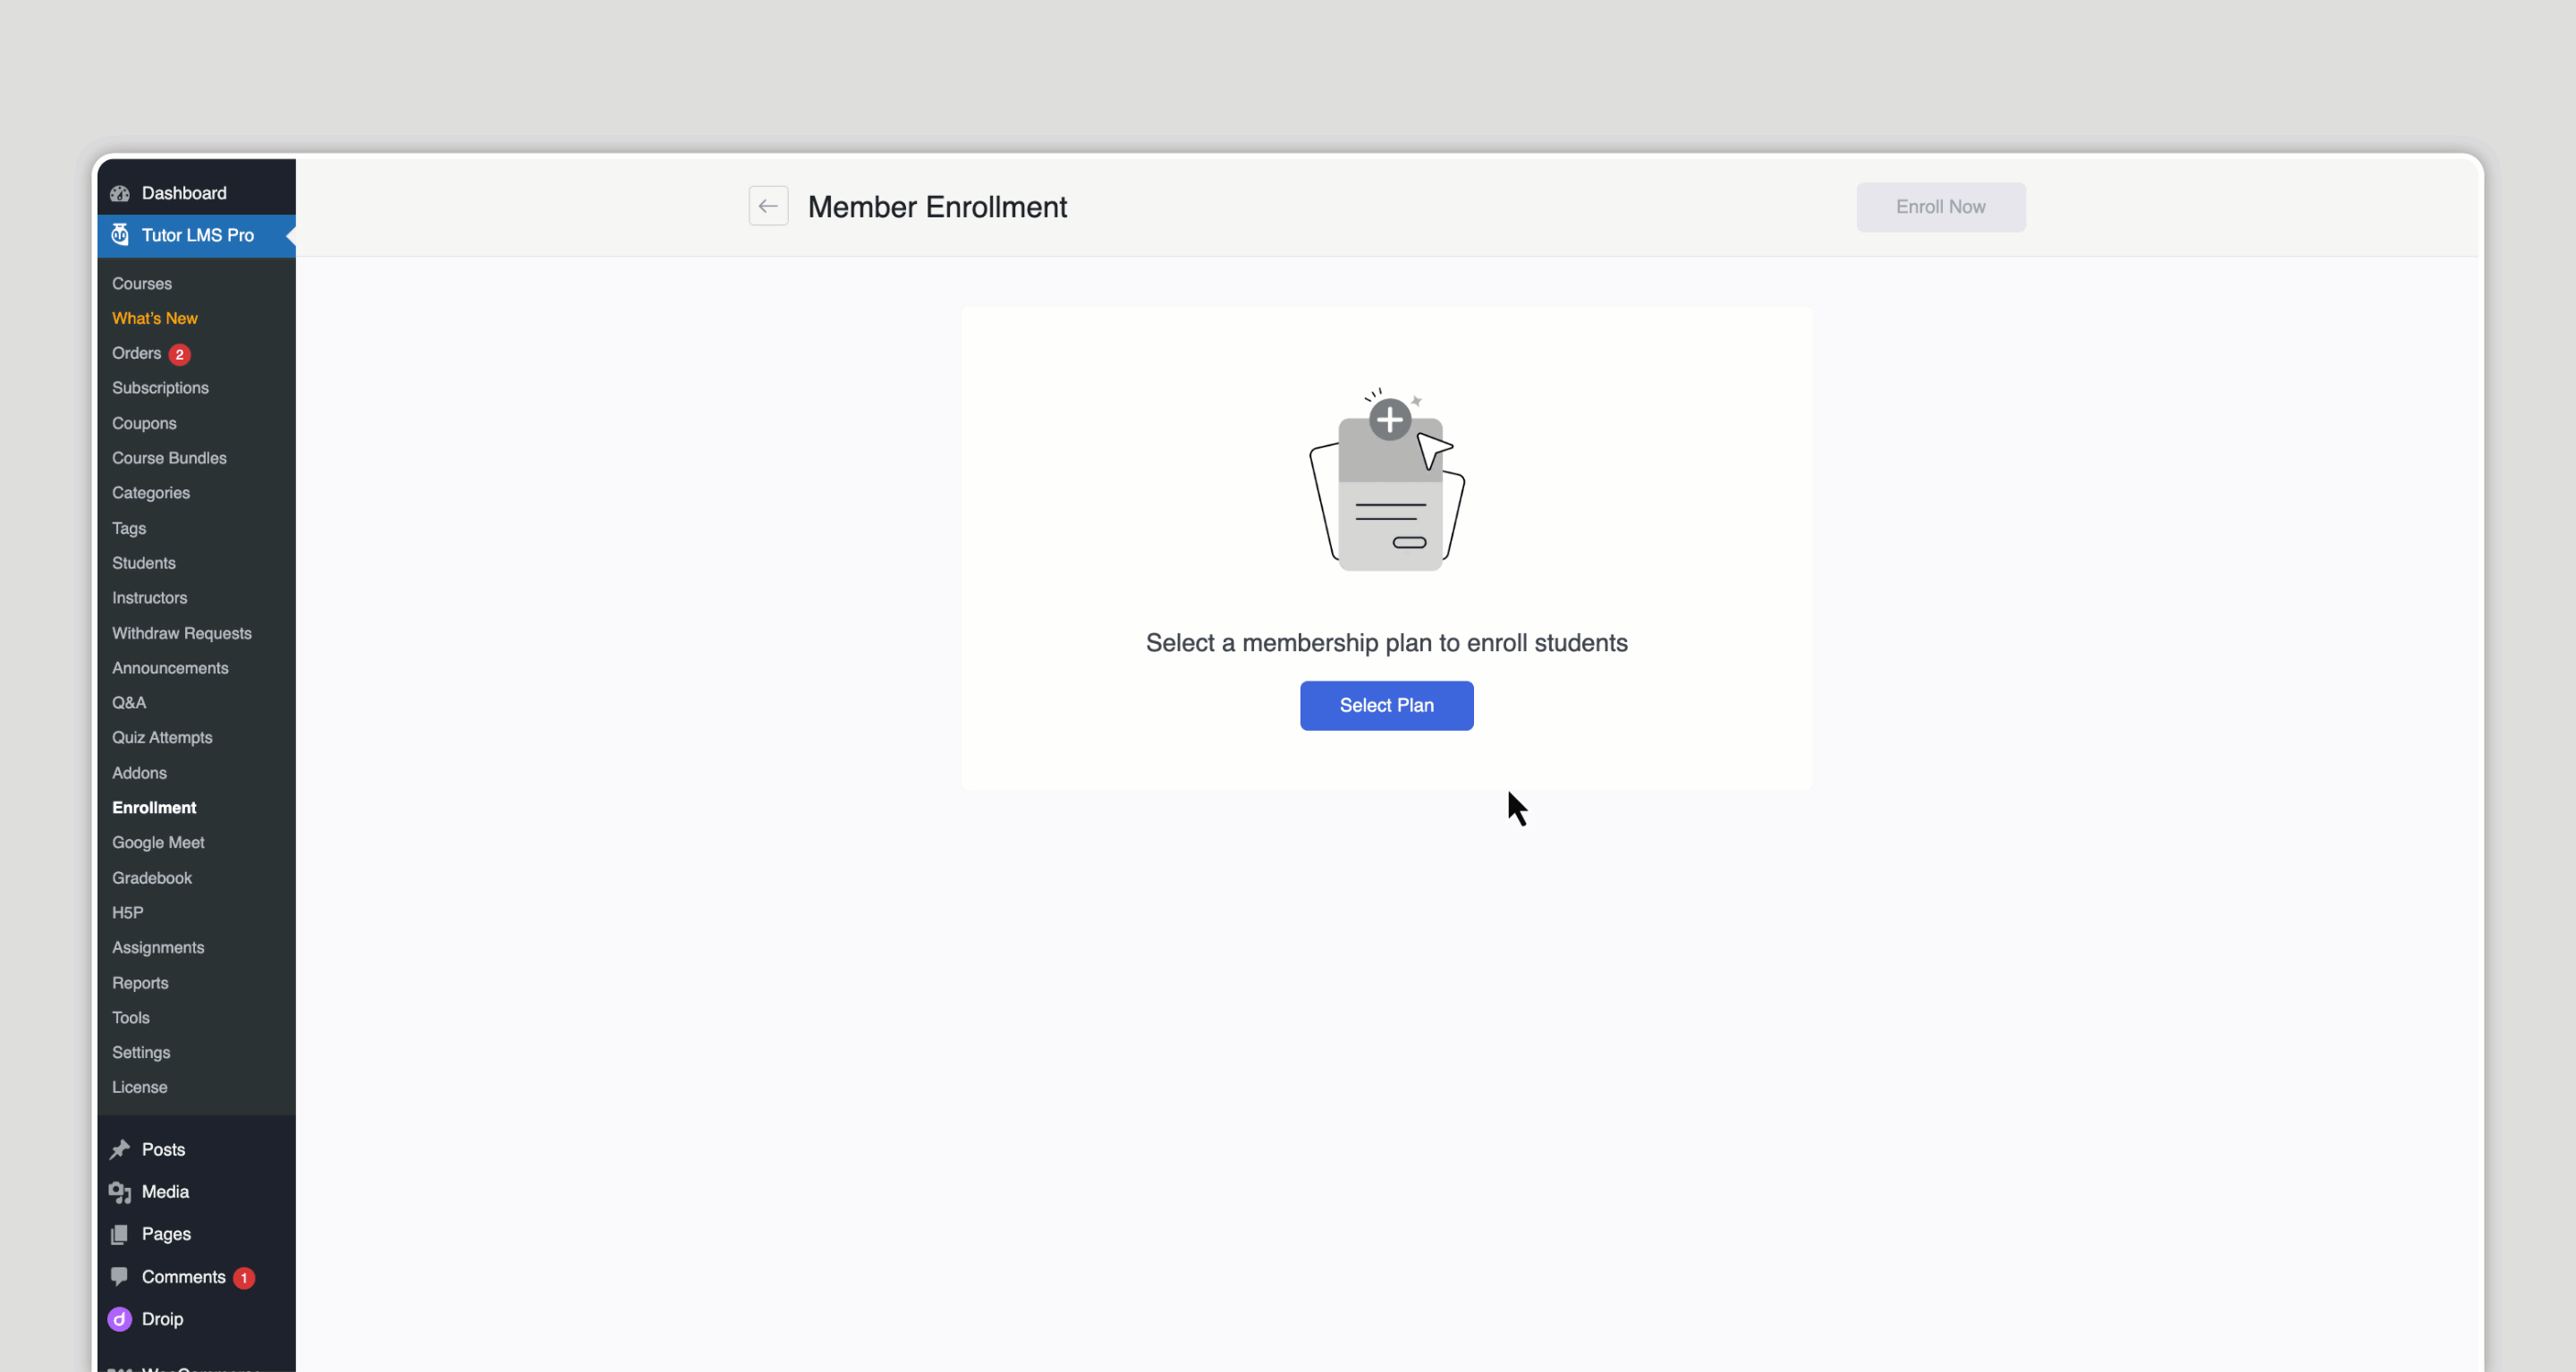
This powerful feature streamlines the enrollment process for bundled and subscription content, automatically granting students access to all courses contained within that membership tier.
Scaling Up Effortlessly: Bulk Enrollment via CSV
When your course offerings expand or you need to onboard dozens (or even hundreds) of students at once, manual enrollment becomes impractical. Whether you’re starting a new semester, migrating from another platform, or onboarding a whole corporate team onto your eLearning platform. For these scenarios, you need efficiency and speed.
This is where Tutor LMS’s bulk enrollment truly shines. It lets you enroll many students simultaneously using a simple CSV file. (CSV stands for Comma Separated Values – essentially a basic spreadsheet saved in a specific format).
Using CSV for Student Import
Tutor LMS simplifies adding multiple students via CSV student import Tutor LMS. Here’s how:
- Prepare Your CSV File:
First, you’ll need your list of students in a CSV file. It typically requires just basic information:
- First Name
- Last Name
- Email Address
To make things easier and ensure the format is correct, Tutor LMS provides a sample CSV file. You can download this directly from the Enroll Students window after clicking the Upload CSV button.
- Upload and Review:
- Just like with manual enrollment, first, choose the specific course or the membership enrollment plan where these students will be added.
- Upload and import your prepared CSV file.
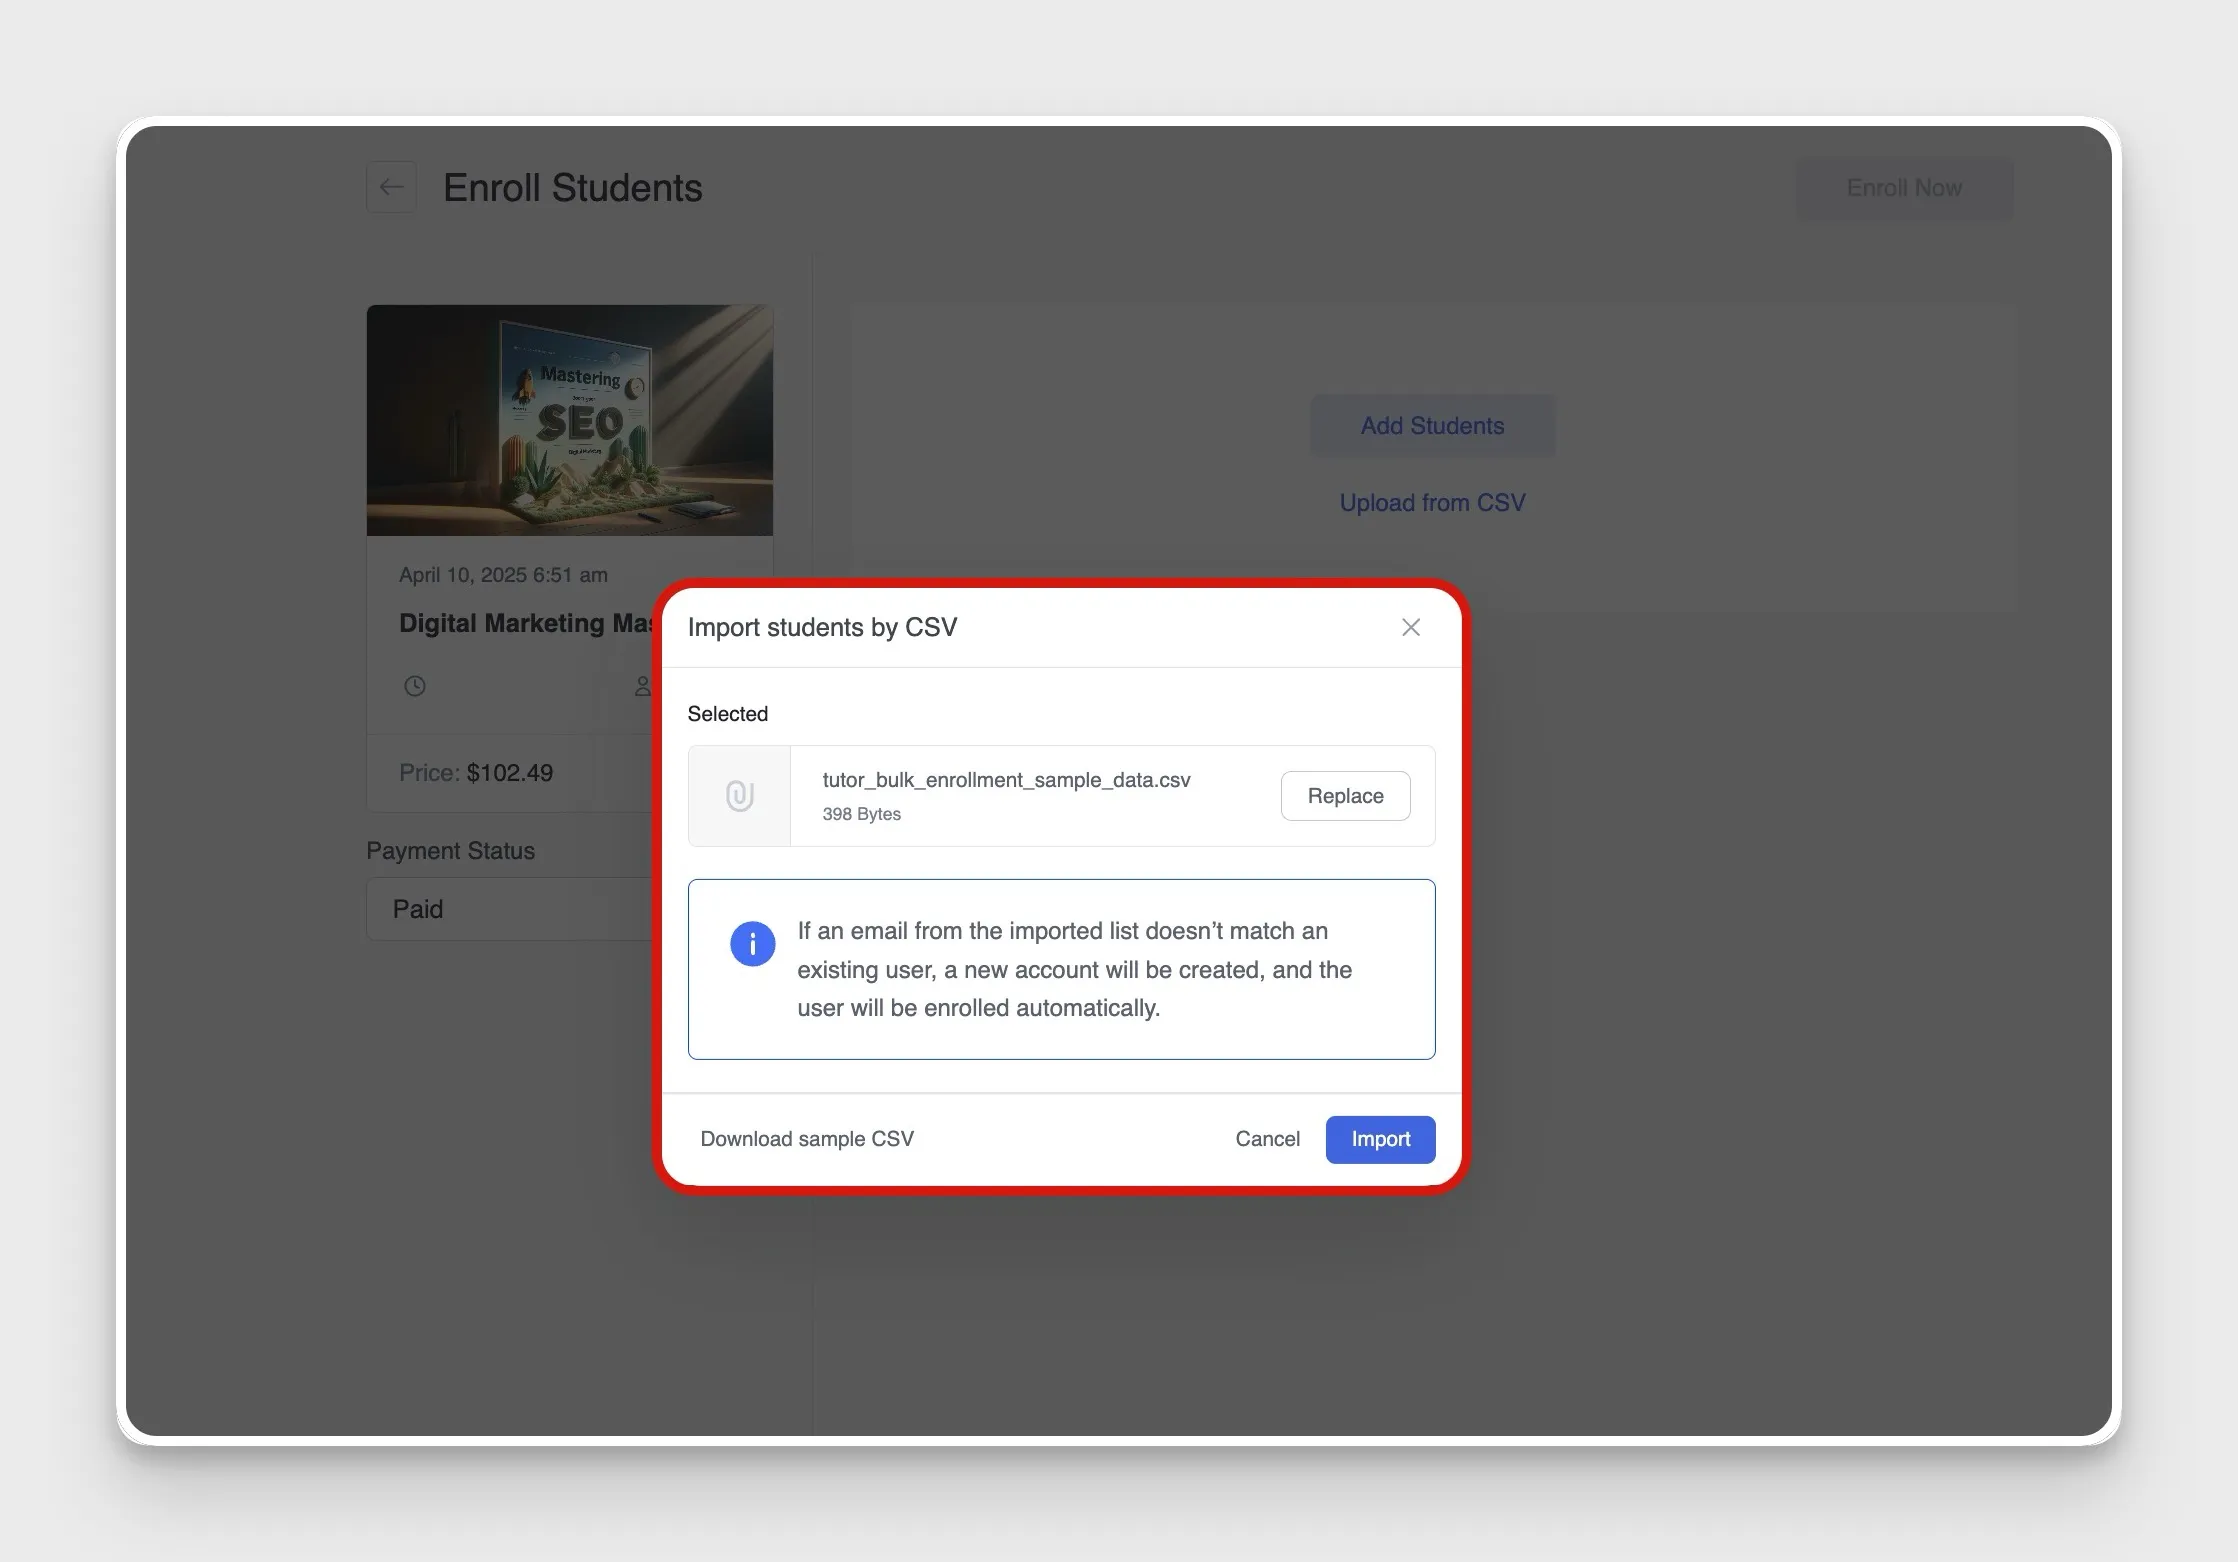
- Review the complete list of students before finalizing, easily removing any specific individuals by using the checkboxes next to the names imported from your file.
What’s very useful here is that you’re not limited to only the students from your CSV file. You can also use the Add button to find and select other students who are already registered.
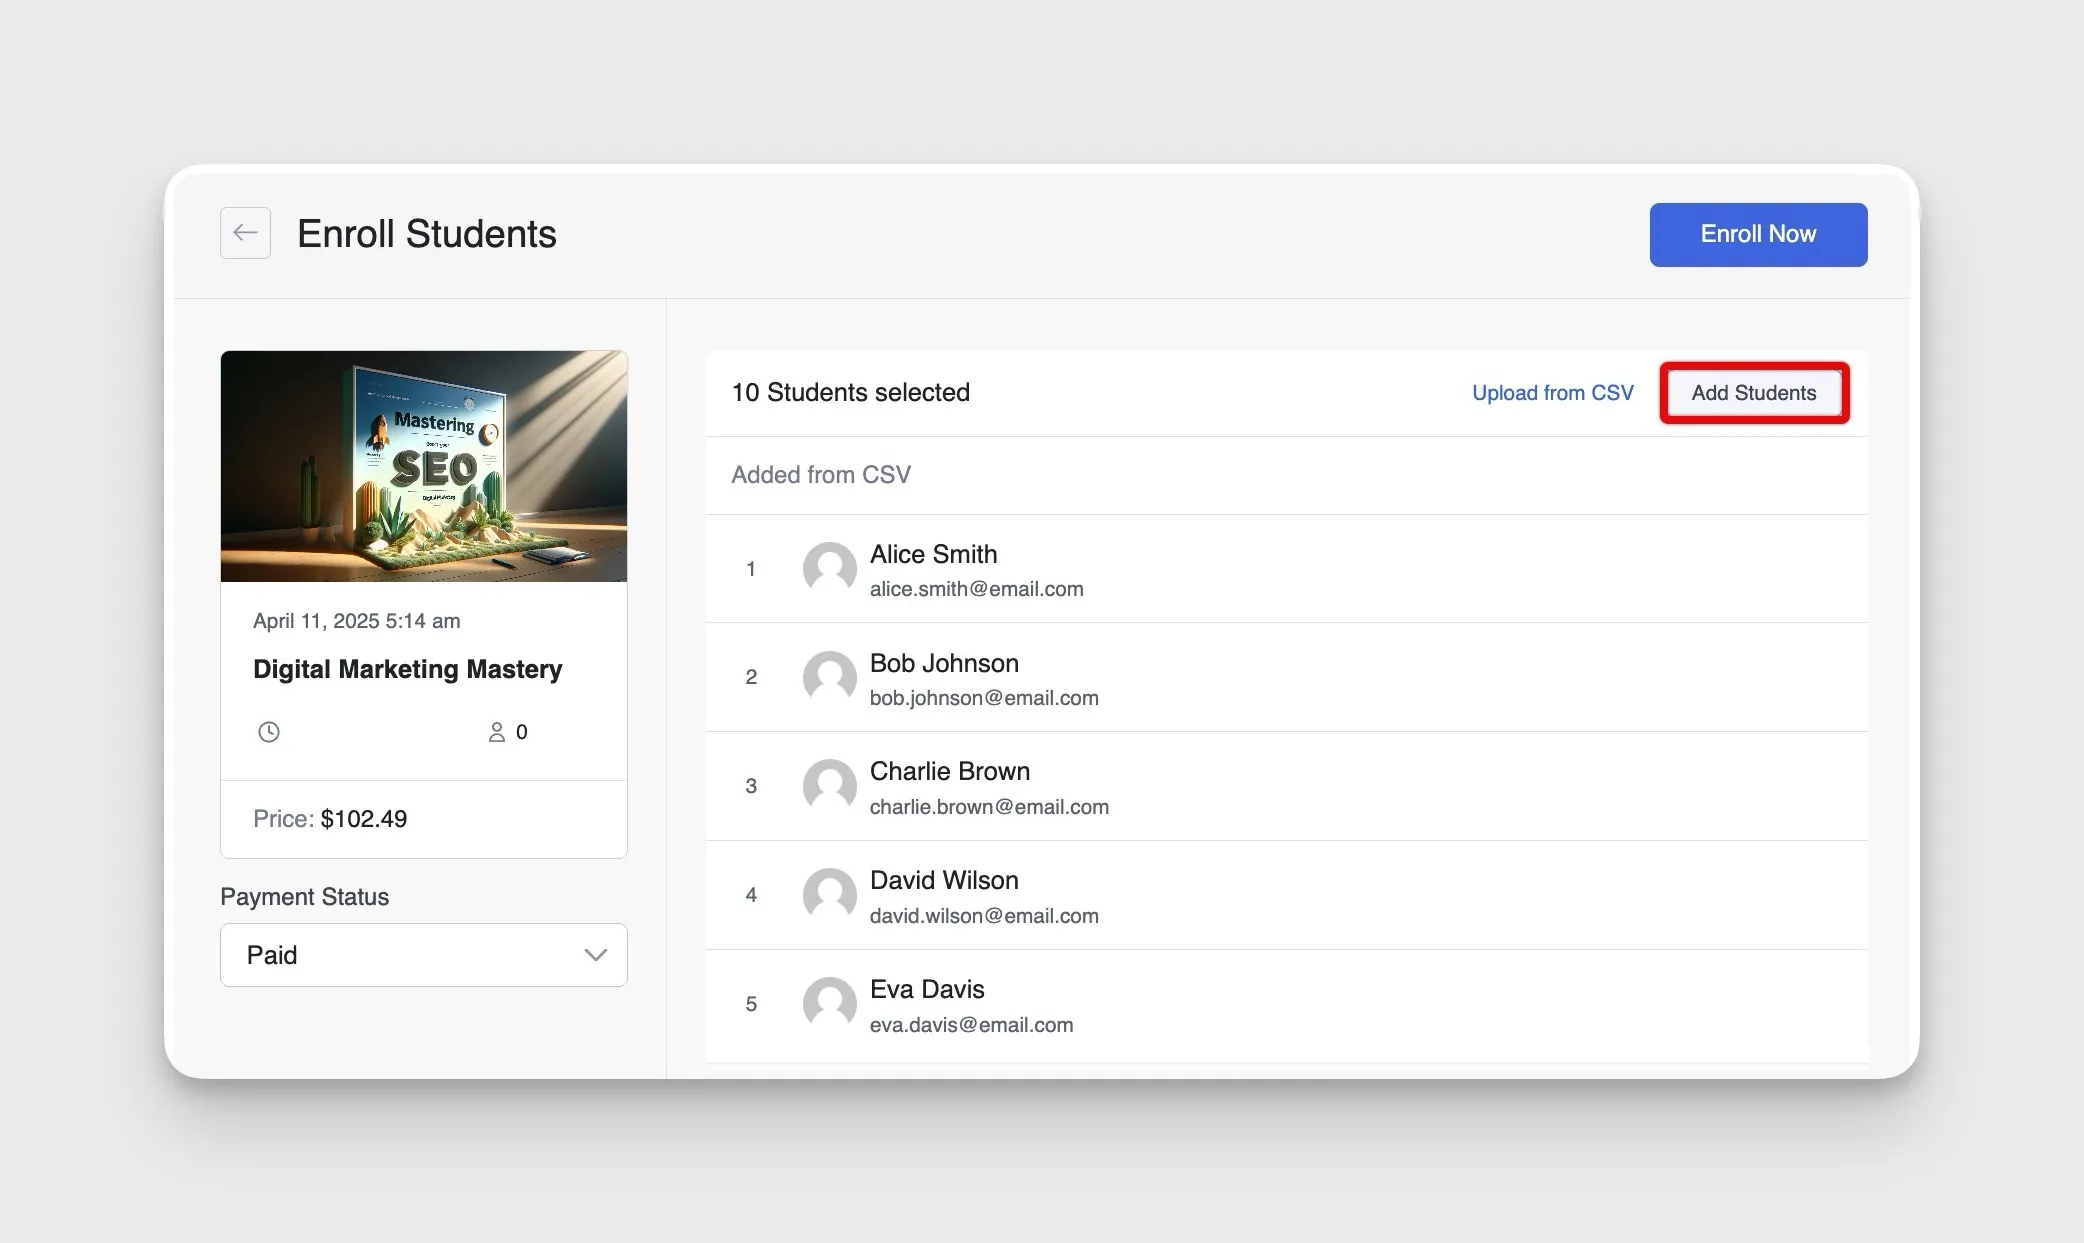
- Confirm and Process: Once your list is finalized, click the Enroll Now button. You’ll get a confirmation showing success/failure counts.
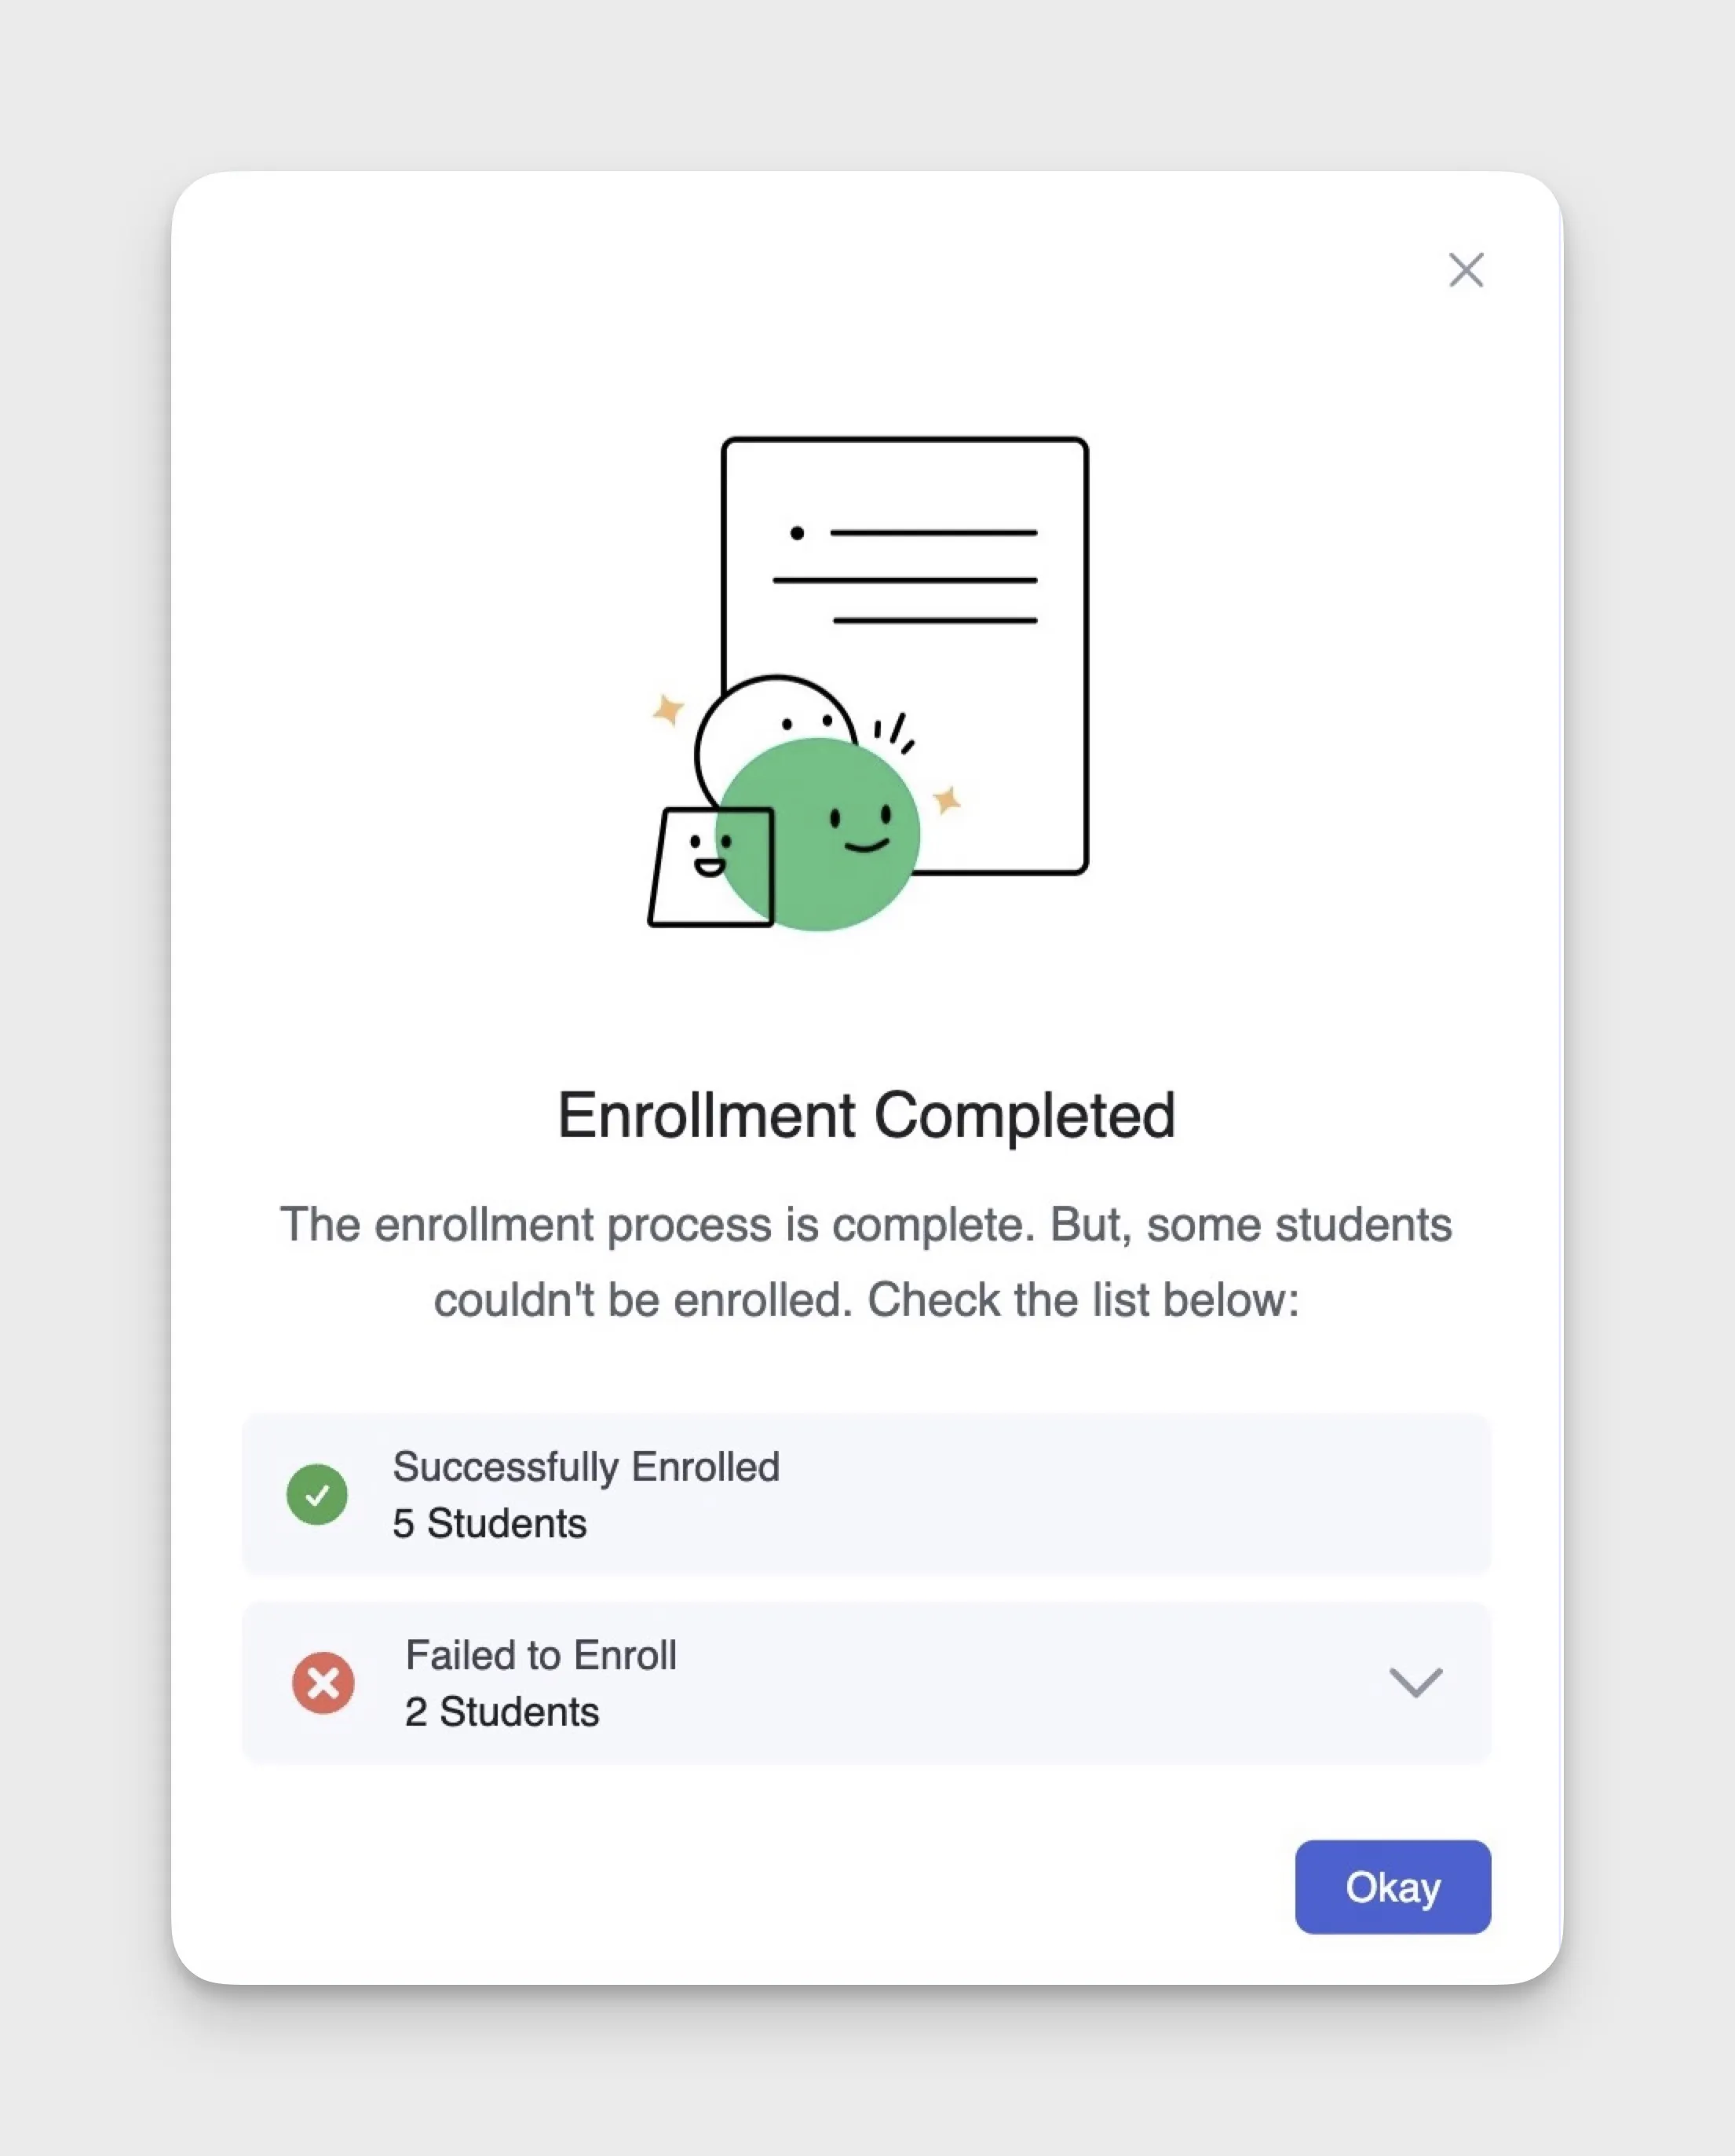
Note: Tutor LMS automatically creates WordPress accounts for any email addresses not already in your database and sends password reset emails to those new users. Existing users identified in the CSV are correctly enrolled without creating duplicate accounts.
Membership Plan Bulk Enrollment
A significant recent enhancement extends bulk enrollment capabilities beyond individual courses to include membership plans. This allows you to:
- Import dozens of users into specific membership tiers in seconds
- Grant access to entire course bundles with a single import
- Scale your membership-based offerings without scaling your workload
Seamless Payment Handling for Manual Enrollments
We’ve covered adding students manually and in bulk. Now, let’s revisit something we touched on during manual enrollment: how does Tutor LMS simplify tracking, invoicing, and completing transactions.
1. The “Unpaid” Workflow: Track Pending Payments Easily
When you enroll a student into a paid course or membership plan and choose the “Unpaid” payment status, you essentially create a pending enrollment. The student gets added to the course or membership plan list, but they won’t gain access to the actual paid course or plan right away. This acts as a safeguard, ensuring that access is granted only after the payment is fully completed for any paid course enrollment you initiate.
2. The Convenience of Automatic Invoicing
One of the biggest time-savers in this process is the Tutor’s automatic invoice generation. When you complete a manual enrollment for a paid item (even if you set it to “Unpaid”), Tutor LMS automatically creates the necessary invoice in the background. You don’t need to manually generate or send an invoice for these specific enrollments, the system takes care of it!
How Students Complete Payment?
So, how does the student finalize their enrollment when you’ve set it to “Unpaid”? It’s a pretty straightforward process:
- They log into their account and navigate to Student Dashboard > Order History. This section will display the pending order you created.
- They can simply click a Pay button associated with that order and proceed to pay using the payment gateways you’ve integrated (like Stripe, PayPal, etc.). Successful online payment grants them immediate access.

Admin Manual Completion Option
What if a student pays you directly, perhaps via a bank transfer, check, or another offline method? You can easily grant them access manually:
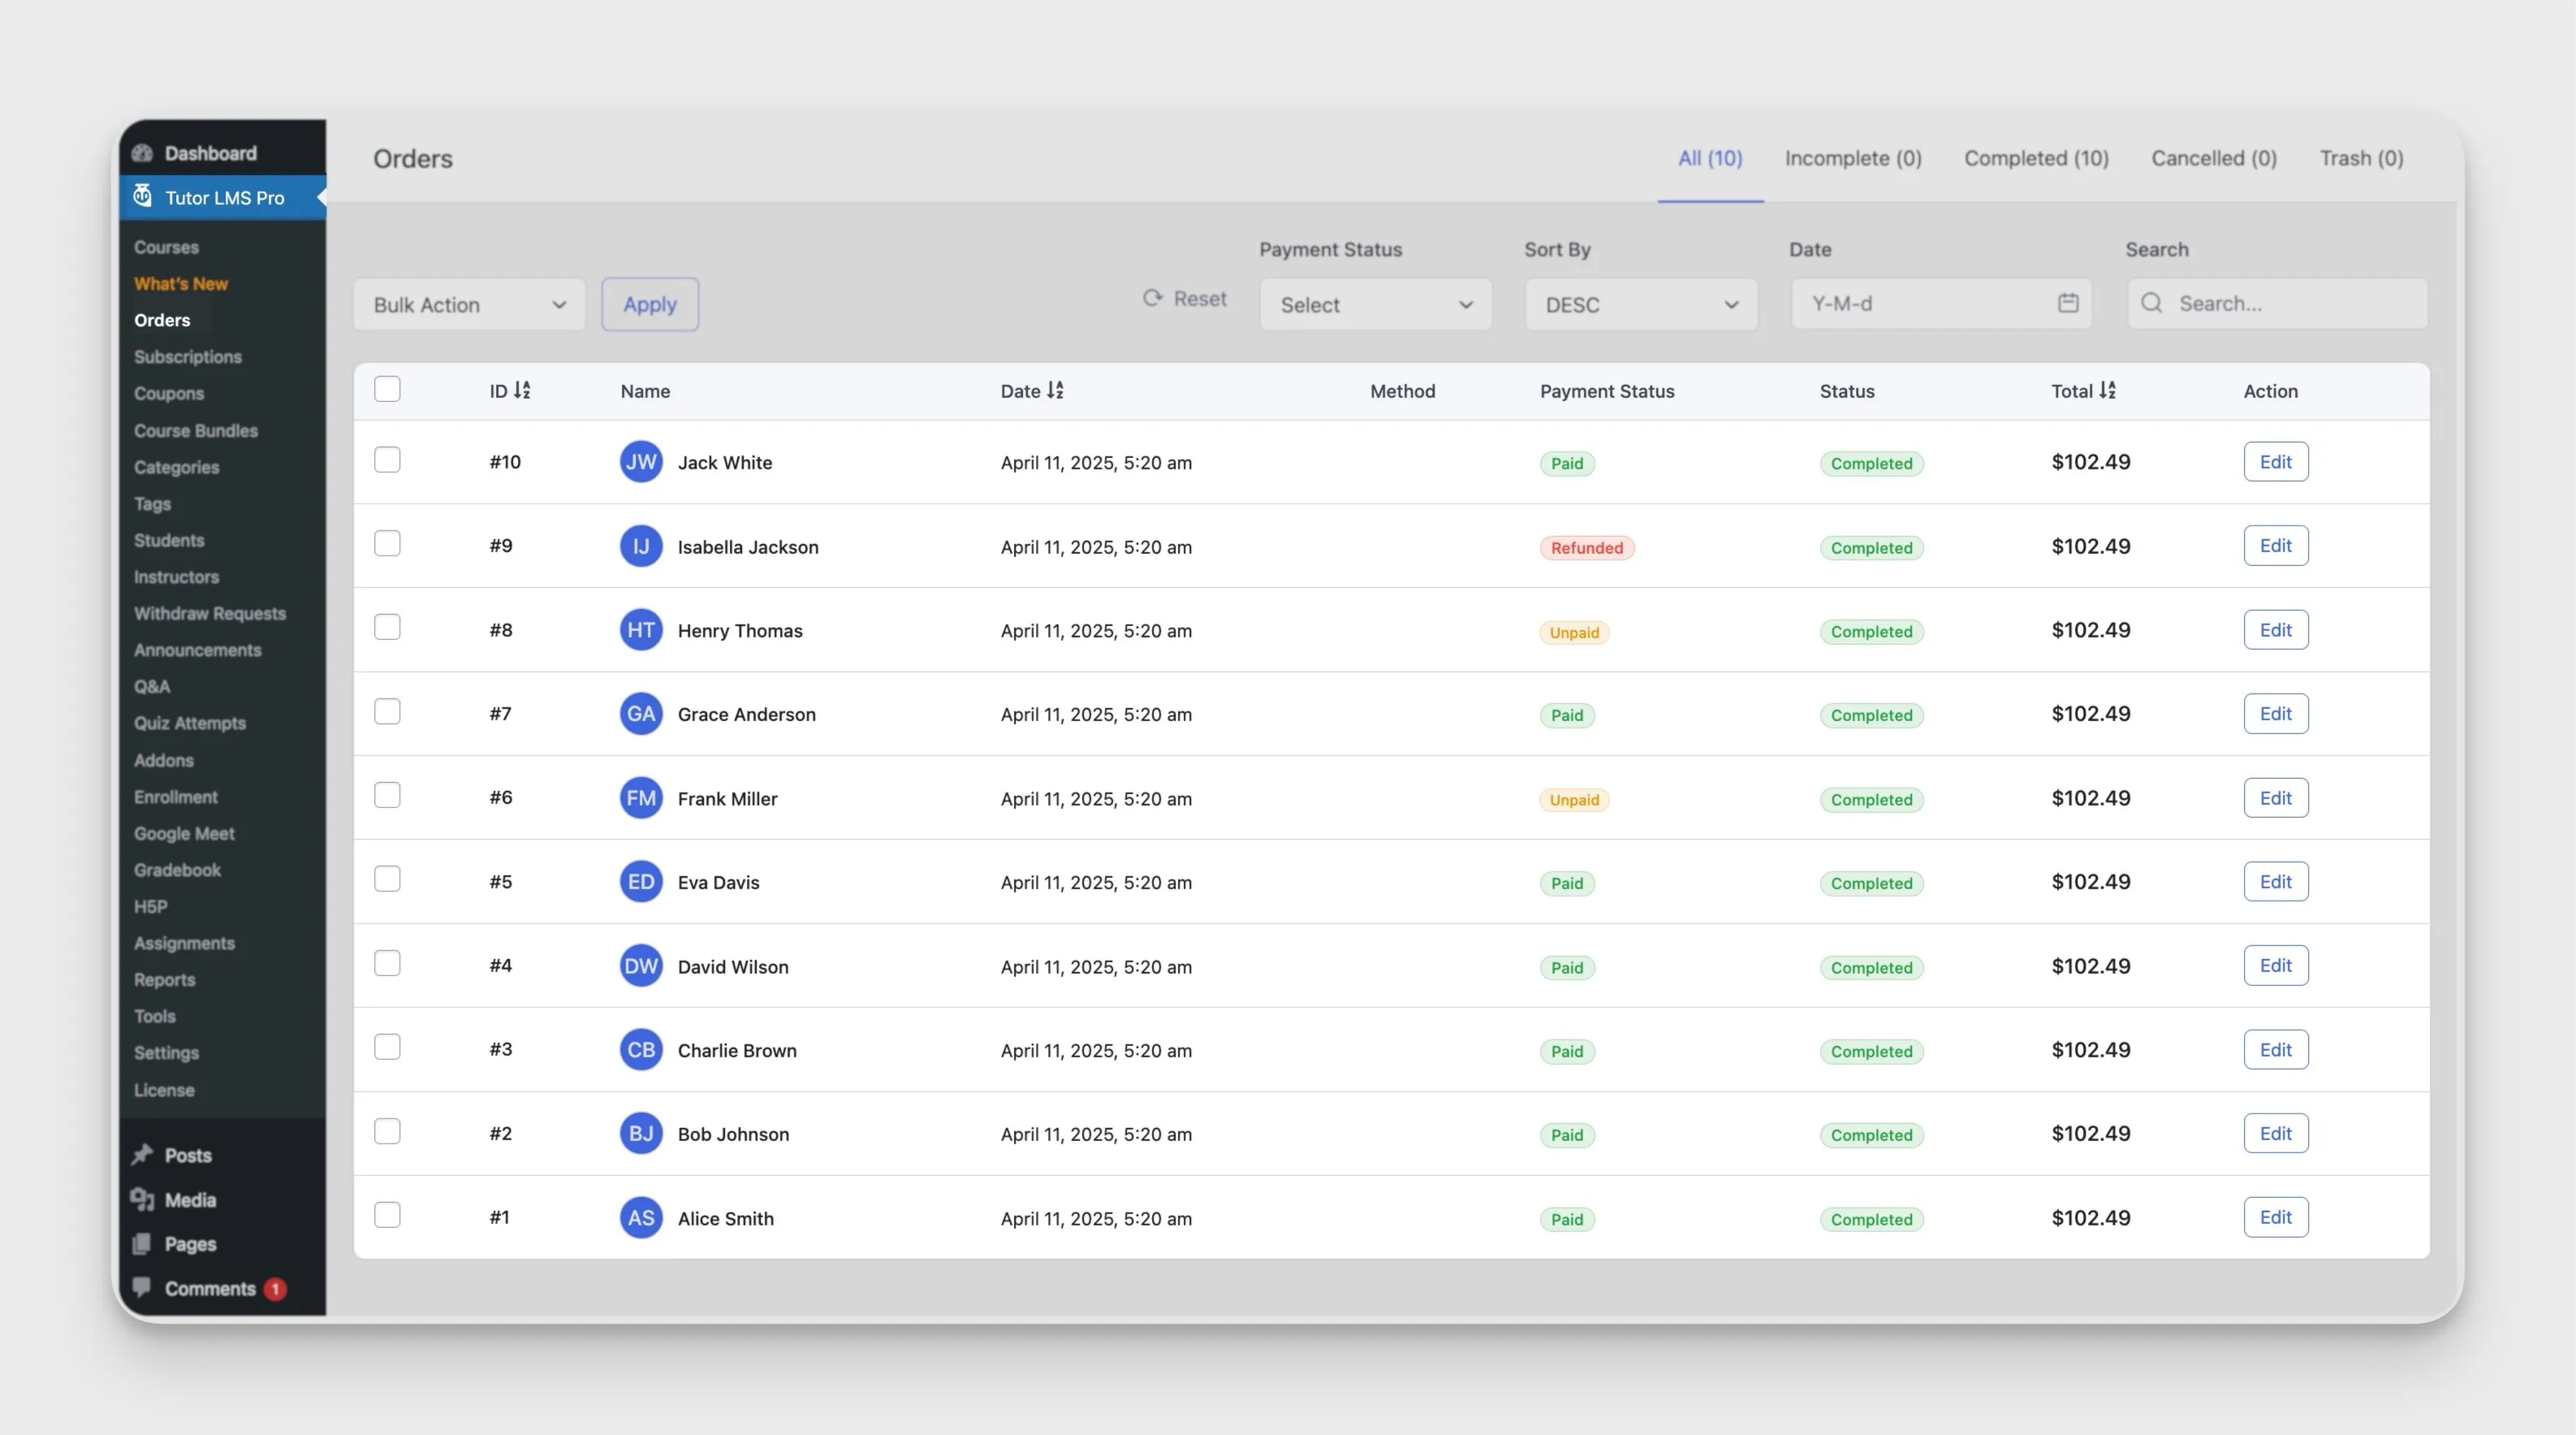
- You’ll need to locate the pending order associated with that student. The administrator then needs to manually mark the specific order as “Complete” on the Orders page using the Mark as paid button.
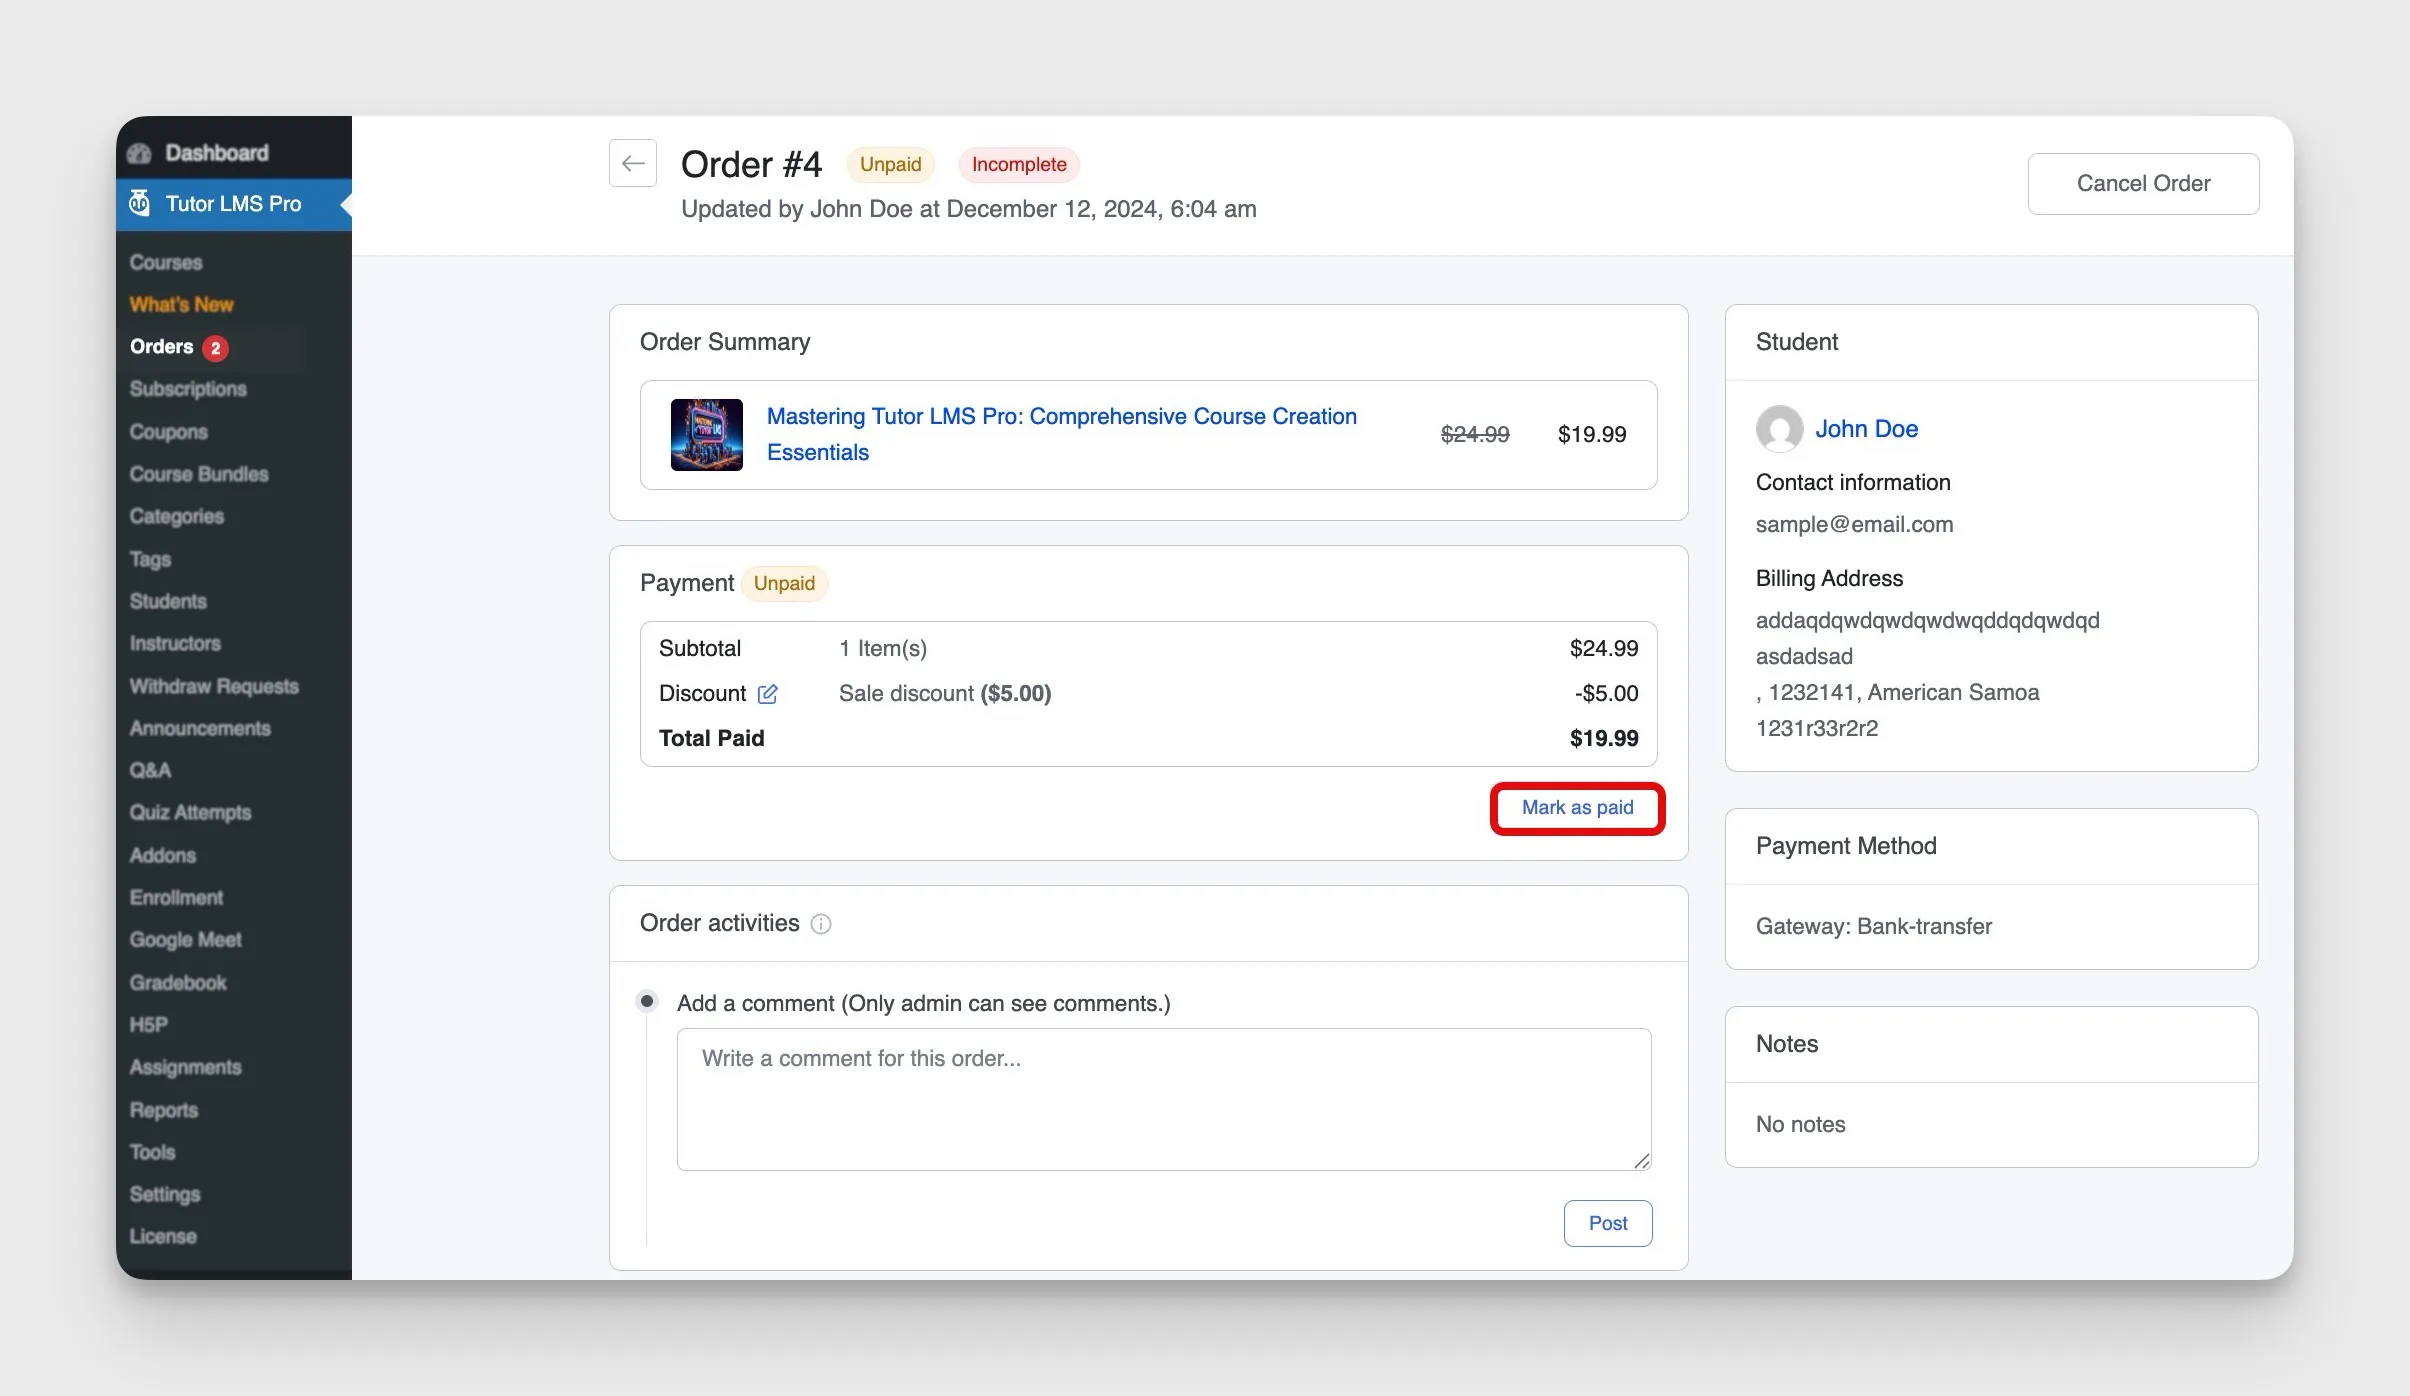
Once payment is marked as complete (either automatically via online payment or manually by you), the student can conveniently download the finalized invoice directly from their dashboard area for their own records.
Conclusion: Empowering Your Online Learning Community
Tutor LMS consistently evolves, clearly focusing on giving educators and administrators like you the effective tools to run a successful online learning platform. The powerful student enrollment features we’ve covered are a prime example of this commitment. You benefit from the precise control offered by manual enrollment and the time-saving efficiency of bulk enrollment, whether you’re managing individual online courses, course bundles, or comprehensive Tutor LMS membership enrollment plans.
By helping you simplify enrollment, the platform doesn’t just save time enrolling students; it also contributes to a smoother start for your learners. So, we encourage you to fully utilize these powerful tools. Embracing efficient enrollment strategies can truly help you unlock the full potential of your courses in WordPress using Tutor LMS.

Start Using Tutor LMS Today
Ready to take your online courses to new heights? Download Tutor LMS now and enjoy a journey of eLearning excellence.