Design
Appearance
The Appearance section allows you to configure the visual interface of the student dashboard. This setting determines how learners interact with course content and view their progress.
Accessing Appearance Settings
Navigate to Tutor LMS > Settings > Design in your WordPress admin dashboard. Locate the Appearance section to configure your preferred platform appearance.
Learning Mode
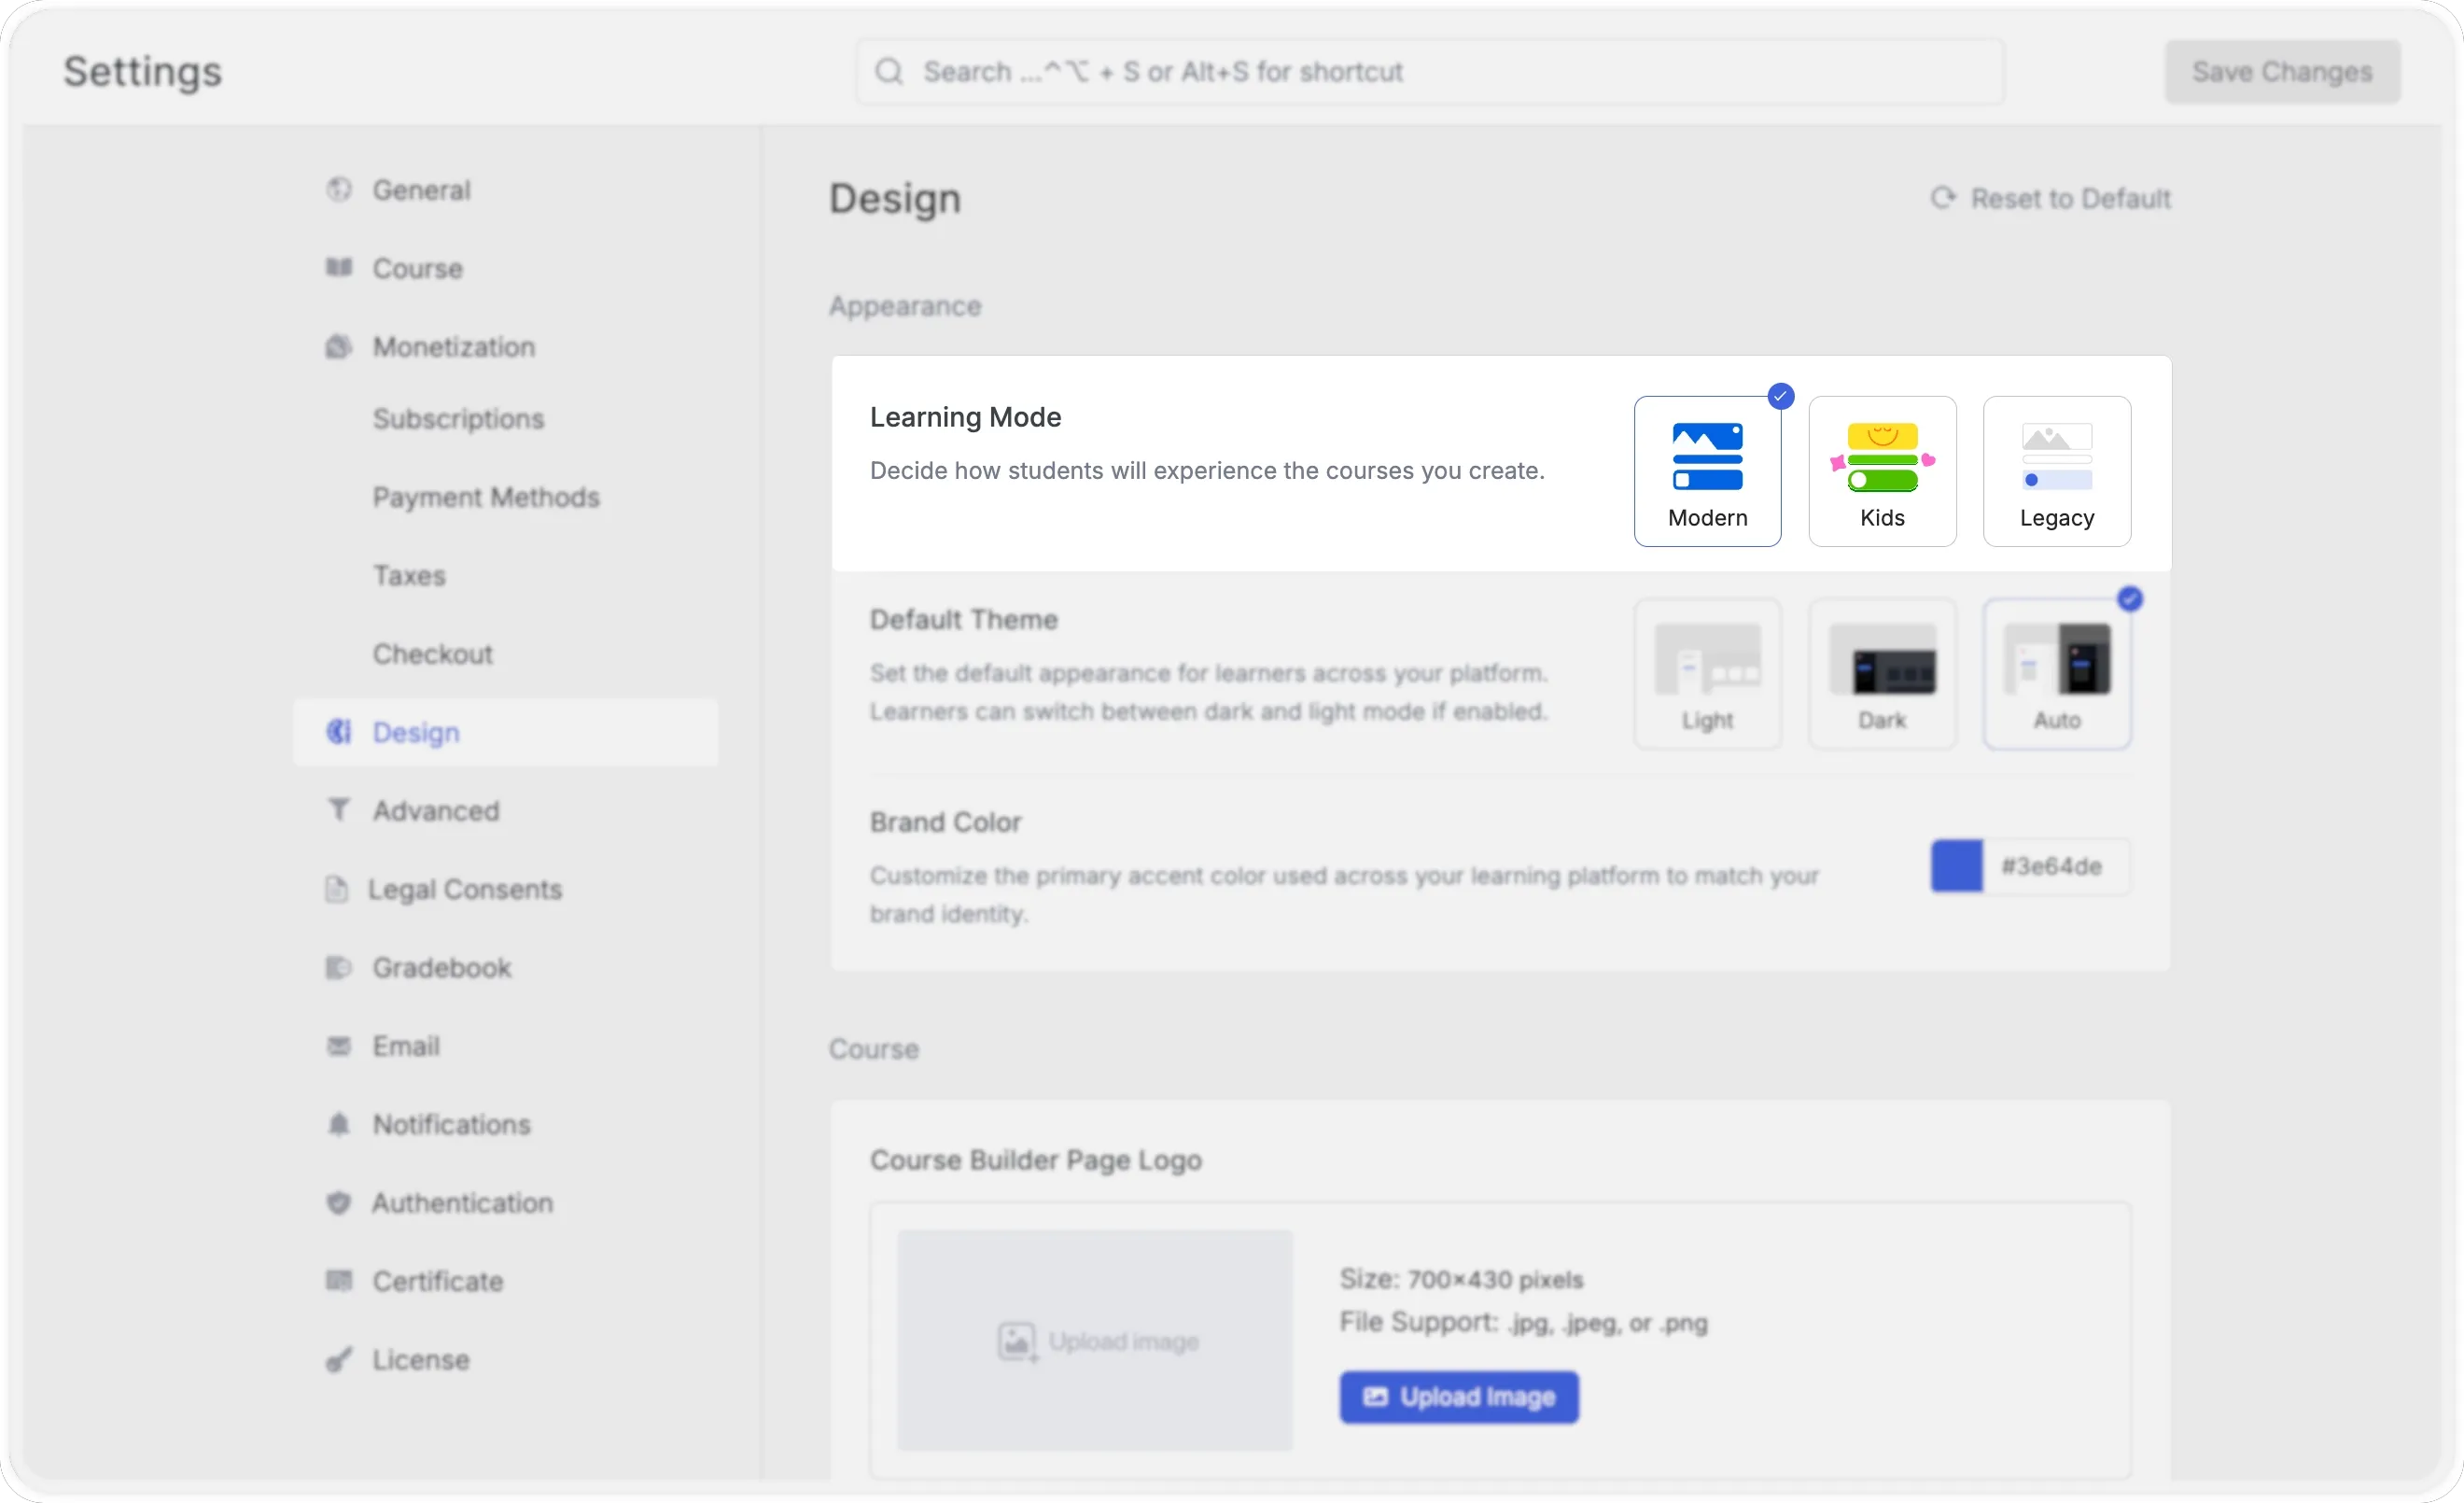
Learning Mode sets the overall interface layout students see when they access your courses. Three options are available:
| Learning Mode | Target Audience | Description |
|---|---|---|
| Modern | Adult learners and professionals | Clean, optimized dashboard with unified progress tracking, quick access to active courses, and a streamlined layout focused on learning efficiency. |
| Kids | Children and young students | Visually engaging interface featuring bright colors, gamified elements like learning streaks, and playful icons to encourage participation. |
| Legacy | Existing installations | Preserve the Tutor LMS 3.0 dashboard interface for sites requiring visual continuity with previous versions. |
To apply an appearance mode, navigate to Settings > Design > Appearance, select your preferred mode, and save changes. The selected mode applies immediately to the student dashboard.
Note: Modern mode is the default layout for fresh Tutor LMS 4.0 installs. You can toggle between learning modes at any time without running extra configurations or risking your existing course data.
Default Theme
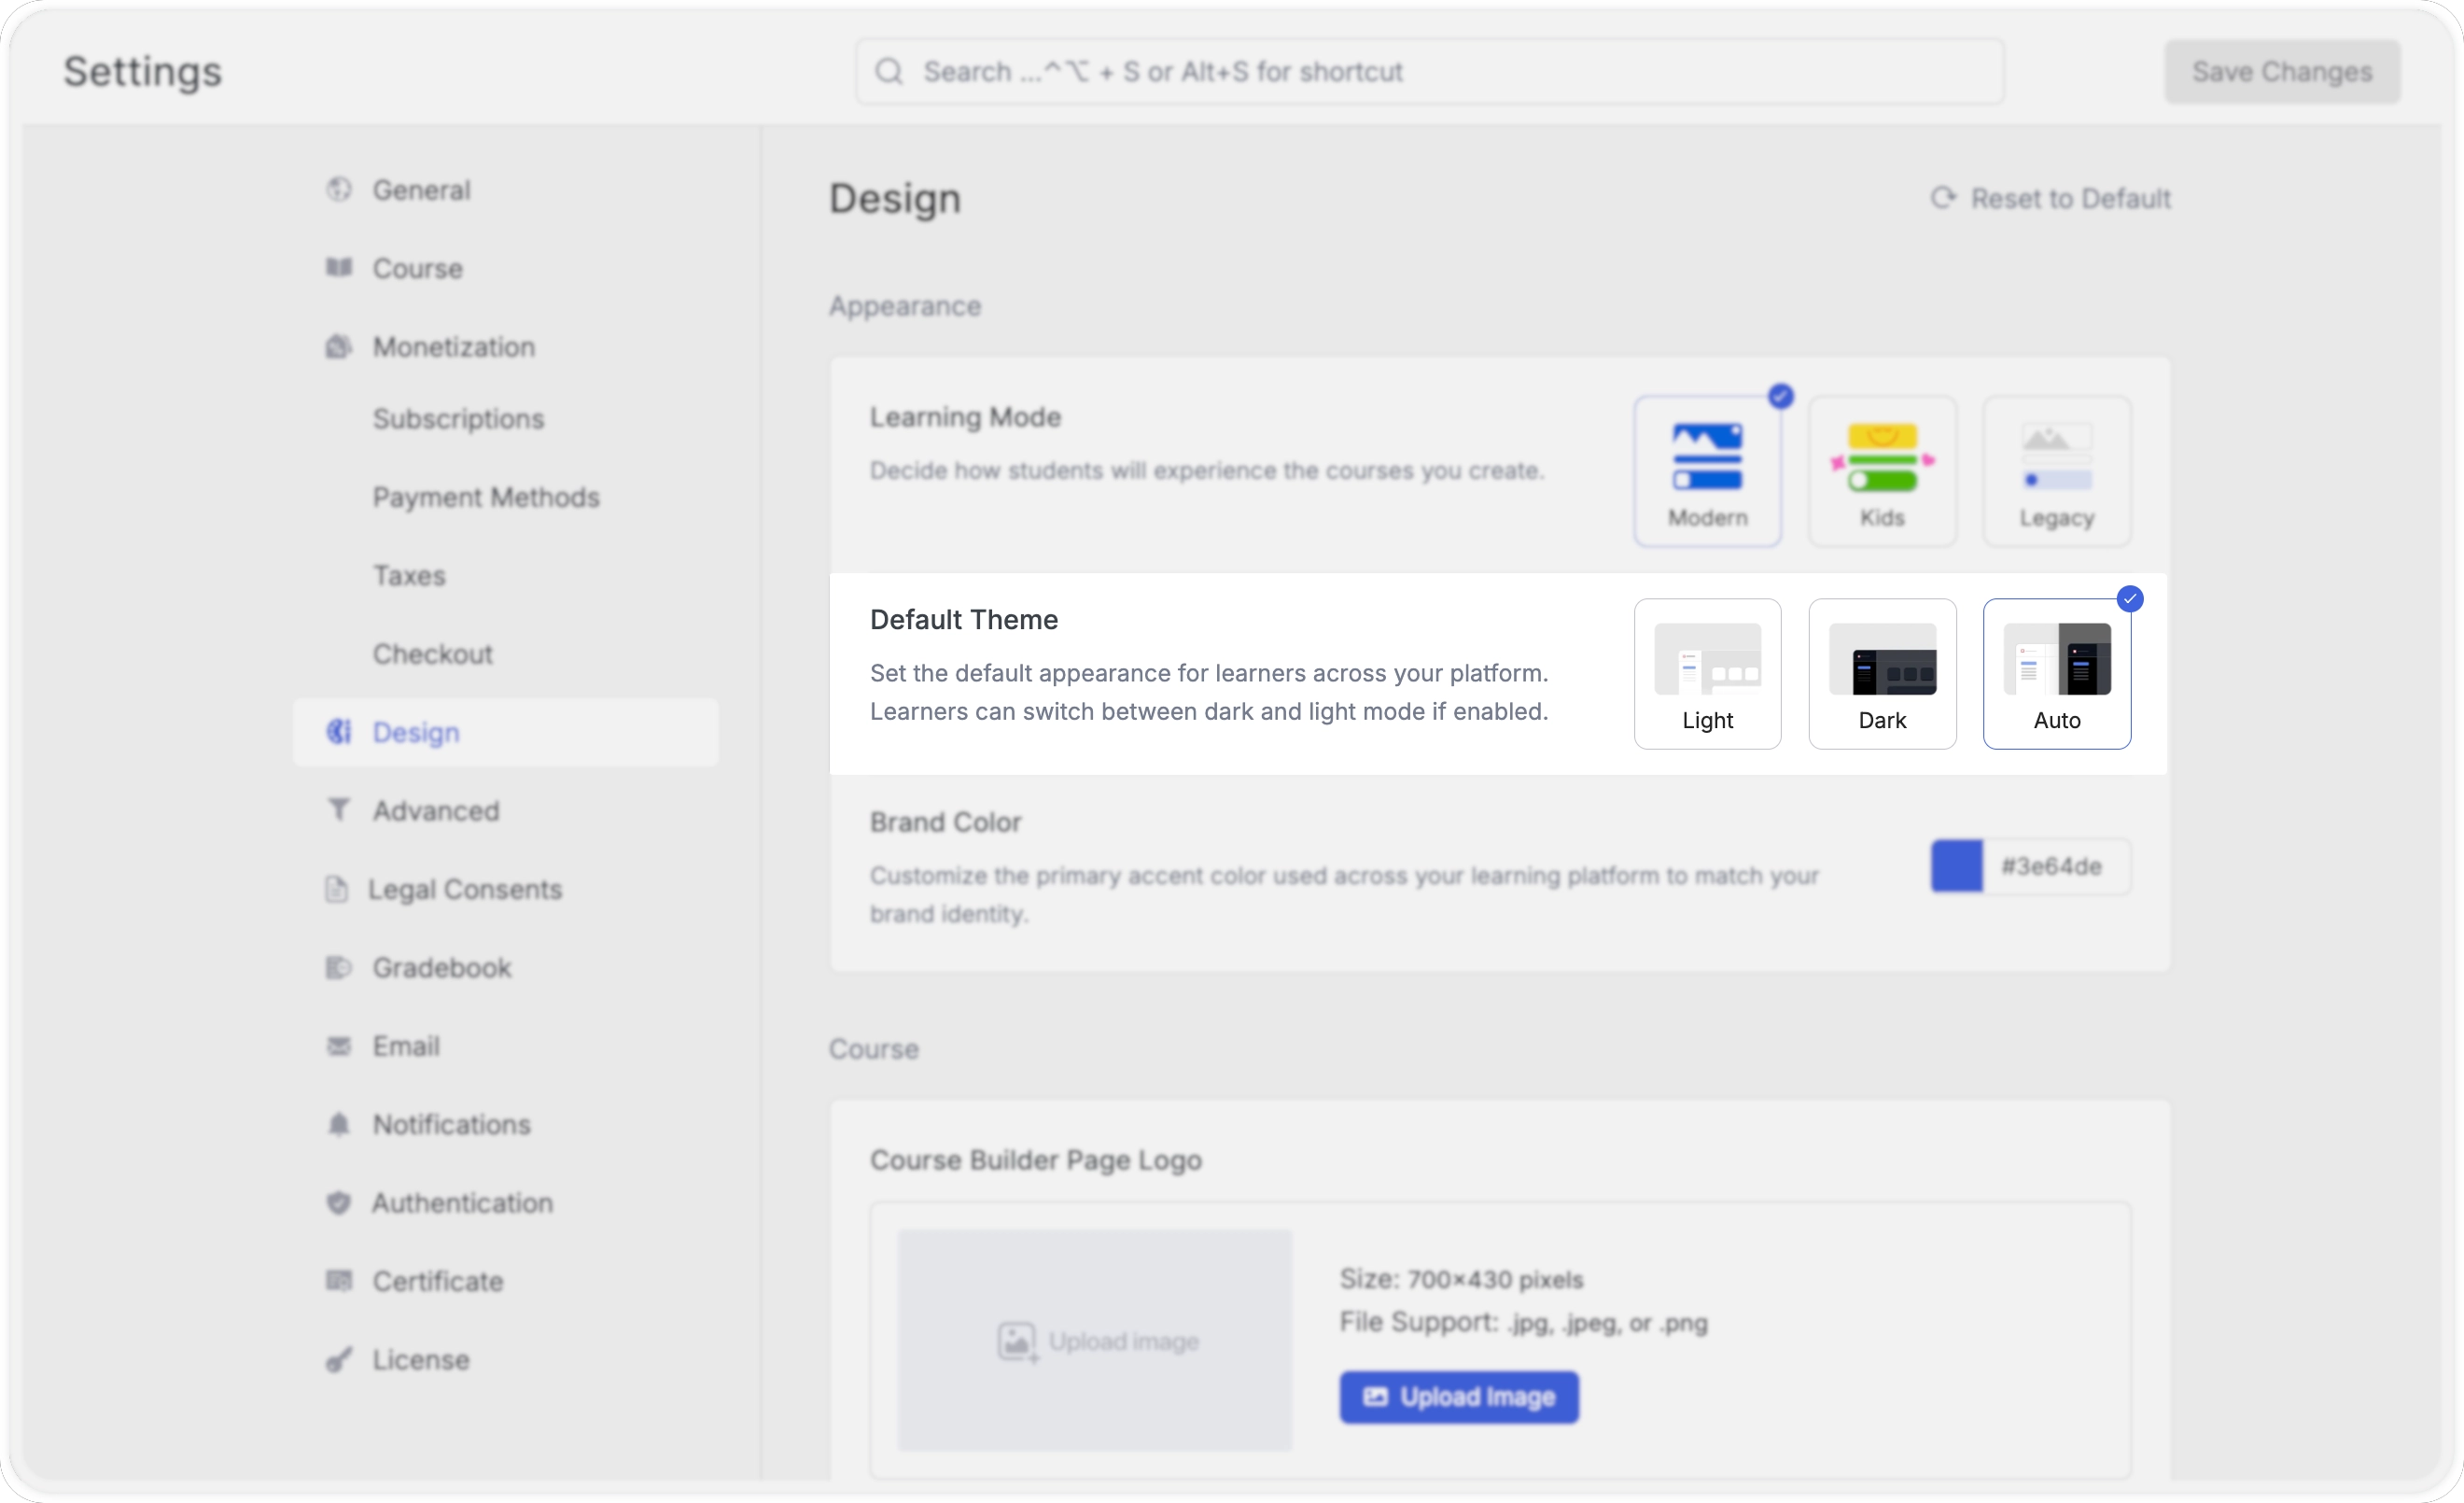
This setting controls the color theme applied to your platform by default. Three options are available:
- Light displays the platform with a white background and dark text, which is the standard reading layout most learners expect.
- Dark applies a dark background throughout the interface, reducing eye strain in low-light environments.
- Auto follows the device’s system preference, switching between light and dark automatically based on what the learner’s device is set to.
When Auto or Dark is selected, learners retain the ability to manually switch between light and dark mode from their own account preferences, provided that option is enabled in your platform settings.
Brand Color
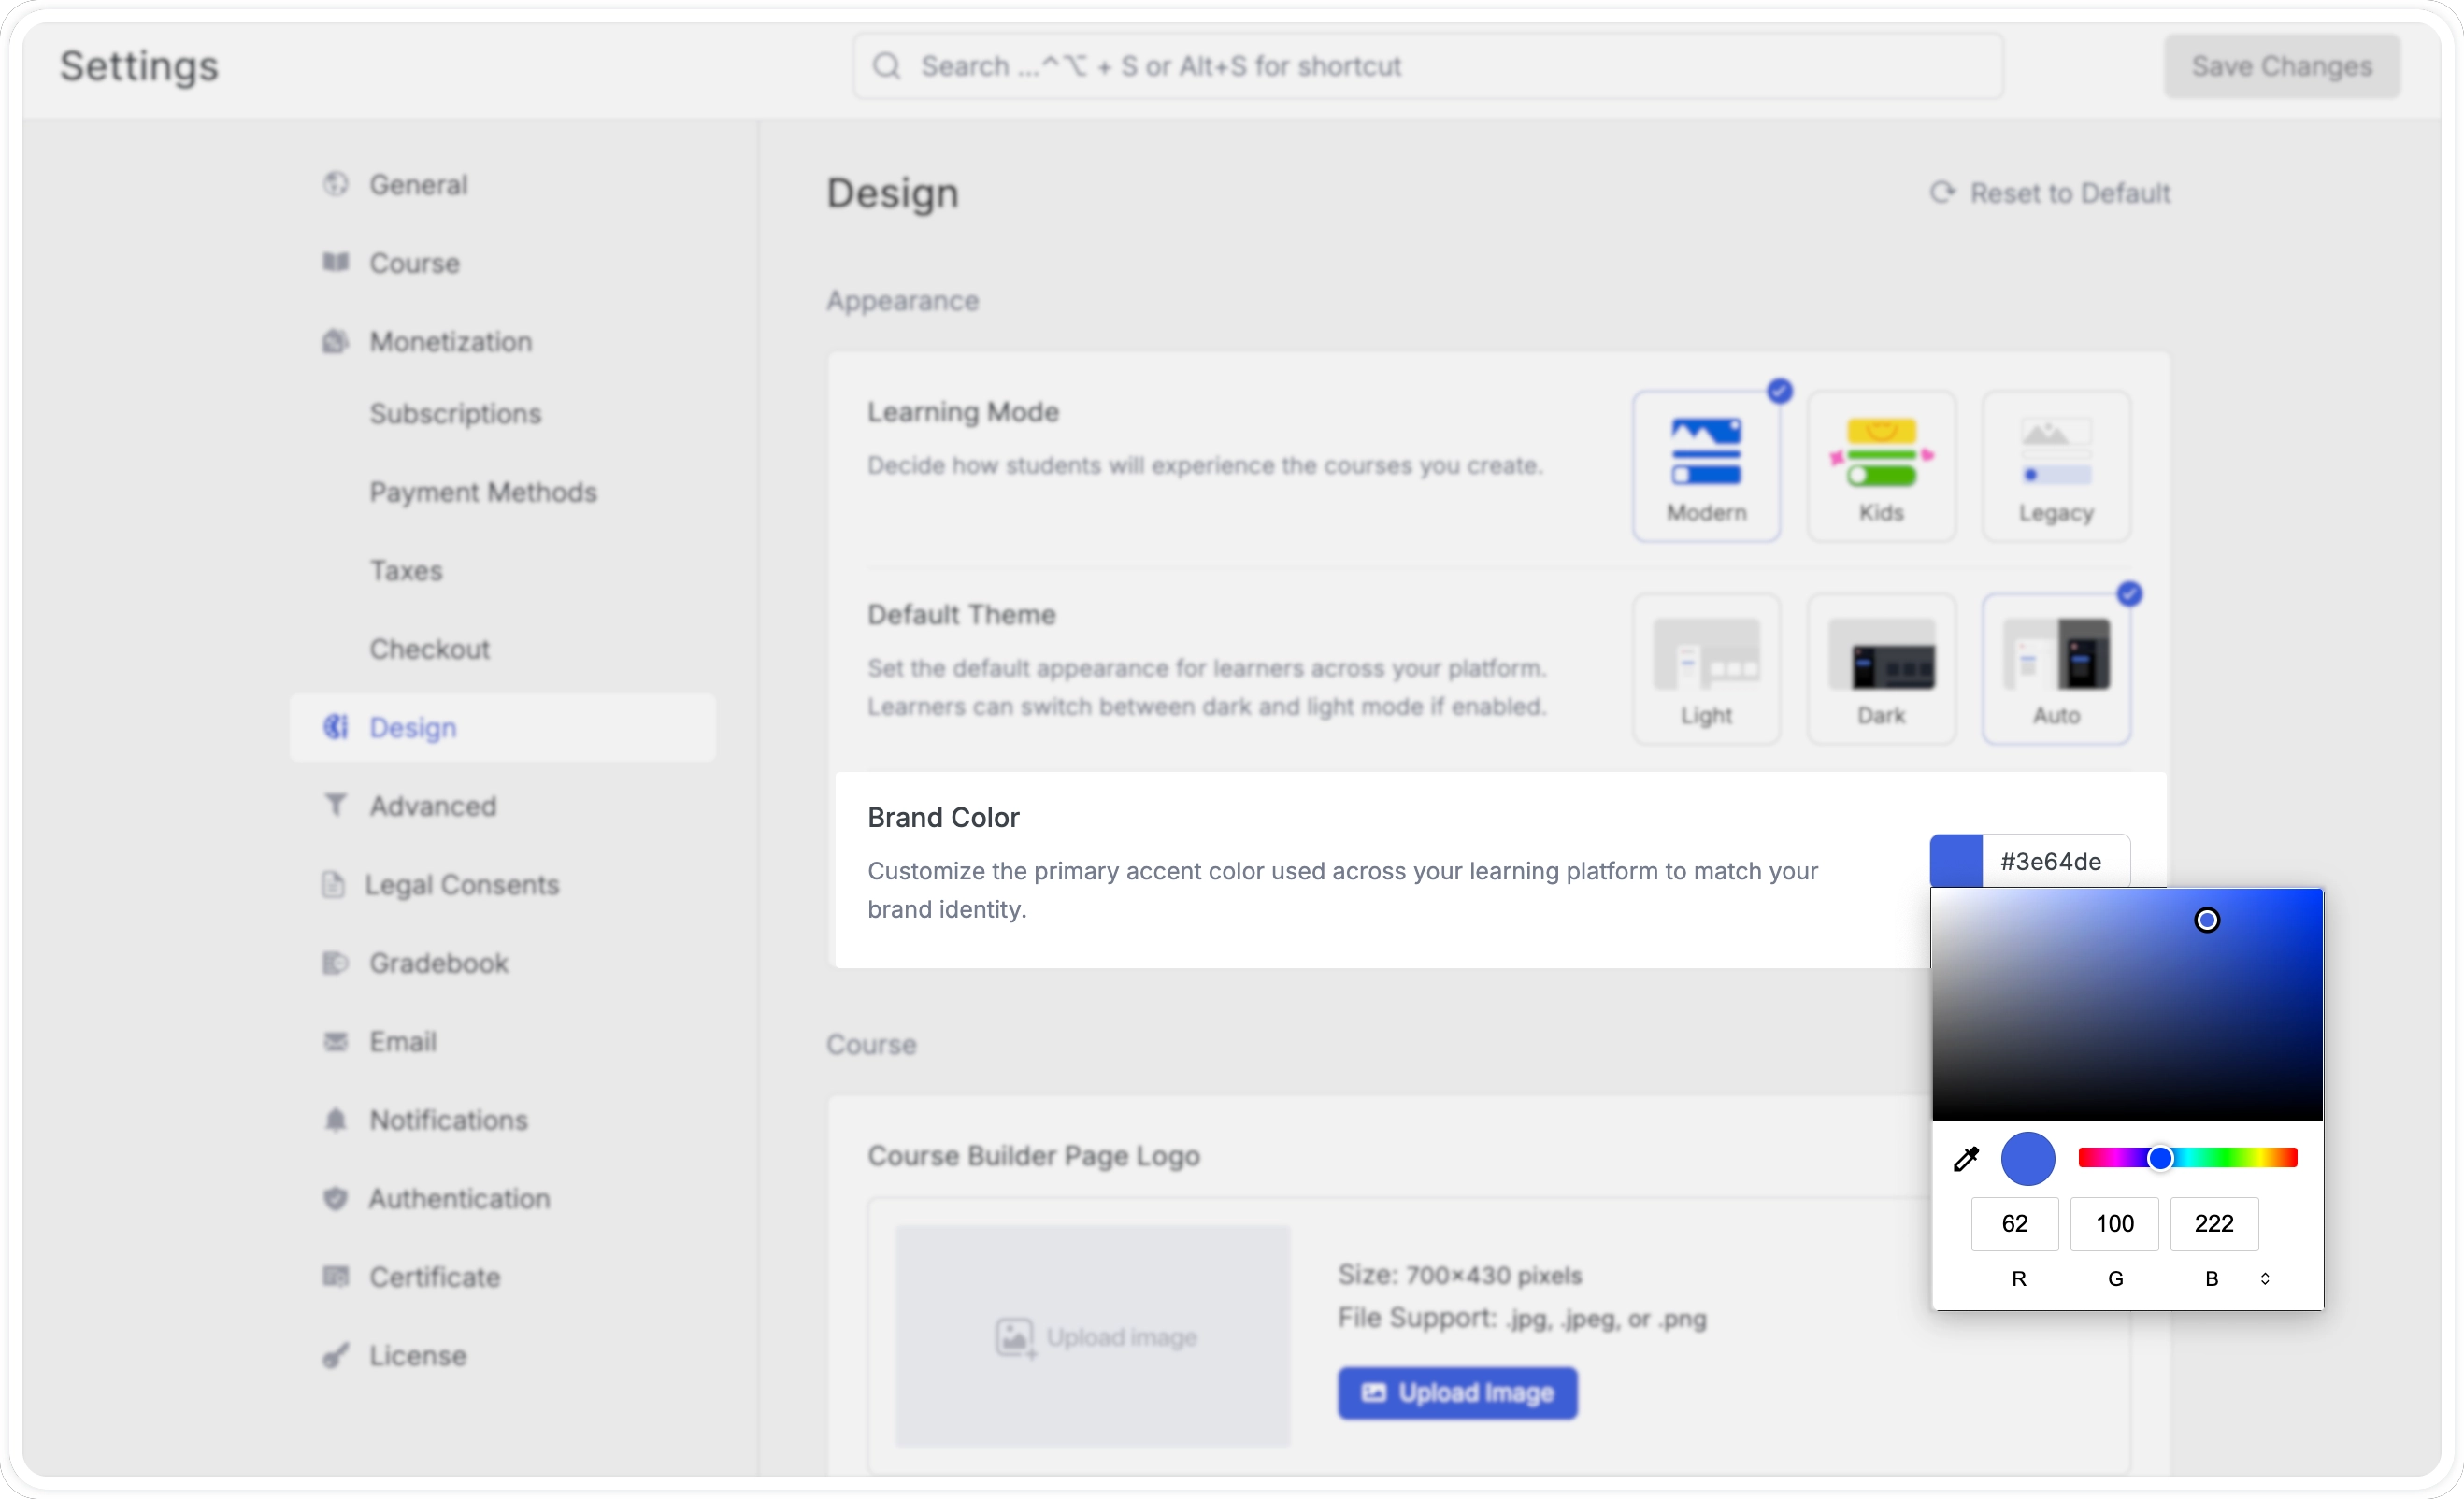
Brand Color sets the primary accent color used across buttons, progress indicators, active states, and other interface highlights throughout the platform. Clicking the color swatch opens a picker where you can:
- Select a color visually using the gradient canvas
- Enter a hex code directly
- Input precise RGB values using the R, G, and B fields at the bottom of the picker
Choosing a color that matches your logo or website palette keeps the platform experience consistent with your broader brand identity. After selecting your color, click Save Changes at the top right of the Settings page to apply it.
Course
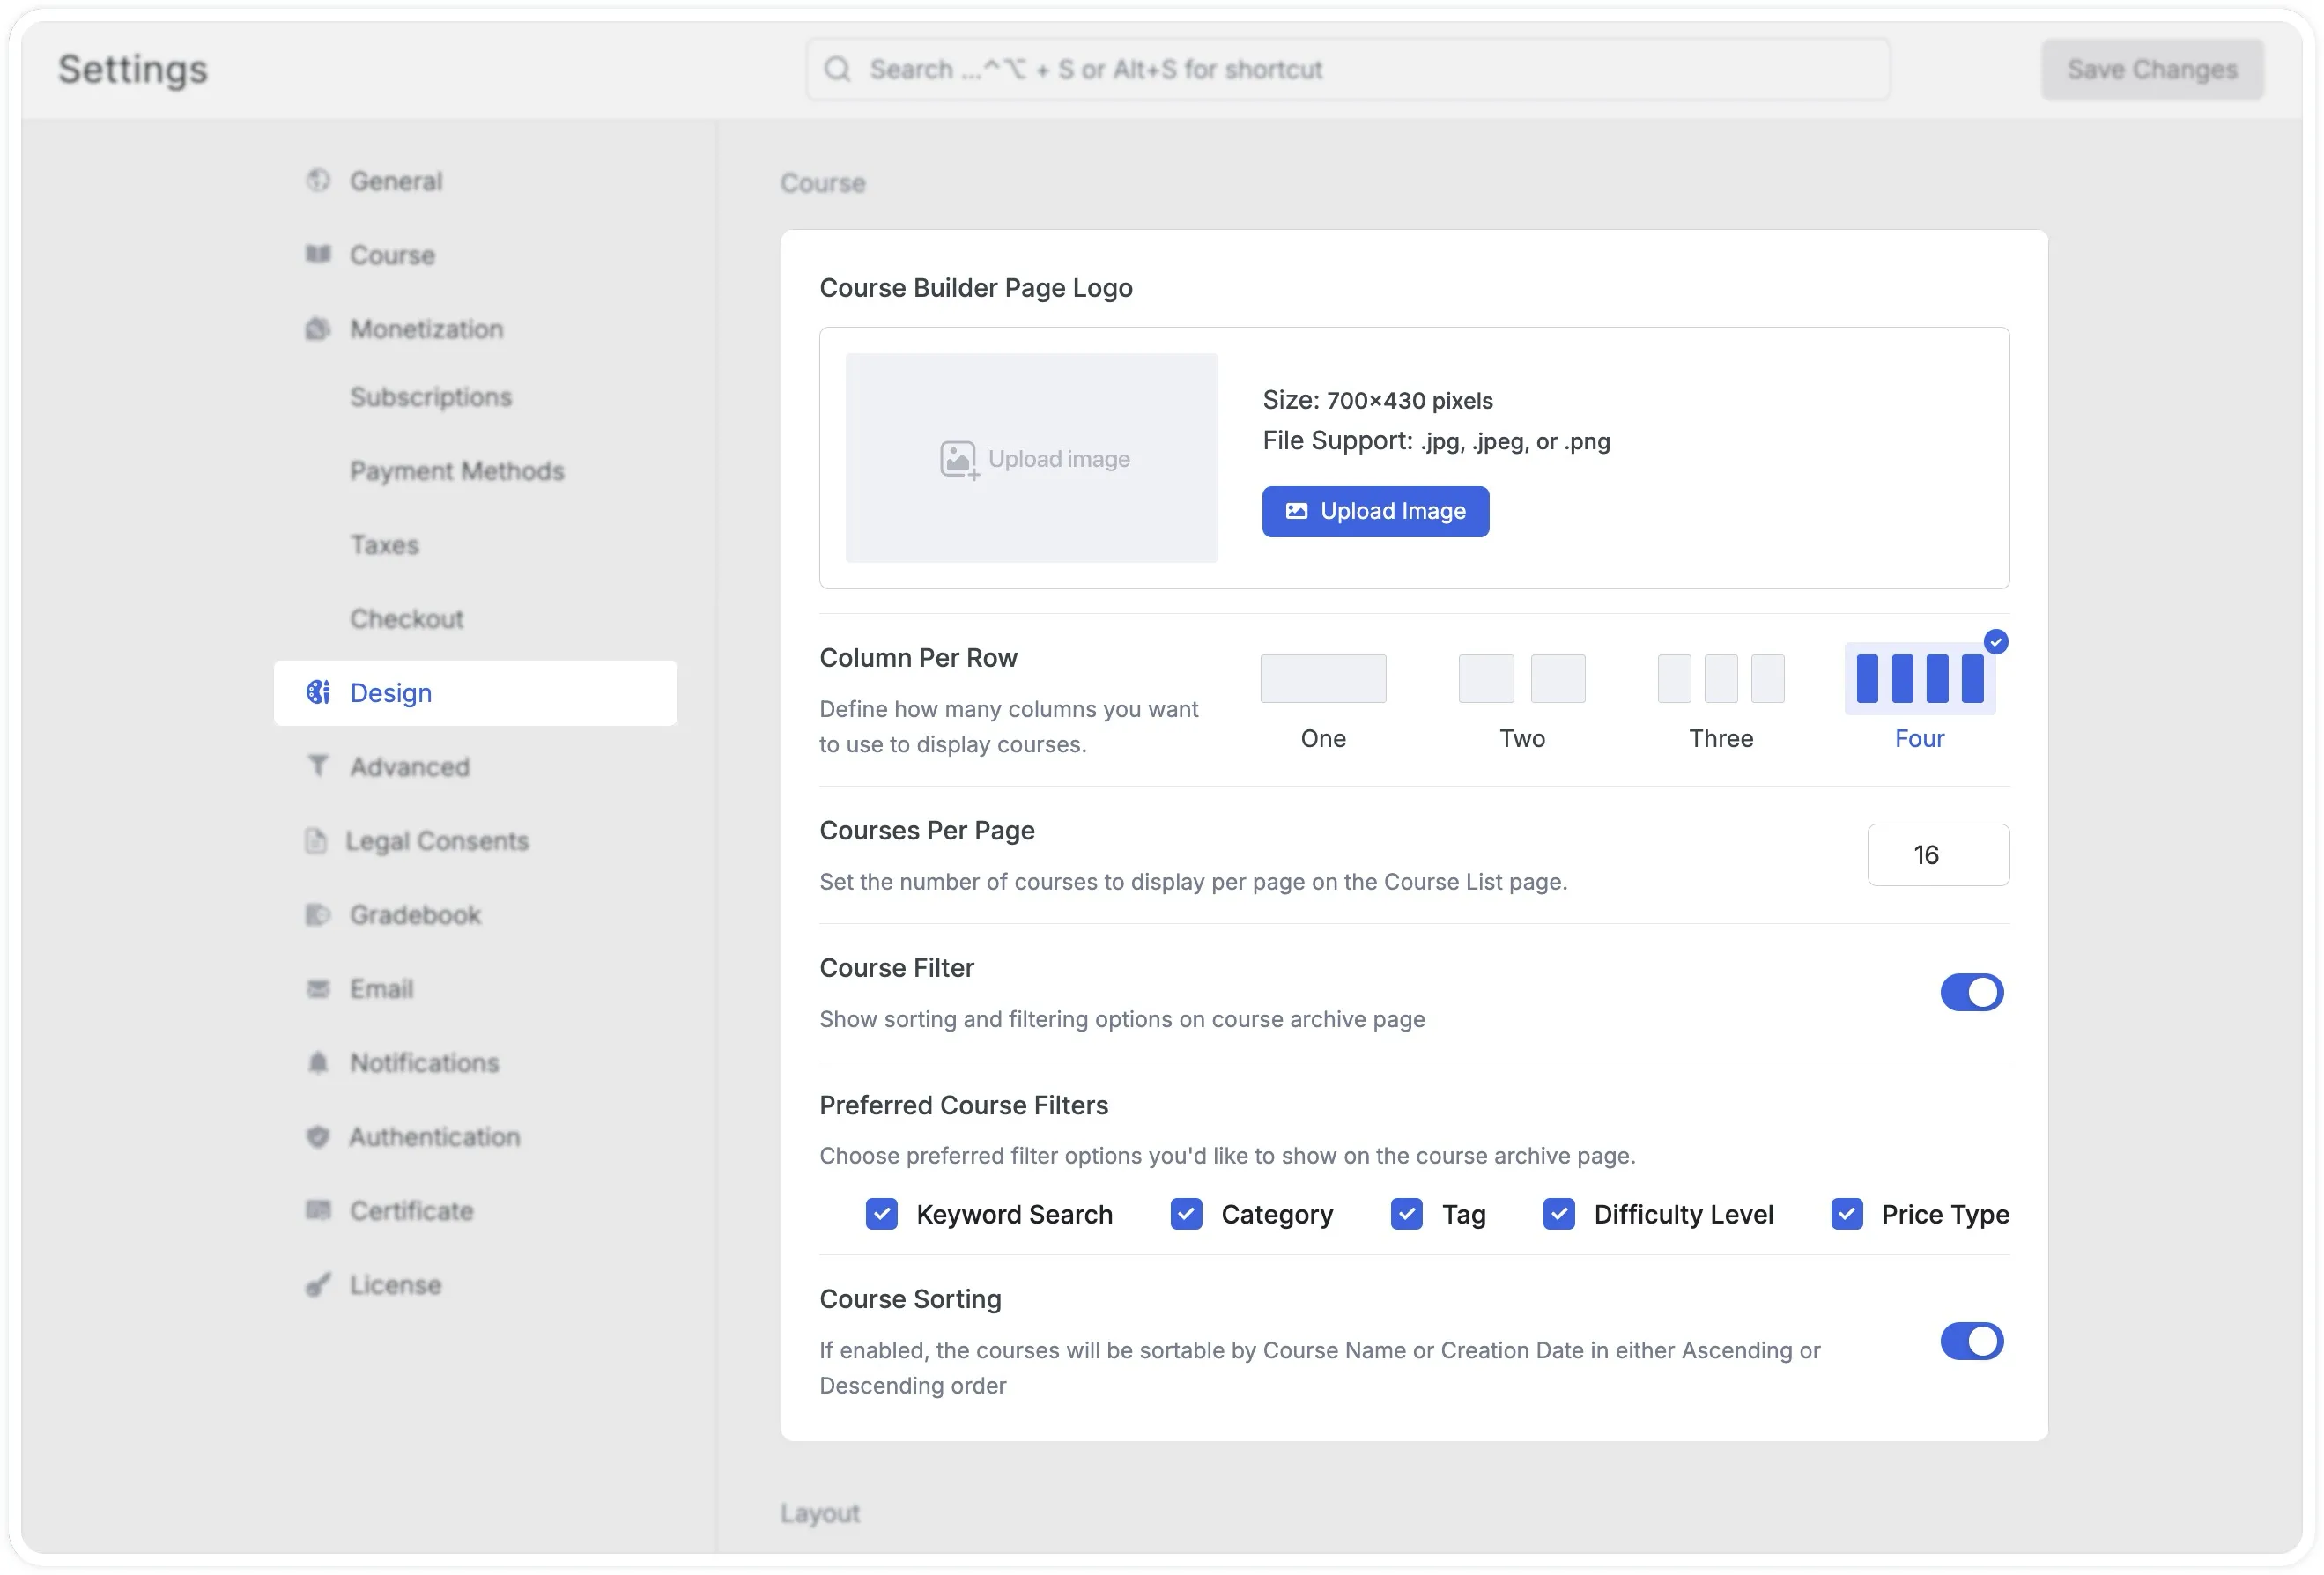
- Course Builder Page Logo: Add the logo you want to display on the frontend course builder when instructors create or edit a course.
- Column Per Row: Define how many columns you want to use to display courses on the Course Archive Page.
- Course Filter: Show sorting and filtering options on the Course Archive Page
- Courses Per Page: Set the number of courses you want to display “per page” for pagination.
- Preferred Course Filters: Choose the preferred filter options you’d like to show on the Course Archive Page.
- Course Sorting: Enable this option to allow the courses to be sorted by Course Name or Creation Date in either Ascending or Descending order.
Layout
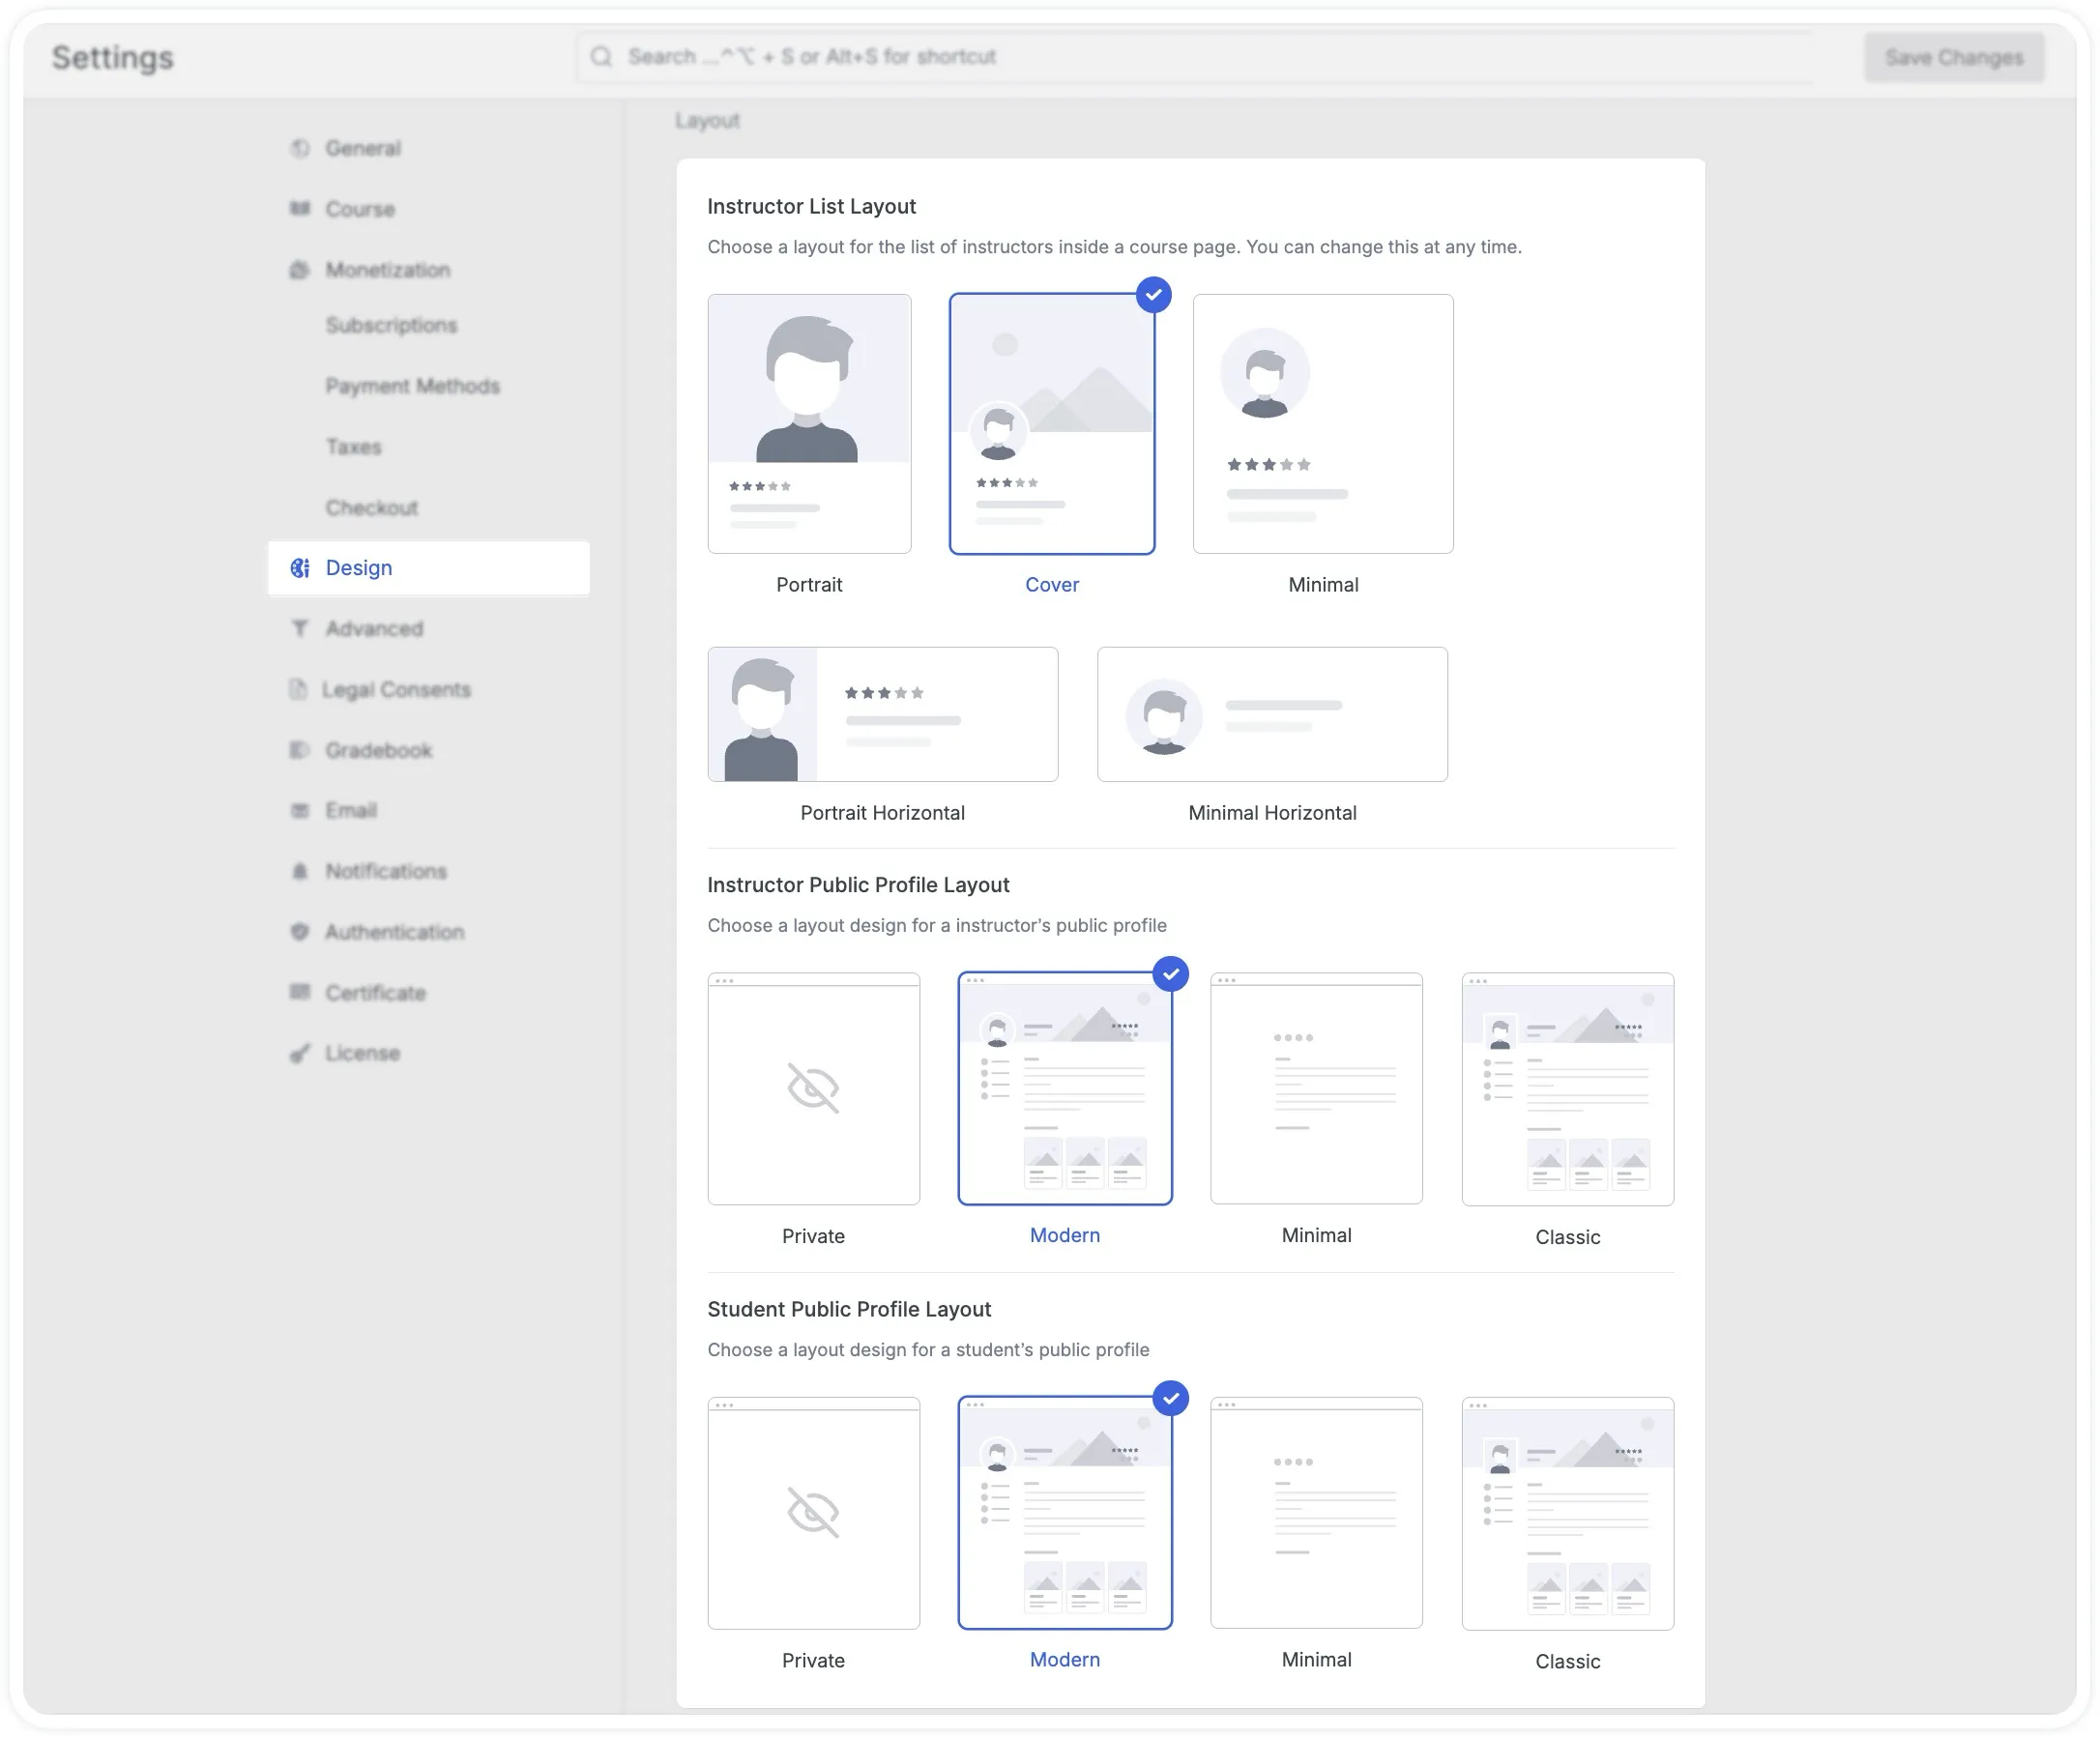
- Instructor List Layout: Choose a layout for the list of instructors inside a course page. You can change this at any time. Options include:
- Portrait
- Cover
- Minimal
- Portrait Horizontal
- Minimal Horizontal
- Instructor Public Profile Layout: Choose a layout design for an instructor’s public profile. Options include:
- Private
- Modern
- Minimal
- Classic
- Student Public Profile Layout: Choose a layout design for a student’s public profile. Options include:
- Private
- Modern
- Minimal
- Classic
Showcase Certificate
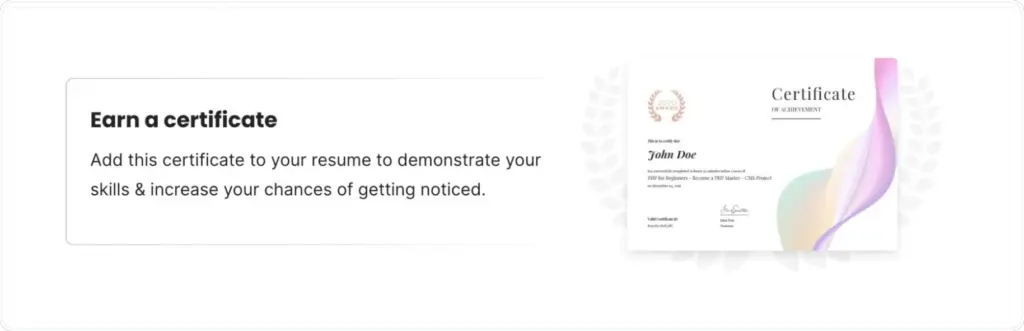
Tutor LMS allows course creators to showcase certificates on course details pages, providing certificate previews to prospective students.
Prerequisite: The Certificate Builder plugin must be activated for the showcase feature to work if you’ve used the plugin to create your certificates. Details on downloading and using this plugin can be found in the Certificate Builder documentation.
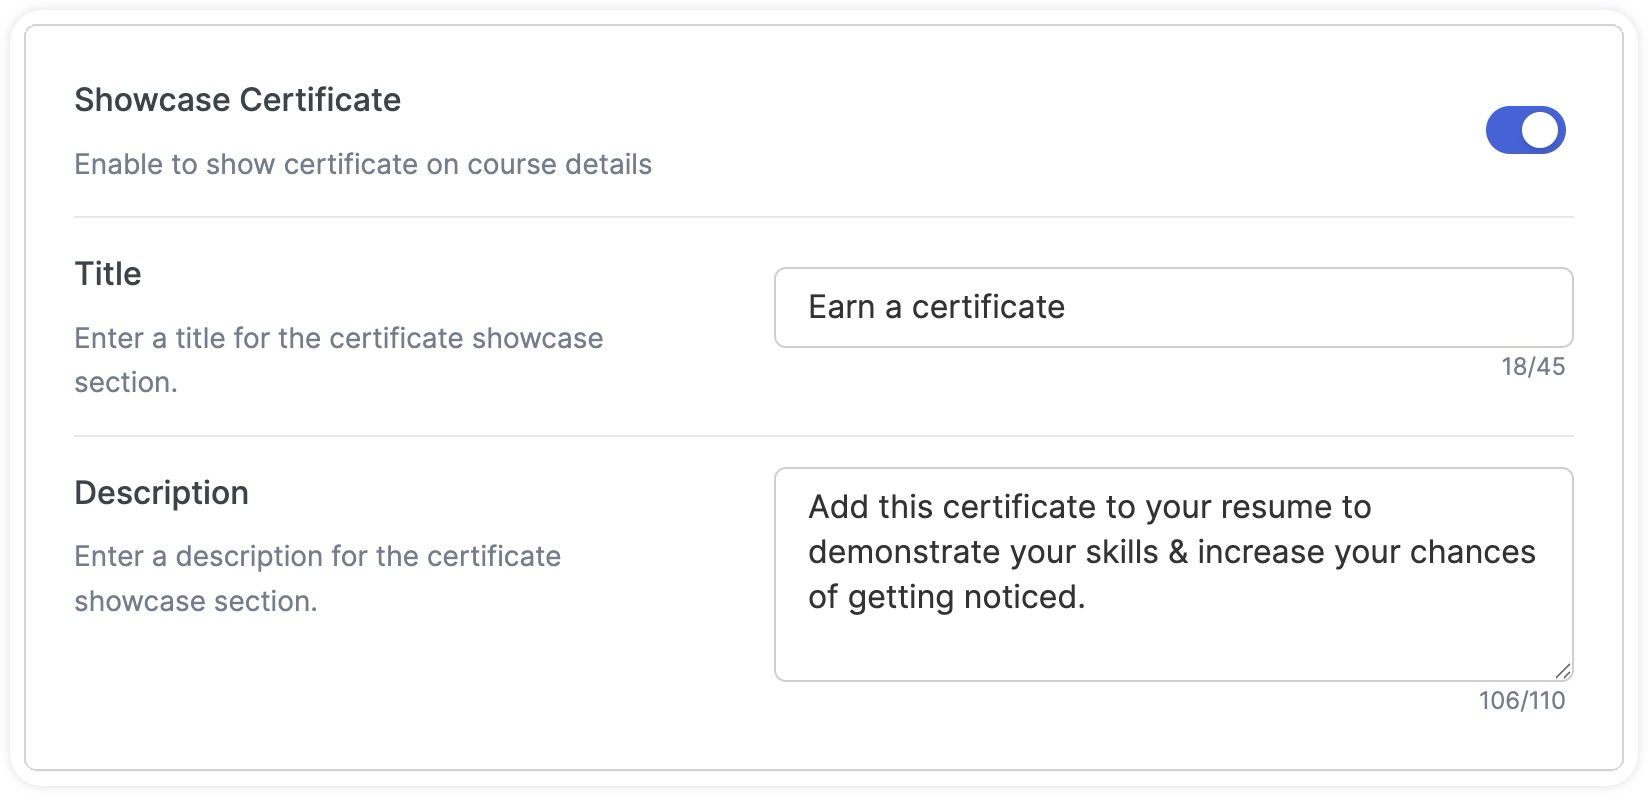
The “Showcase Certificate” option is located under Tutor LMS > Settings > Design section. Enabling this toggle displays a certificate showcase on course details pages.
When enabled, course creators can now customize the section with the following:
- Title: A Title for the showcase section
- Description: A personalized message for the showcase section
The certificate showcase section is displayed on the Course Details page responsively across all themes and devices. Here’s the preview of this section on the course page:
Course Details
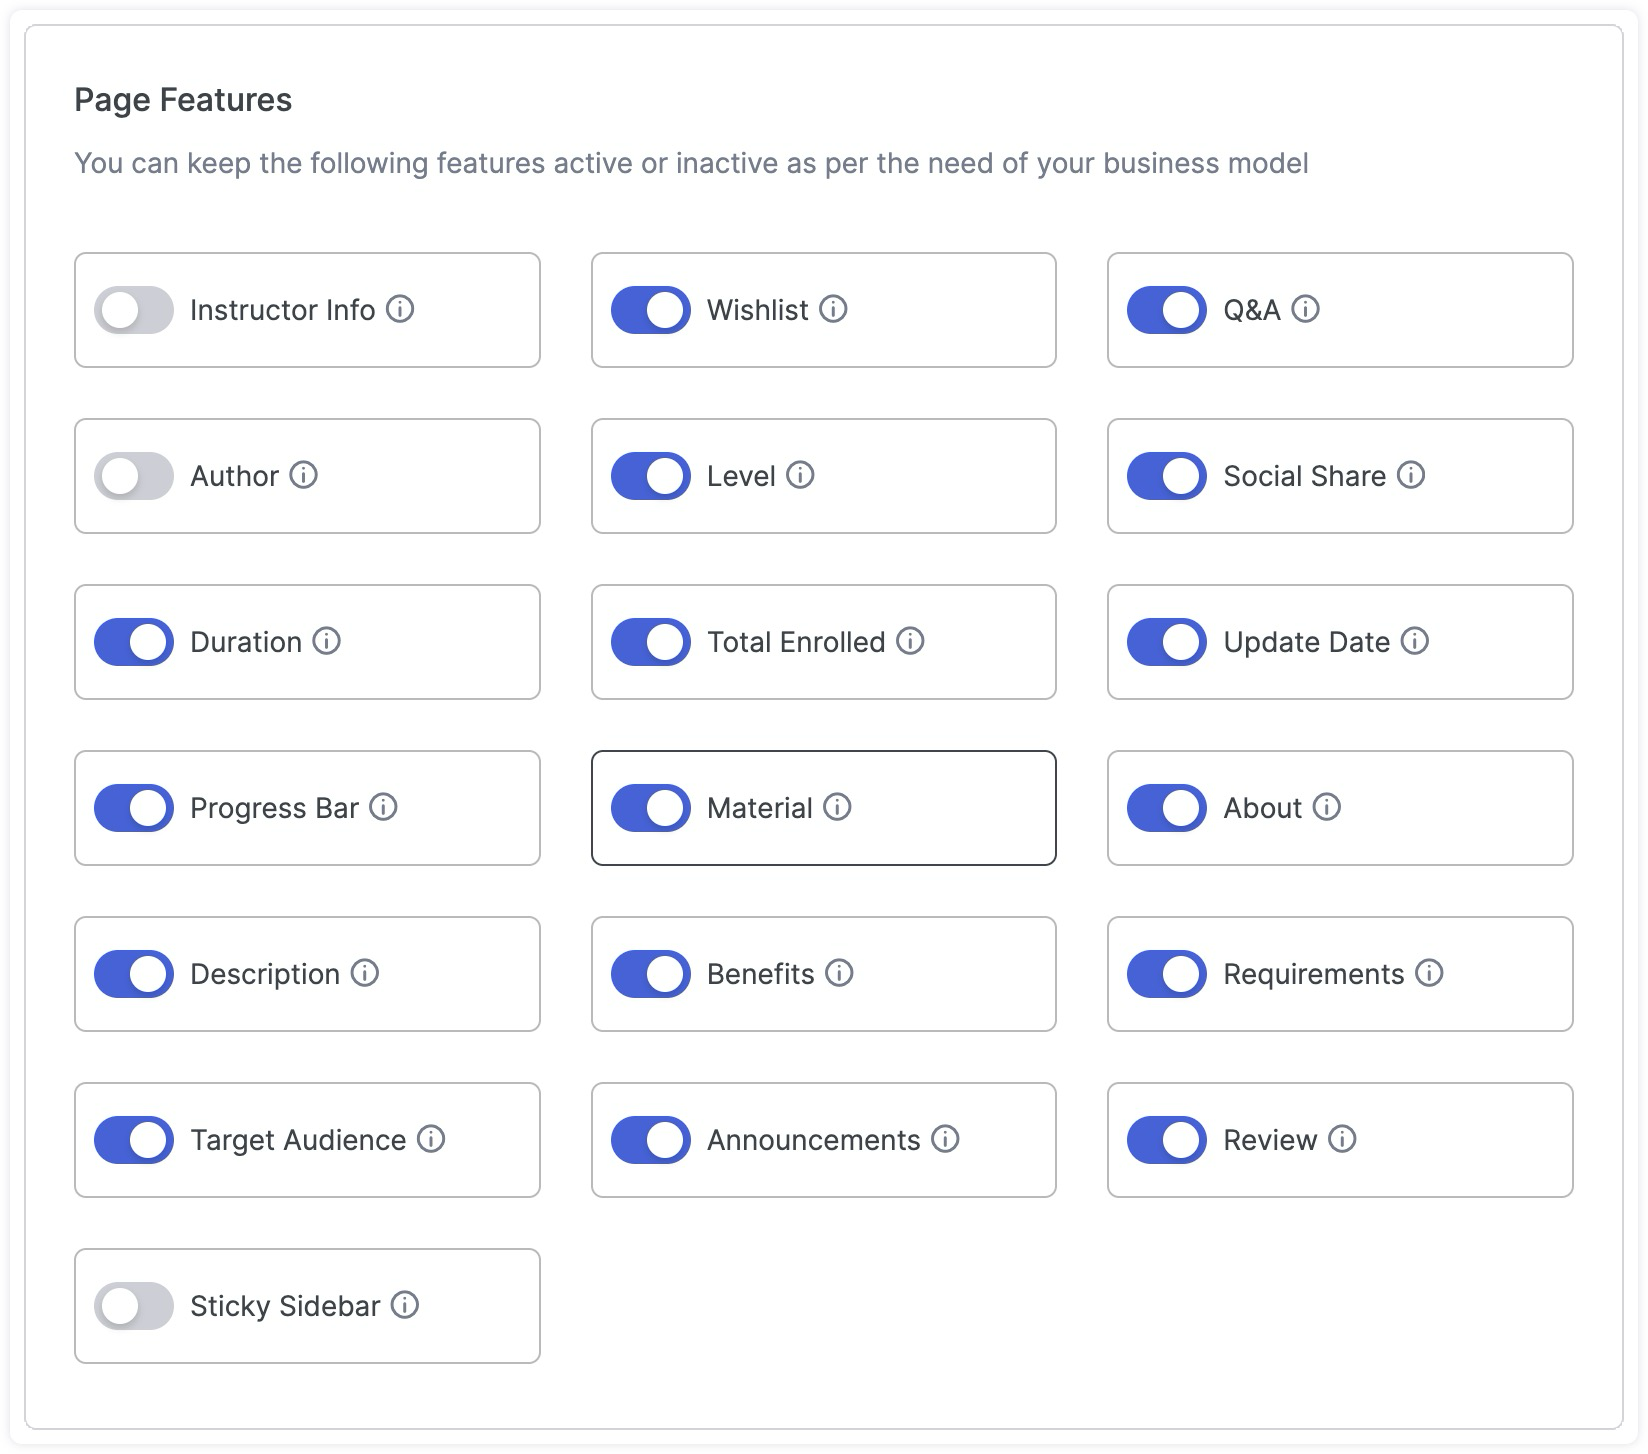
Enable/Disable these options to have them show/conceal them on the frontend Course Details Page for your instructors. Only the admin can change these toggles.
- Instructor Info: Enable to show Instructor Info
- Q&A: Enable to add a Q&A section
- Author: Enable to show Course Author name
- Level: Enable to show Course Level
- Social Share: Enable to allow Course Social Share
- Course Duration: Enable to show Course Duration
- Total Enrolled: Enable to show Total Enrolled Students
- Update Date: Enable to show the last date the course was updated.
- Progress Bar: Enable to show the Course Progress of students
- Material: Enable to show Course Materials
- About: Enable to show the Course’s About section
- Description: Enable to show Course Description
- Benefits: Enable to show Course Benefits
- Requirements: Enable to show Course Requirements
- Target Audience: Enable to show the Course’s Target Audience
- Announcements: Enable to show Course Announcements
- Review: Enable to show Course Reviews
- Sticky Sidebar: Enable to keep the sidebar fixed as users scroll through long pages. Learn how to keep the sidebar sticky by following this Sticky Sidebar Tutorial.
Position of the Enrollment Box in Mobile View: Define where you want the Enrollment Box to be positioned on your Course Details Page by selecting an option from here. Options include:
- On Page Top
- On Page Bottom
Position of the Enrollment Box in Mobile View
The “Position of the Enrollment Box in Mobile View” setting gives you direct control over where that box appears on the Course Details page for mobile visitors.
The dropdown offers two options:
- On Page Top places the enrollment box above the course content, making it the first actionable element a mobile visitor sees when the page loads
- On Page Bottom positions it below the course details, which works better when you want prospective students to read through the course description and benefits before they see the enrollment prompt
To configure this setting:
- Go to Tutor LMS in your WordPress admin panel
- Navigate to Settings and select the Design tab
- Scroll down to the Position of the Enrollment Box in Mobile View section
- Select your preferred position from the dropdown
- Click Save Changes
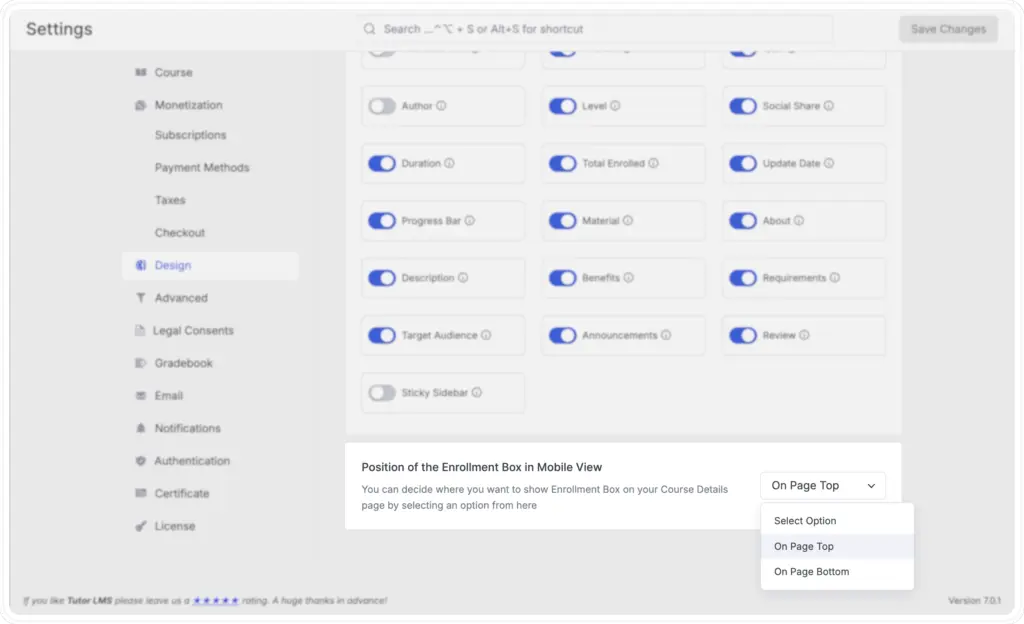
The default position is On Page Top. If your course pages are content-heavy and you find visitors are enrolling without reading the full description, switching to On Page Bottom can improve the quality of enrollments by giving learners more context first.