Course Bundle
The Course Bundle feature in Tutor LMS allows you to group multiple courses into a single comprehensive package and sell them together. This is ideal for designing structured learning paths, offering bundled discounts, increasing student retention, and boosting revenue.
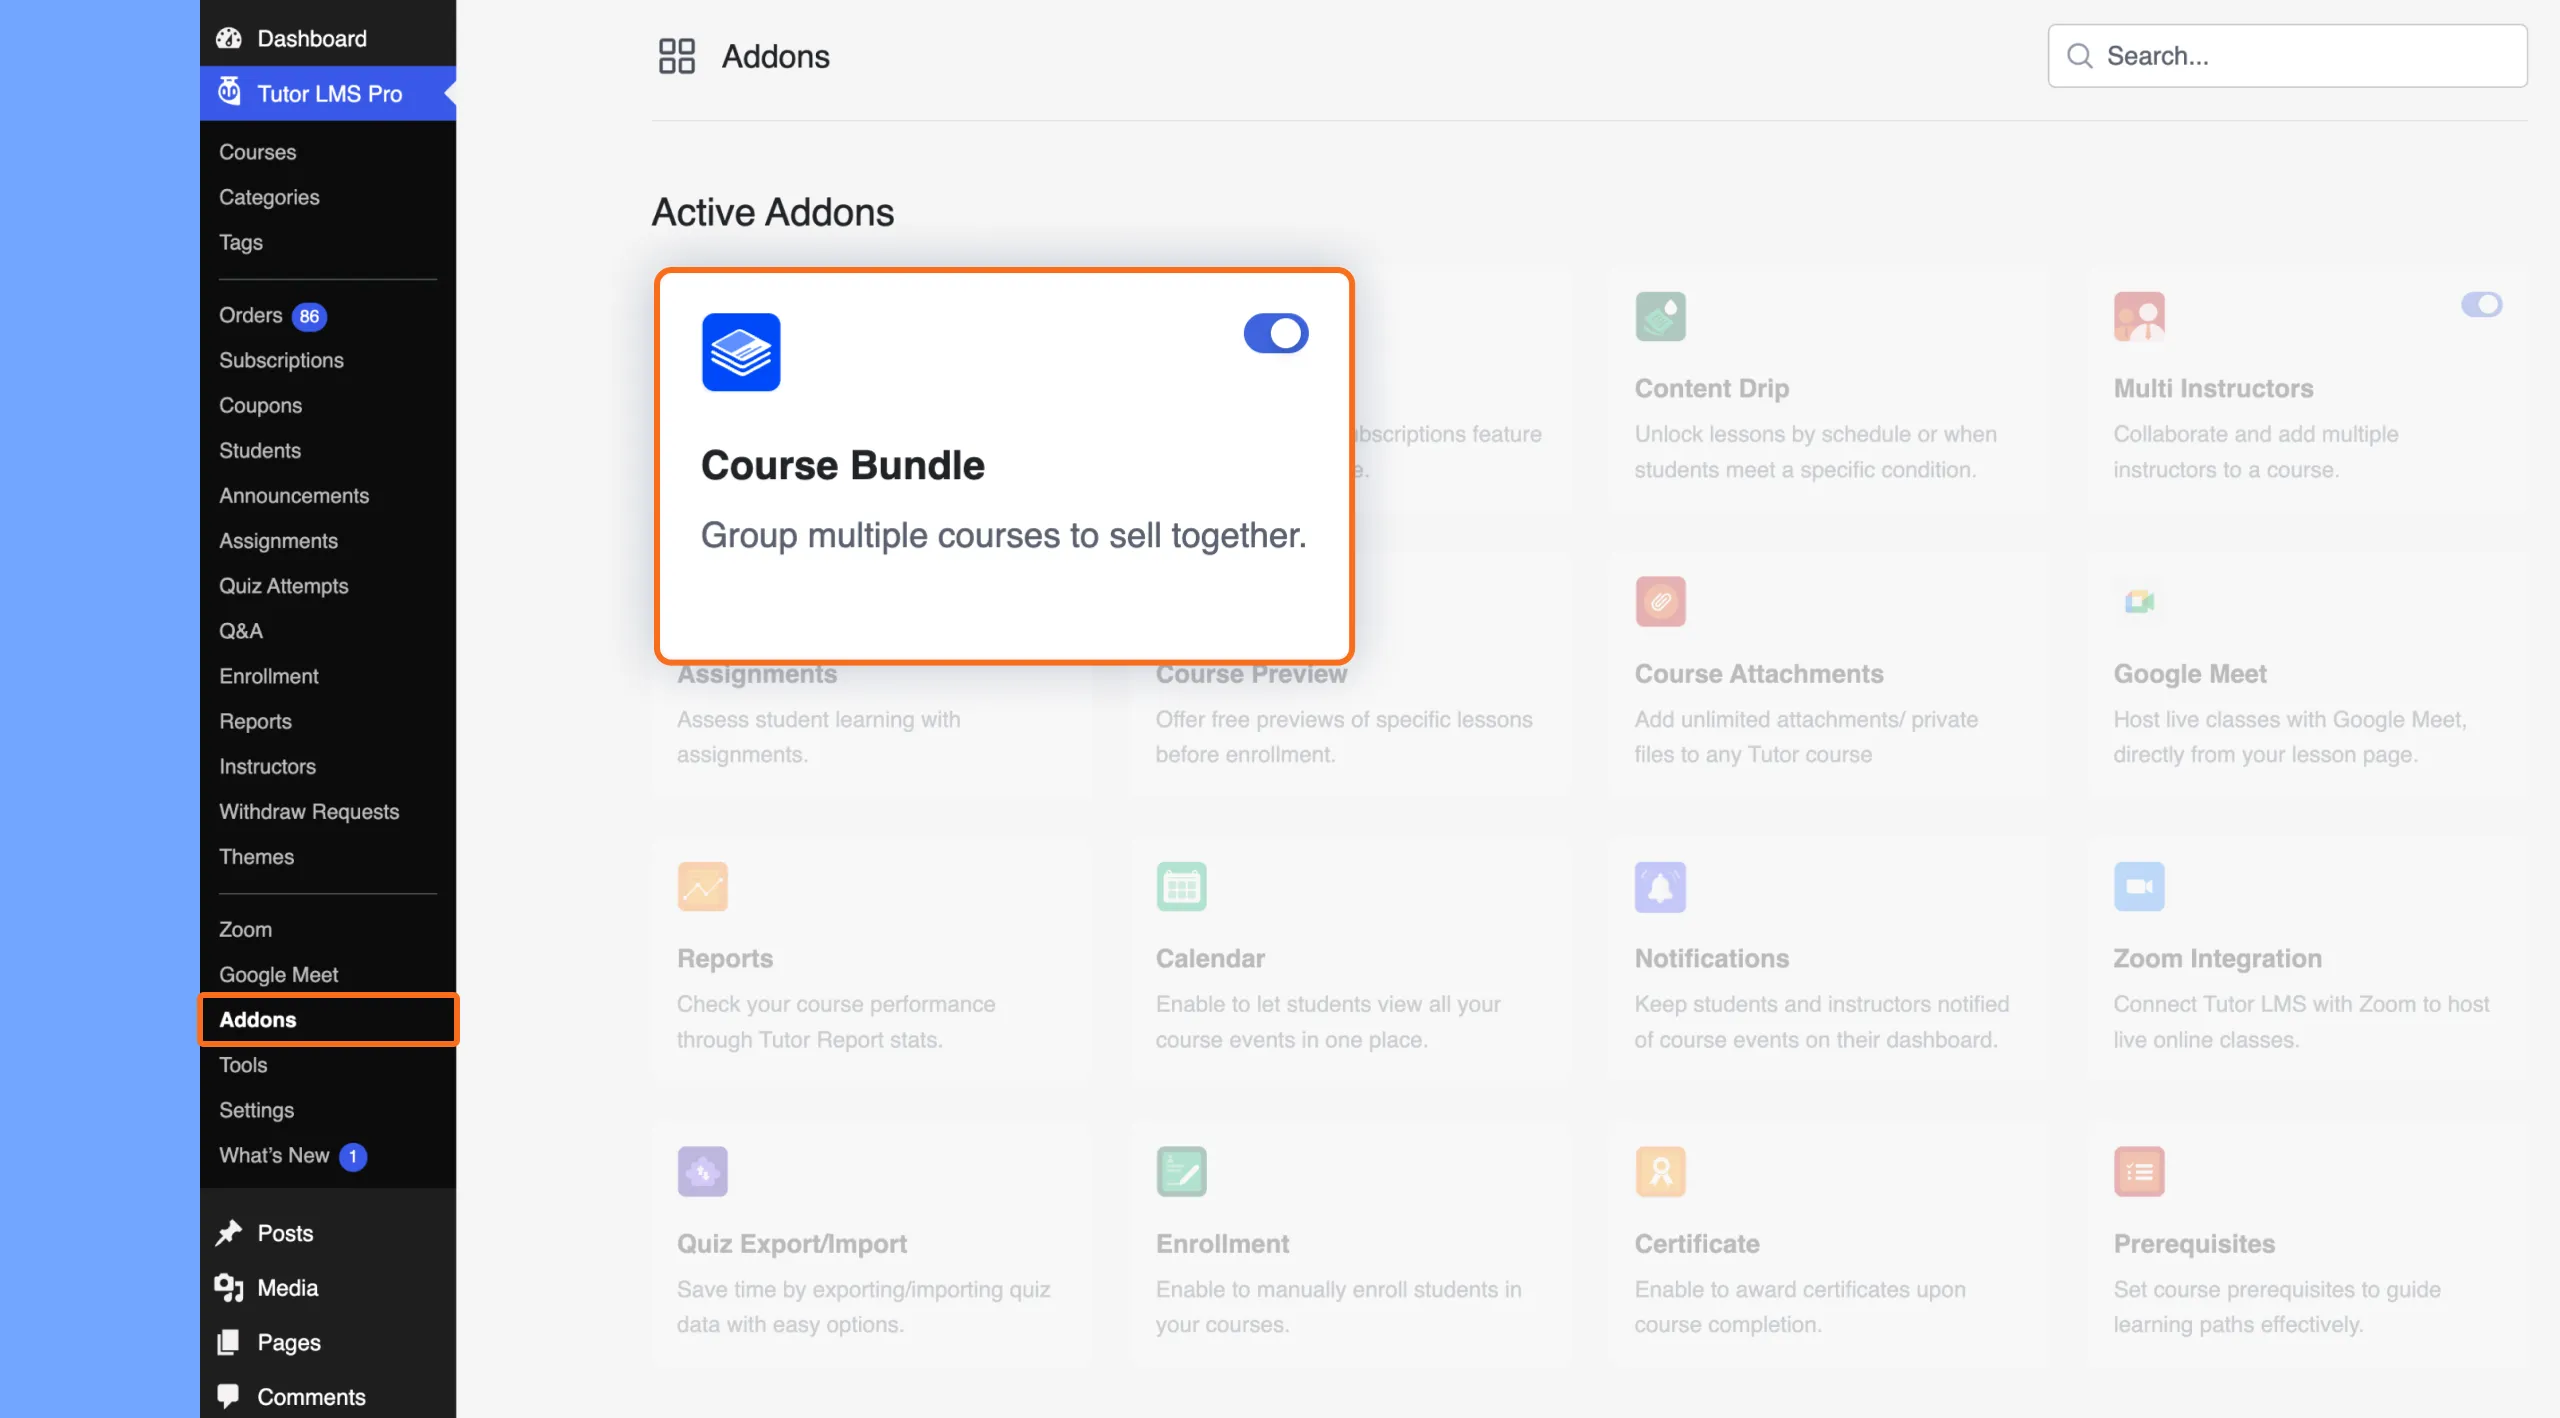
Step 1: Activate the Course Bundle Addon
Before creating course bundles, ensure the addon is activated:
- Navigate to Tutor LMS Pro > Addons from your WordPress admin dashboard.
- Locate the Course Bundle addon.
- Toggle the switch to enable it.
Step 2: Access the Course Bundle Builder
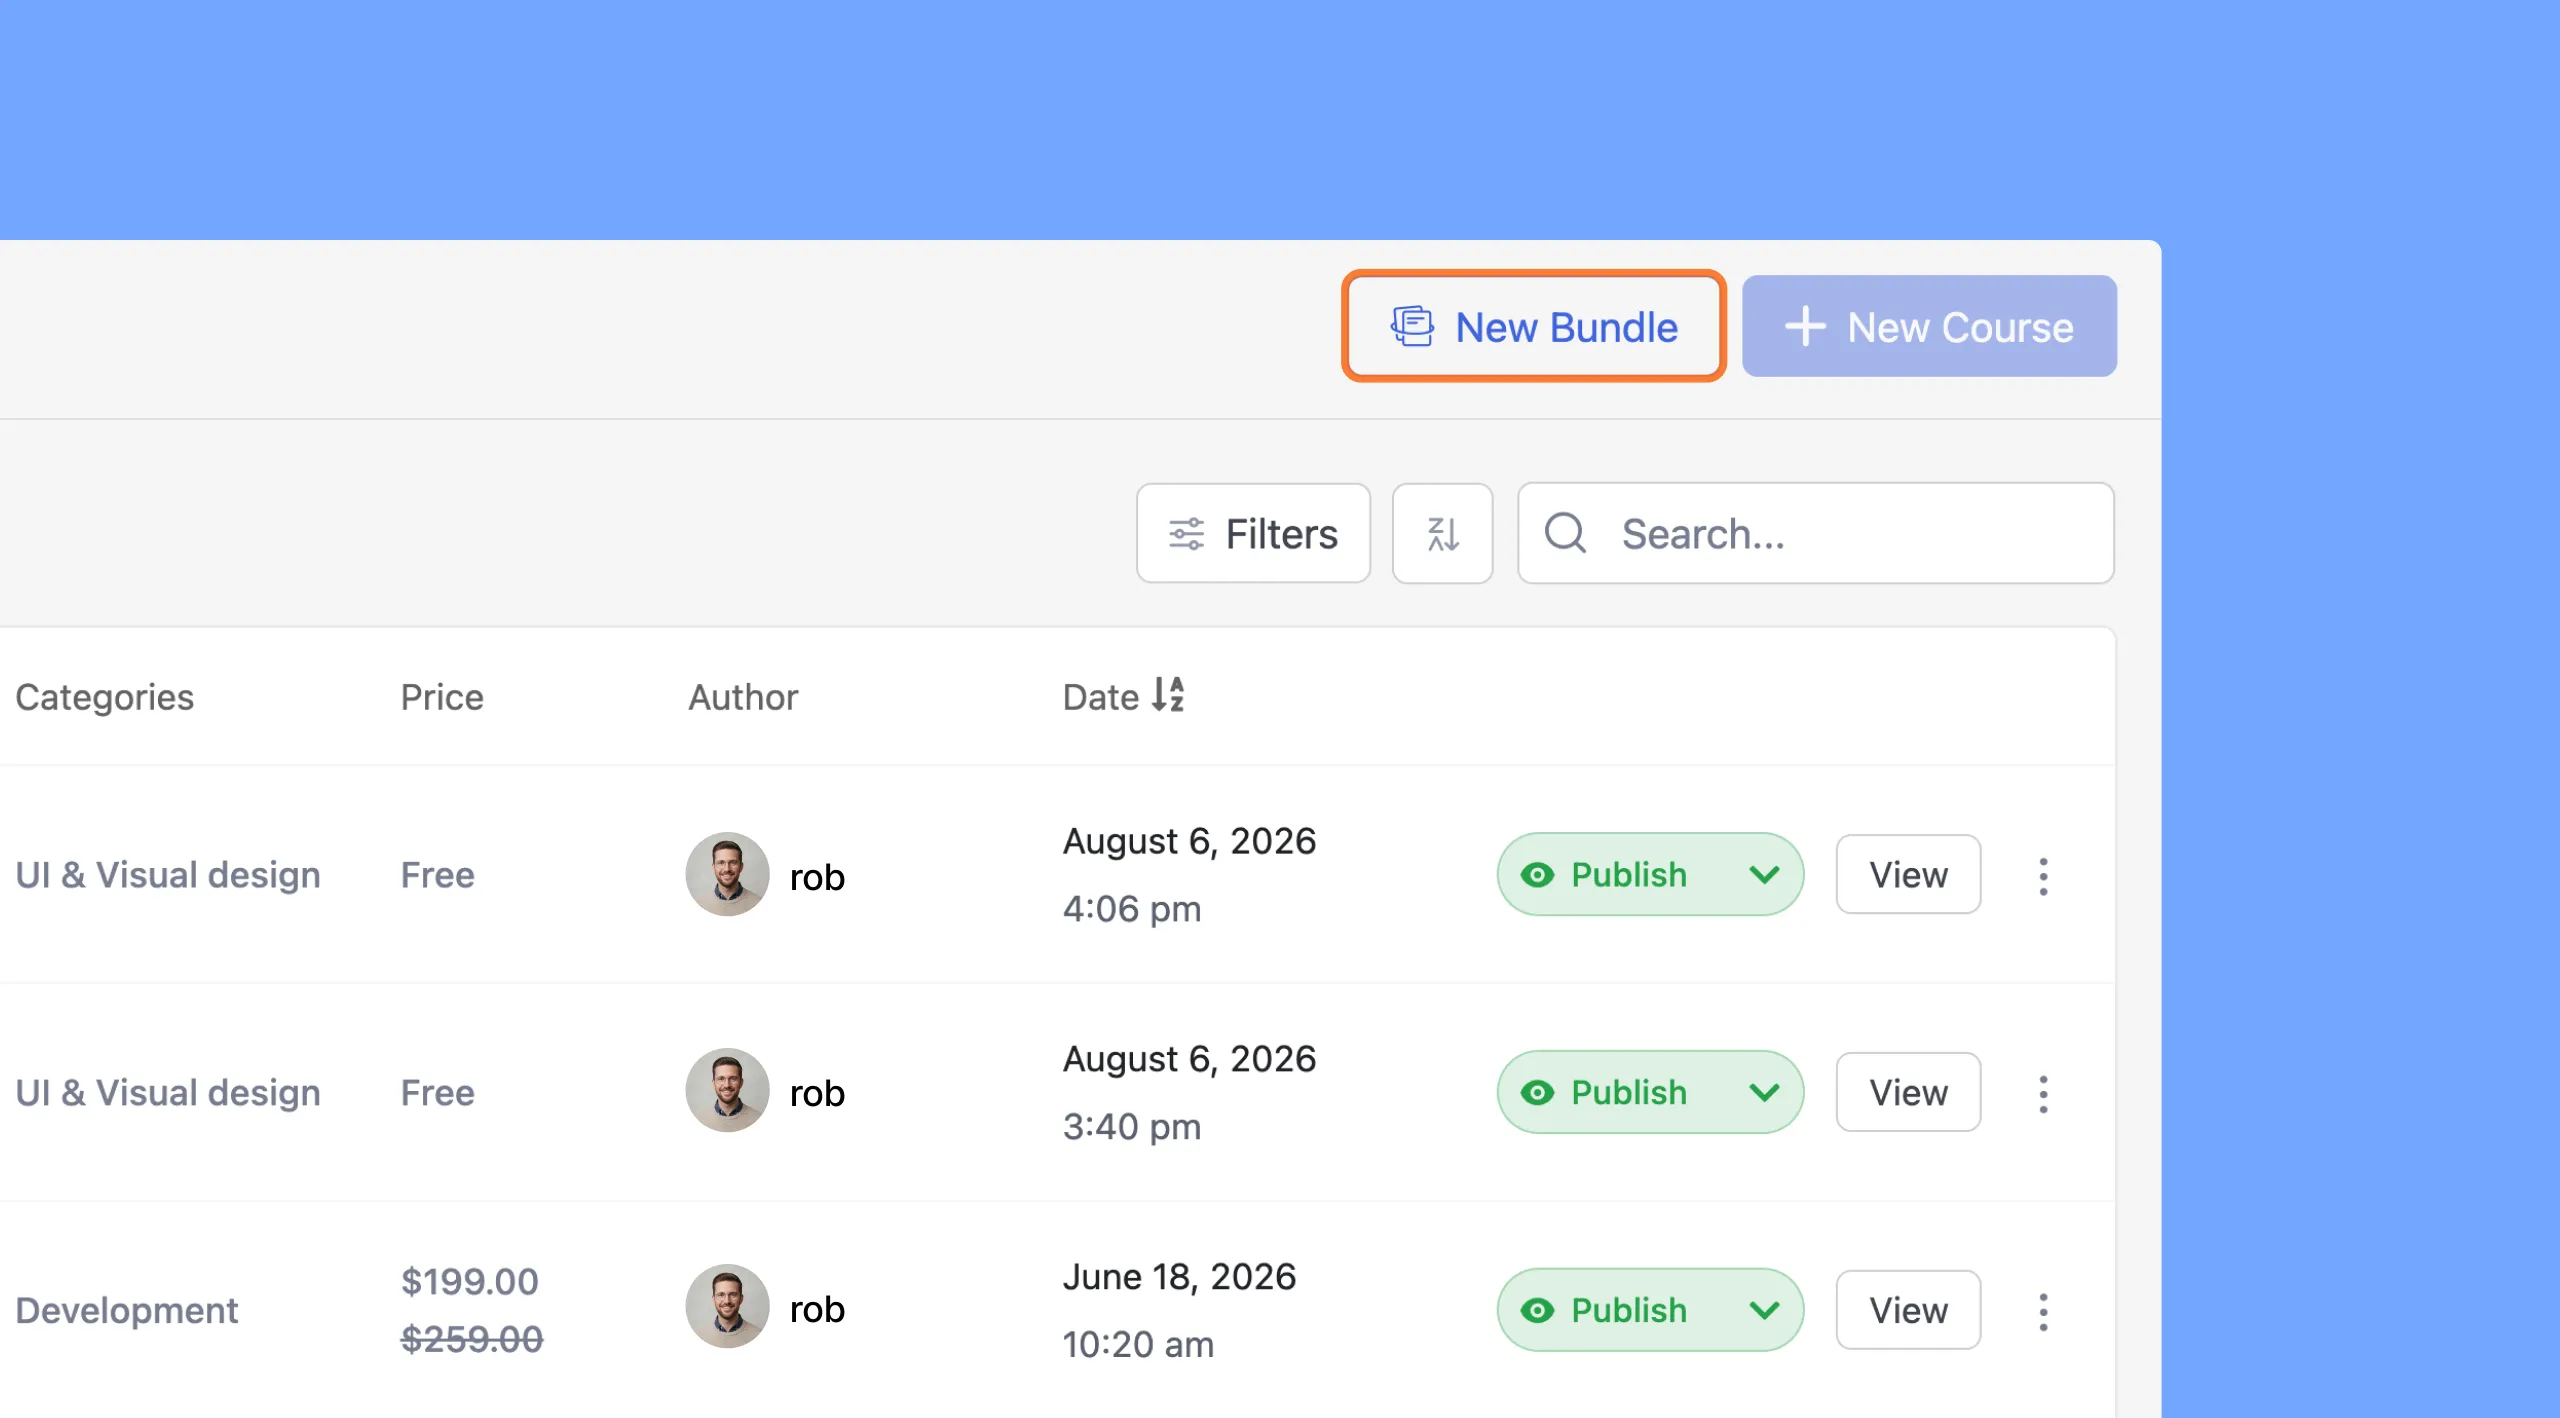
You can create and manage course bundles from both the backend WordPress admin and the frontend instructor dashboard:
- From WP Admin: Go to Tutor LMS Pro > Courses and click the New Bundle button located next to the + New Course button.
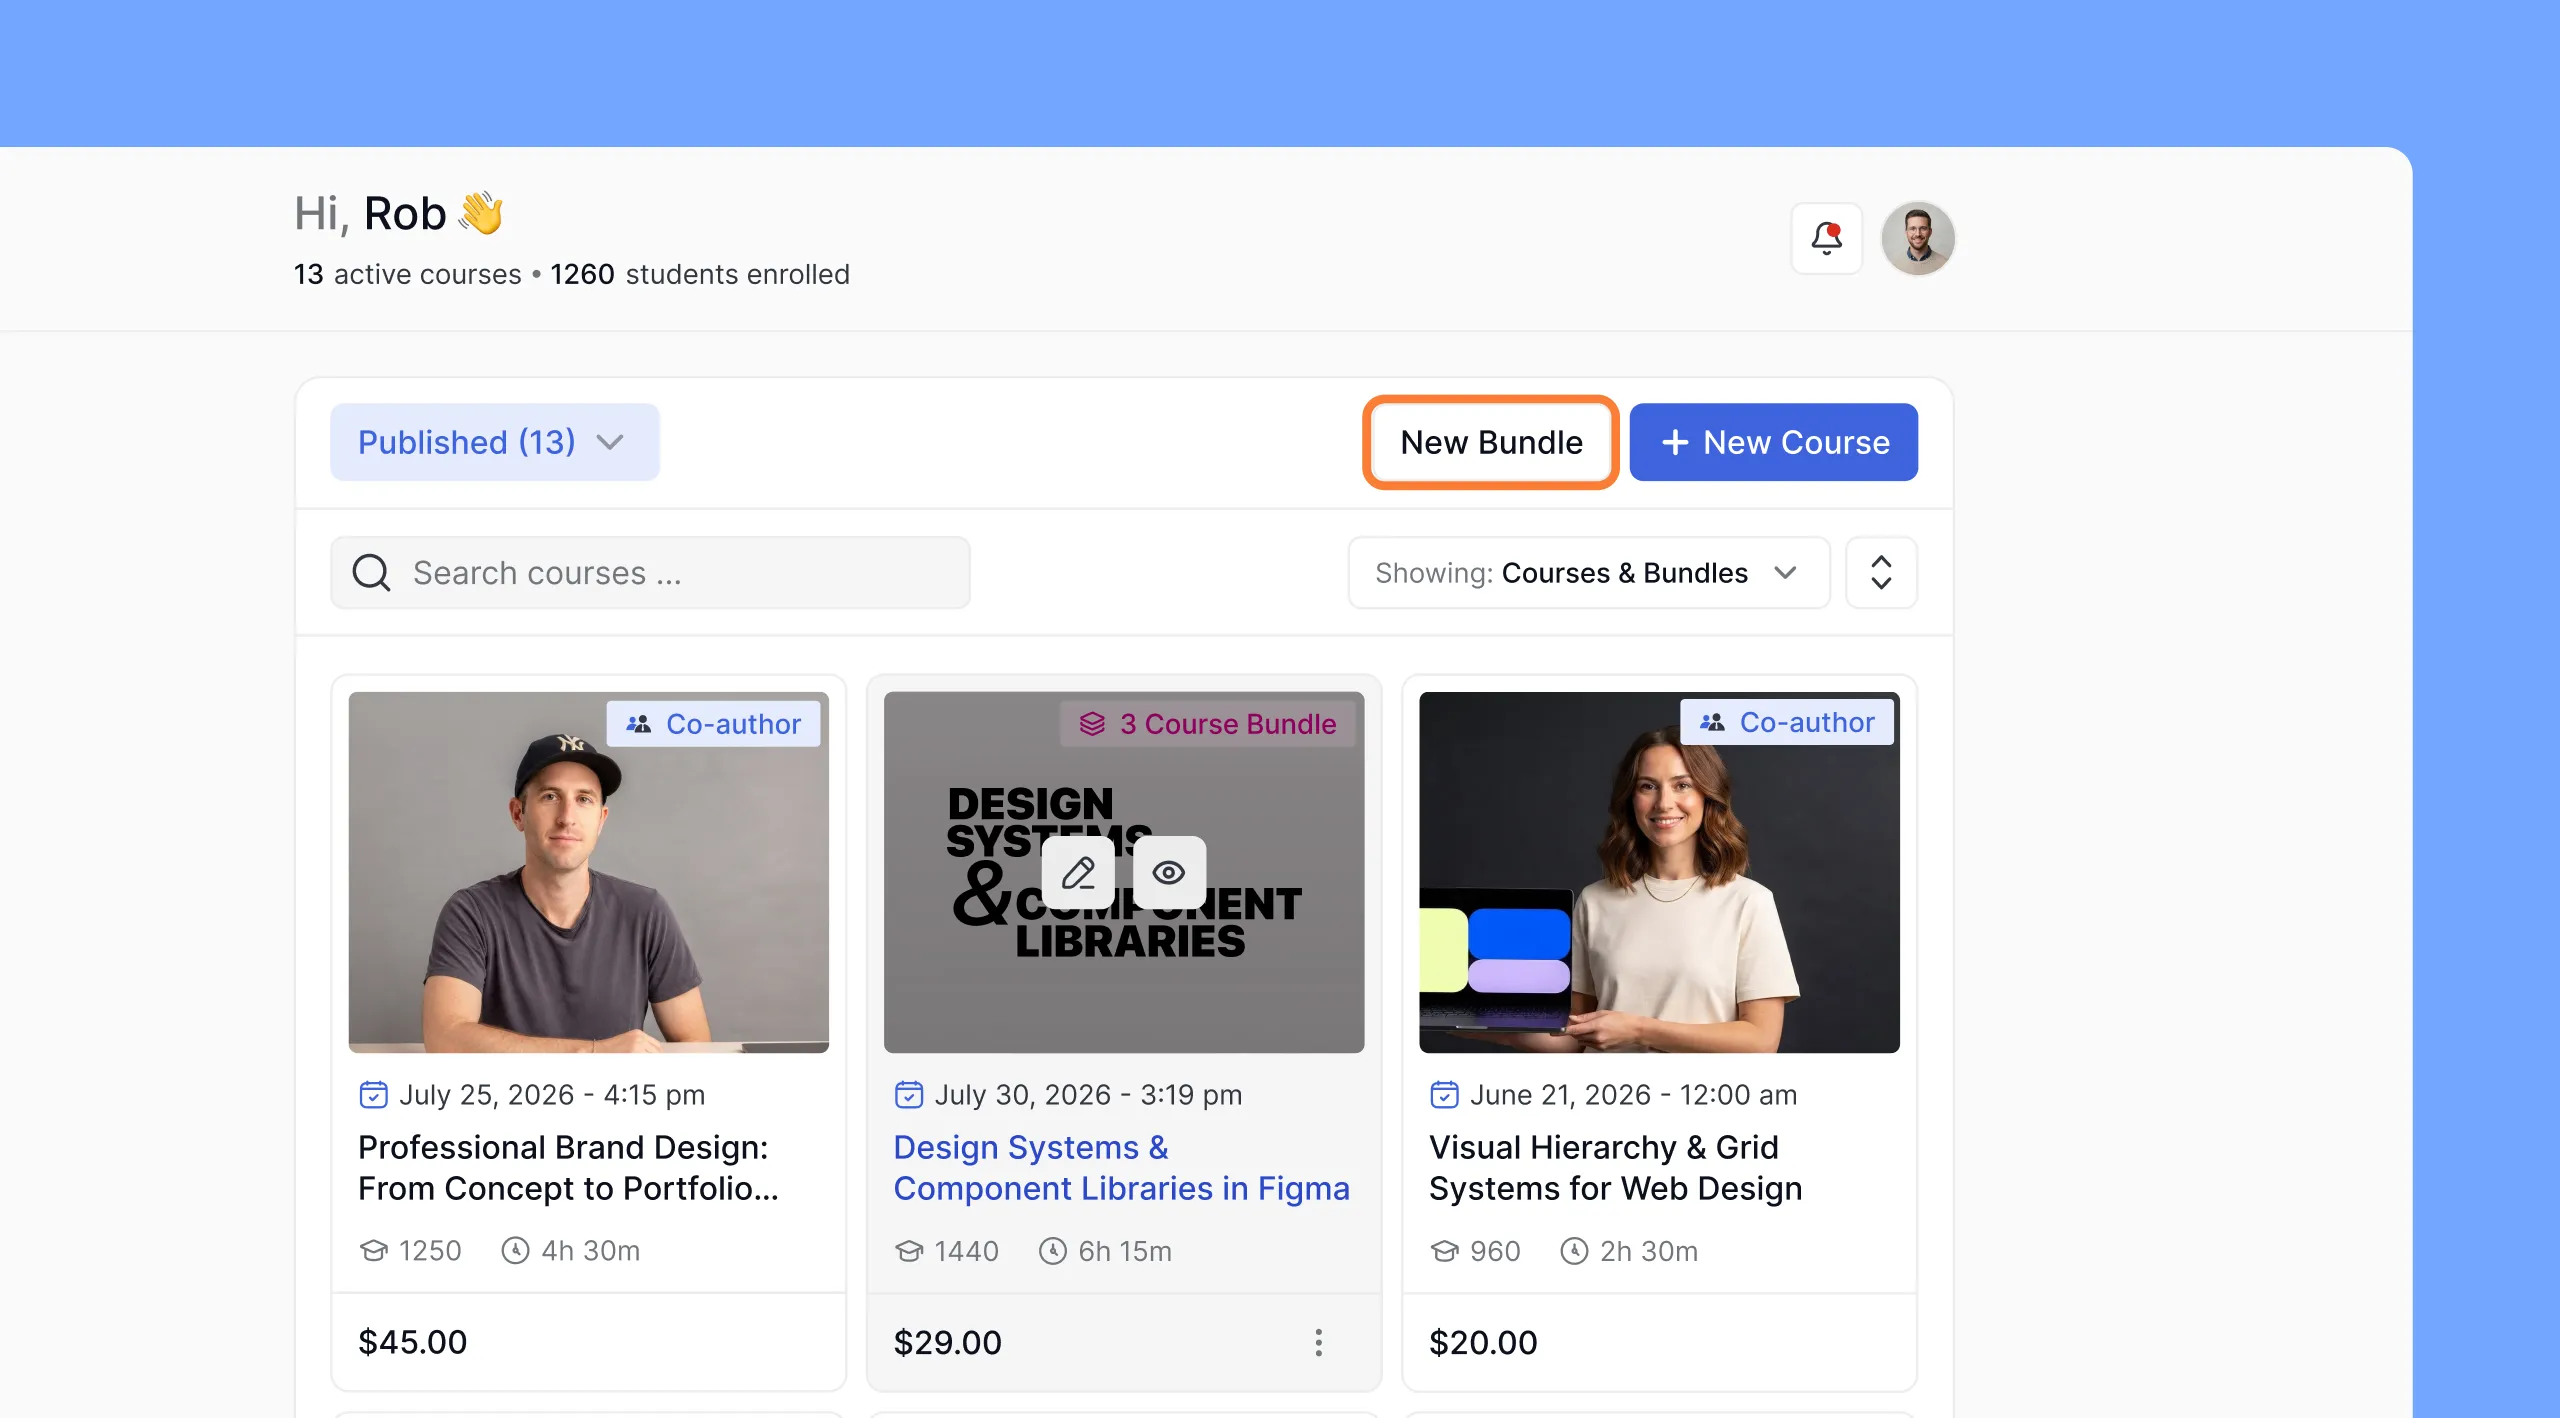
- From Frontend Instructor Dashboard: Navigate to the Courses tab and click New Bundle in the top-right corner. (You can also filter the course list by selecting Showing: Courses & Bundles, Courses, or Bundles).
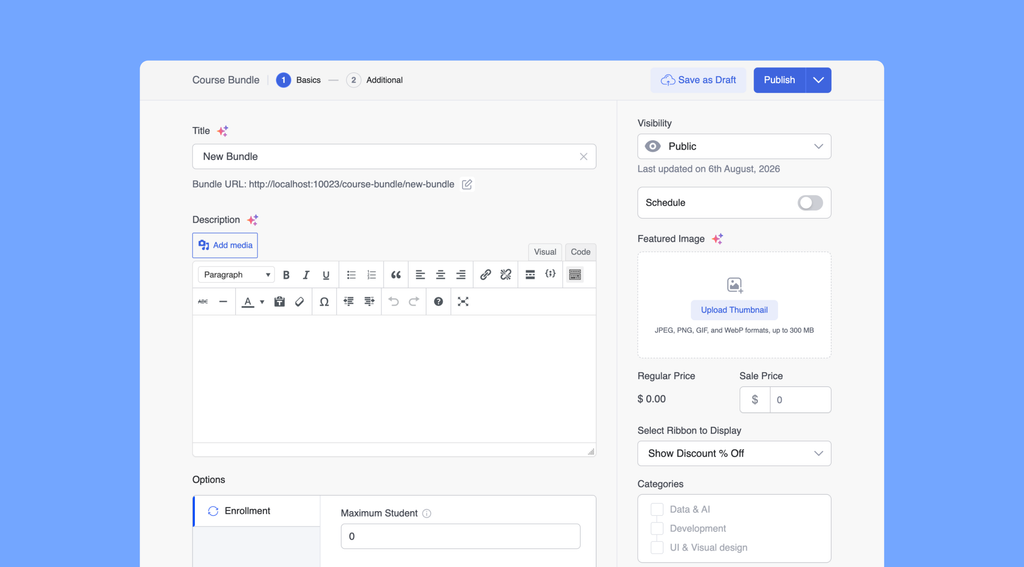
Clicking New Bundle launches the dedicated Course Bundle Builder, which divides bundle creation into two structured tabs: 1. Basics and 2. Additional.
Step 3: Configure Basic Settings
The Basics tab is where you define core bundle information, manage enrolled course lists, configure enrollment rules, and set up pricing and monetization.
Main Content Area
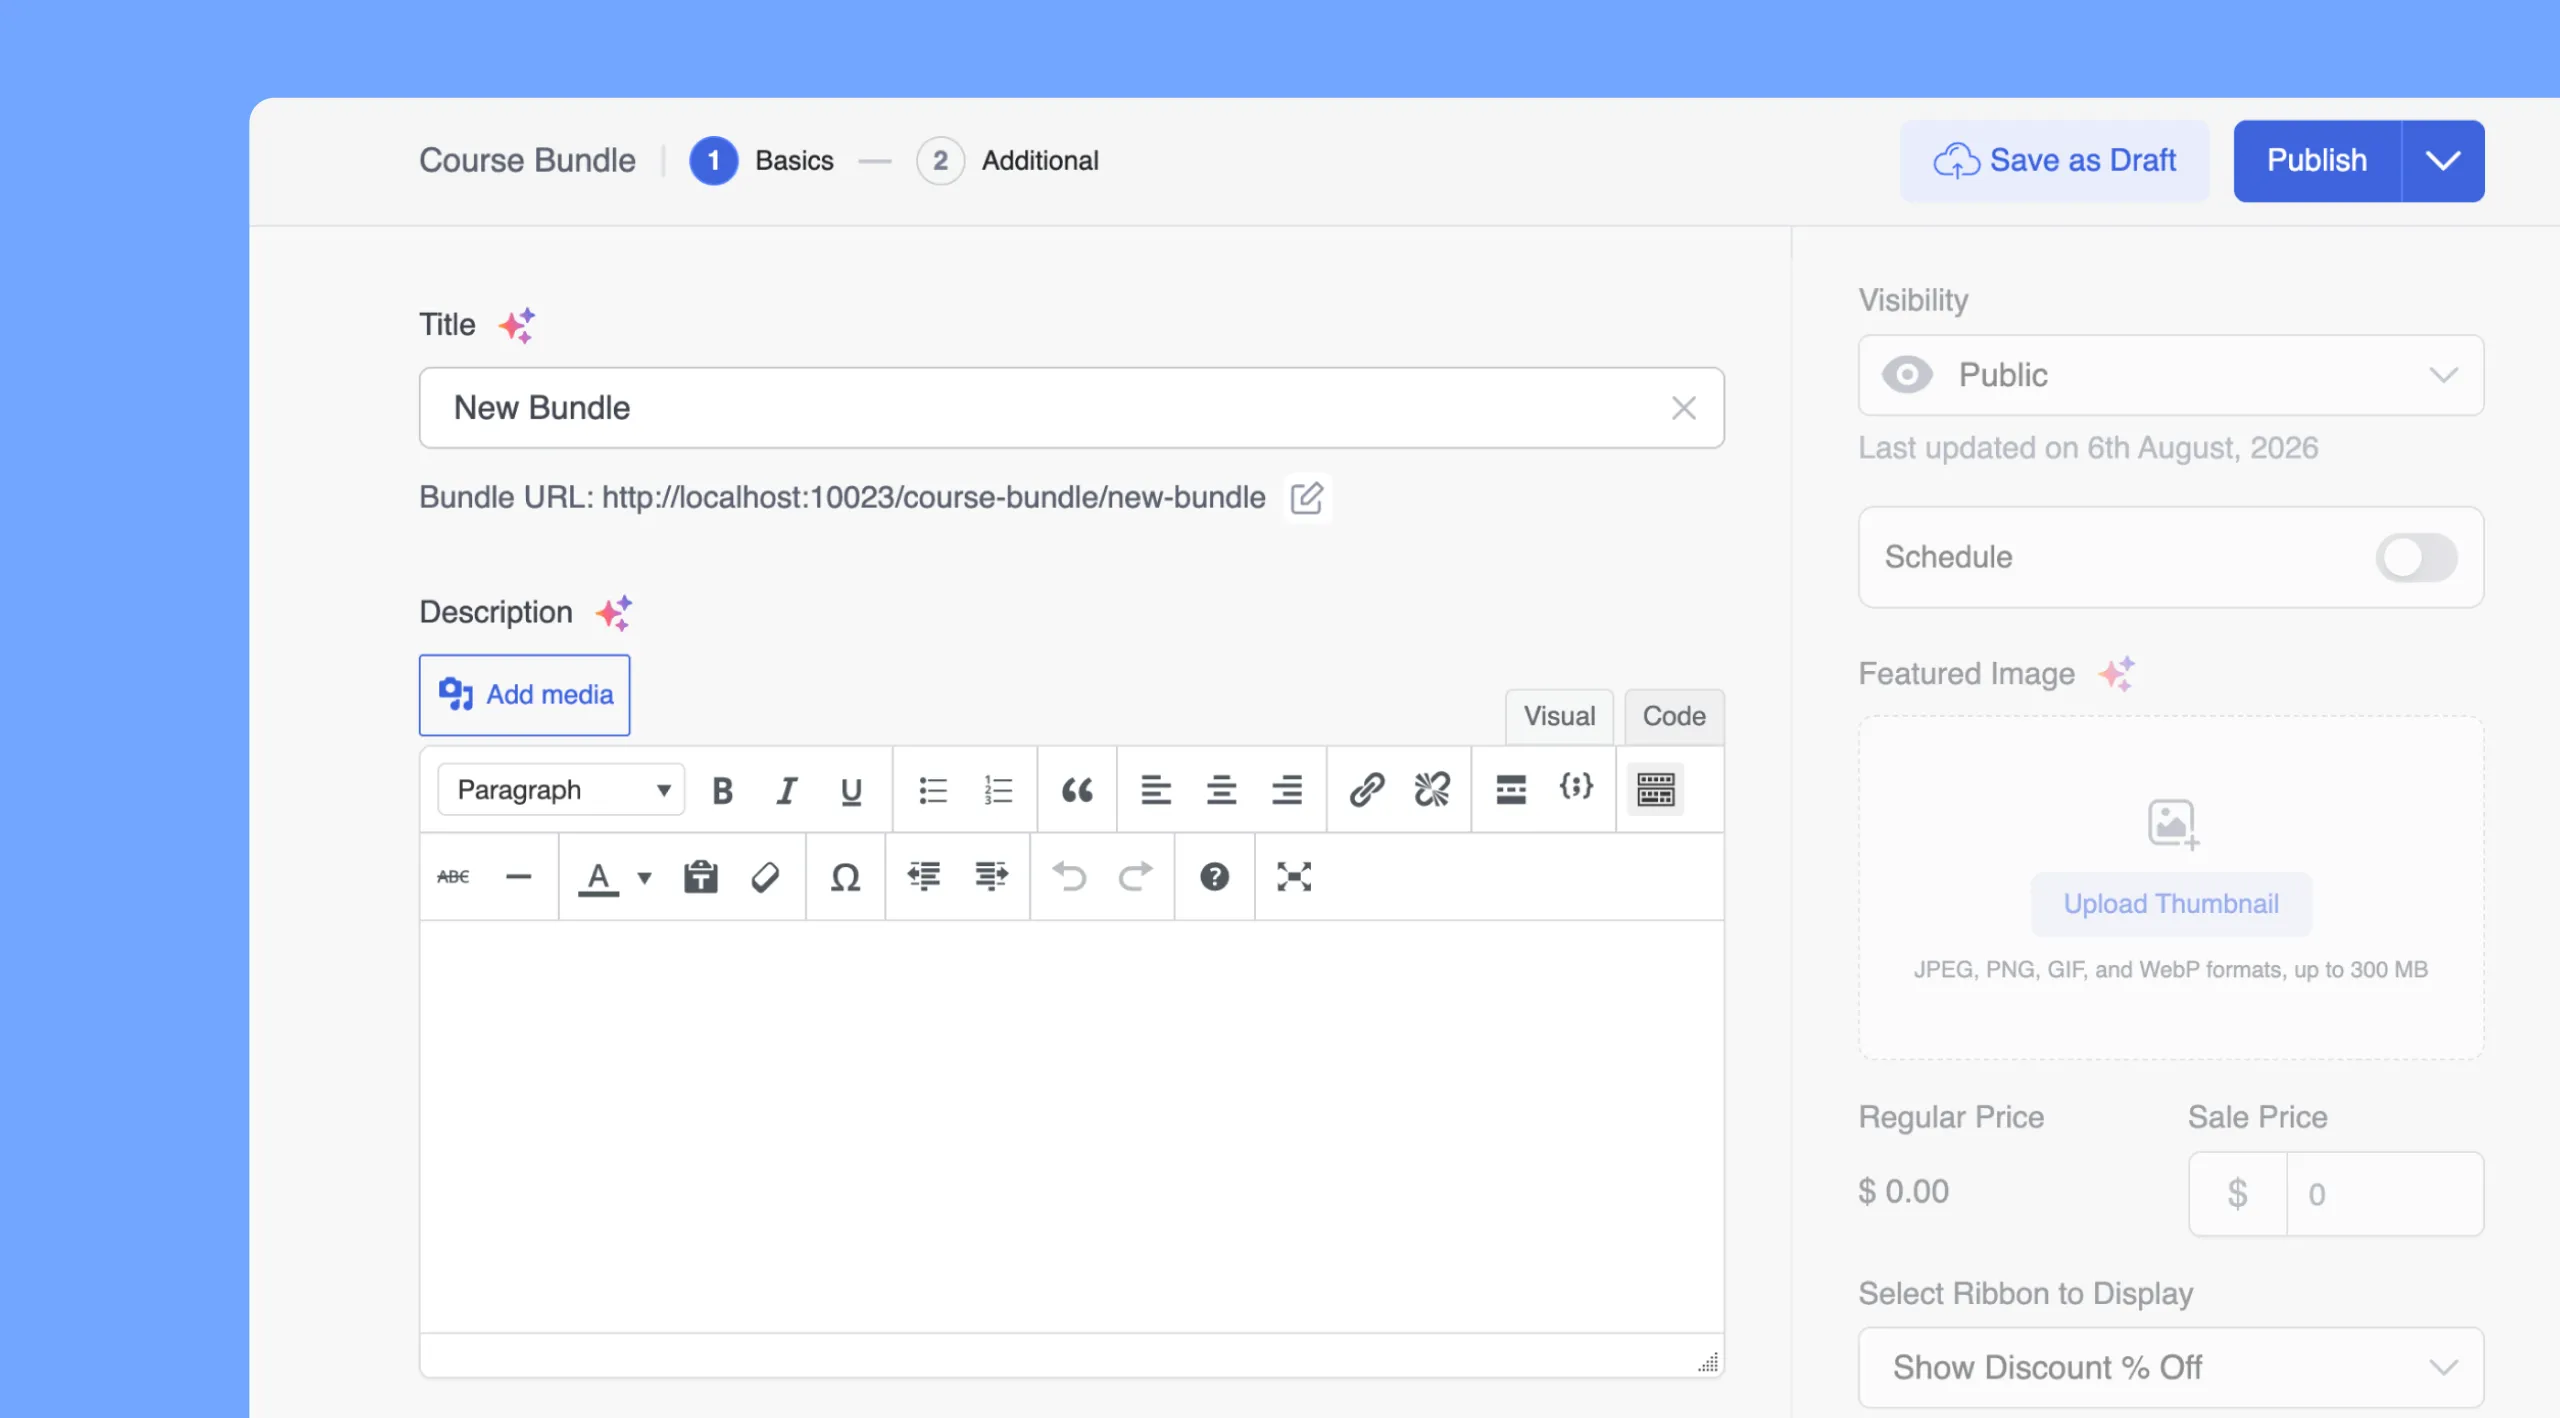
- Title: Enter a descriptive name for the course bundle.
- Bundle URL: Tutor LMS automatically generates a permalink slug based on your title. Click the pencil (Edit) icon next to the URL to customize the slug, then click Save.
- Description: Use the rich text editor to provide an overview of the bundle, learning objectives, and what students will gain. You can use text formatting, lists, links, and the Add Media button to embed images or media.
Enrollment Options
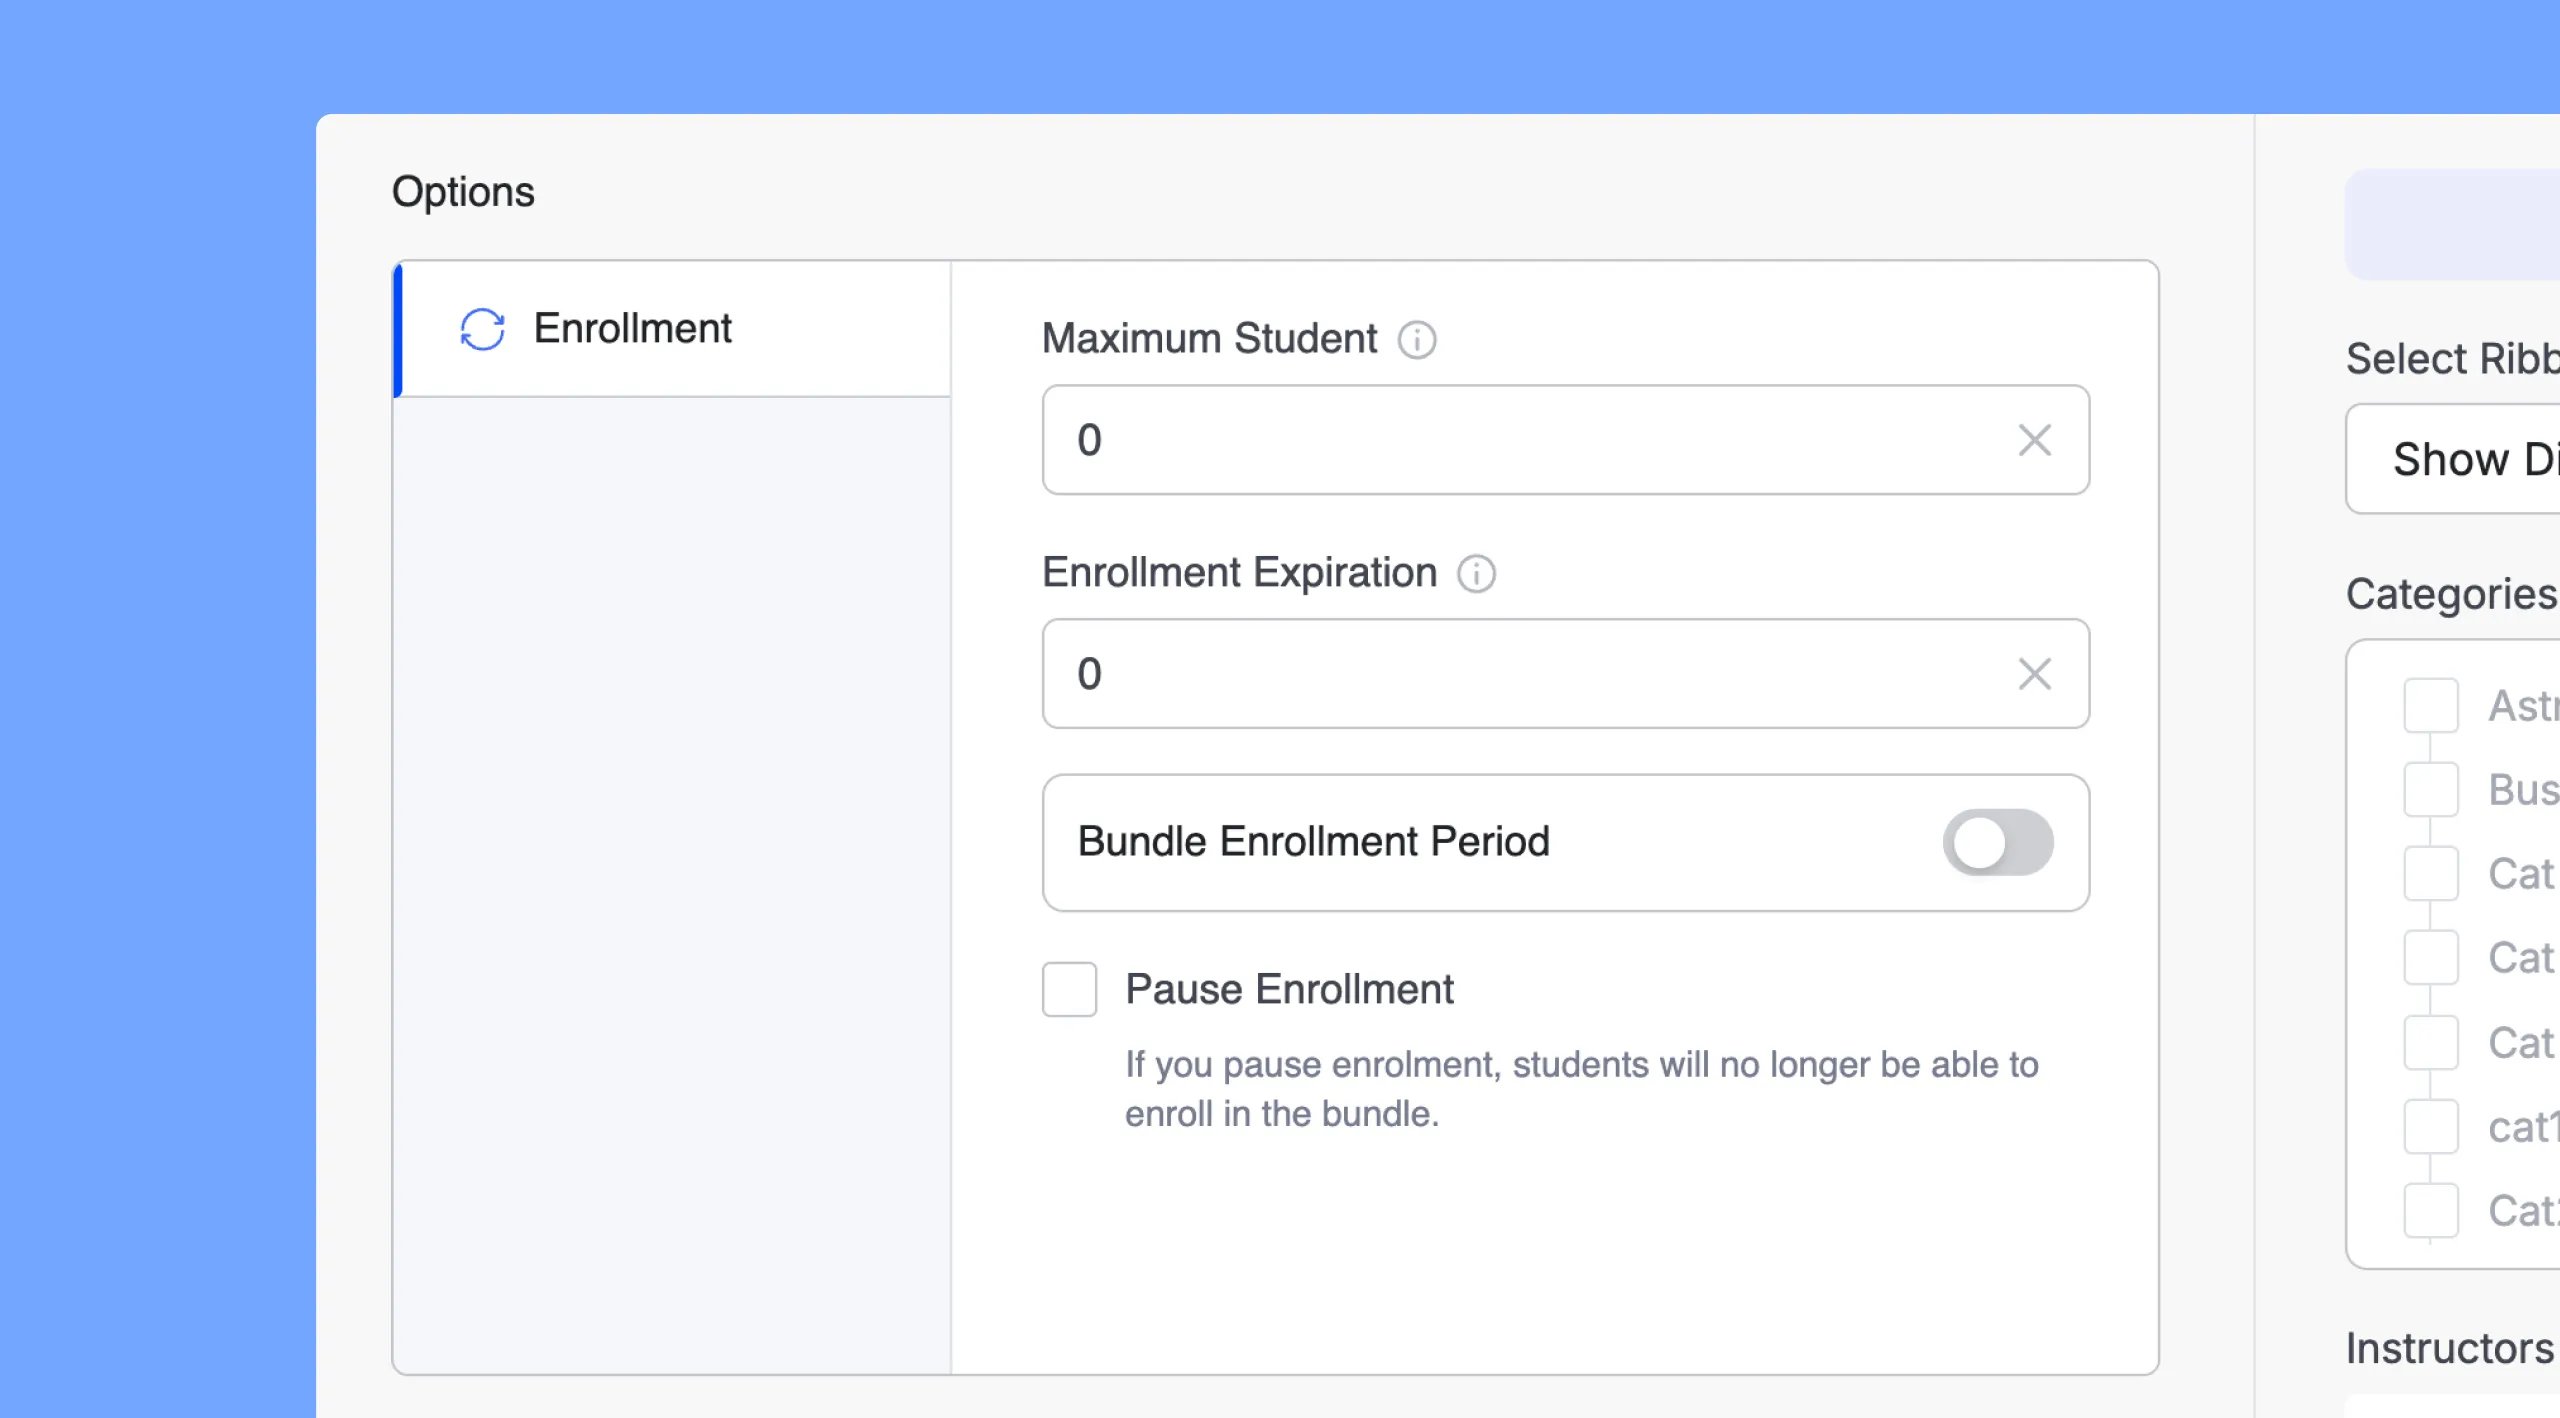
Under the Options > Enrollment section, you can configure student capacity and enrollment timeframes:
- Maximum Student: Set the maximum number of students allowed to enroll in the bundle. Set this to 0 for unlimited enrollments.
- Enrollment Expiration: Specify the number of days a student retains access after enrollment. Set this to 0 for lifetime access.
- Bundle Enrollment Period: Toggle this option ON to restrict enrollment to a specific date and time window:
- Start Date & Time: Select the exact start date from the calendar picker and set the time (hh:mm a).
- Add End Date: Click to set a closing date and time after which new enrollments are disabled.
- Pause Enrollment: Check this box to temporarily halt all new enrollments for this bundle without unpublishing the page.
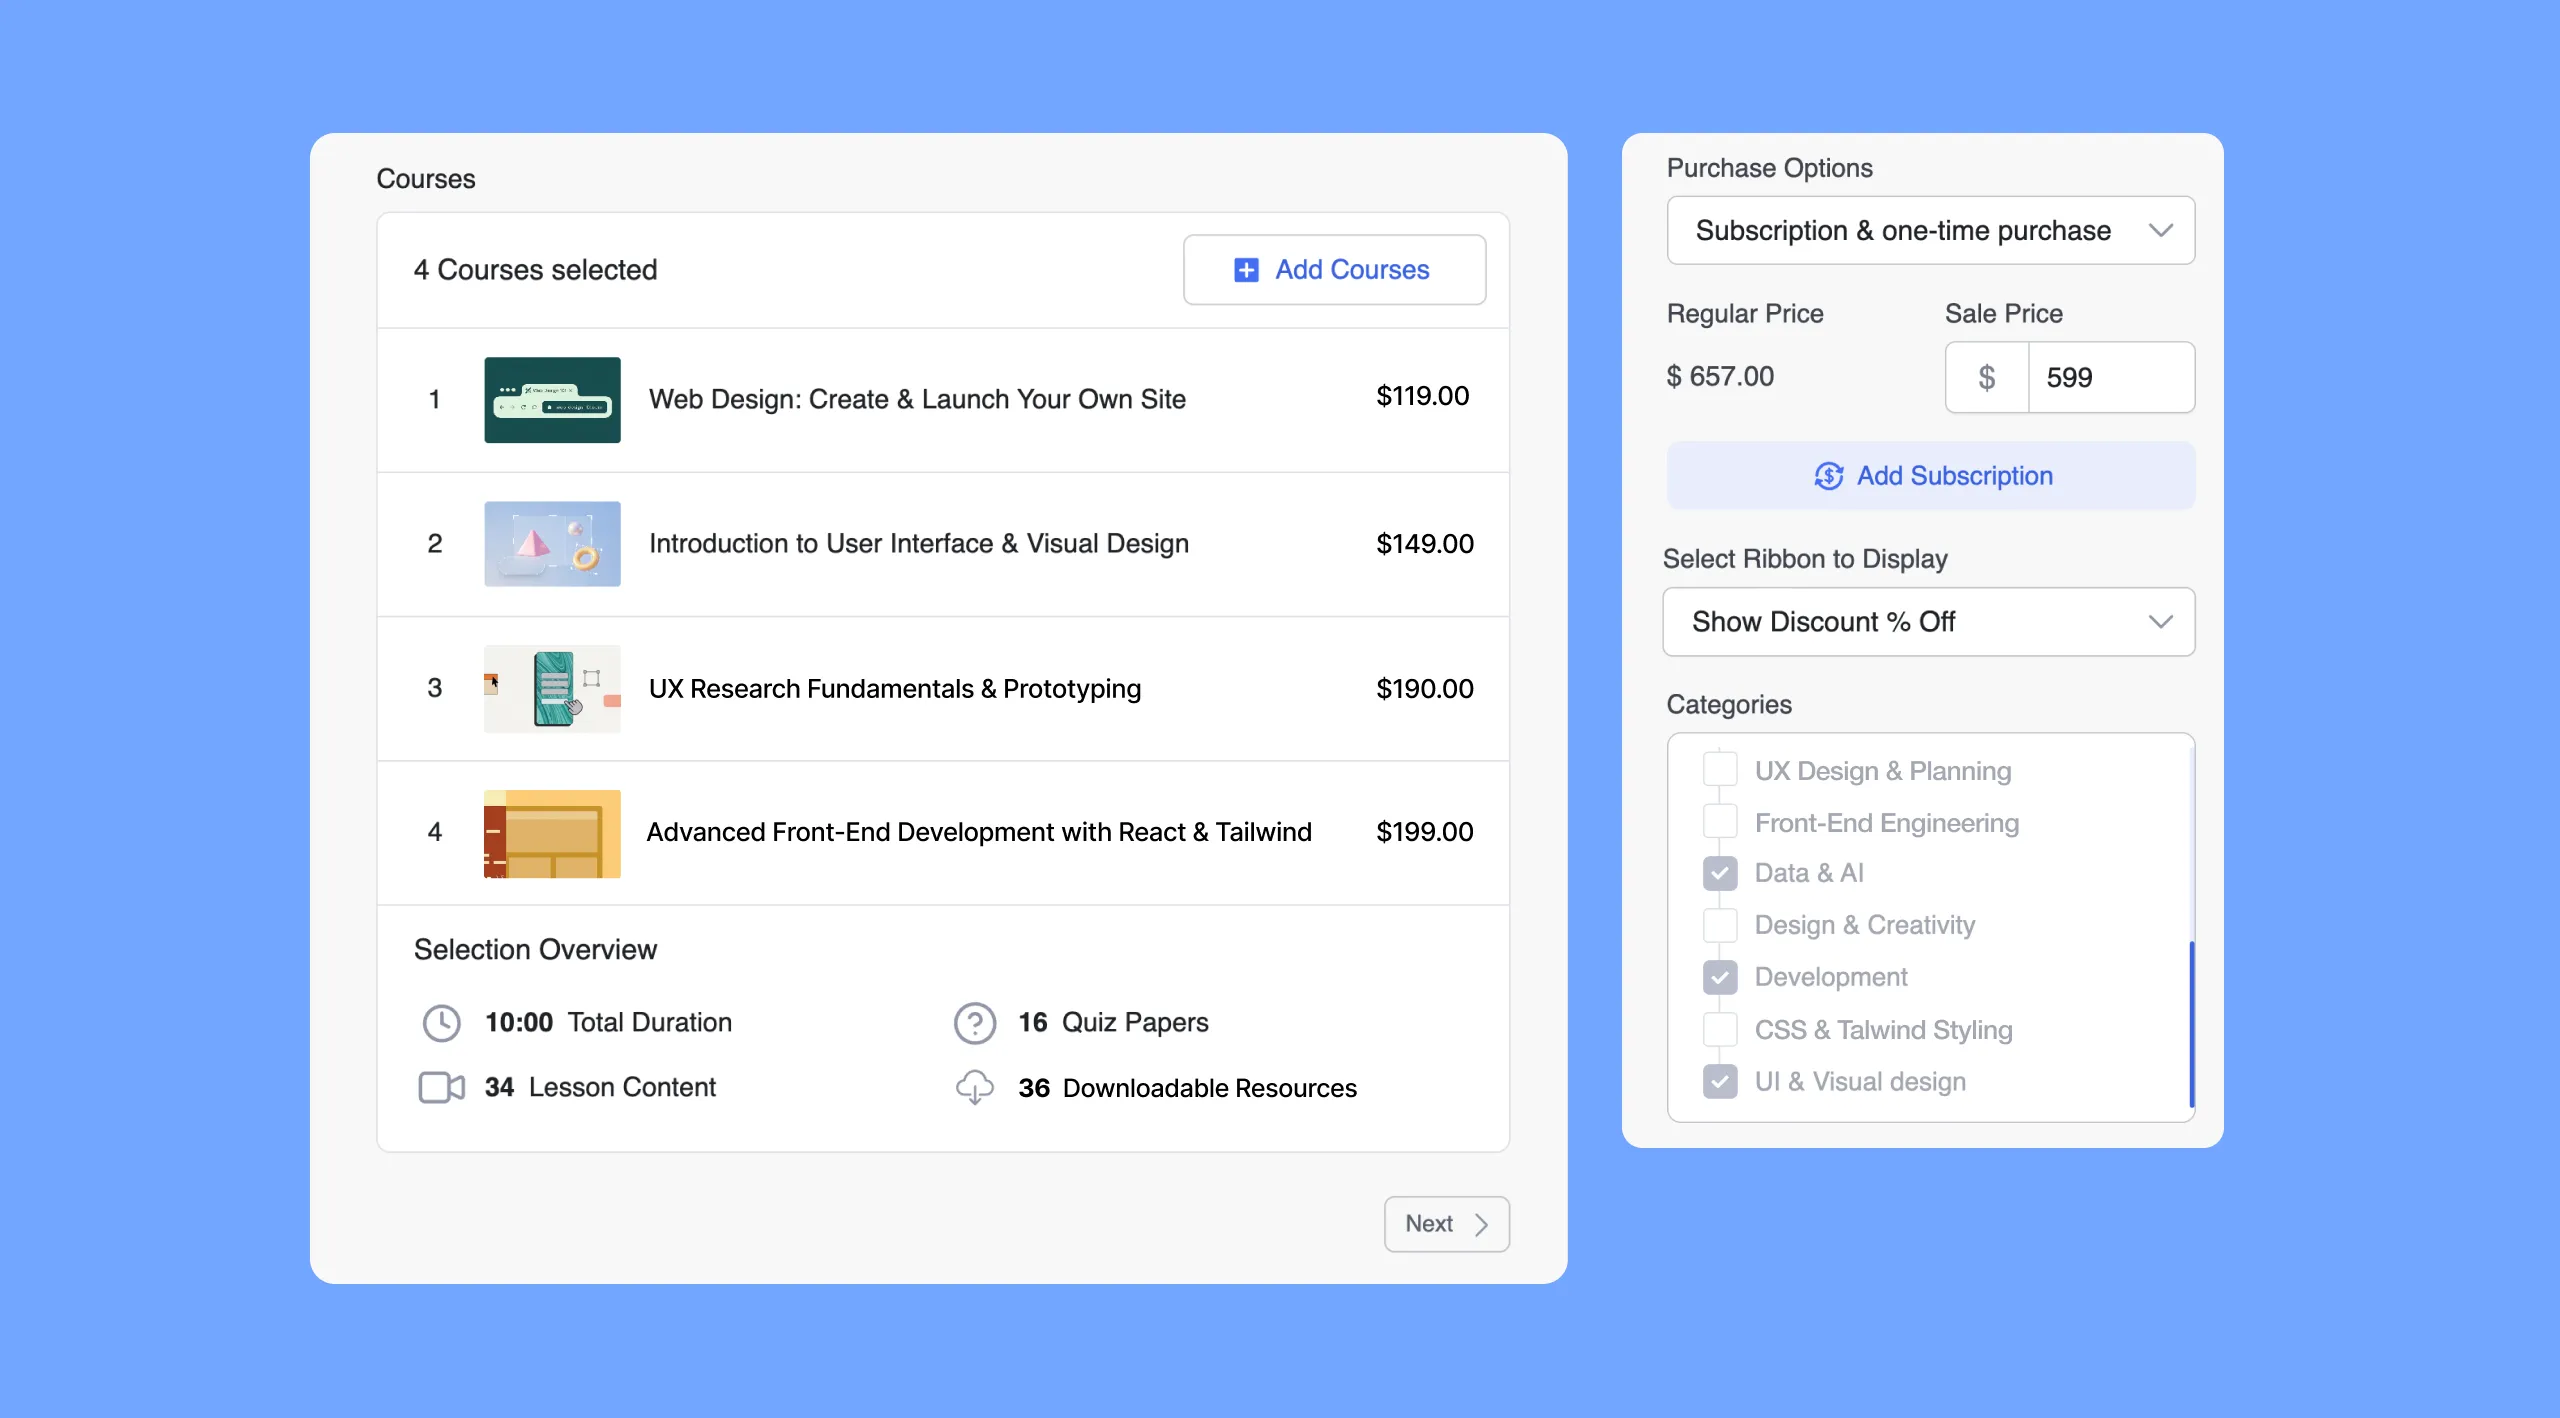
Courses & Selection Overview
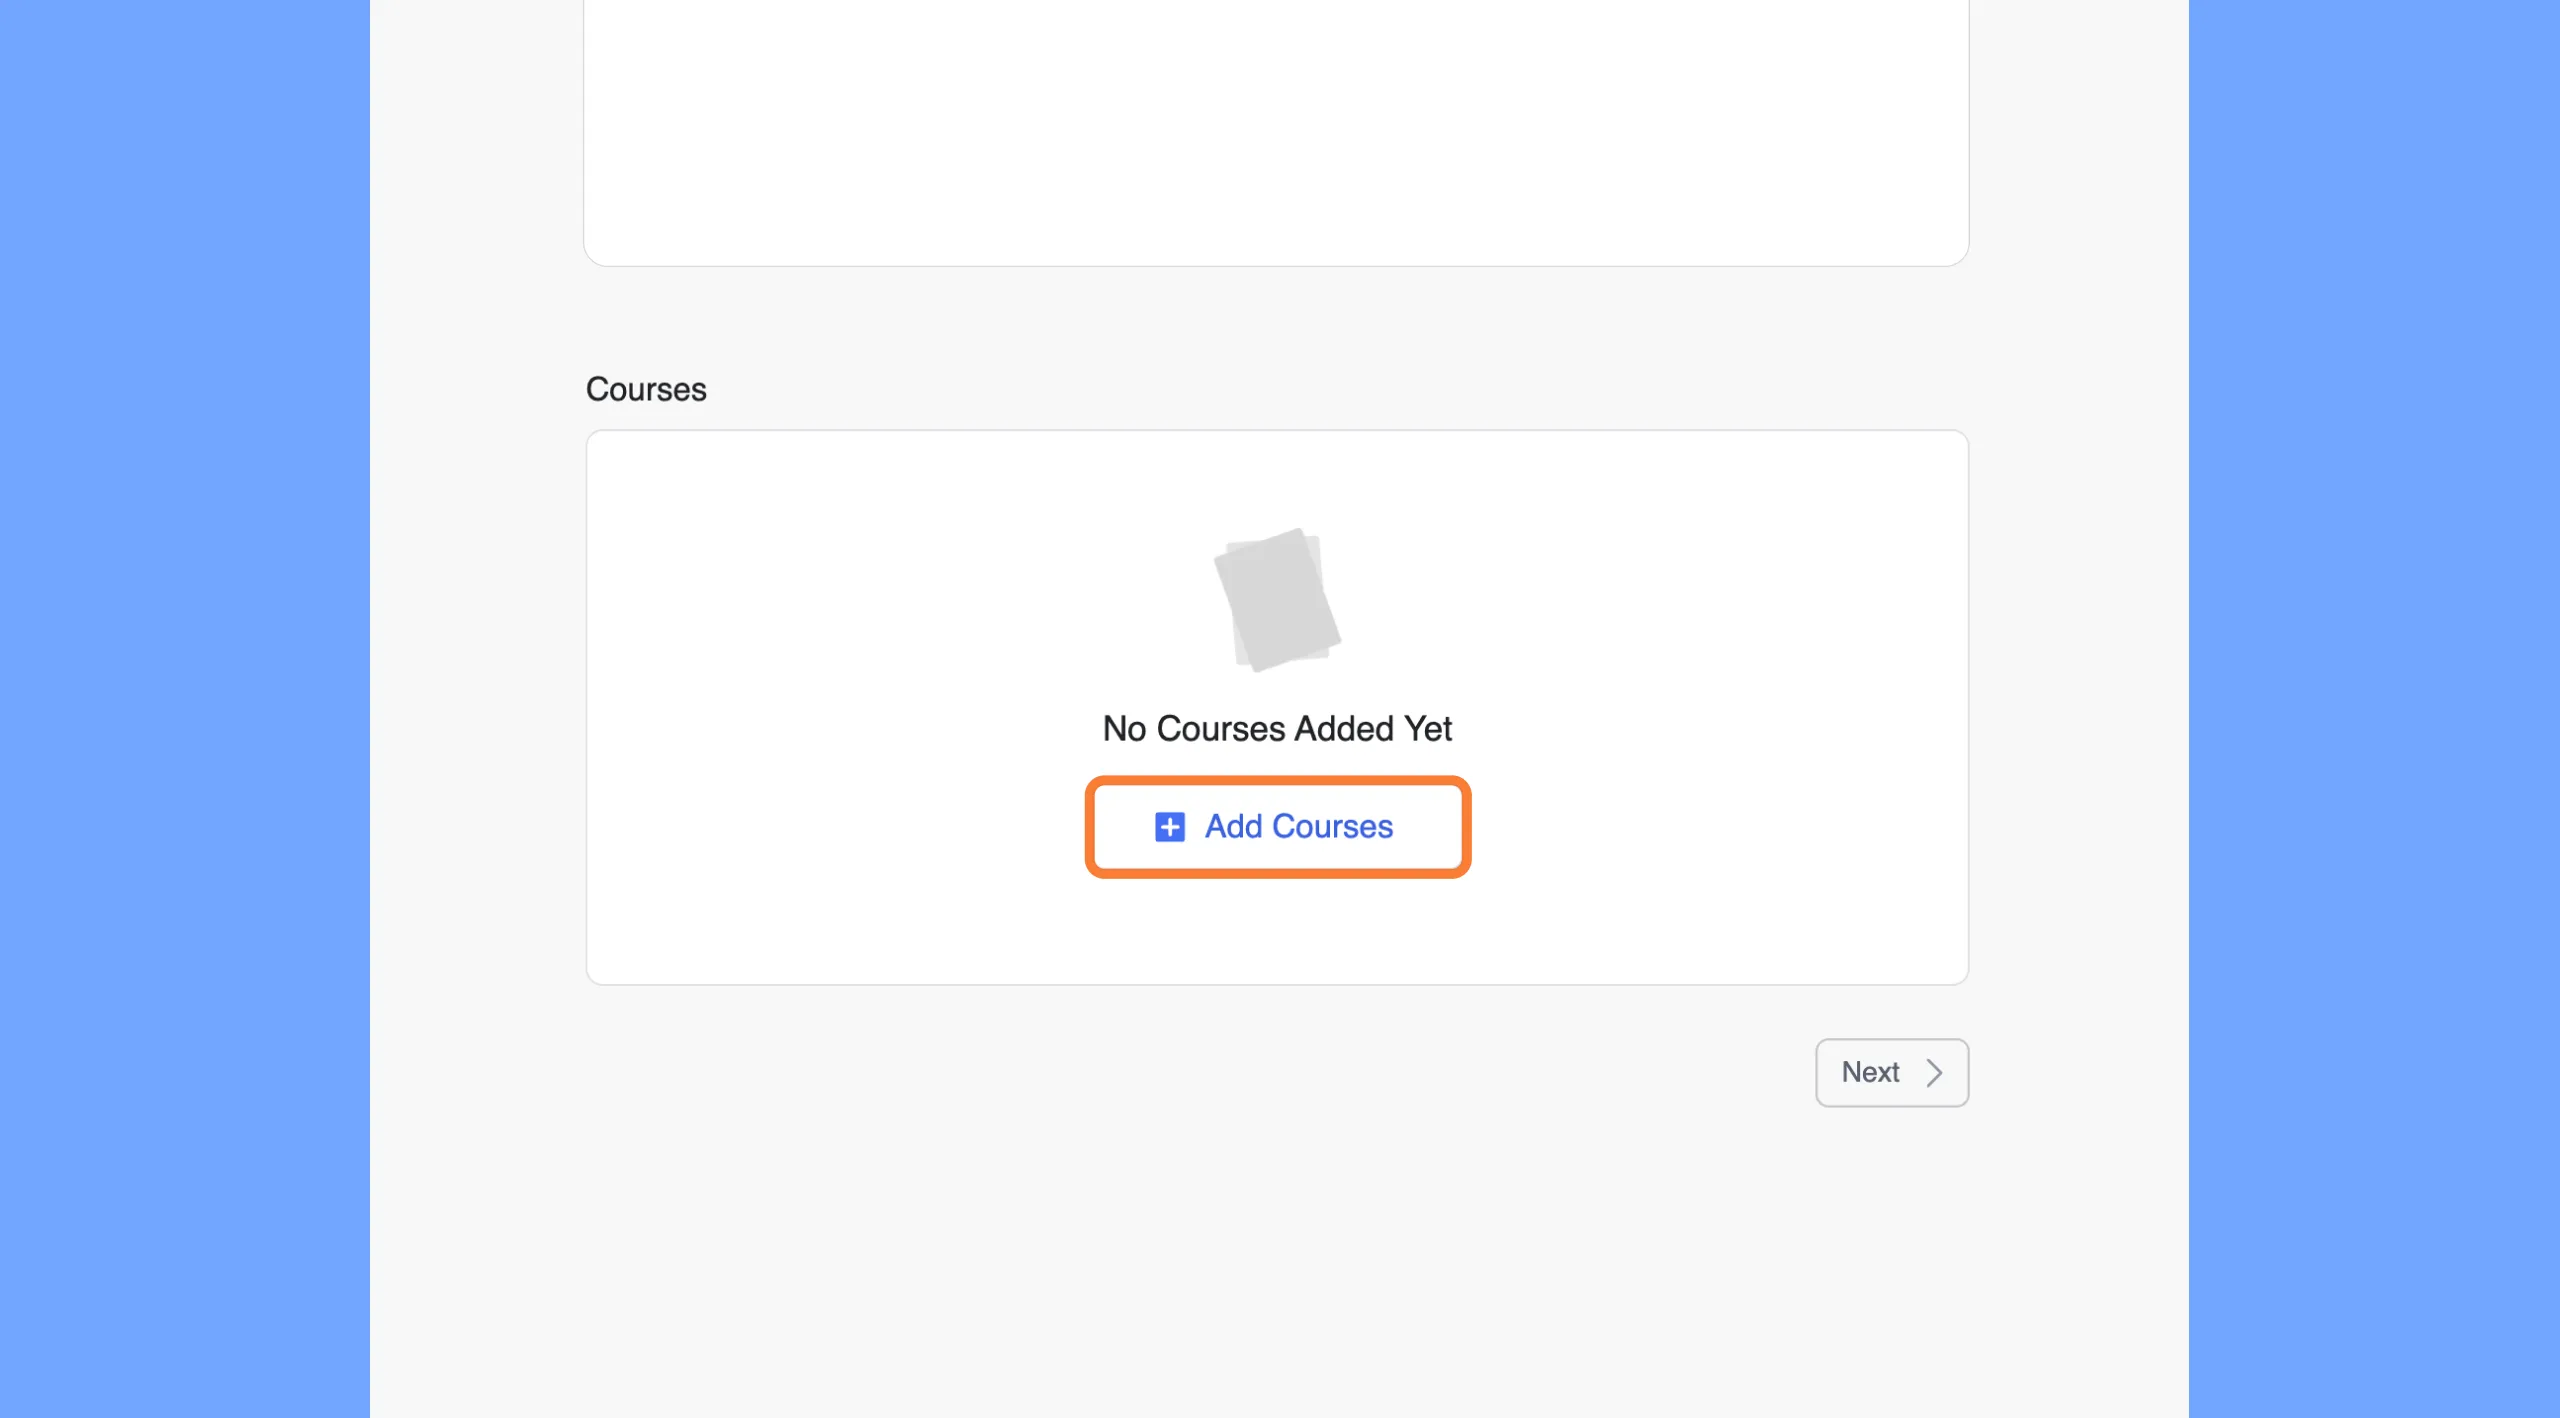
Click the + Add Courses button to include courses in the bundle:
- Course Selection Modal: A popup displays all published courses on your site with their regular/sale prices, pagination, and a search field. Check the box next to each course you want to include and click Add.
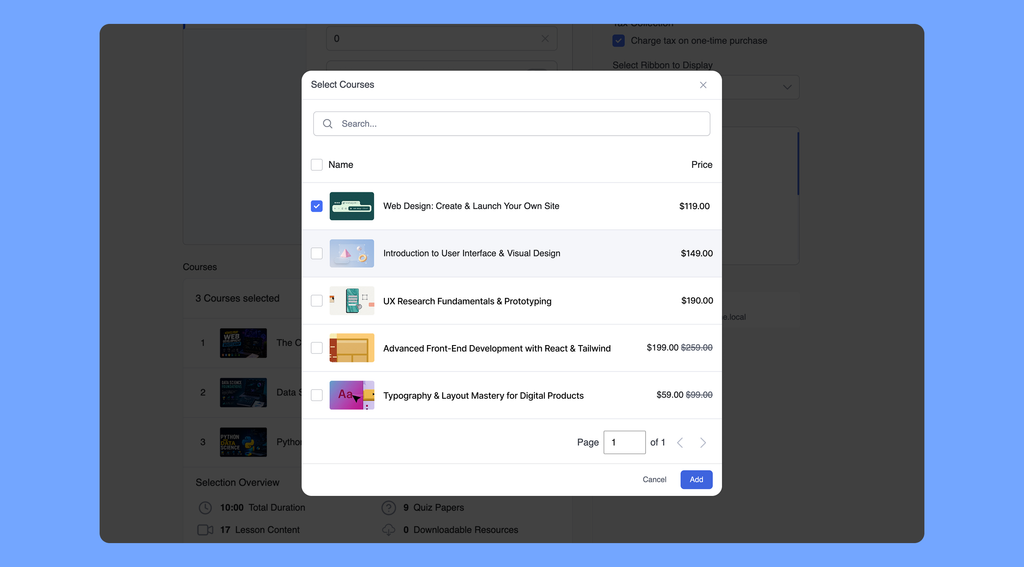
- Reordering & Managing: The selected courses appear in a numbered list. You can drag and drop courses using the handle icon to arrange their presentation order, or click the ✕ icon to remove a course from the bundle.
- Selection Overview: Below the course list, an automated summary dynamically calculates and displays:
- Total Duration: Combined runtime of all video and lesson content across the bundled courses.
- Lesson Content: Total count of lessons included.
- Quiz Papers: Total count of quizzes included.
- Downloadable Resources: Total count of downloadable attachment files.
Sidebar Configuration (Basics Tab)
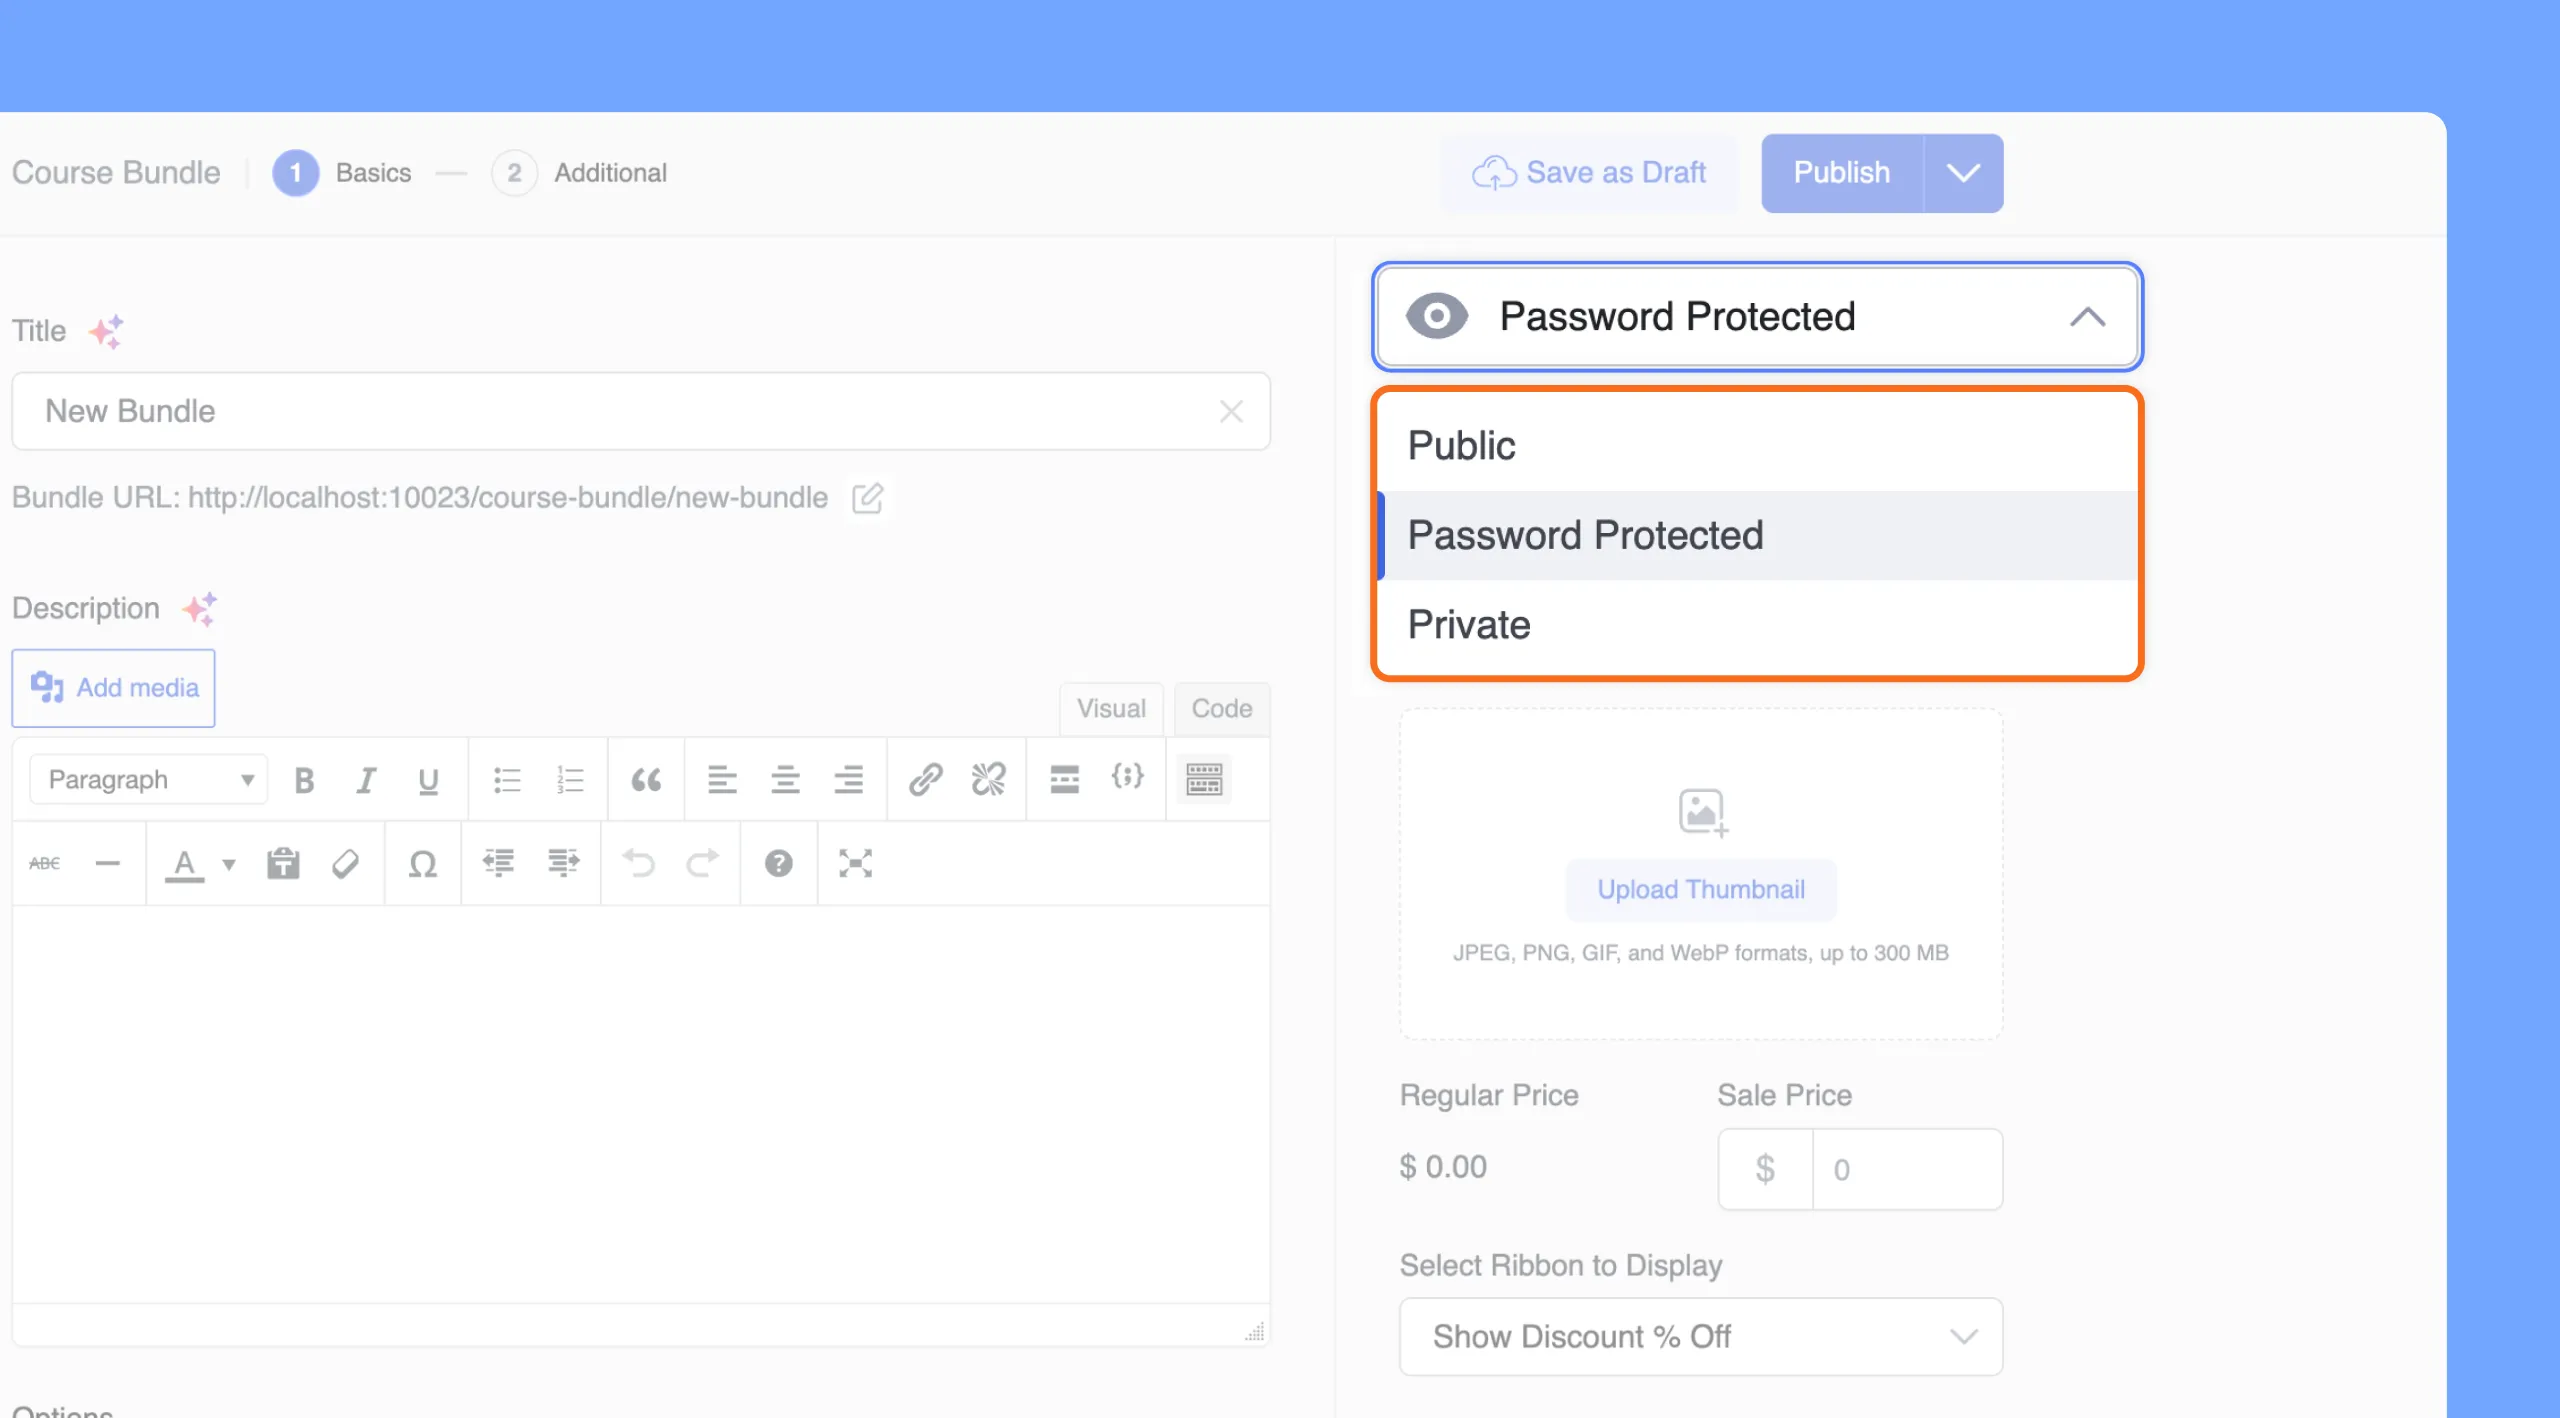
- Visibility: Choose who can access the bundle:
- Public: Visible to all site visitors on course archive and search pages.
- Password Protected: Requires students to enter a password to access and enroll.
- Private: Hidden from public listings; requires manual student enrollment by administrators or instructors.
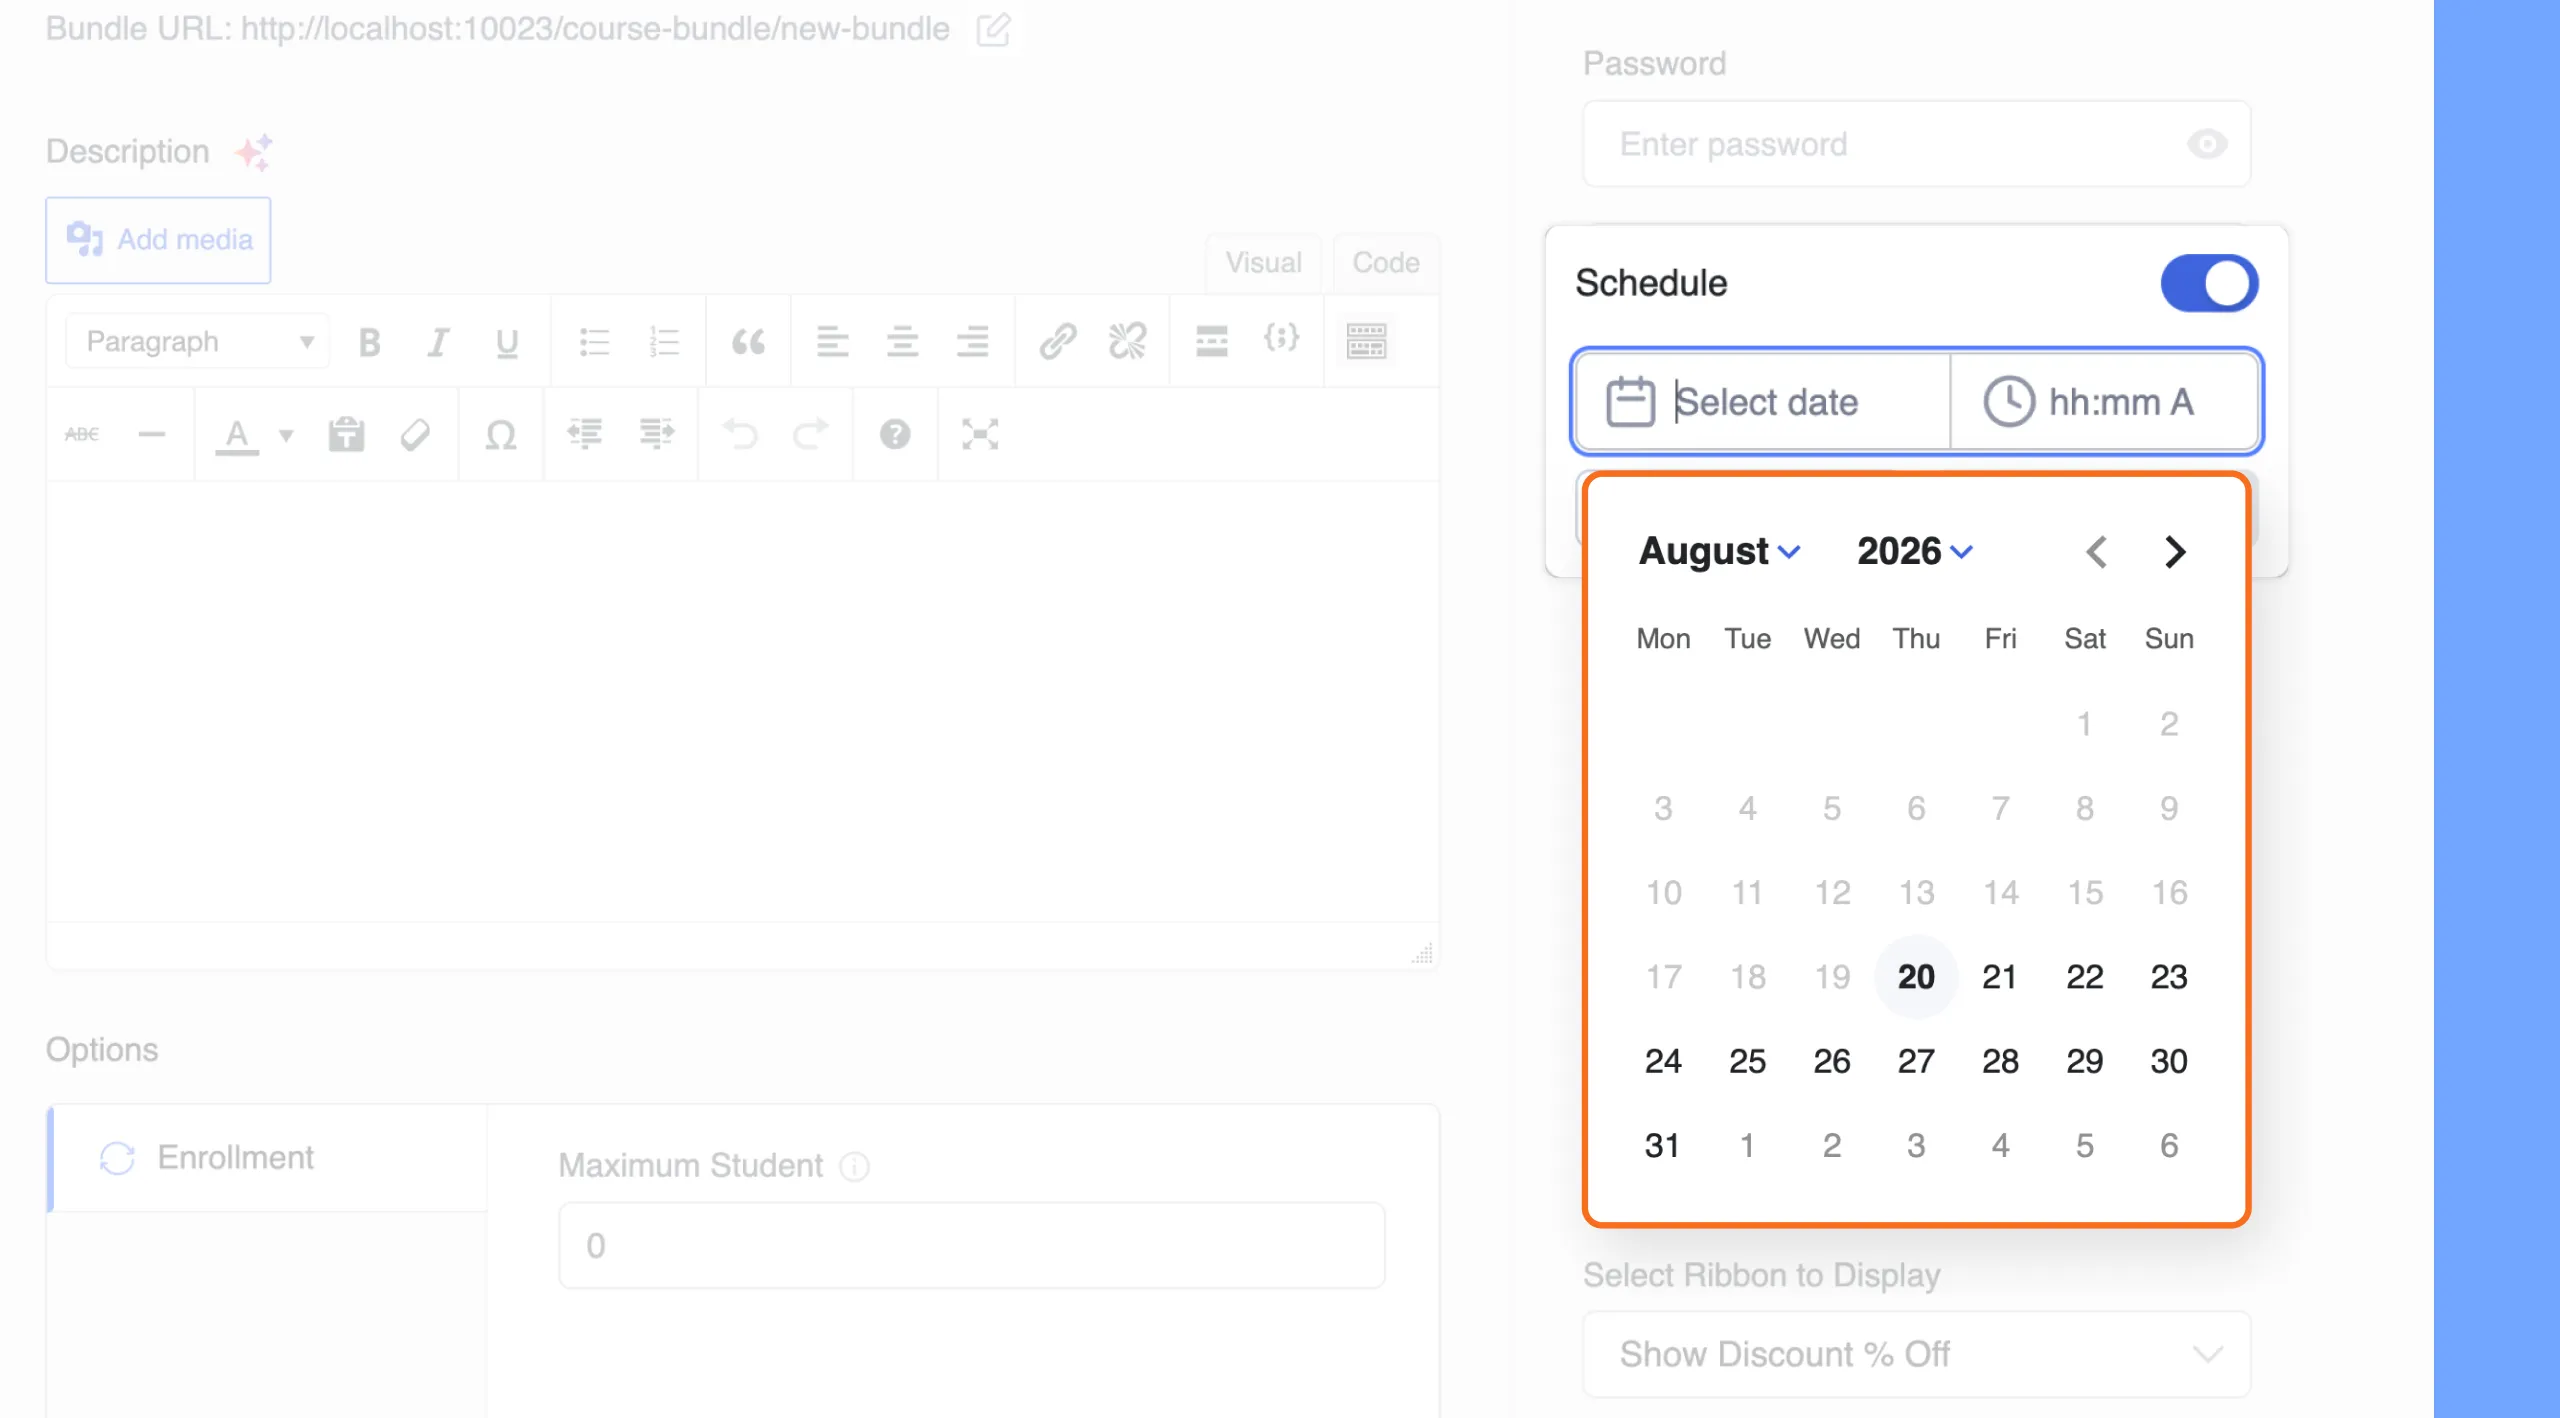
- Schedule: Toggle ON to schedule the bundle for future automatic publication at a designated date and time (Select date and hh:mm a).
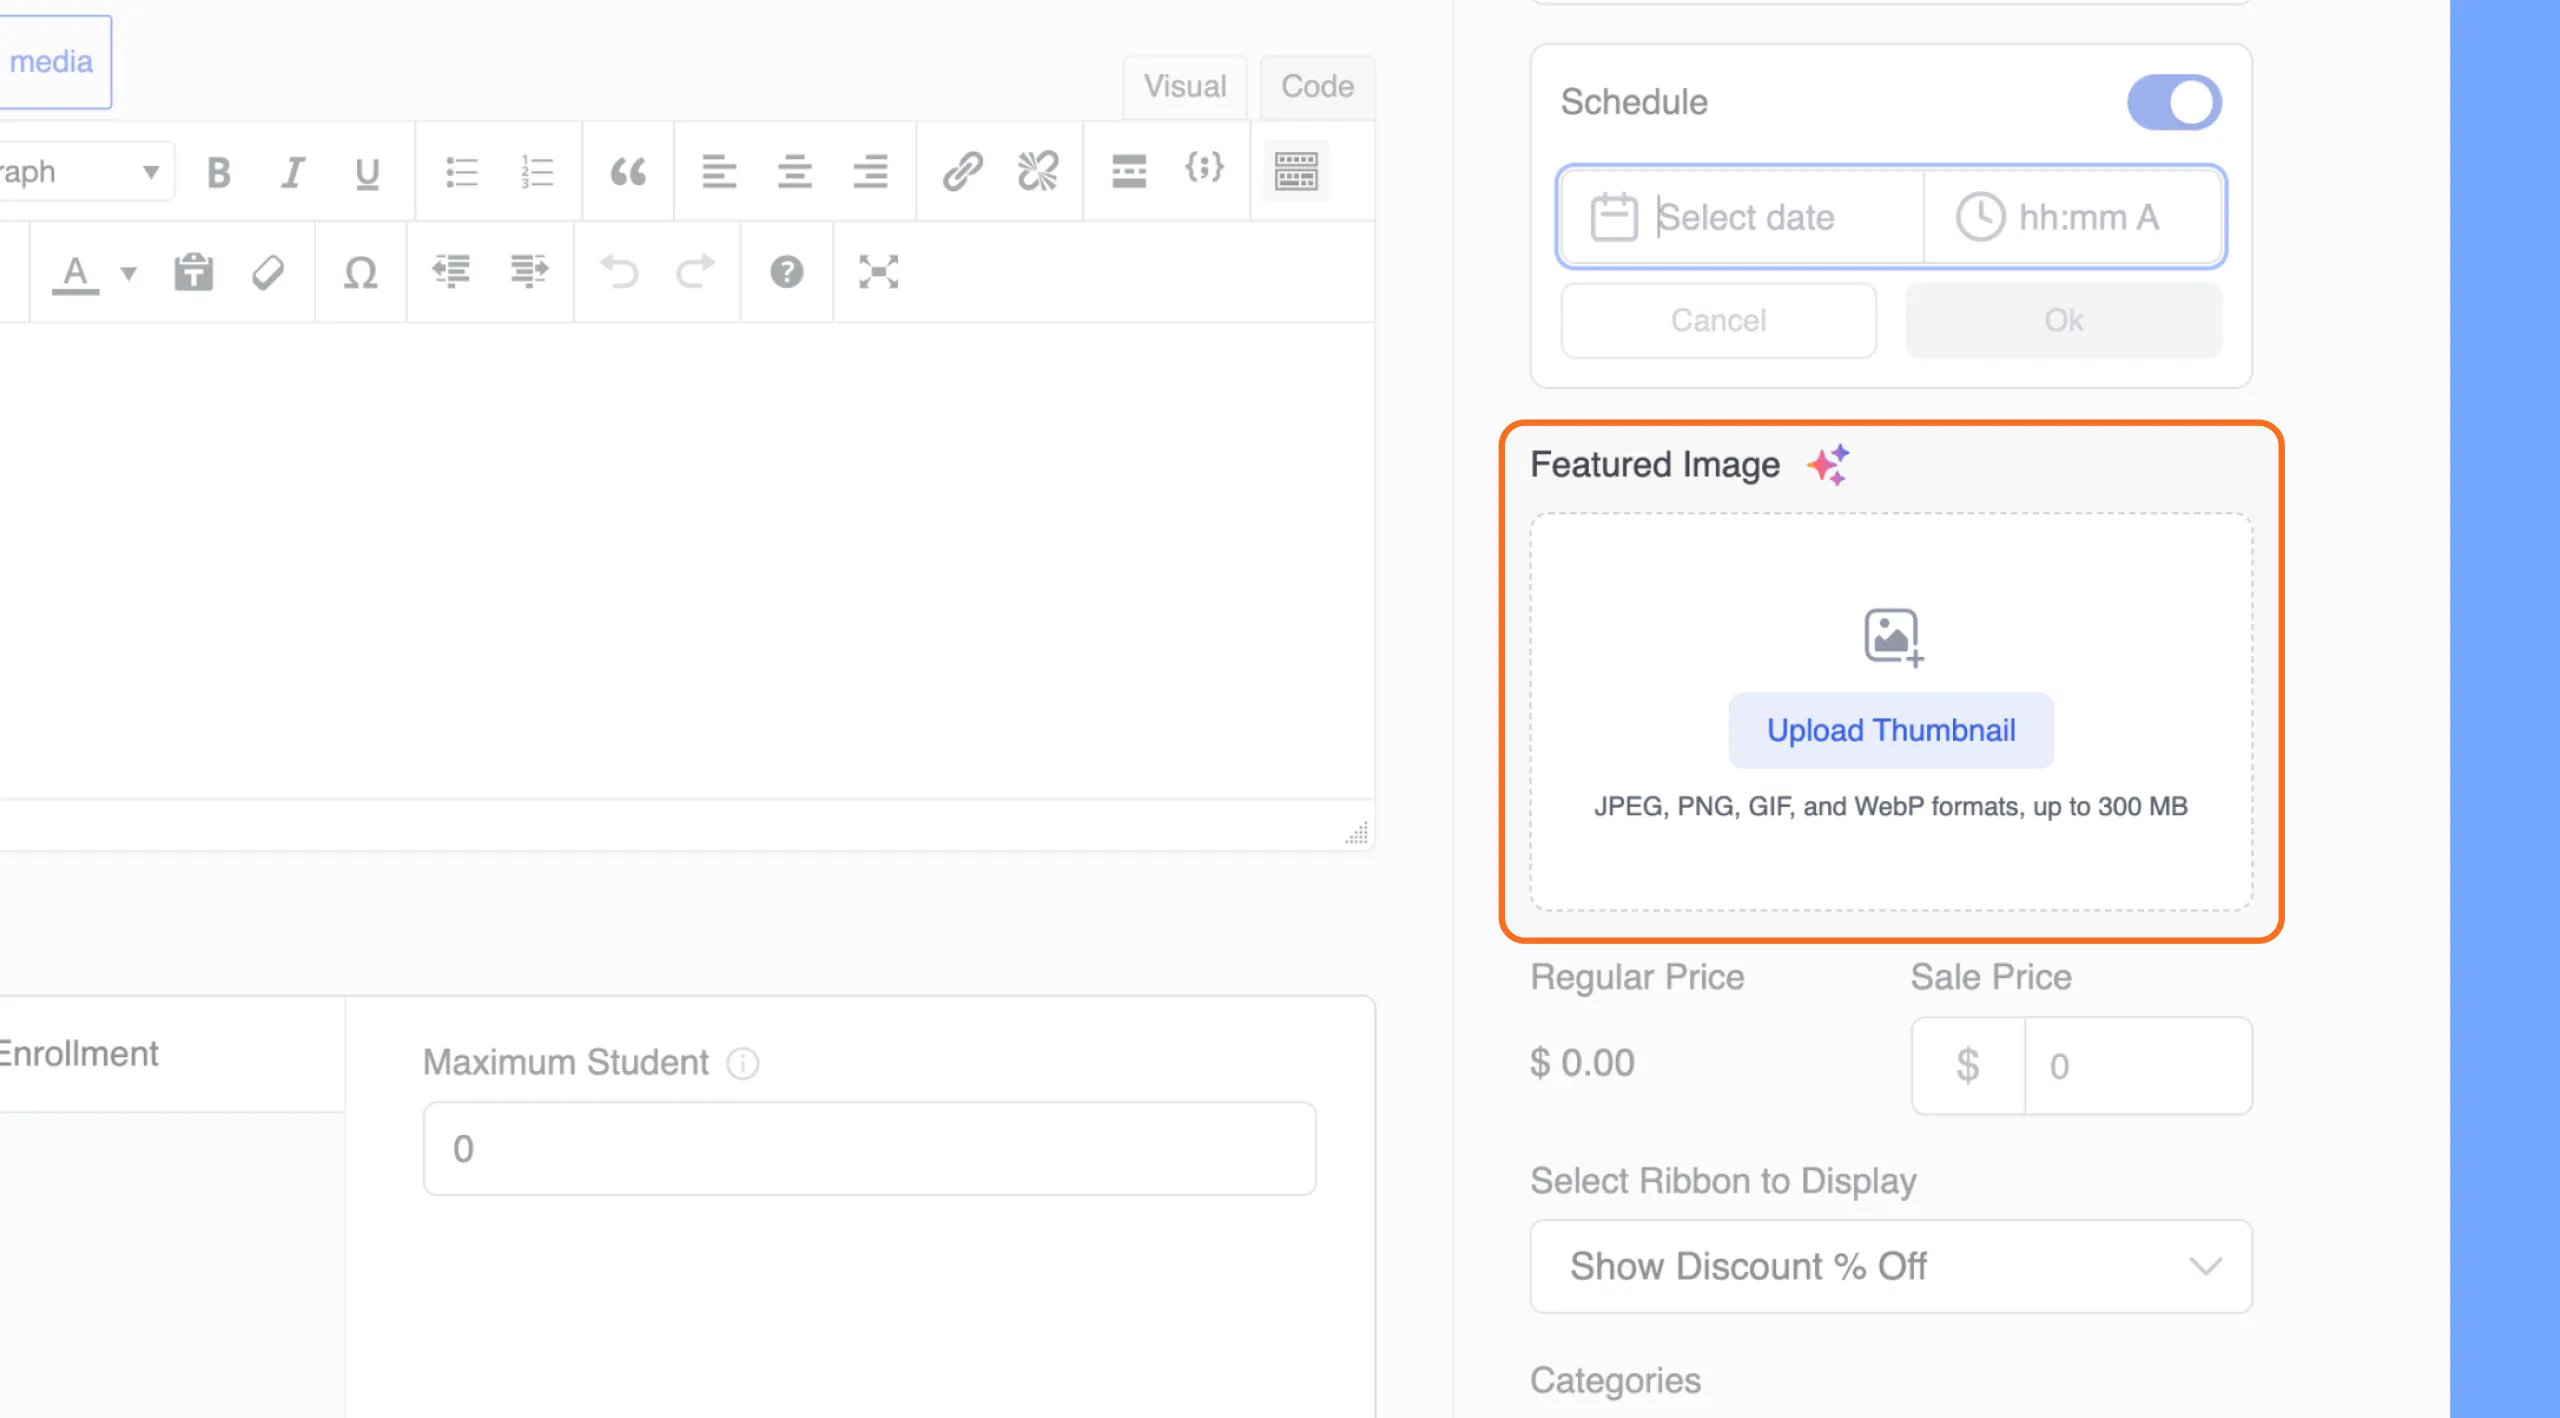
- Featured Image: Click Upload Thumbnail to upload a cover image (supports JPEG, PNG, GIF, and WebP formats up to 300 MB).
Purchase Options & Pricing
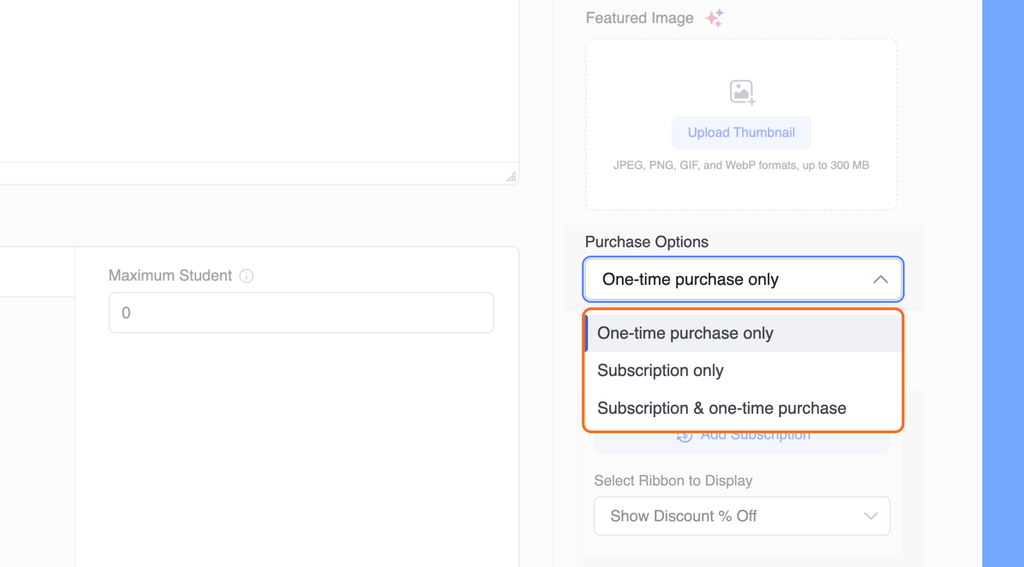
Select how you want to monetize the bundle:
- One-time purchase only: Learners purchase lifetime or fixed-duration access for a single payment.
- Subscription only: The bundle is accessible exclusively through recurring subscription plans.
- Subscription & one-time purchase: Gives learners the flexibility to choose between a one-time payment and a recurring subscription plan.
Note: For a step-by-step guide on creating and configuring recurring plans, billing cycles, enrollment fees, and tiered pricing, please refer to the Tutor LMS Subscriptions Documentation.
- Pricing (One-Time Purchase):
- Regular Price: Automatically calculated by summing the individual prices of all selected courses in the bundle.
- Sale Price (Optional): Enter a discounted price to incentivize bundle purchases over individual course enrollments.
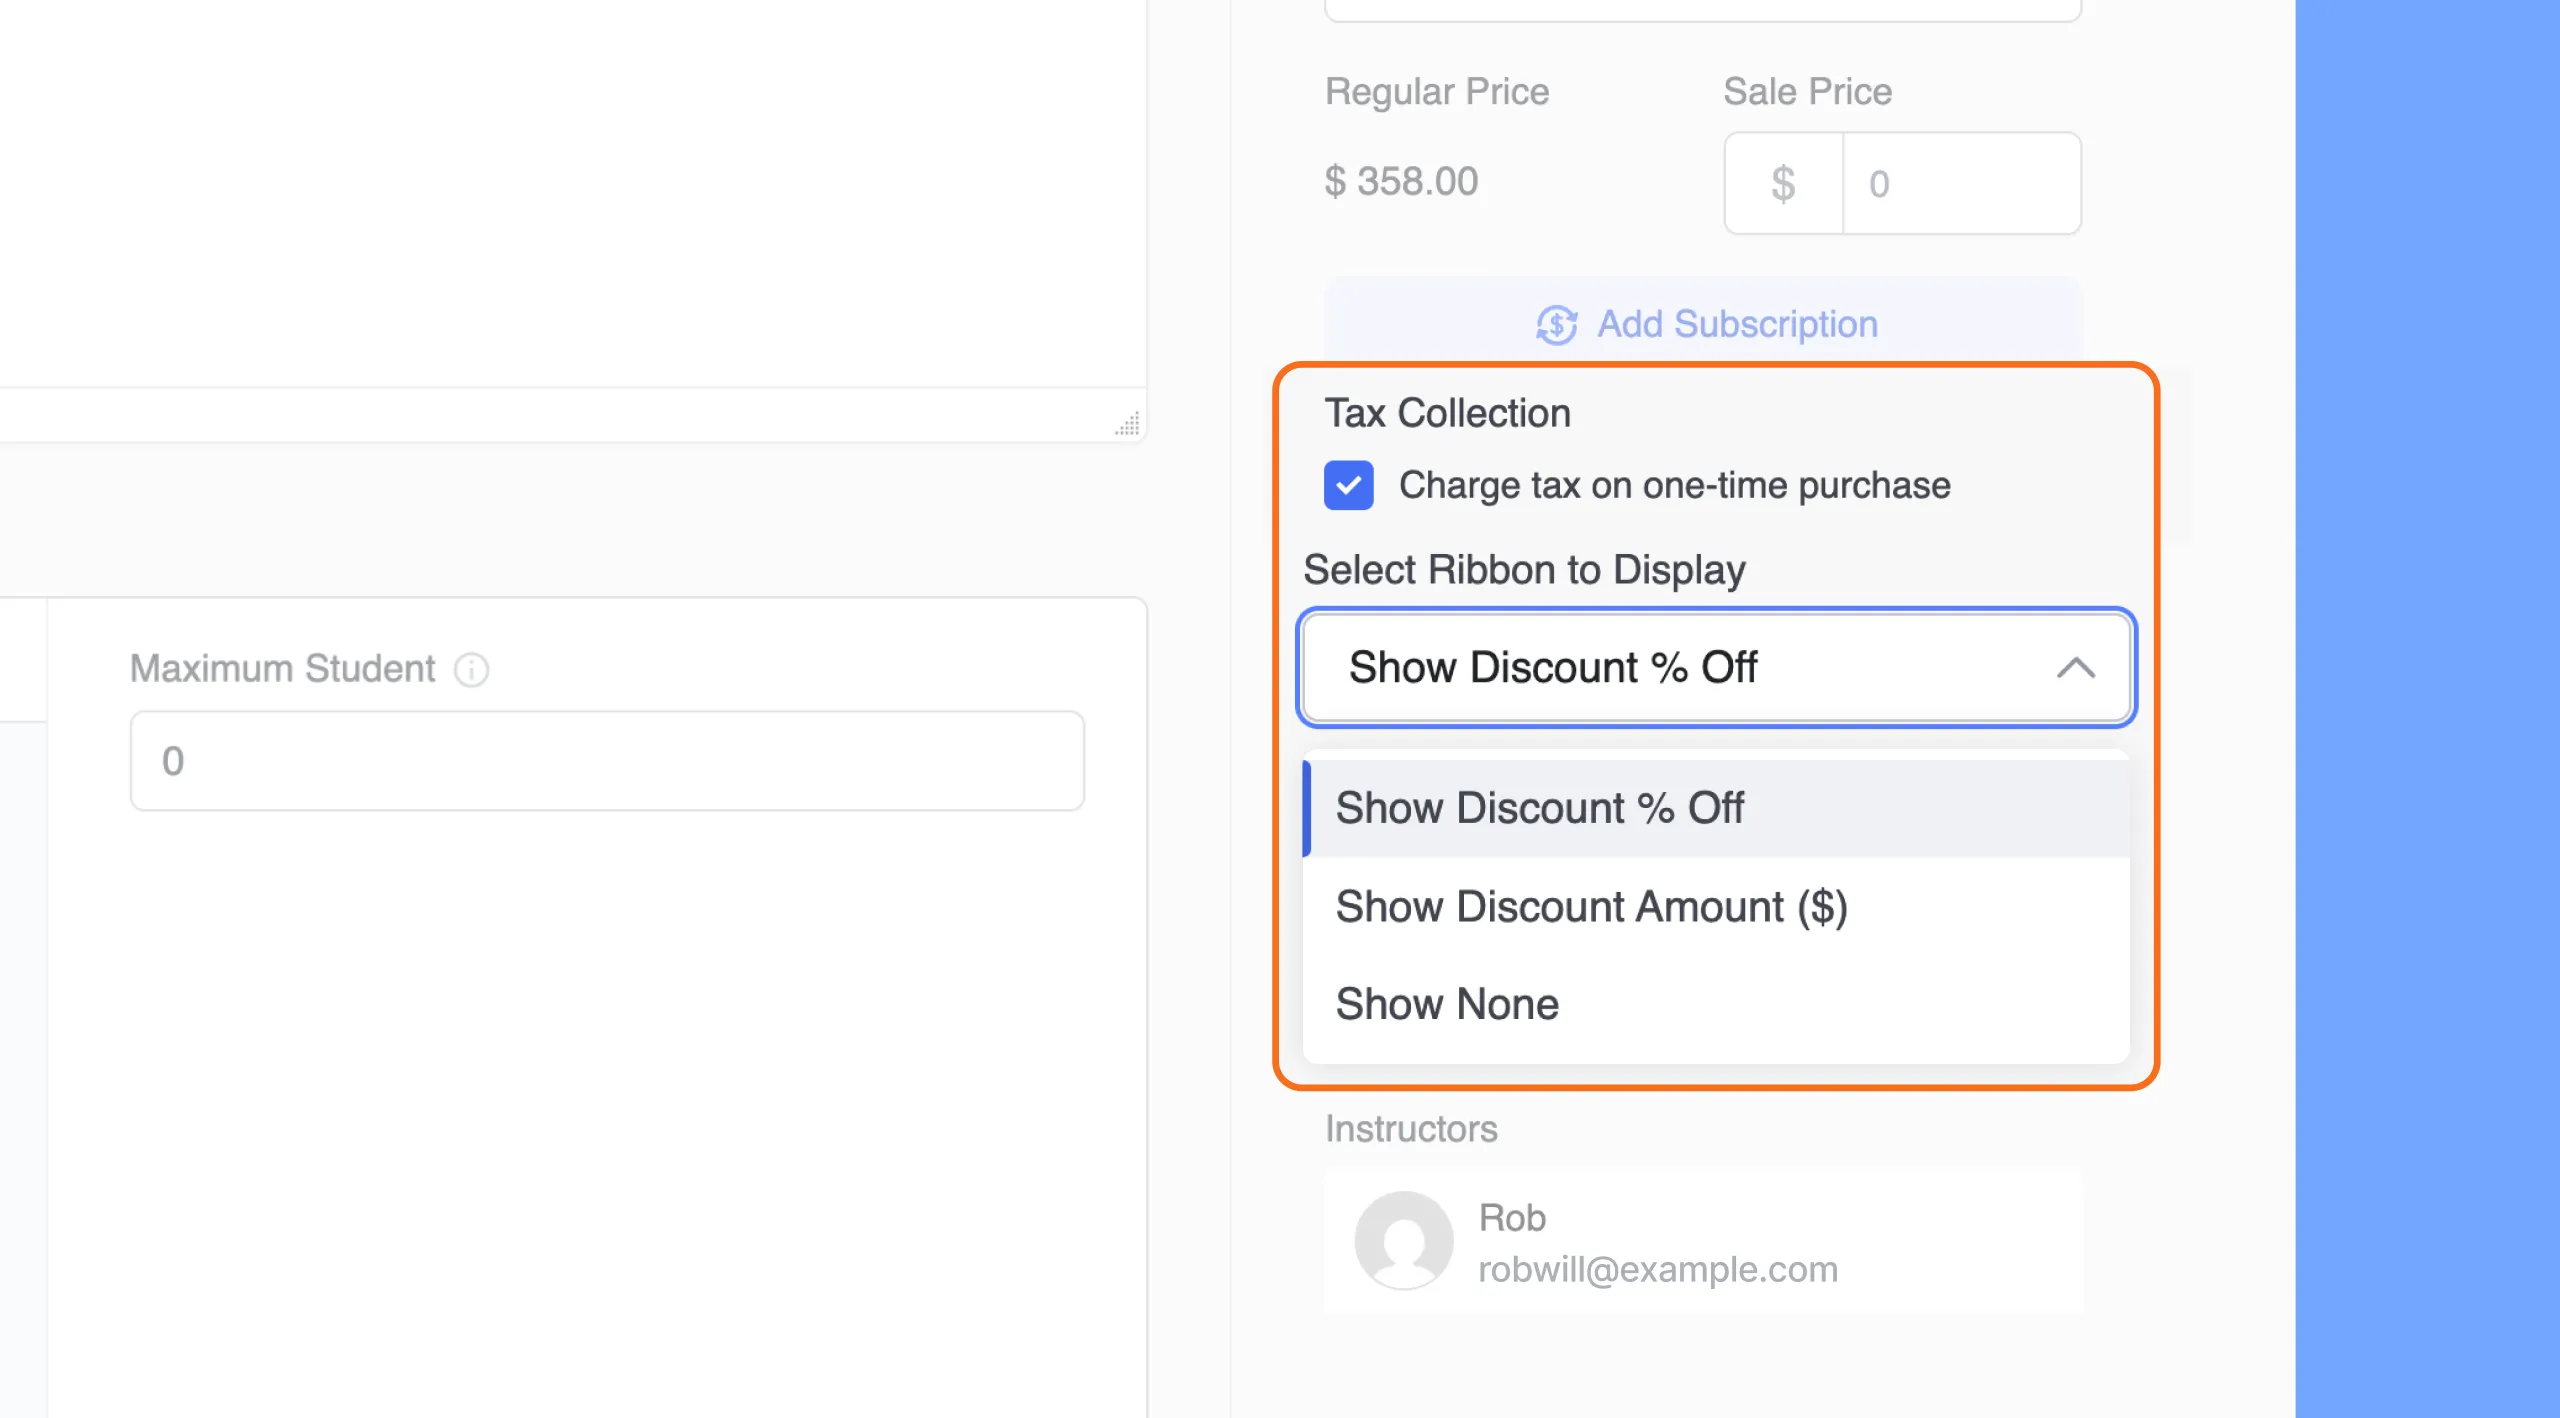
- Tax Collection: Select Charge tax on one-time purchase and/or Charge tax on subscription to apply your site’s configured tax rates to bundle transactions.
Display & Organization
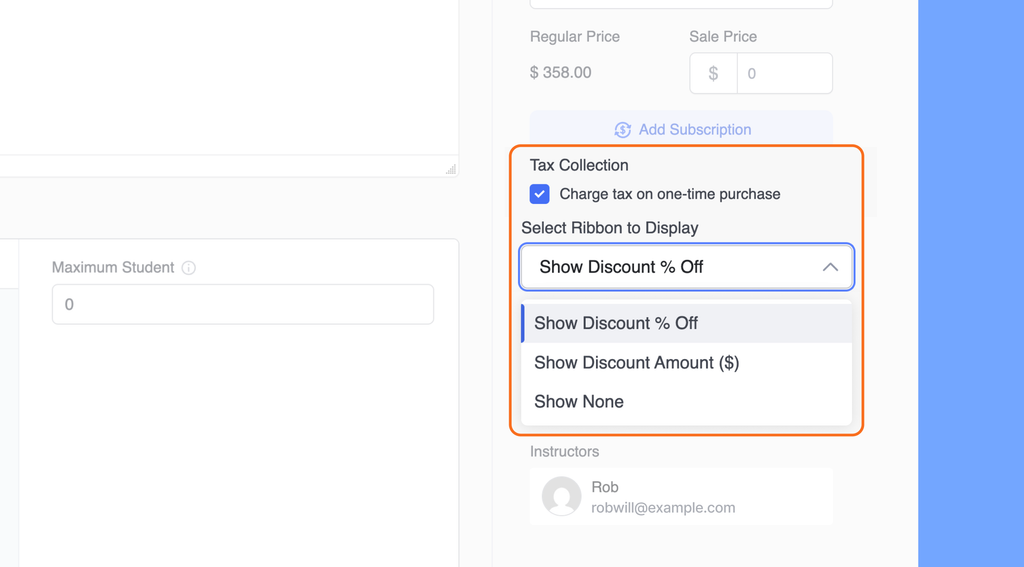
- Select Ribbon to Display: Highlight promotional badges on the bundle card:
- Show None
- Show Discount % Off: Displays a percentage-based savings badge.
- Show Discount Amount ($): Displays a fixed-amount savings badge.
- Categories: Assign your bundle to one or more categories. This helps organize your catalog and makes filtering easier for students.
- Instructors: Displays the primary instructor/author assigned to the bundle.
Once the basic settings are configured, click Next > in the bottom-right corner to proceed to the next step.
- Categories: Automatically populated based on the categories of the courses included in the bundle to help organize and filter it within your catalog.
- Instructors: Displays the primary instructor/author assigned to the bundle.
Once the basic settings are configured, click Next > in the bottom-right corner to proceed to the next step.
Step 4: Configure Additional Settings
The Additional tab allows you to configure learning outcomes and certificate options.
- What Will I Learn?
Enter the key takeaways, competencies, or benefits students will acquire upon completing the bundle. Enter one takeaway per line; these will be rendered as a bulleted checklist on the frontend bundle page.
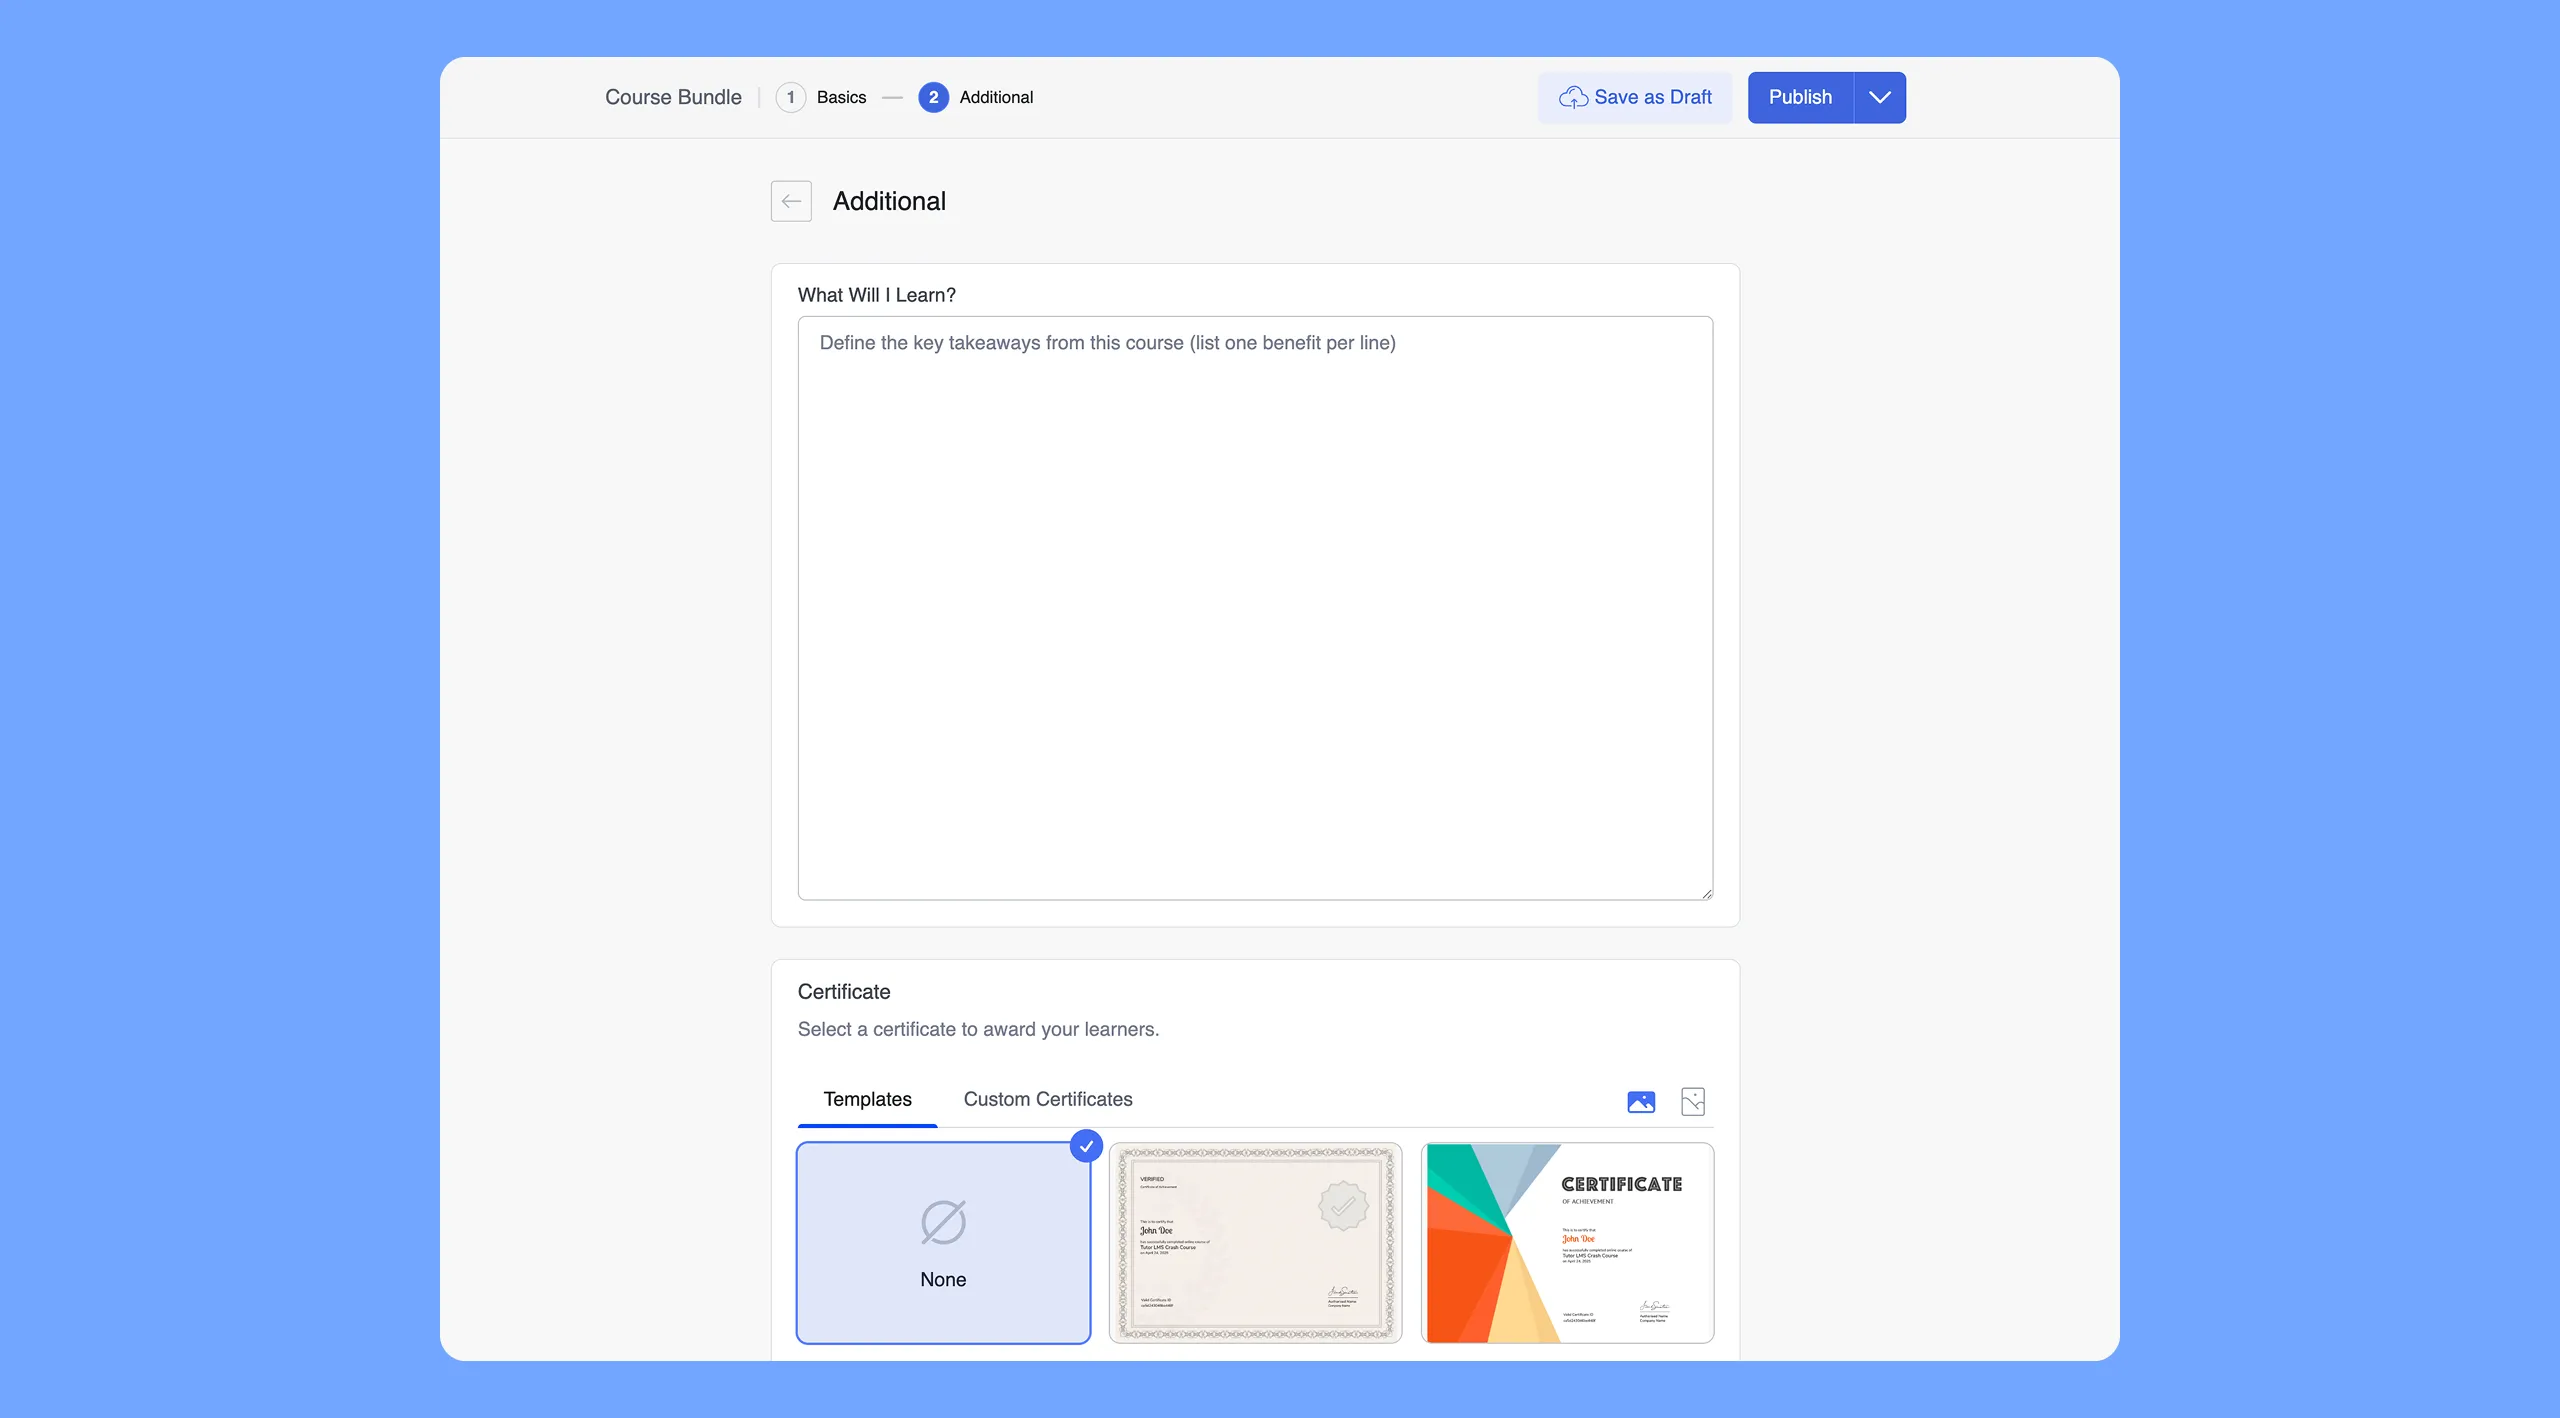
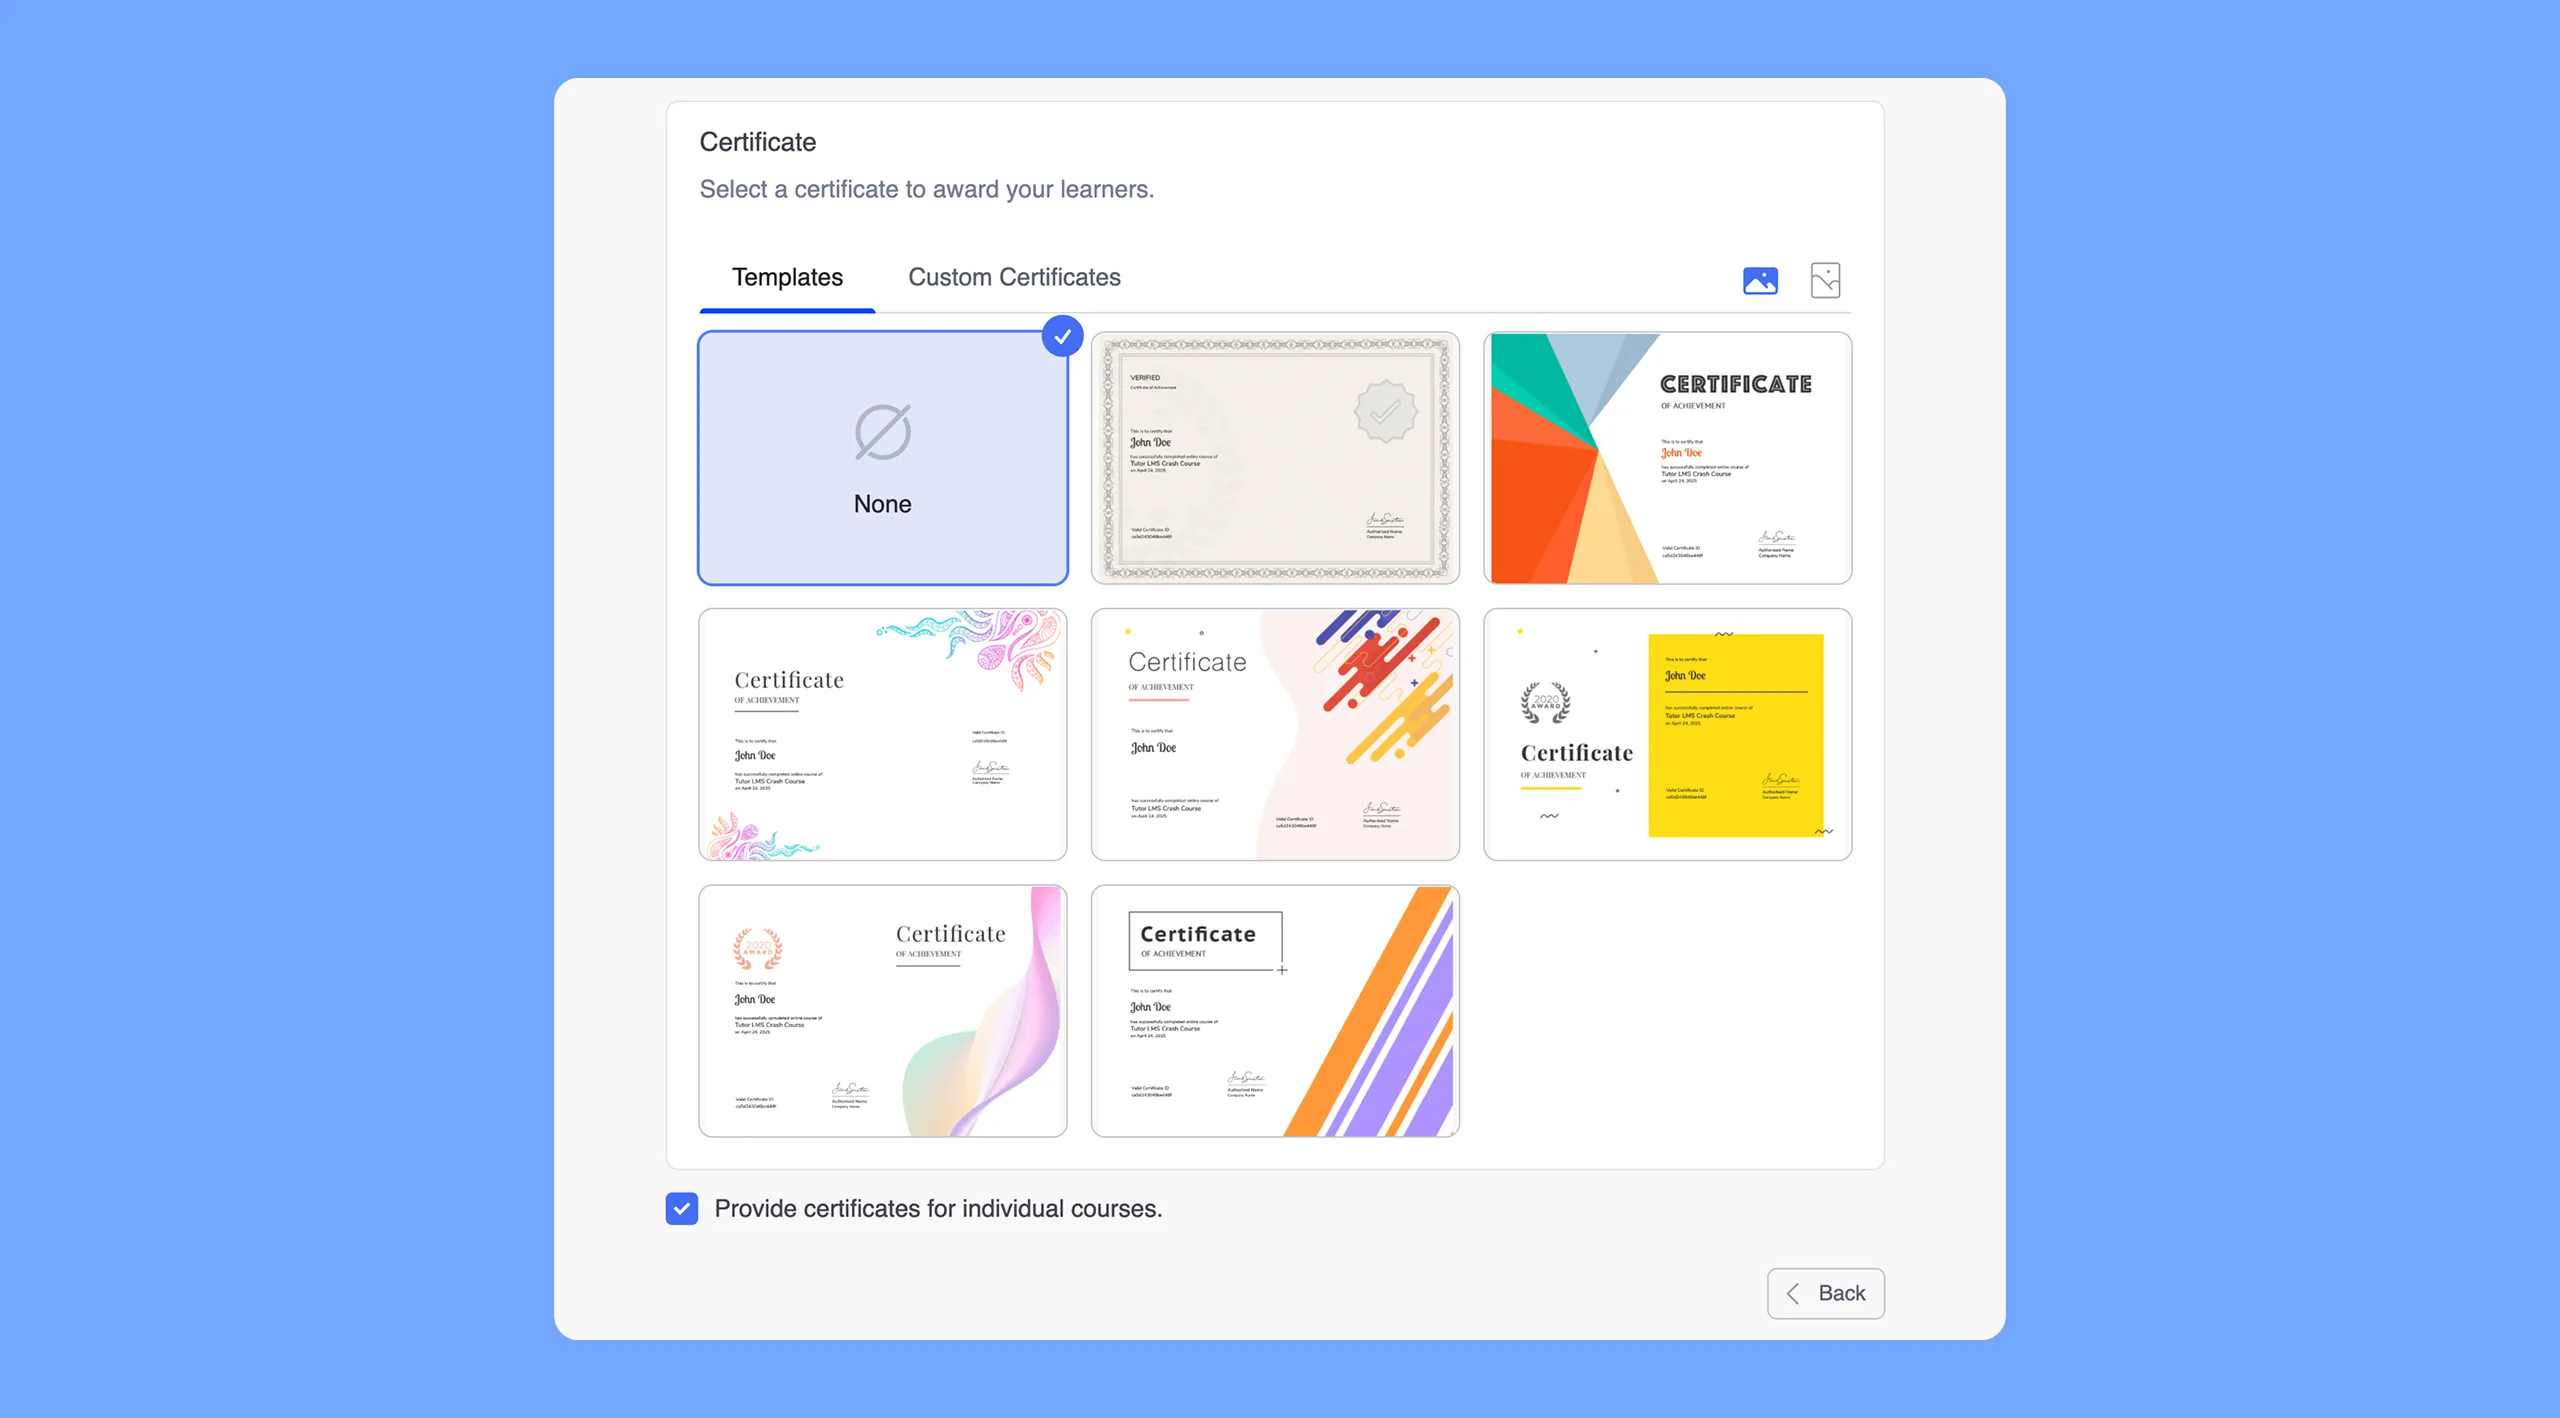
- Certificate
Choose whether and how certificates are awarded upon completing the bundle:
- None: No bundle-level certificate will be awarded.
- Templates: Choose from pre-built certificate designs (e.g., Default, Abstract Landscape, Decorative Landscape, Floating Landscape, Stripe Landscape).
- Custom Certificates: Select a custom certificate created with the Tutor LMS Certificate Builder. Hover over any design to click Preview (opens a full-screen sample view) or Select.
- Provide certificates for individual courses: Check this box if you want learners to receive completion certificates for each individual course completed within the bundle in addition to (or in place of) the master bundle certificate.
Step 5: Publish Your Course Bundle
In the top-right header of the builder, you have access to quick publication controls:
- Save as Draft: Saves all current settings without making the bundle live.
- Publish / Update: Immediately publishes the bundle to your site or updates an existing live bundle.
- Dropdown Options (Arrow next to Publish):
- Preview: Opens the frontend course bundle single page in a new tab to review the layout, course list, and pricing card.
- Move to Trash: Deletes the bundle.
- Legacy Mode: Switches from the modern builder interface to the classic WordPress backend editor if needed.
Preview the Bundle Course
Once your course bundle is published, students will be able to view and purchase it from your course catalog.
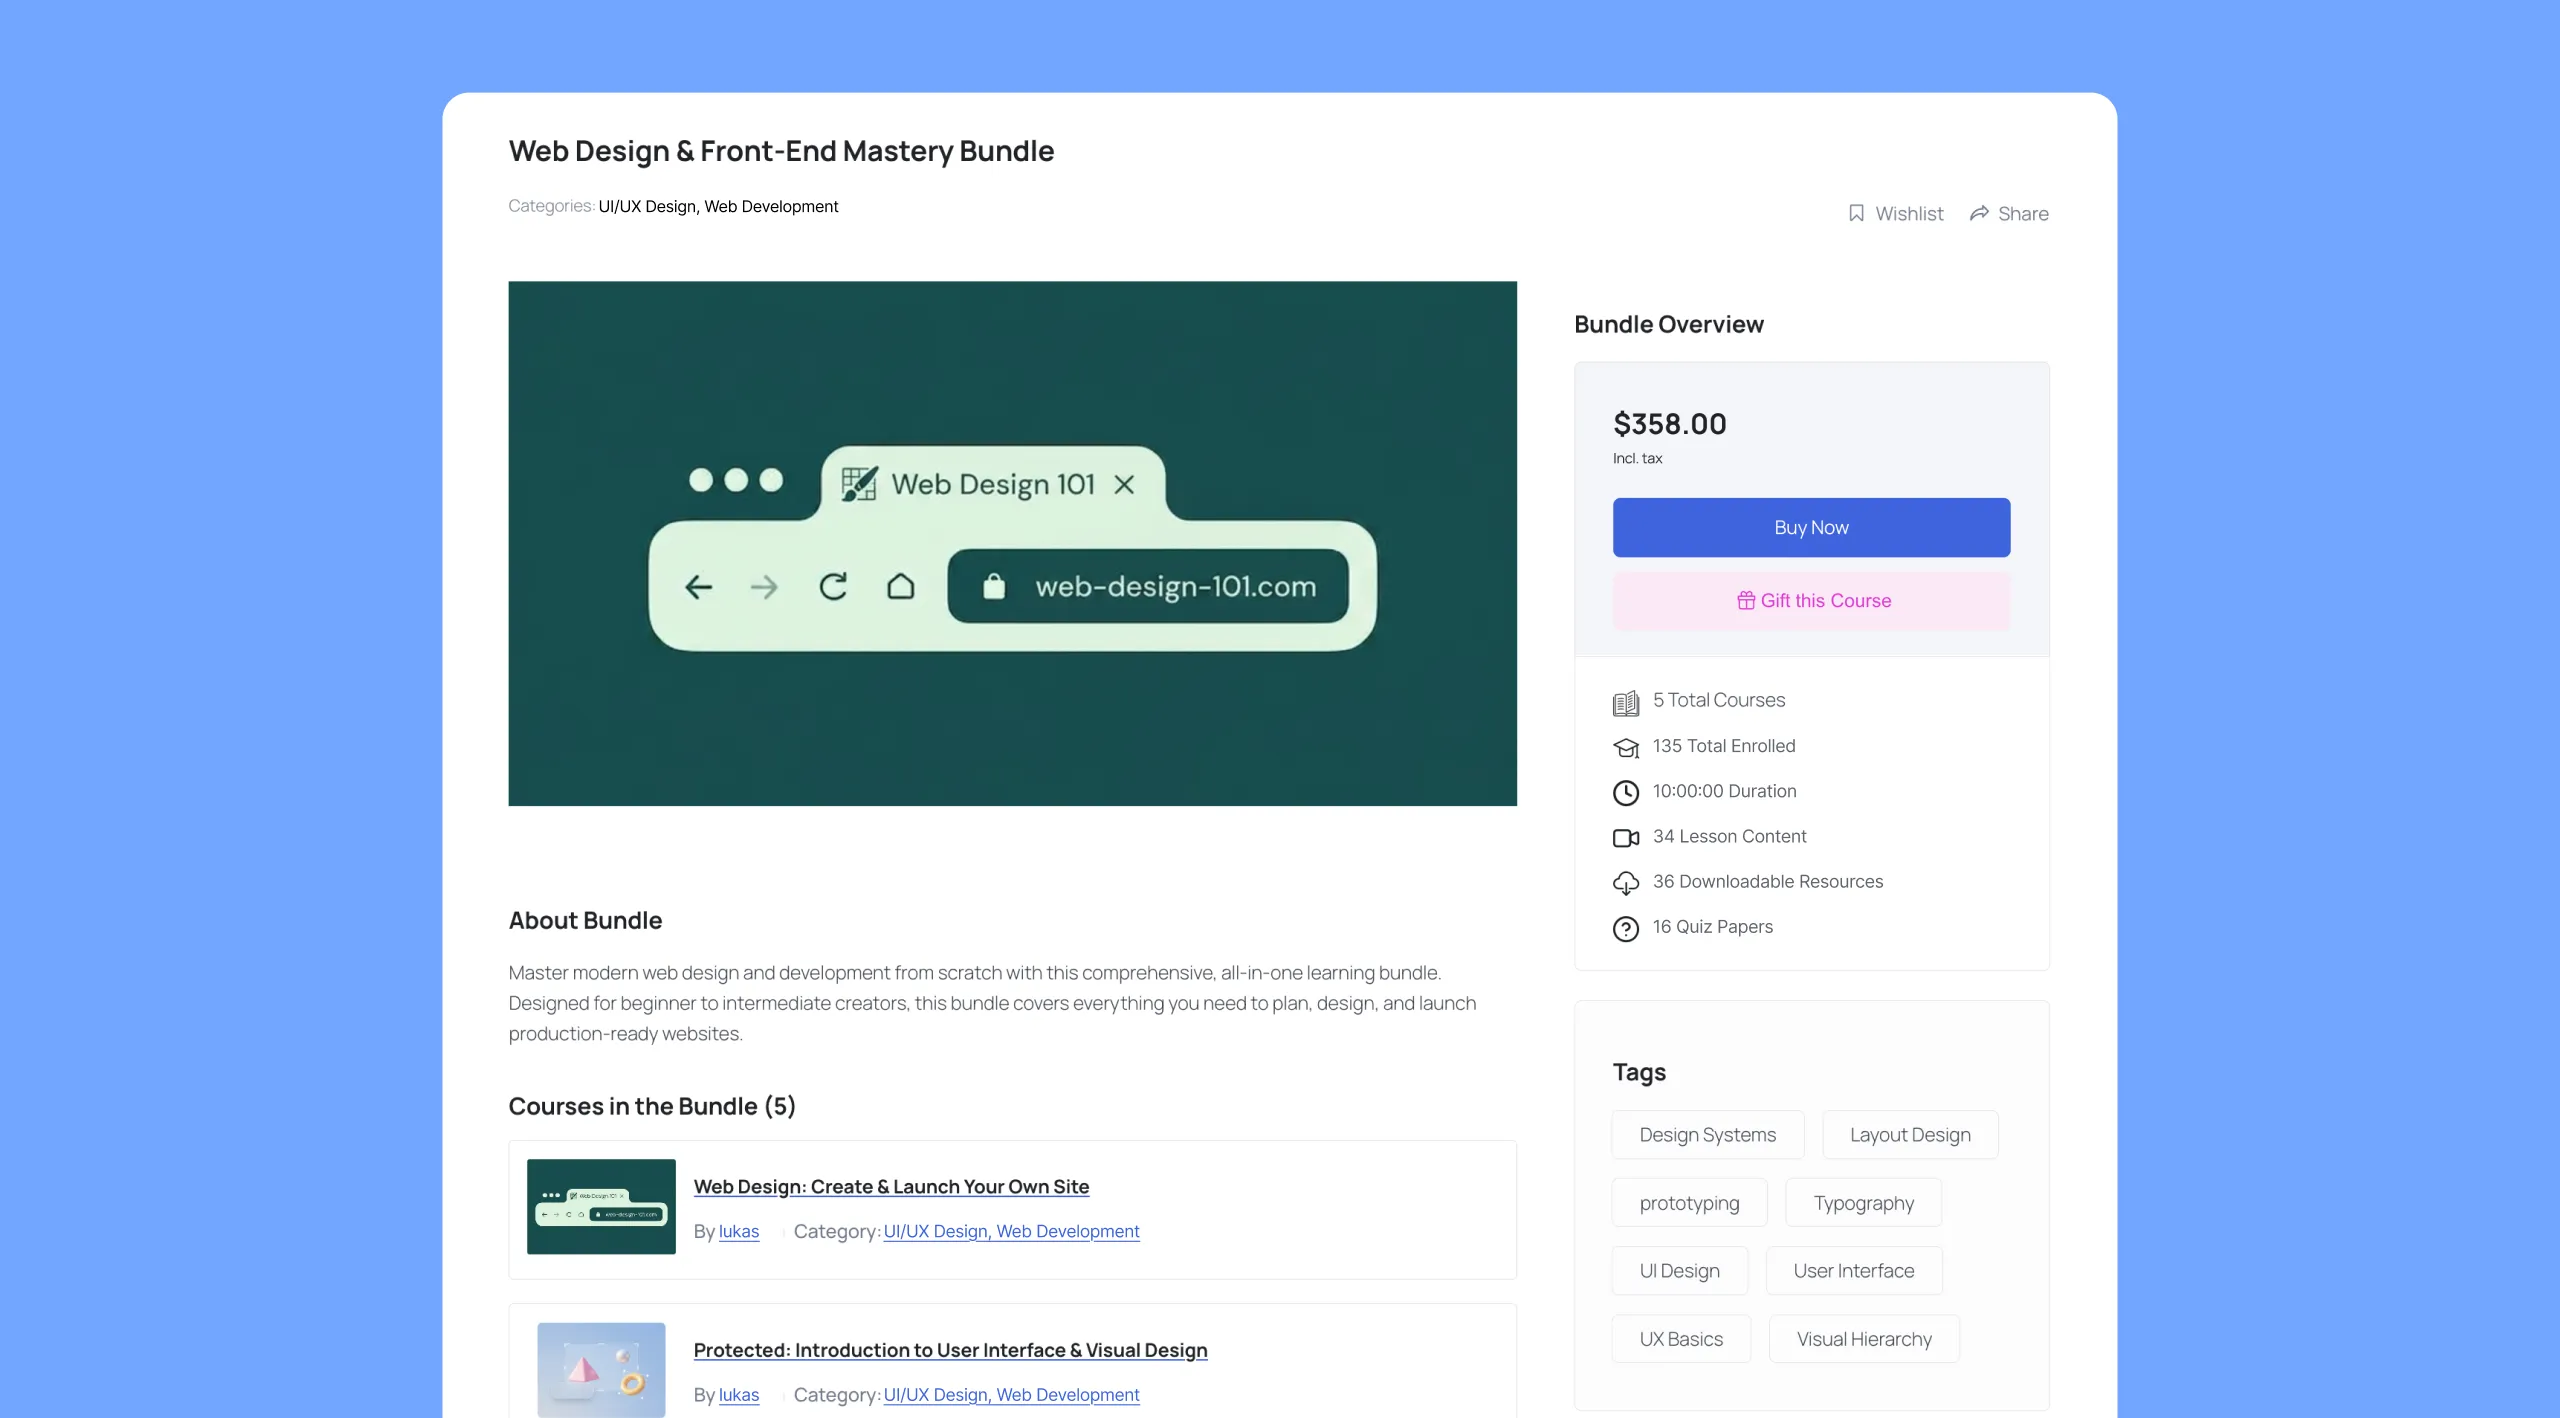
The frontend view highlights the bundle’s featured image, pricing/subscription options, the list of included courses, and the specific learning outcomes you configured in the steps above.
Important Notes
- Enrolled Students Restriction: Once student(s) are actively enrolled in a course bundle, you cannot add or remove individual courses from that bundle to prevent disruption to existing student learning paths and progress tracking.
- Prerequisites Logic: Prerequisites configured inside individual courses are bypassed when a user is enrolled via a bundle, granting access to all bundled content simultaneously.