Quiz Export/Import
The Quiz Export/Import addon allows you to export or import an existing quiz to be used later on in a Tutor LMS environment. This means you can reuse existing quiz material for a new quiz and also use it as a starting block, which saves you both time and effort.
To make it simpler to understand, let’s go with a scenario. Suppose you need to create a new quiz whose questions are quite similar to the ones in an existing quiz in the same course or a different one. Using the Import/Export feature, you can export the existing quiz in the form of a CSV file.
Then, you can simply visit the course where the new quiz will be and import the CSV file that you exported. You can then save the imported quiz as it is or even modify it to suit your needs.
Getting Started
Now, to get started with this addon, make sure you have the latest version of Tutor LMS, free & premium versions. Then, make sure you already have a quiz you can export. To learn how to do that, hop over to this documentation.
Prerequisites
Before you export or import a quiz, make sure your site meets these requirements:
- WordPress Version: WordPress 6.0 or higher
[VERIFY: minimum WordPress version in current docs] - Required Plugins: Tutor LMS (Free) and Tutor LMS Pro (latest versions installed and activated)
- Required Addon: Quiz Export/Import addon enabled under Tutor LMS Pro → Add-ons
- User Role: Administrator or Instructor
Enable Quiz Export/Import from the Addons
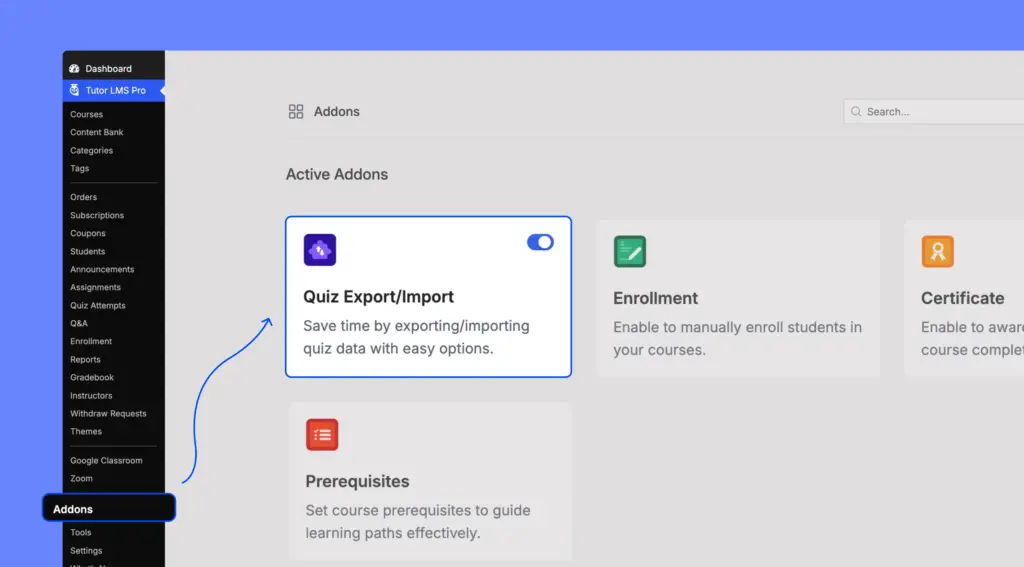
Next, to access the Quiz Export/Import features, you need to first enable the addon. To do this, navigate to WP Admin > Tutor LMS Pro > Addons and enable the Quiz Export/Import by clicking on the toggle button below it.
Export Quiz
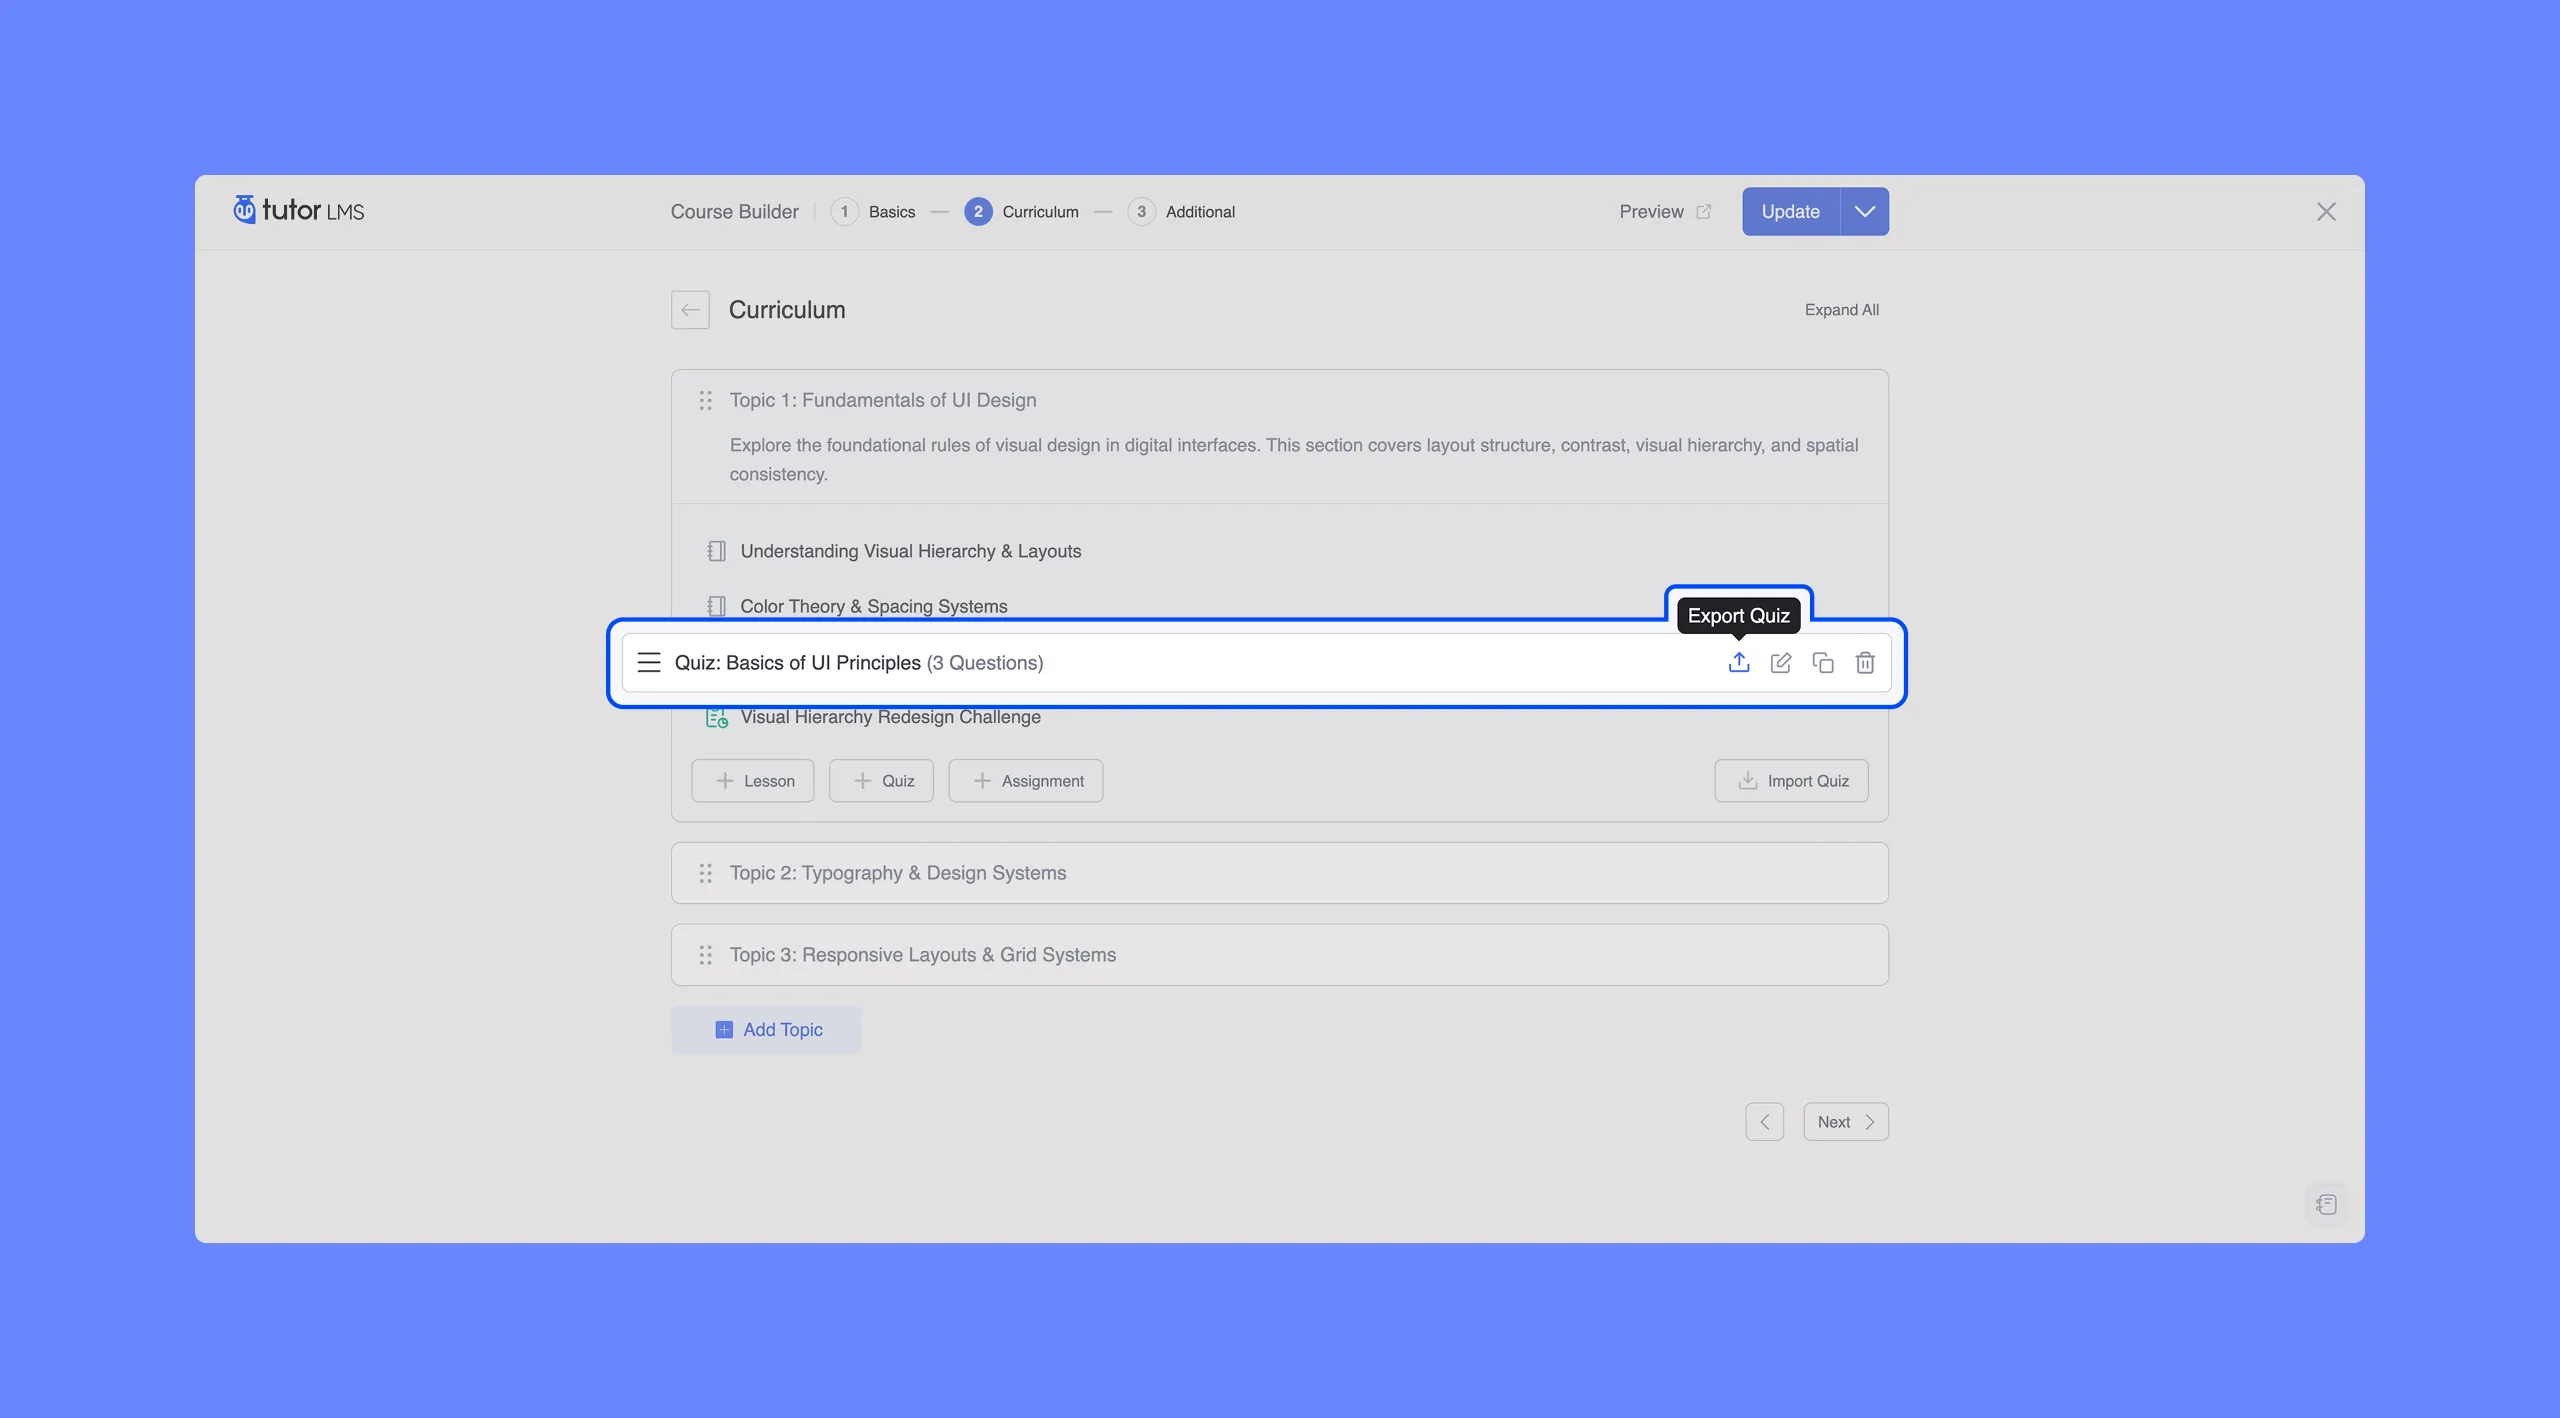
Once you’ve enabled the addon, visit the course that has the quiz you want to export in edit mode. In the Course Builder, locate the quiz, and you’ll find the Export Quiz icon on the right side.
Once you click on it, your quiz will be exported as a CSV file format to your local device.
Import Quiz
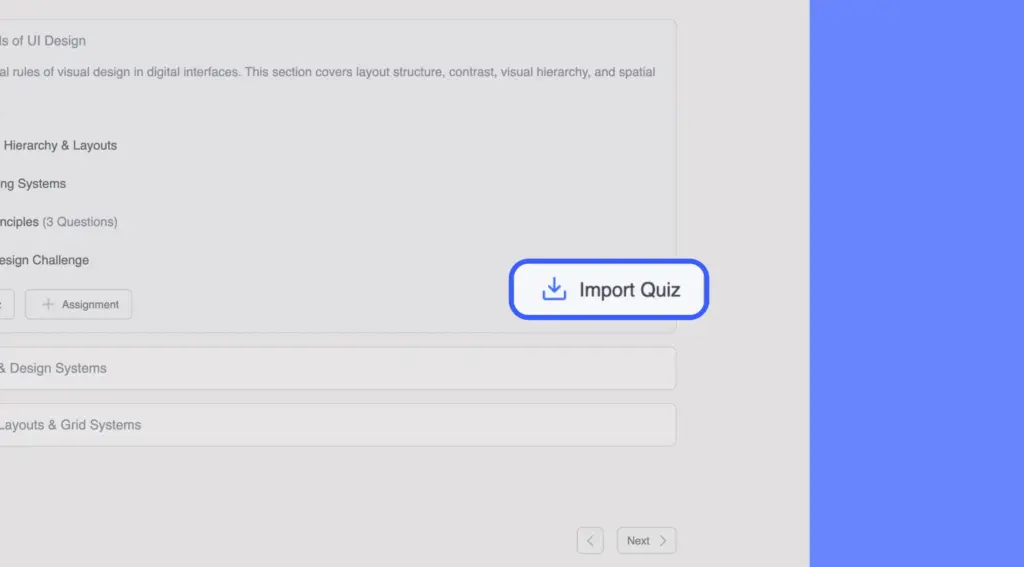
Next, it’s time to Import a Quiz. Create a new course or enter an existing one in edit mode. In the Course Builder, you’ll find the Import Quiz button.
Finally, click on the Import Quiz button and it will open the file manager dialog box. Now, select the file you want to upload and it will import the quiz.
Finish off by clicking on Publish/Update to save everything.
Understanding the Exported CSV File
When you export a quiz from Tutor LMS, the system downloads it as a CSV (Comma-Separated Values) file. This file contains the quiz settings, questions, and their corresponding answers.
You can open the CSV file using spreadsheet applications such as Microsoft Excel or Google Sheets. Each row represents a specific part of the quiz, while the columns contain the properties associated with that part.
A typical quiz CSV file contains three types of information:
- Quiz settings: Contains the quiz title, description, time limit, passing grade, and other configuration options.
- Question rows: Contains the question title, description, question type, marks, and other question-specific settings.
- Answer rows: Contains the available answers, answer types, correctness information, and other answer-specific properties.
The Row Type property identifies whether a row contains question or answer information. A question row uses question, while an answer row uses answer.
Each question can have multiple answer rows, depending on the question type. These rows contain the answer options or values associated with that question.
Editing an Exported CSV File
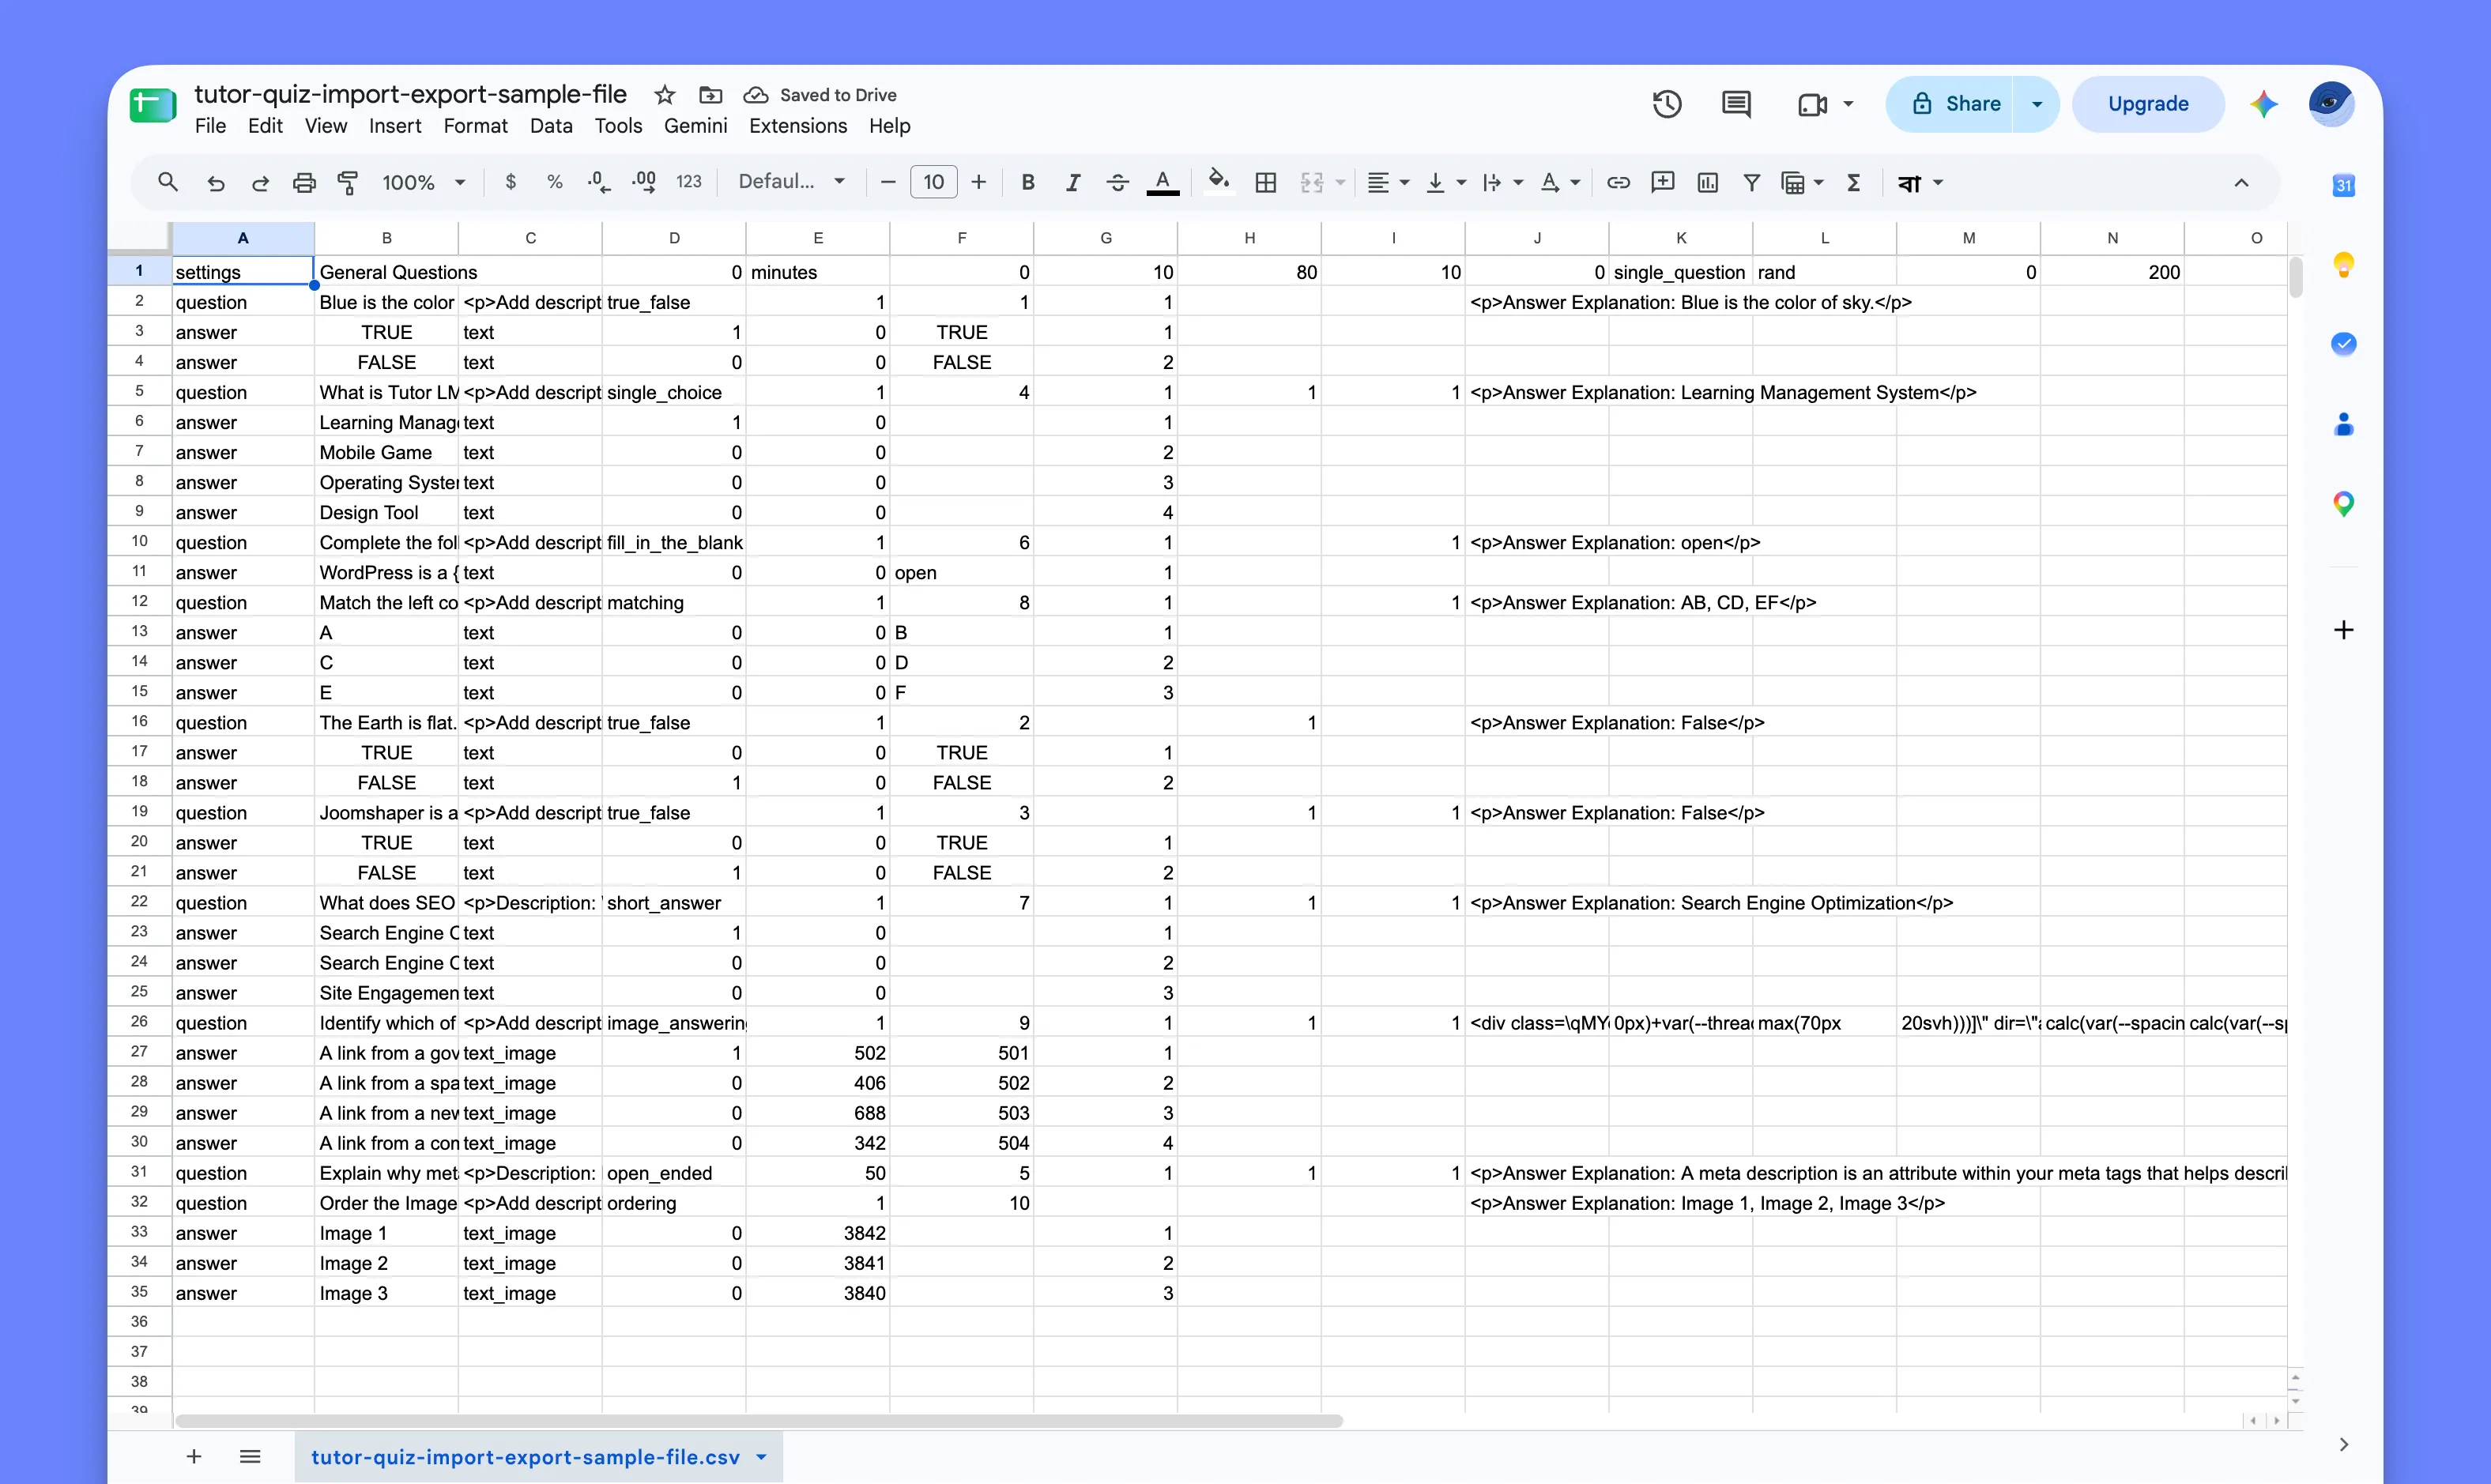
You can open an exported .csv file in Google Sheets or Microsoft Excel to edit questions in bulk or build a new quiz before importing it into Tutor LMS.
- Open Google Sheets or Microsoft Excel and go to File → Open → Upload.
- Select your exported
.csvquiz file to load the data into the spreadsheet. - Update the quiz settings in Row 1, or edit the
questionandanswerrows below it. - Save or download the file in
.csv(Comma-Separated Values) format before importing it back into Tutor LMS.
Tip: If you are unsure how a specific question type is formatted, create a sample quiz with that question type inside the Quiz Builder first. Export that quiz as a CSV file and open it in your spreadsheet editor to use as a template.
Guidelines for Editing the CSV
A Tutor LMS quiz CSV file uses different rows to store quiz settings, questions, and answers. Each column holds a specific property, but its purpose can change depending on the row type.
The following table explains what each column contains:
| Column | What It Contains |
|---|---|
| A – Row Type |
Identifies the row as settings (always Row 1), question, or answer.
|
| B – Title |
|
| C – Description / Answer Type |
|
| D – Time Limit / Question Type / Is Correct |
|
| E – Time Type / Marks / Image ID |
|
| F – Hide Quiz Time / Question Order / Match Value |
|
| G – Attempts / Required / Answer Order |
|
| H – Passing Grade / Randomize Answers |
|
| I – Question Limit / Show Points |
|
| J – Shuffle Questions / Answer Explanation |
|
| K – Question Layout |
settings only: Defines how questions appear in the quiz (e.g., single_question).
|
| L – Question Order |
settings only: Sets the overall question sorting method (e.g., rand or sorting).
|
| M – Short Answer Character Limit |
settings only: Sets the maximum character limit for short-answer responses (or 0 for default).
|
| N – Open-Ended Character Limit |
settings only: Sets the maximum character limit for open-ended/essay responses (e.g., 200).
|
Before importing your updated file, double-check that every choice-based question has its answer rows directly beneath it. Refer to the CSV Property Reference below for exact column details, or download the sample CSV file as a guide.
Sample CSV Download
You can download the sample CSV file from the button below and use it as a reference while creating your own quiz import file.
CSV Property Reference
In this section, we’ll share all the properties you can use to create a custom CSV file.
Supported Question Types
Here are the supported question types of Tutor LMS:
| Question Type | Description |
true_false | True or False question |
single_choice | Single correct answer |
fill_in_the_blank | Fill in the blank question |
matching | Matching pairs question |
short_answer | Short text answer |
image_answering | Image-based answer selection |
open_ended | Long descriptive answer |
ordering | Ordering or sequence question |
Quiz Settings Row
Here’s the list of properties you can use while preparing the CSV file.
| Property | Description |
| Quiz Title | Write the quiz question |
| Quiz Description | Optional quiz description |
| Time Limit | Quiz duration value |
| Time Type | Example: minutes, hours, days |
| Hide Quiz Time | Use 1 to hide time, 0 to show |
| Attempts Allowed | Maximum number of attempts |
| Passing Grade | Passing percentage |
| Question Display Limit | Number of questions shown |
| Shuffle Questions | Use 1 to enable, 0 to disable |
| Question Layout | Example: single_question |
| Question Order | Example: rand for random order |
| Short Answer Character Limit | Character limit for short answers |
| Open-Ended Character Limit | Minimum character count |
| Open-Ended Word Limit | Maximum word count |
| Retry Mode | Use retry |
Question Row Properties
Use the following properties to add different quiz settings:
| Property | Description |
| Row Type | Must be question |
| Question Title | The main quiz question |
| Question Description | Optional question description with HTML support |
| Question Type | Defines the question type |
| Marks | Marks assigned to the question |
| Question Order | Position of the question |
| Required | Use 1 for required |
| Randomize Answers | Use 1 to shuffle answers |
| Show Points | Use 1 to display points |
| Answer Explanation | Explanation shown after submission |
Answer Row Properties
| Property | Description |
| Row Type | Must be answer |
| Answer Title | Answer text or label |
| Answer Type | Example: text or text_image |
| Is Correct | Use 1 for correct answer, 0 for incorrect |
| Image Attachment ID | Required for image-based answers |
| Match or Correct Value | Used for matching and fill in the blank questions |
| Answer Order | Position of the answer |
Special Formatting Examples
Here are some special formatting options which you can use to customize the quiz questions and answers even more.
Fill in the Blank Format
Use curly braces {} to define the correct answer.
Example: WordPress is a {open} source platform.
Matching Question Format
Use the sixth column of the answer row to define the matching pair.
Example:
| Left Item | Matching Value |
| A | B |
| C | D |
Image Answering Questions
For image-based answers:
- Use
text_imageas the answer type. - Provide valid image attachment IDs.
- Make sure the images already exist in the WordPress media library.