Loco Translate
Tutor LMS is the most popular Learning Management System (LMS) plugin for WordPress. If you need to translate it into your local language, Loco Translate is one of the easiest plugins to use. This documentation will walk you through the entire process, from setup to testing and exporting your translations using Loco Translate.
1. Install Tutor LMS and Loco Translate
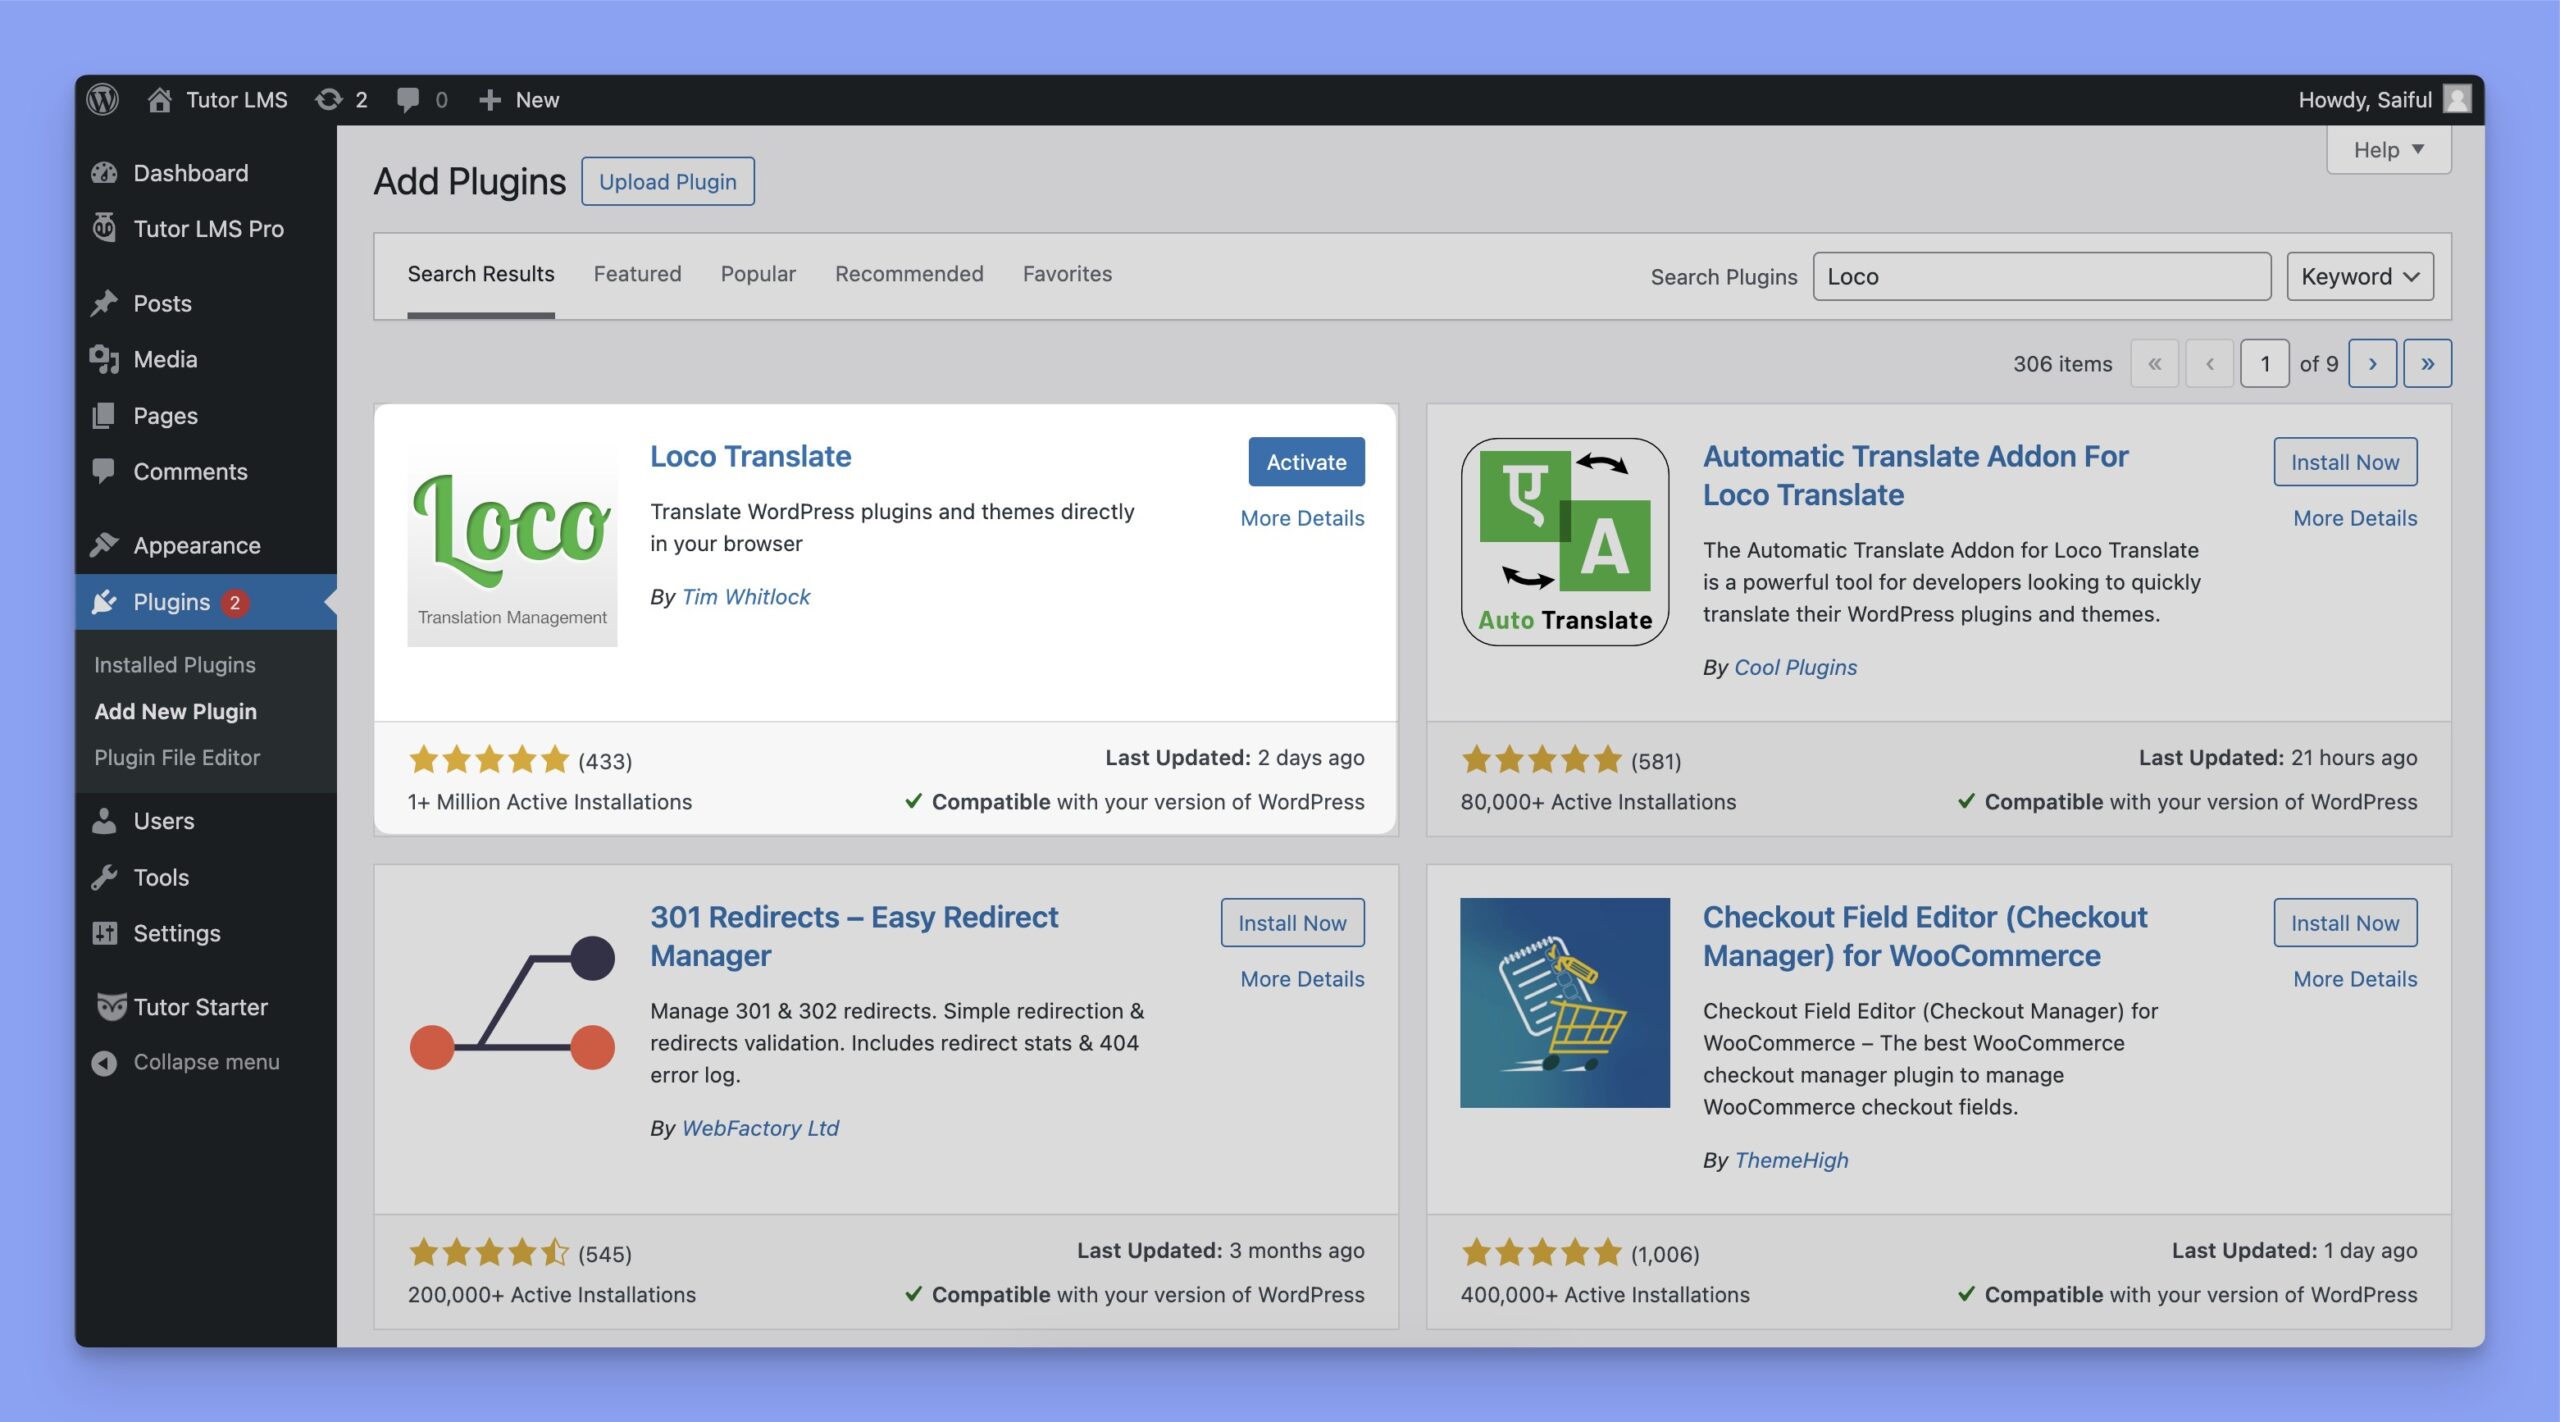
Before you begin, ensure that both Tutor LMS and Loco Translate are installed and activated on your WordPress website.
Tutor LMS provides the core functionality for creating and managing courses, while Loco Translate simplifies the process of translating plugins and themes.
2. Set Up Loco Translate for Tutor LMS
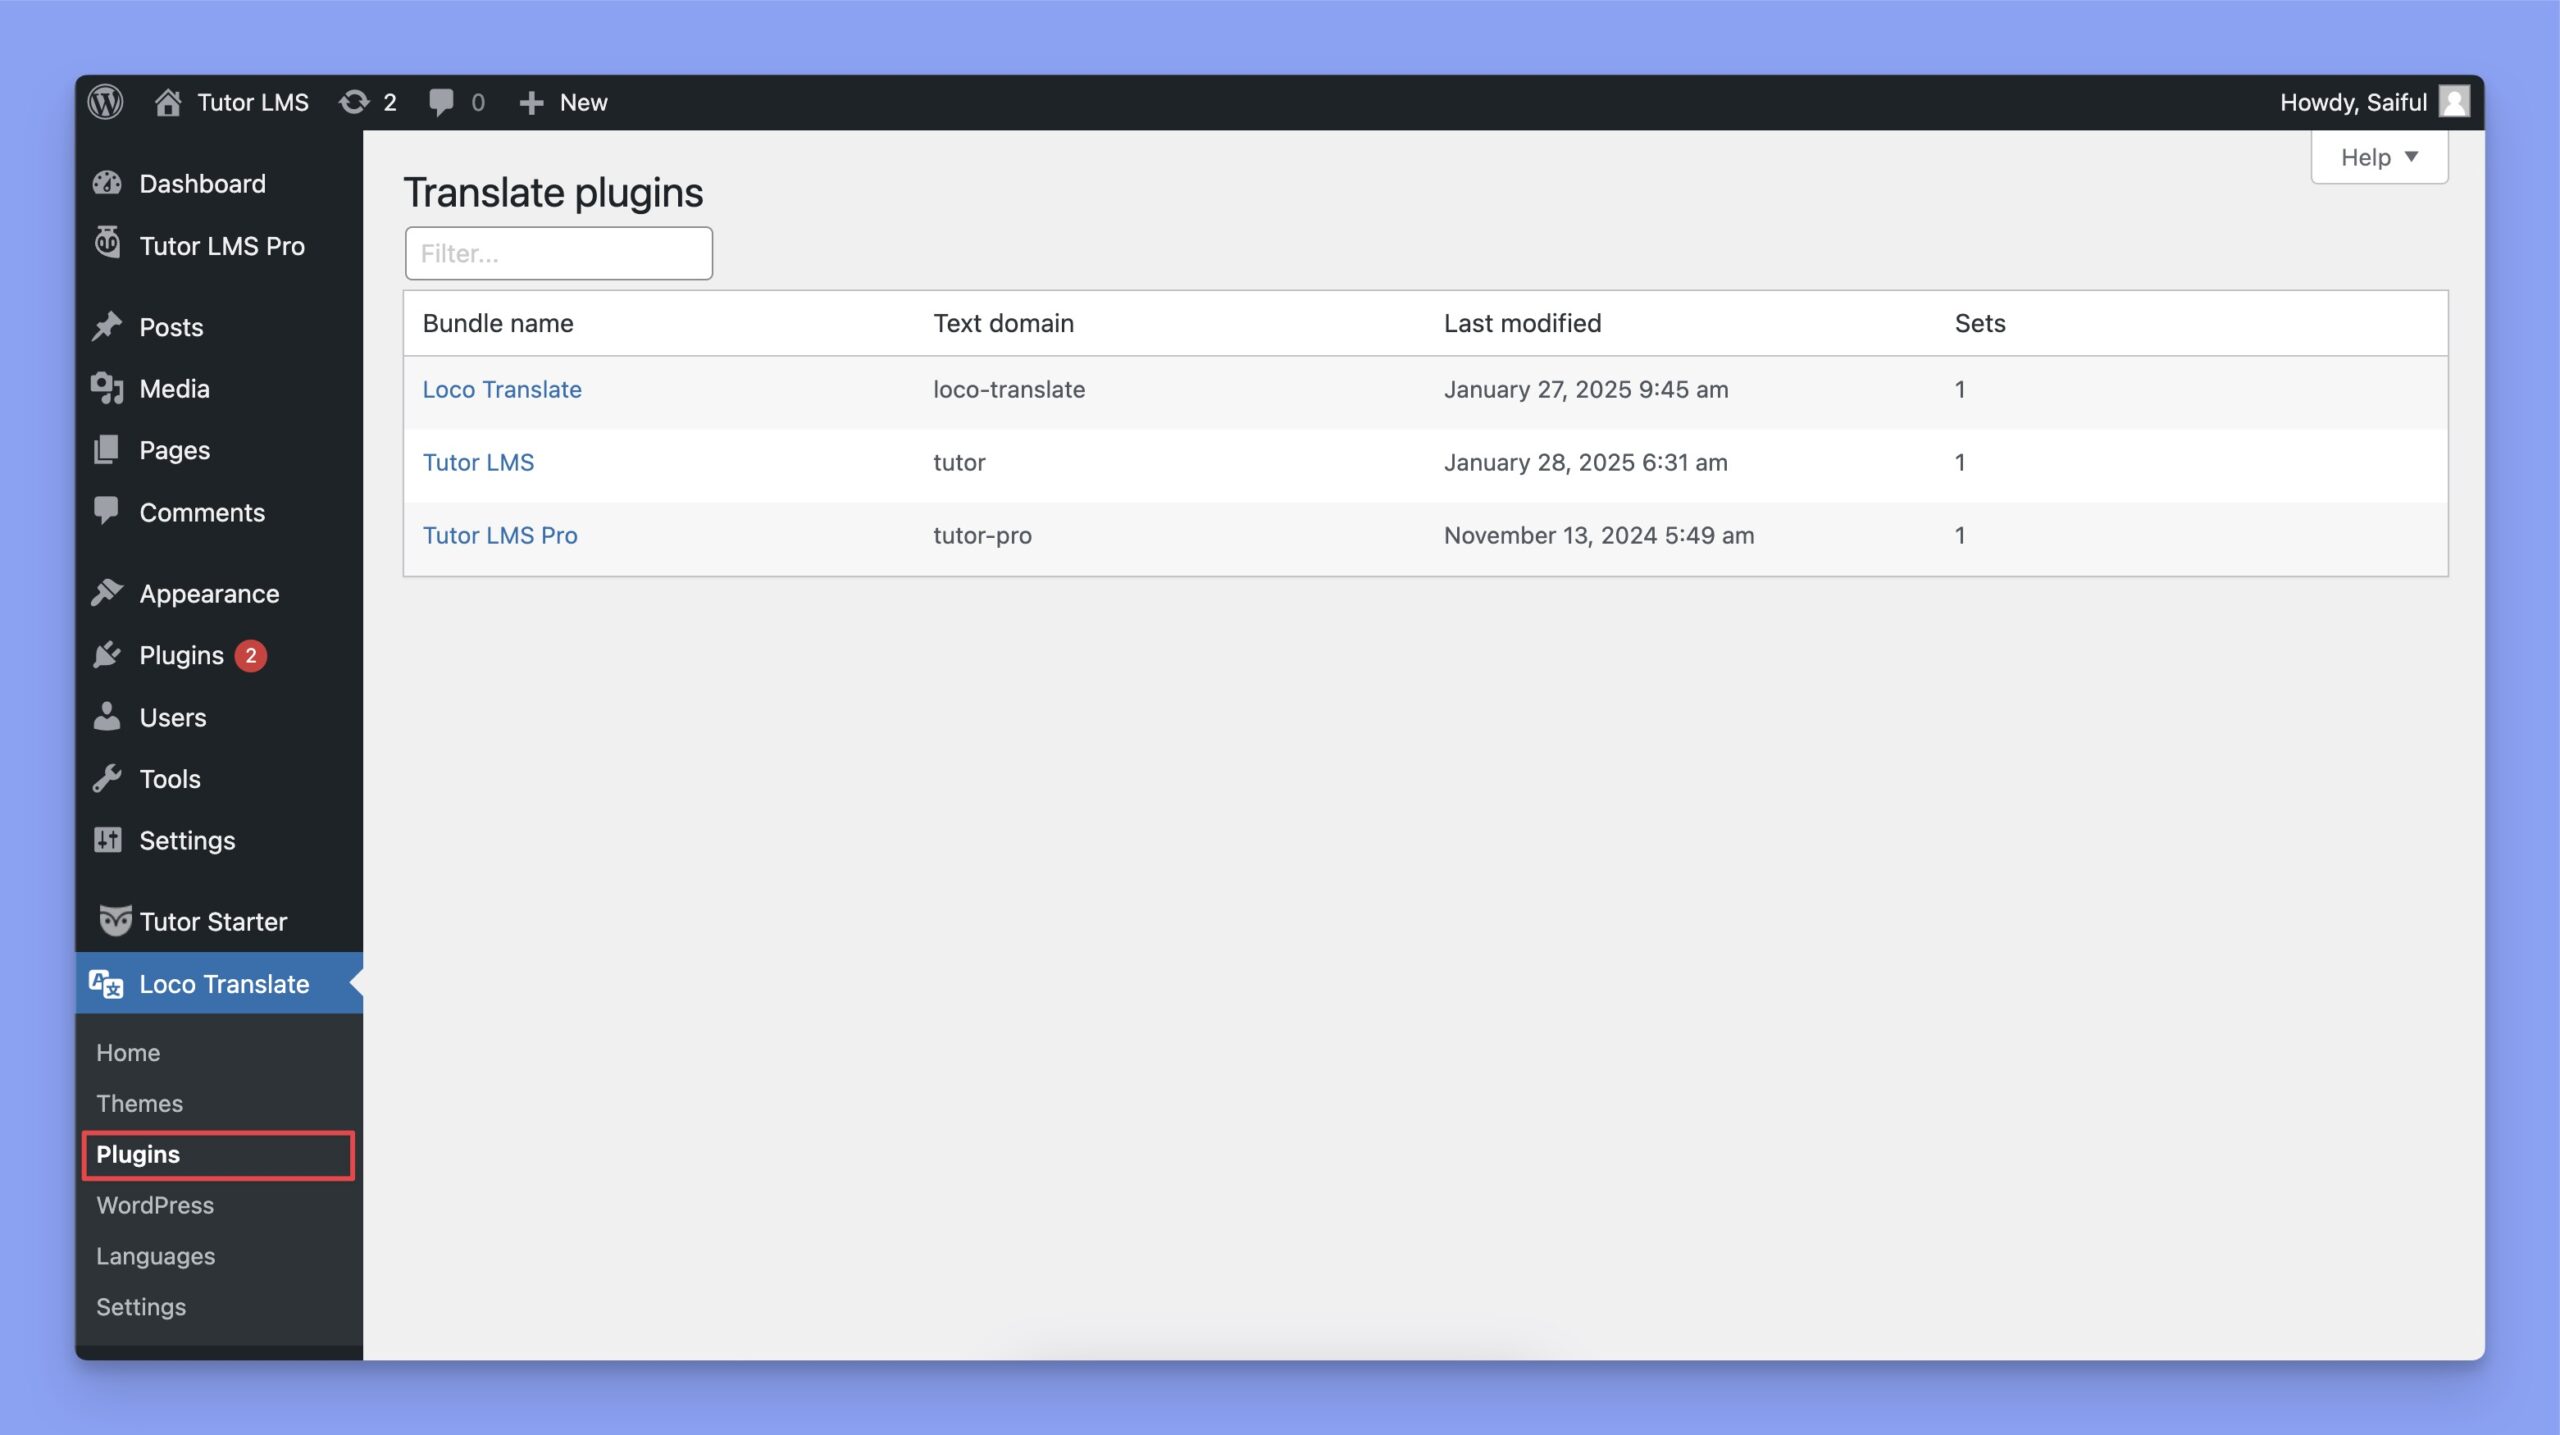
Once both plugins are installed, navigate to Loco Translate > Plugins in your WordPress dashboard. Locate Tutor LMS in the list of plugins and select it.
3. Add New Language
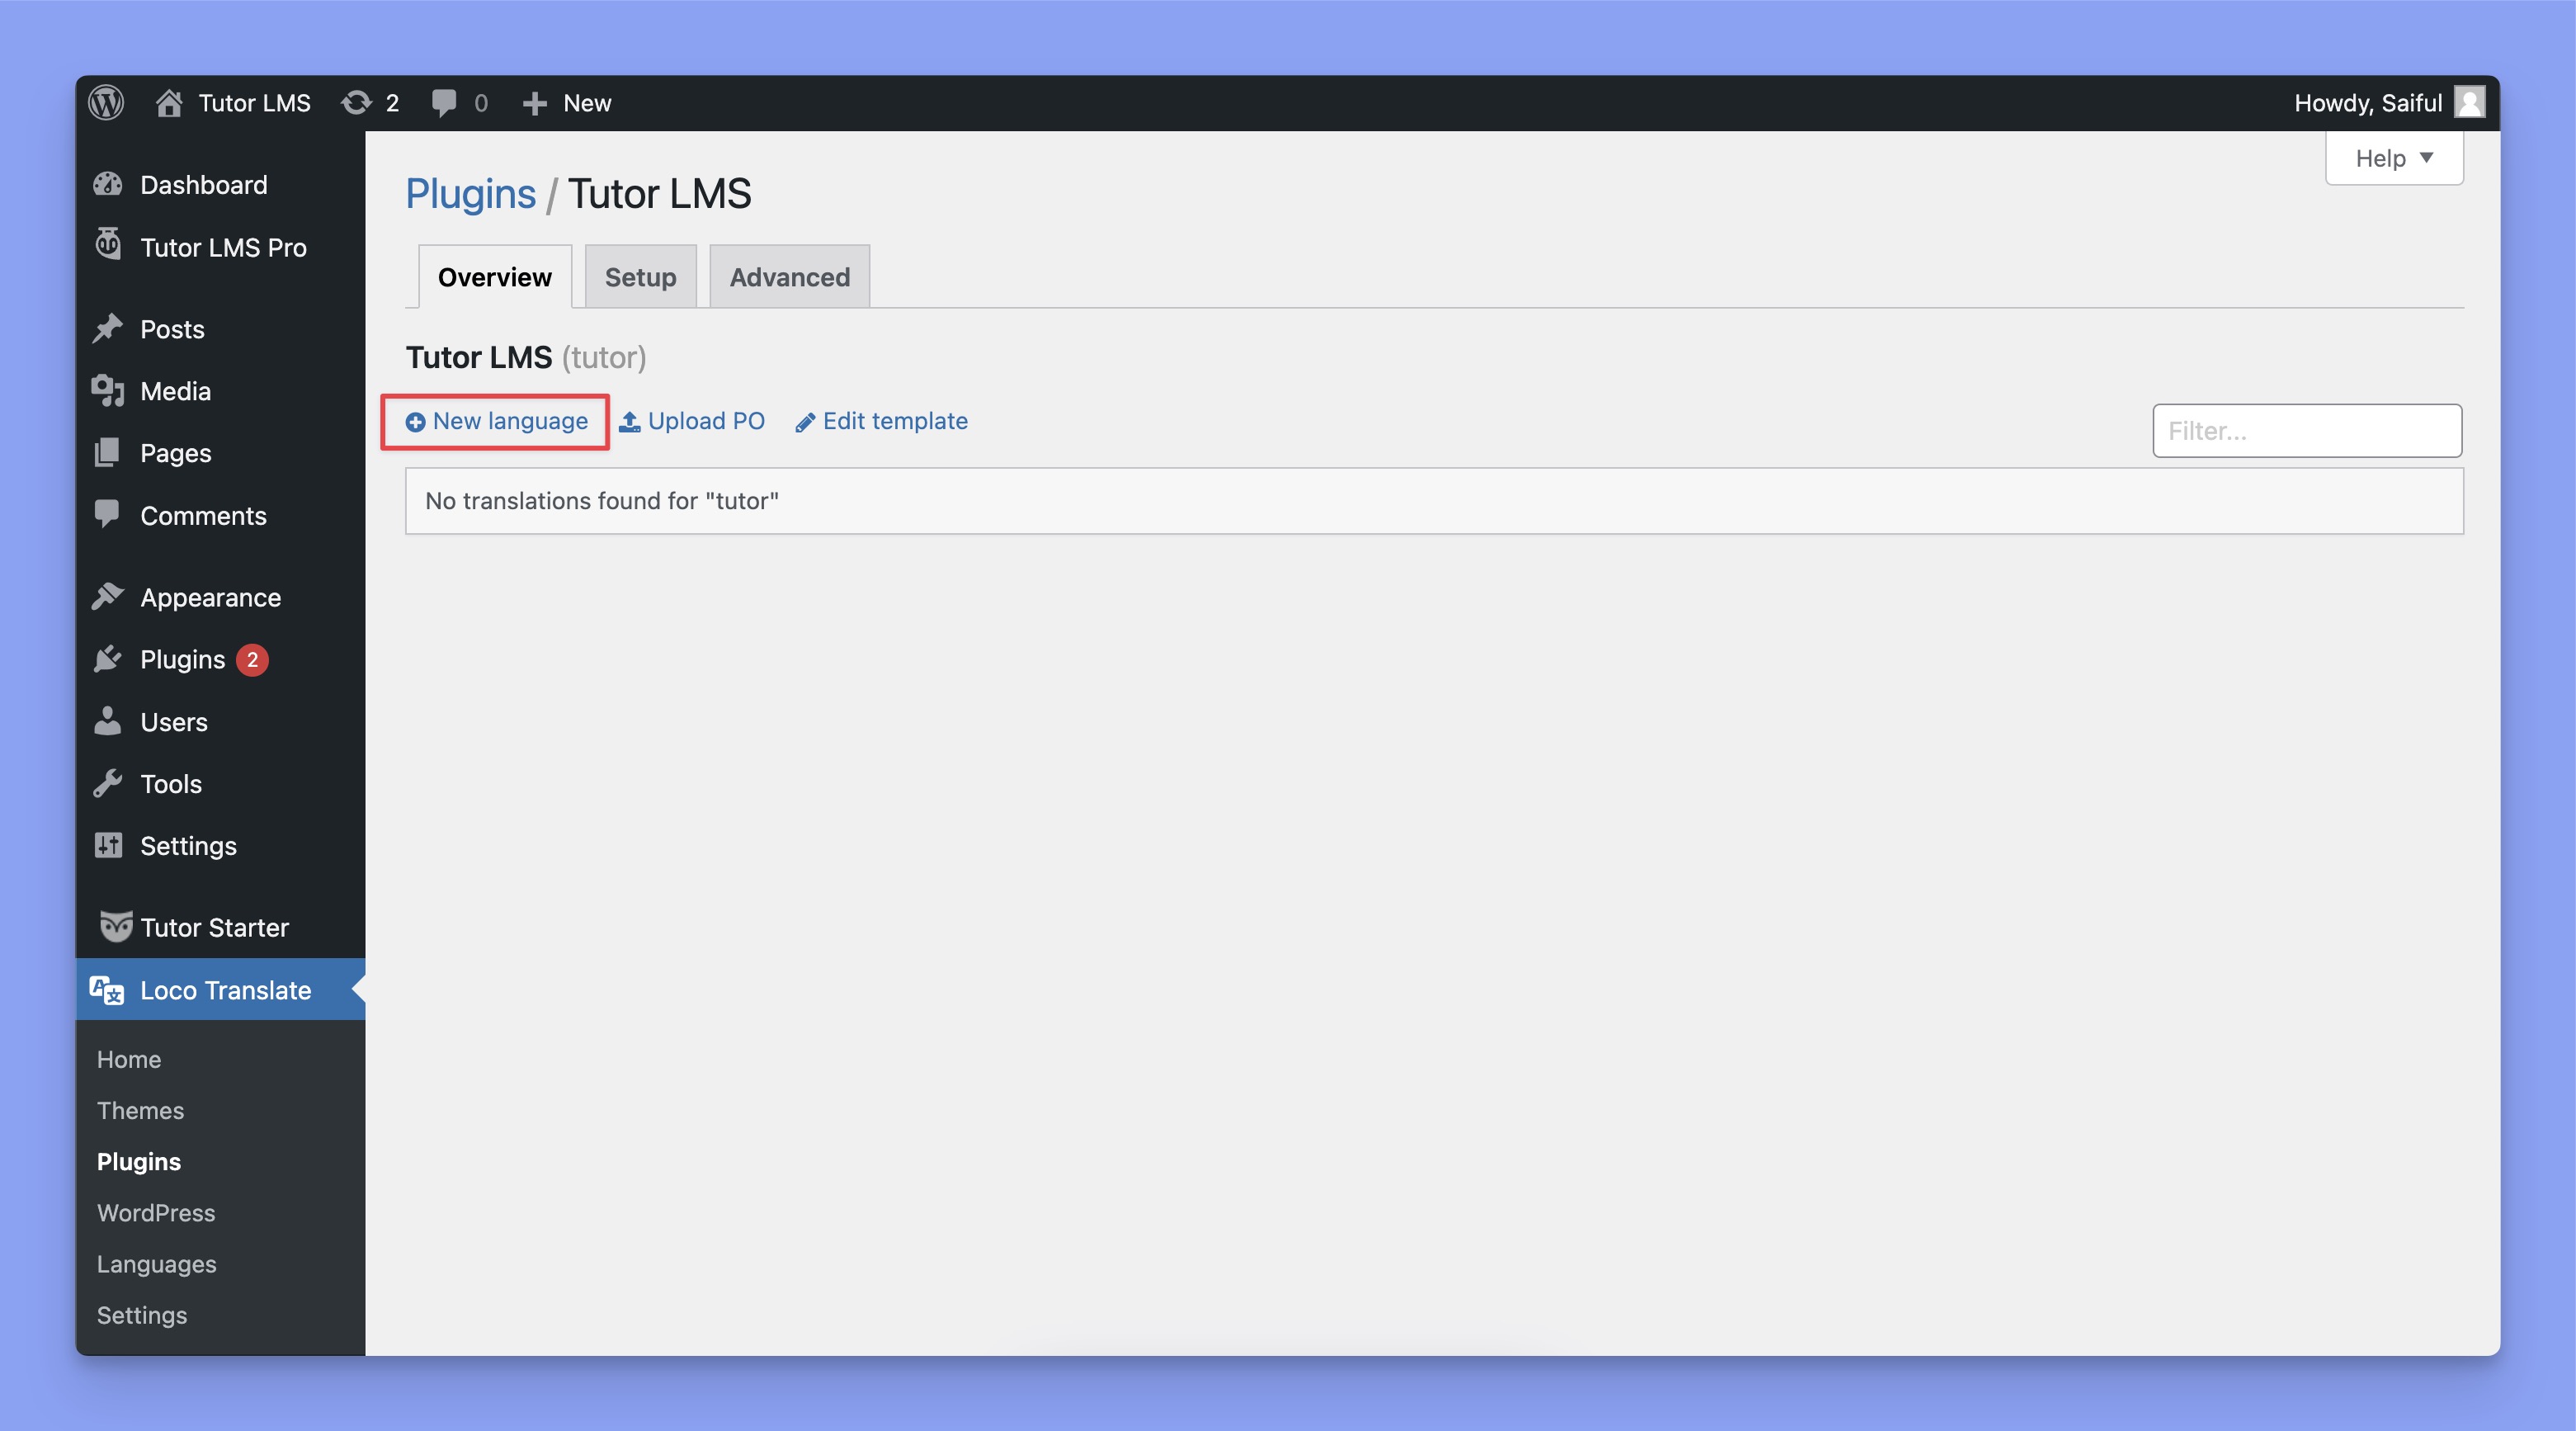
From here, you can create a new language for your translations. Click New Language to begin your translation.
Then, choose the language you want to translate Tutor LMS into and decide where to save the translation files.
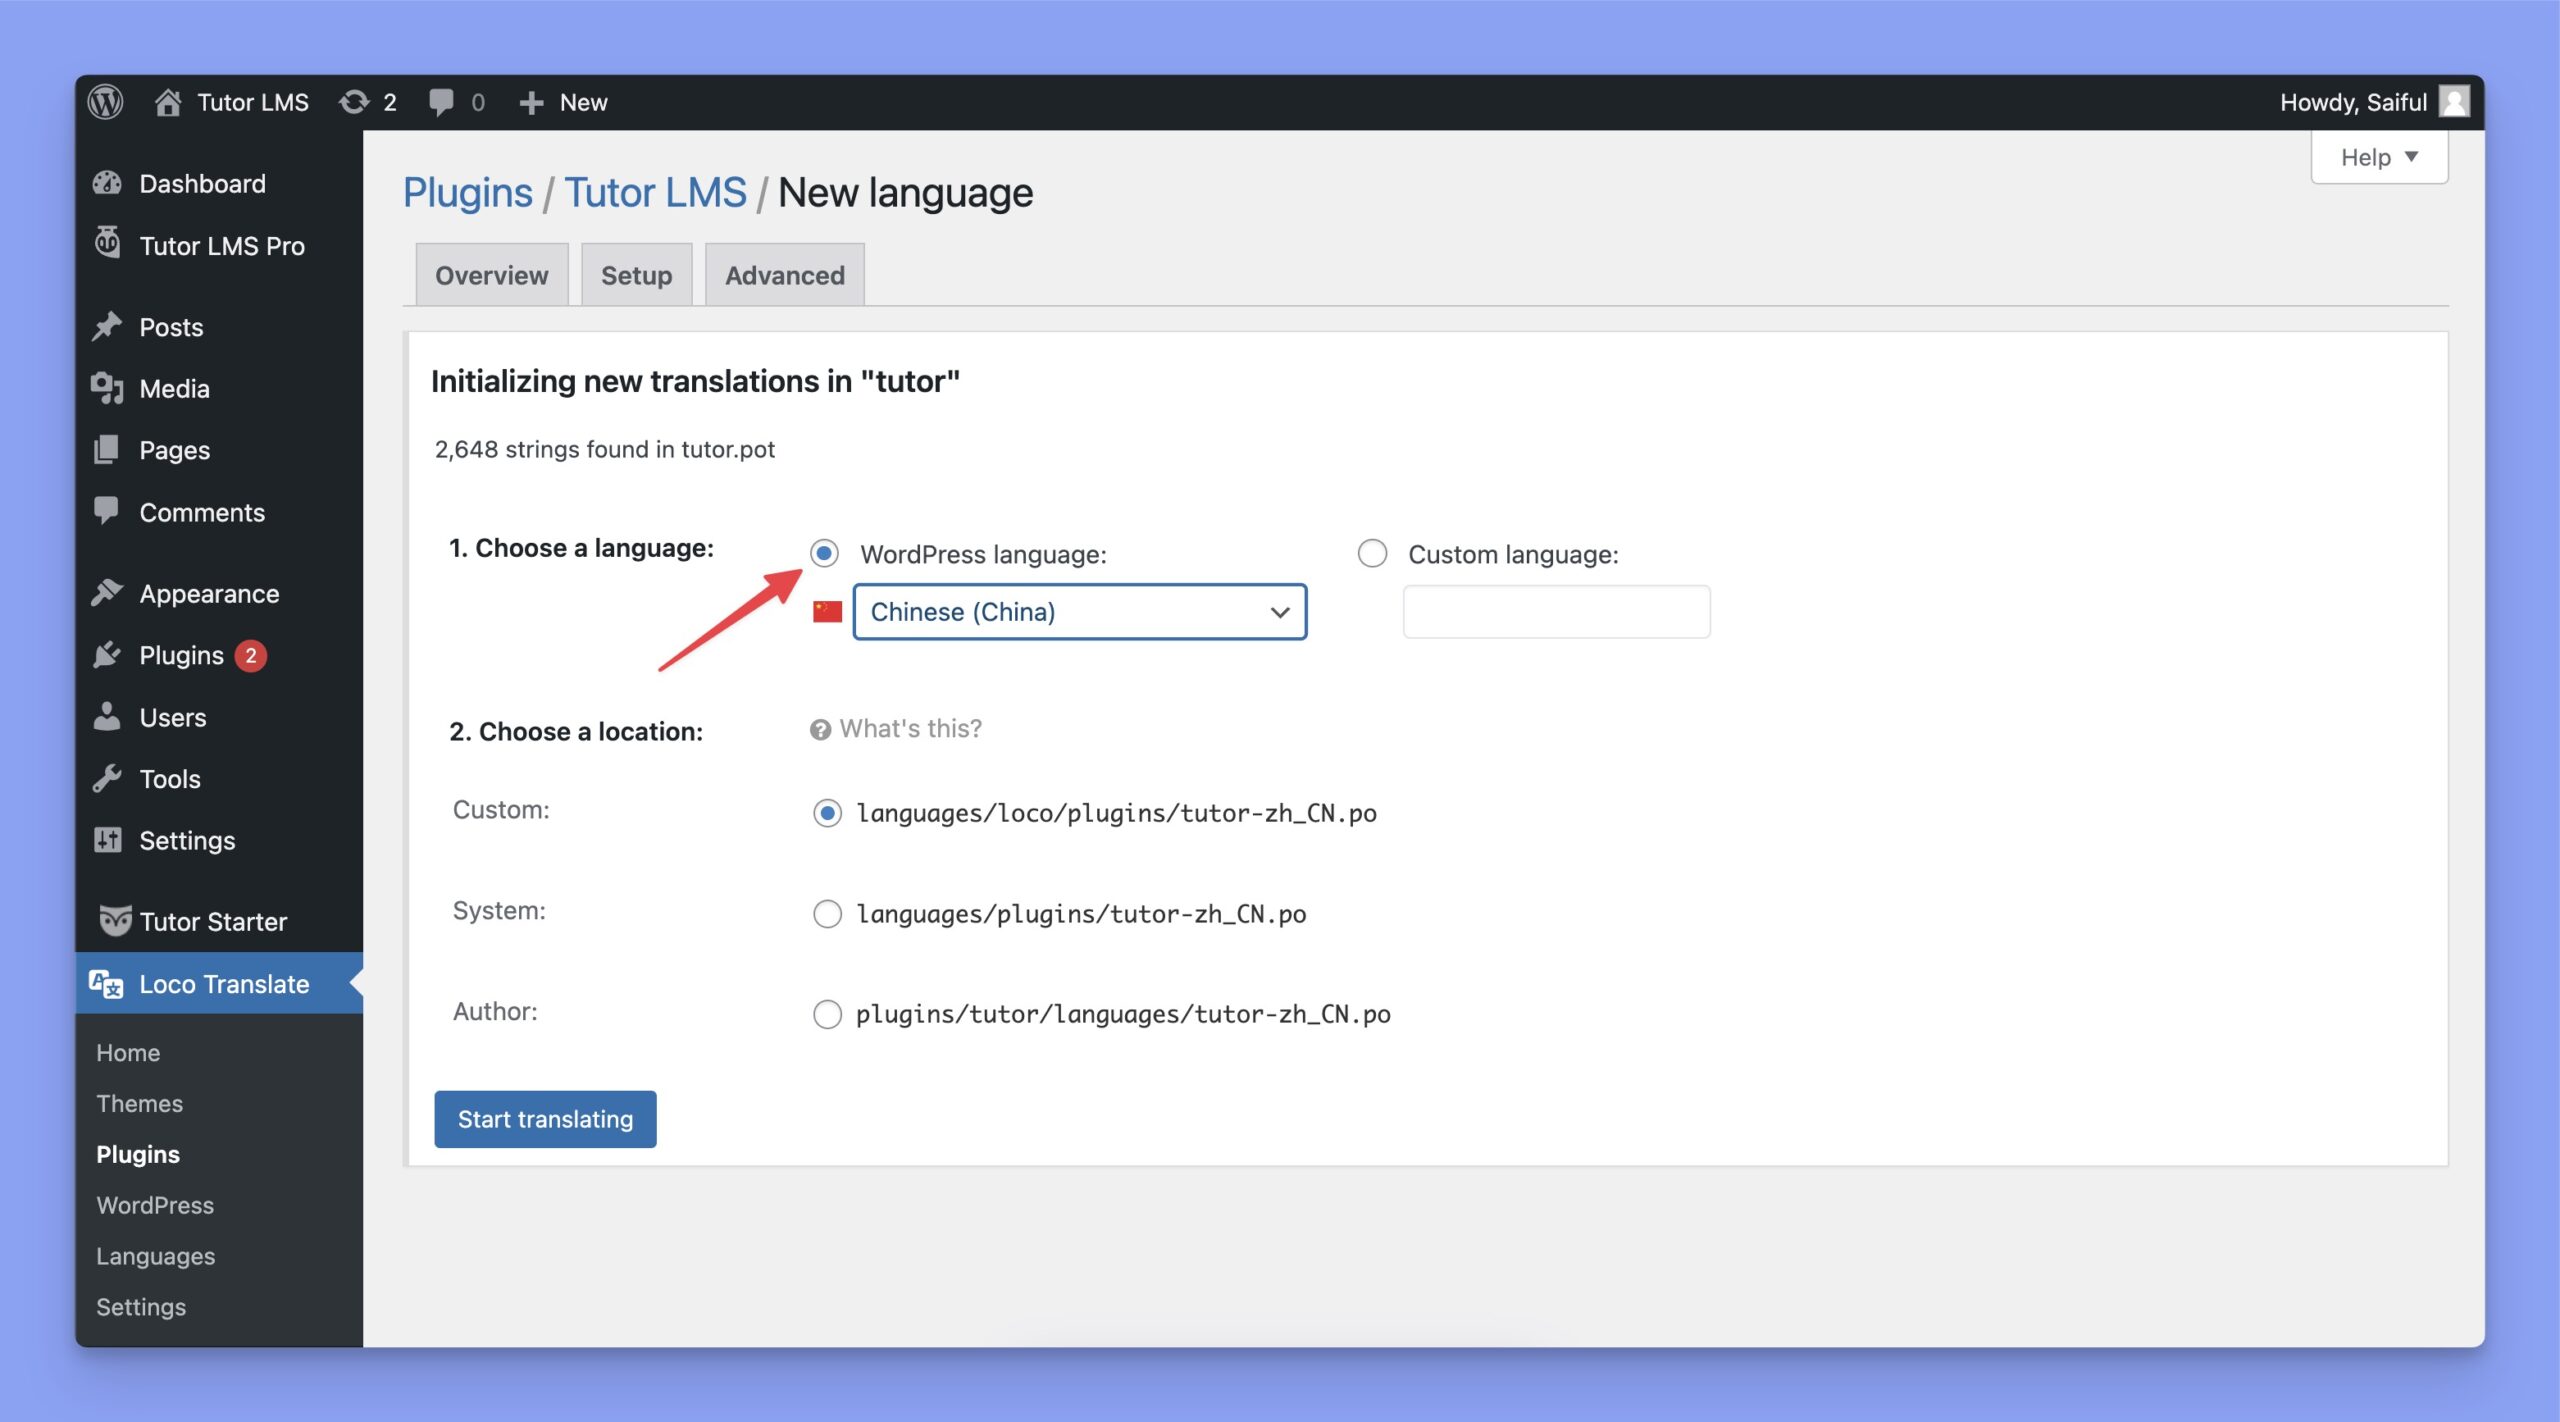
When saving translation files, you’ll need to choose where to store them. The options are:
- Custom Directory (Recommended): Saved in Loco Translate’s protected folder (
wp-content/languages/loco/). This location is safe from updates and ensures priority. - System Directory: Saved in the WordPress global language directory (
WP_LANG_DIR) but can be replaced by automatic updates. - Author Directory: Saved in the plugin or theme folder but overwritten during updates. Use it only if you’re the developer or have any specific requirements.
4. Translate Tutor LMS Strings
After setting up the language, you’ll be redirected to the translation editor. Here, you’ll find a list of all translatable strings used in Tutor LMS. Each string is displayed alongside an input field where you can enter the translated text.
Use the search bar to find specific strings or apply filters to show only untranslated strings. As you work, save your progress regularly to ensure no translations are lost.
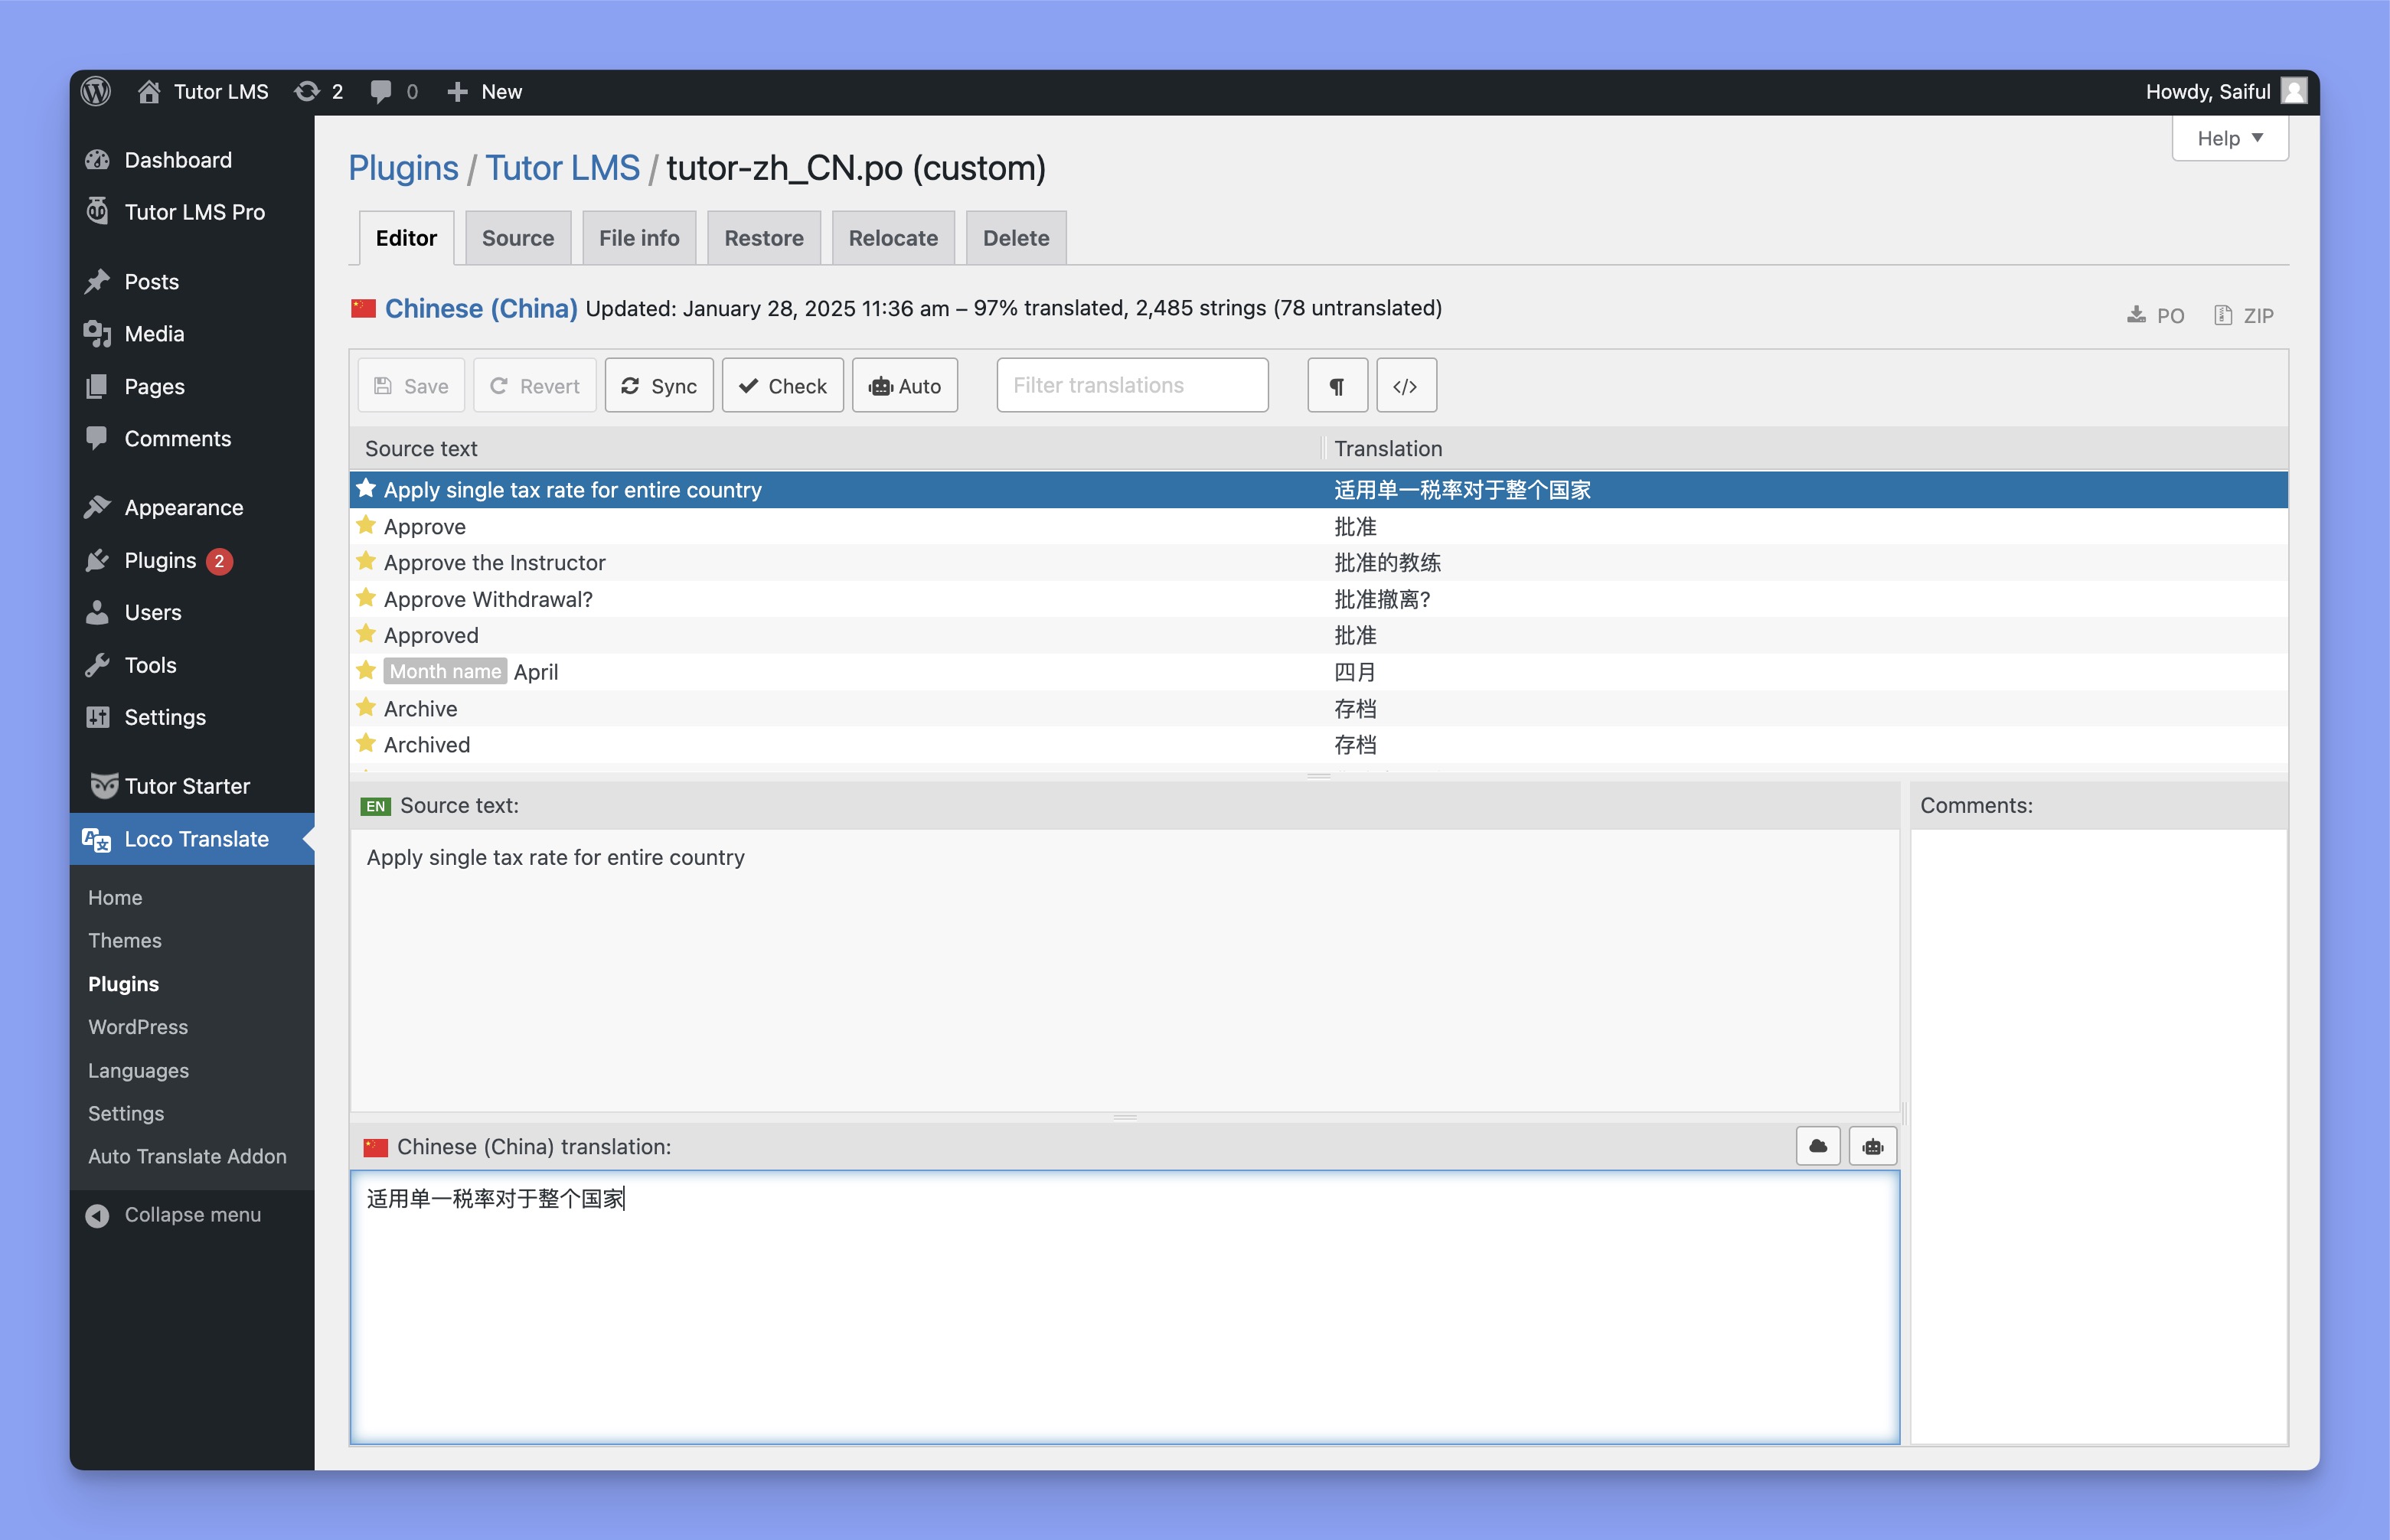
If you want to translate these strings automatically, you can use the Automatic Translate Addon For Loco Translate plugin.
5. Save and Sync Translations
Once you’ve completed your translations, click Save to store them in the selected directory.
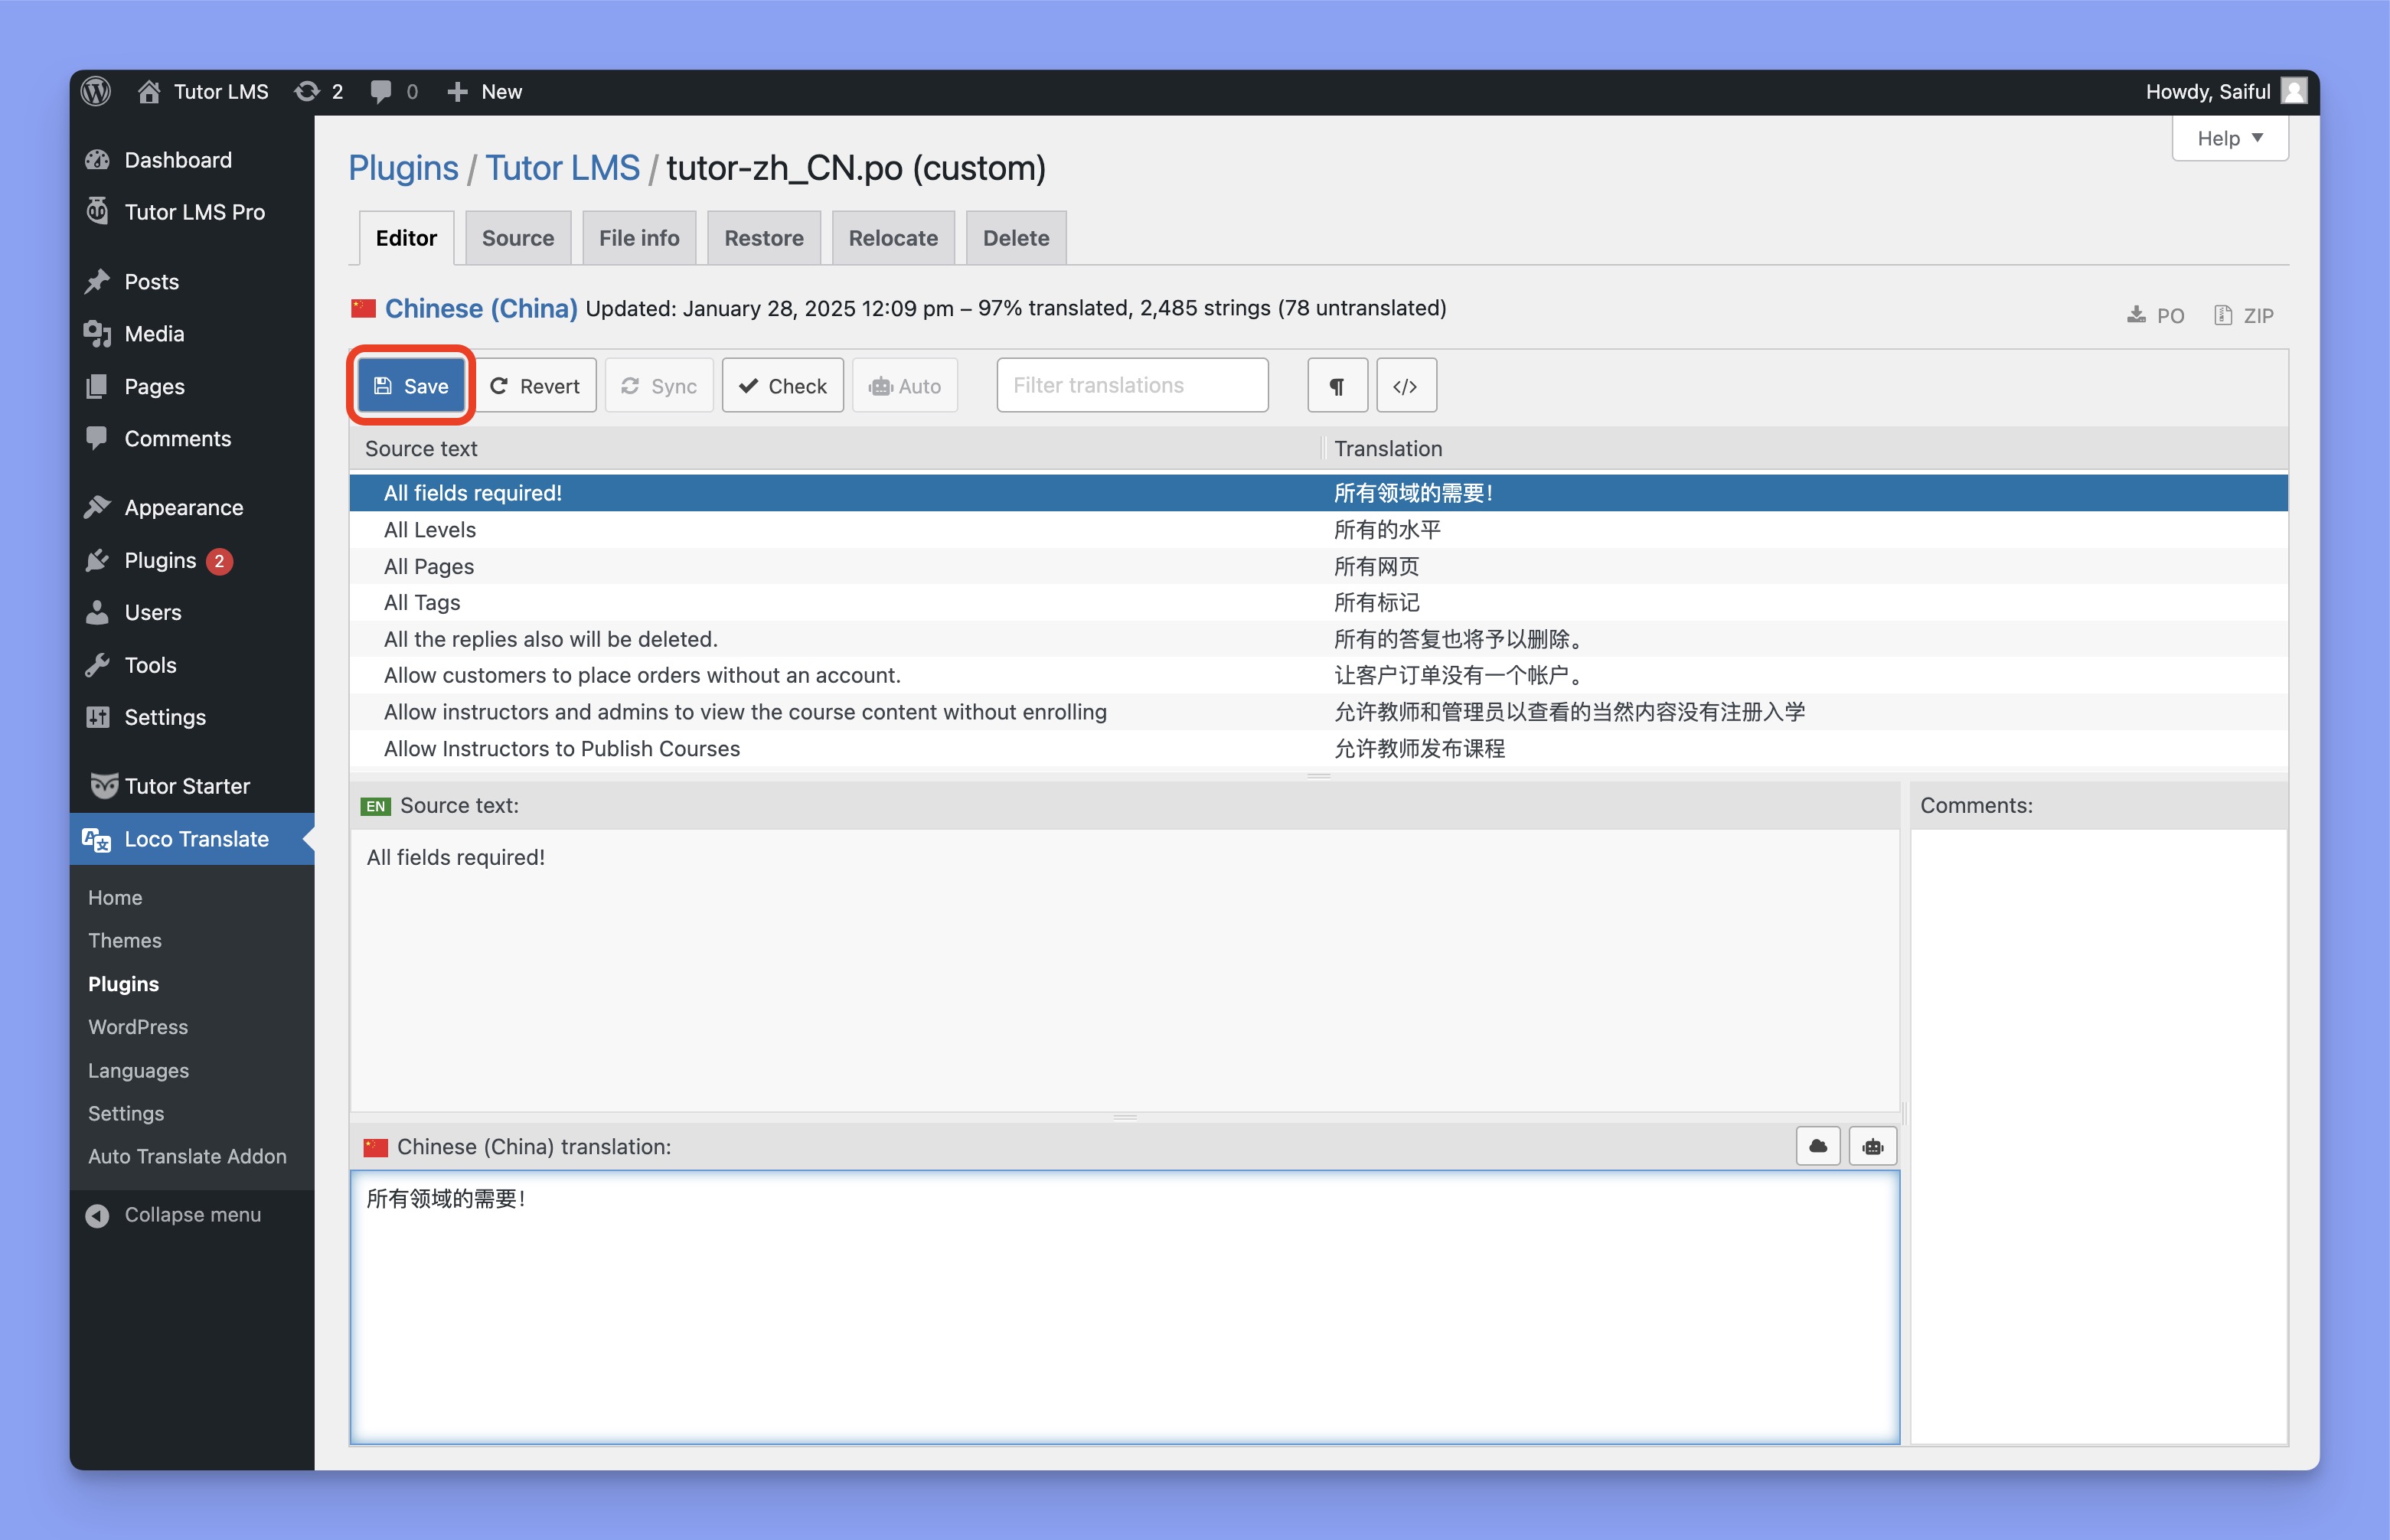
If Tutor LMS receives an update that adds new strings, you can click Sync in Loco Translate to load these new strings into the editor. This ensures your translations remain up-to-date.
6. Test the Translations
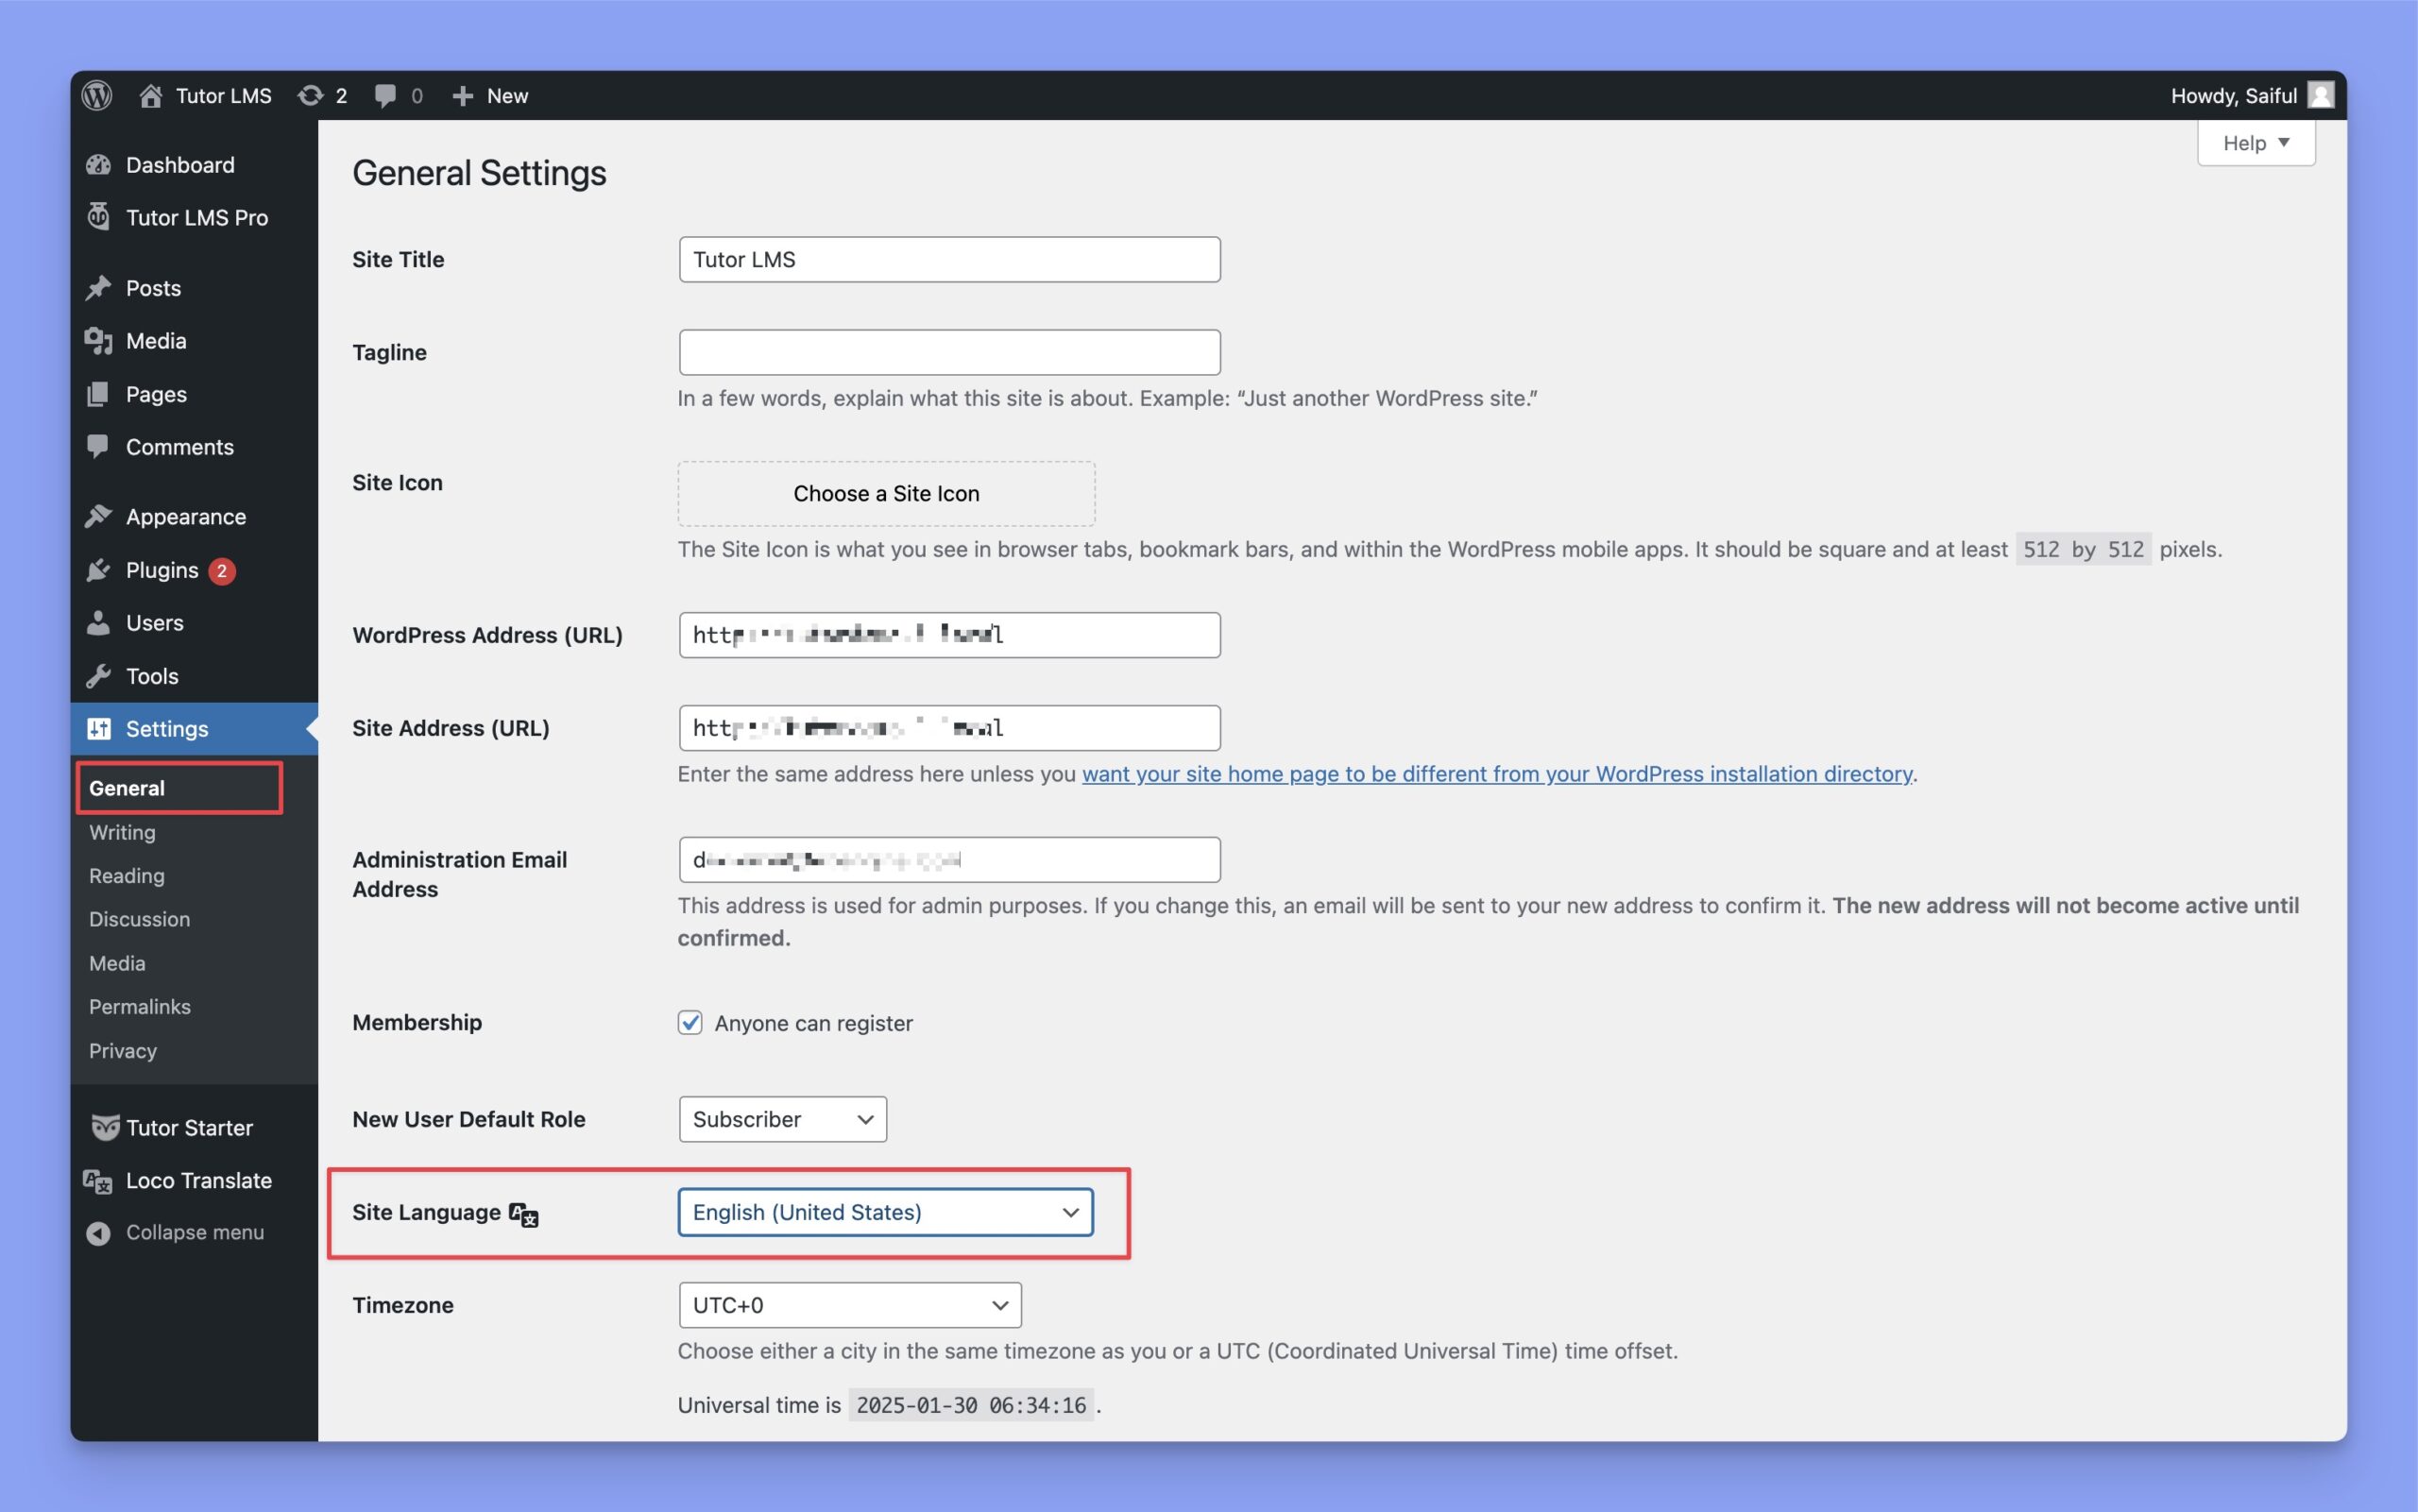
To verify that your translations are working correctly, you have to change the site language first. To do so, navigate to WP Dashboard > Settings > General and select the language you’ve translated Tutor LMS into. Finally, click on the Save Changes button.
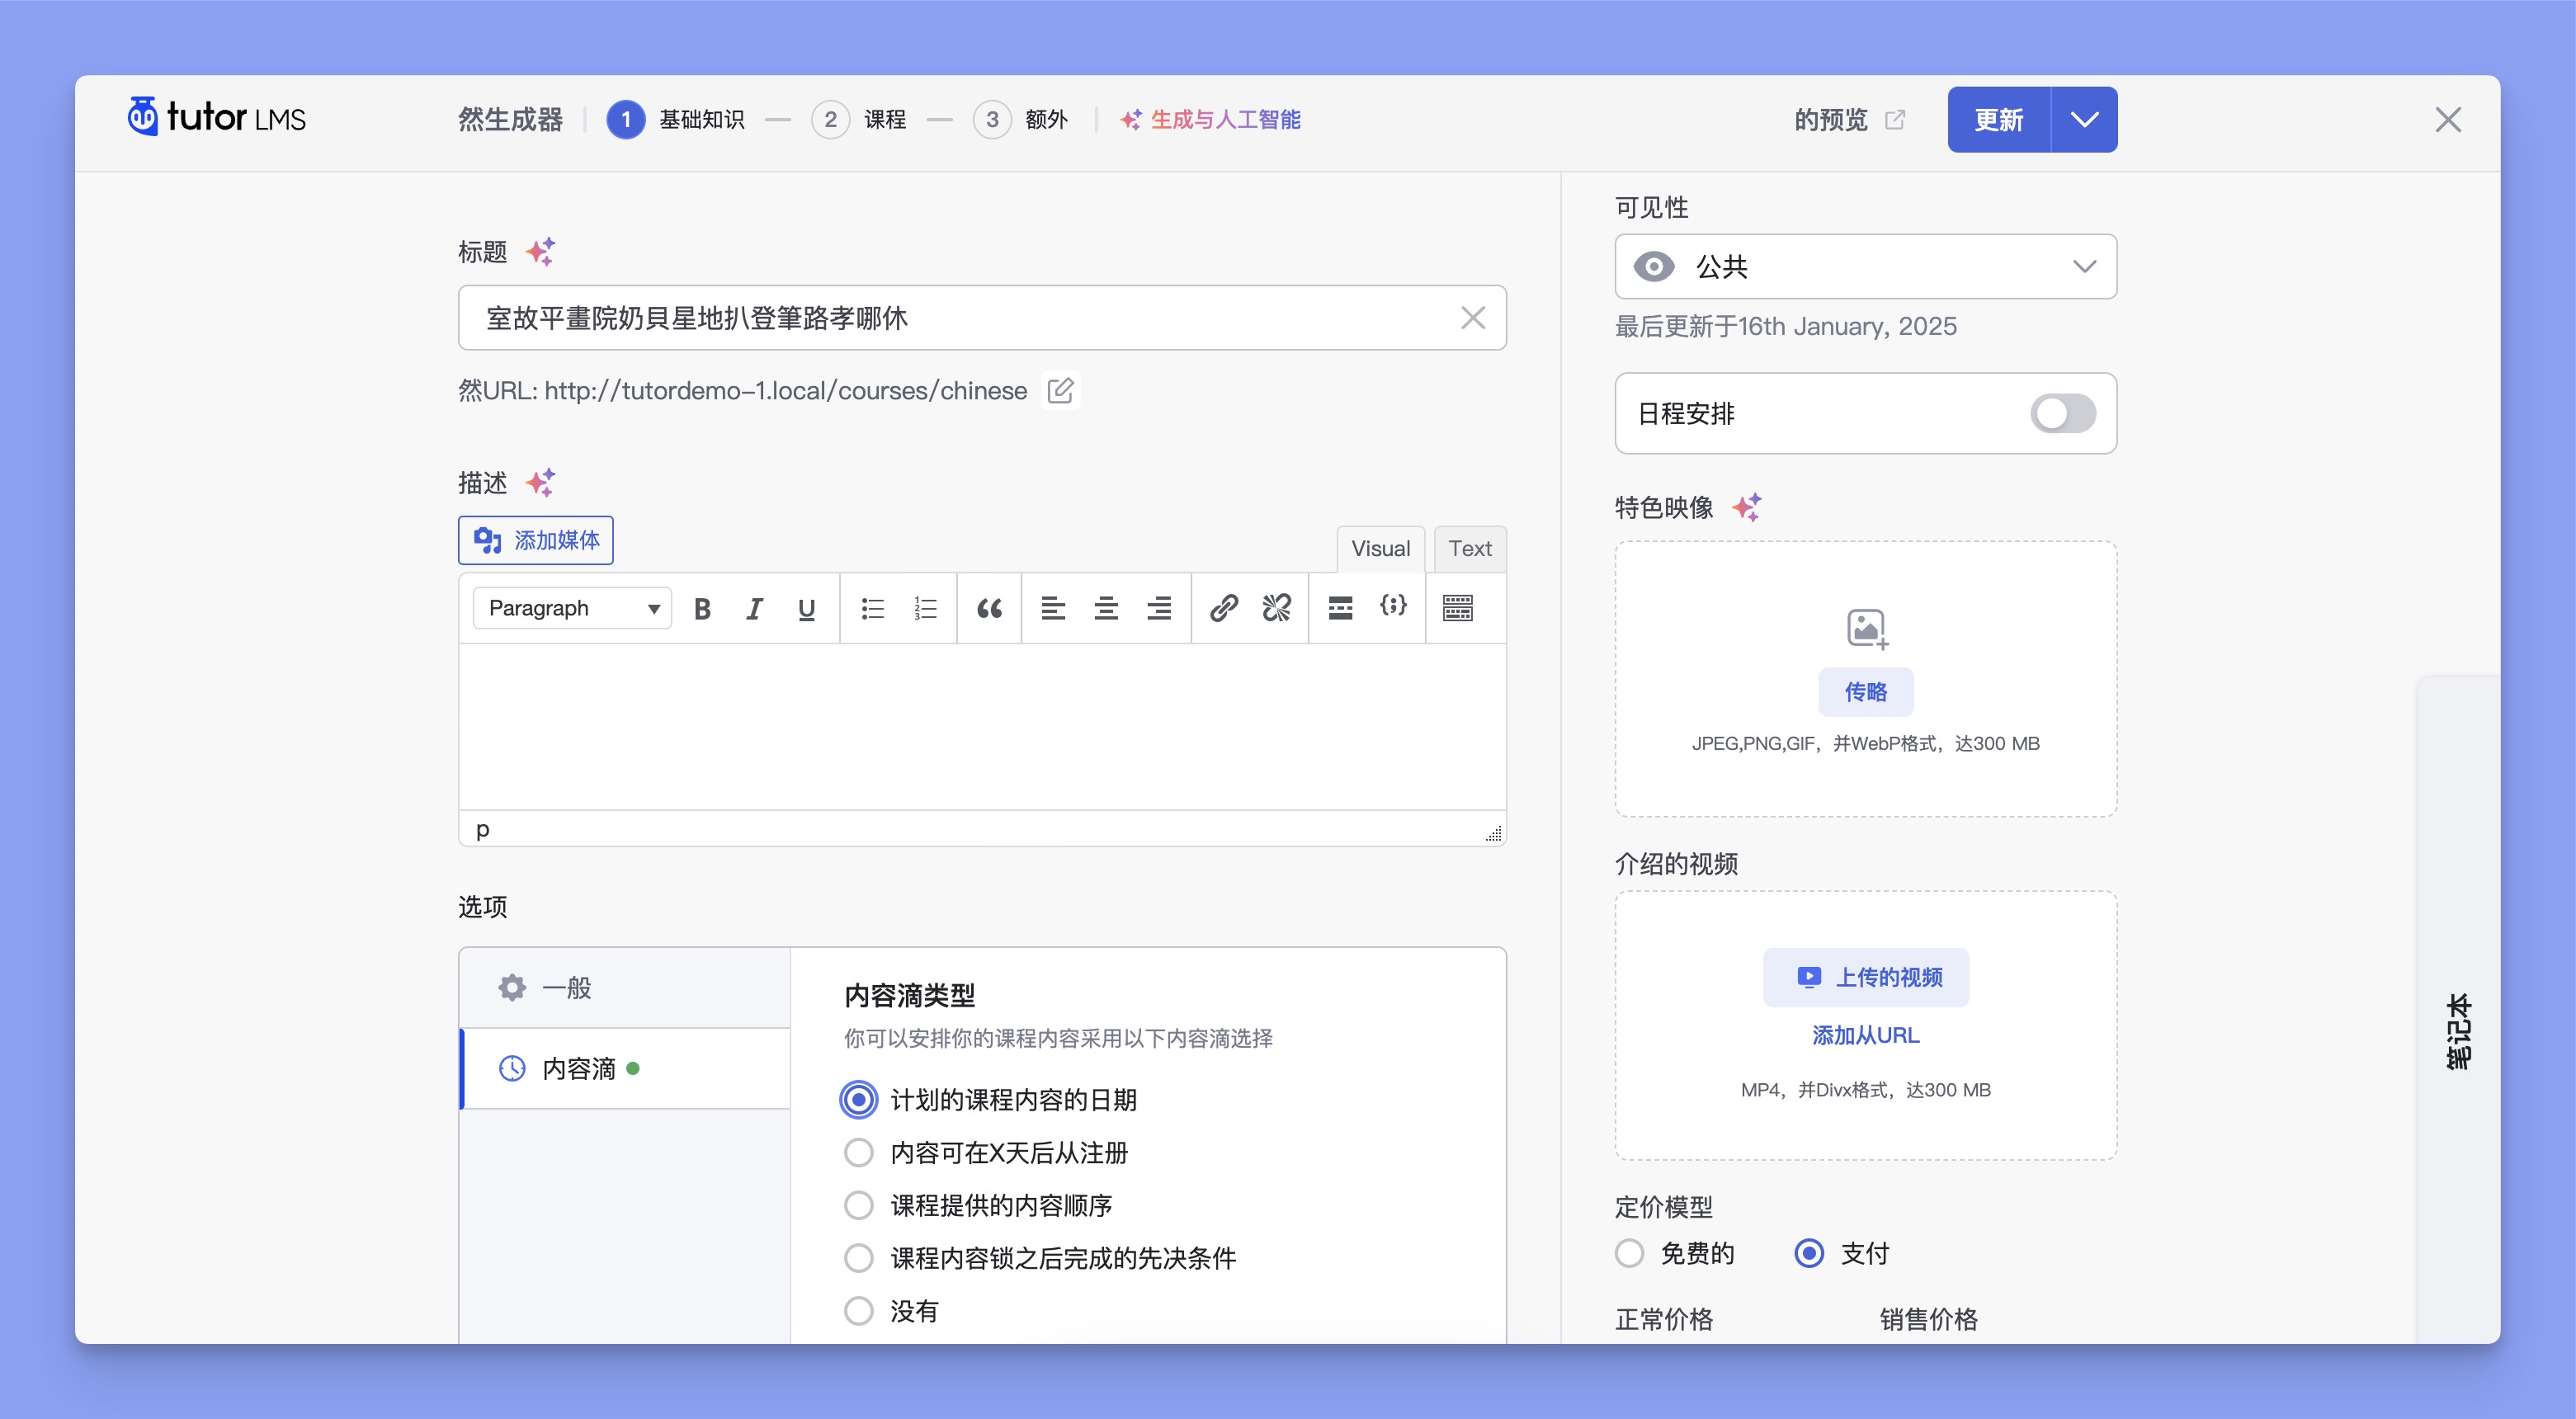
Then, navigate to your Tutor LMS pages (e.g., course builder, dashboard) and check if the translations appear as expected.
As we’ve translated Tutor LMS into Chinese, all text within the plugin will appear in Chinese. Check out the image below:
7. Export Translation Files
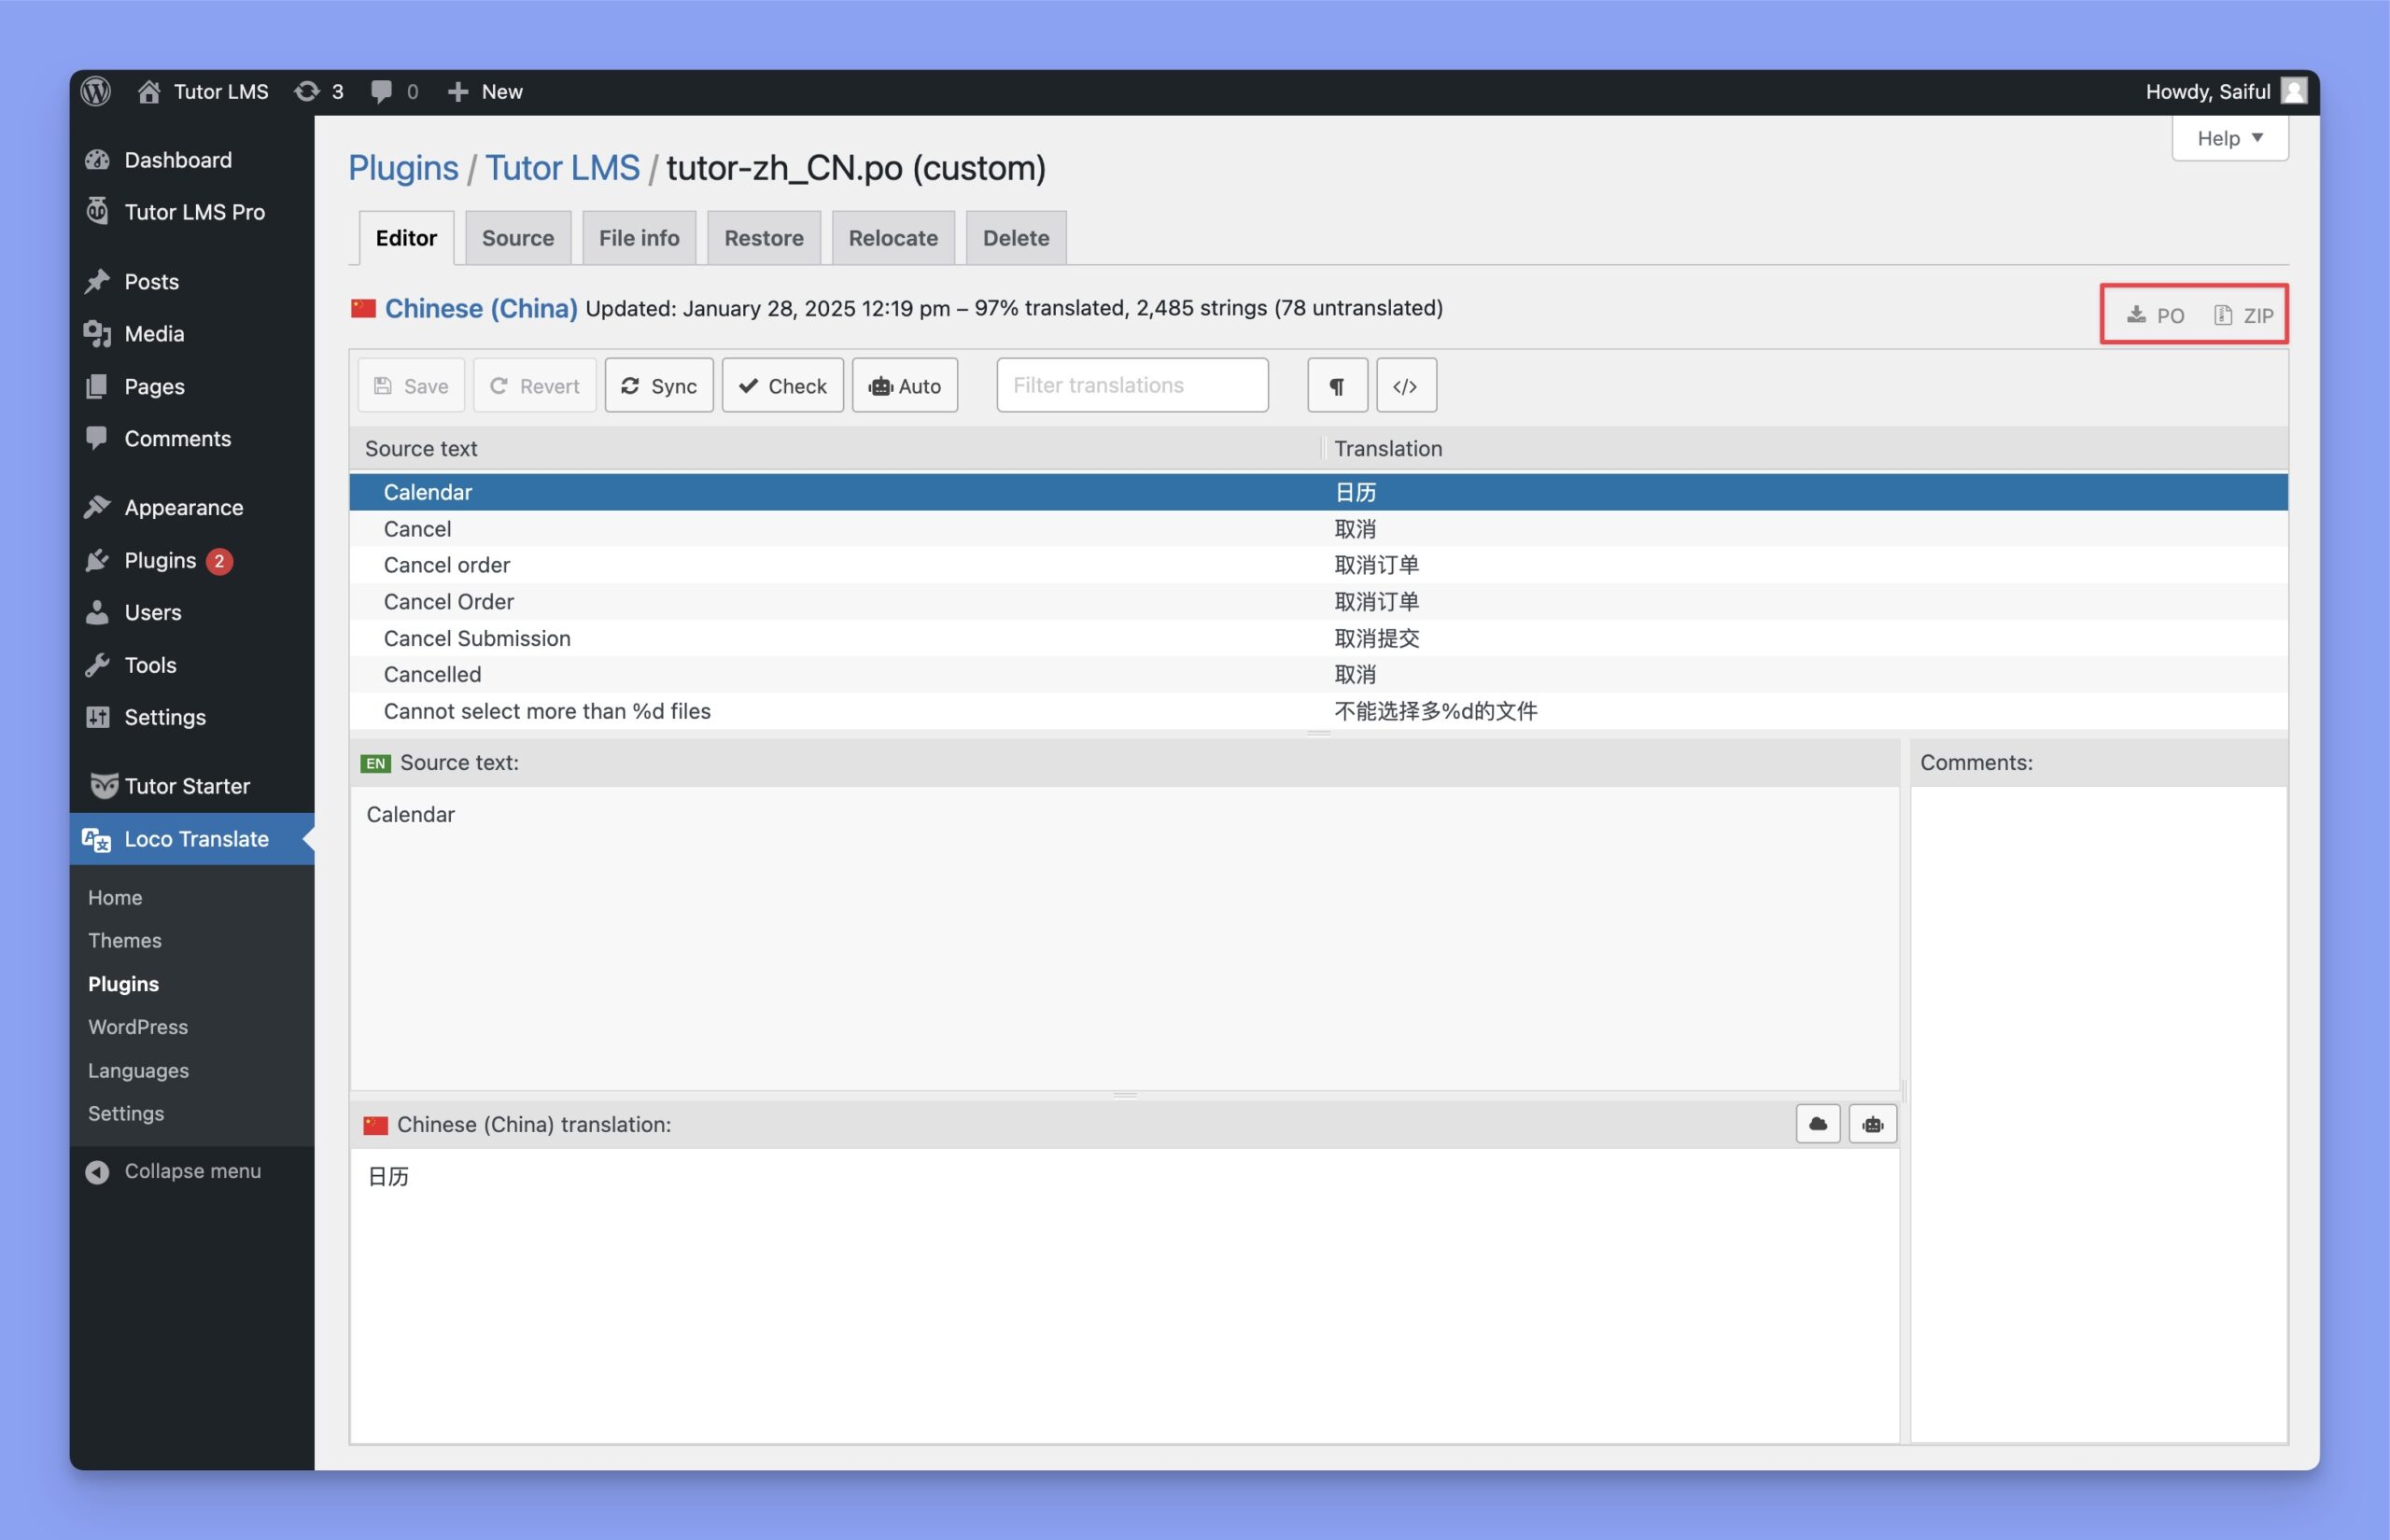
For backup or migration purposes, you can export your translation files from Loco Translate. Simply click on the PO or Zip icon, and the translation file will be downloaded. Store the translation file in a secure location for future use.
Troubleshooting Common Issues
- Translations Not Appearing: Ensure the correct language is selected in Settings > General and that the translation files are saved in the appropriate directory.
- Missing Strings: Use the Sync button in Loco Translate to load any new strings added after an update.
- Translations Lost After Update: Ensure you save your files in a Custom location to avoid overwriting during updates.