WooCommerce
To use WooCommerce as your eCommerce platform, you need to enable WooCommerce from the Tutor LMS Settings.
To do this, navigate to WP Admin > Tutor LMS > Settings > Monetization and select WooCommerce as your eCommerce Engine.
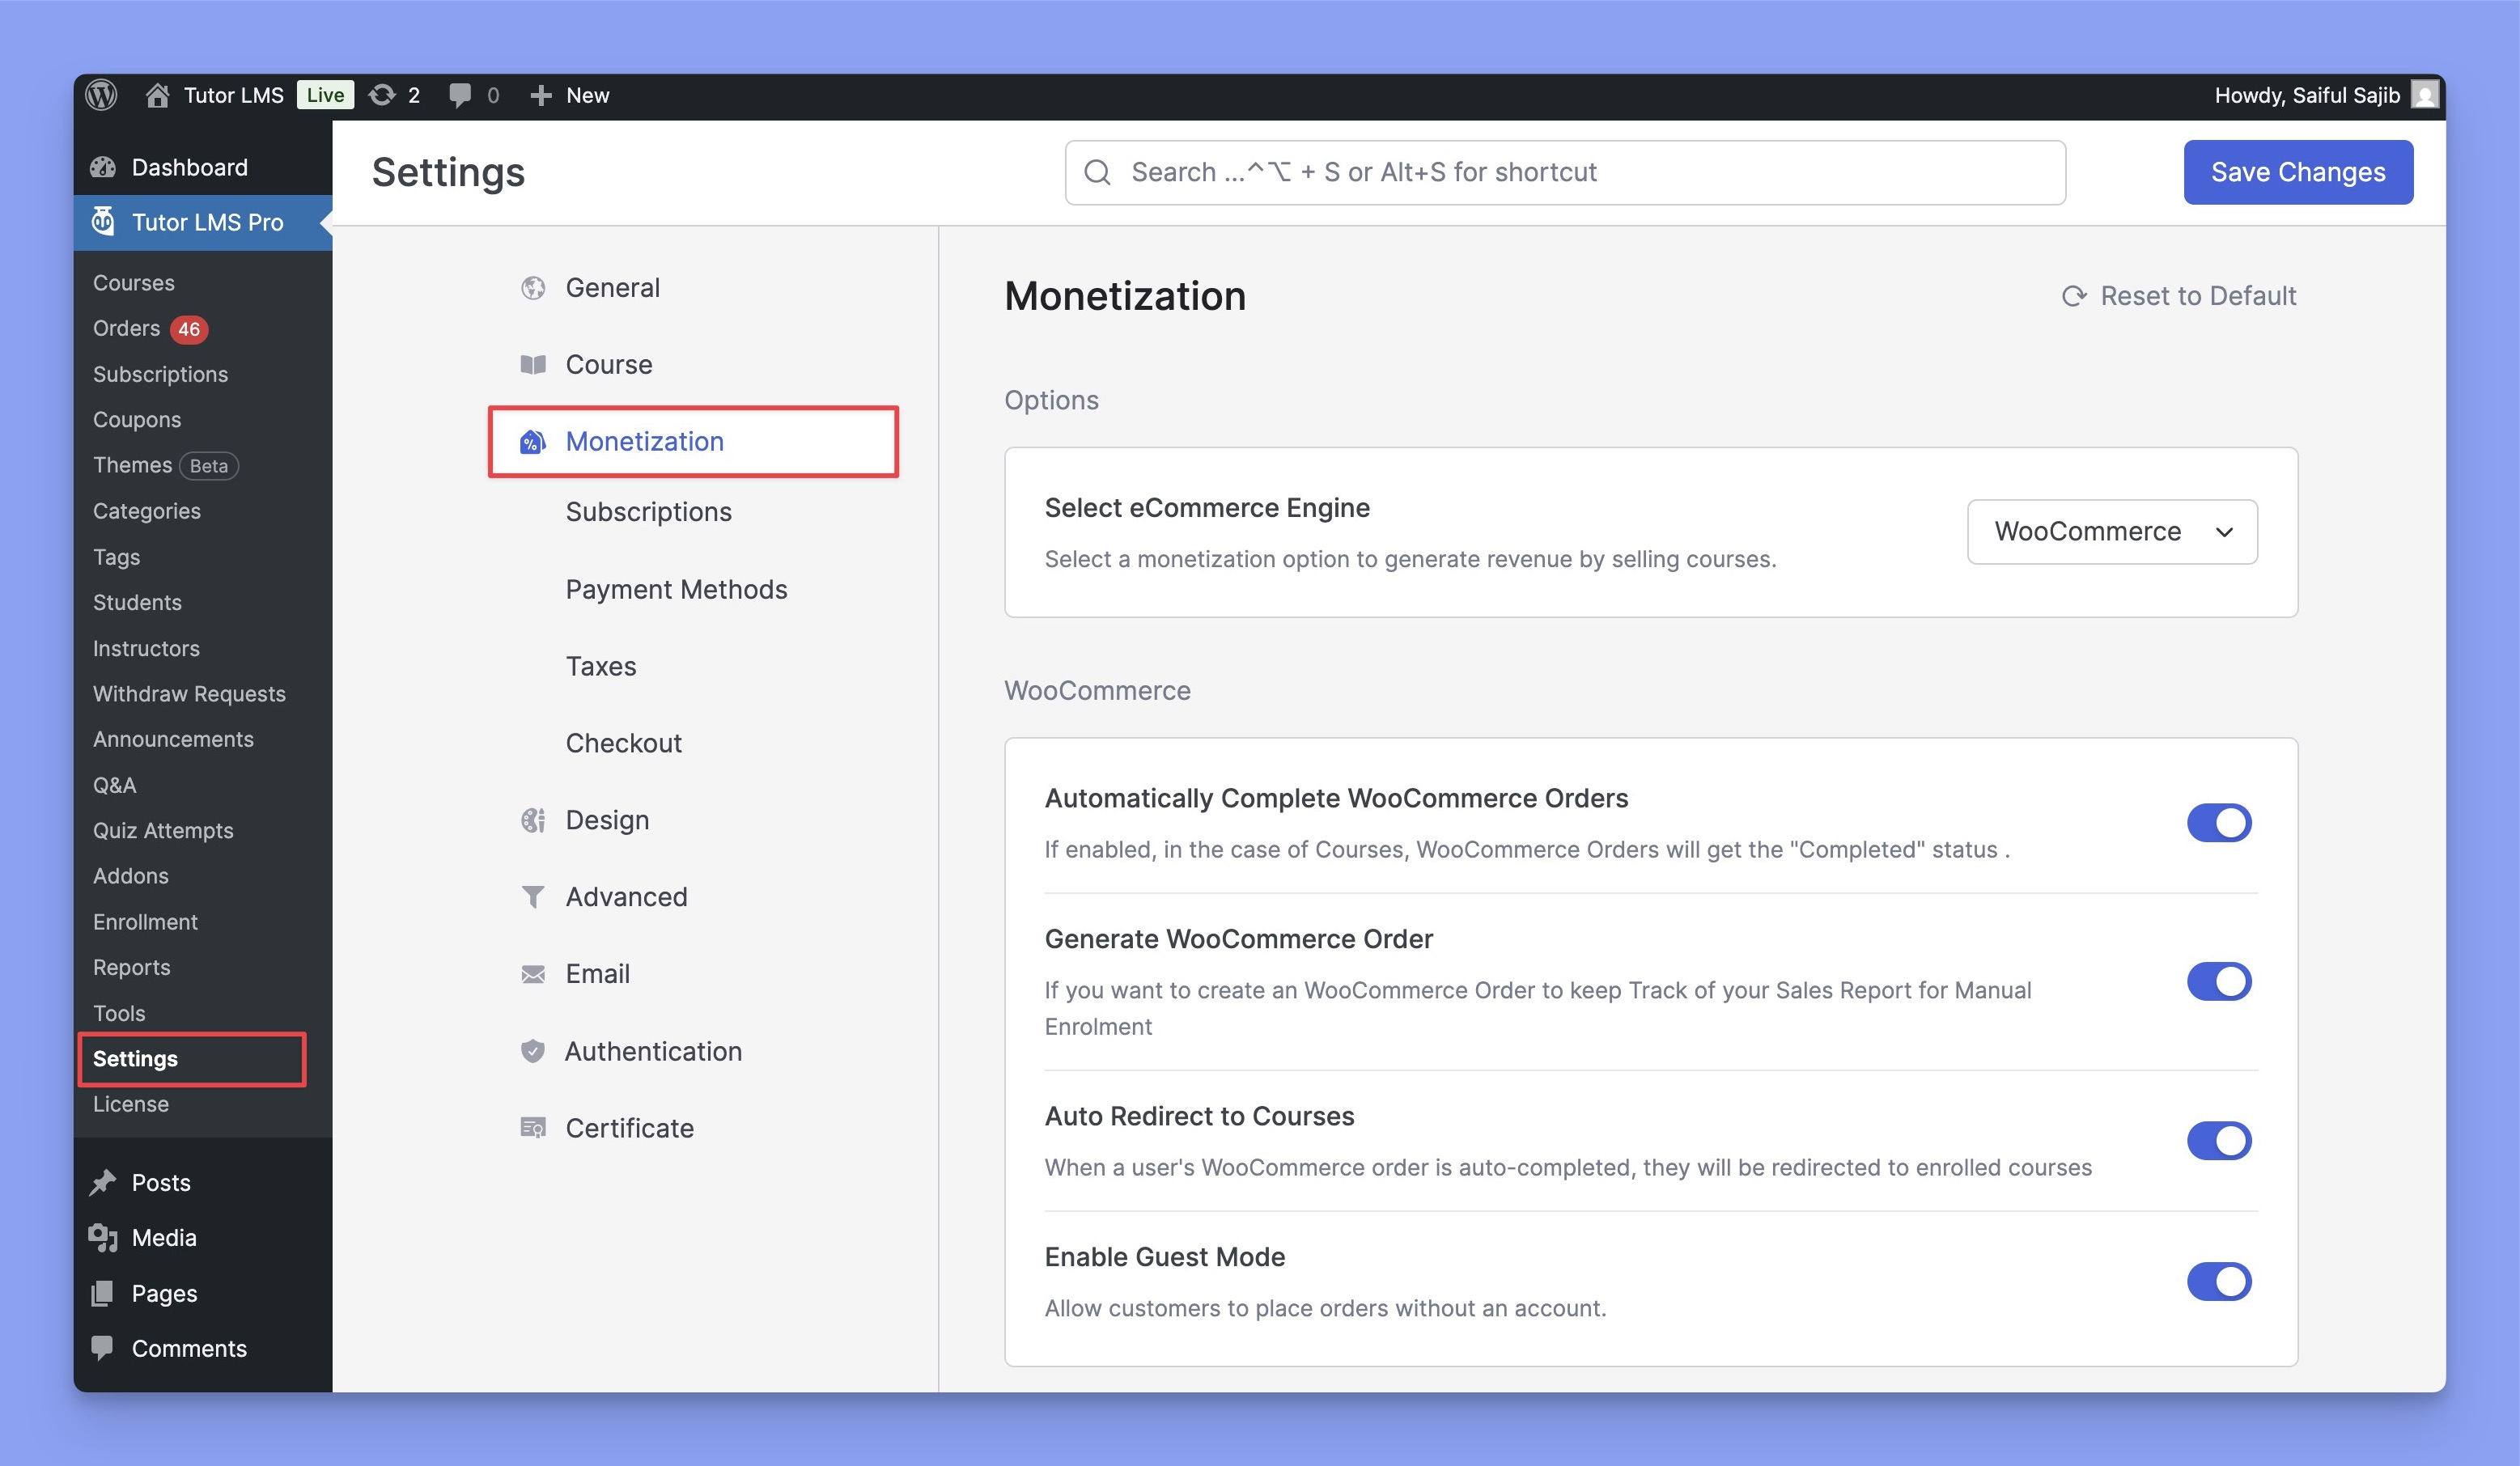
Select eCommerce Engine: Select a monetization option to generate revenue by selling courses. Supports: Native, WooCommerce, WooCommerce Subscriptions, Easy Digital Downloads, Paid Memberships Pro, and Restrict Content Pro.
Automatically Complete WooCommerce Orders: If you’re using WooCommerce as your eCommerce Engine, then you will see this option. If enabled, your WooCommerce Orders will automatically get “Completed” status in the case of Courses.
Generate WooCommerce Order: Enabling this option with generate an WooCommerce order for manually enrolled students.
Auto Redirect to Courses: When students successfully complete the payment, they will be automatically redirected to the courses. You must enable the “Automatically Complete WooCommerce Orders” options to complete the student’s payment.
Enable Guest Mode: Enable this option to let the students to purchase courses without creating an account first.
Revenue Sharing
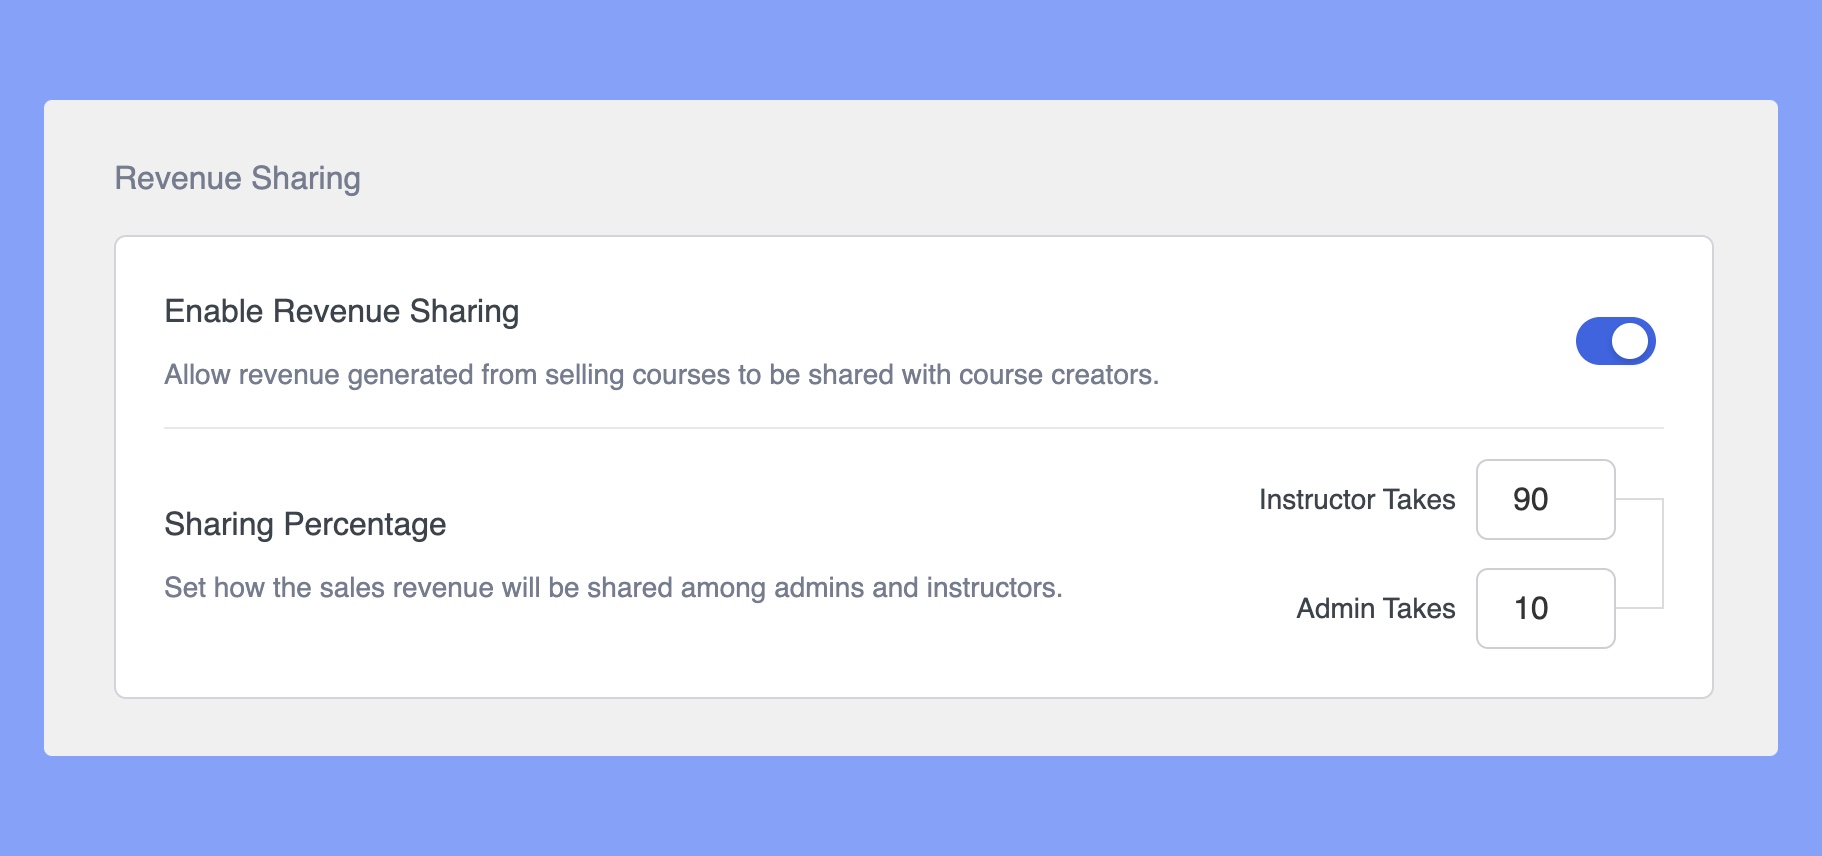
Enable Revenue Sharing: Allow sharing revenue generated from courses with course creators.
Sharing Percentage: Define how the sales revenue will be shared among the admins and instructors. Note that these values are in percentage.
Making a Course Paid
Now, it’s time to learn how you can make a course paid using WooCommerce. There are a few simple steps involved so let’s go over what they are.
Creating a Product
The first thing you need to do is create a Product with WooCommerce. You can do this from WP Admin > Products.
Click on Add New to open the Product Creation Page. Here, give the Product a title — this can be the same as the Course Name to keep things simple.
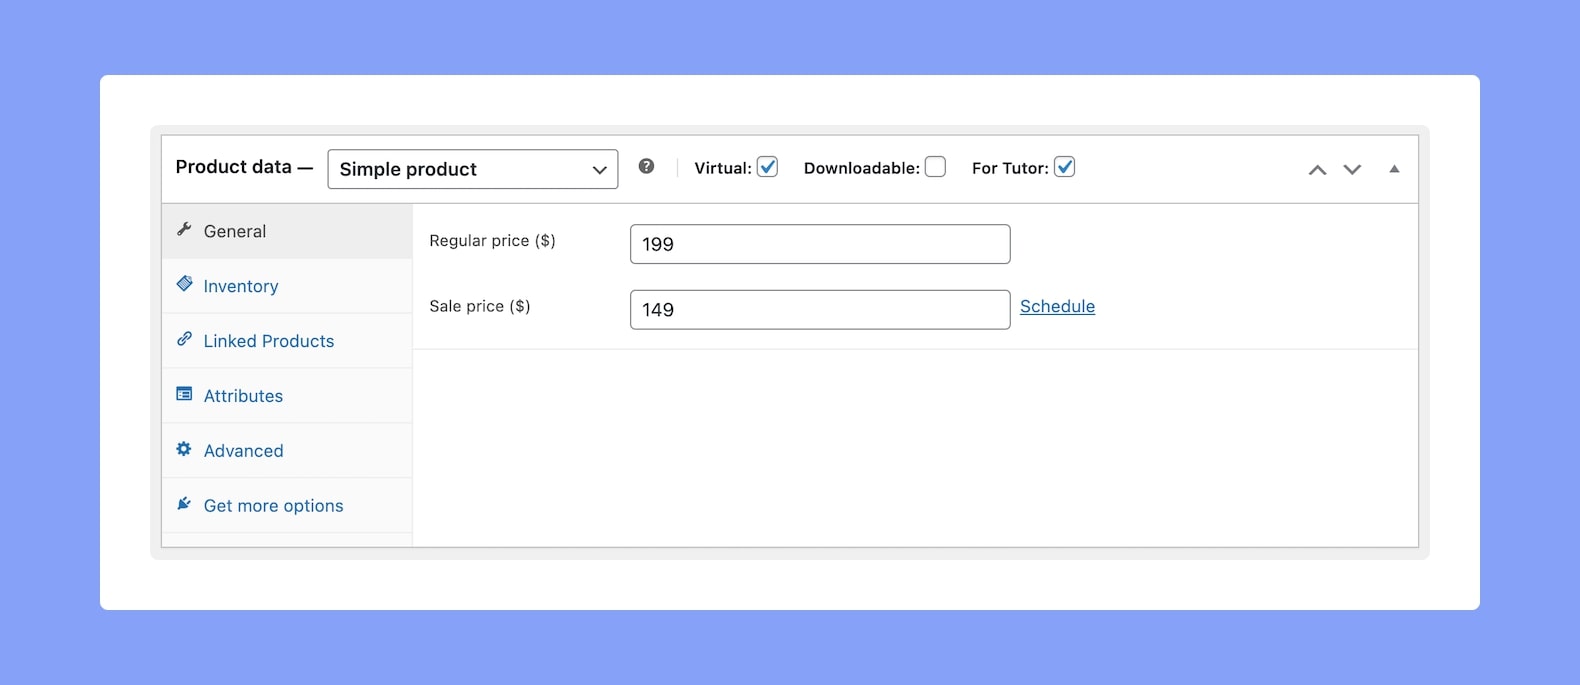
Then, in the Product Data section define the following features as they’re listed below:
- Product Type – Simple Product
- Virtual – Enabled
- For Tutor – Enabled
- Regular Price – Set a price of your choice
You can also set a Sale Price but that’s optional. Finally, click on Publish to save this product.
Linking a Product to a Course
Now it’s time to link our product to our Course. To do this, visit your Course in edit mode. With the WooCommerce plugin activated and enabled, a new Add Product section should appear on your Course Creation Page.
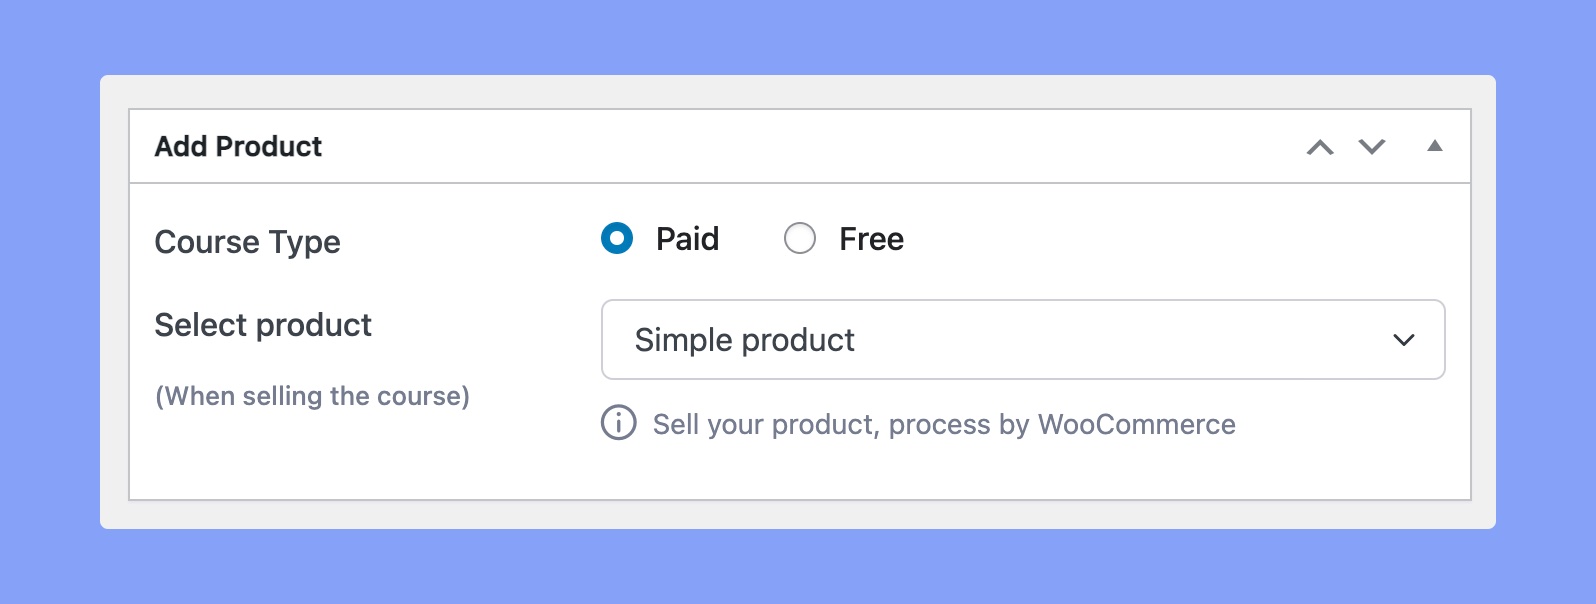
Scroll down to this section and select the option Paid. Then, from the following dropdown, select the product that you made. Next, set a Regular Price (and Sale Price if desired) if it’s not set already. Finally, click on Update (or Publish, if you’re creating the course from scratch) to finish off.
Setup Payment Method
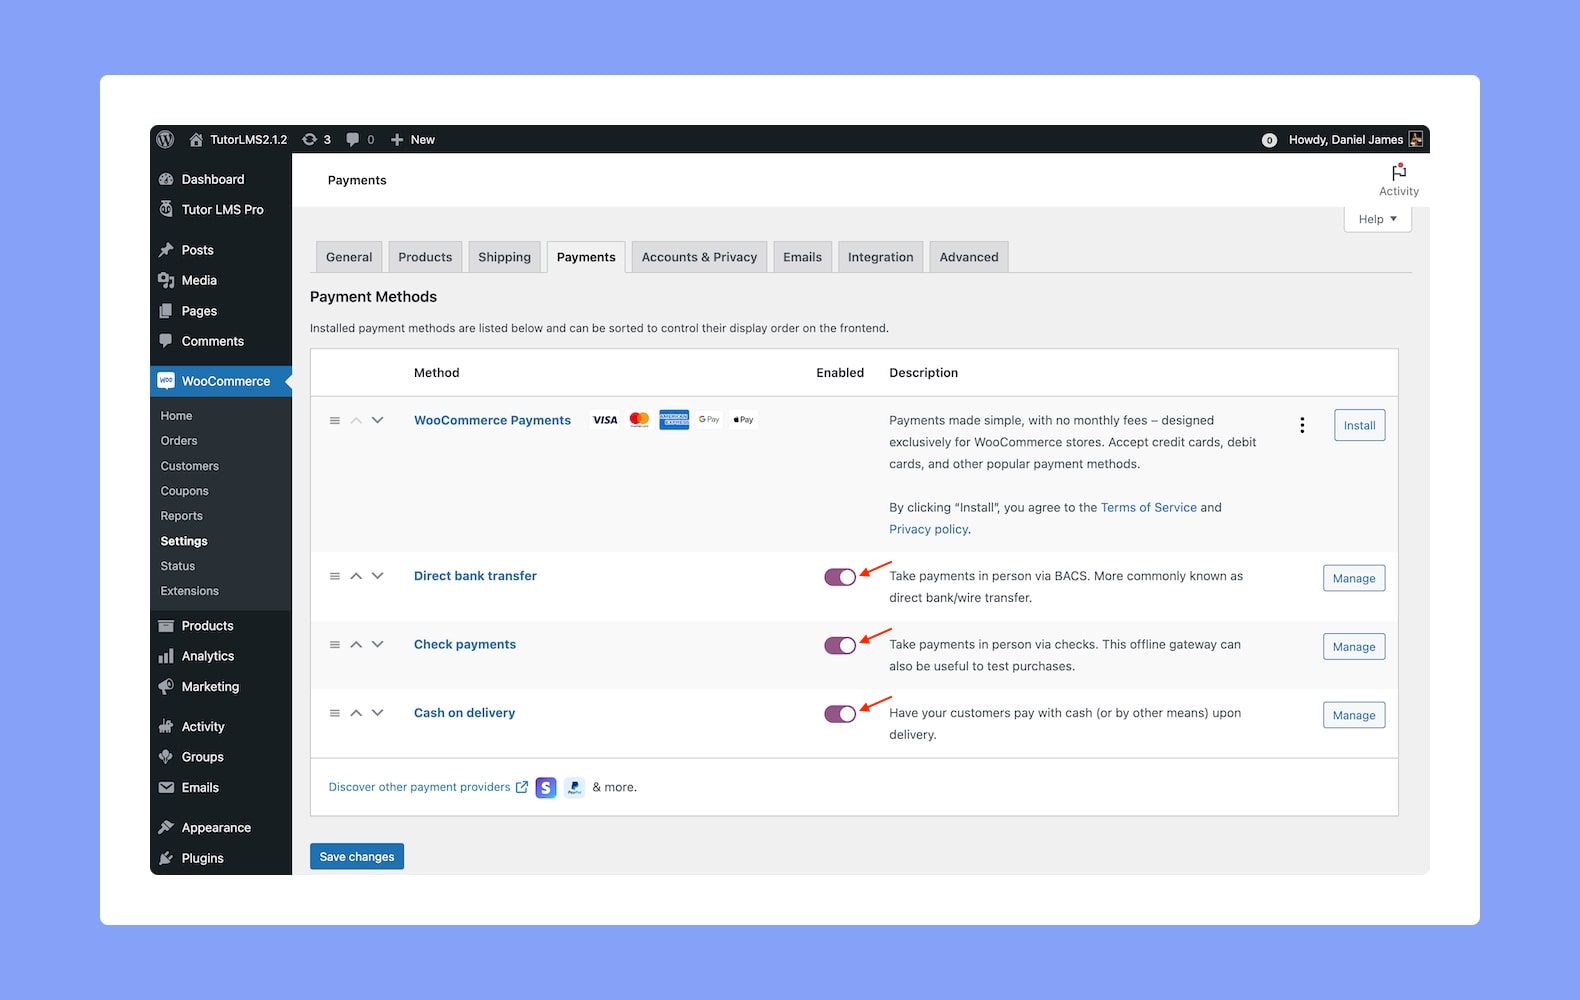
The final step in this process is setting up your payment methods. To do this, find the WooCommerce Payment Settings from WP Admin > WooCommerce > Settings > Payments (tab). Here, enable and configure the preferred payment methods of your choice.
Now that that’s done, anyone will be able to add your course to their cart or to the wishlist and buy the course anytime they want!