Authorize.net
Authorize.Net, a subsidiary of Visa, is a reliable and widely used payment gateway. With Authorize.Net, you can process payments securely using credit cards, eChecks, and other options. Now, you can seamlessly integrate Authorize.net and take payments for your eLearning website.
Before proceeding, make sure that Authorize.Net supports your region and currency.
Adding Authorize.net as a Payment Option
Follow the steps below to add Authorize.net payment gateway to your Tutor LMS website:
- Log in to your Tutor LMS WordPress Dashboard.
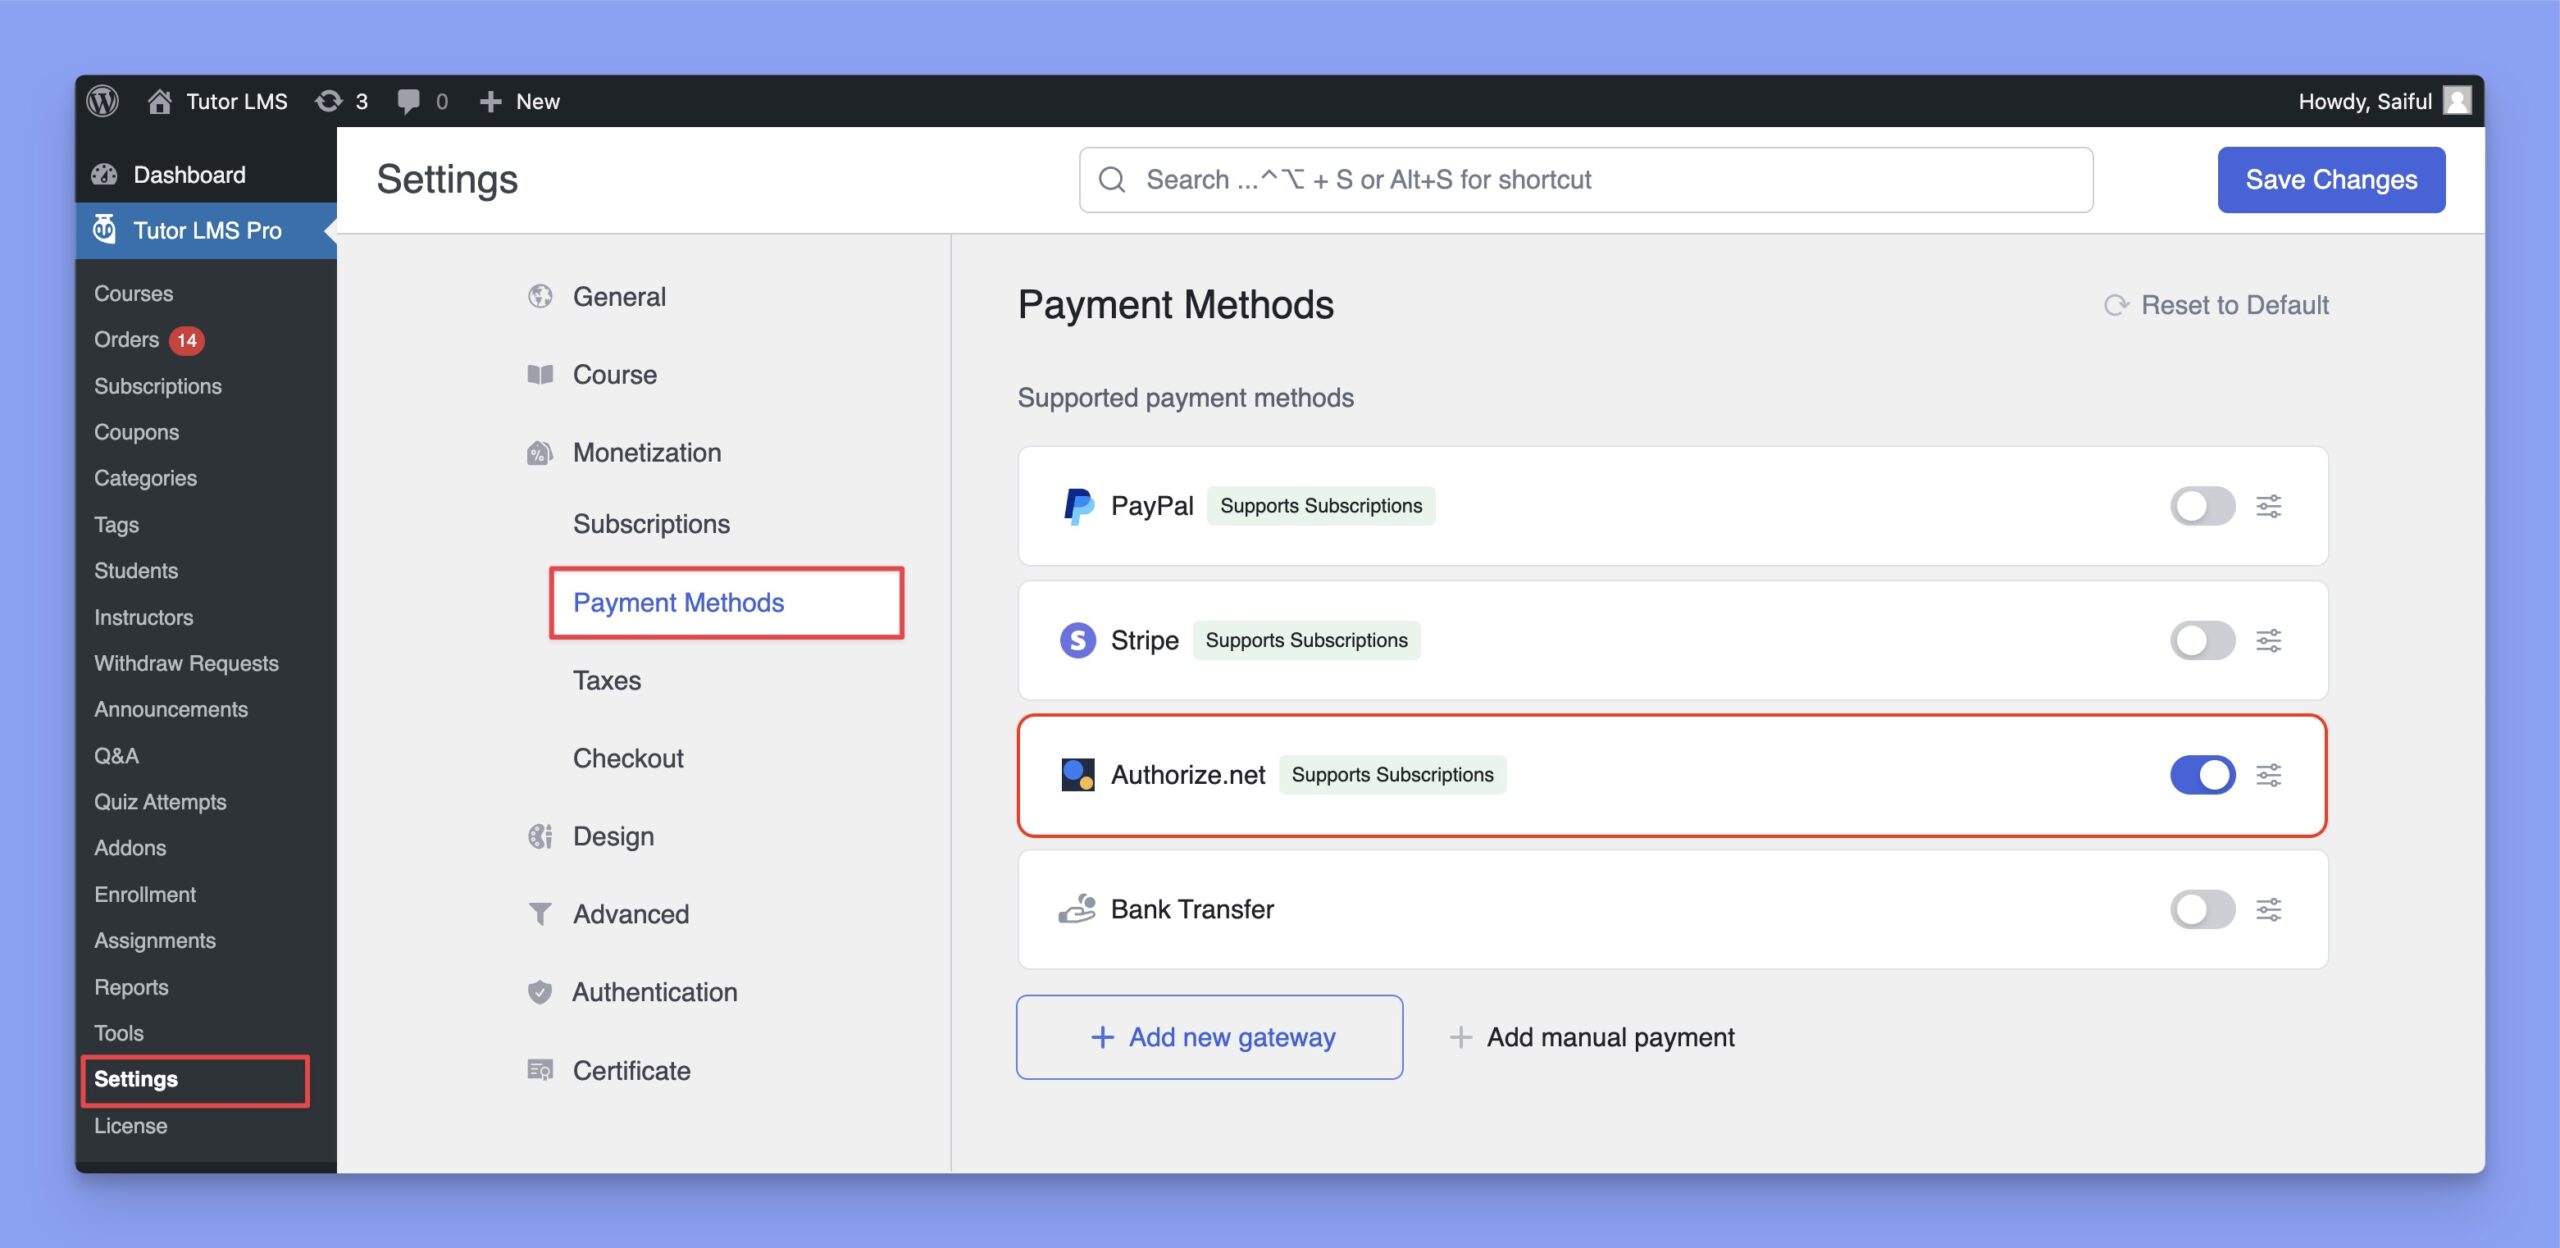
- Navigate to Tutor LMS Pro > Settings > Monetization > Payment Methods.
- Click on the Add new gateway button.
- From the list of available payment methods, select Authorize.net and click the Install button.
- Once installed, Authorize.net will appear as one of your payment options.
Note: You’ll need an active Tutor LMS Pro subscription to use Authorize.net.
Configuring Authorize.net Integration
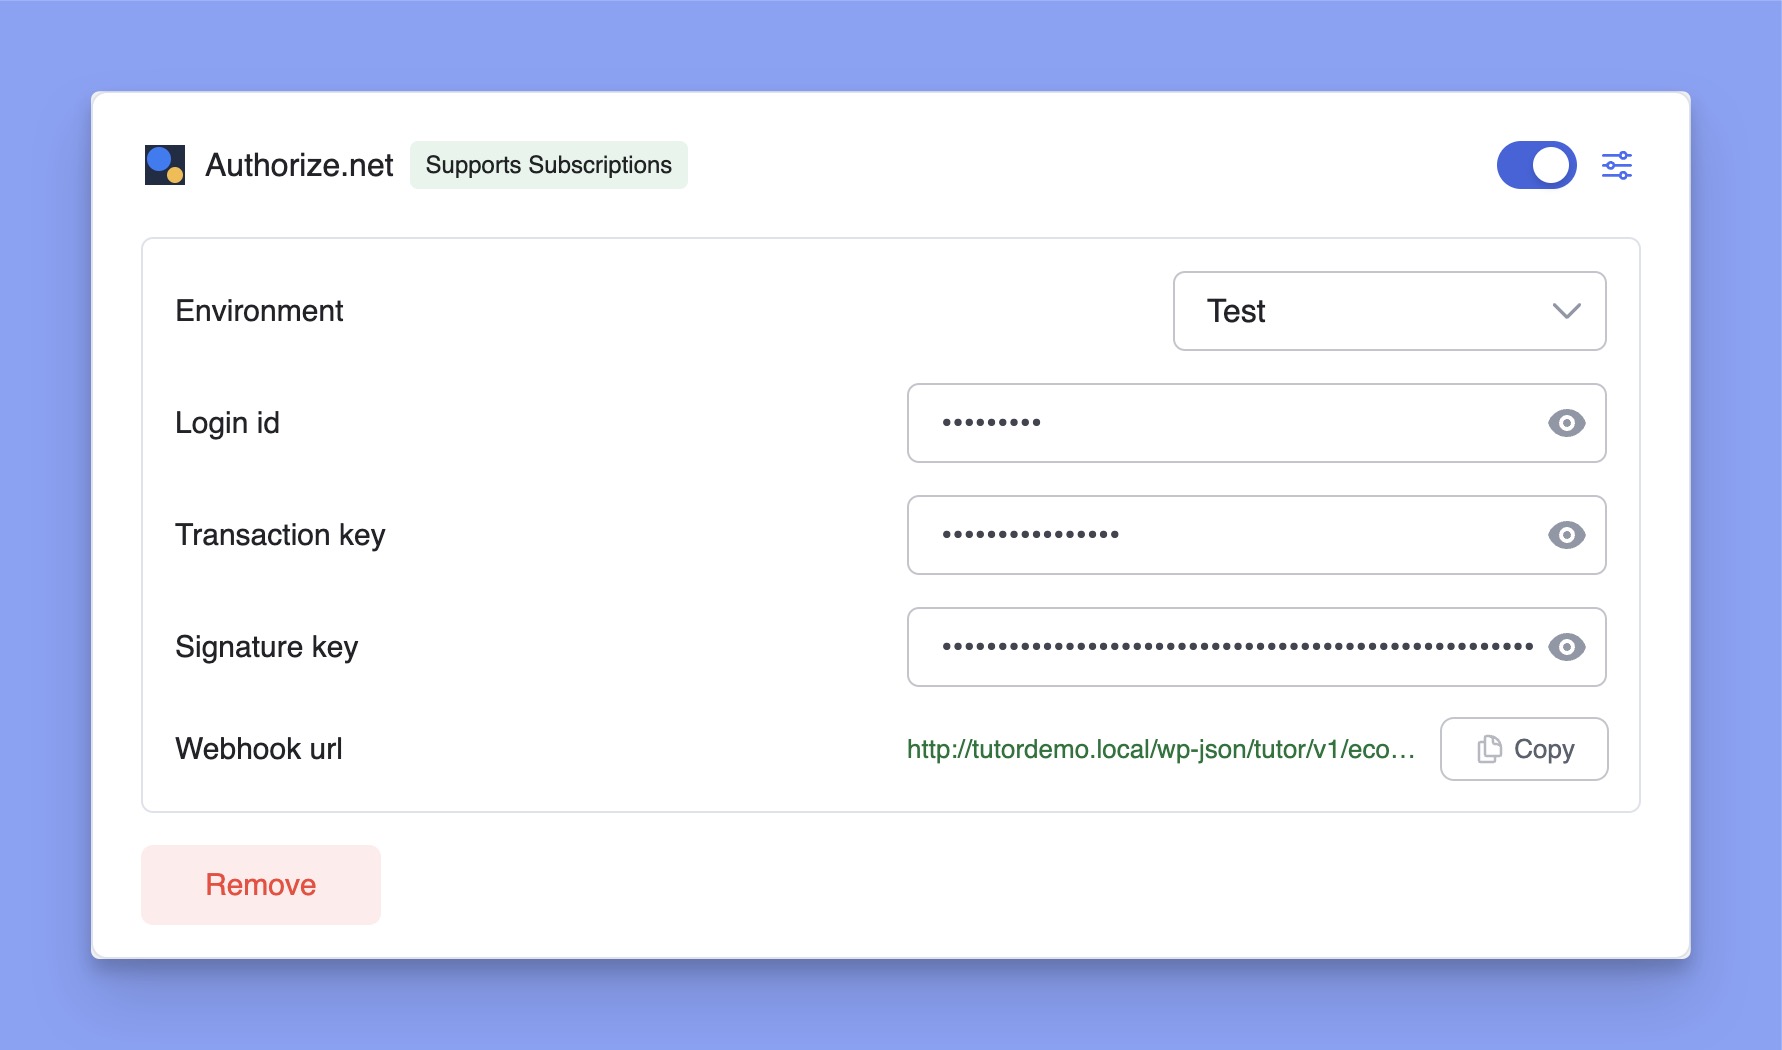
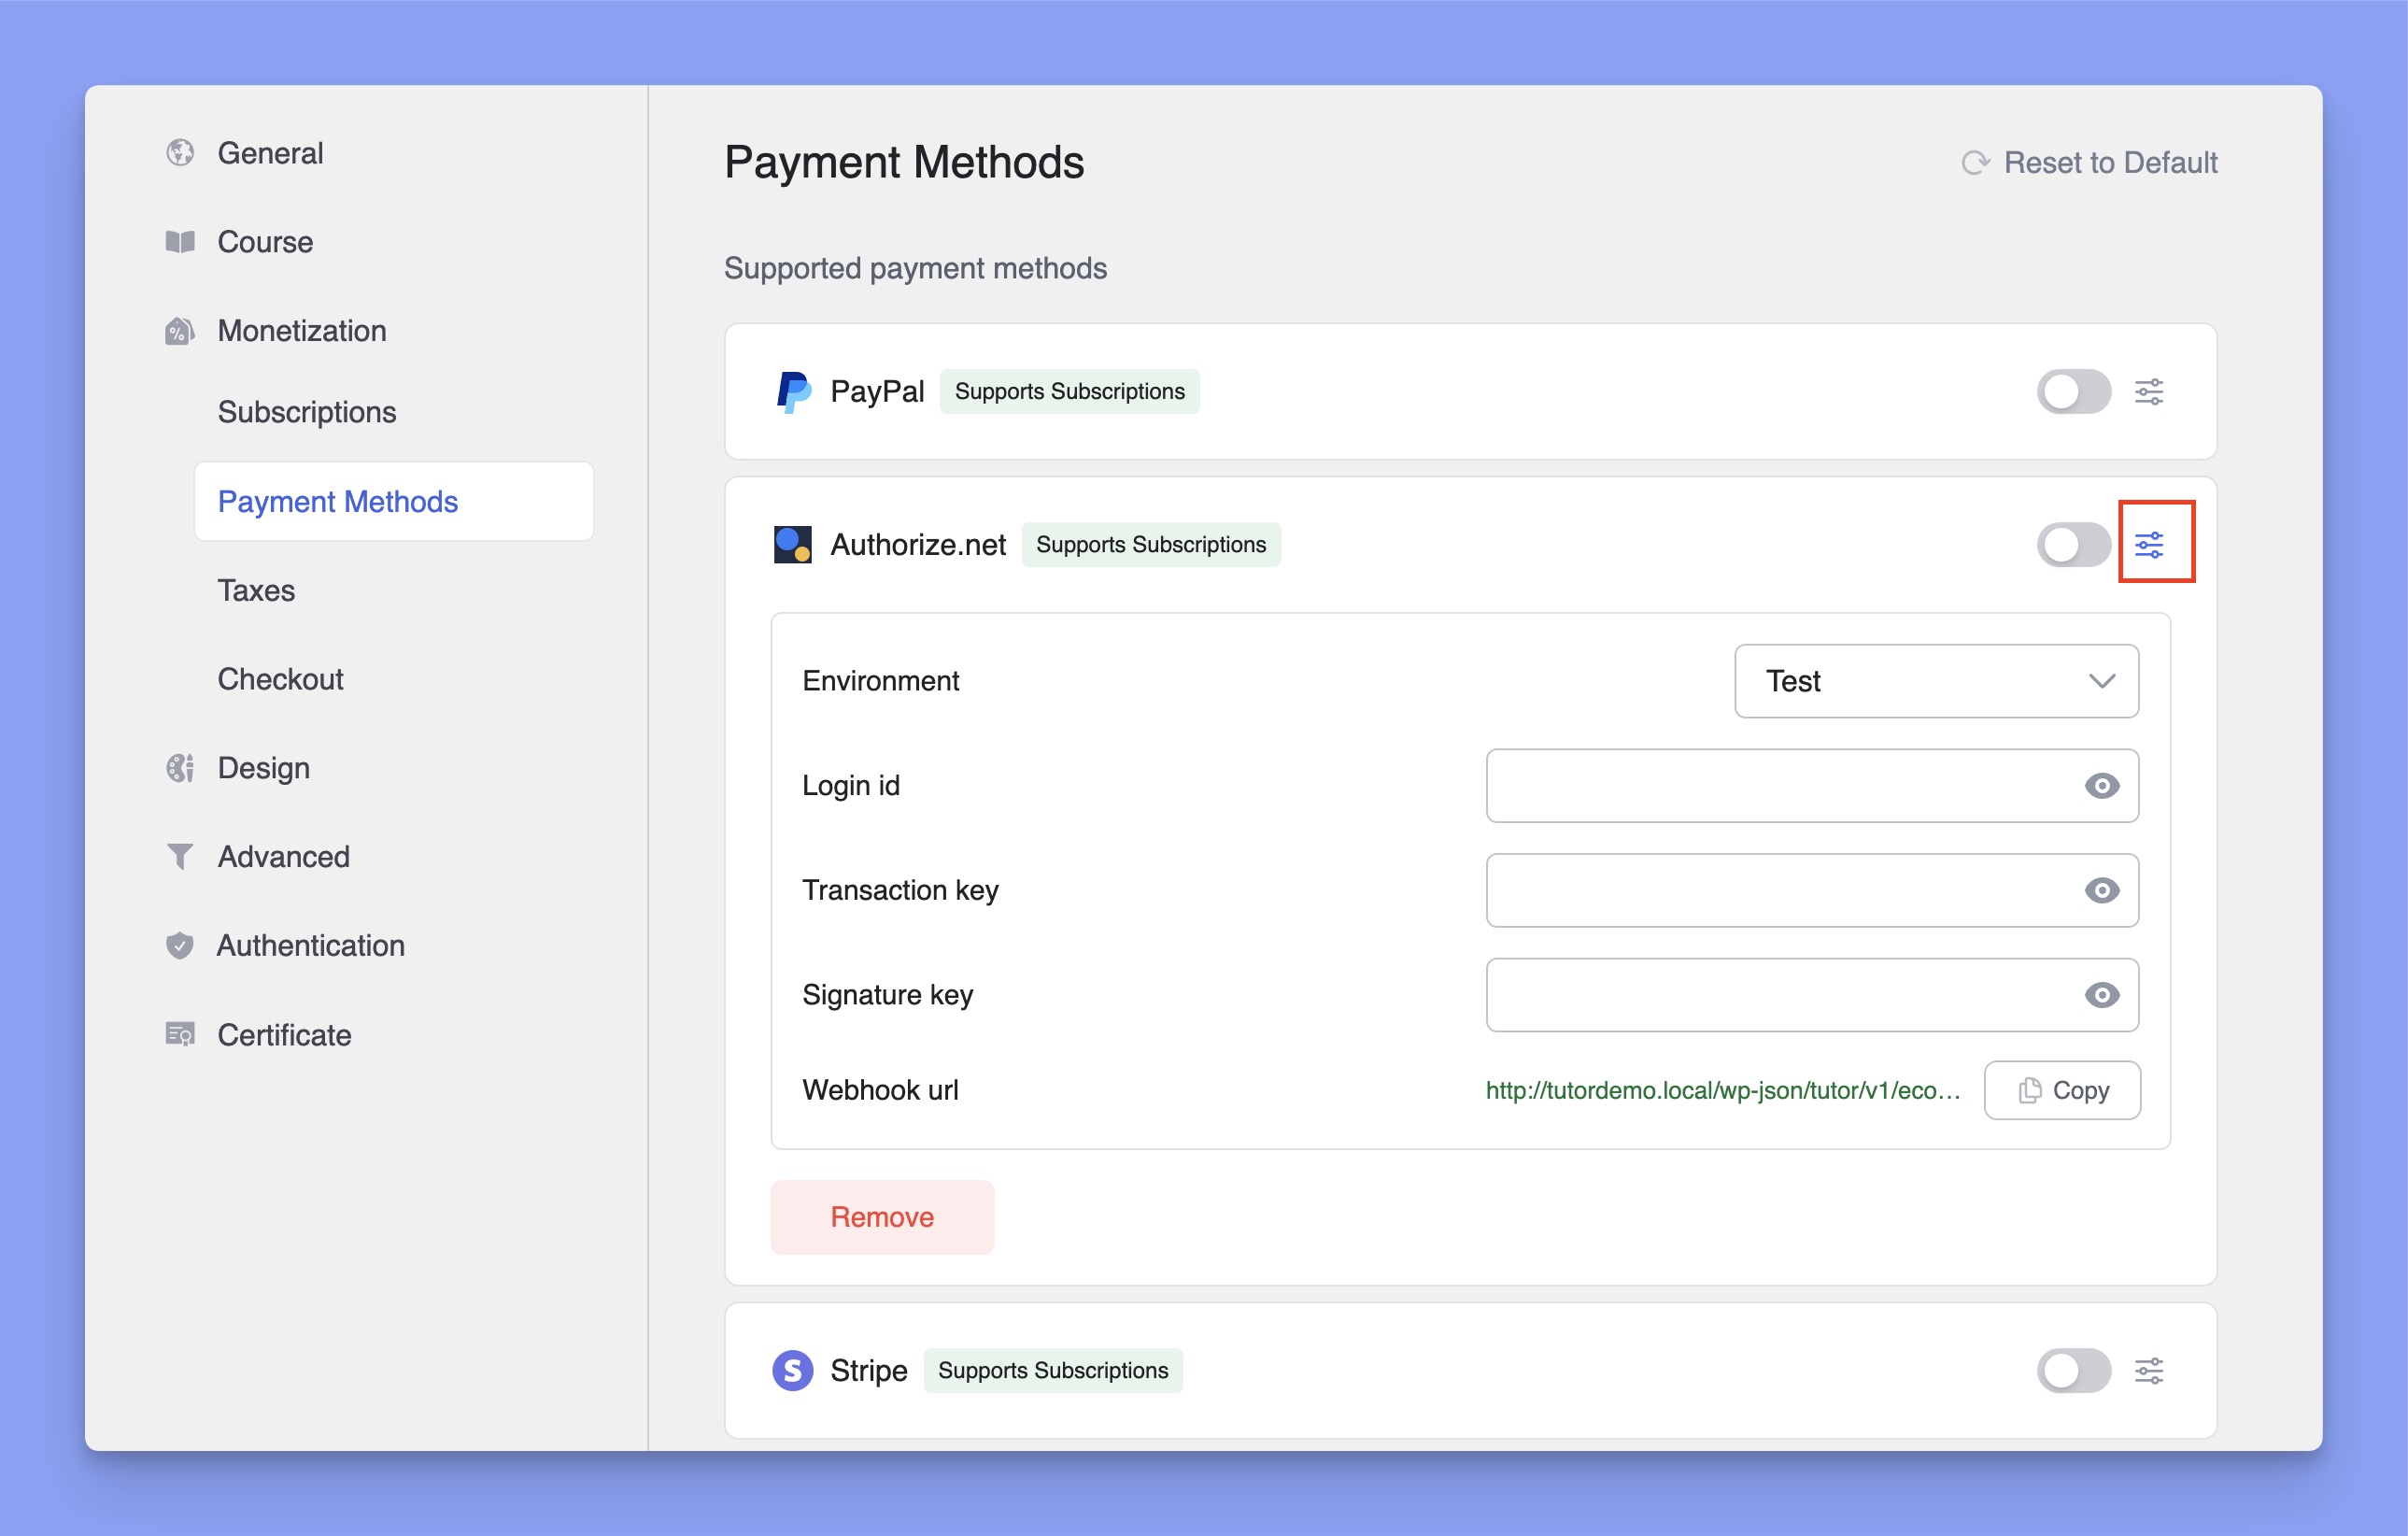
In the Payment Methods section, click the Setup icon next to Authorize.net to expand the settings. Here, you have to select the Environment, Login ID, Transaction key, and Signature key.
How to get Authorize.net Login ID and Keys?
To use Authorize.net on your Tutor LMS website, you’ll need the Login ID, Transaction key, and Signature key. Here’s the step-by-step process to get that.
- Login to your Authorize.net account.
- Navigate to Account > Settings.
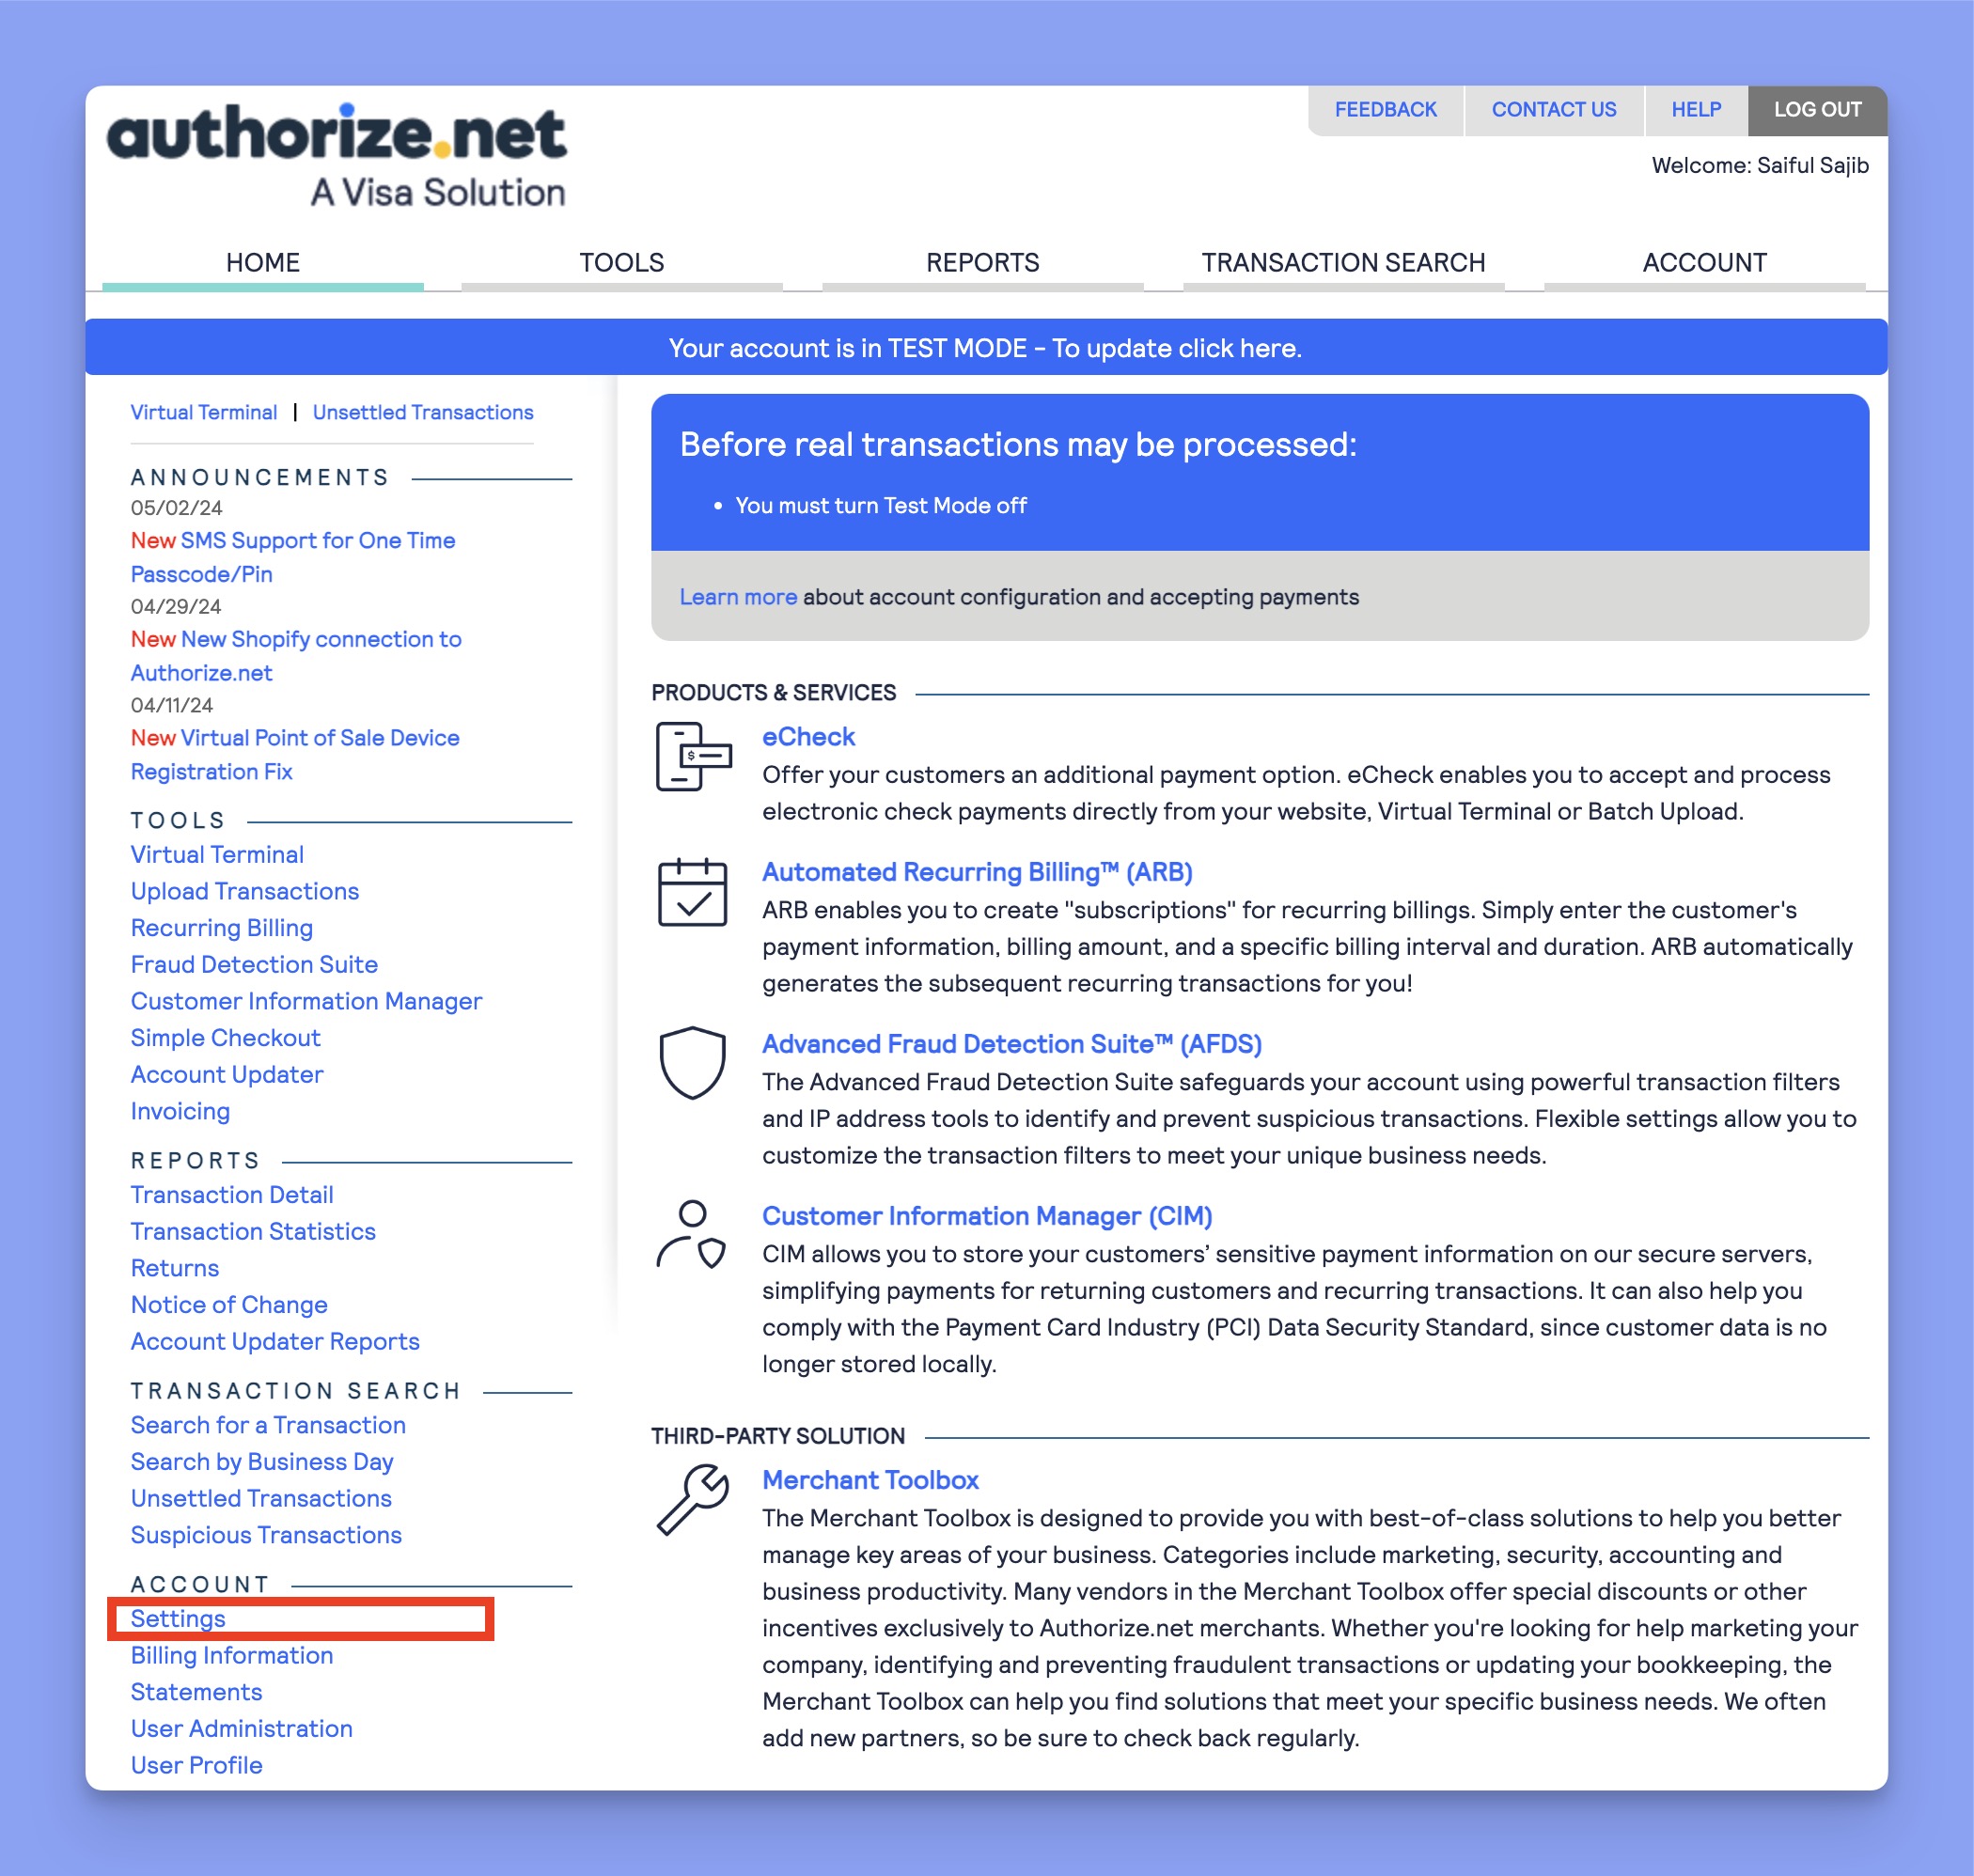
- Navigate to API Credentials & Keys under the Security Settings section.
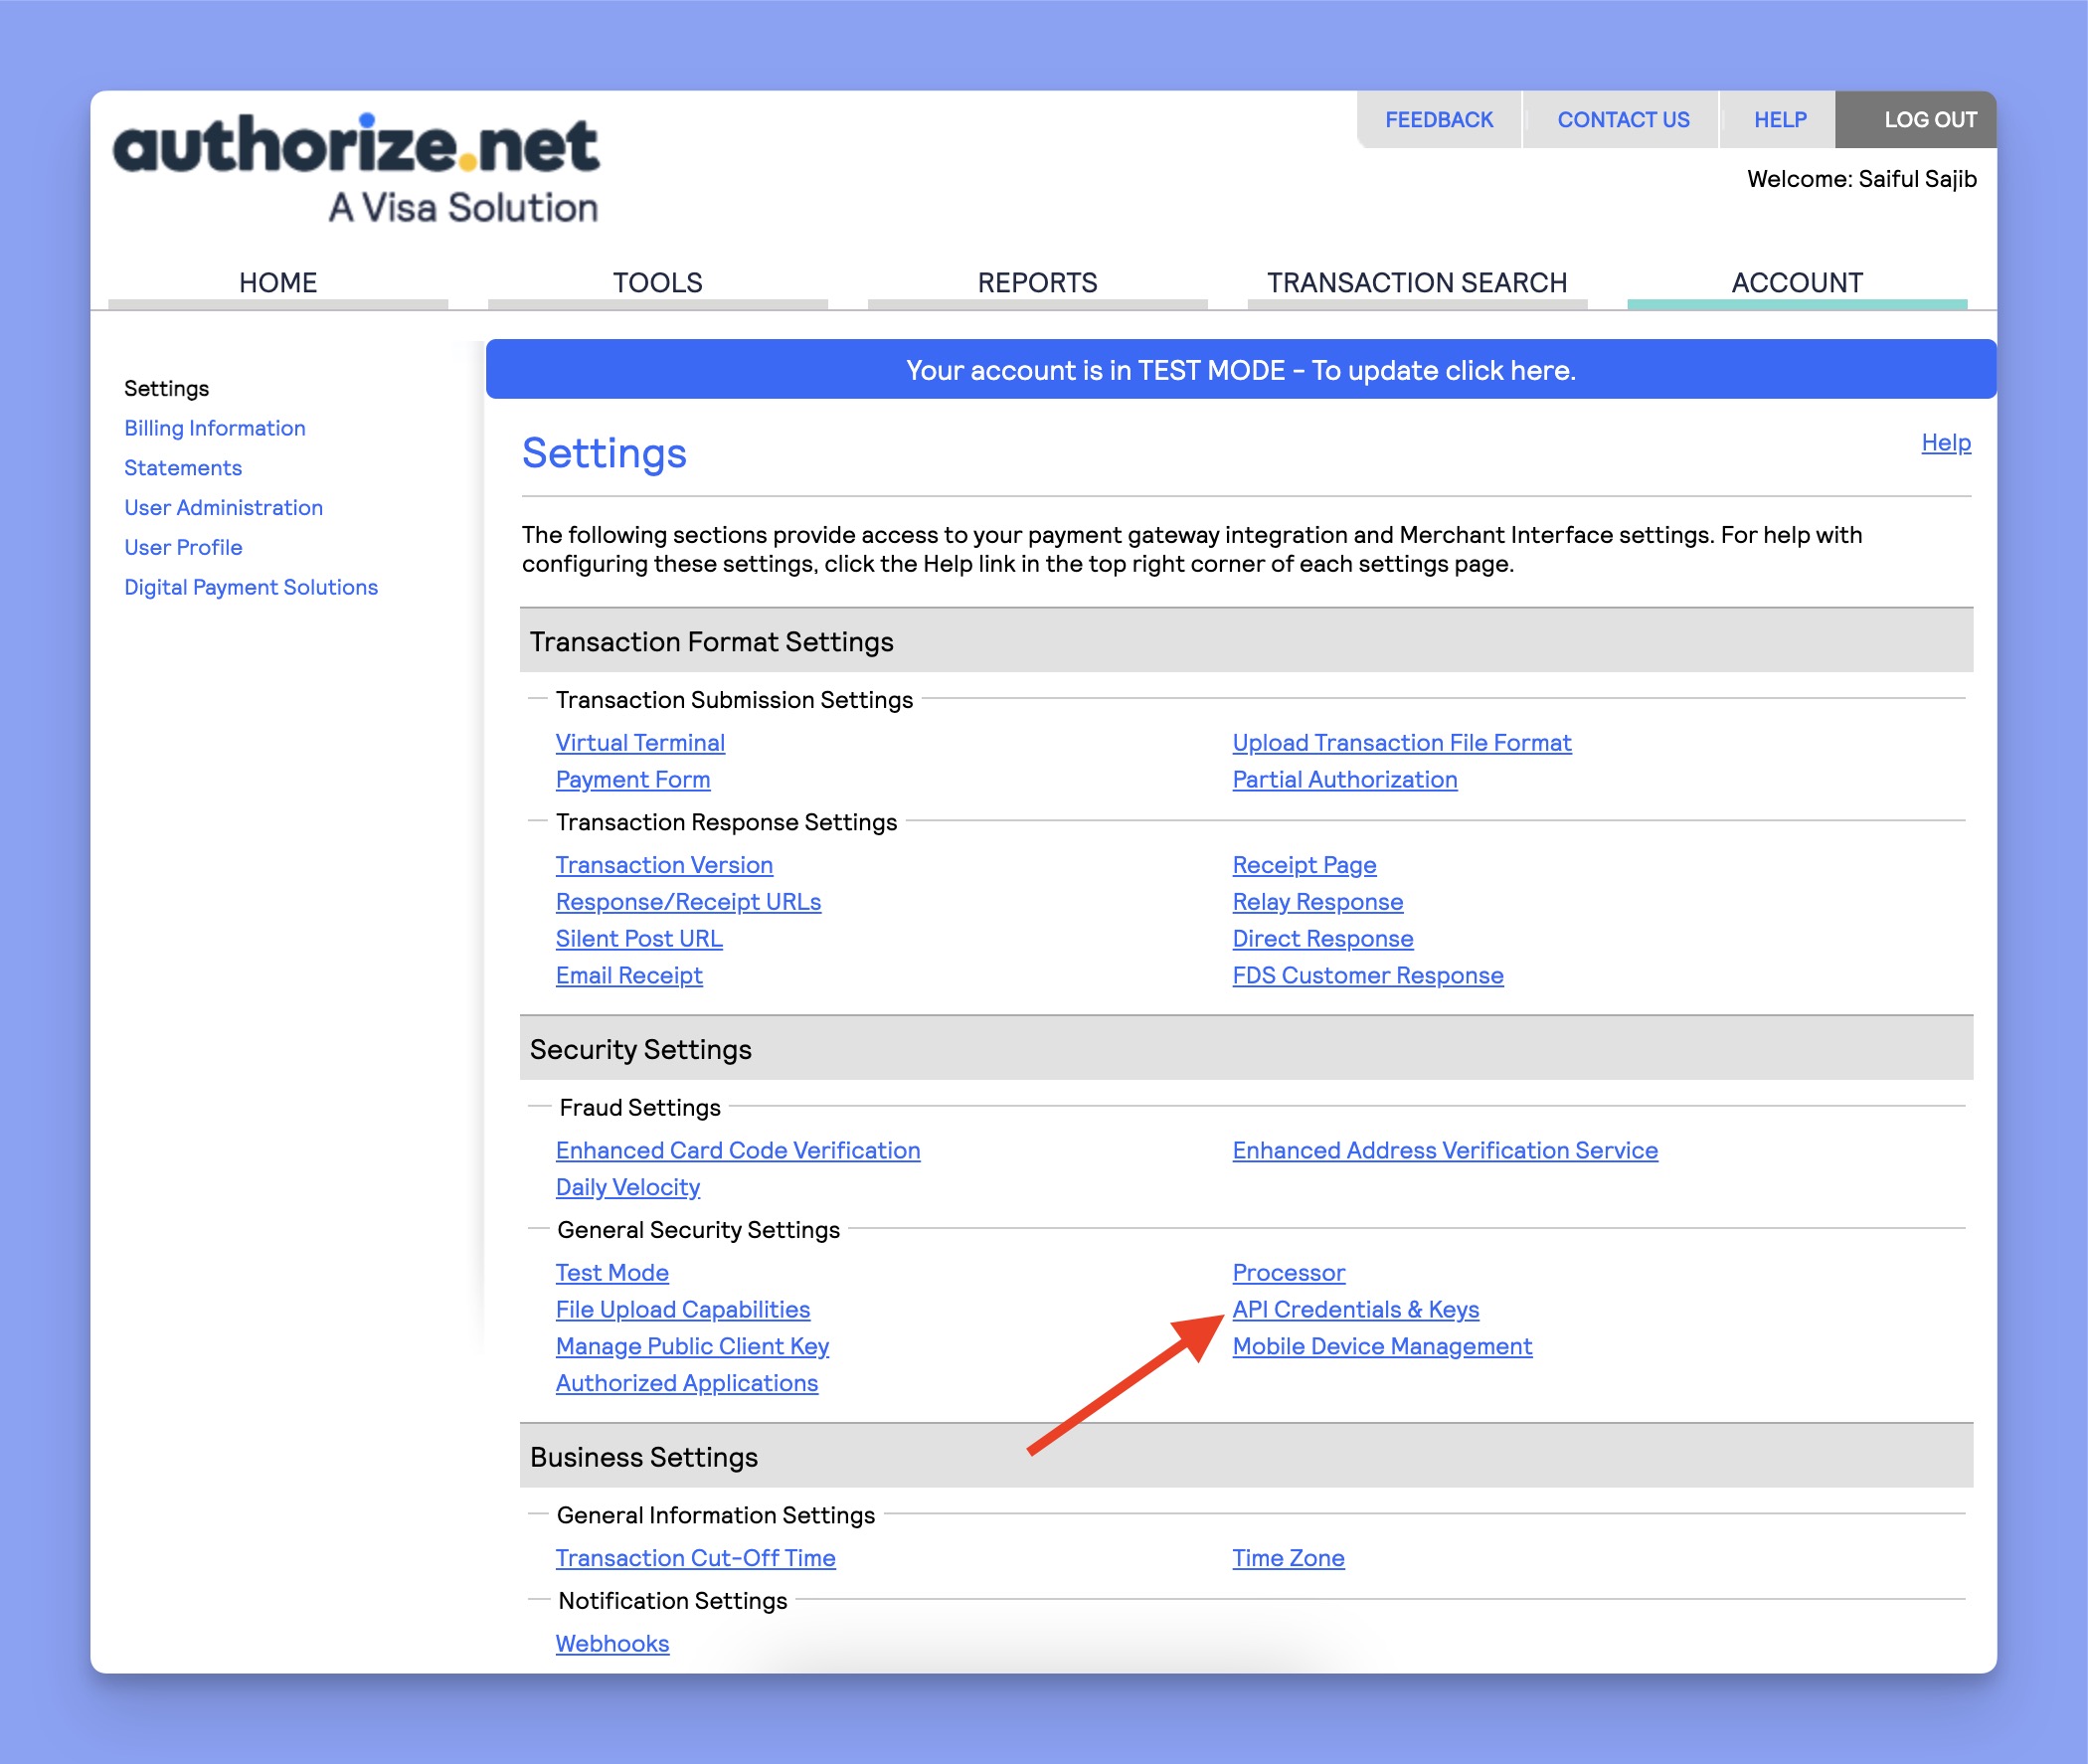
- You’ll get the Login ID in this section. To generate the Transaction Key and Signature Key, select the appropriate radio button and click Submit.
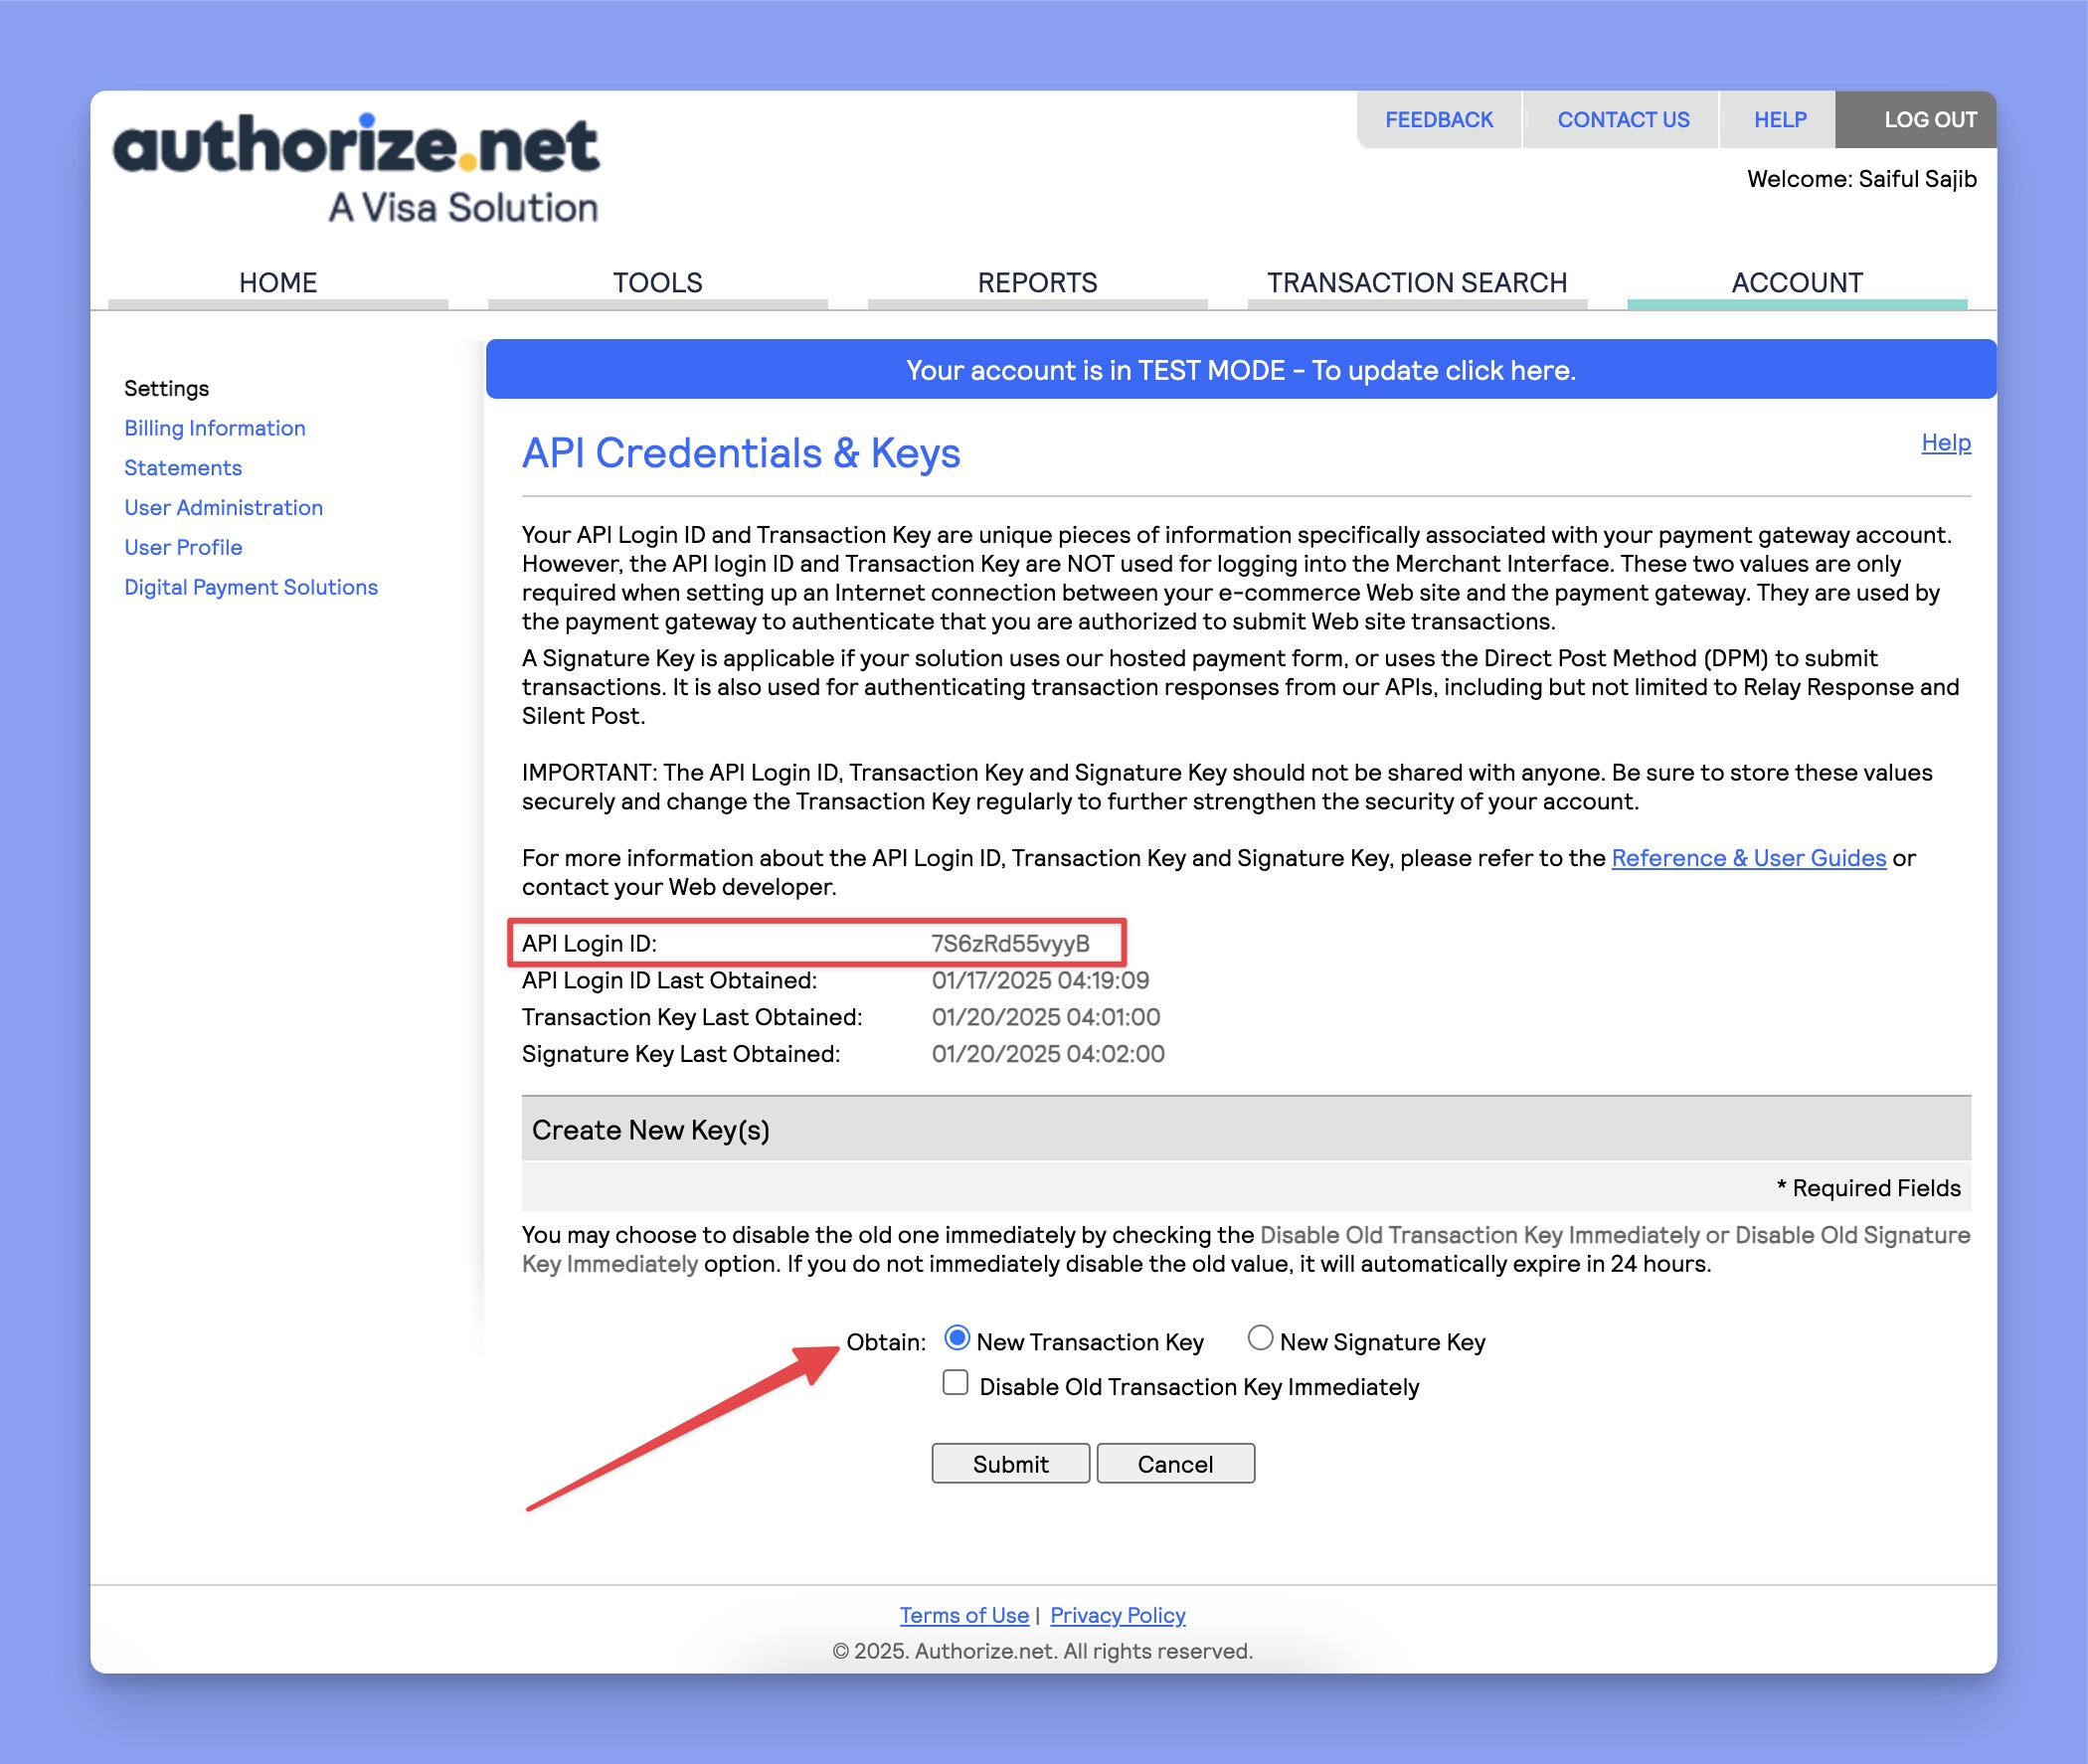
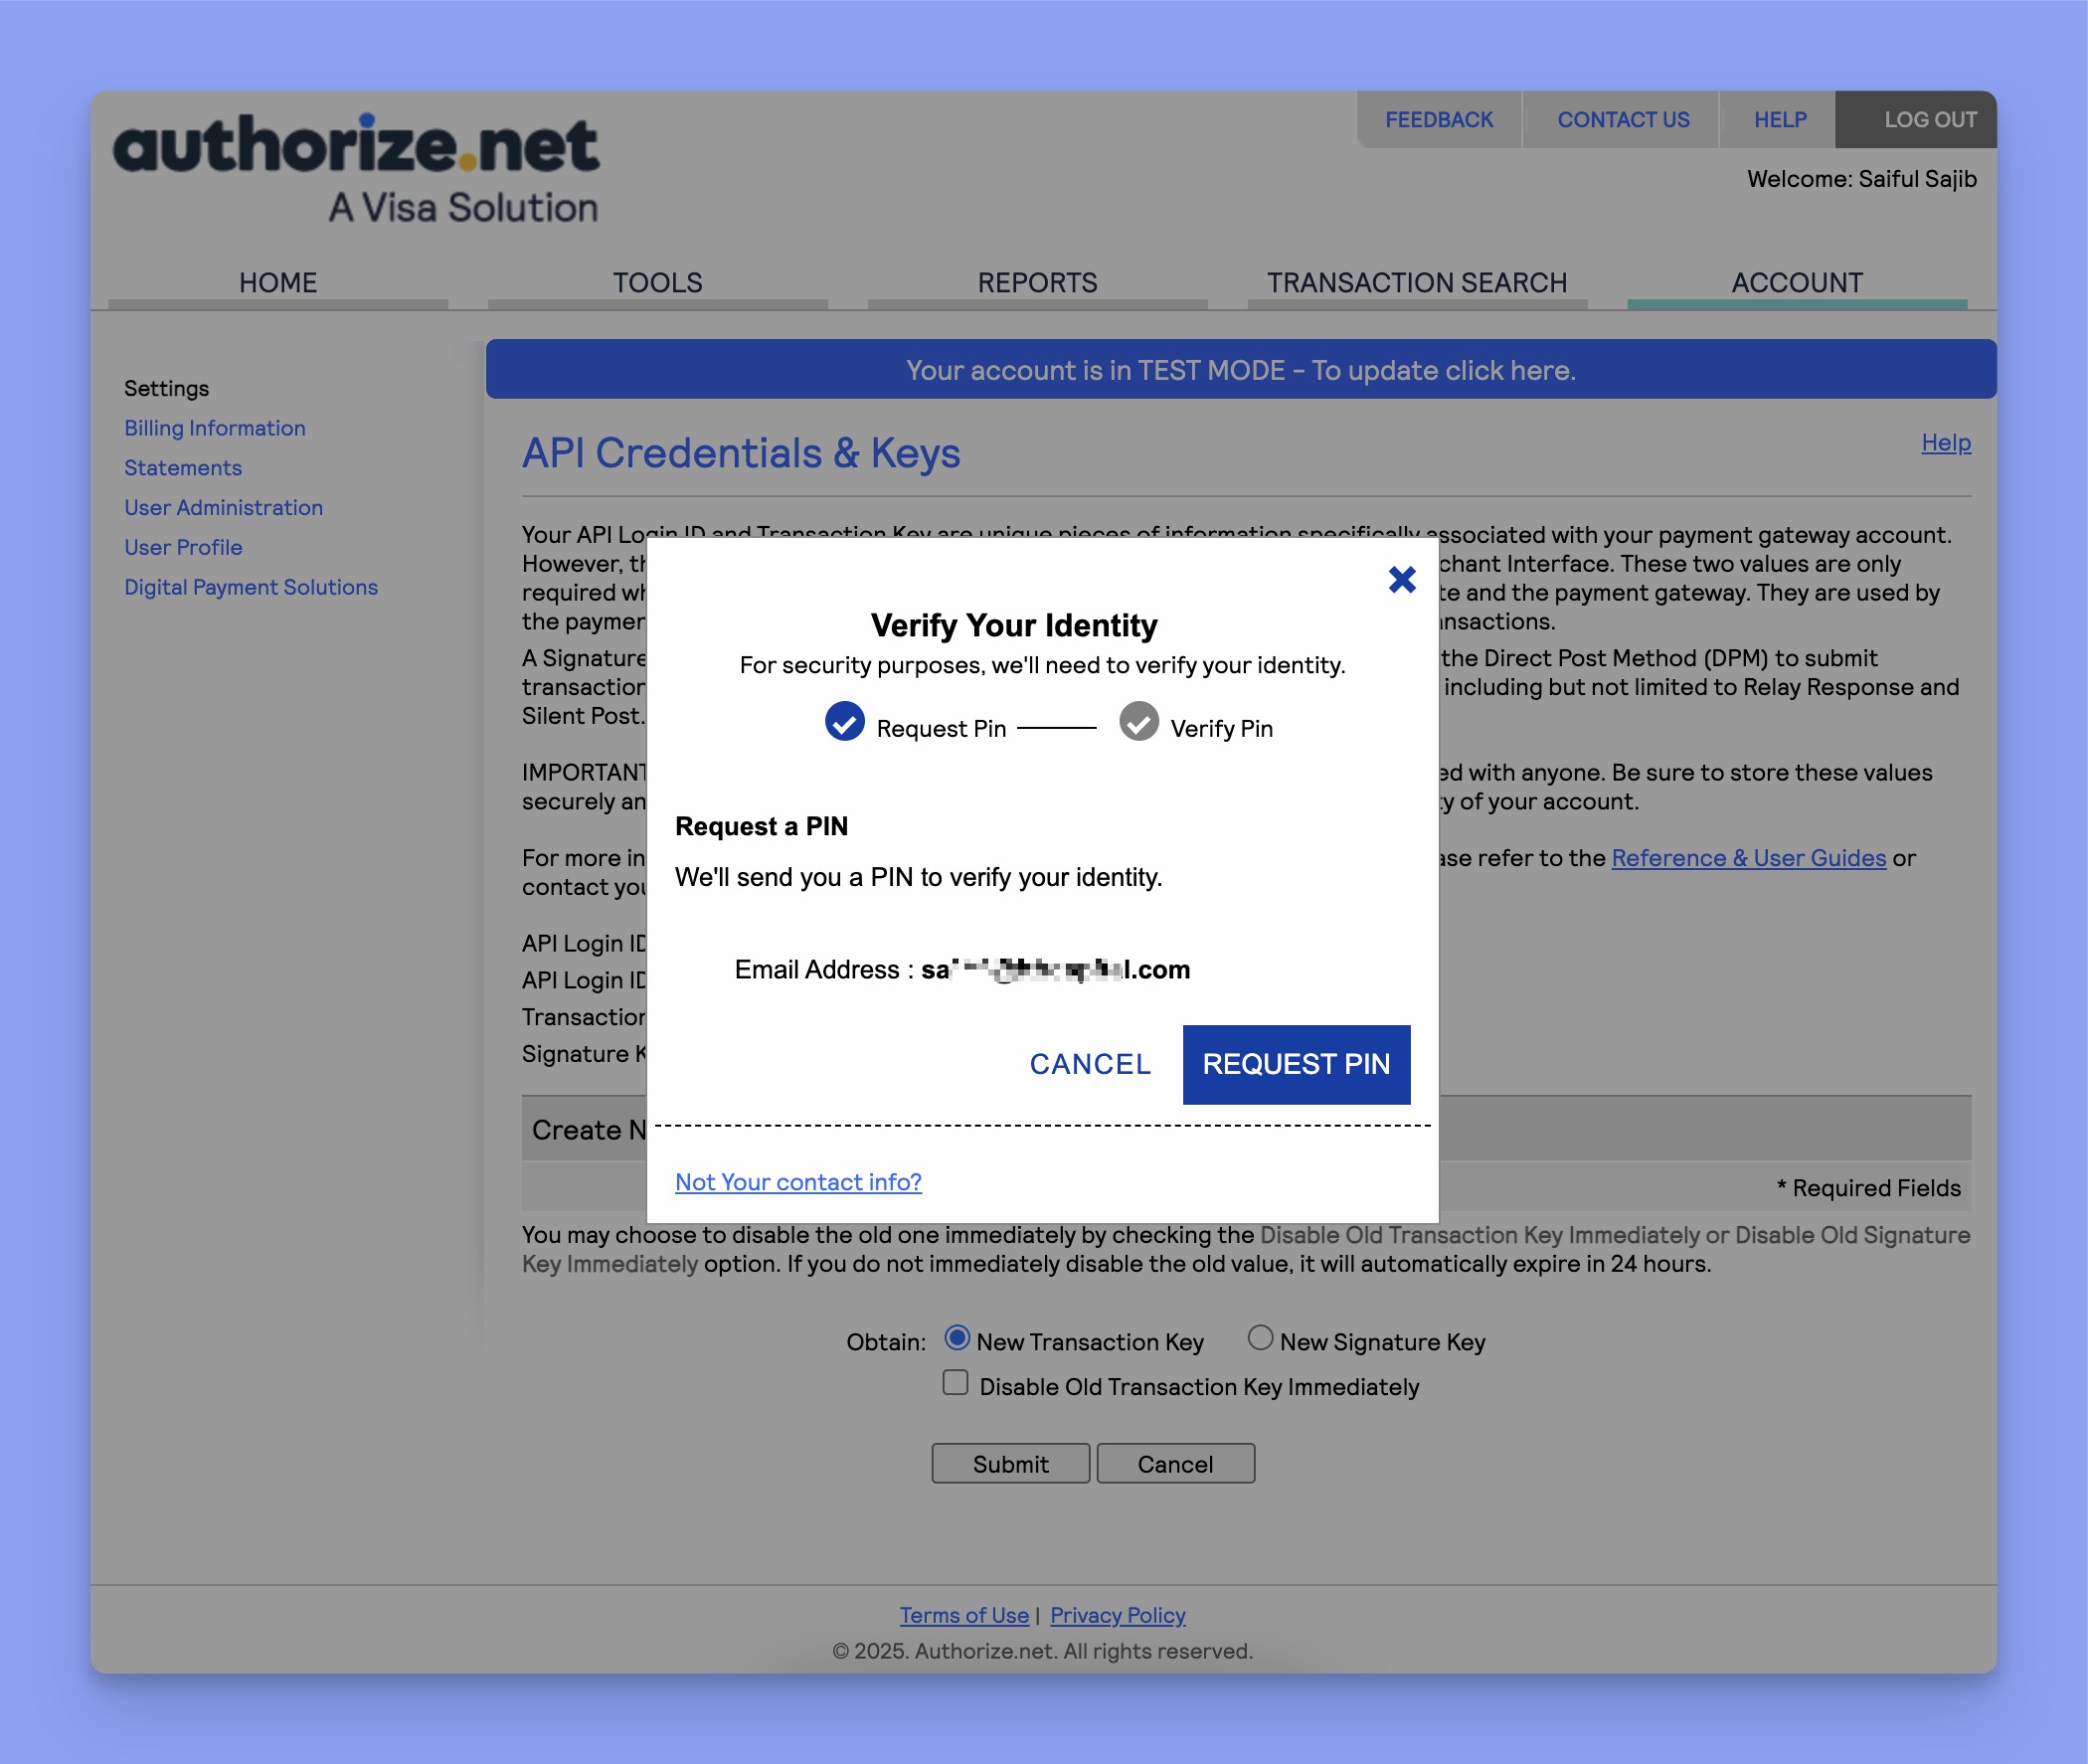
- Now, you need to verify your email again by entering a PIN.
- Once verified, the Transaction Key will appear on the screen. Make sure to copy it.
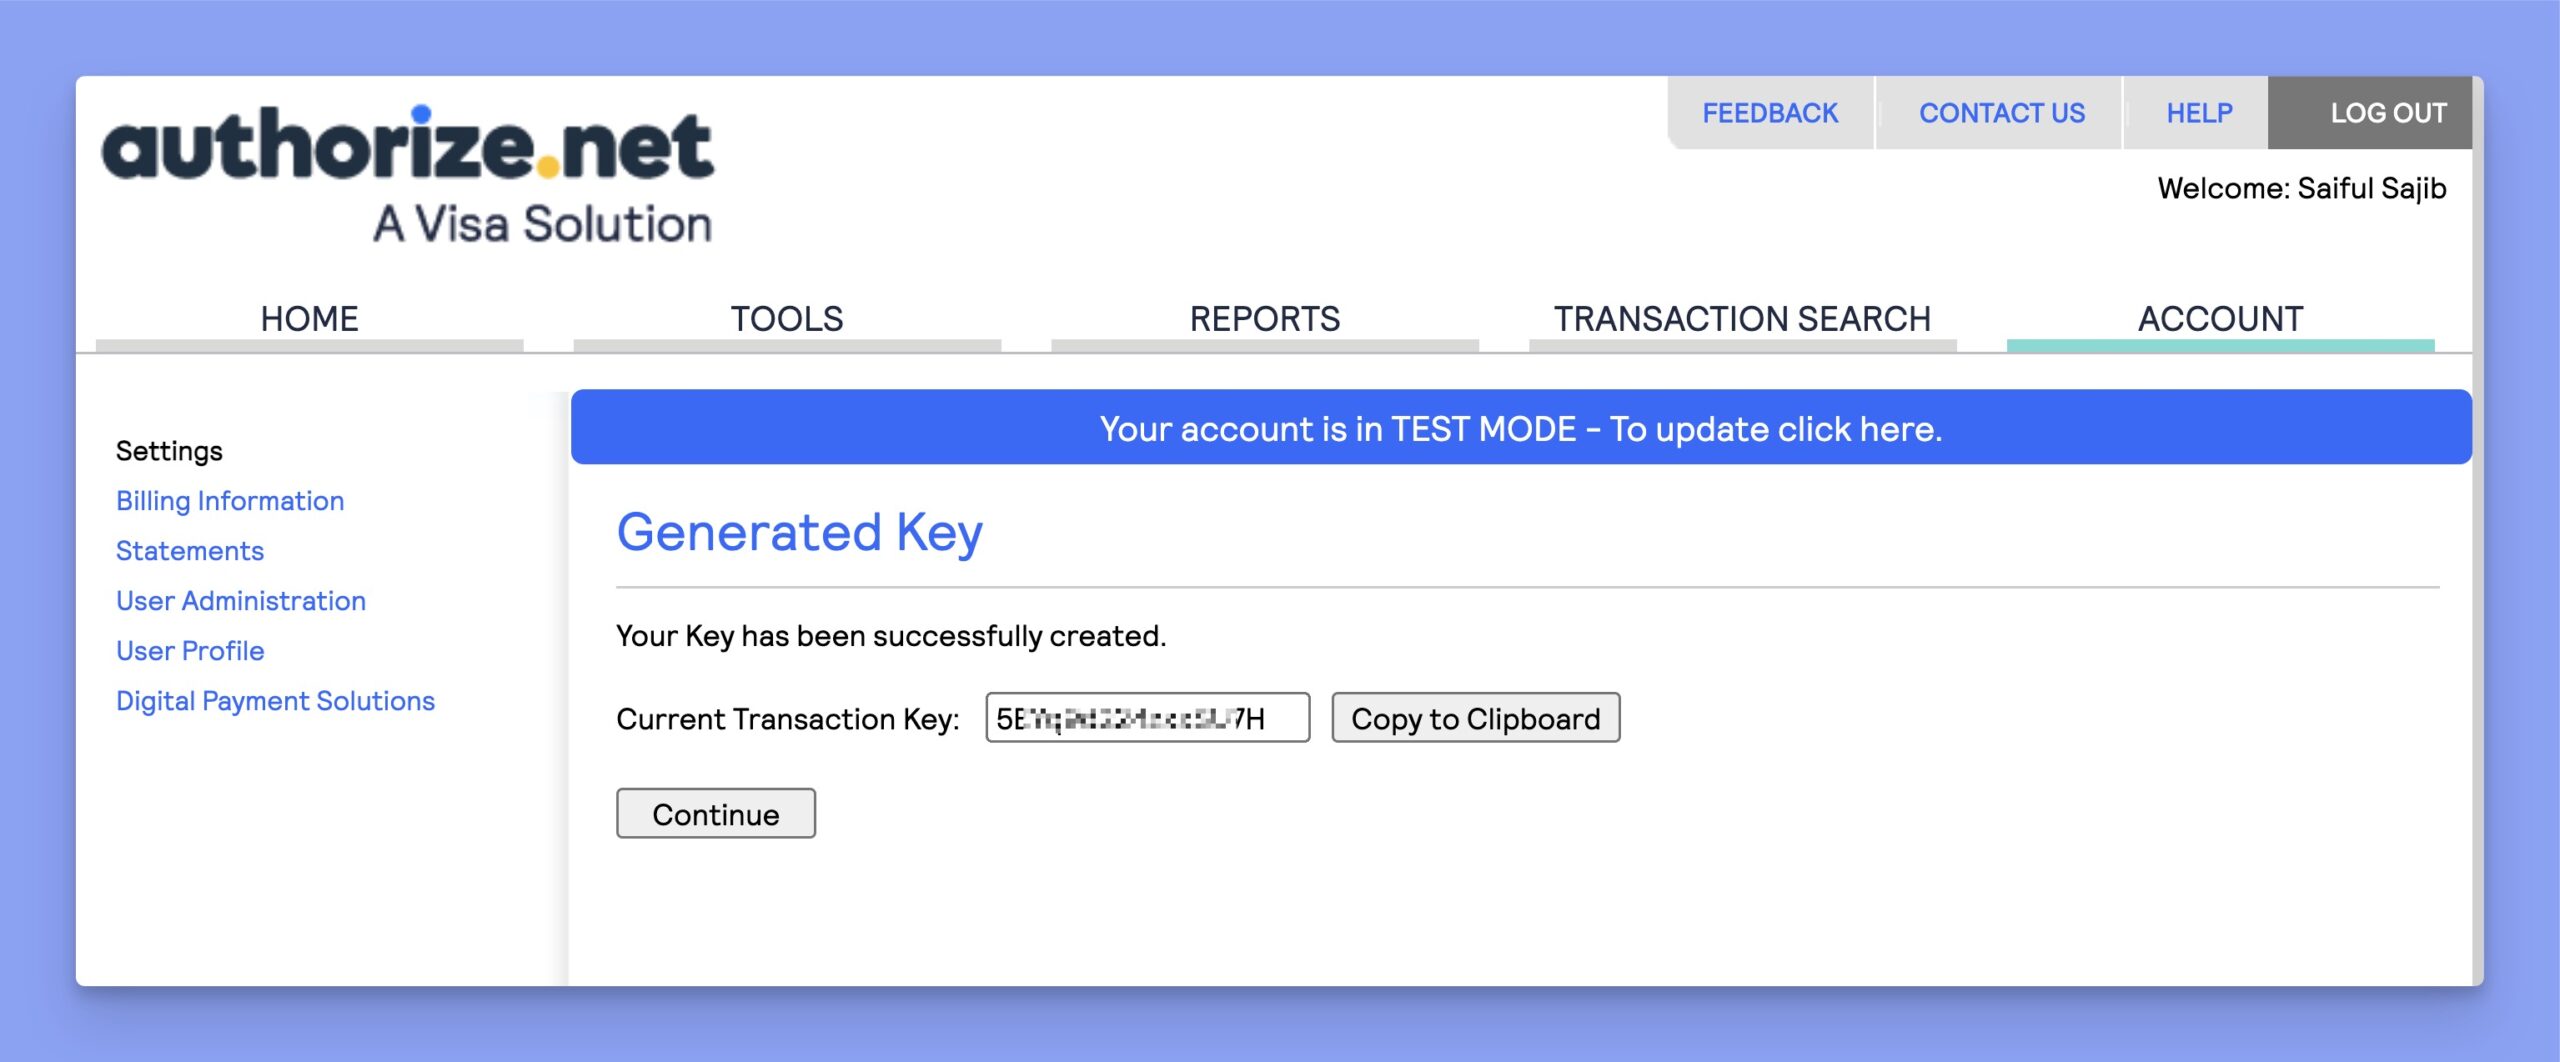
Repeat the same process to generate a signature key and copy that too.
Note: the code is displayed only once and cannot be retrieved again. Make sure to copy it and store it safely for future reference.
- Now, you have to add the Endpoint URL. To do so, navigate to Account > Business Settings > Webhooks.
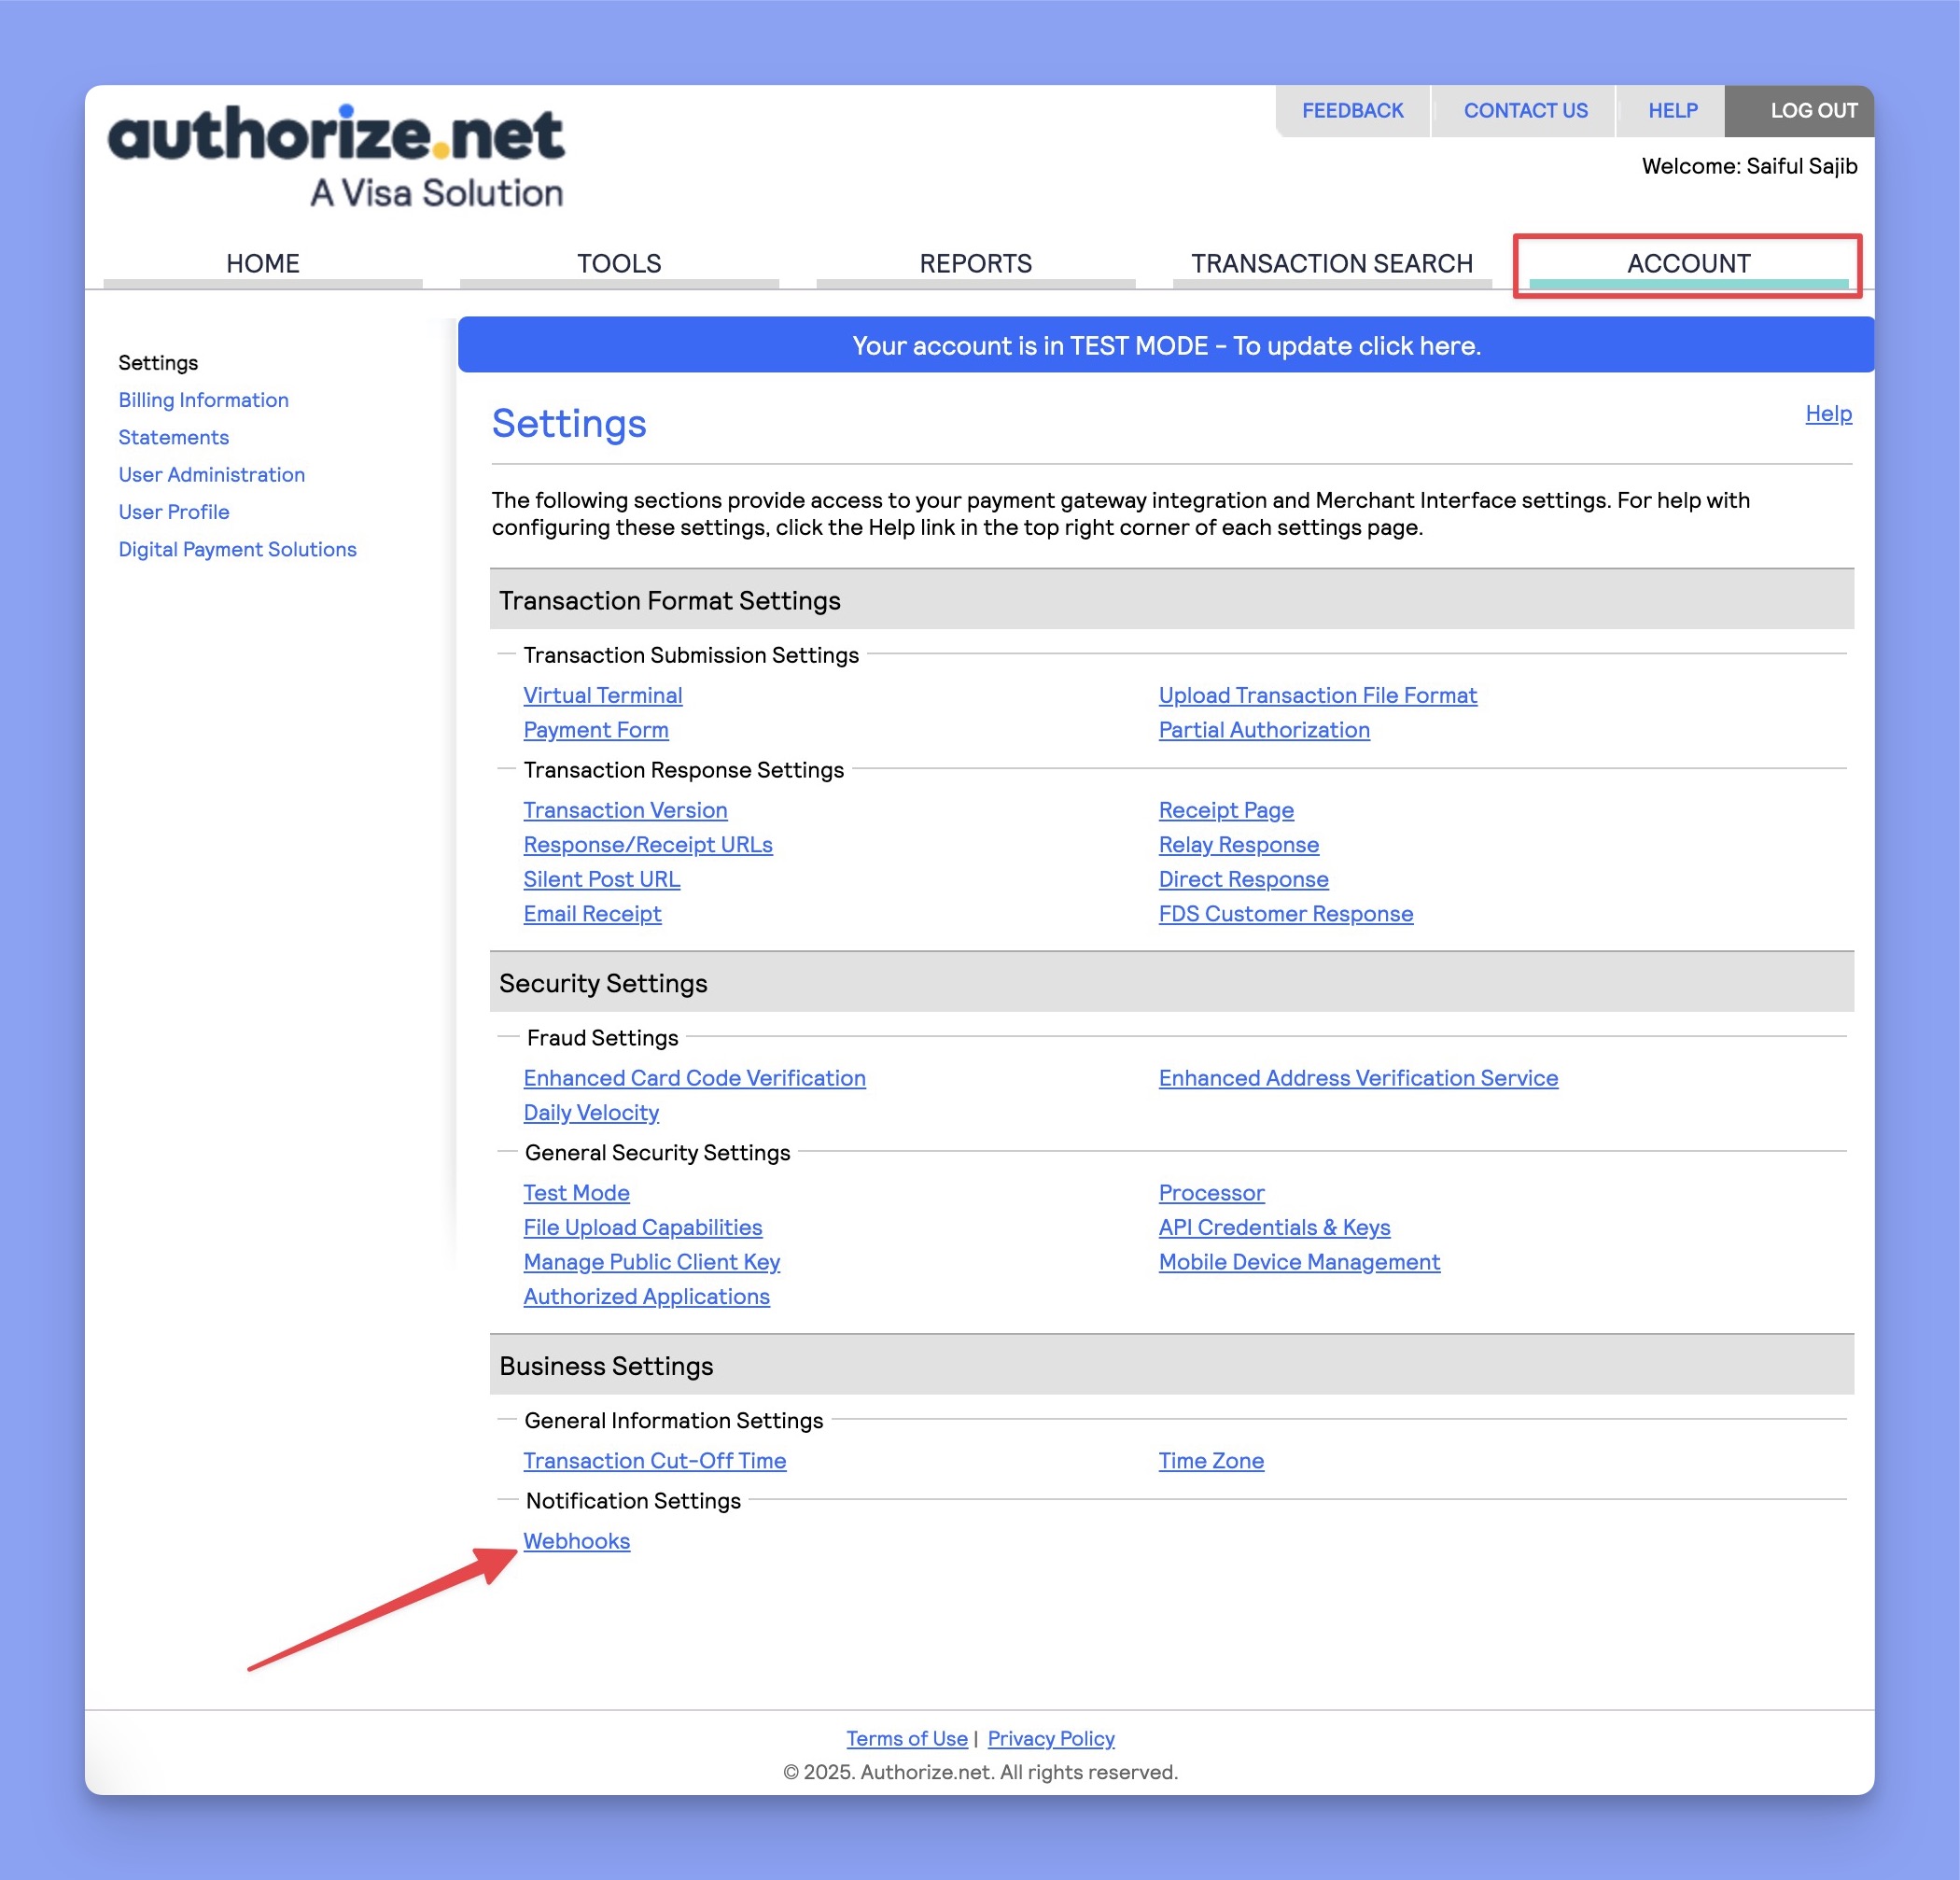
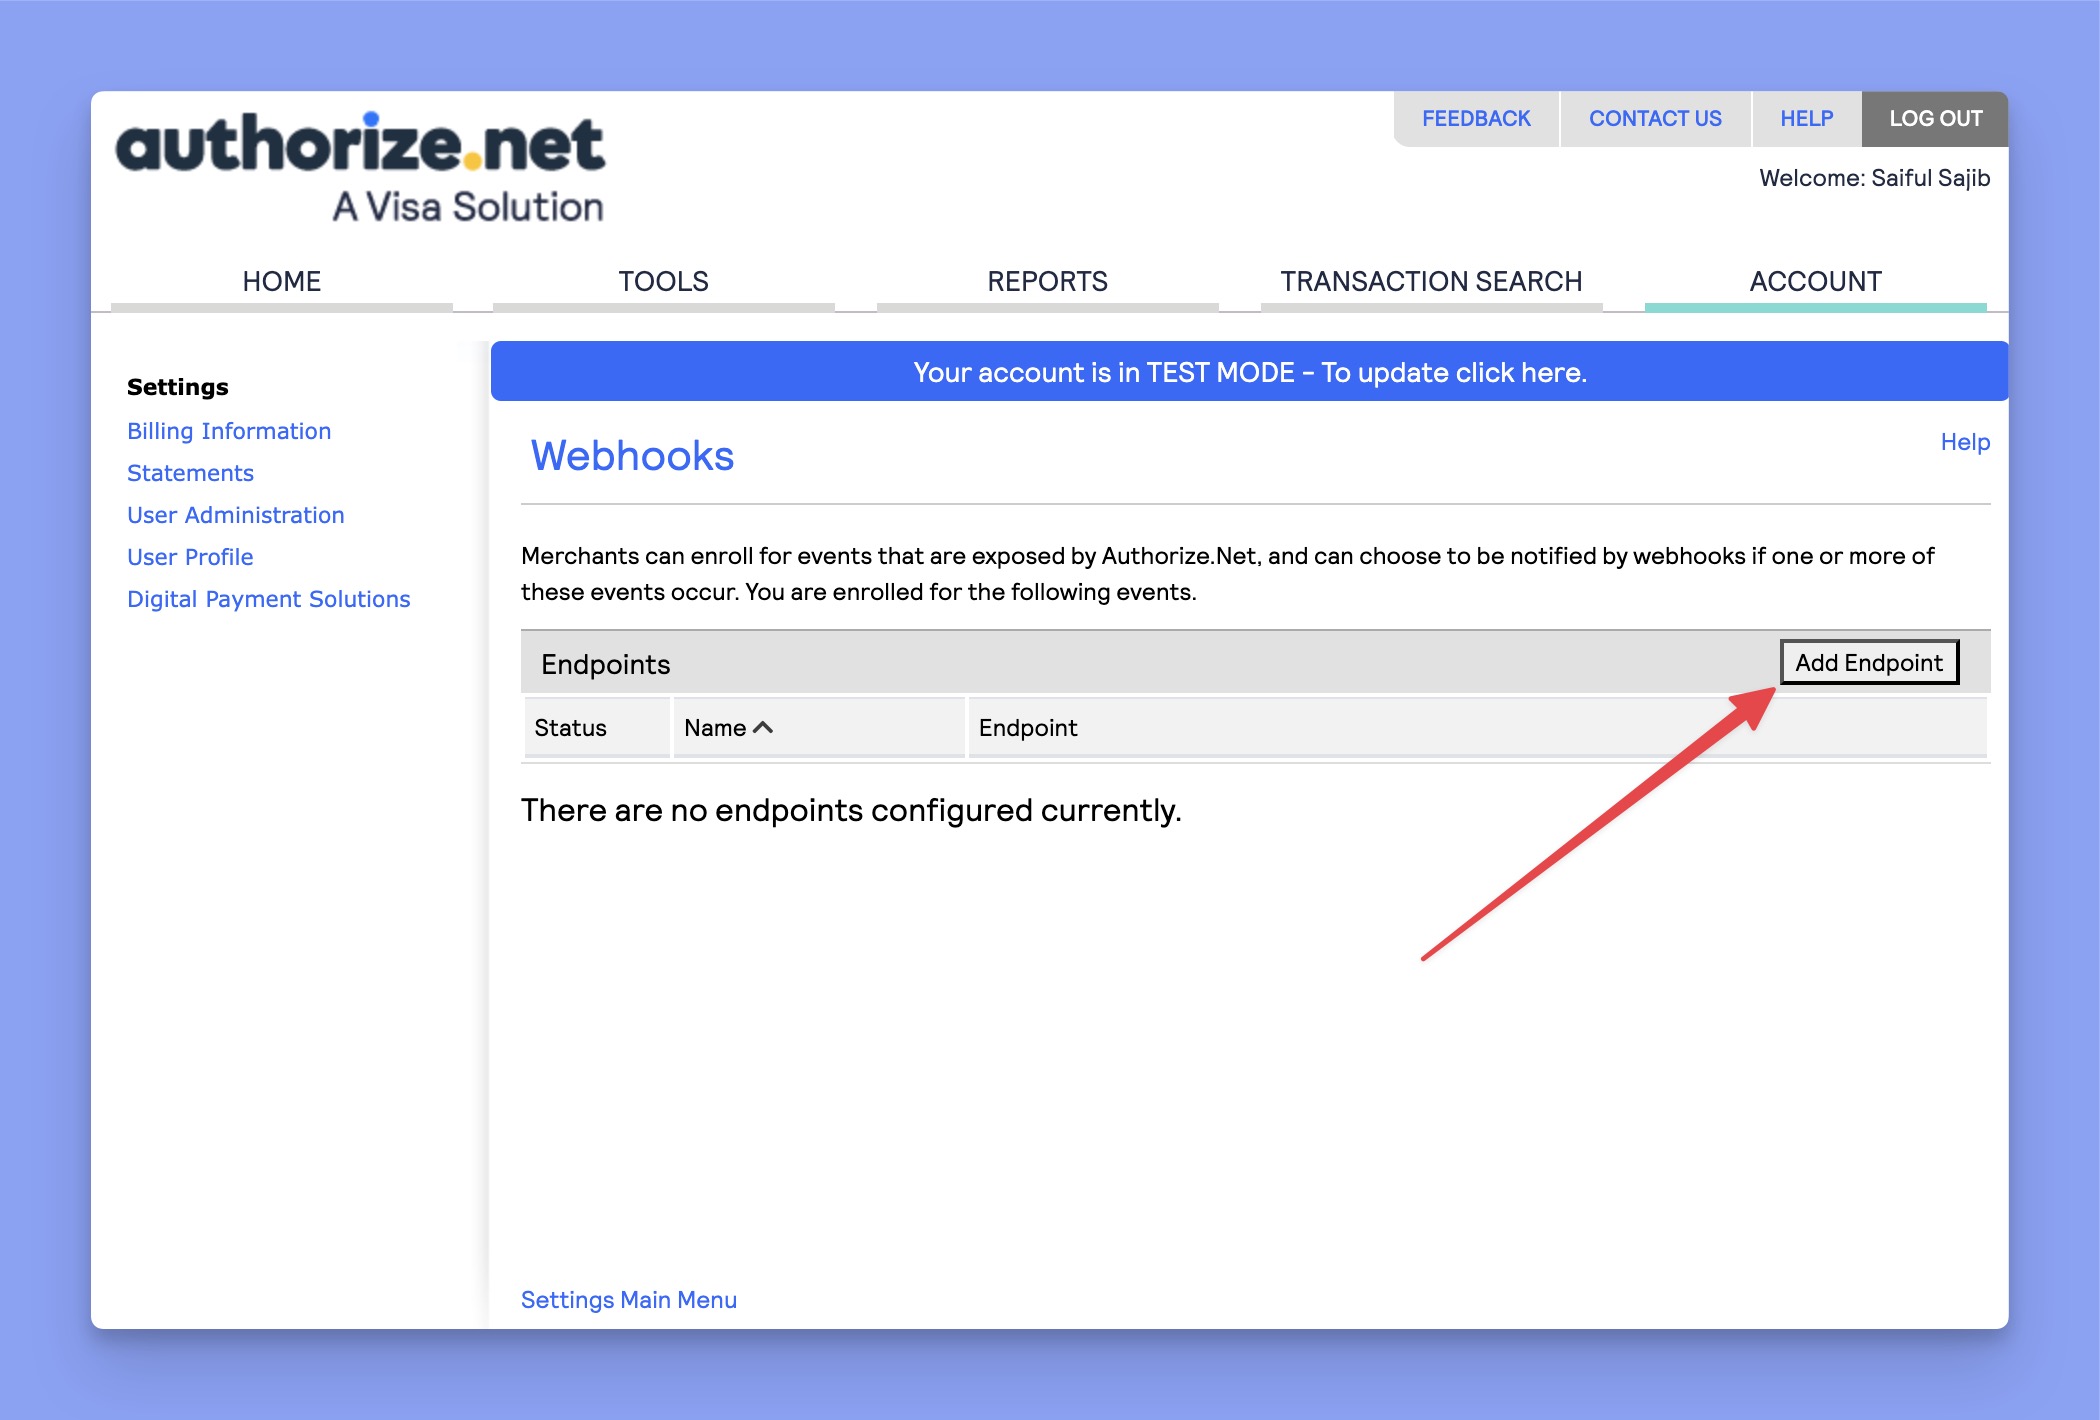
- On the Webhooks page, click on the Add Endpoint button.
- There, you need to enter the Endpoint Name, Endpoint URL, and set the Status to Active. You can copy the Endpoint URL from the Authorize.Net settings on your website. The sample Endpoint URL is:
https://yourdomain.com/wp-json/tutor/v1/ecommerce-webhook/authorizenet
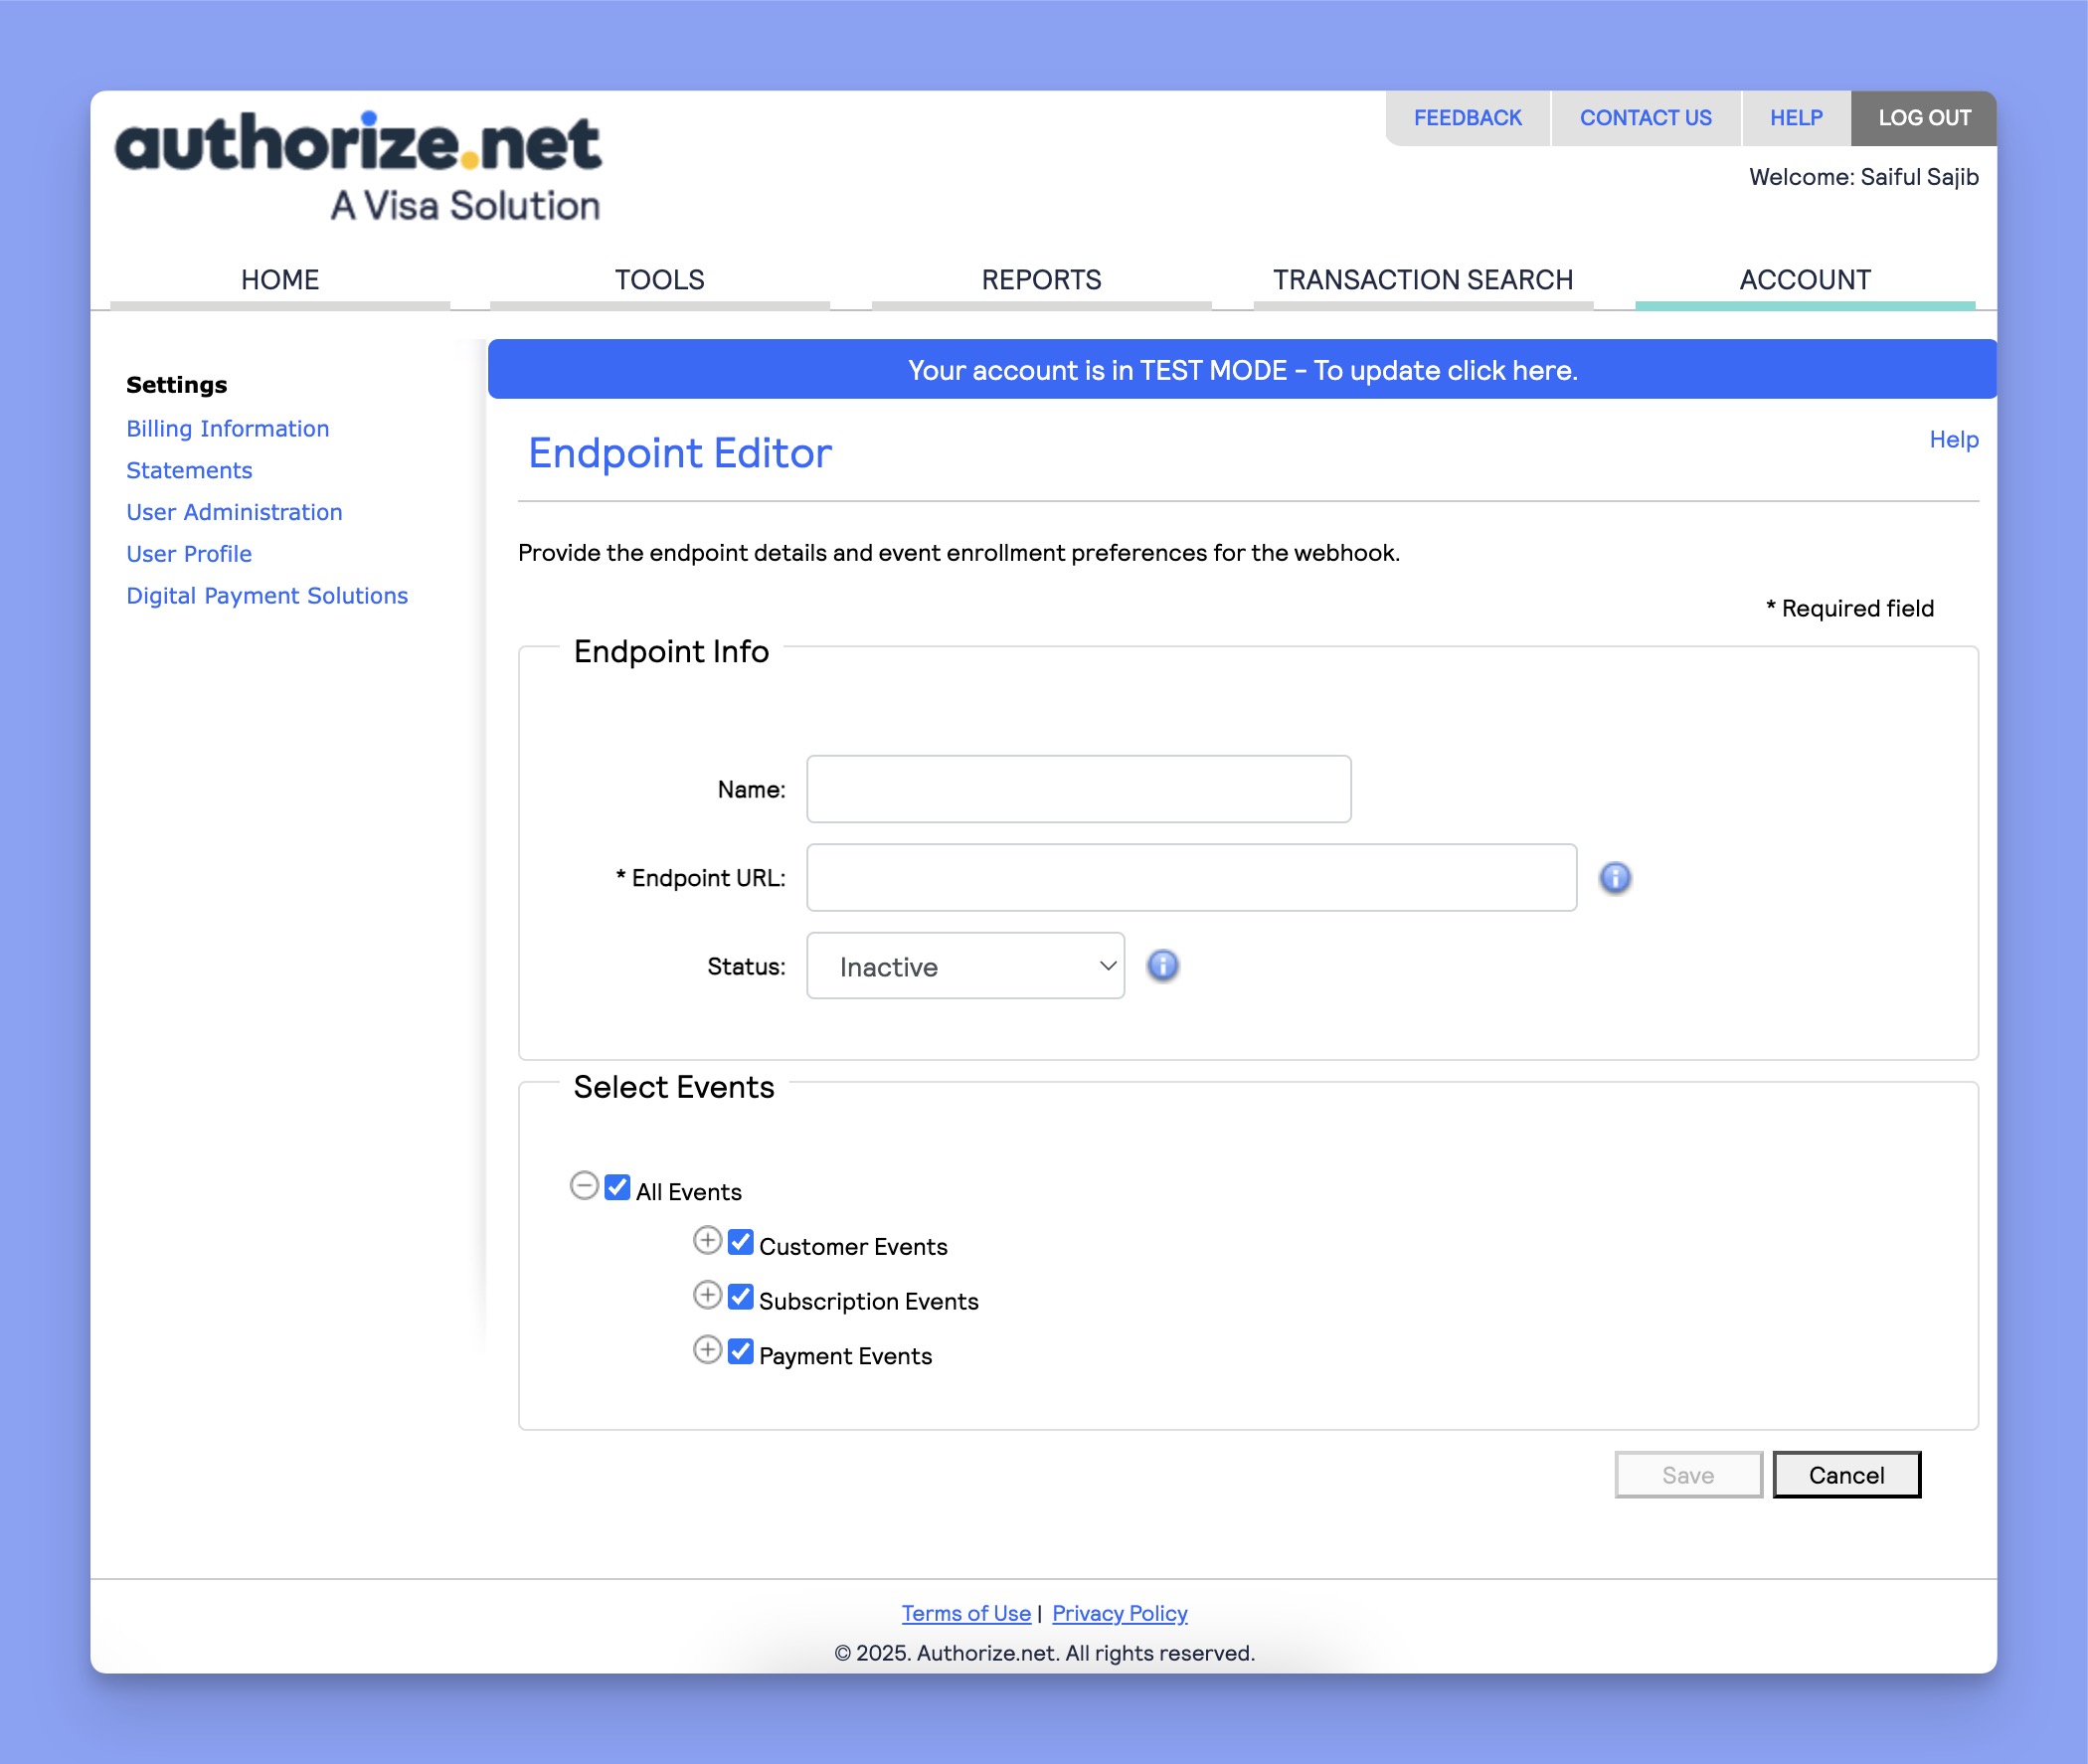
Finally, select the required events and click on the Save button.
Configuring Authorize.net Settings in Tutor LMS
Now, navigate to the Authorize.net configuration section and follow the steps below:
- Choose between Test or Live Environment, depending on whether you want to process real transactions or run test payments.
- Paste the Authorize.net Login ID & Keys in the input field.
- Click Save Changes to finalize your Authorize.net integration.