Quiz Settings
The Settings panel in Tutor LMS 4.0 has been redesigned into a cleaner layout with two main sections: Quiz Scope and Navigation & Display. A live summary panel on the right side of the screen reflects your settings in real time.
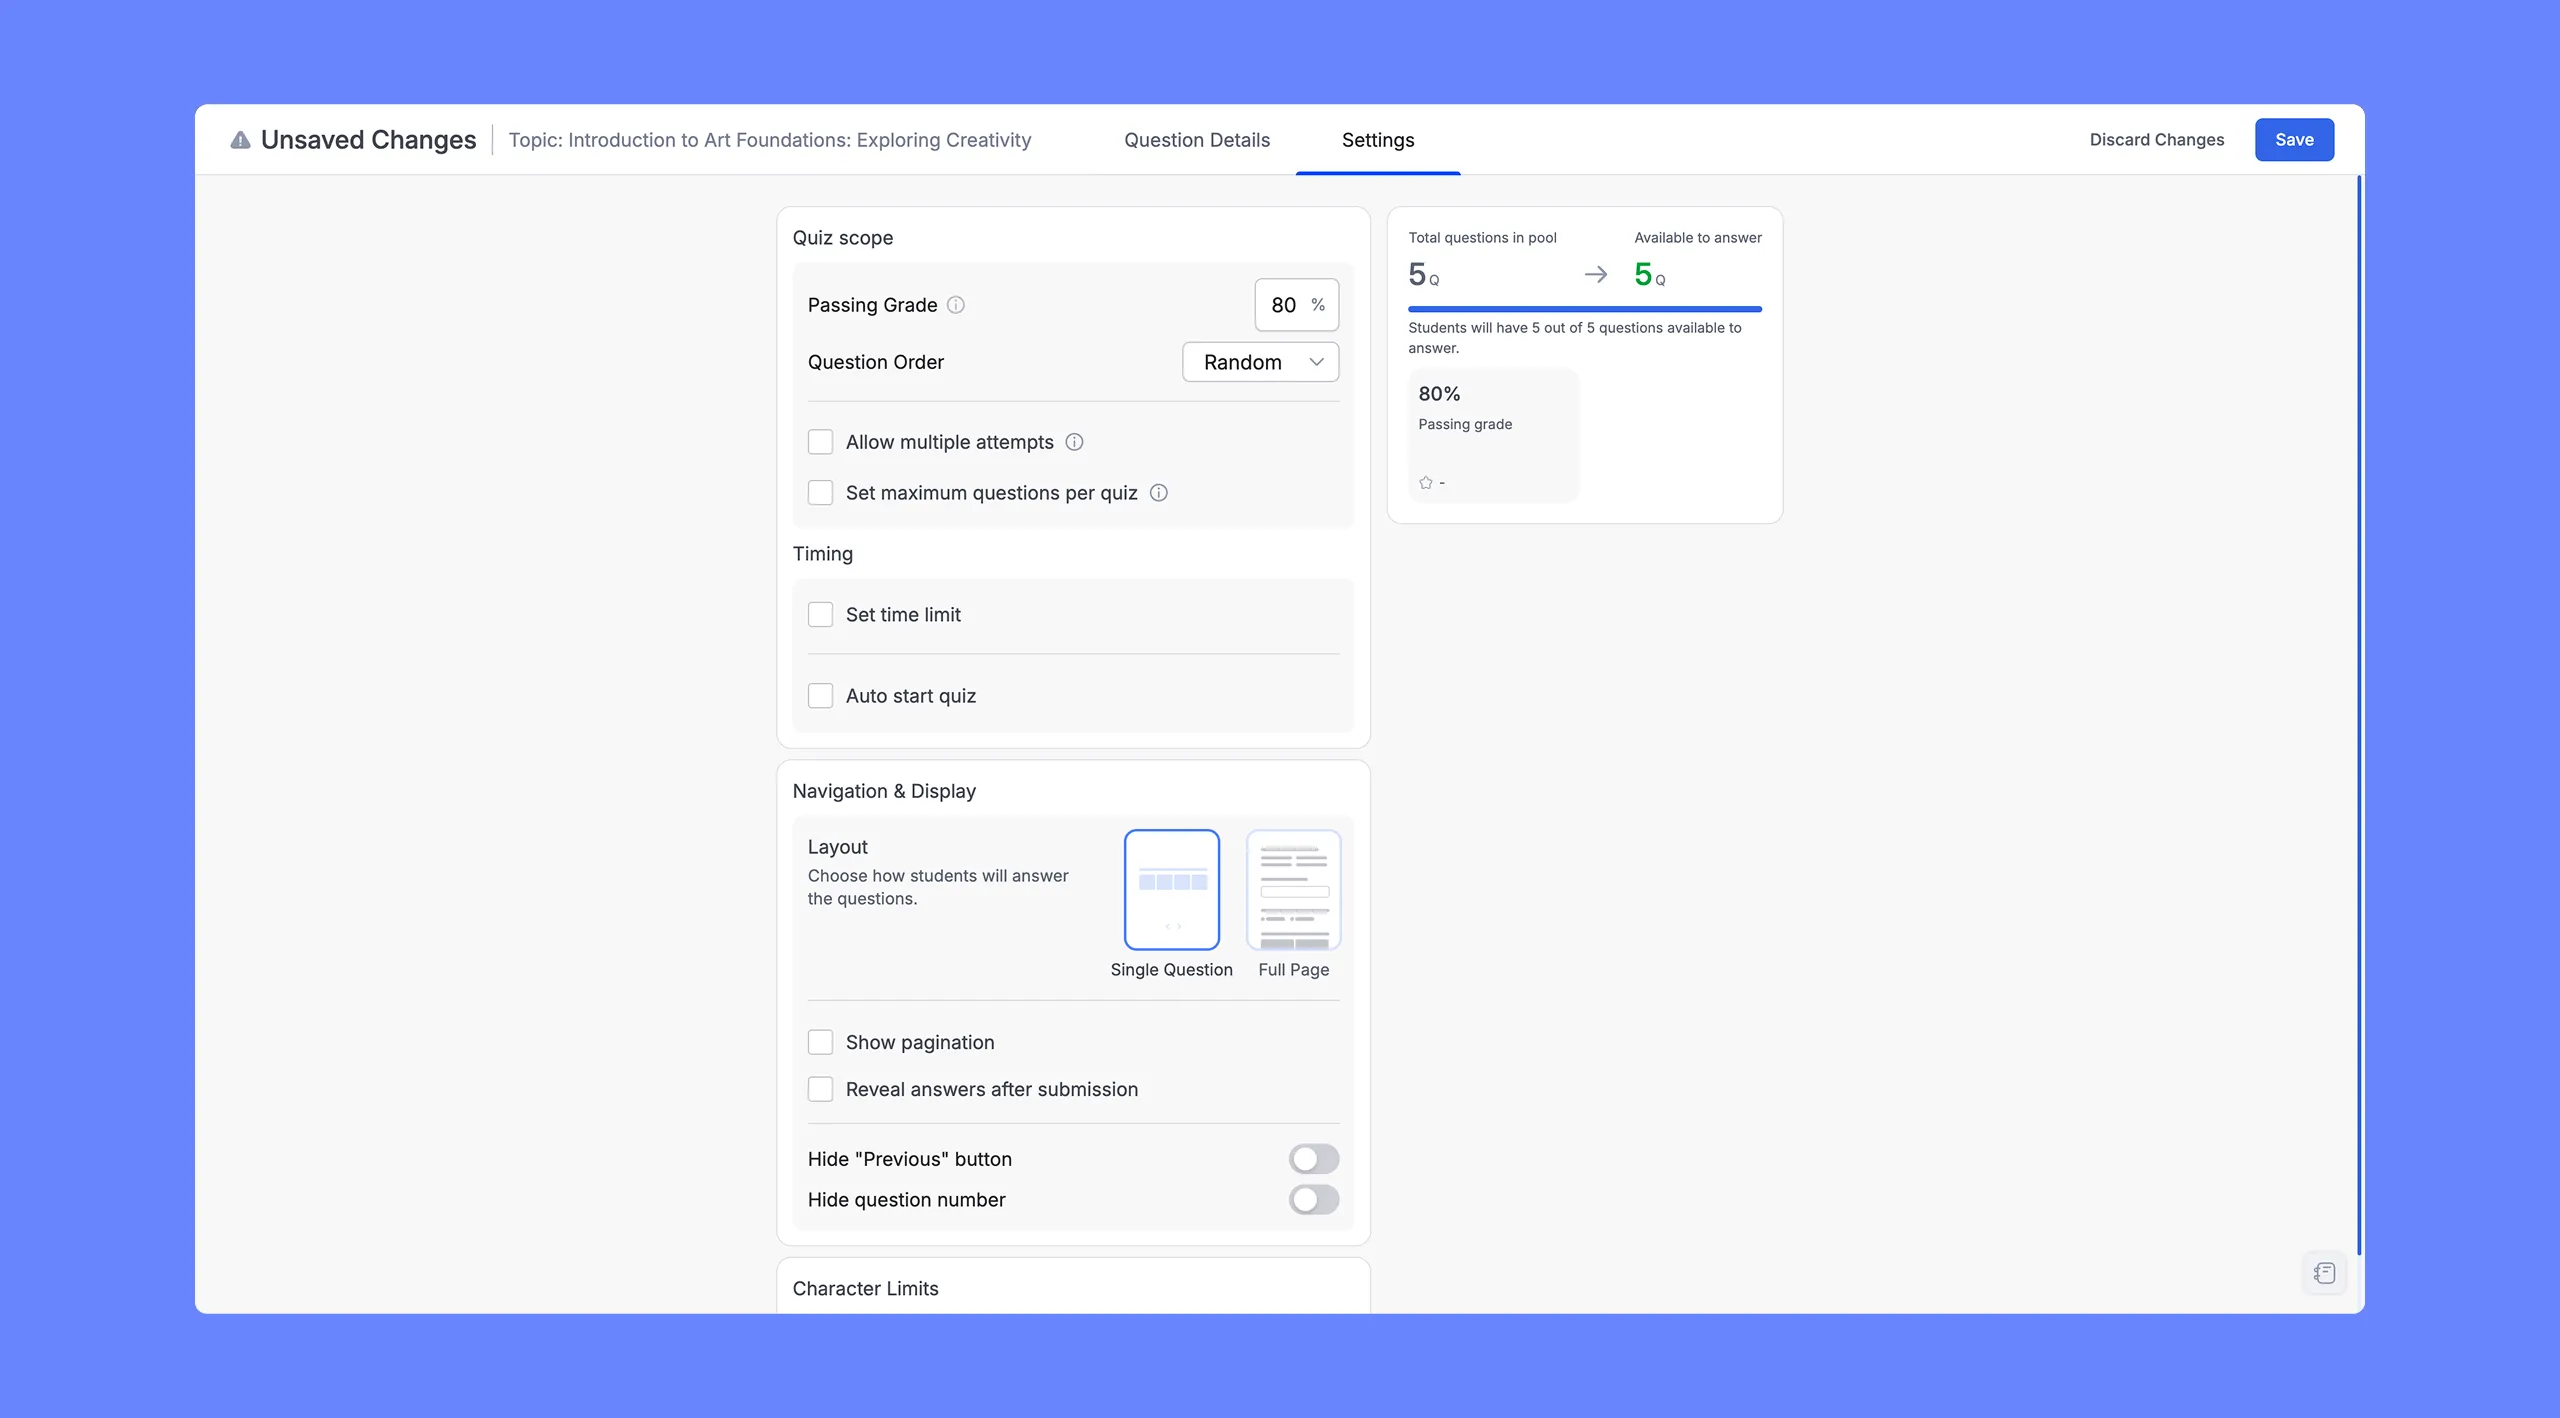
To access quiz settings, open the Quiz Builder and click the Settings tab at the top of the screen.
Quiz Scope
This section controls the rules around how the quiz is attempted and graded:
- Passing Grade: Sets the minimum score a student must achieve to pass the quiz, expressed as a percentage. For example, entering 80 means a student needs to answer at least 80% of the available points correctly to pass. This value is reflected in the live summary panel on the right.
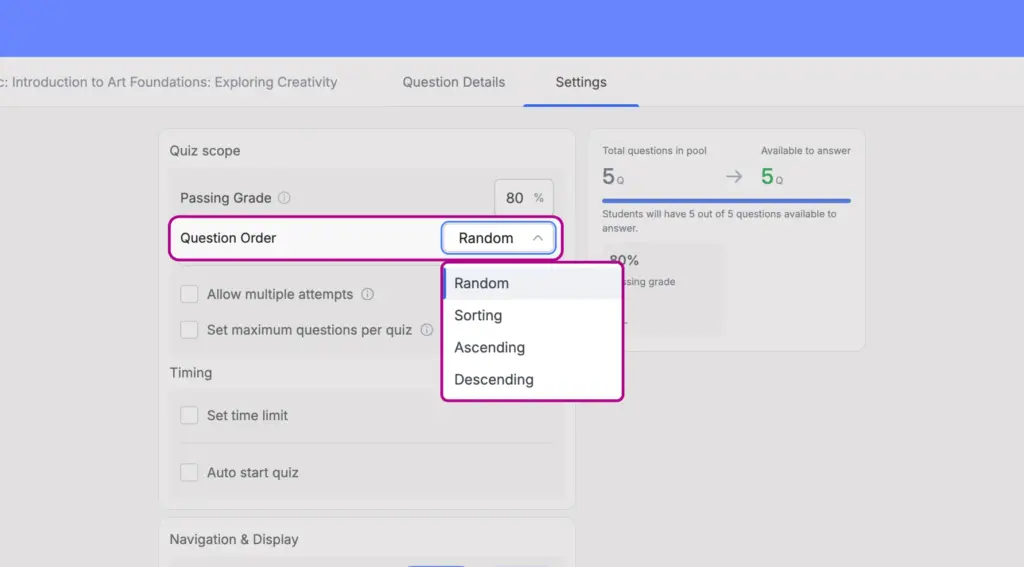
- Question Order: Controls the specific sequence in which questions are presented to students. The dropdown menu includes the following options:
- Random: Shuffles the questions each time a student takes the quiz. Using this order helps reduce the chance of students sharing answers, since each attempt will present the questions in a different, unpredictable sequence.
- Sorting: Displays the questions in the exact custom order you have manually arranged them. You can adjust this sequence by clicking and dragging the six-dot handle next to any question in the builder’s left-hand sidebar.
- Ascending / Descending: Automatically organizes the questions in either a forward (Ascending) or backward (Descending) sequence based on their standard alphanumeric order.
- Limit attempts allowed: When this checkbox is enabled, a number field appears where you can set the maximum number of times a student is allowed to attempt the quiz. For example, setting this to 3 means a student can take the quiz up to three times. If left unchecked, students can attempt the quiz an unlimited number of times.
- Limit questions to answer: When this checkbox is enabled, a number field appears where you can specify how many questions from the total pool are presented to each student. For example, if your quiz has 20 questions in total but you enter 10 here, each student will be shown only 10 of those questions per attempt. This works in combination with the Question Order setting, if Random is selected, the 10 questions will be randomly drawn from the full pool each time.
The live summary on the right shows the result: for example, “Students will have 10 out of 20 questions available to answer.”
Timing
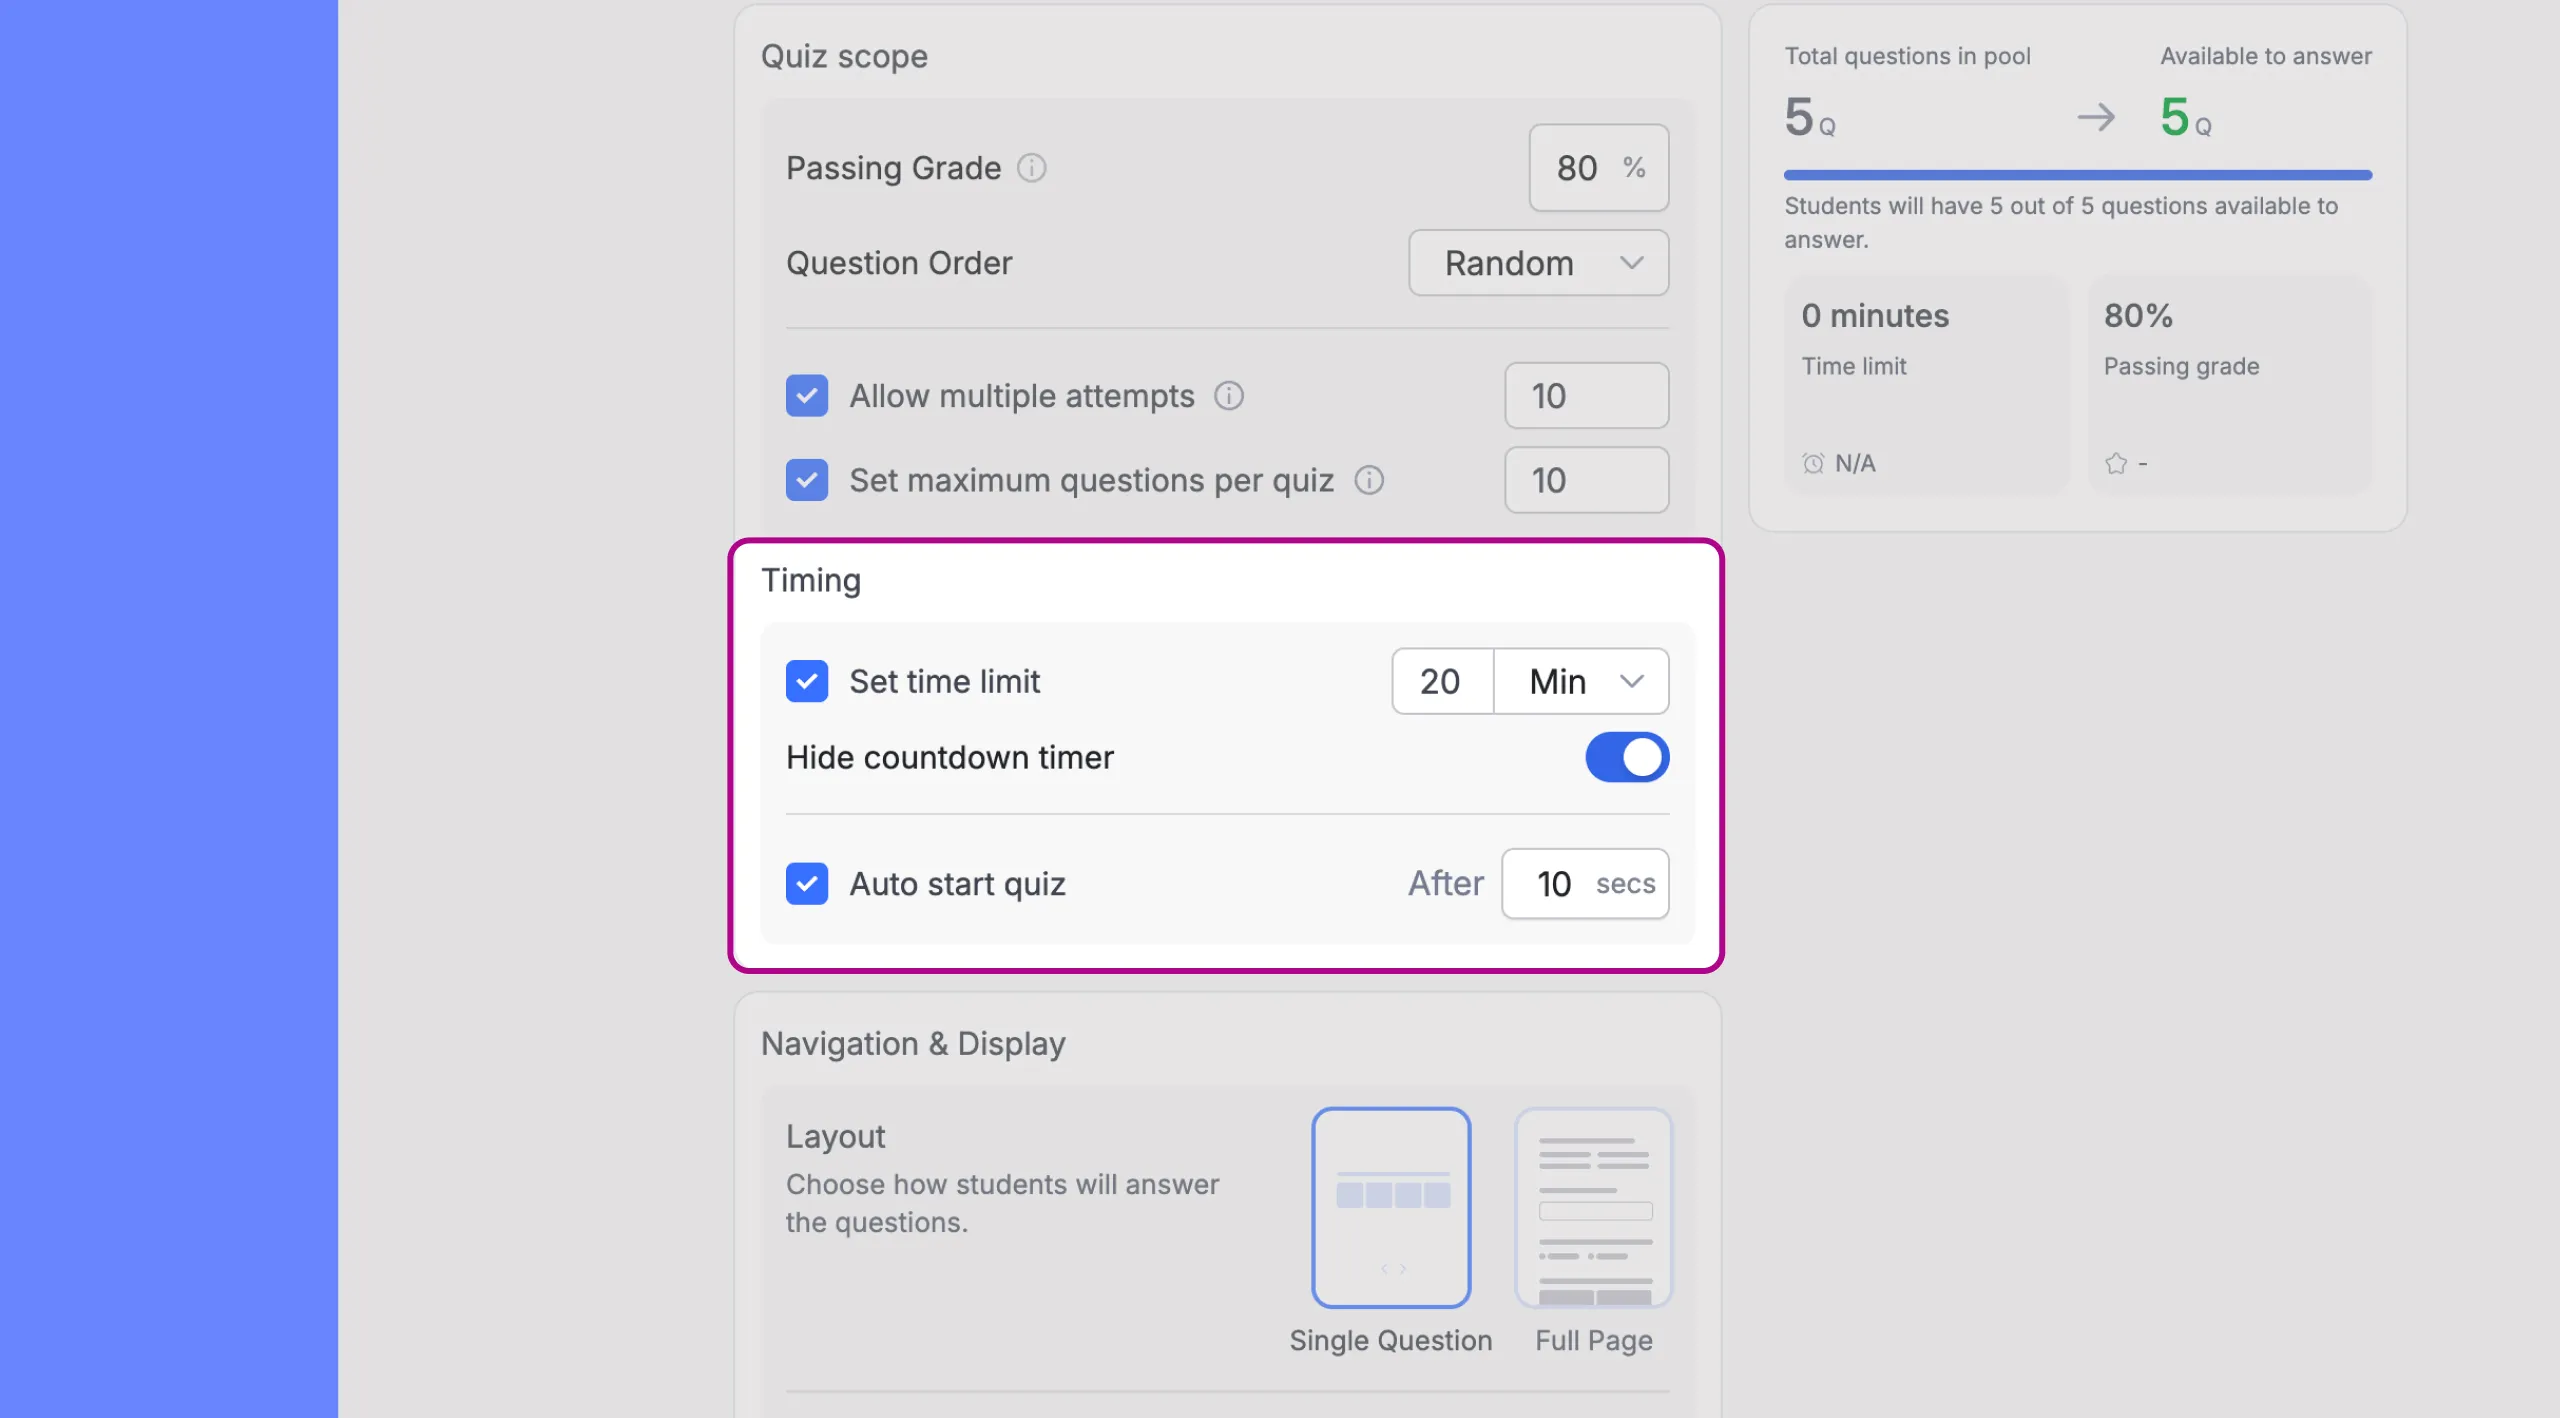
- Set Time Limit: When this checkbox is enabled, a time input appears where you can set how long students have to complete the quiz. You can enter the duration and choose between Min (minutes) or another time unit from the dropdown. The live summary panel will display the time limit for confirmation.
- Hide quiz timer from students: This toggle appears when a time limit is set. When enabled, the countdown timer is hidden from the student’s view; they will not see how much time remains. The quiz will still end when the time expires. This can be useful if you do not want students to feel rushed by a visible countdown.
- Auto start quiz: When this checkbox is enabled, the quiz begins automatically after a short delay rather than requiring the student to click a start button. A field labelled After lets you enter the number of seconds to wait before the quiz starts. For example, entering 5 means the quiz starts automatically 5 seconds after the student arrives at the quiz page.
Navigation & Display
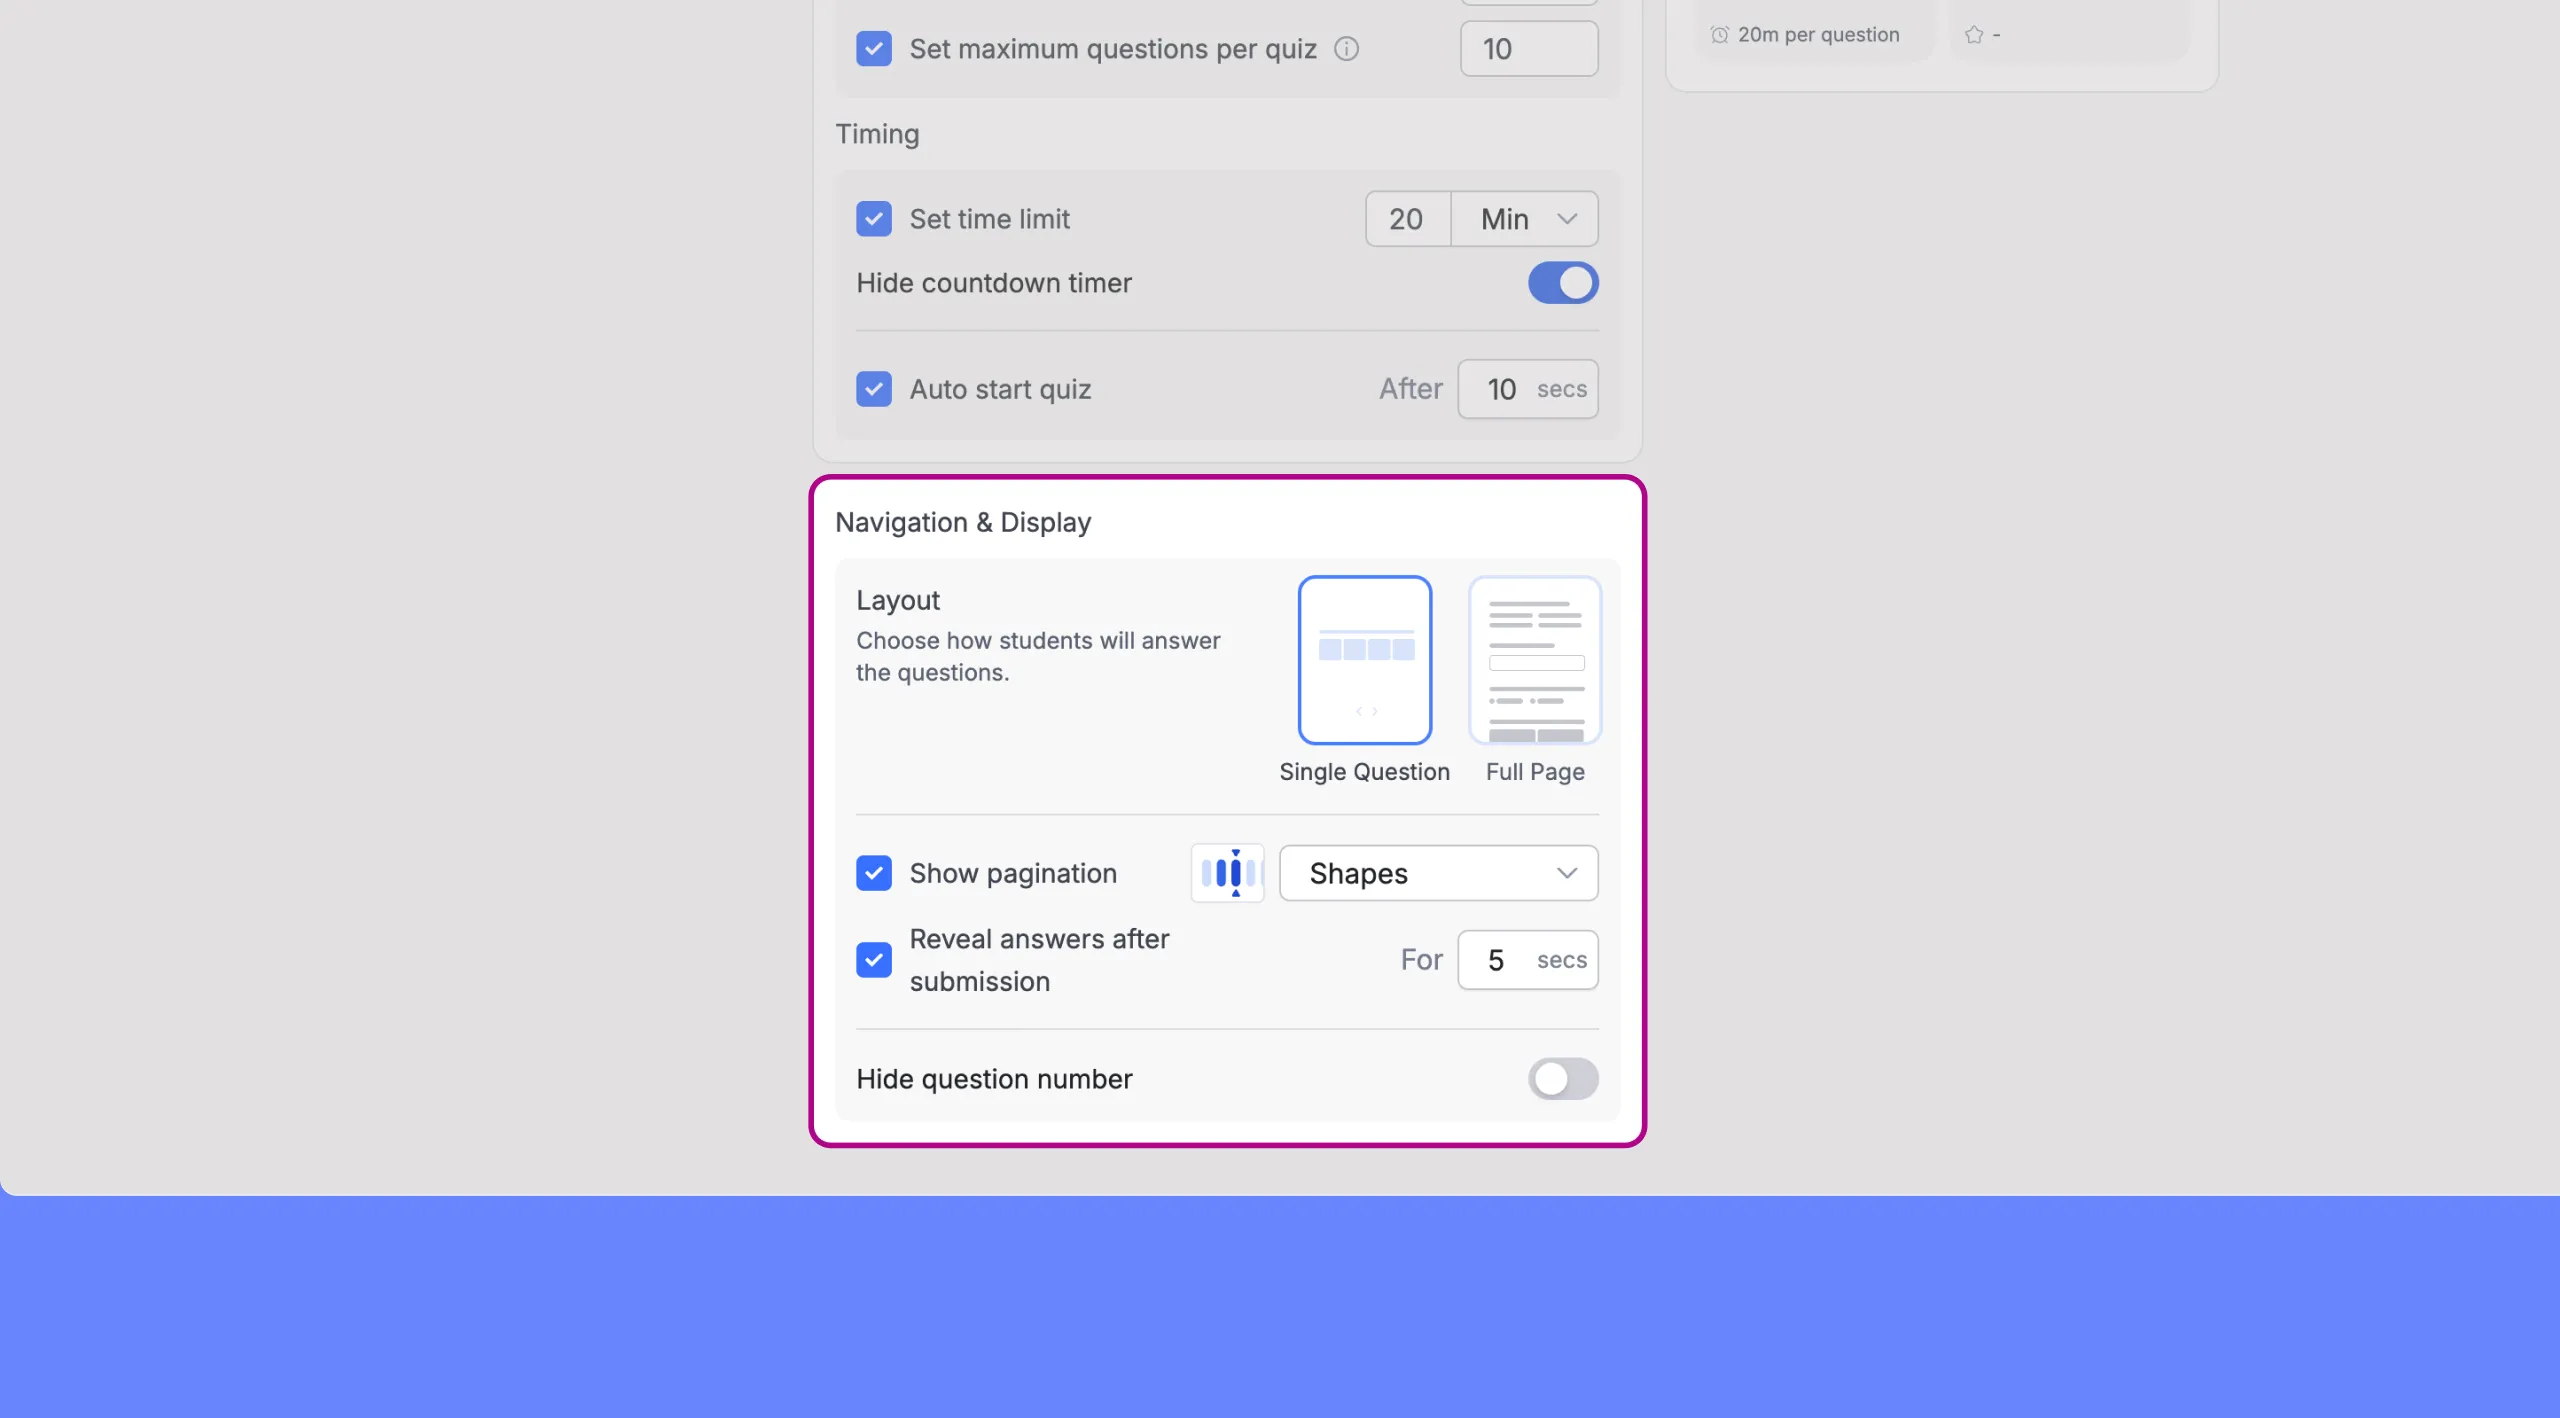
This section controls how the quiz looks and how students move through it:
- Layout: Choose between two visual layouts for how questions are presented:
- Single Question: One question is displayed at a time. Students click Next to move to the following question. This keeps the experience focused and is well-suited for quizzes with interactive question types like puzzles or graphs.
- Full Page: All questions are displayed on a single scrollable page. Students can see and answer all questions at once before submitting.
- Show pagination: When enabled, a pagination indicator appears so students know which question they are on and how many remain. A style dropdown lets you choose between Radio (dot-style indicators) and Shapes (block-style indicators) for the pagination display.
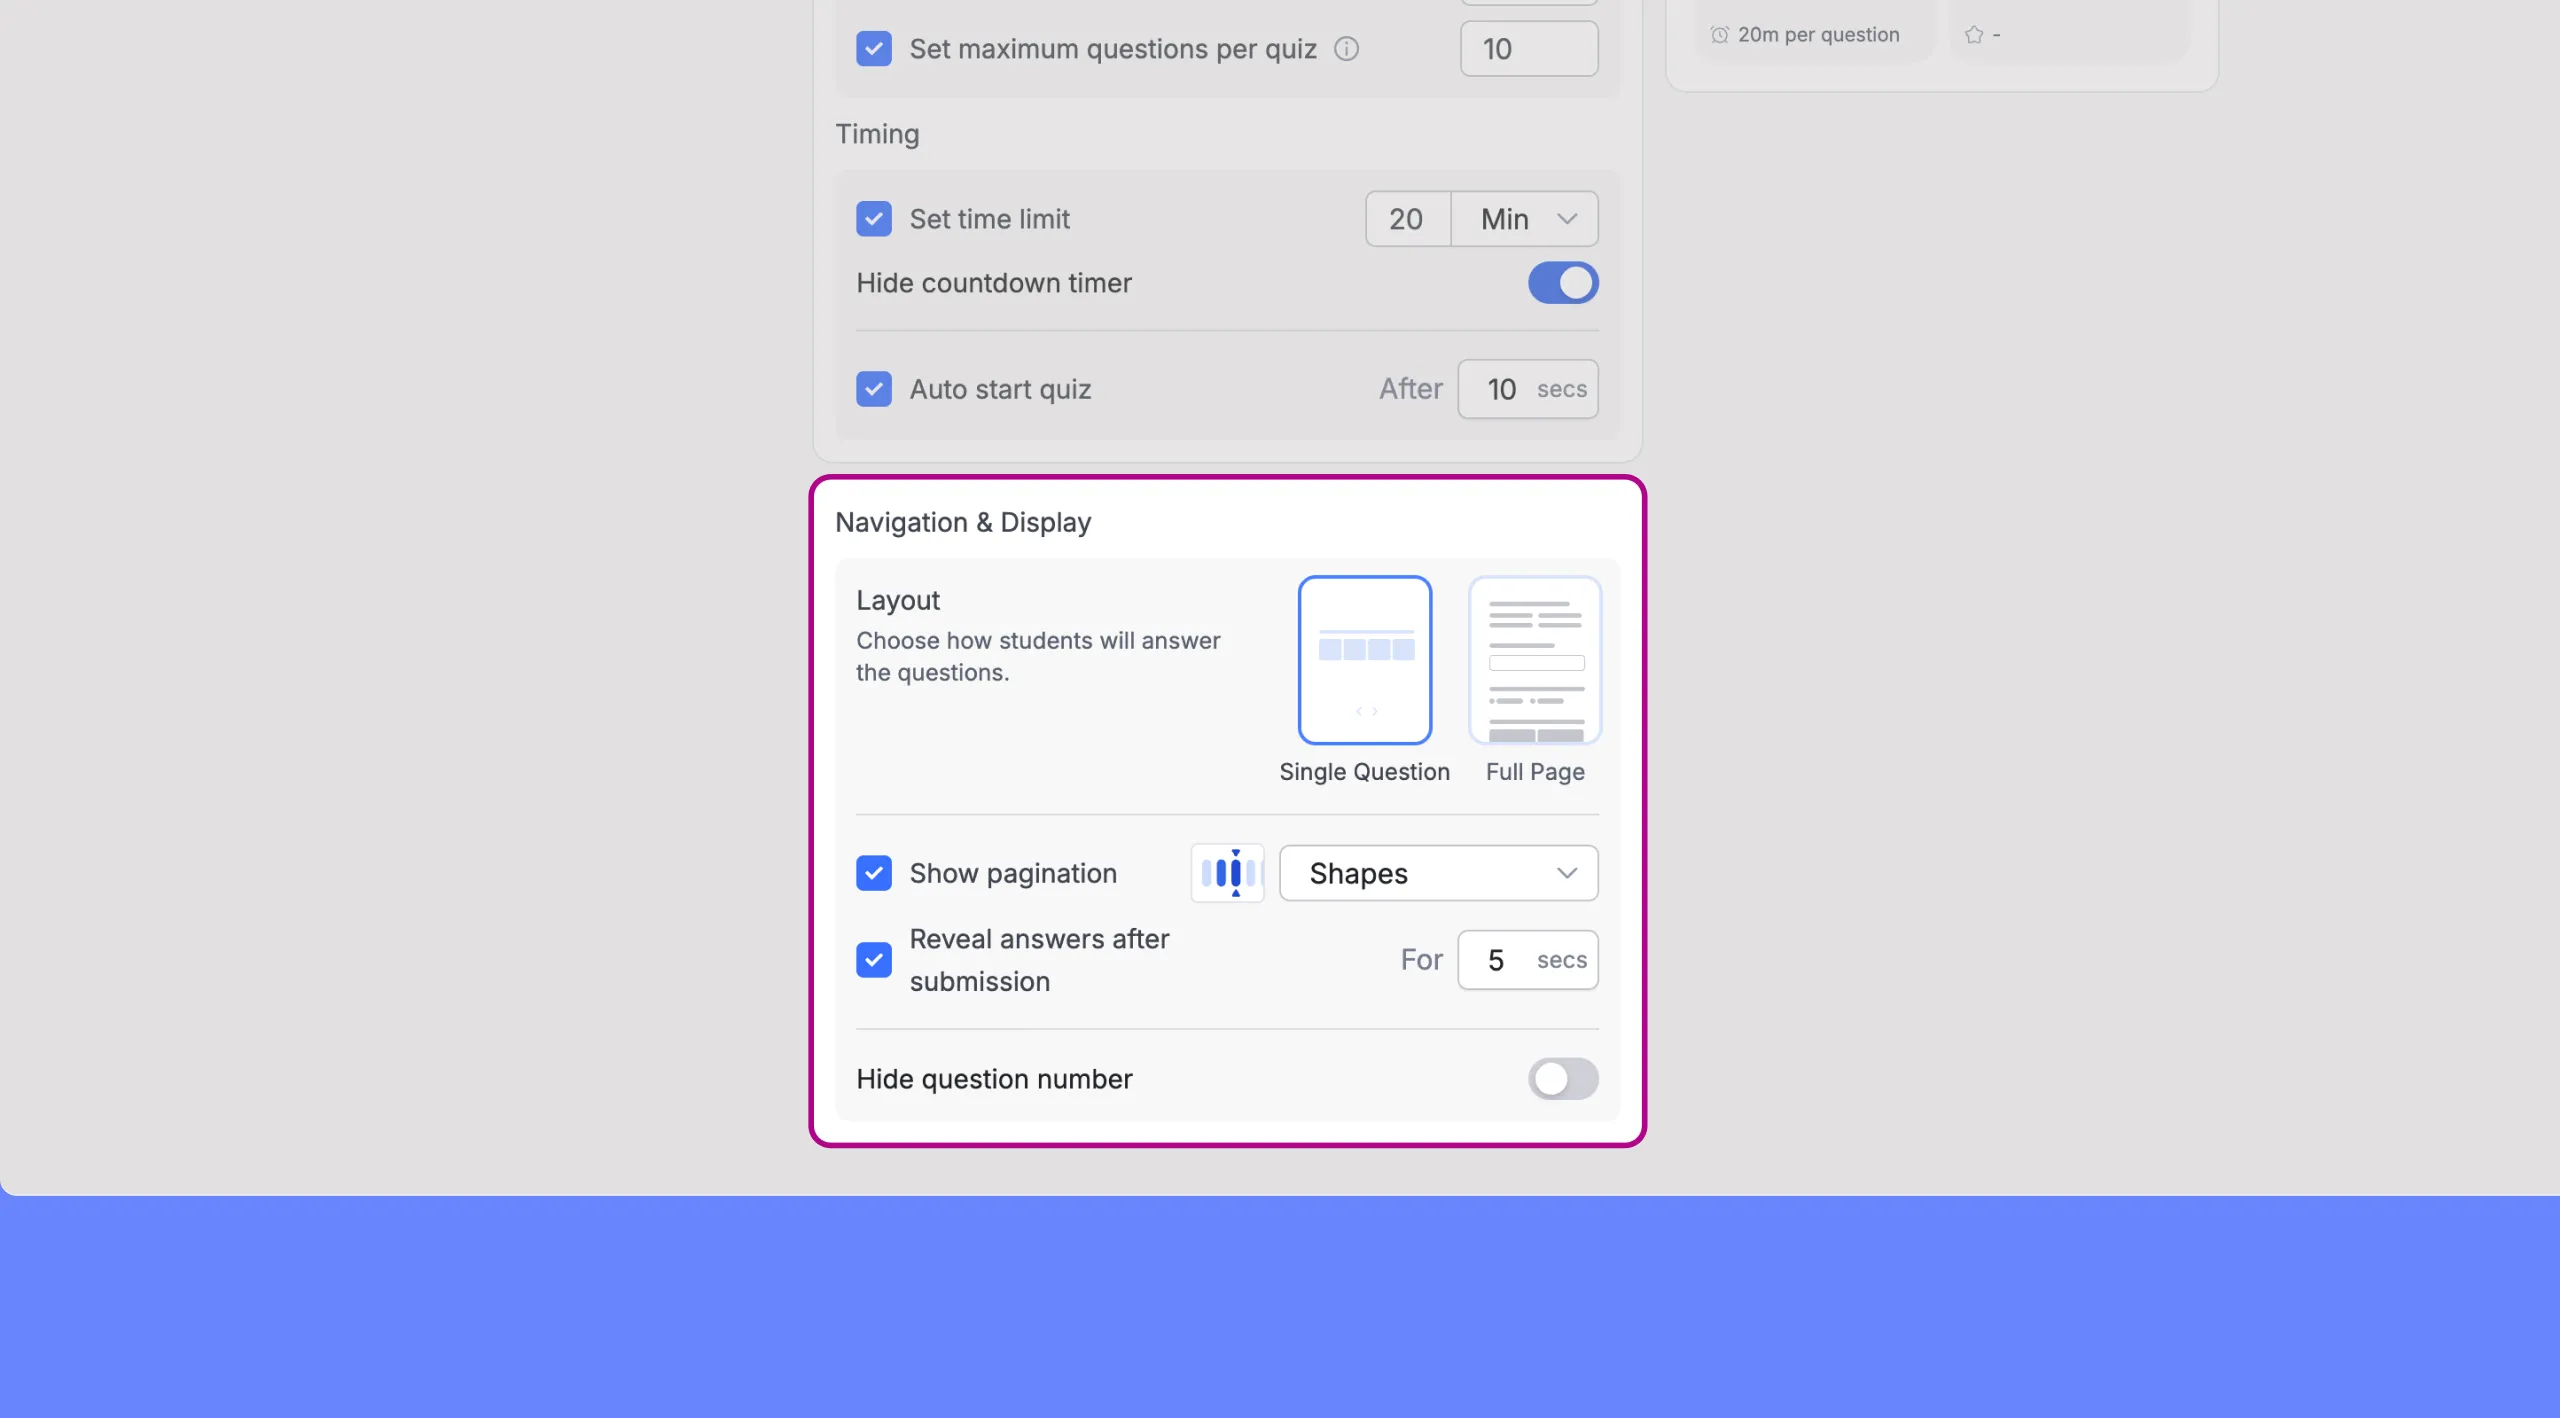
- Reveal answers after submission: When this checkbox is enabled, students can see the correct answers after they submit the quiz. An optional “For” field lets you enter the number of seconds the answer will be revealed for. If left blank, answers remain visible indefinitely after submission.
- Hide previous button from students: When this toggle is enabled, the Back button is hidden during the quiz. Students can only move forward through the questions and cannot return to a previous one. This is useful for timed quizzes or when you want to prevent students from changing earlier answers.
- Hide question number: When this toggle is enabled, the question number label (e.g., “Question No: 01/05”) is not shown to students. The quiz still progresses in order, but students cannot see their position in the question sequence.
Live Settings Summary
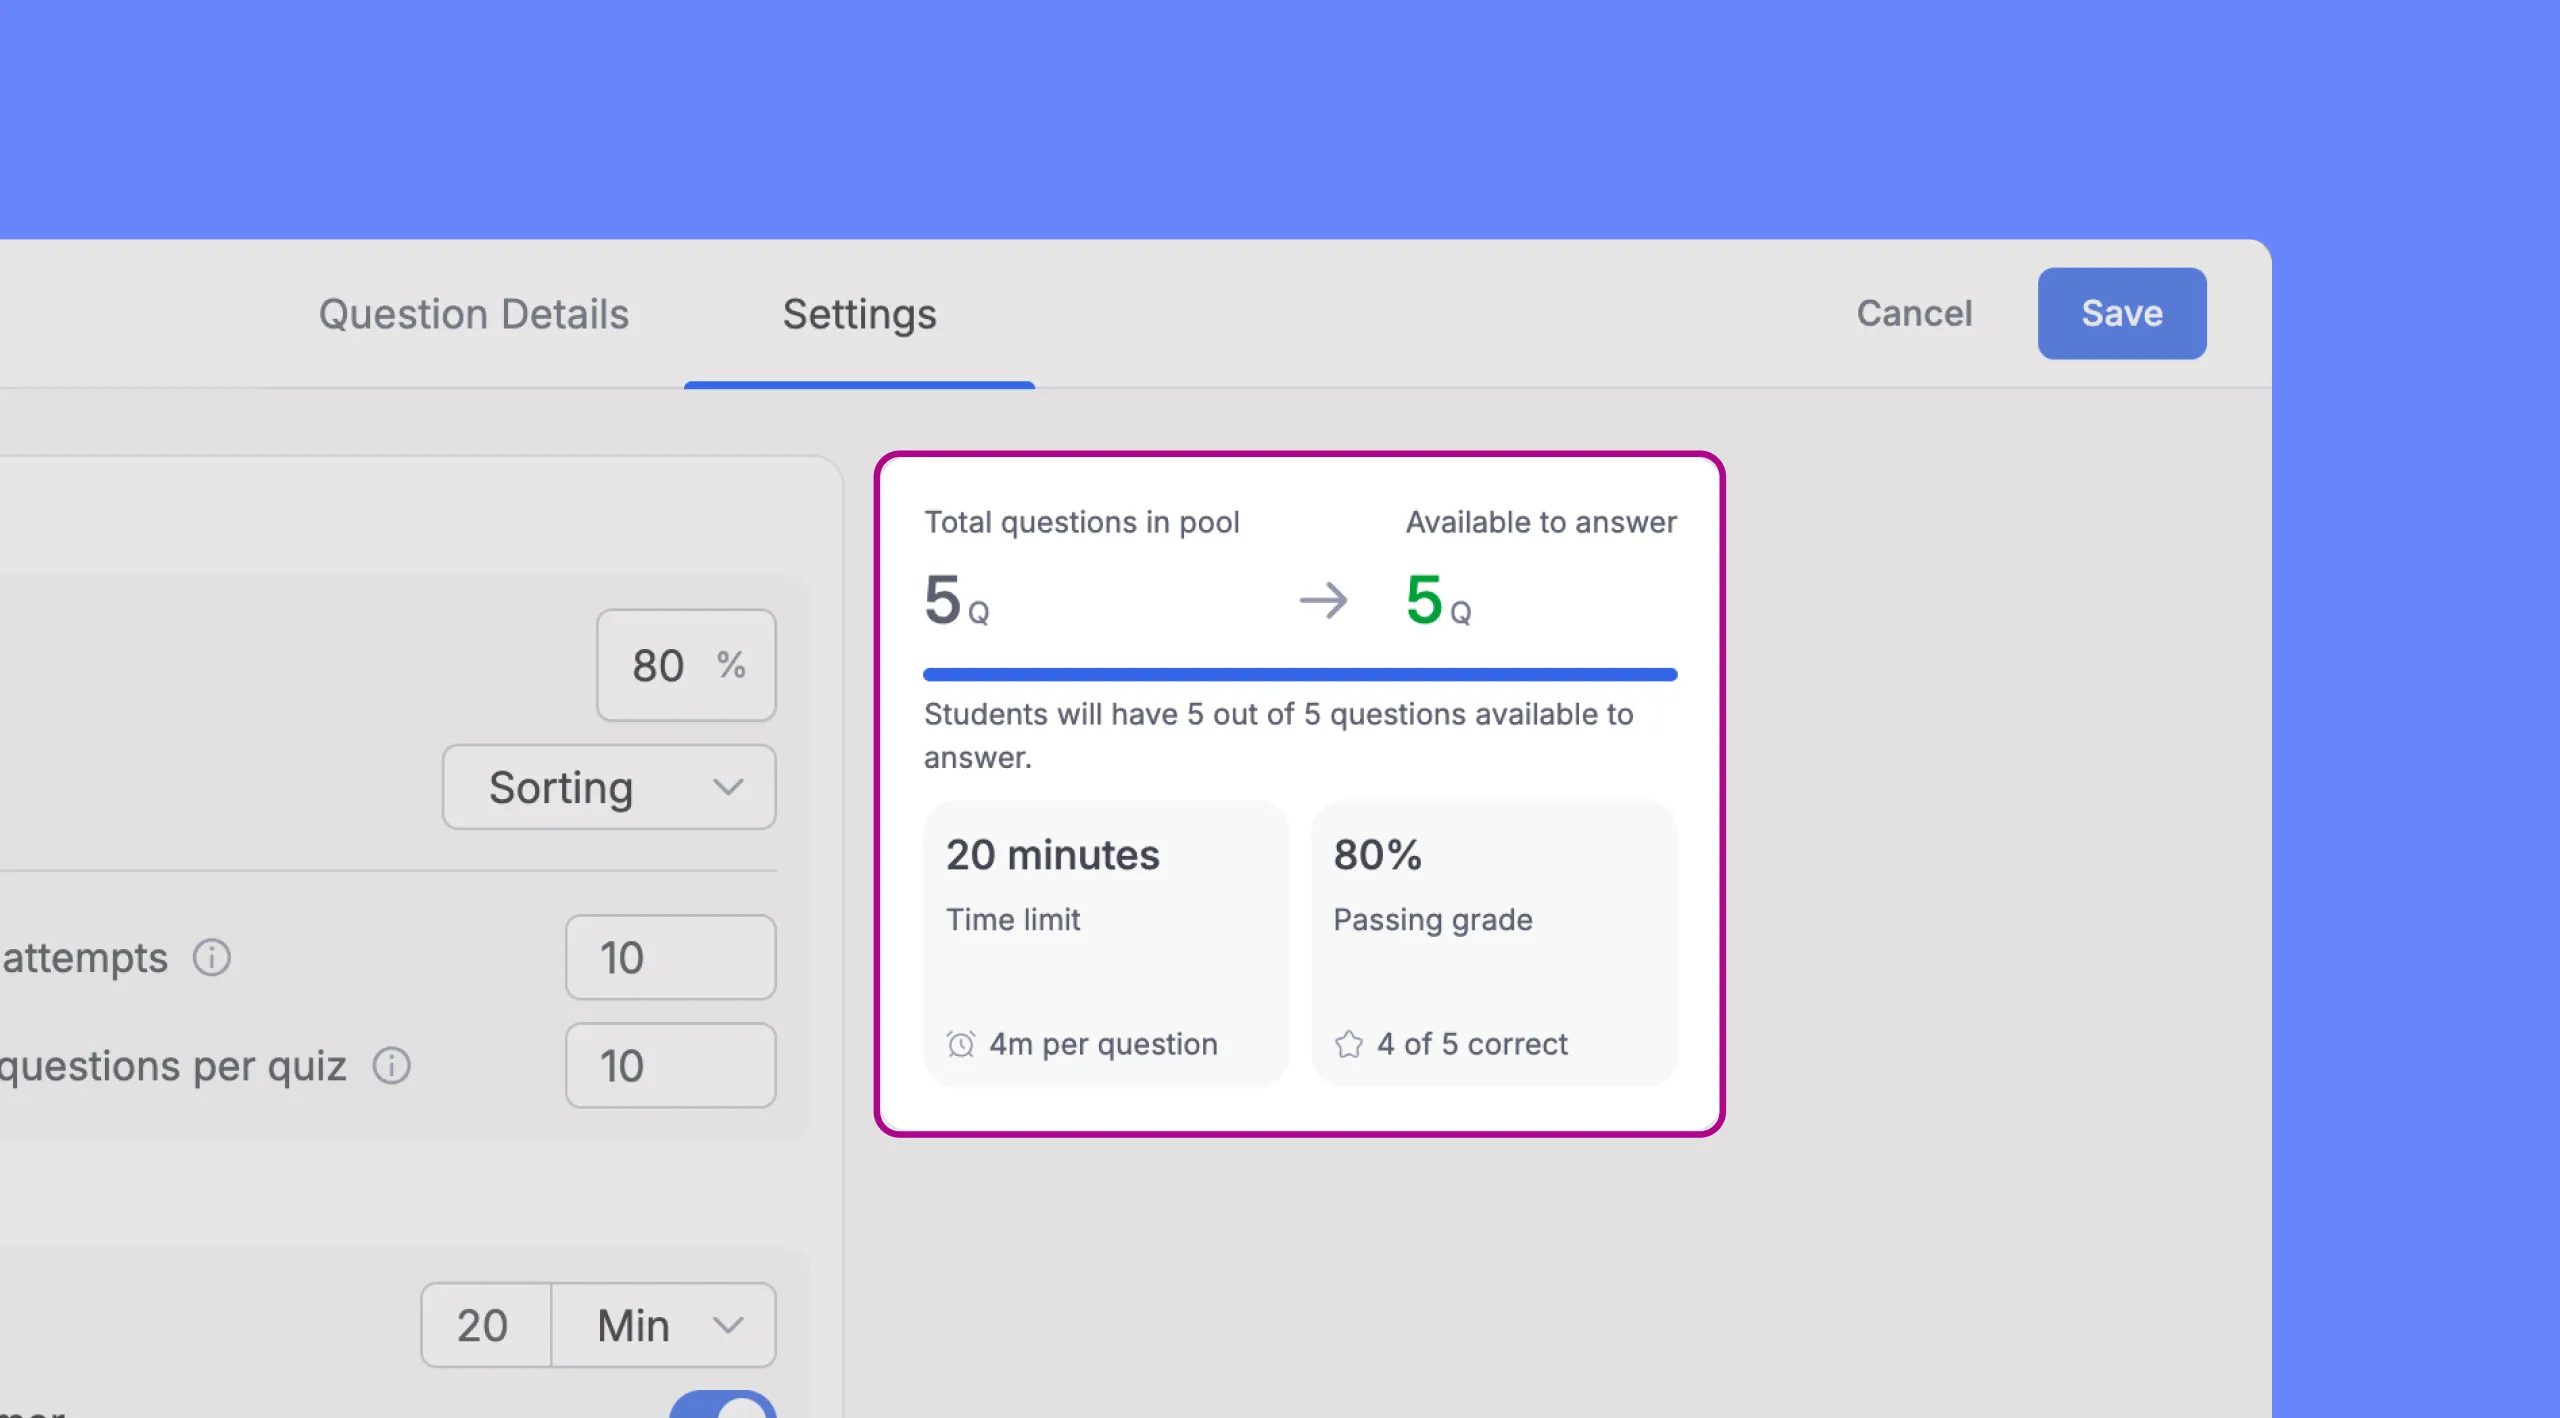
On the right side of the Settings tab, a summary panel updates in real time as you configure your quiz. It displays:
- Total questions in pool: The number of questions you have added to the quiz.
- Available to answer: How many questions each student will see per attempt, based on your Limit questions to answer setting.
- A short statement confirming the relationship, for example: “Students will have 5 out of 5 questions available to answer.”
- Time limit: The configured time limit, or “N/A” if none is set.
- Passing grade: The passing grade percentage you have entered.
This panel is useful for reviewing your quiz setup at a glance before saving.
Saving Your Quiz
Once you have finished configuring the question details and settings, click the Save button in the top-right corner of the screen. If you have unsaved changes, the header will display an Unsaved Changes indicator as a reminder.