Course Builder Basics
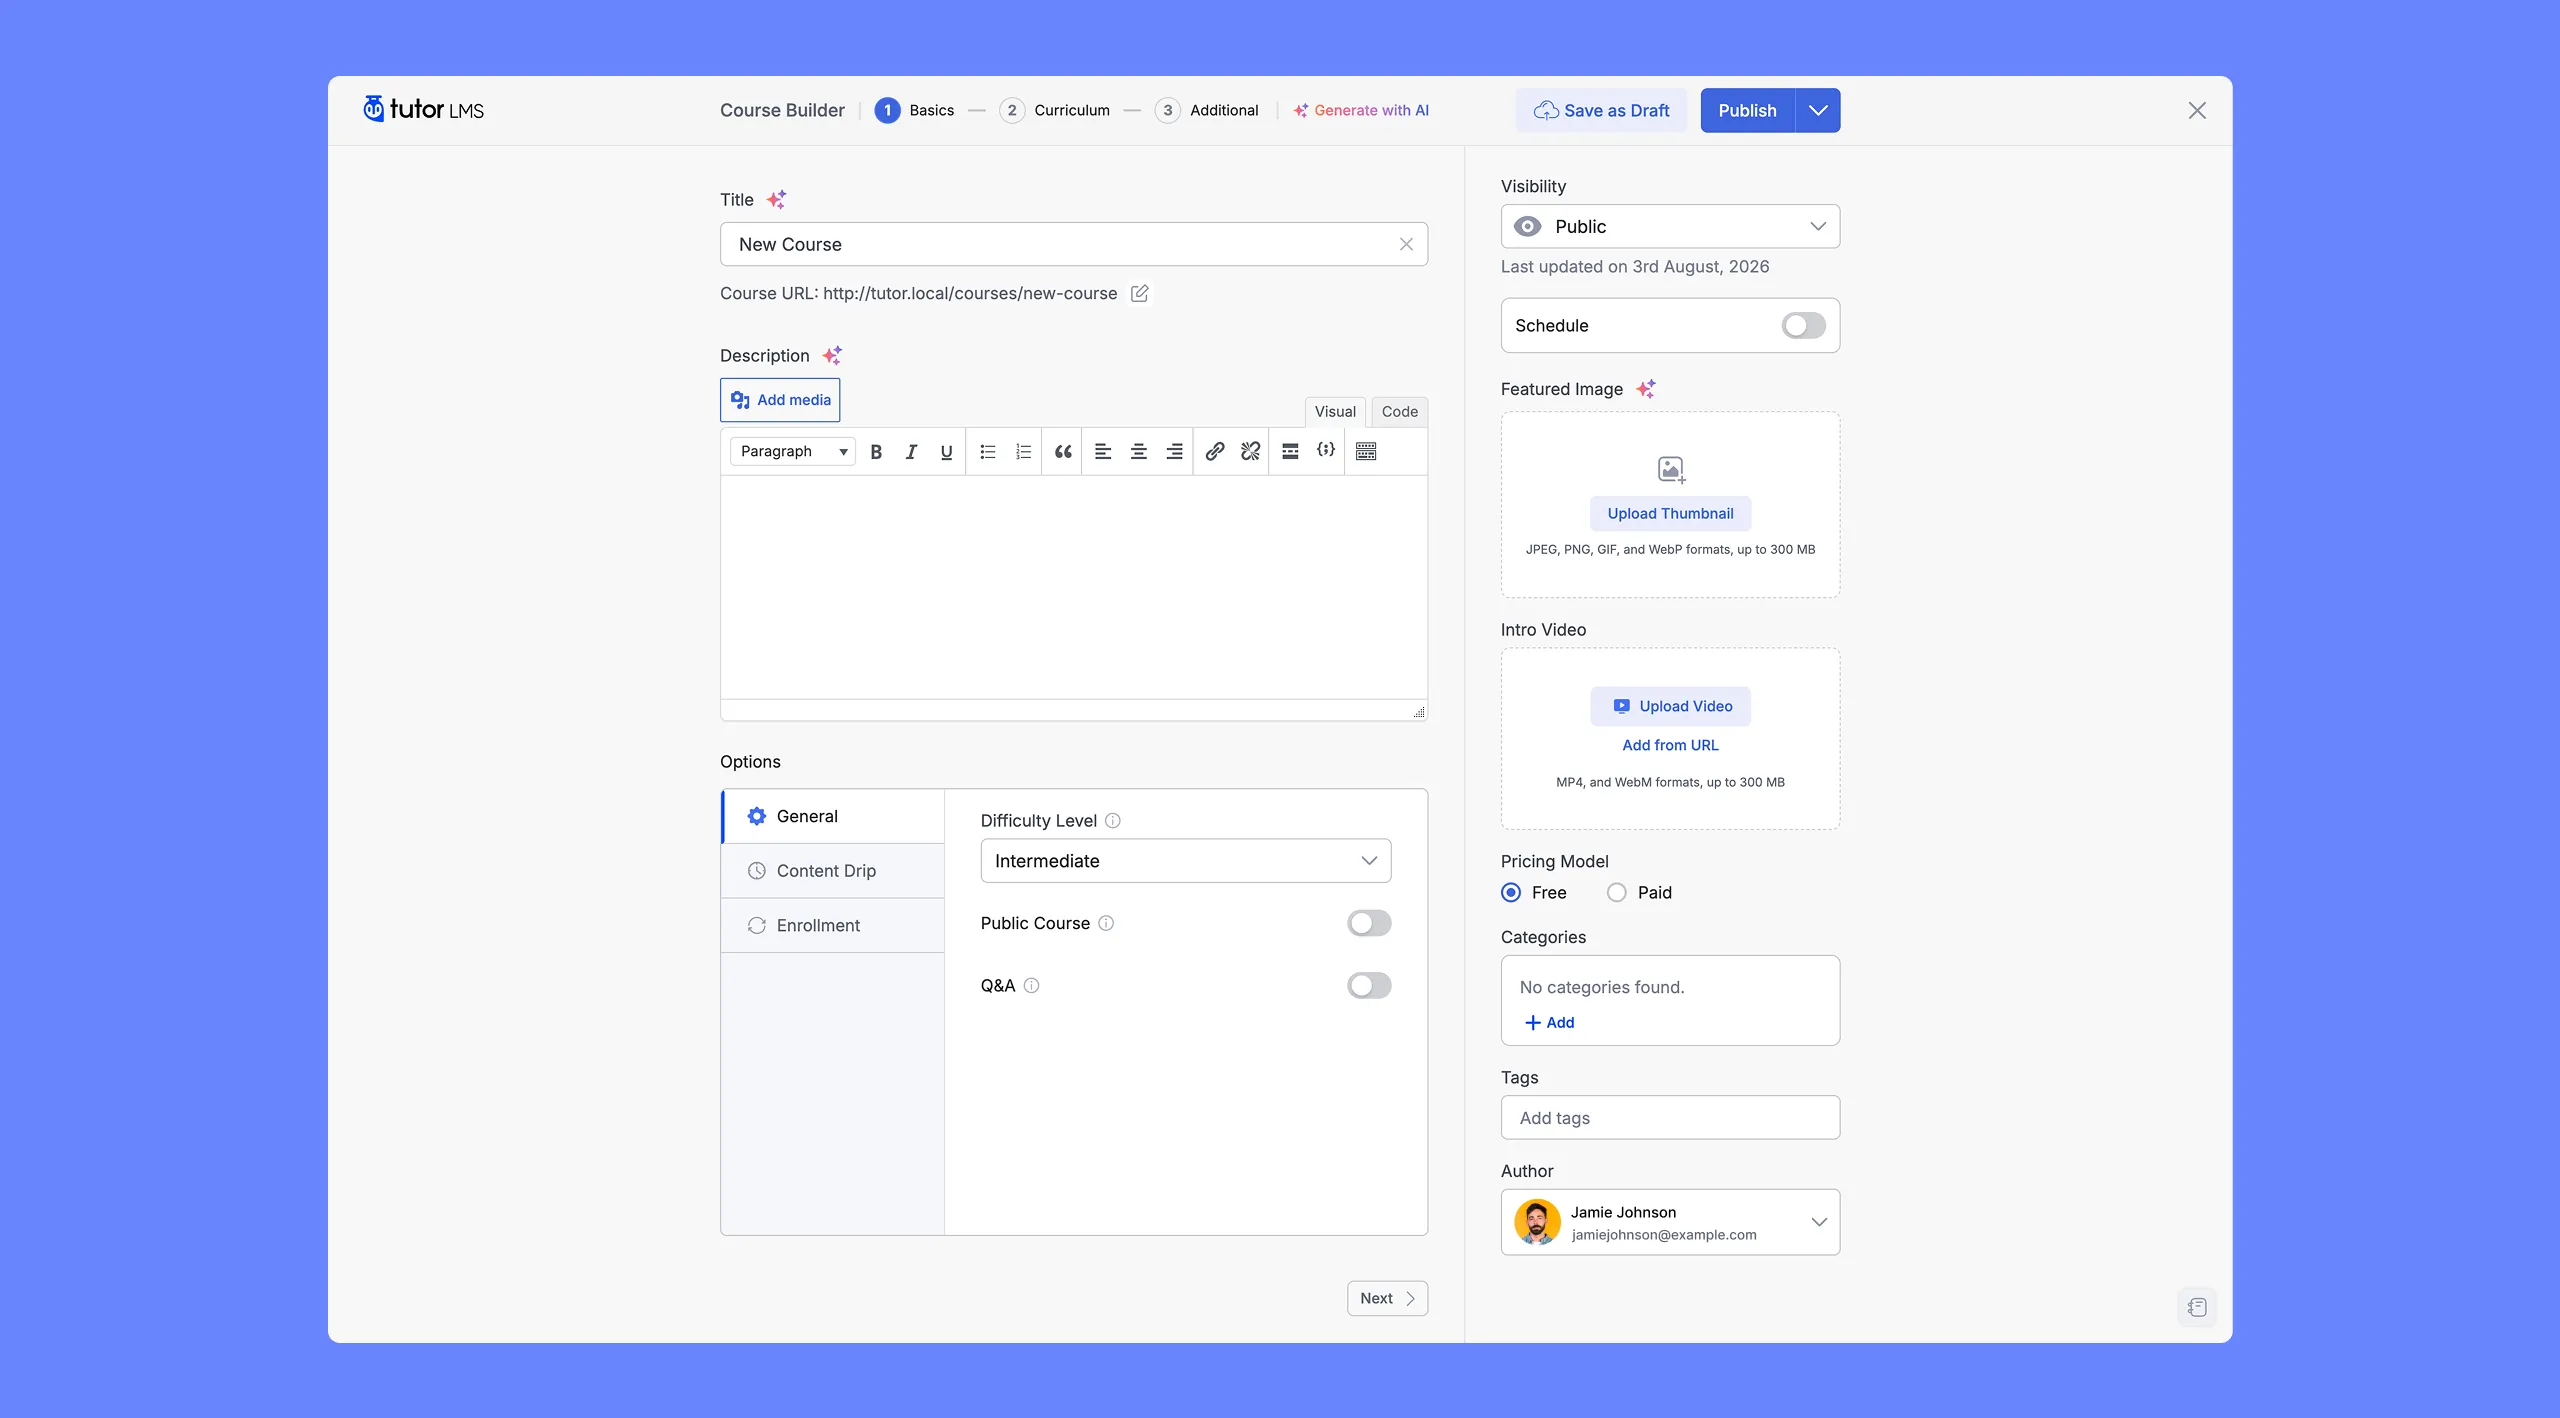
The Tutor LMS “Course Builder” is your command center for crafting engaging online courses. It empowers you to structure your content, add various media, and assess student learning all in one place.
Within the Course Builder, you can:
- Build a structured curriculum: Create topics and lessons to organize your course content logically. Easily manage the order of these elements.
- Add rich content to lessons: Populate your lessons with various content types, including text, images, videos, and downloadable resources.
- Assess with Quizzes and Assignments: Design a variety of assessments directly within the Course Builder, including quizzes, interactive quizzes, and assignments. Choose from various question types, configure settings, and provide personalized feedback.
Accessing the Course Builder
Tutor LMS offers flexible ways to access the Course Builder, allowing you to manage your courses from different areas within your WordPress environment.
From Your WordPress Dashboard:
- Log in to your WordPress dashboard.
- Go to “Tutor LMS > Courses.”
- Either create a new course by clicking “Add New” or edit an existing course by clicking on its title or choosing “Edit” from the actions menu.
From Your Tutor LMS Dashboard:
- Log in to your Tutor LMS front-end dashboard. This is usually located at yourwebsite.com/dashboard.
- To create a new course, click “Create a New Course.”
To edit an existing course, hover over the course and click “Edit.” The Course Builder will be available on the course editing page.
Course Basic
The “Course Basic” section is where you lay the groundwork for your online course. This is where you’ll establish key elements that shape how your course appears and functions.
Course Title and Course URL
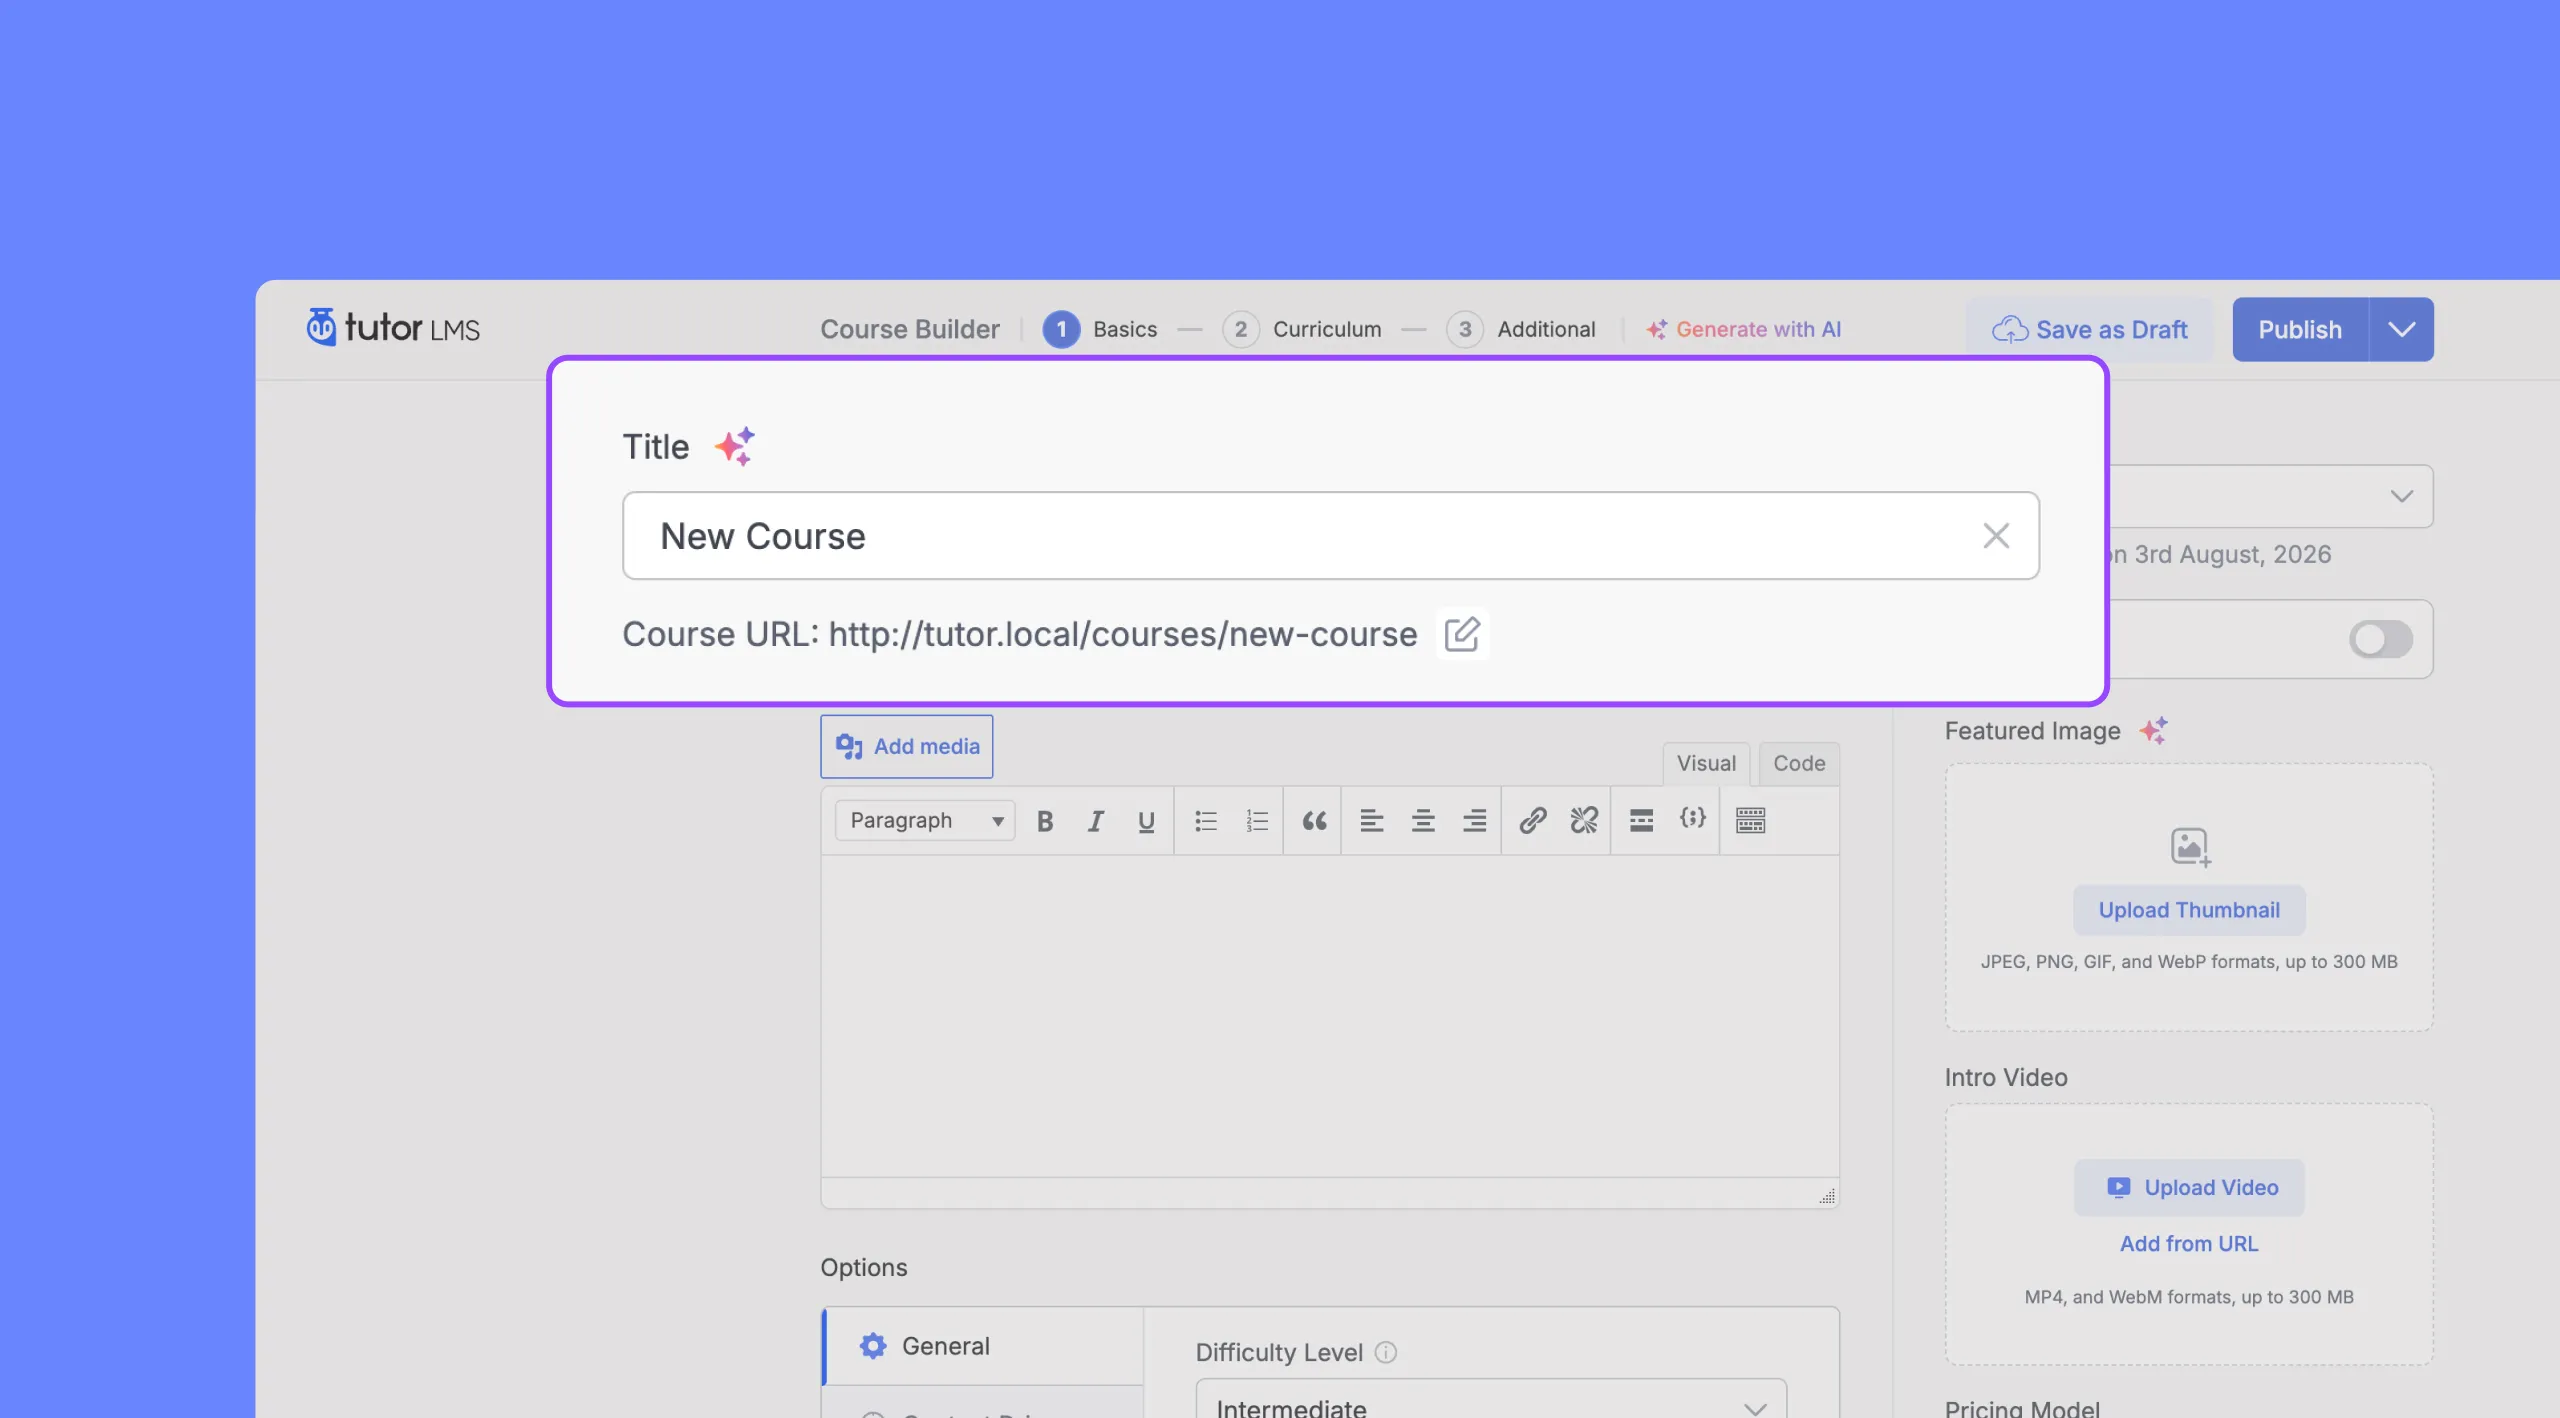
The Course Title is the name of your course. It should be clear, concise, and accurately reflect the course content.
The Course URL is the web address used to access your course. It is automatically generated based on your course title, but you can manually edit it if needed.
Course Description
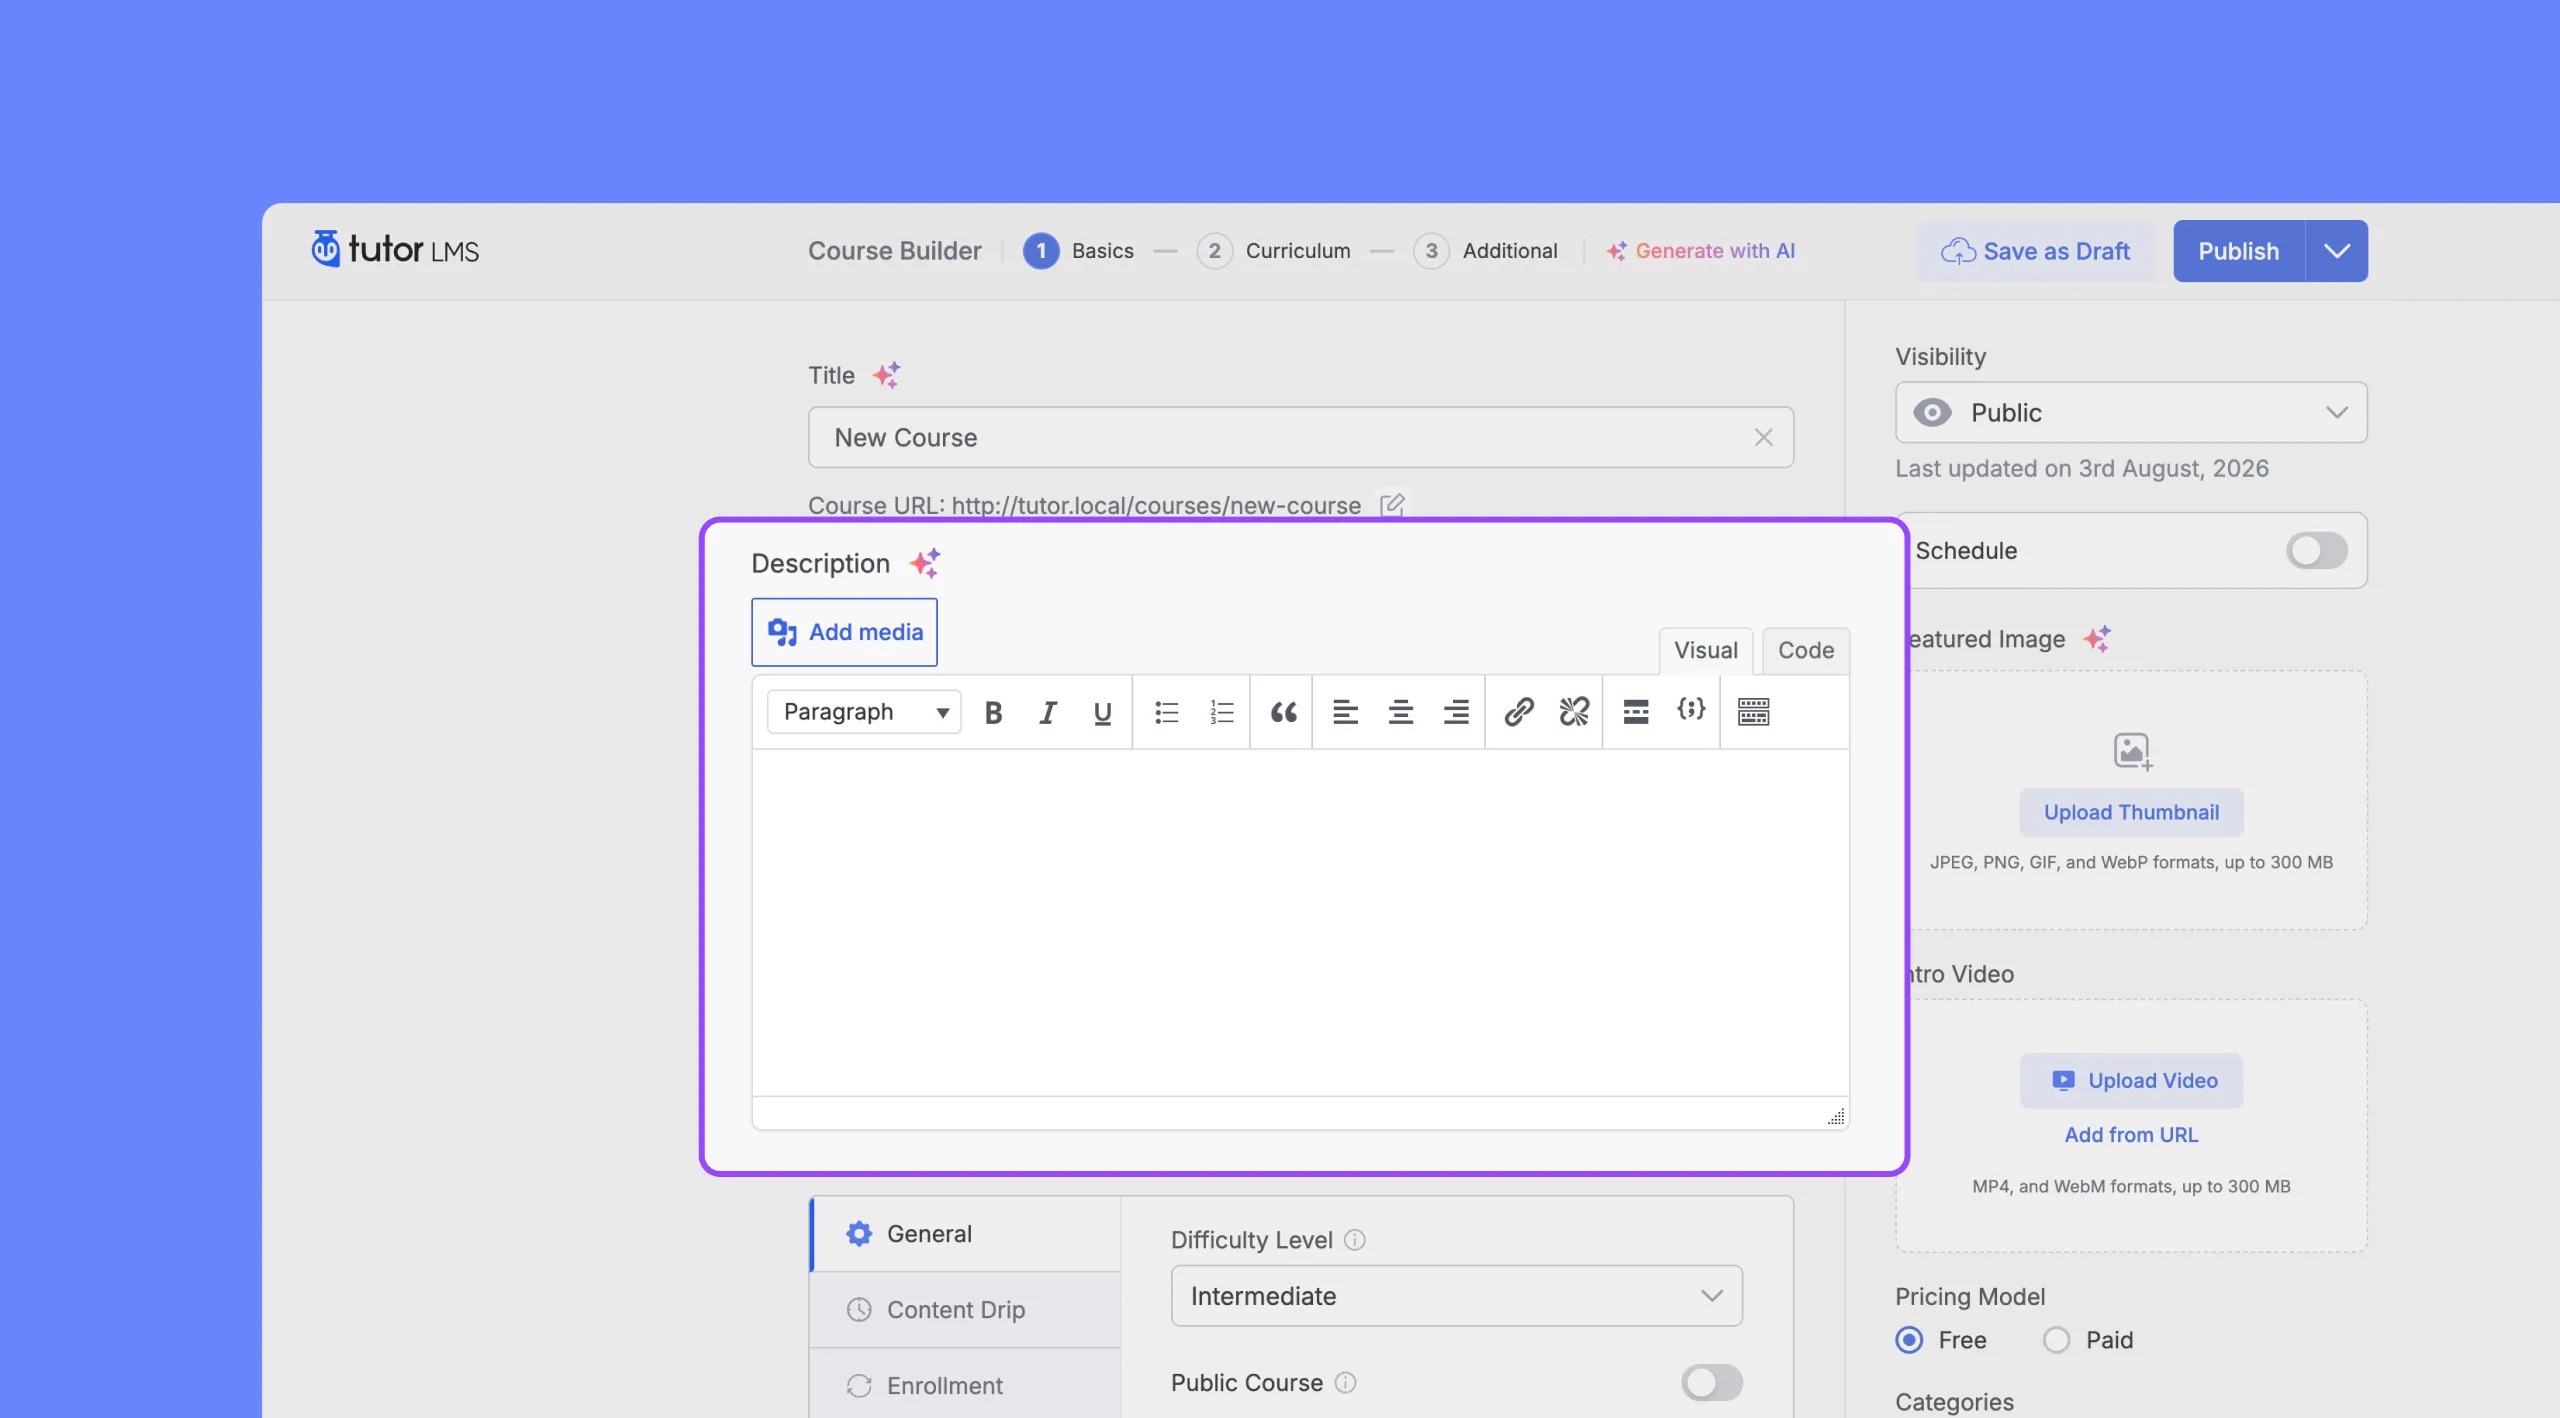
The course description provides a concise overview of the course content and learning outcomes. Use this section to entice potential students to enroll in your course.
Formatting with the Rich Text Editor:
Tutor LMS provides a rich text editor to help you format your course description. You can:
- Structure your text: Use headings, subheadings, and bullet points.
- Add visuals: Insert images to make your description more engaging.
- Incorporate links: Include links to relevant resources.
- Adjust formatting: Use bold, italics, and underlining to emphasize key points.
Course Settings Overview
The Course Settings allow you to customize key aspects of your course, ensuring it aligns with your teaching goals and student needs. Here is a breakdown of the available settings:
General Settings
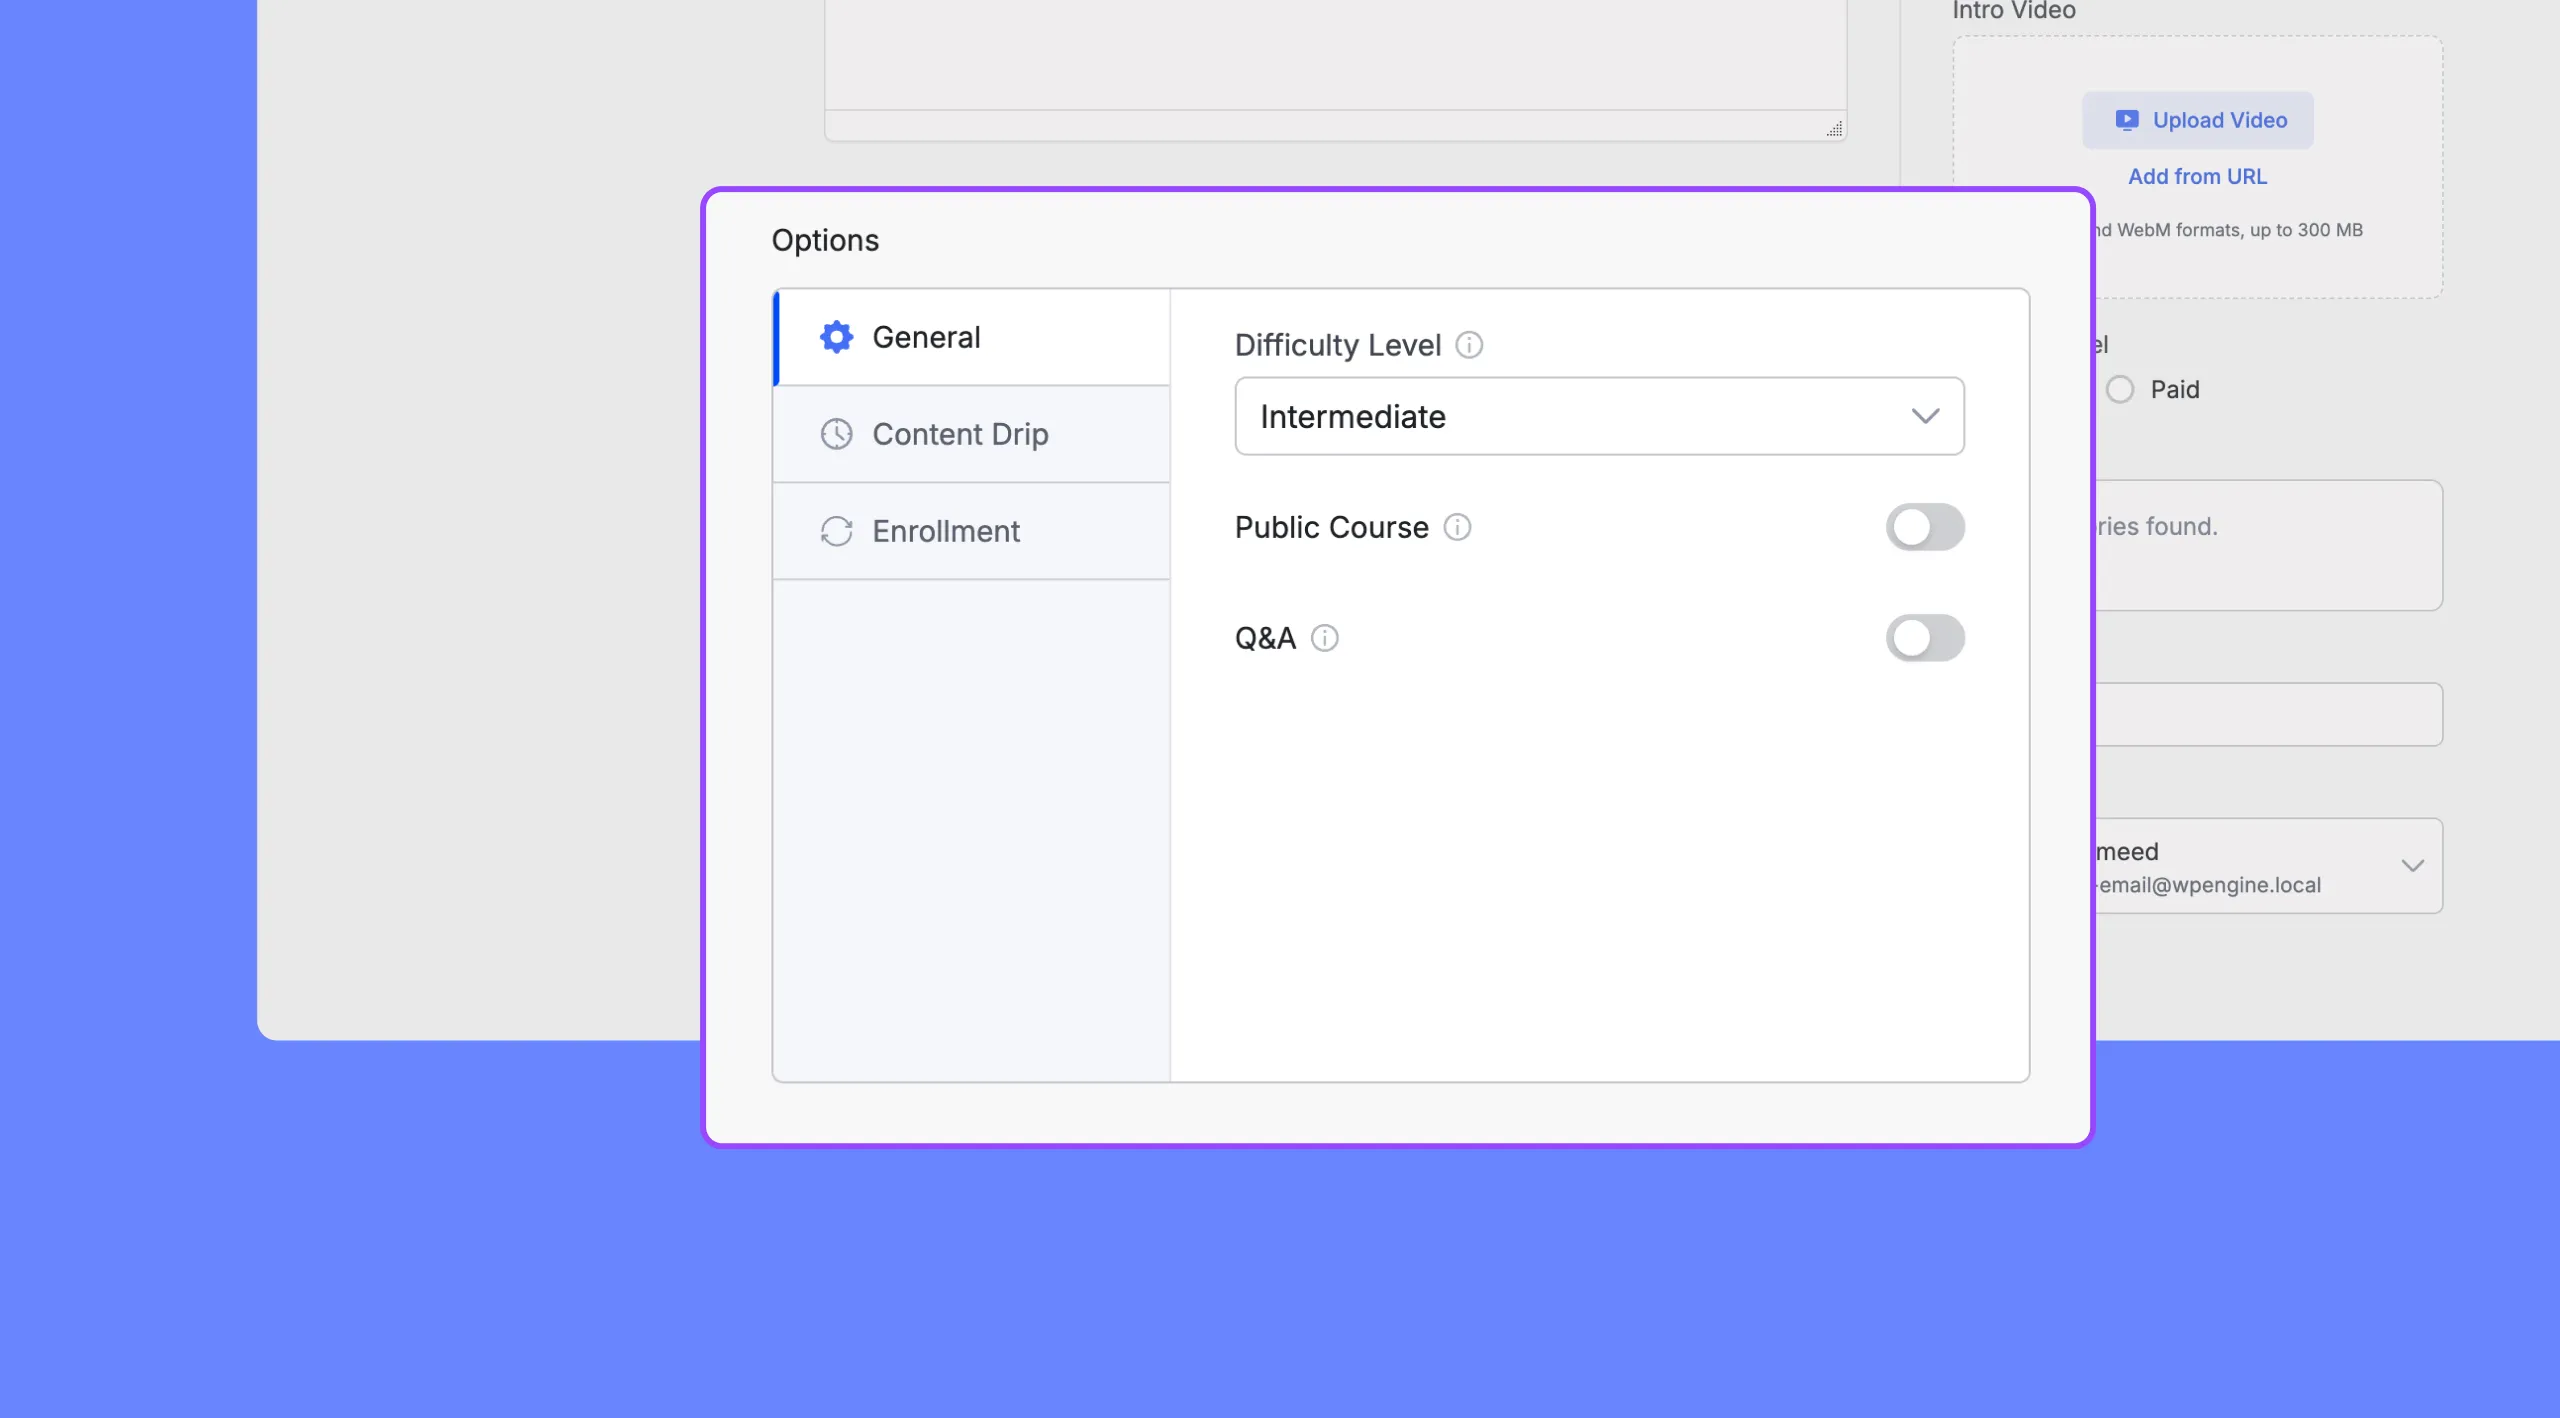
- Maximum Students: Limit the number of students who can enroll in your course. Leaving this field at “0” sets no enrollment limit.
- Difficulty Level: Indicate the difficulty level of your course to help students determine if it’s the right fit for them. Choose from:
- All Levels
- Beginner
- Intermediate
- Expert
- Public Course: Enable this option to make your course publicly accessible. When turned on, students can view the course content without creating an account.
Content Drip
The Content Drip feature allows you to release course content gradually over time, rather than making everything available at once.
Content Drip Types
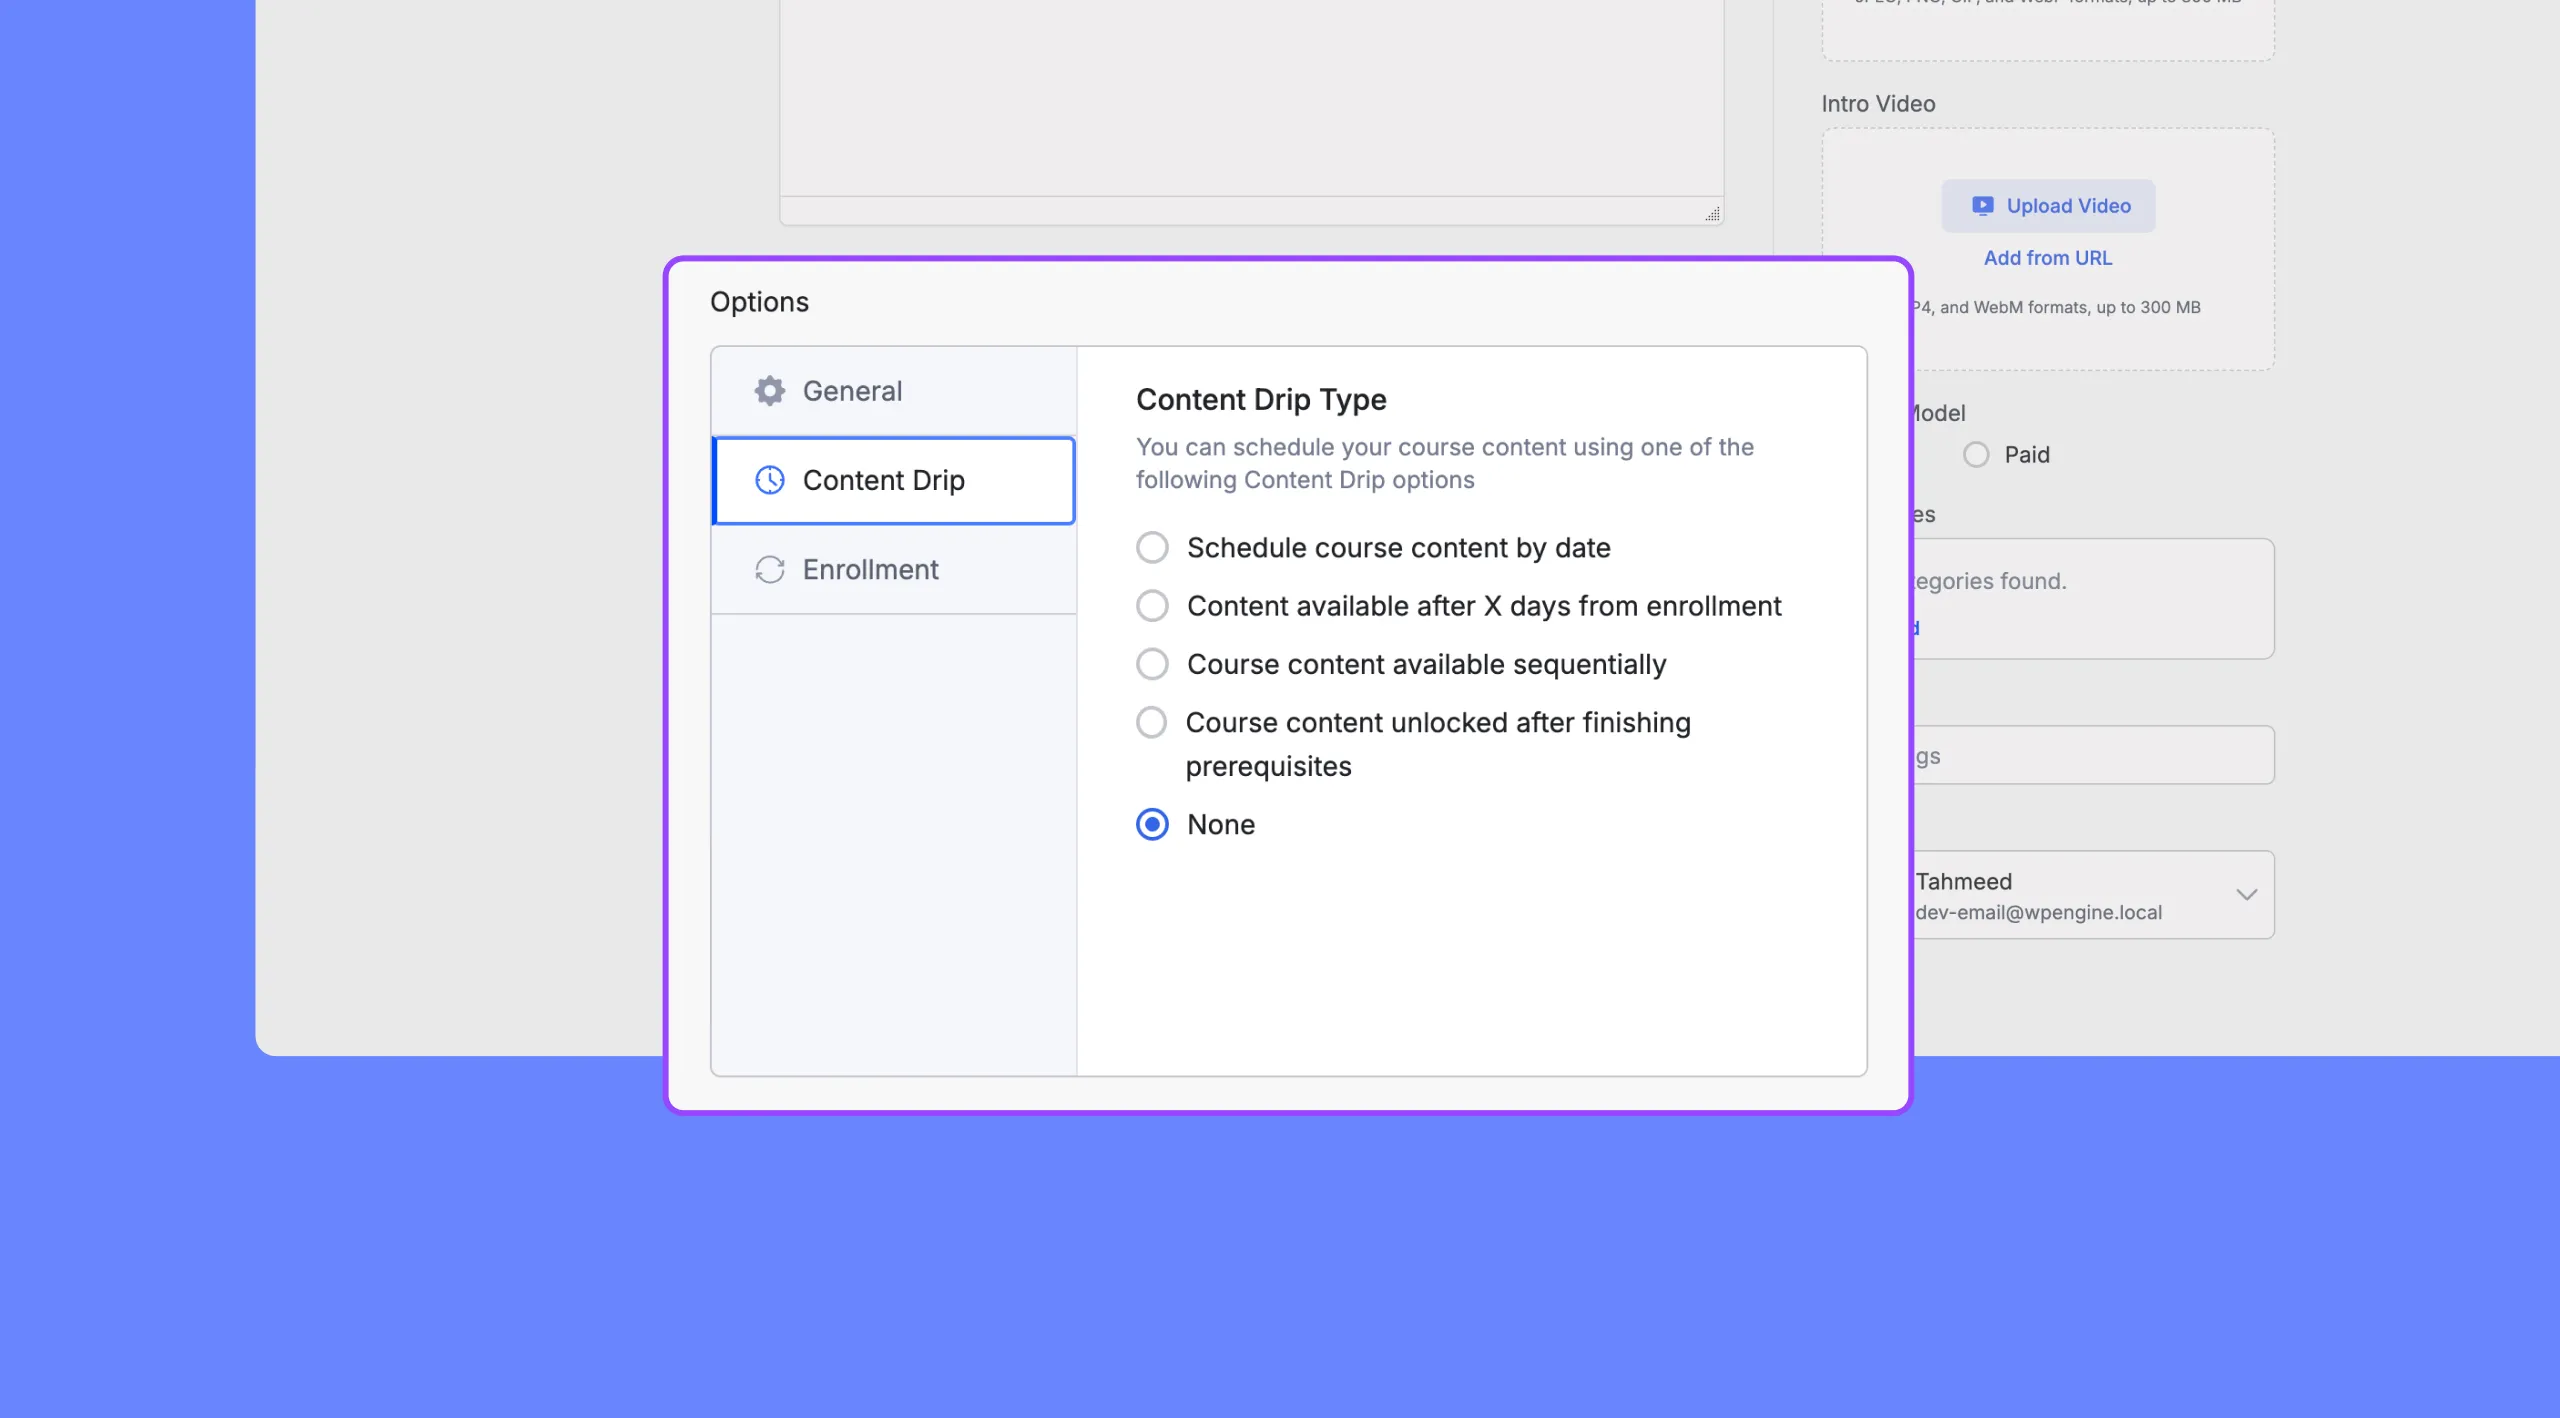
Tutor LMS offers flexible options to control how you drip your content:
- Schedule course content by date: Release content on specific dates, allowing you to create a predefined schedule.
- Content available after X days from enrollment: Make content available after a set number of days from the enrollment date.
- Course content available sequentially: Unlock lessons or modules one after another, ensuring students progress through the course in a defined order.
- Course content unlocked after finishing prerequisites: Make access to certain content dependent on the completion of prerequisite lessons or quizzes.
Note: To use Content Drip, ensure the Content Drip add-on is enabled. You can find and activate this add-on within your WordPress dashboard under “Tutor LMS Pro > Add-ons.” For detailed instructions on using this feature, refer to our dedicated Content Drip documentation.
Enrollment
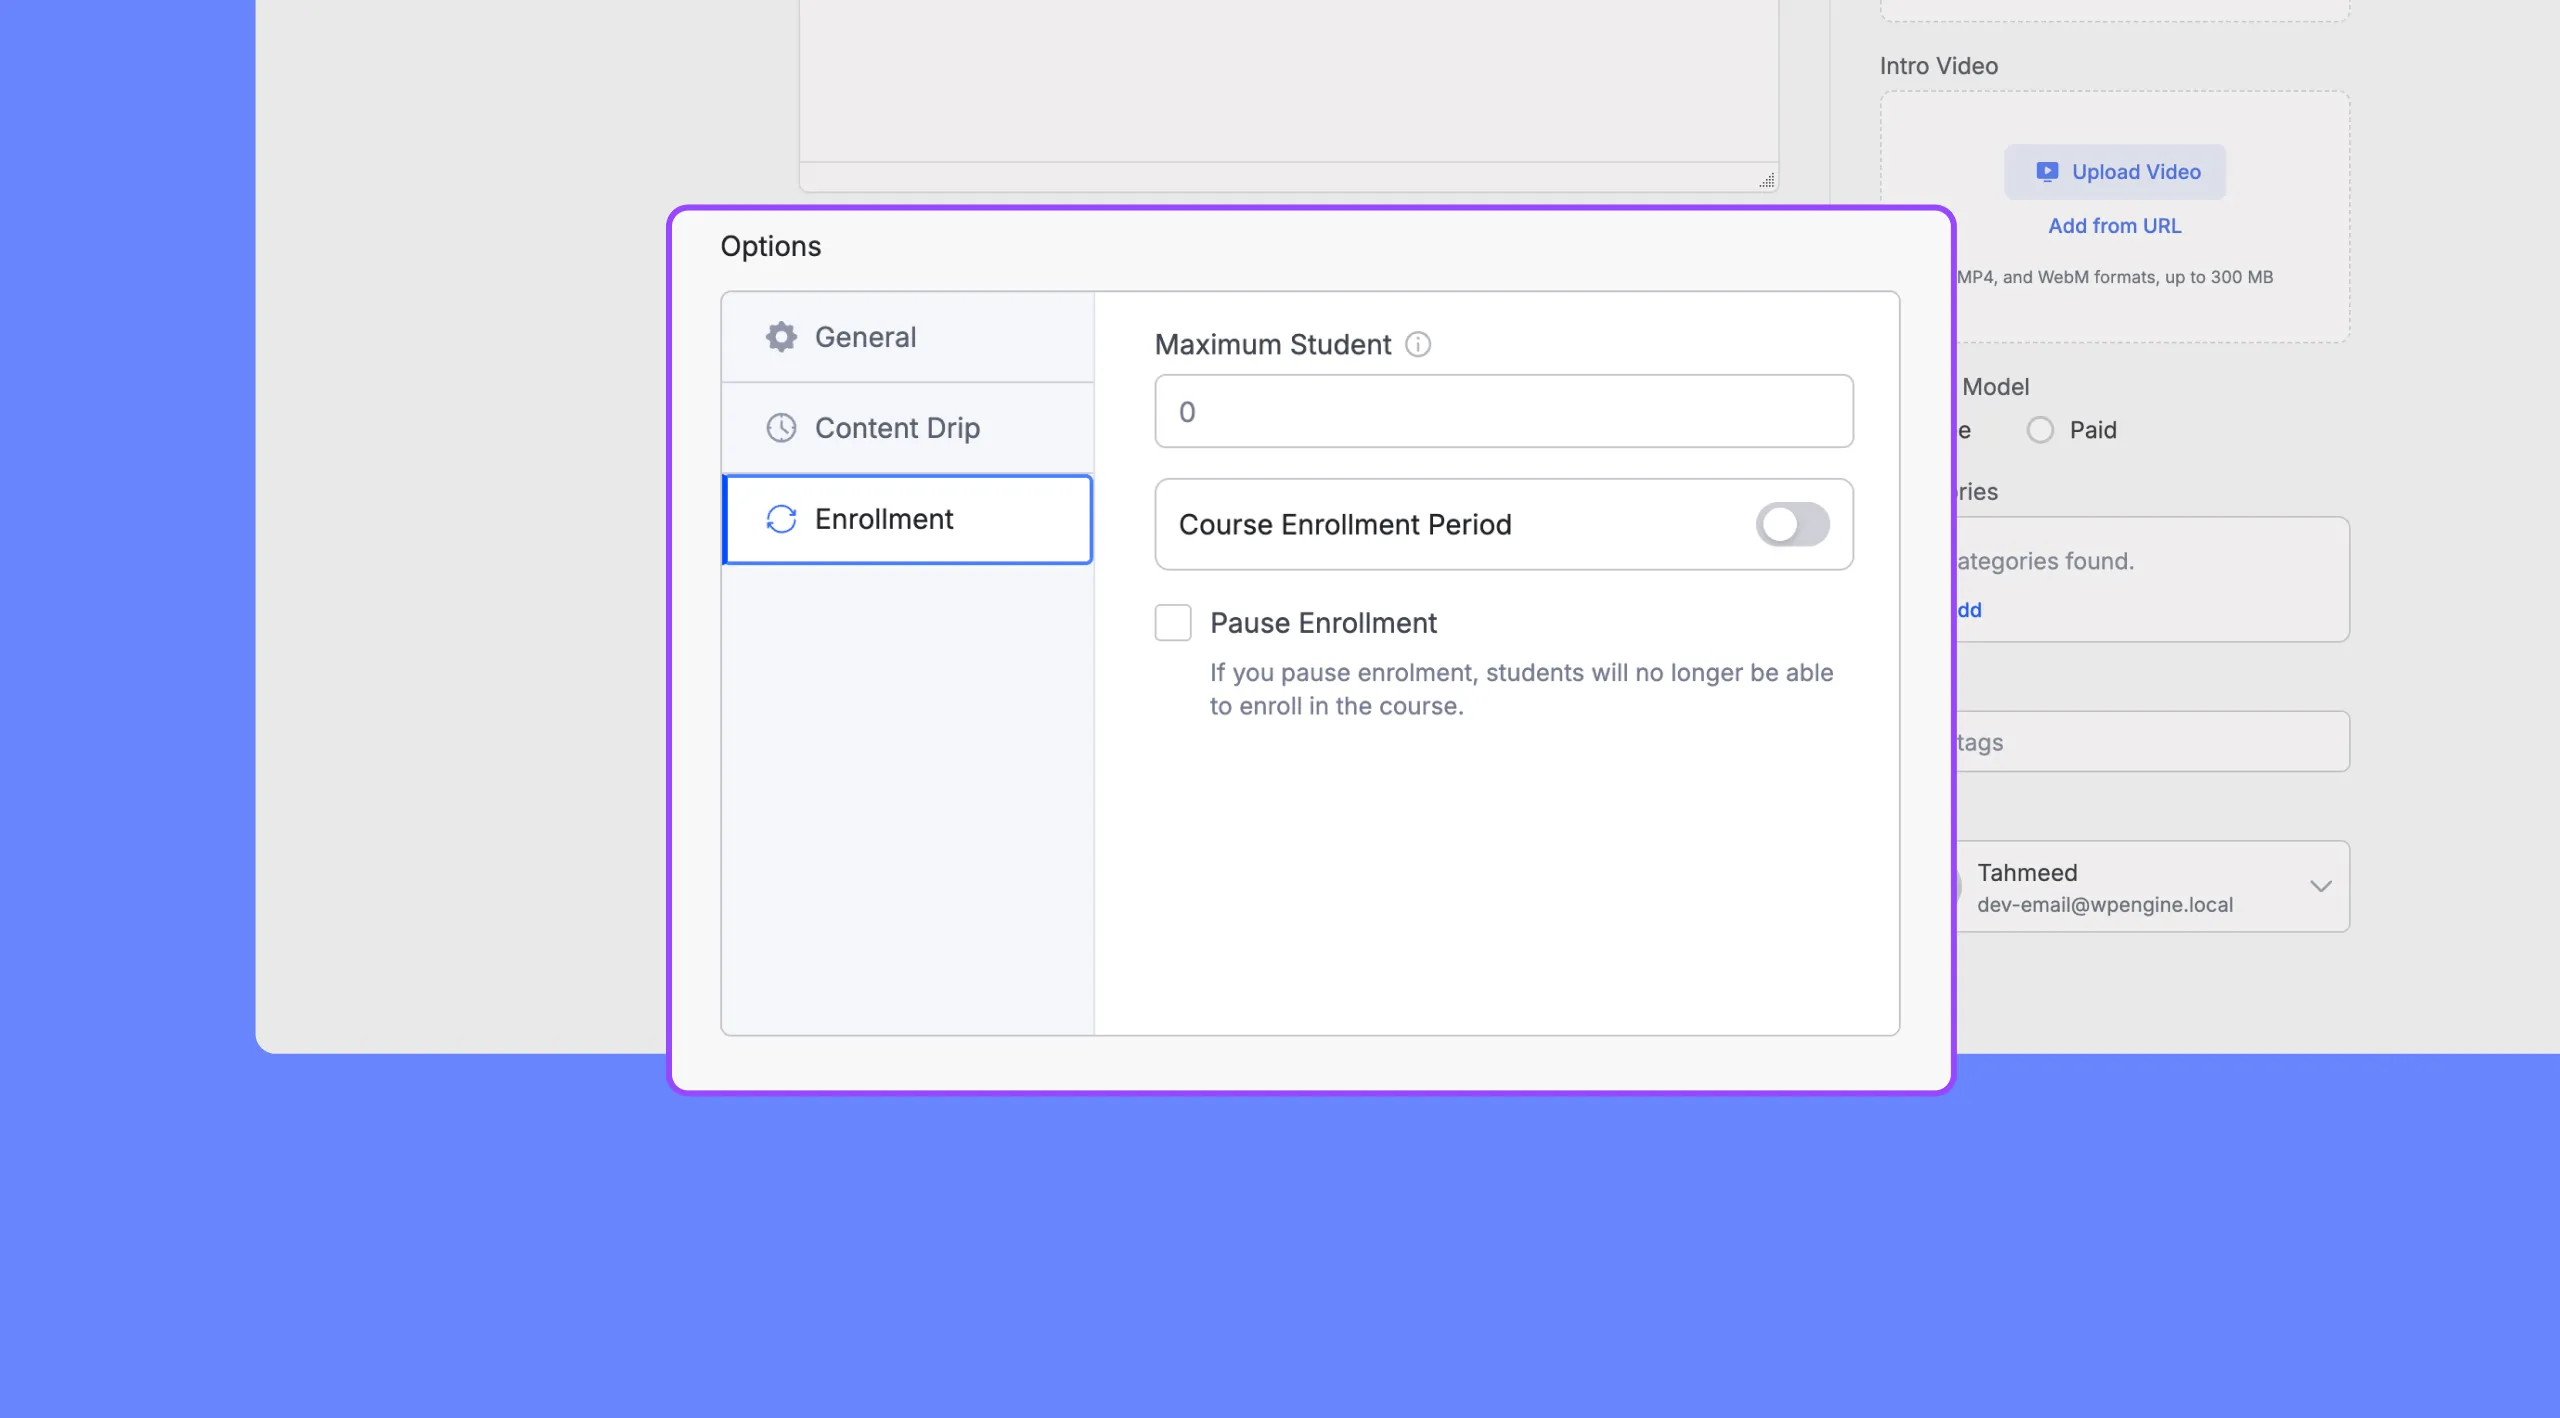
The Enrollment tab allows you to control how students can enroll in your course. You can manage student limits, enrollment timeframes, and control access with ease.
Here are the available options of the Tutor LMS Enrollment tab:
- Maximum Student: Set the maximum number of students who can enroll in the course. For no limit, set the value as 0 (zero).
- Enrollment Expiration: Define how many days a student will remain enrolled in the course after enrolling. 0 means lifetime access.
Note: You have to enable the “Enrollment Expiration” option from the course settings in order to set the enrollment expiration time.
- Course Enrollment Period: Enable this to define a start and end date for when enrollment is open. Students will only be able to enroll during this period.
- Pause Enrollment: Check this box to stop new enrollments. Students will not be able to enroll in the courses til it’s unchecked.
Course Visibility
Tutor LMS offers different visibility options to control who can access your courses. This allows you to cater to various learning scenarios, whether you’re offering open enrollment, private training, or exclusive content.
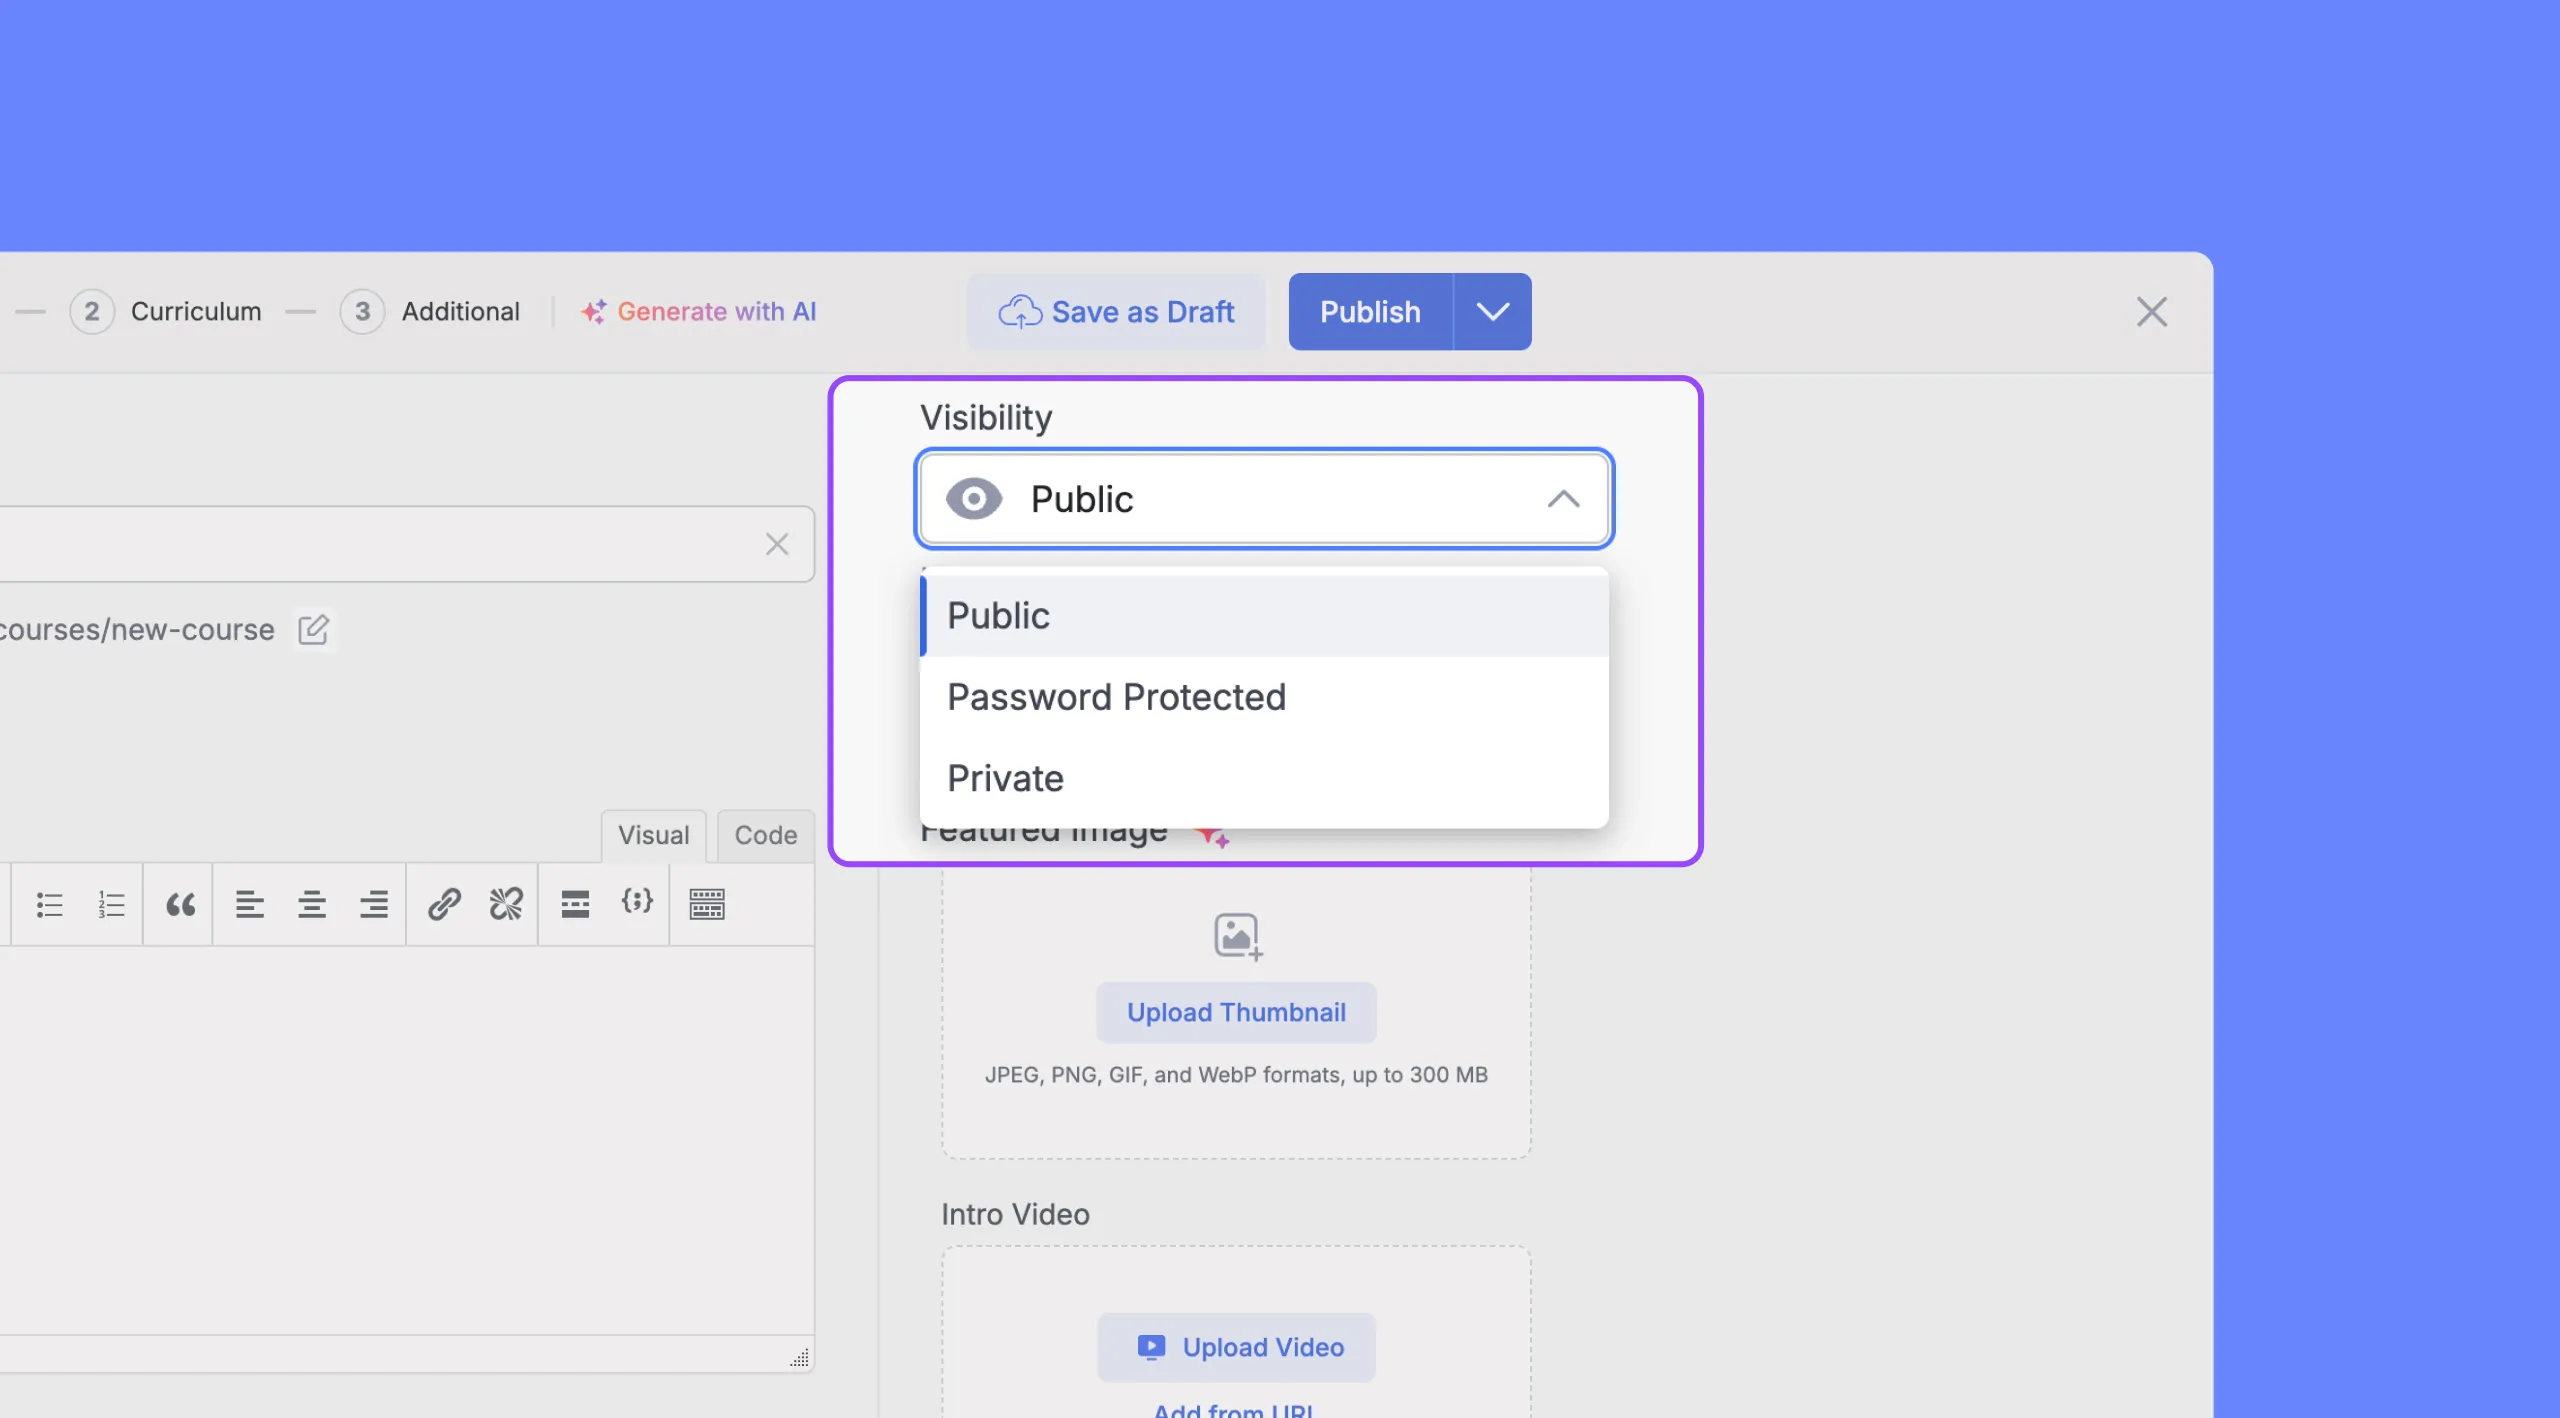
Here’s a breakdown of the visibility statuses:
- Public: Anyone can see and enroll in your course. It will be listed in your course catalog and searchable on your website.
- Password Protected: Only those with the password can access the course. This allows you to create exclusive learning experiences for specific groups.
- Private: The course is hidden from public view. Only enrolled students and administrators can access it.
Scheduling Course Publication
The “Schedule” section controls when your course becomes available to students.
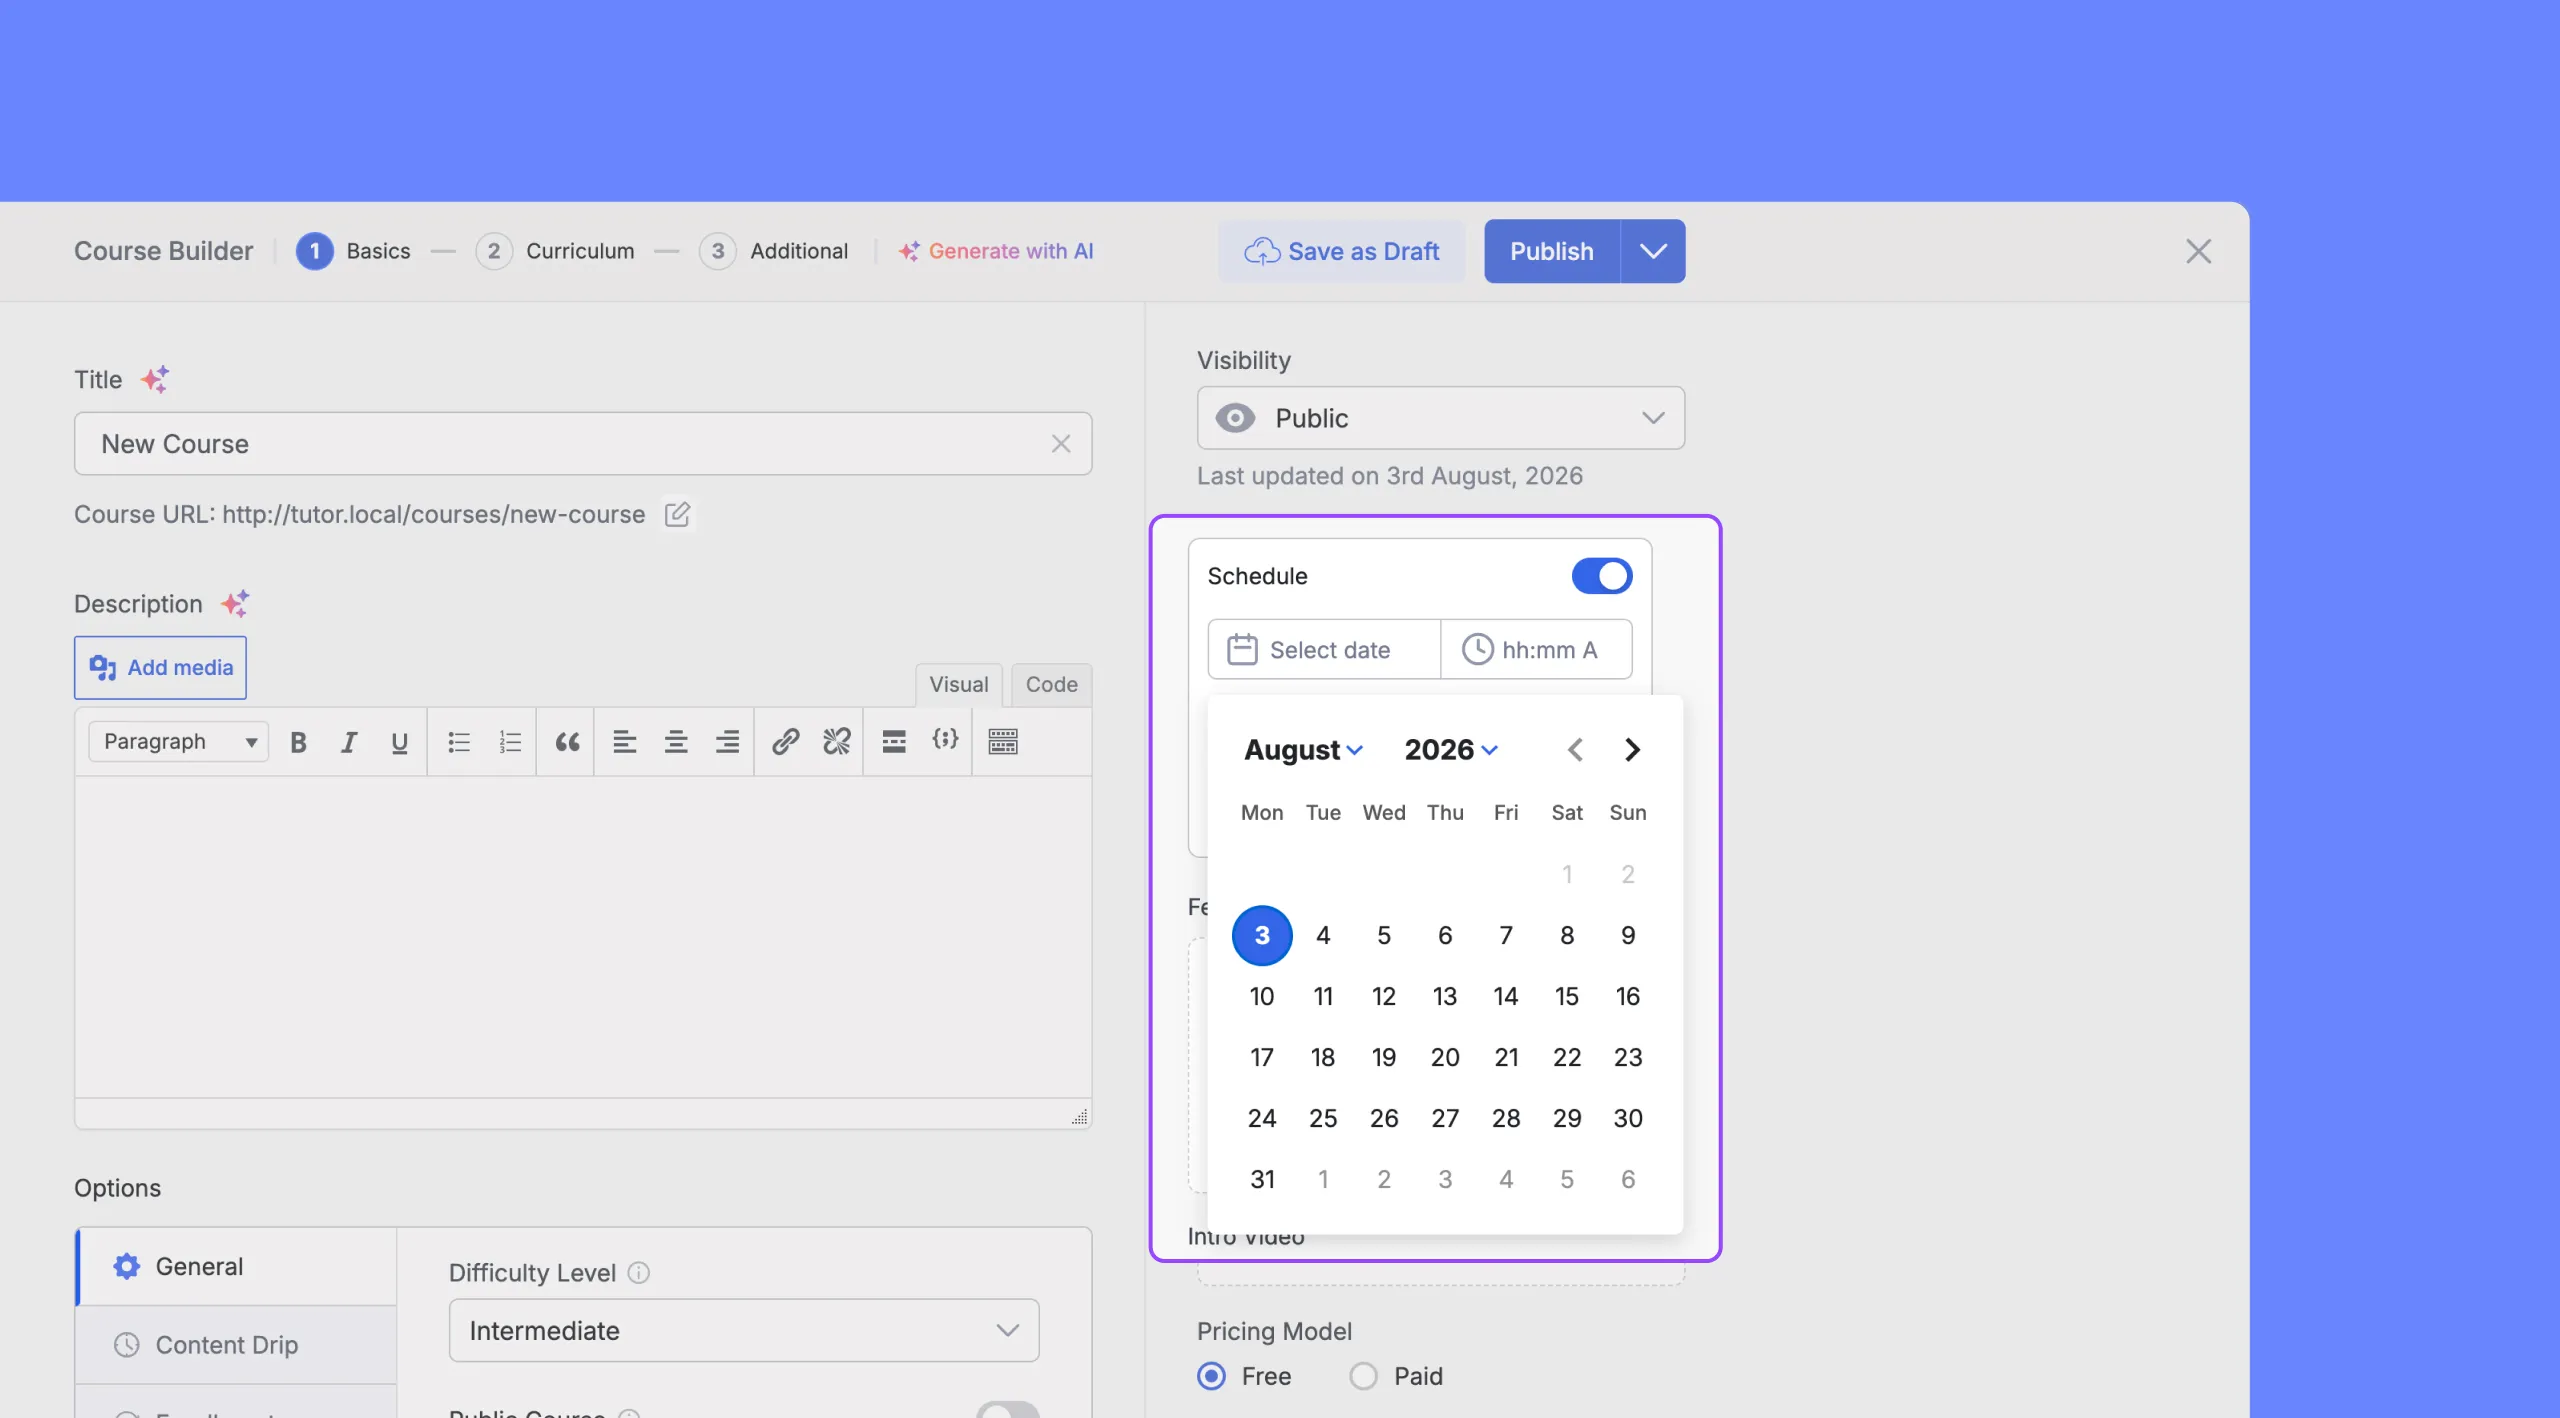
To schedule the course for a future release:
- Click on the “Schedule” toggle to enable it.
- Choose the desired date and time.
- Press “ok” to finalize
Featured Image
The featured image is the visual representation of your course. It’s the first thing potential students see. This image appears on your course catalog page, in course listings, and on social media when your course is shared.
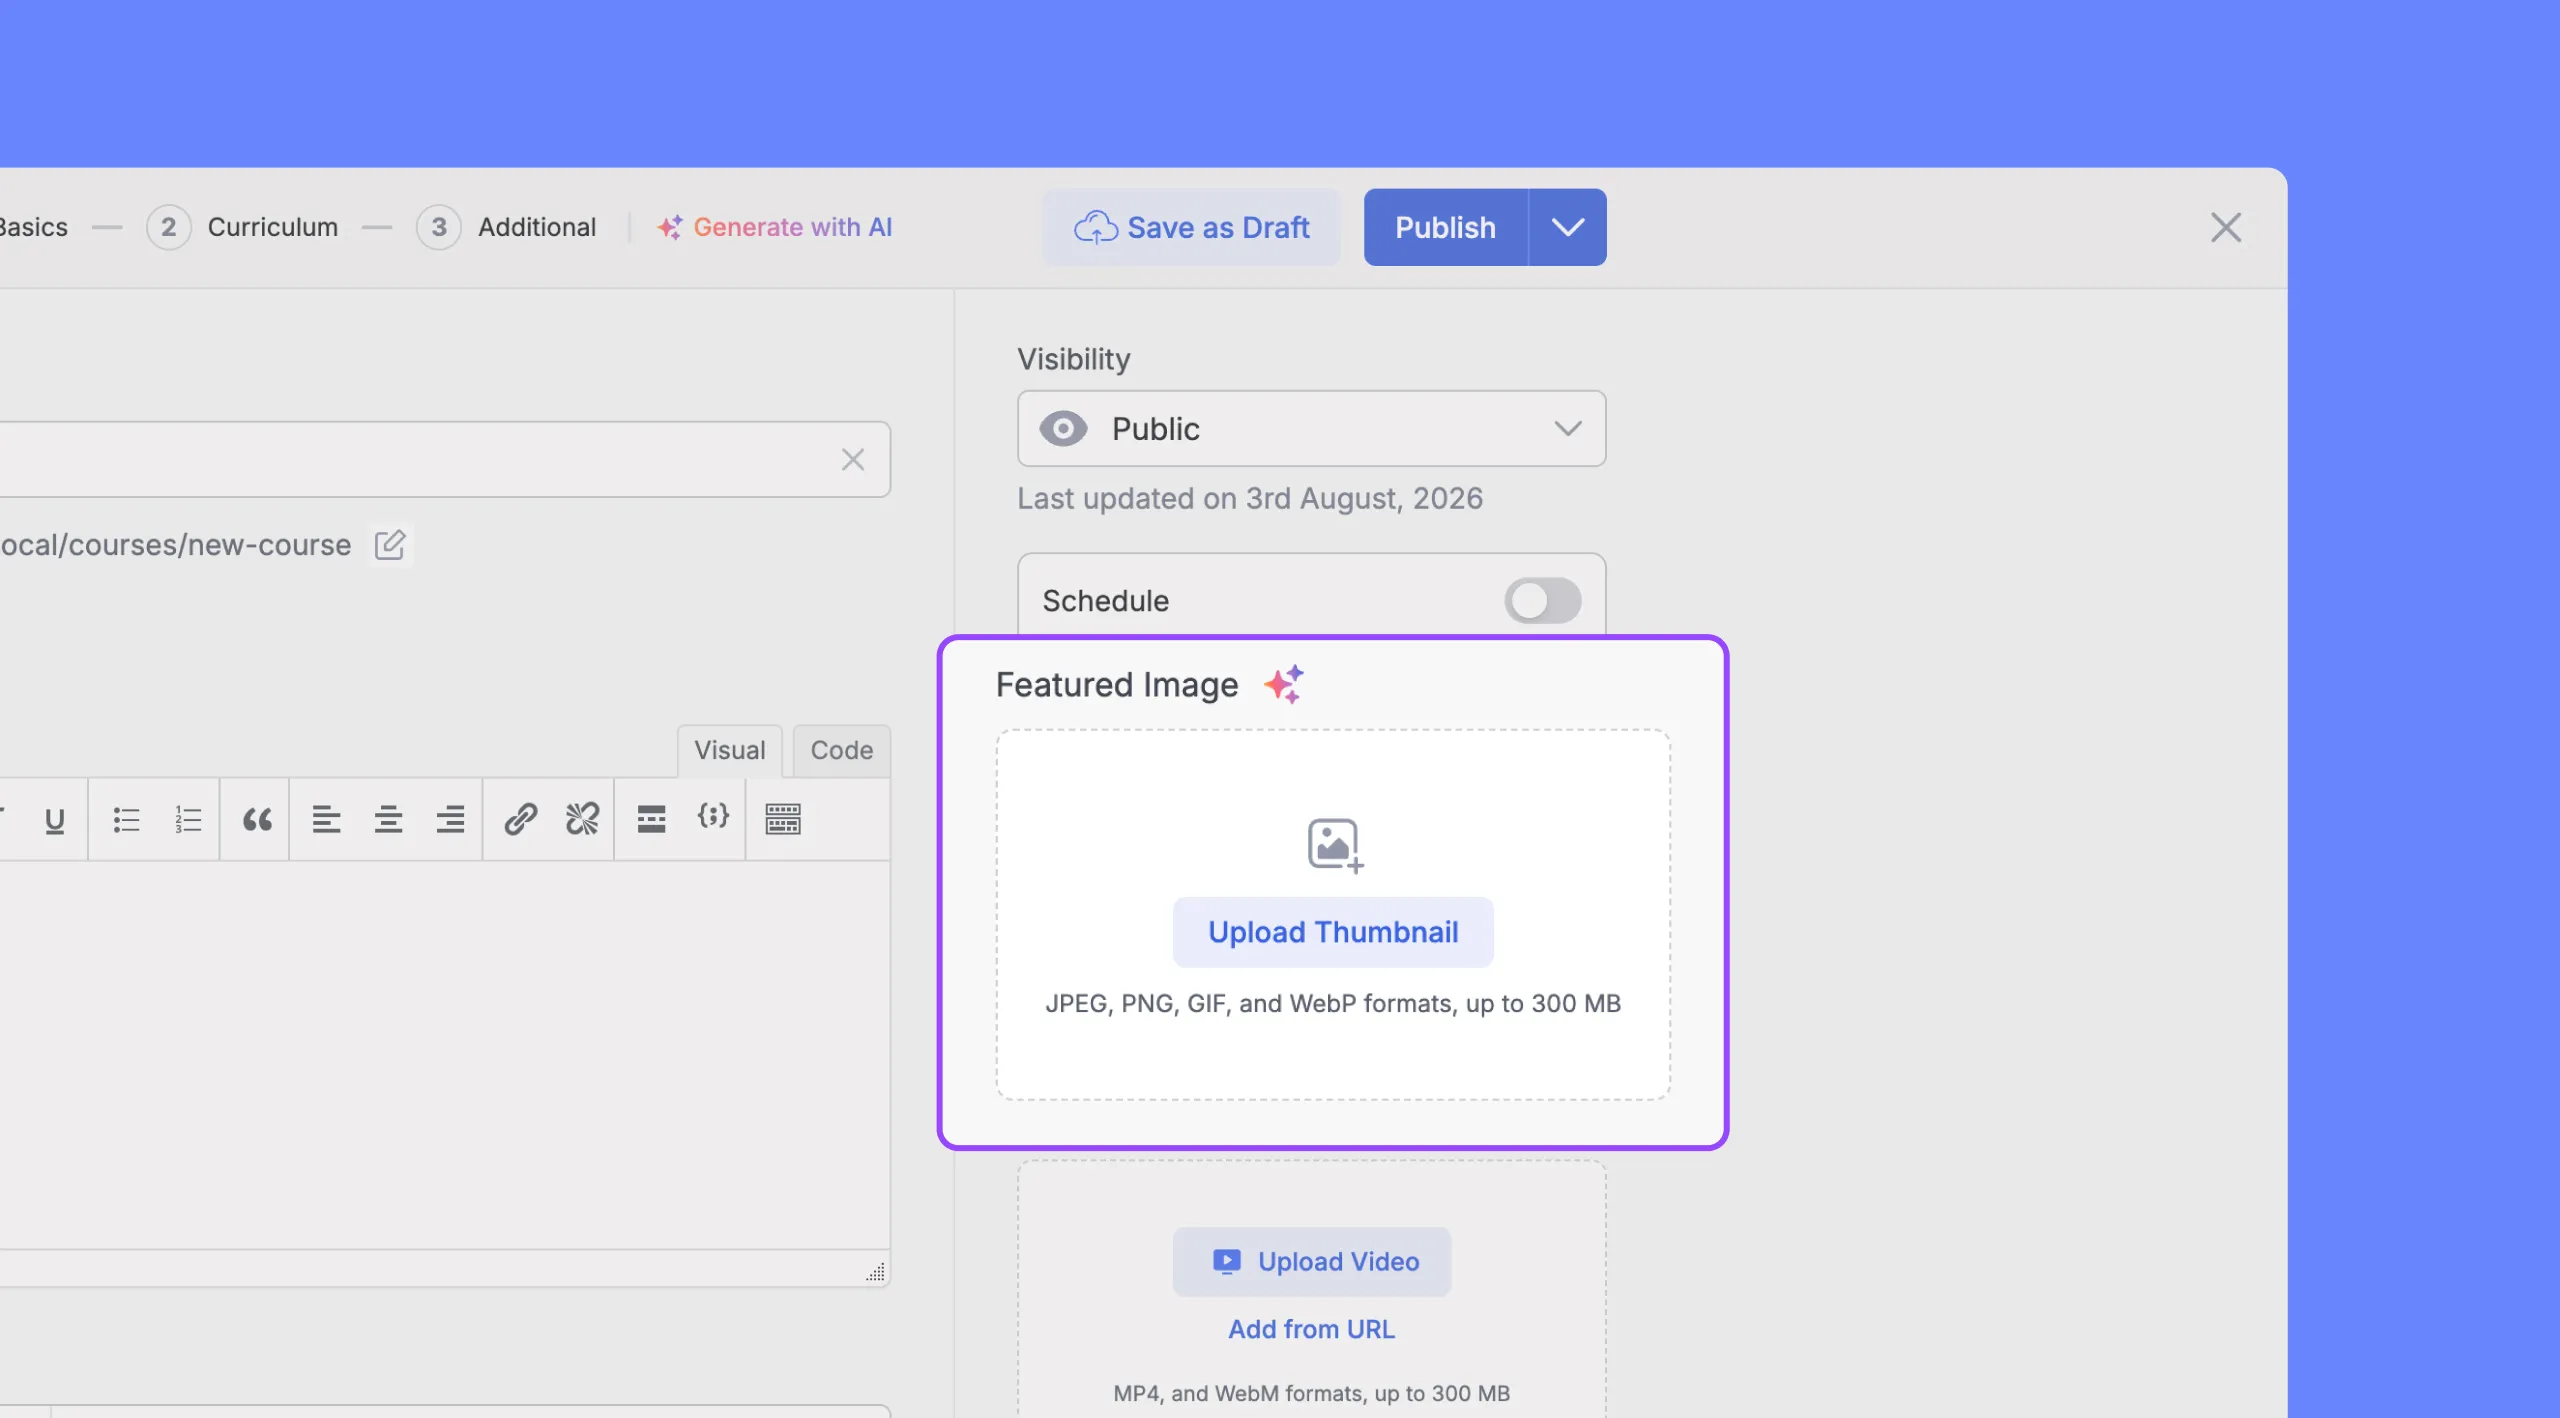
To add a featured image:
- Click the “Upload Thumbnail” button. This will open the WordPress media library.
- Choose an image from your media library or upload a new one.
- Click the “Select” button to set the chosen image as your featured image. The chosen image will now appear in the “Featured Image” section.
Intro Video
The “Intro Video” section allows you to add a video introduction to your course. This provides a welcoming touch and allows potential students to get a glimpse of your teaching style and course content.
Adding an Intro Video
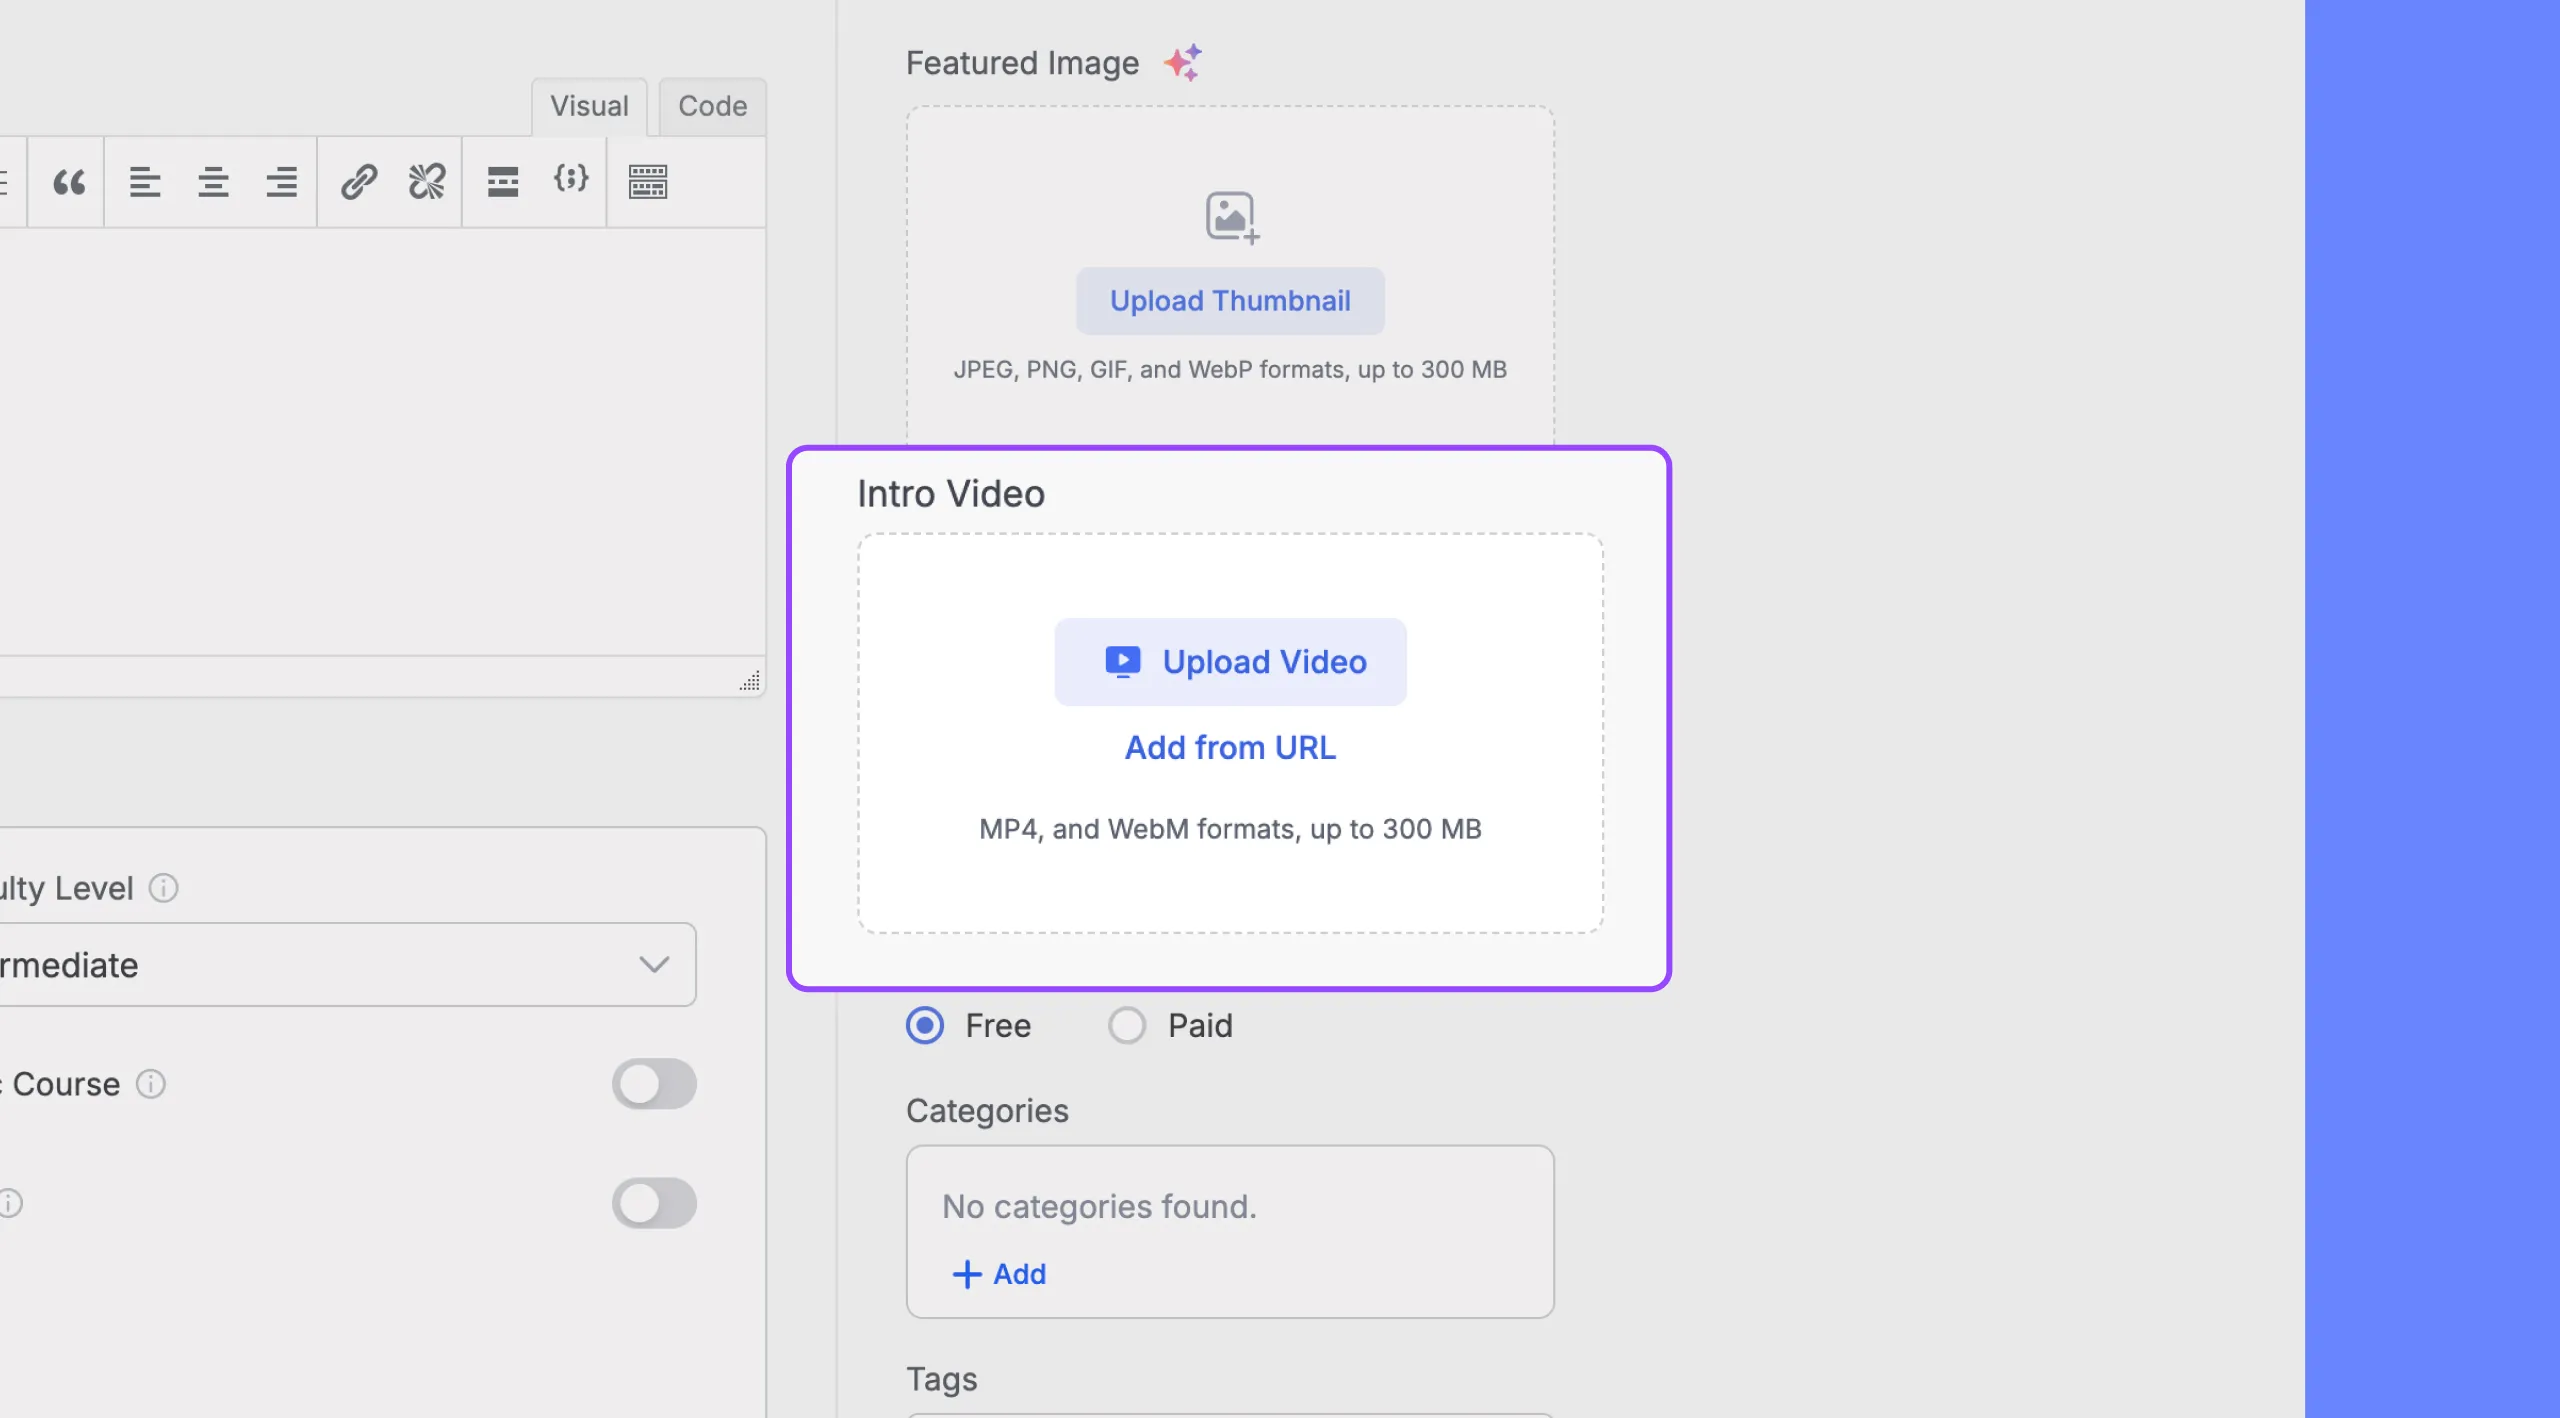
You have two options for adding your video:
- Upload Video: Click the “Upload Video” button to upload an MP4 or WebM video file directly from your computer.
- Add from URL: If your video is hosted online (e.g., on YouTube or Vimeo), click “Add from URL” and paste the video link.
Pricing Model
The “Pricing Model” section allows you to define the pricing structure for your course.
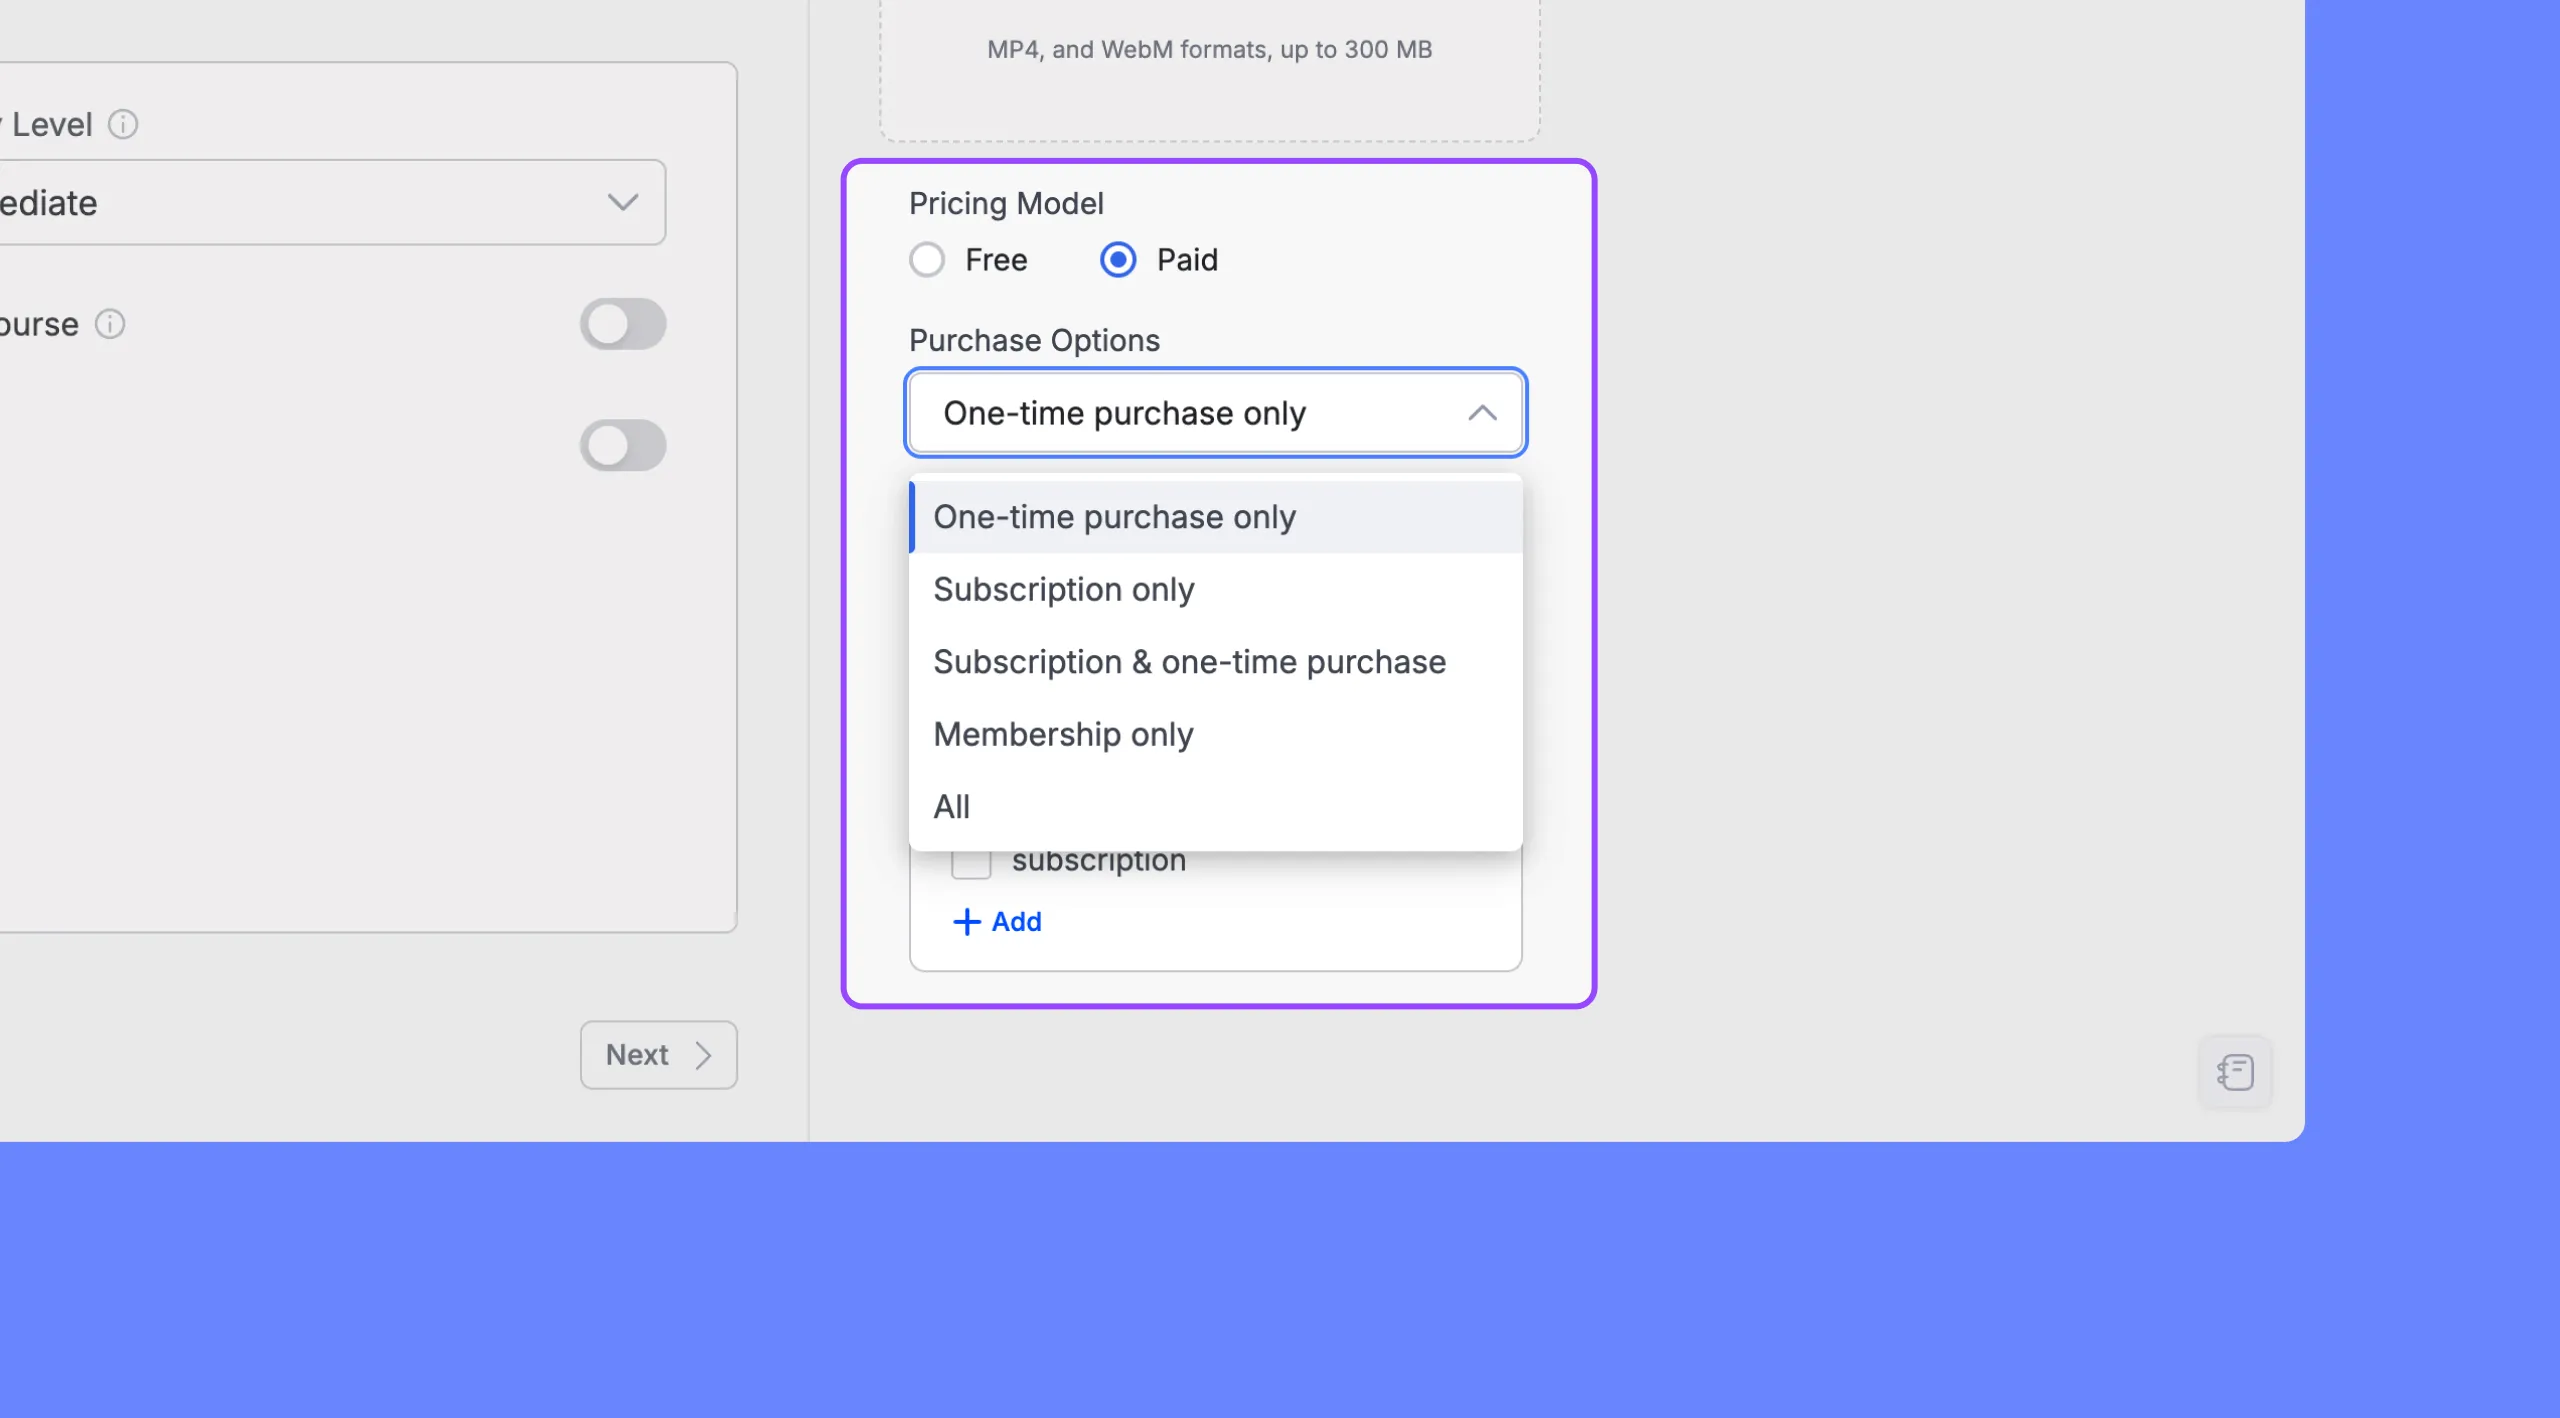
Pricing Options:
- Free: Offer the course free of charge.
- Paid: Set a price for the course.
- Regular Price: The standard price of the course.
- Sale Price: A discounted price for the course.
Subscription:
The “Add Subscription” button allows you to include this course in a subscription package. For detailed information on adding subscriptions and configuring purchase options, refer to our dedicated Subscriptions documentation.
Categories
Using the “Categories” feature, you can assign your course to one or more categories. This helps organize your courses within your Tutor LMS site, making it easier for students to browse and find courses that interest them.
Creating and Assigning Categories
- Click the “+ Add” button.
- In the pop-up window, enter the “Category name.”
- (Optional) Select a “Parent” category to create a hierarchical structure. This allows you to create subcategories within broader categories.
- Click “Ok” to save the category.
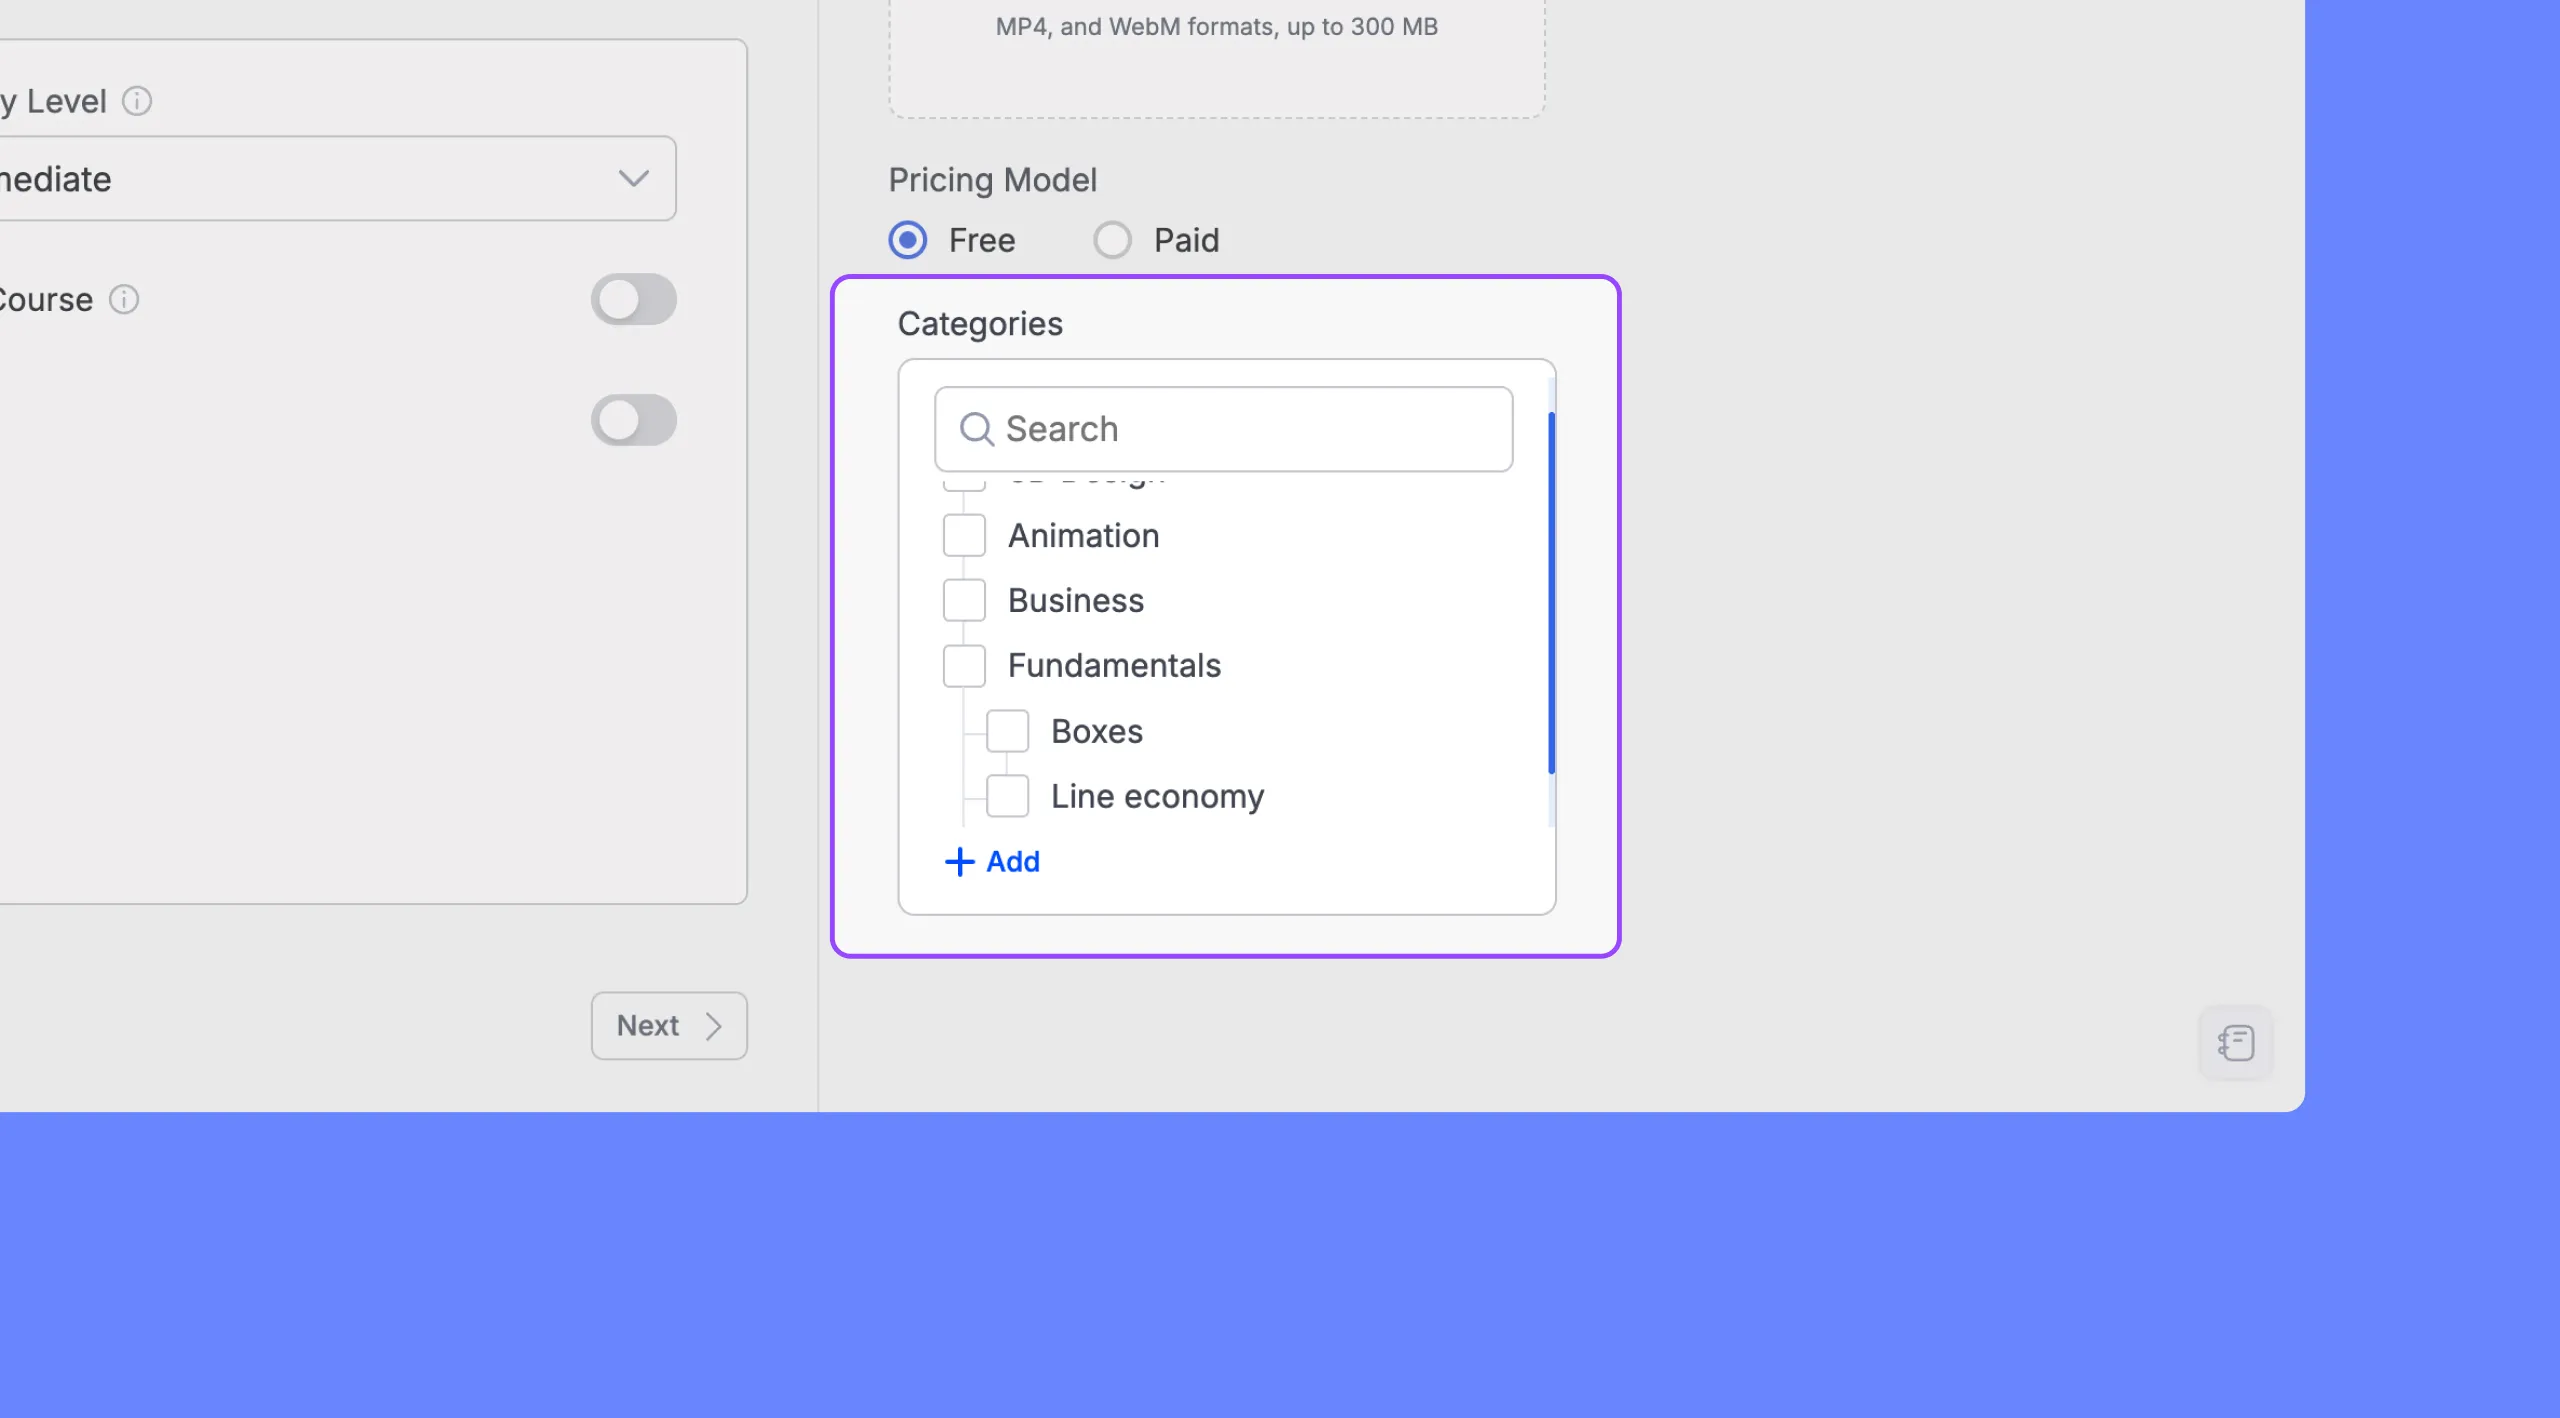
Once you’ve created categories, simply select the relevant ones from the list to assign them to your course. You can assign a course to multiple categories to increase its visibility.
Tags
Using “Tags” you can add relevant keywords to your courses. Think of tags as labels that help categorize and describe your course content. They play a crucial role in improving course discoverability within your eLearning website.
Adding Tags:
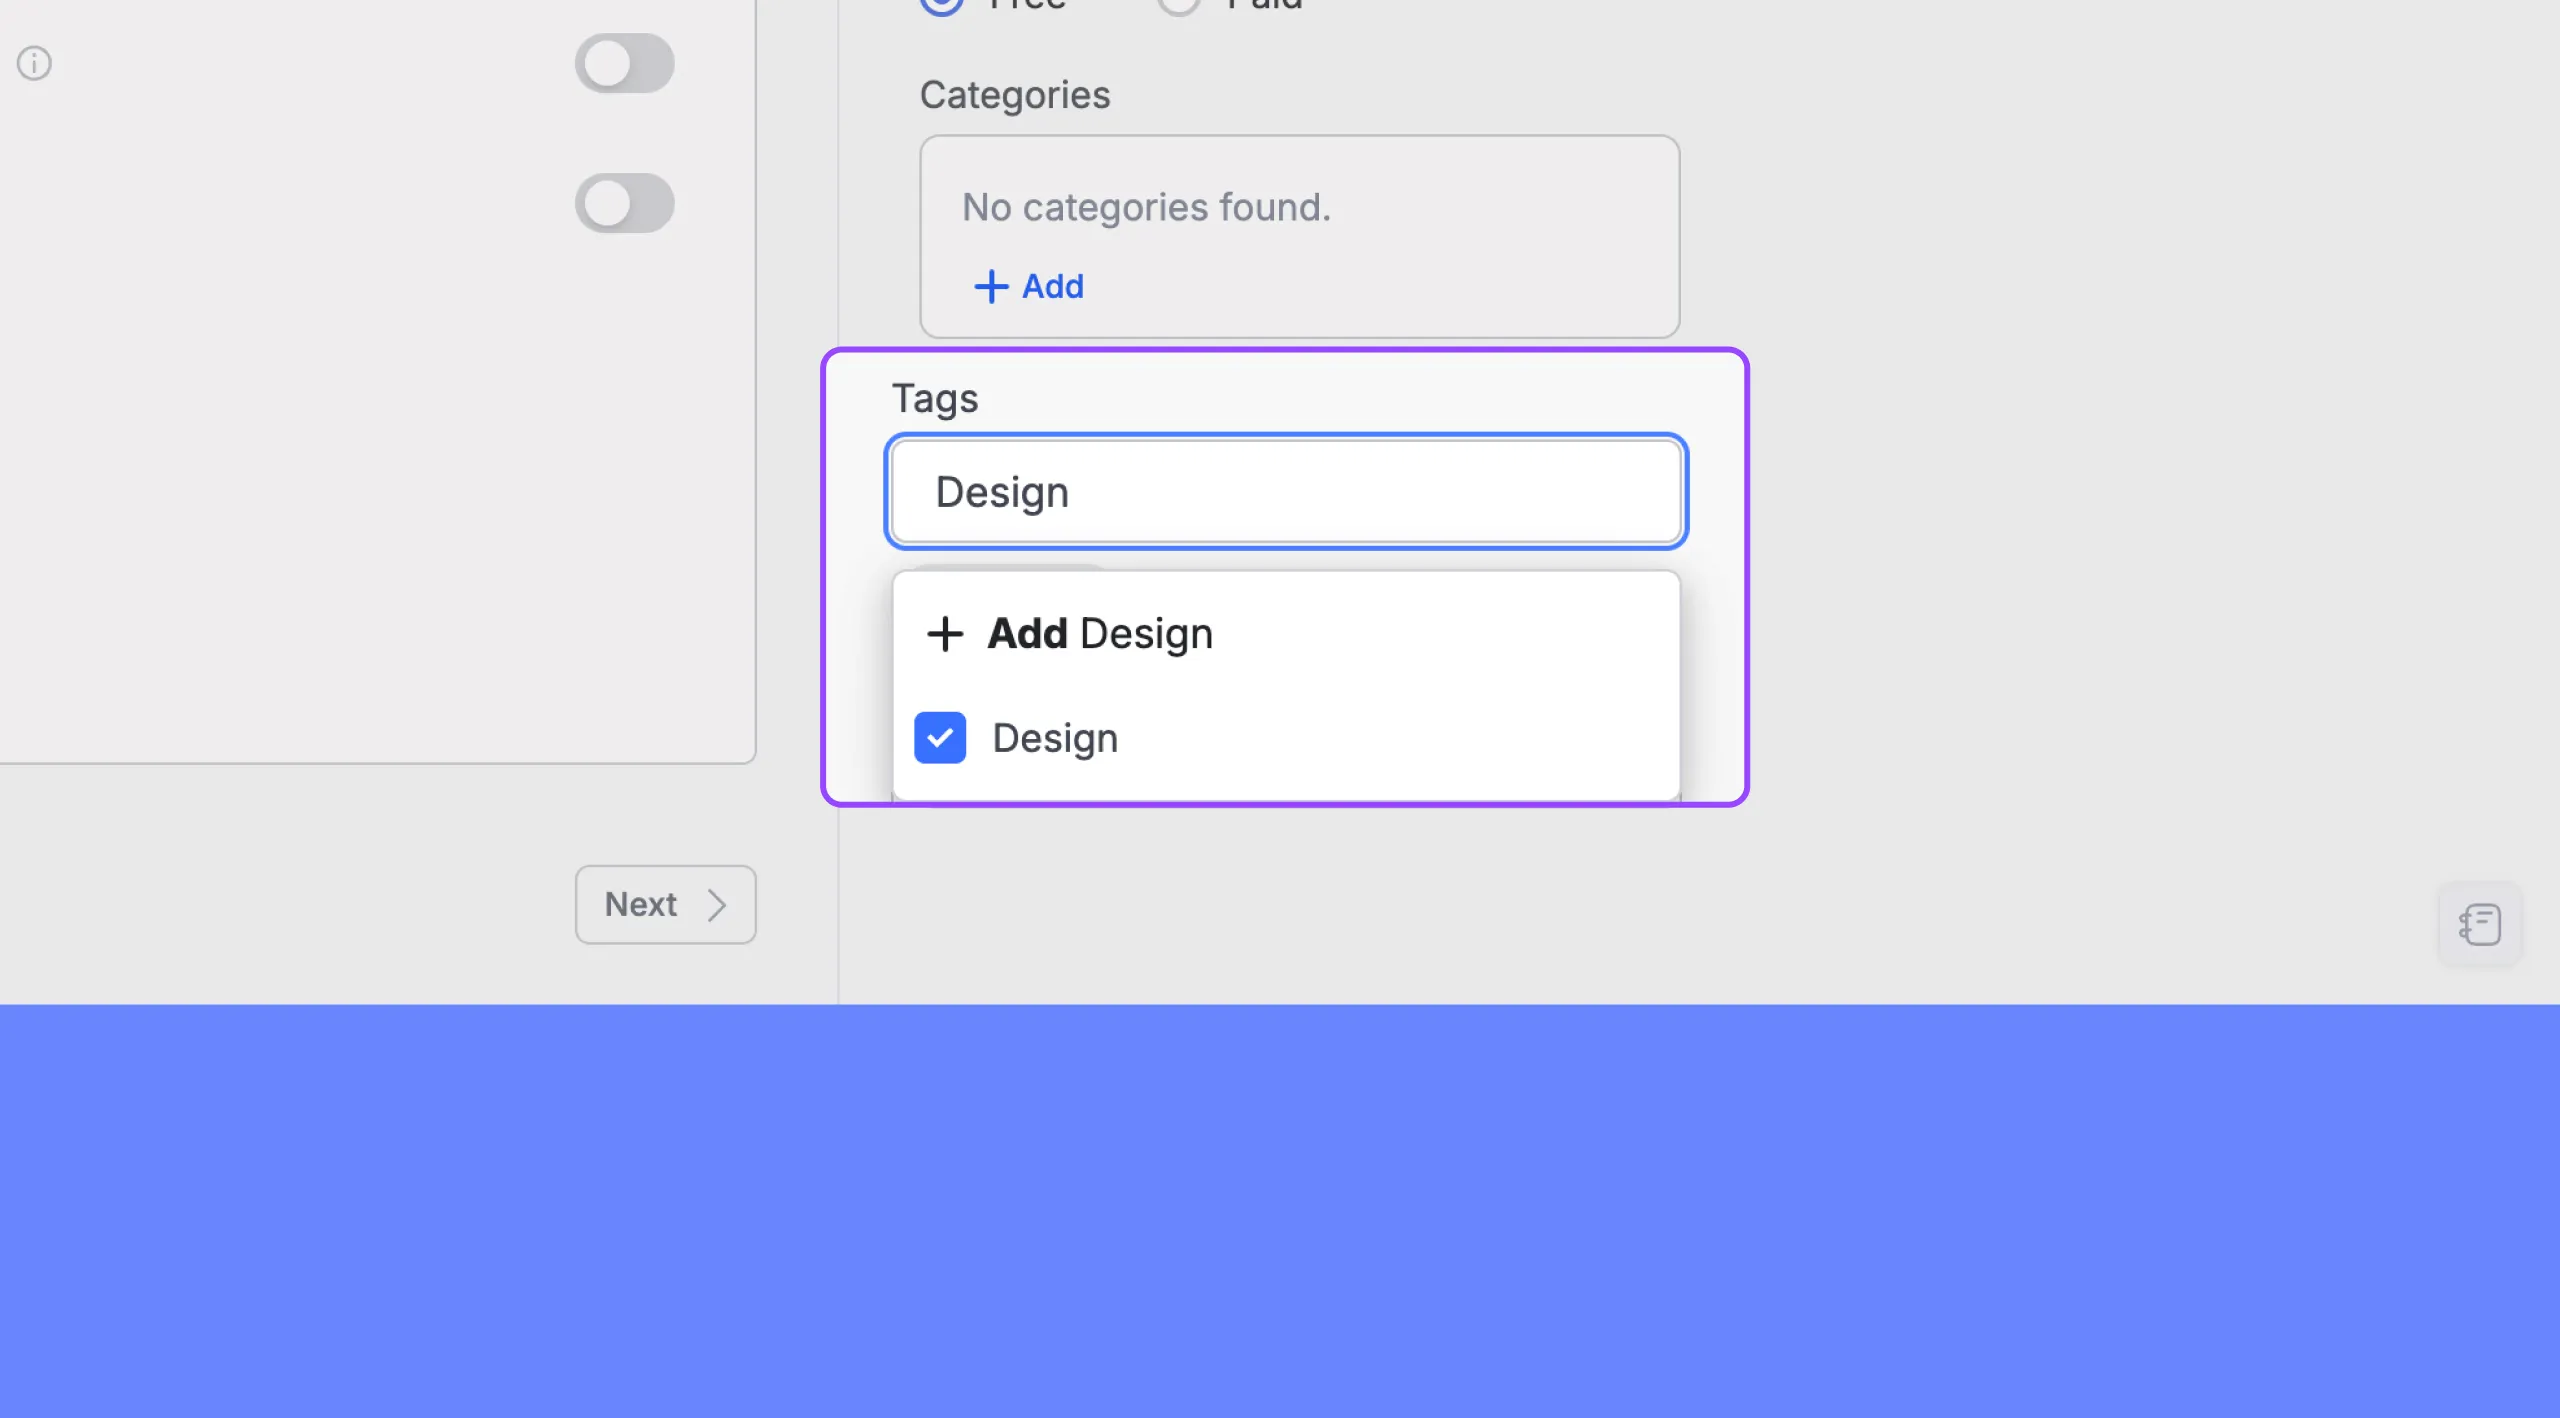
To add a tag, simply start typing it into the “Tags” field. As you type, matching tags will appear in a dropdown list. Select the desired tag or create a new one by typing it in and clicking the “+ Add (tag name)” option that appears below.
Note: You can create tags beforehand through your WordPress back-end by navigating to Tutor LMS > Tags. For detailed information on “Tags,” refer to the dedicated documentation.
Author
The “Author” section allows you to specify the instructor responsible for the course. This is typically the person who created the course content and will be managing student interactions.
Assigning an Author:
The author dropdown displays a list of registered instructors on your Tutor LMS platform. Simply select the appropriate instructor from the list to assign them to the course.
Note: To learn how to add new Instructors to your Tutor LMS platform, please refer to our dedicated documentation.
Adding Multiple Instructors
The “Instructors” section allows you to assign multiple instructors to a course.
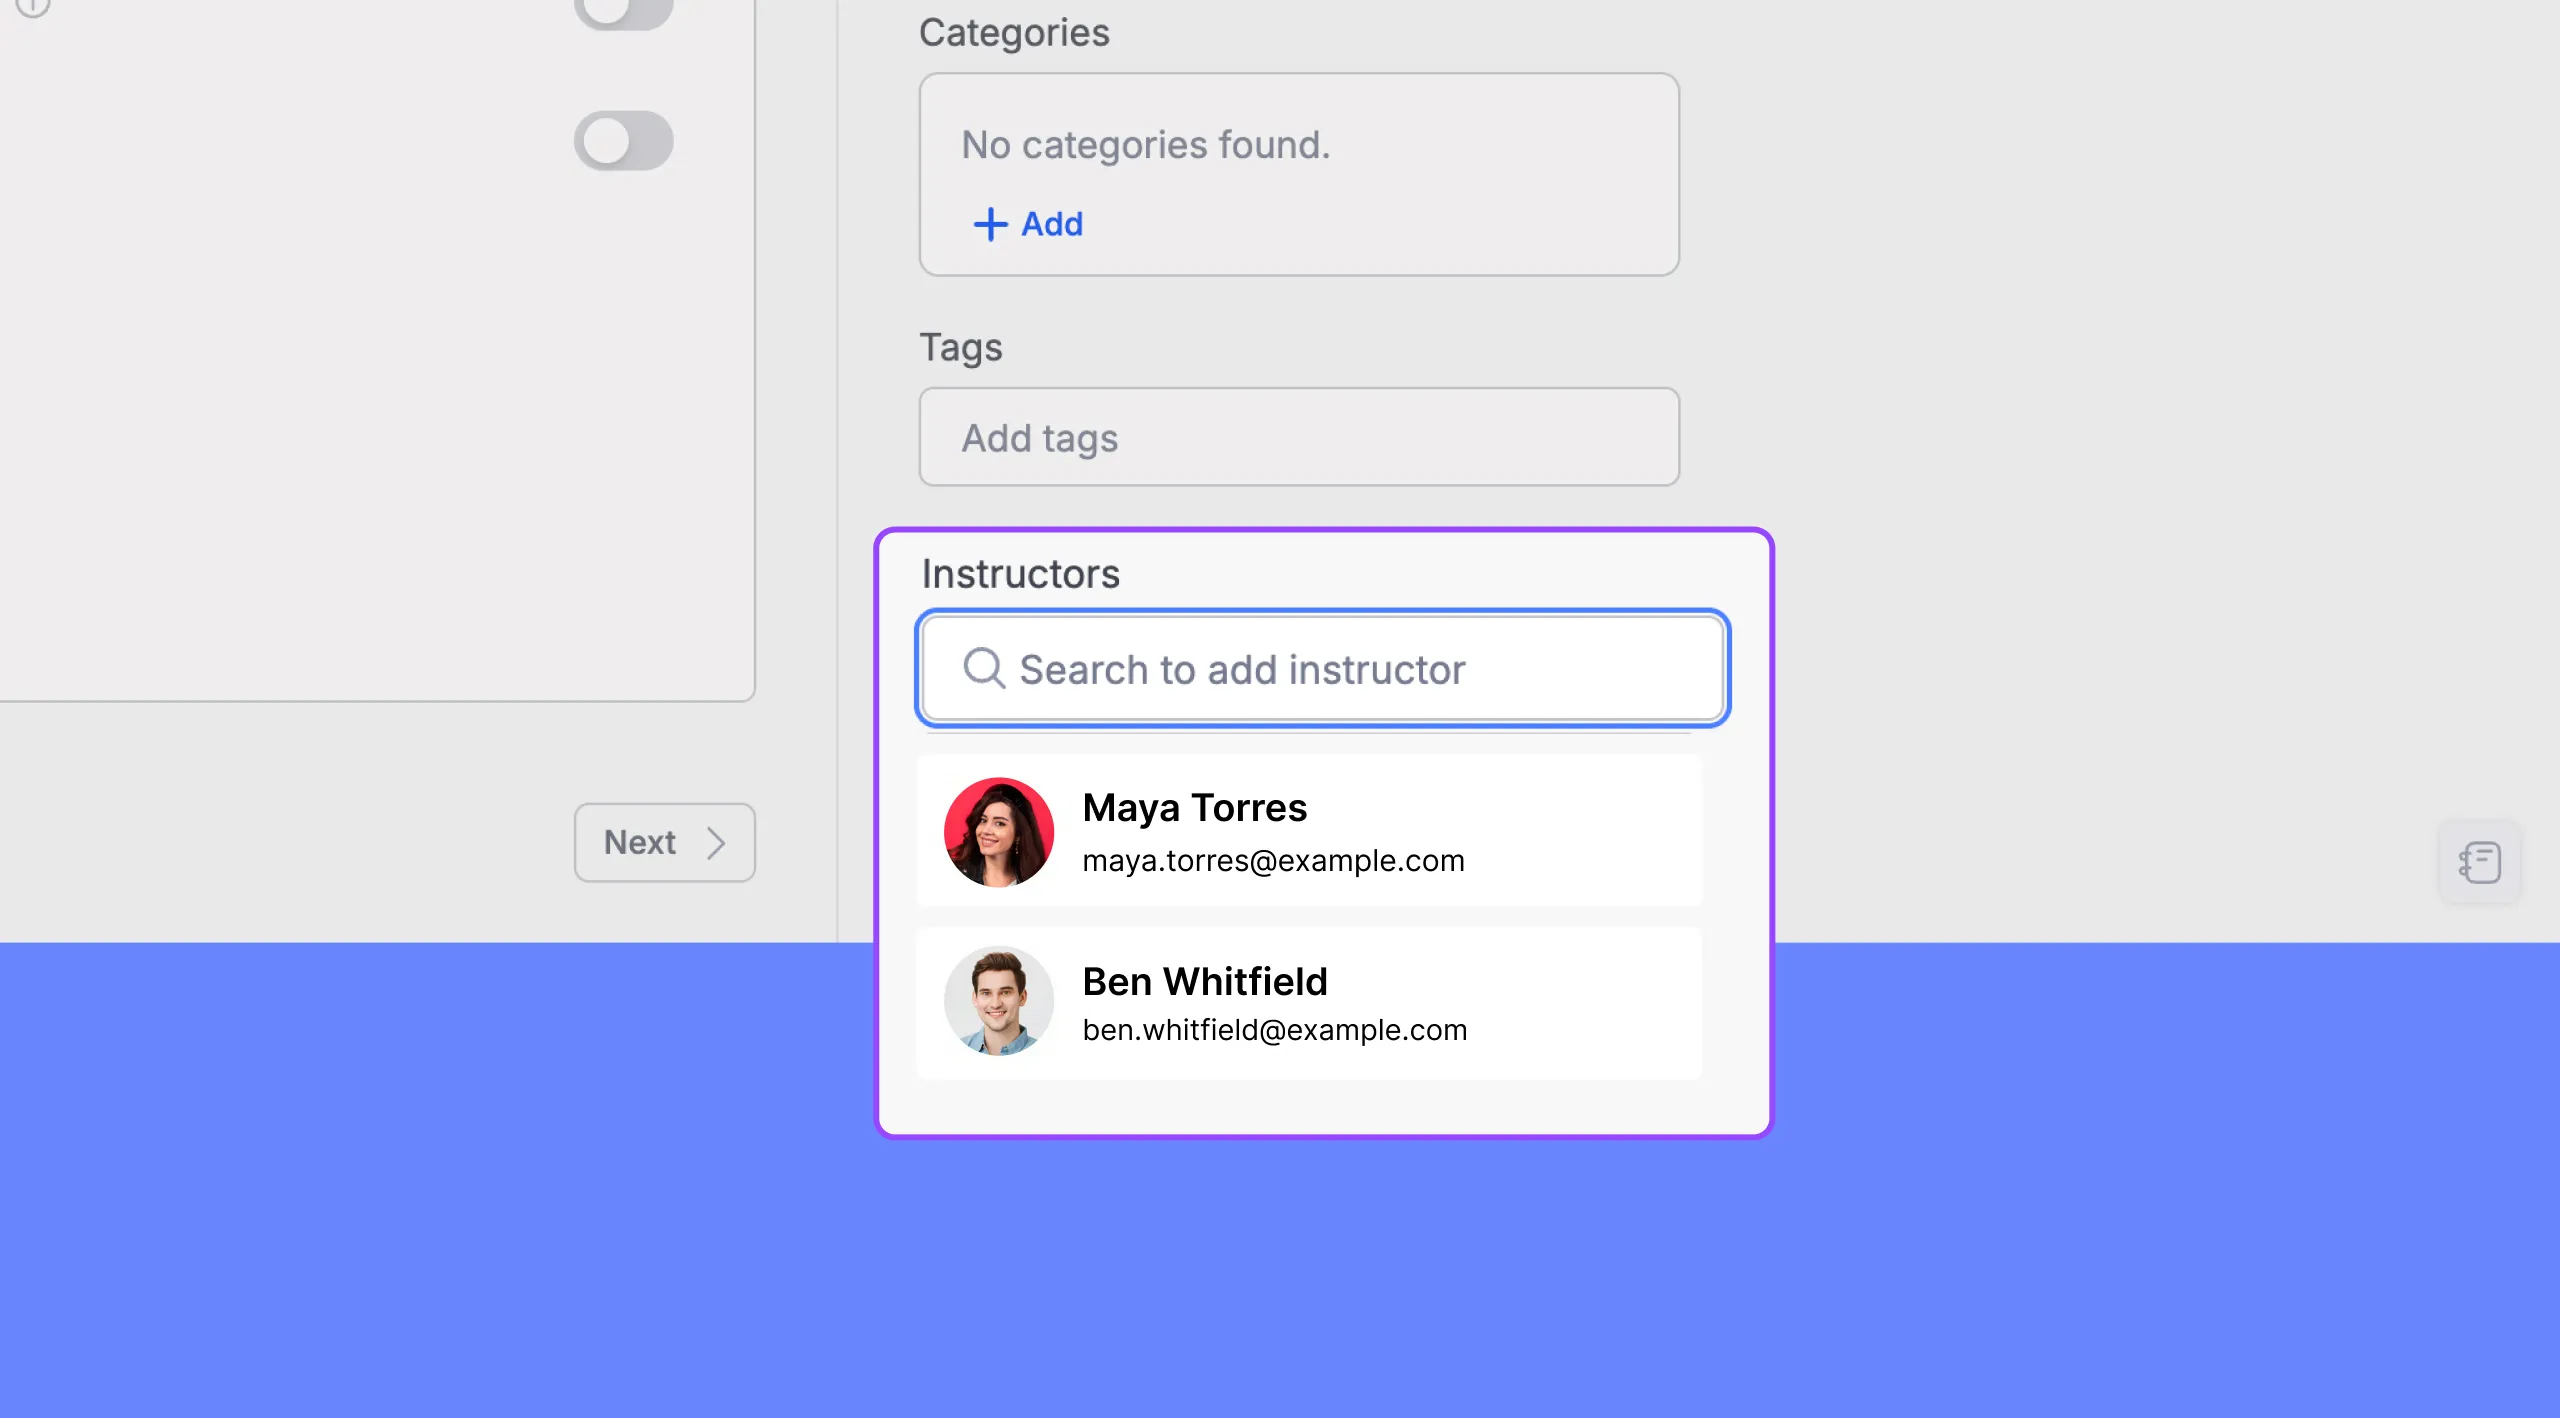
To add instructors, simply start typing their name or email address in the search bar, and select them from the list.
For detailed information on using the “Multi Instructors” add-on, please refer to the dedicated documentation.
Note: This feature requires the Multi-instructor add-on to be enabled. You can activate this add-on in your WordPress dashboard under “Tutor LMS Pro > Add-ons.”
Notebook
The “Notebook” feature provides a convenient space to jot down ideas, draft content, and store code snippets while building your course.
Accessing the Notebook:
By default, the Notebook is minimized. To open the Notebook, simply click on the “Notebook” bar in the bottom right corner of the screen.
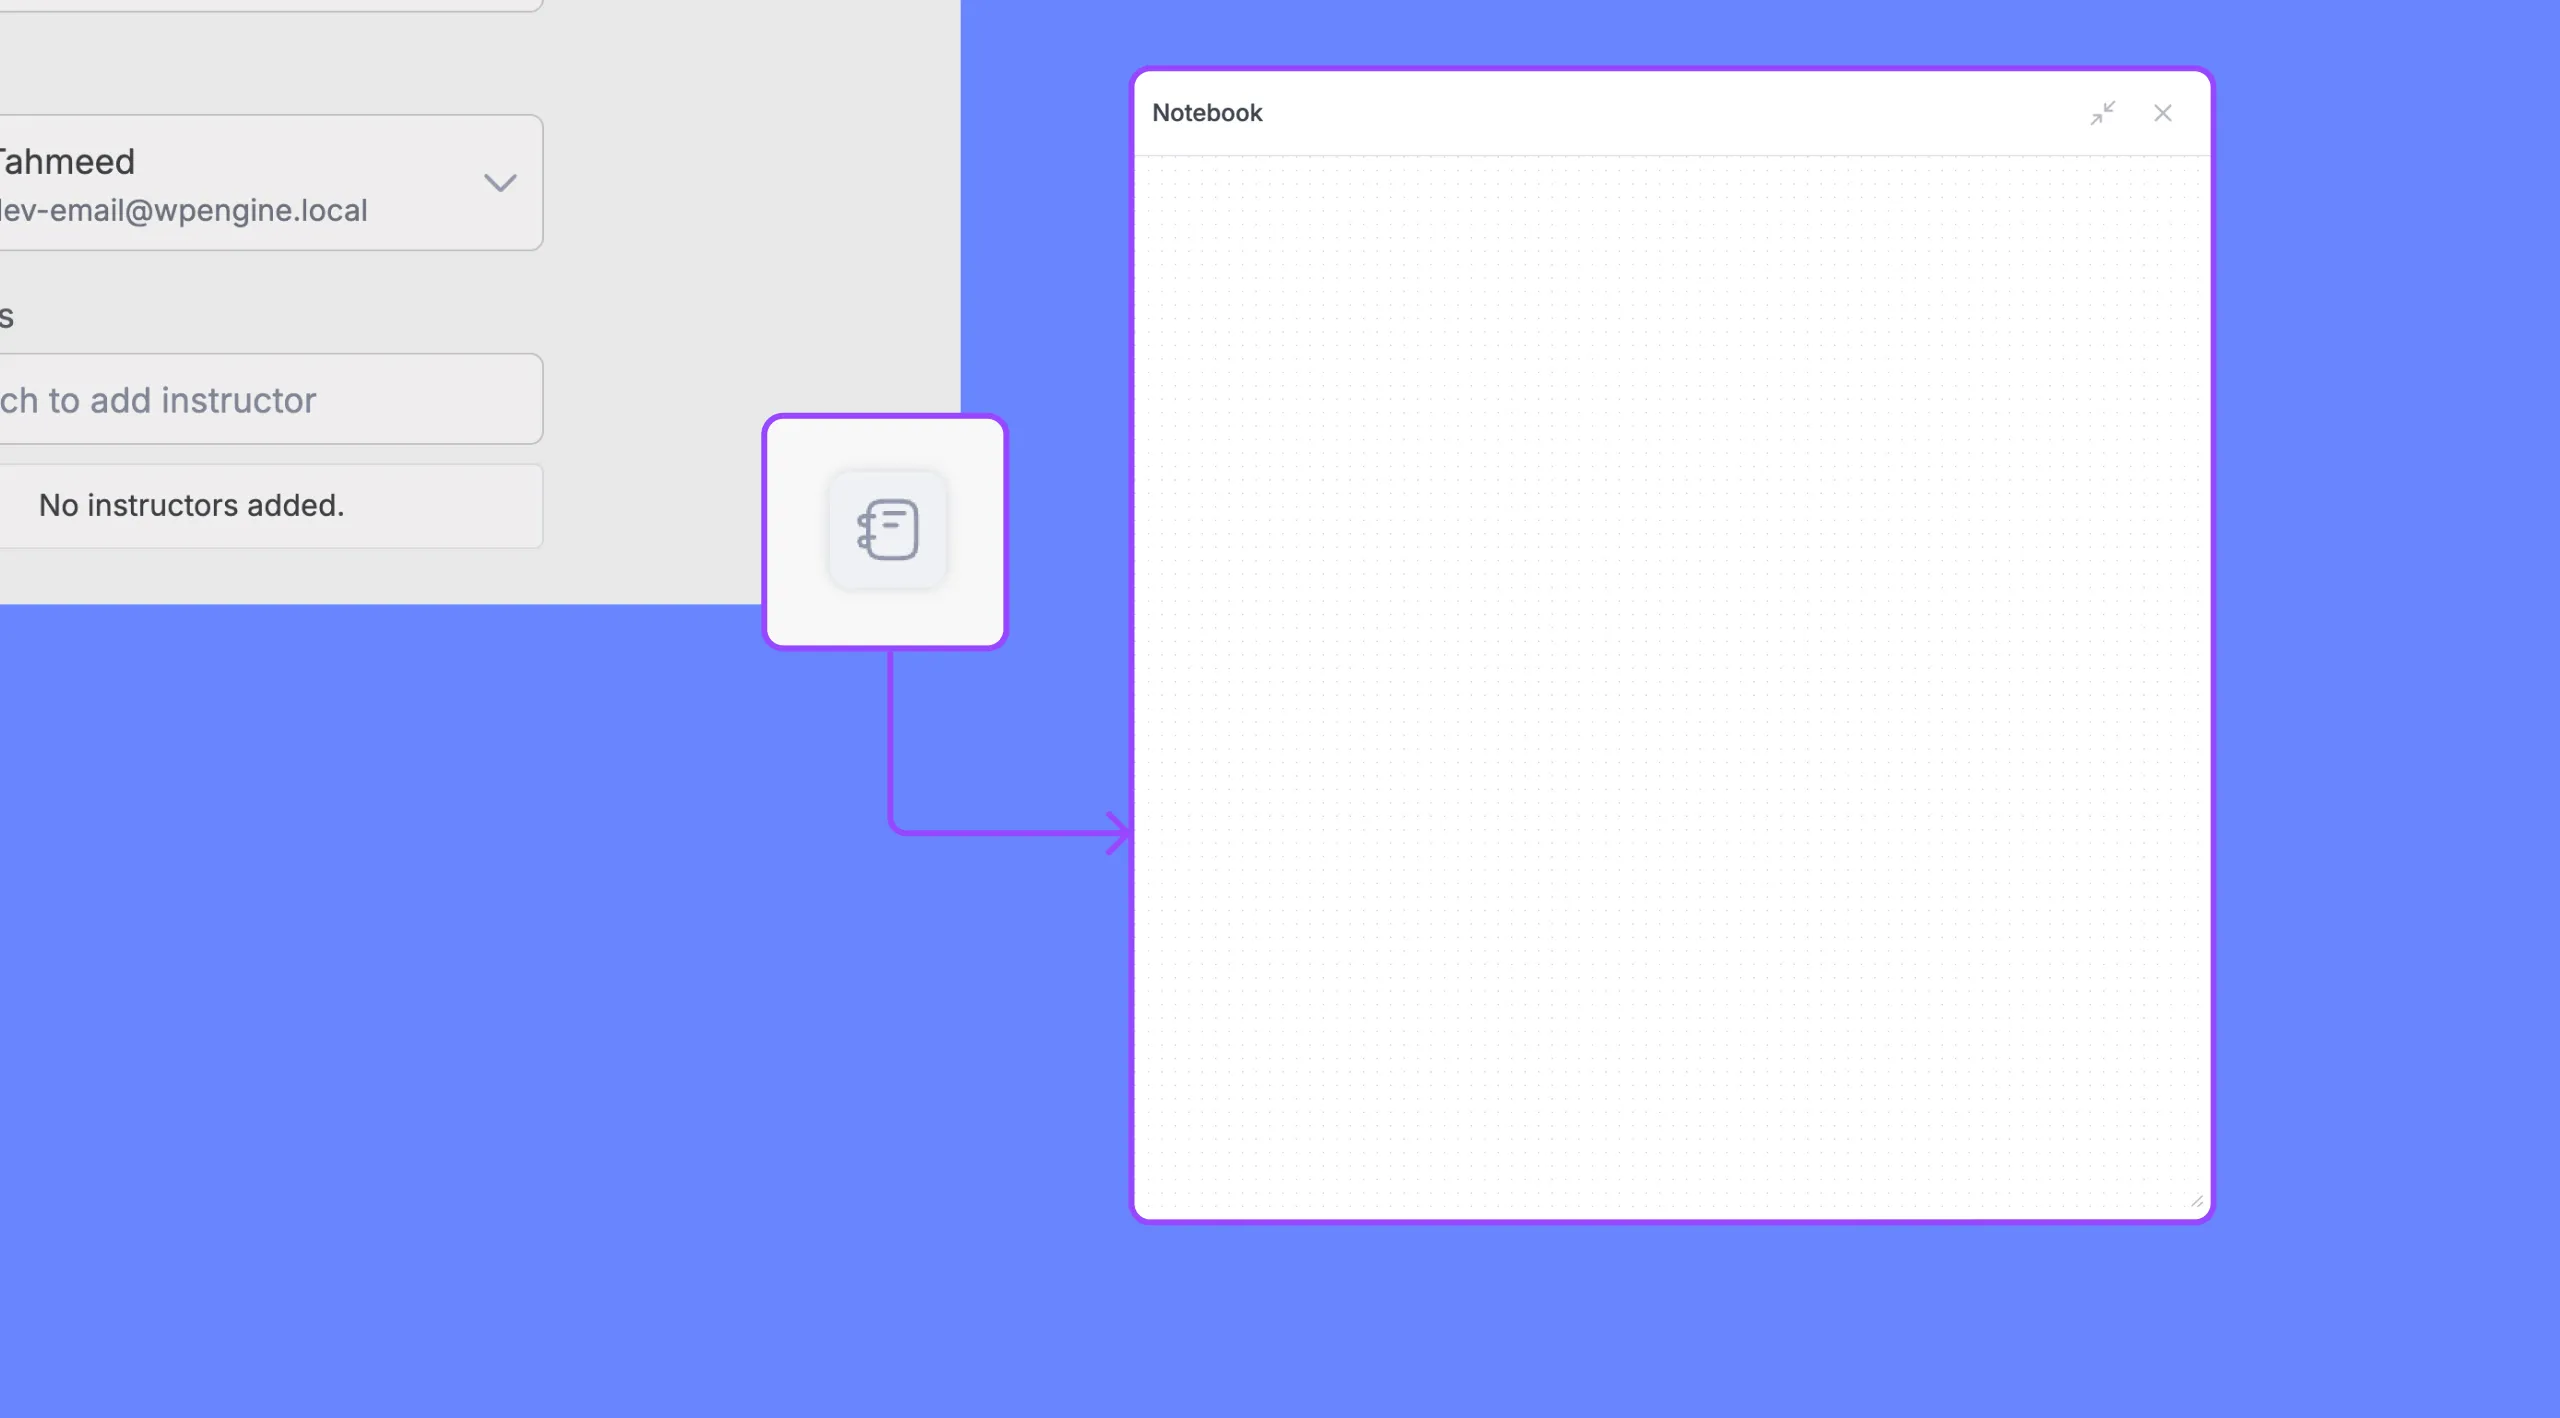
You can minimize the Notebook by clicking the minimize button. To view the Notebook in full screen within the Course Builder, click the maximize button.
Once you’ve completed the “Course Basics” section, you are ready to move on to building your course curriculum. Click the “Next” button at the bottom of the Course Builder to proceed to the “Curriculum” section.