Certificate
The Tutor LMS Pro Certificate add-on allows students to download a Certificate once they have successfully completed a Course.
These Certificates can either be one of the pre-built Certificate Templates available or one that you built from scratch using the Certificate Builder.
And from this Certificate Settings panel, you can customize your preferences for this add-on.
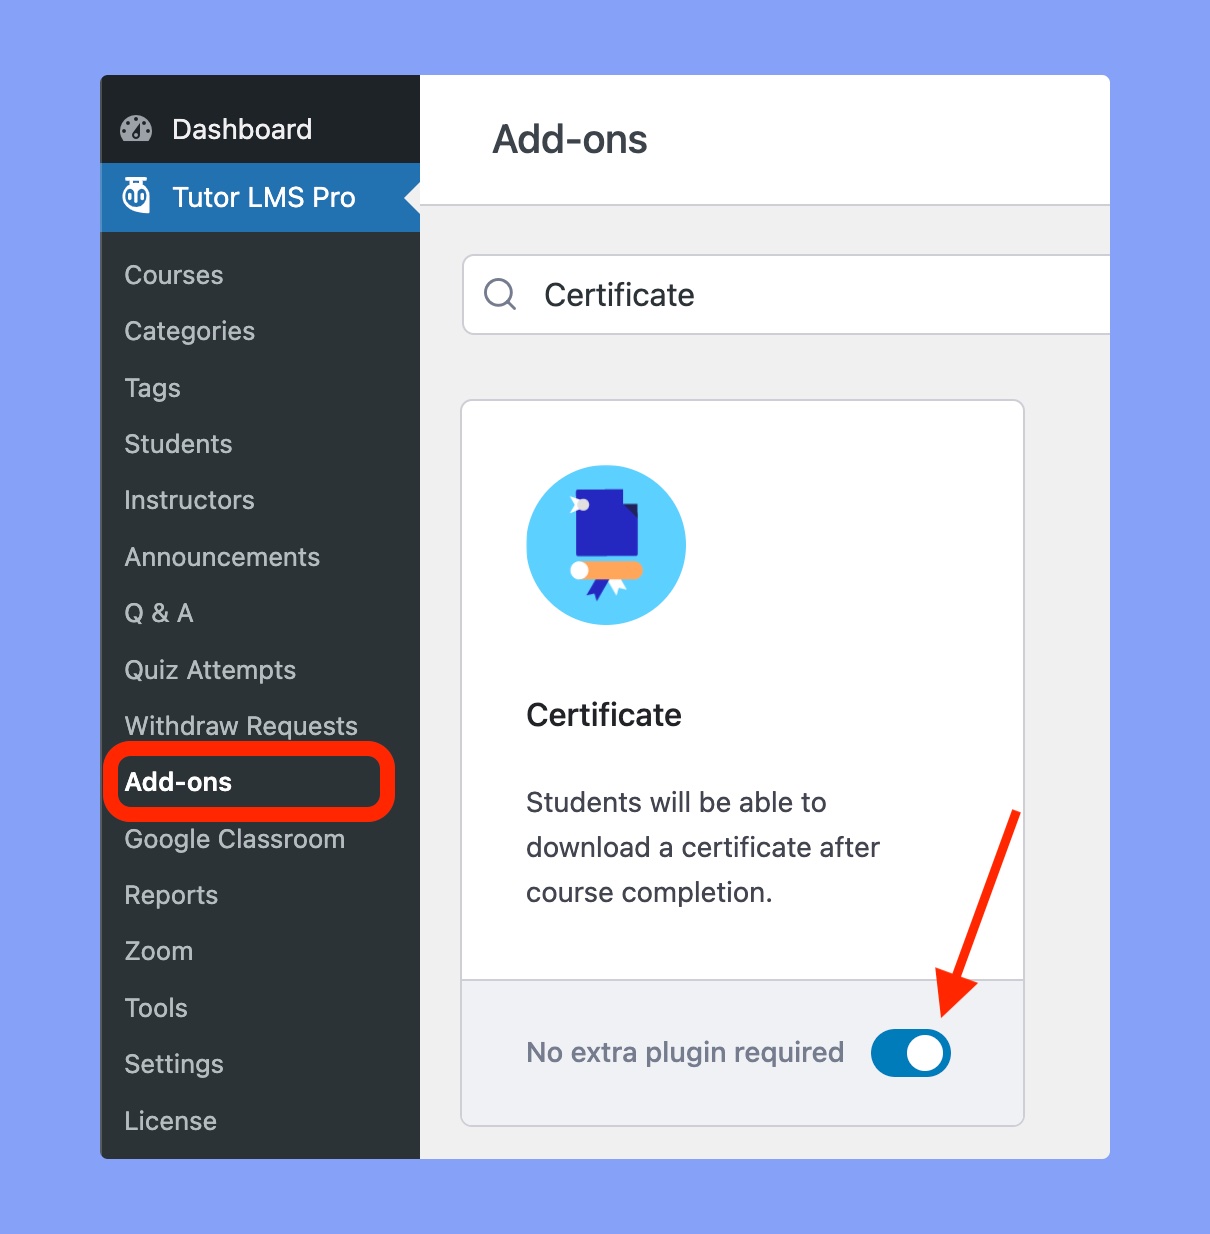
To get the Certificate settings, make sure you have enabled Certificates from WP Admin > Tutor LMS Pro > Add-ons.
Create Certificate
Now if you have the Certificate Builder extension installed and activated, you’ll first be greeted with the Create Certificate section under Certificate Settings.
If you don’t see this, it means you haven’t installed or activated the Certificate Builder extension plugin. However, if you want to use the builder, you can learn how to install it from this documentation.
Here, clicking on the Create Certificate button will take you to the drag & drop Certificate Builder using which you can create custom certificates to award your students on course completion.
You can create a Certificate in 3 easy steps:
- Select your favorite design
- Type in your text & upload your signature
- Finally, press Save and your Certificate is ready!
For more detailed information, hop over to the Certificate Builder Documentation.
All Certificates
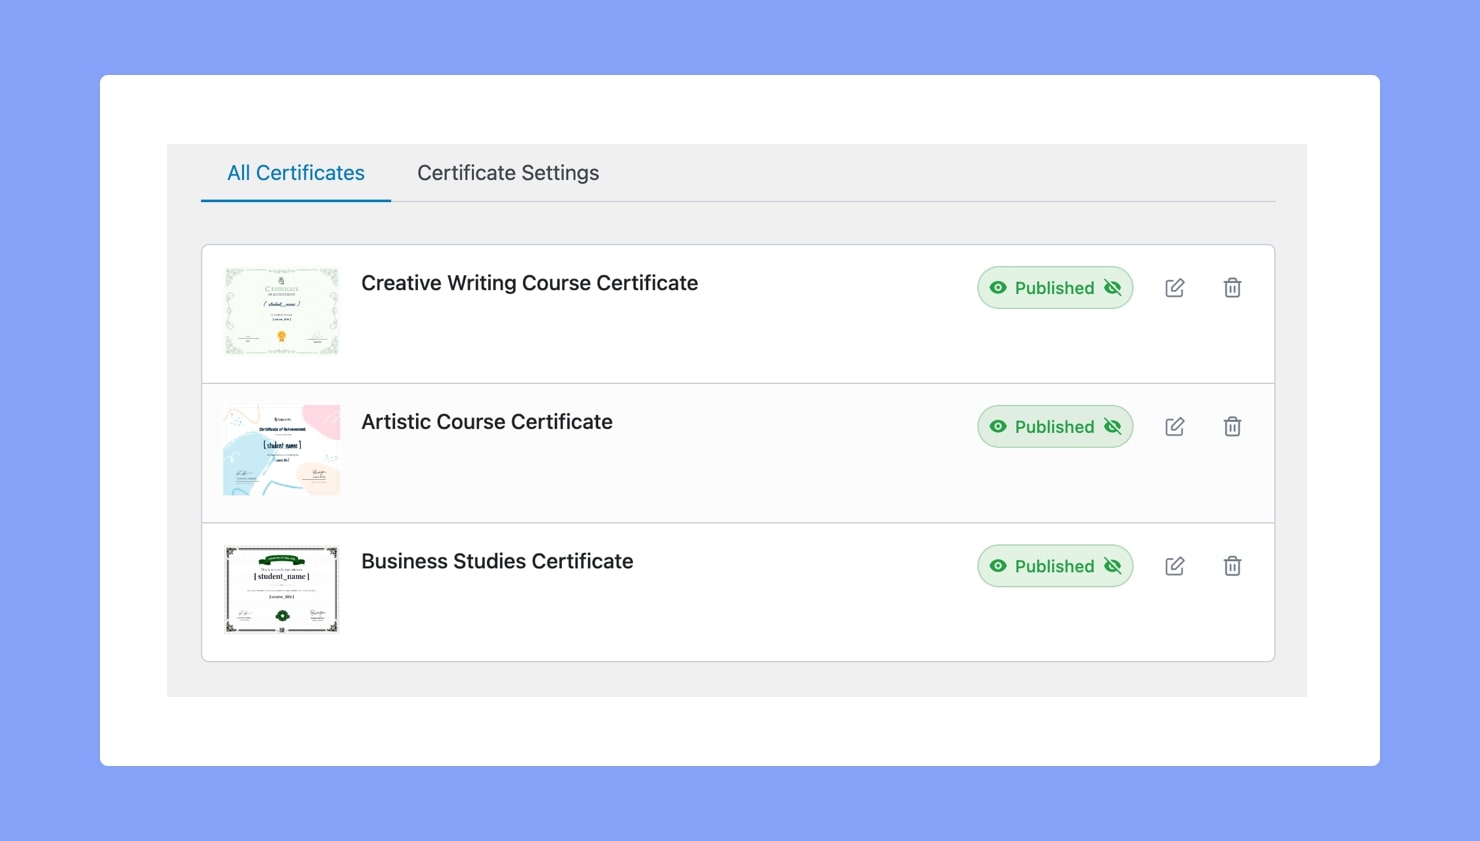
Next, you’ll see two tabs. The first one is All Certificates and again this is only visible for those who have installed and activated the Certificate Builder extension.
Under this tab, you’ll find all of the certificates you have designed. On each item’s right, you’ll find the following options:
Change Certificate Status: You can click on the Published status label and select the Draft status option to make to switch to that state and vice versa.
Edit: Click on the edit icon to go back to the Certificate Builder and edit the chosen certificate.
Delete: Click on the trash icon to delete the chosen certificate.
Certificate Settings
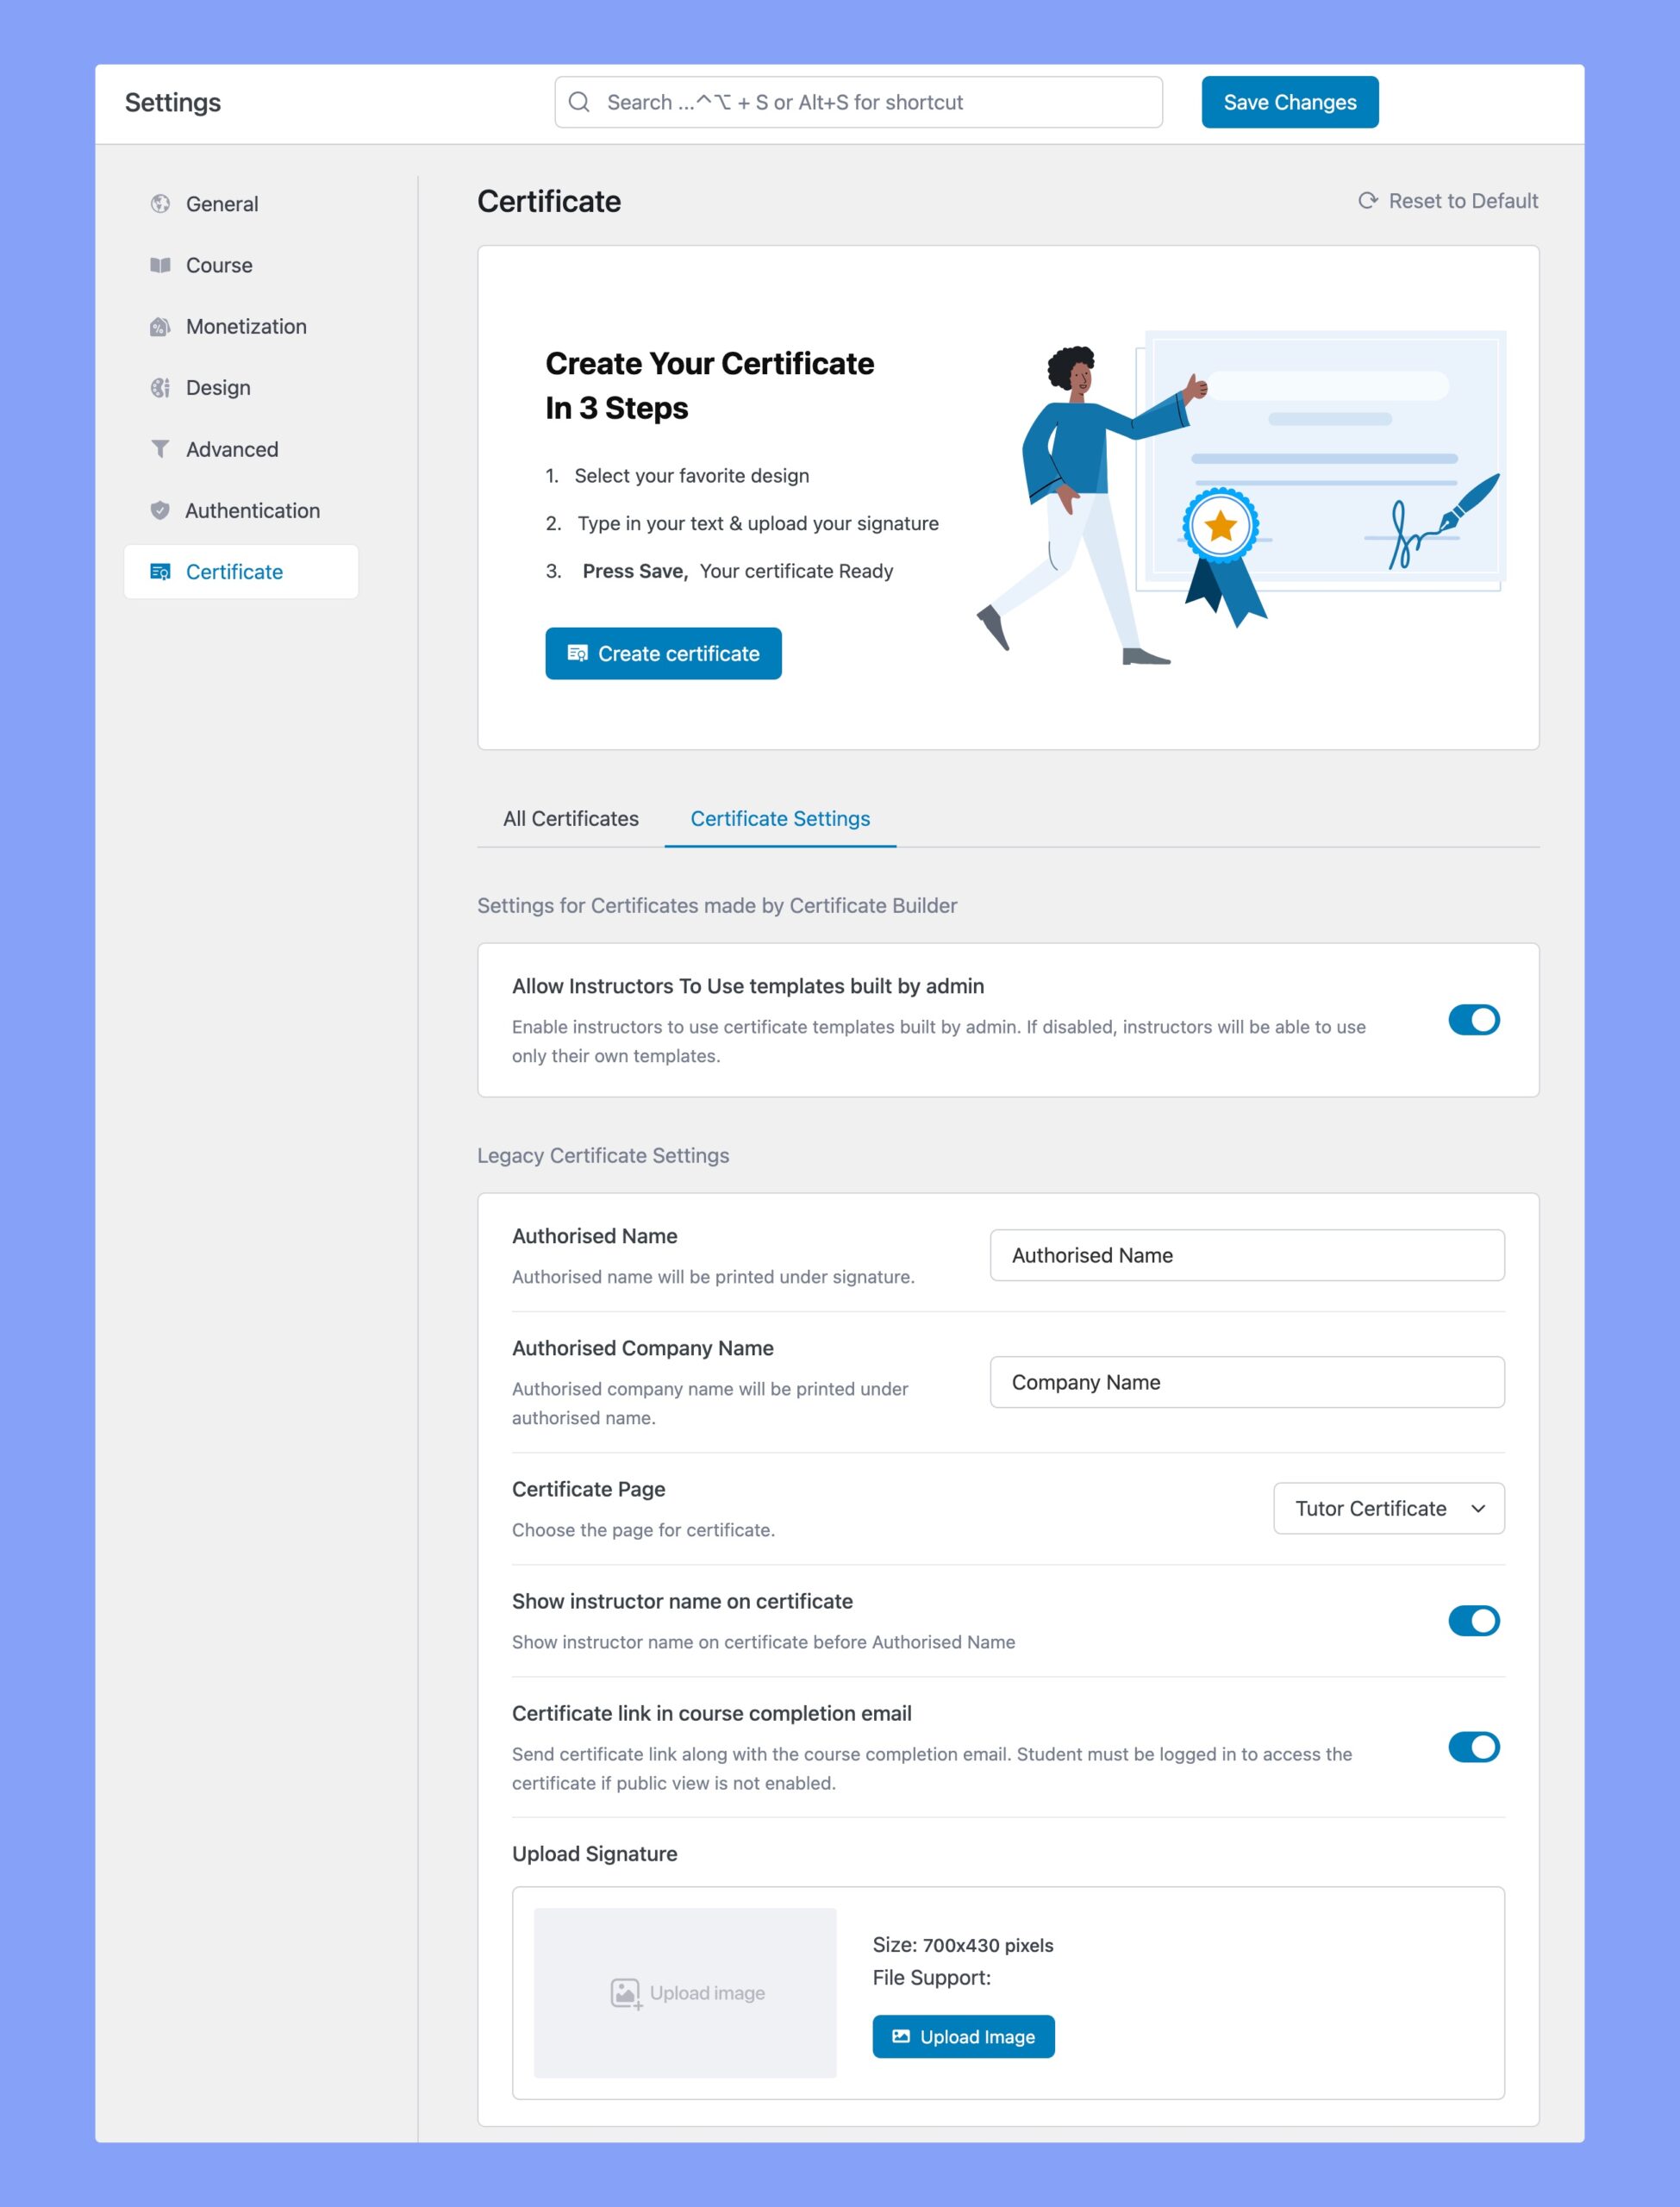
The other tab is Certificate Settings. This is actually where all the settings are and you’ll find configuration options for both the Certificate Builder specifically as well as Certificates in general.
Certificate Builder Settings:
Allow Instructors To Use Templates Built by the Admins: Enable instructors to use the certificate templates built by the admins. If disabled, instructors will be able to use only their own templates.
Legacy Certificate Settings:
This is where you can define all the information your Certificates will display when awarded to Students.
- Authorized Name: Enter the name of the person who is authorized to give the certificate.
- Authorized Company Name: Enter the organization’s name.
- Certificate Page: Choose the main certificate page.
- Show Instructor Name on Certificate: Enable this to display the Instructor’s name on the certificate.
- Certificate Link in Course Completion Email: Enable this to send the certificate link along with the course completion email.
- Upload Signature: Upload an image containing the signature of the authorized person, which will be printed on the certificate.
Once your Certificate Settings have been configured, you can assign a Certificate Template to a Course from the Backend or Frontend Course Builder. You’ll find detailed instructions on this topic here.