Paid Memberships Pro
Paid Memberships Pro is one of the most popular membership and subscription management plugins for the WordPress websites. You have to download it from the Paid Memberships Pro website.
Only the admin will have access to sales data from Paid Memberships Pro Dashboard. There will be no sales data inside Tutor LMS.
Required Plugins
You will need the following plugins in order to offer a subscription-based course:
You can install Tutor LMS from the WordPress.org plugin directory and Tutor LMS Pro from the Tutor LMS website. In terms of Paid Memberships Pro, you have to download it from the Paid Memberships Pro website.
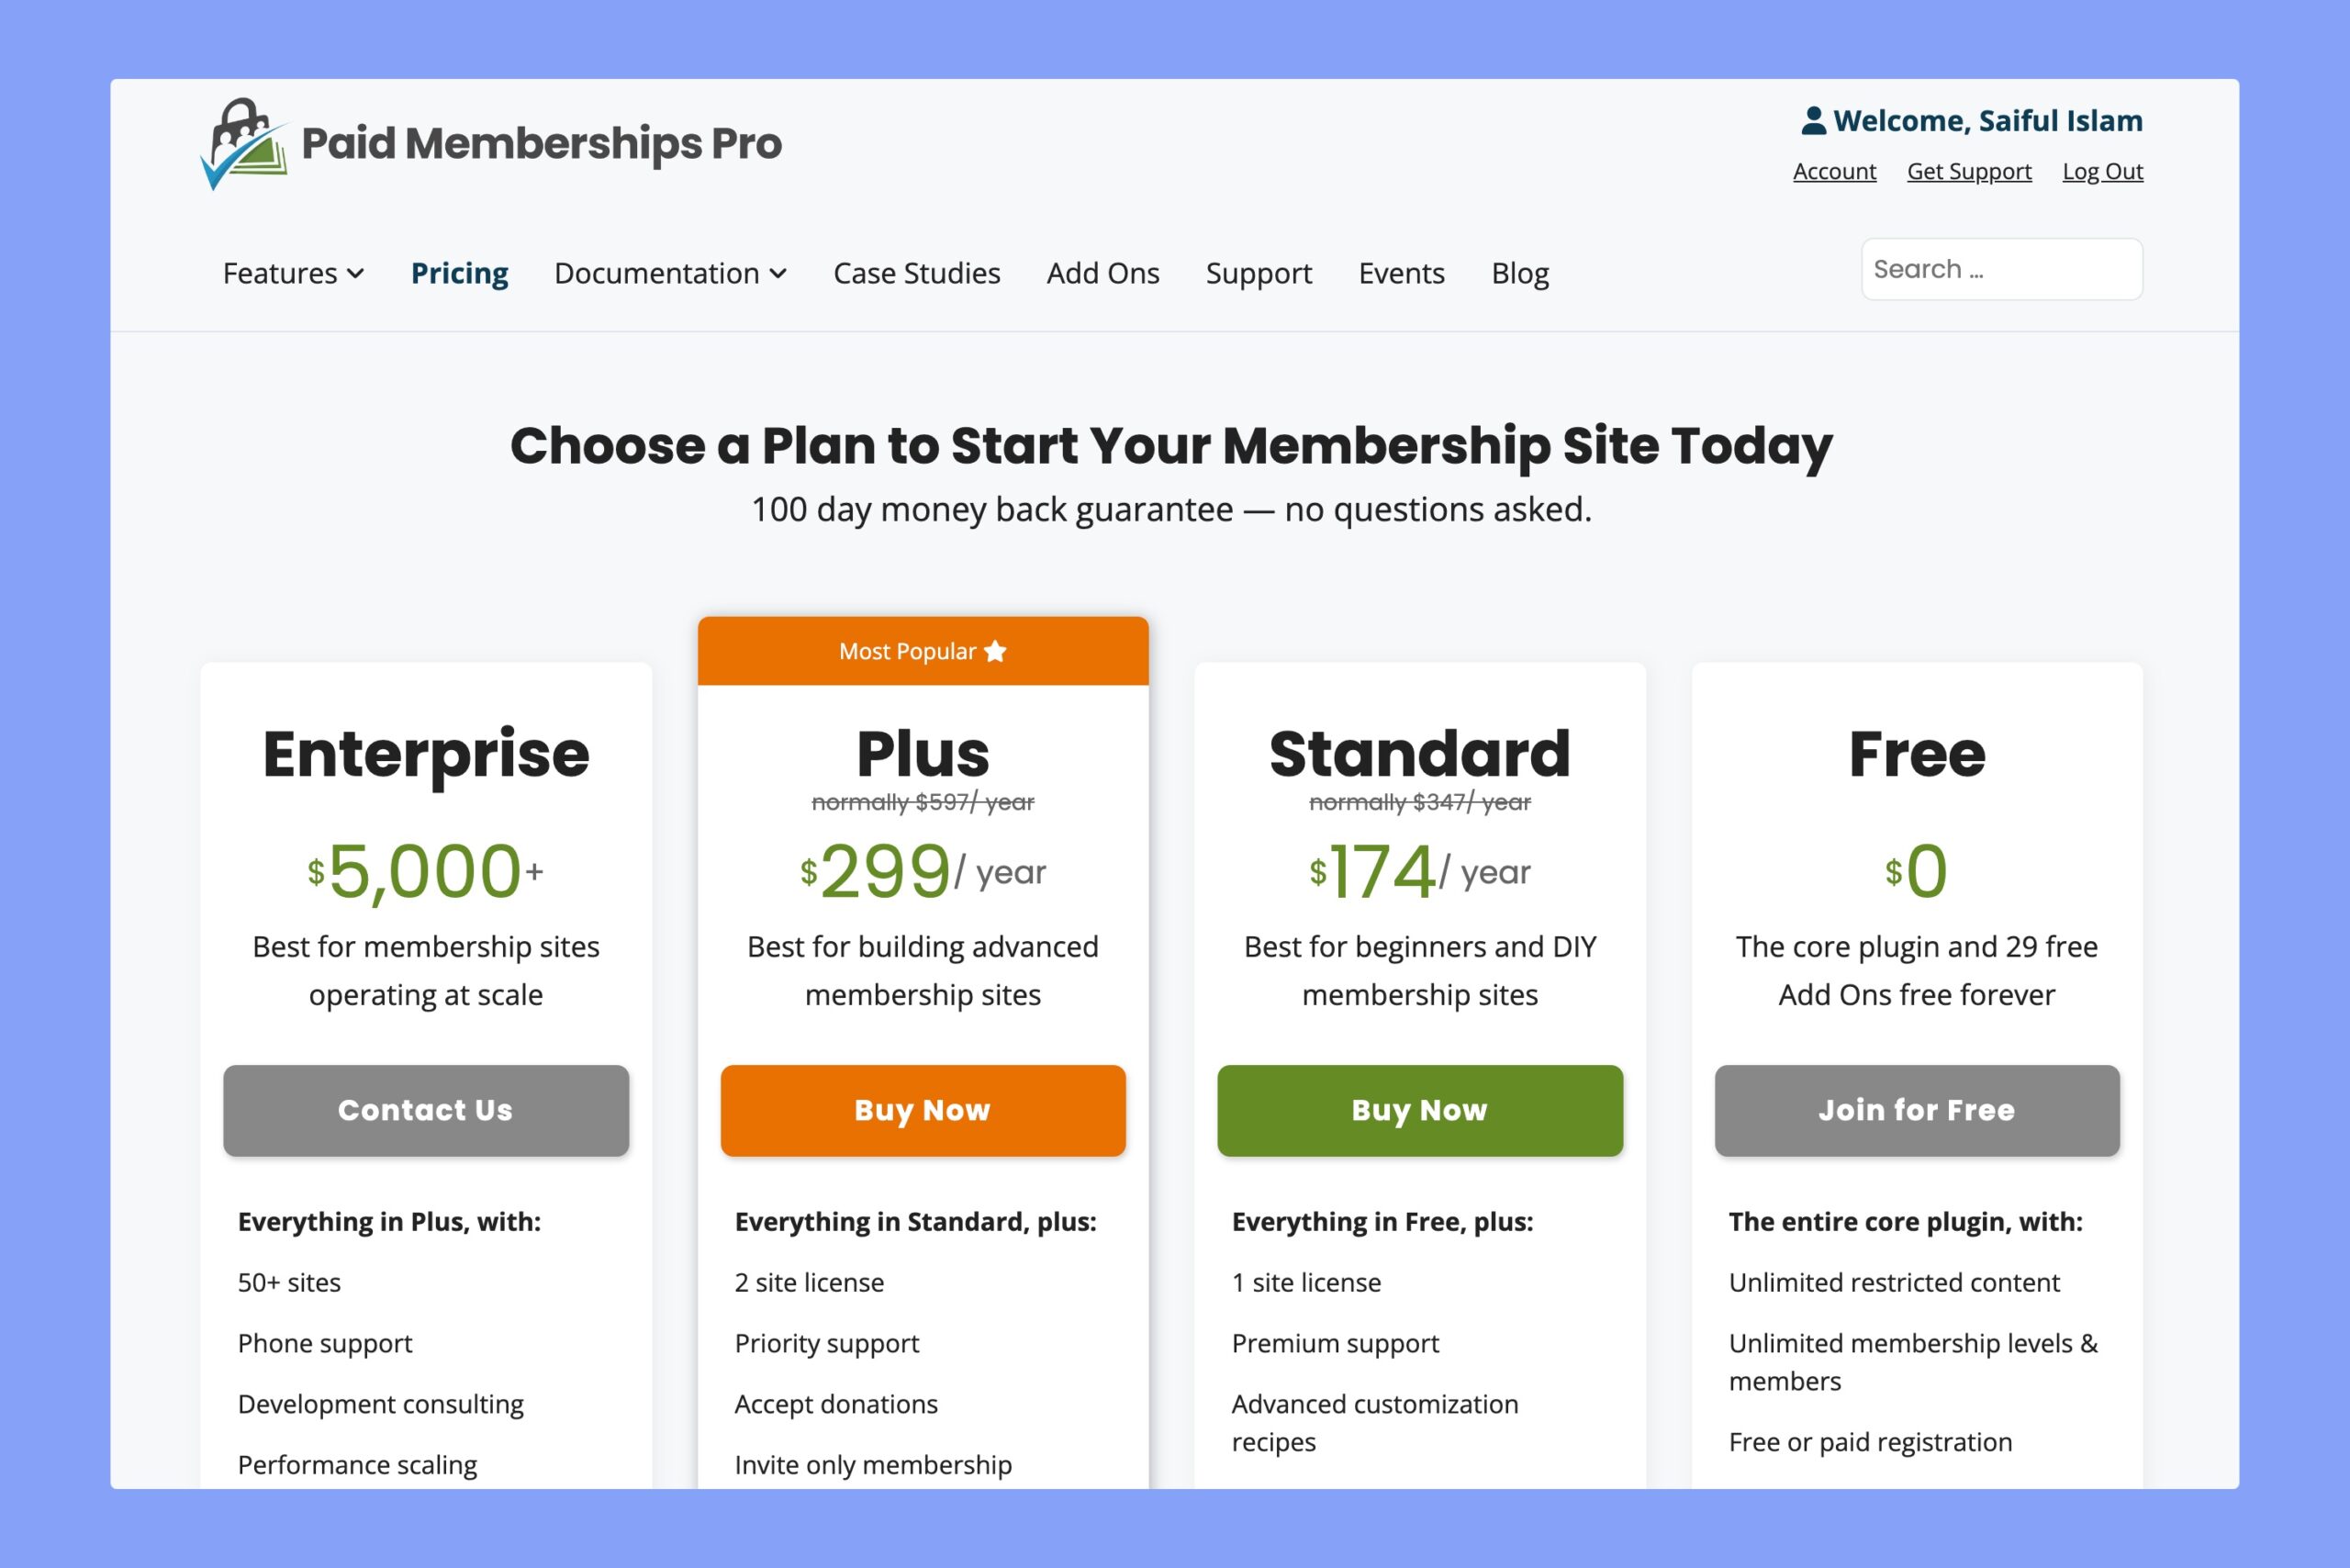
Then, you can download it from their Downloads page. However, if you need assistance with donwloading and installing Paid Memberships Pro, follow their installation documentation.
Creating Membership Level
You have to go through the following steps in order to create a membership level for your website.
1. Enable Paid Memberships Pro Add-on
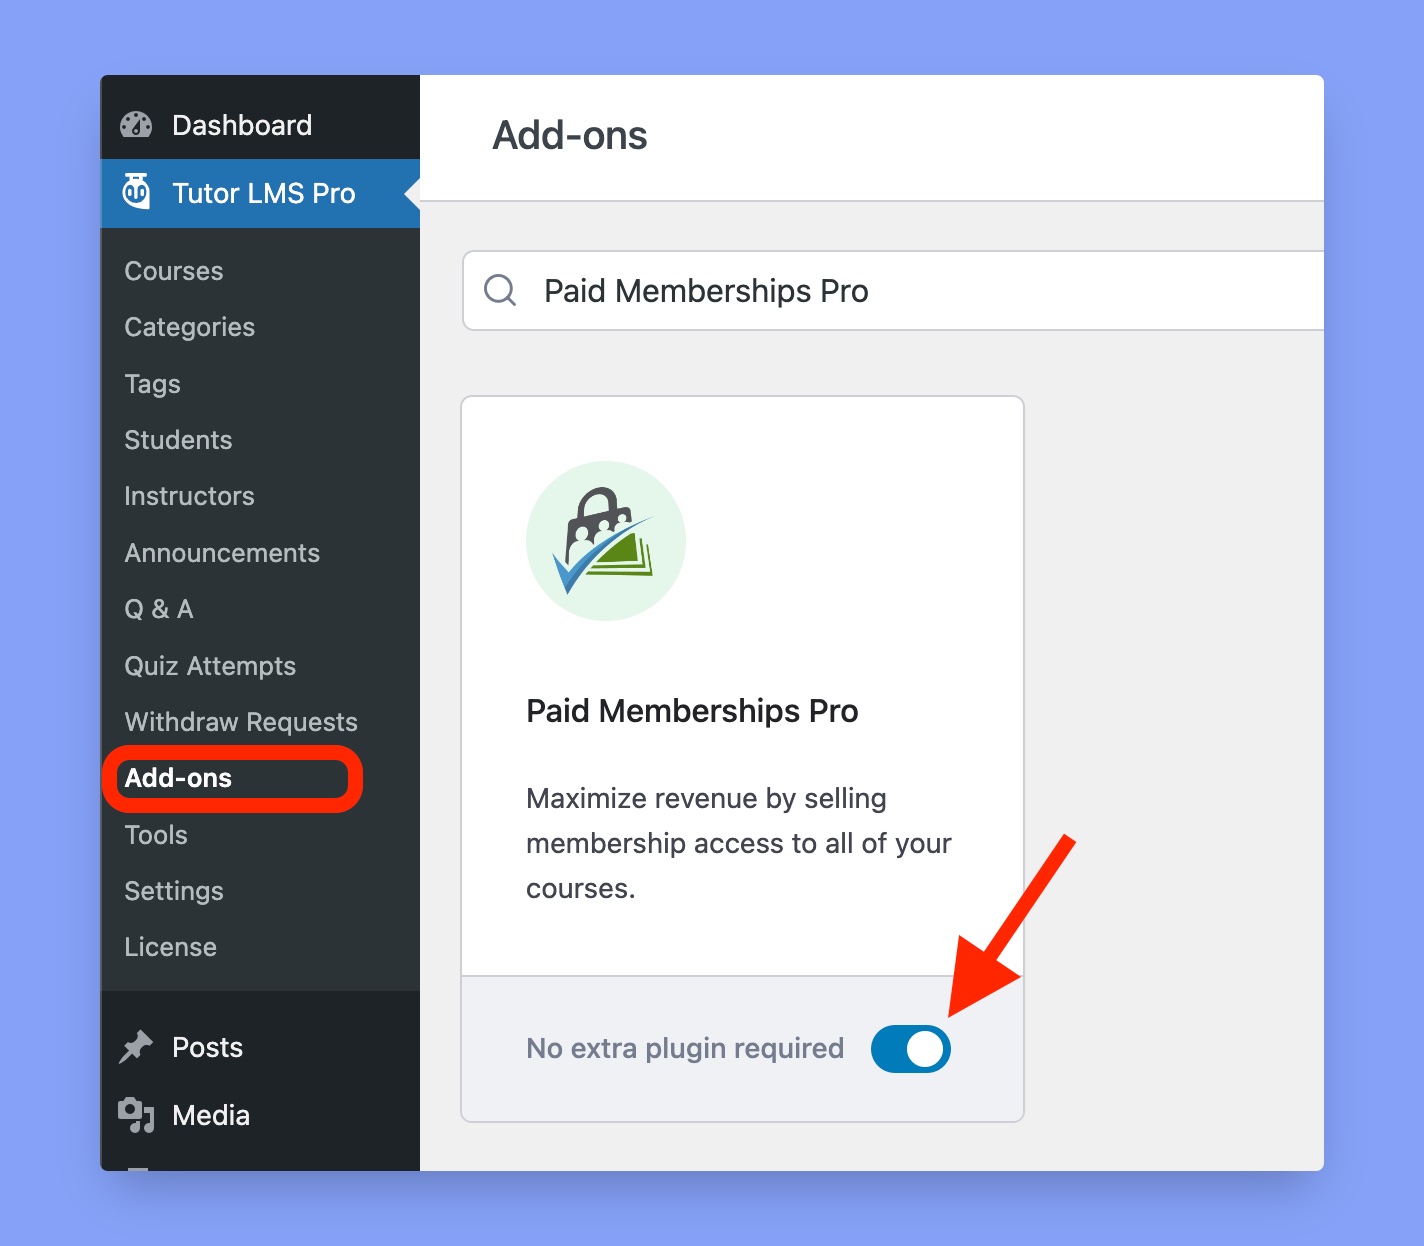
Go to Tutor LMS Pro > Add-ons and search for the Paid Memberships Pro addon. Then enable the addon using the toggle switch beside that.
2. Enable Paid Memberships Pro Monetization
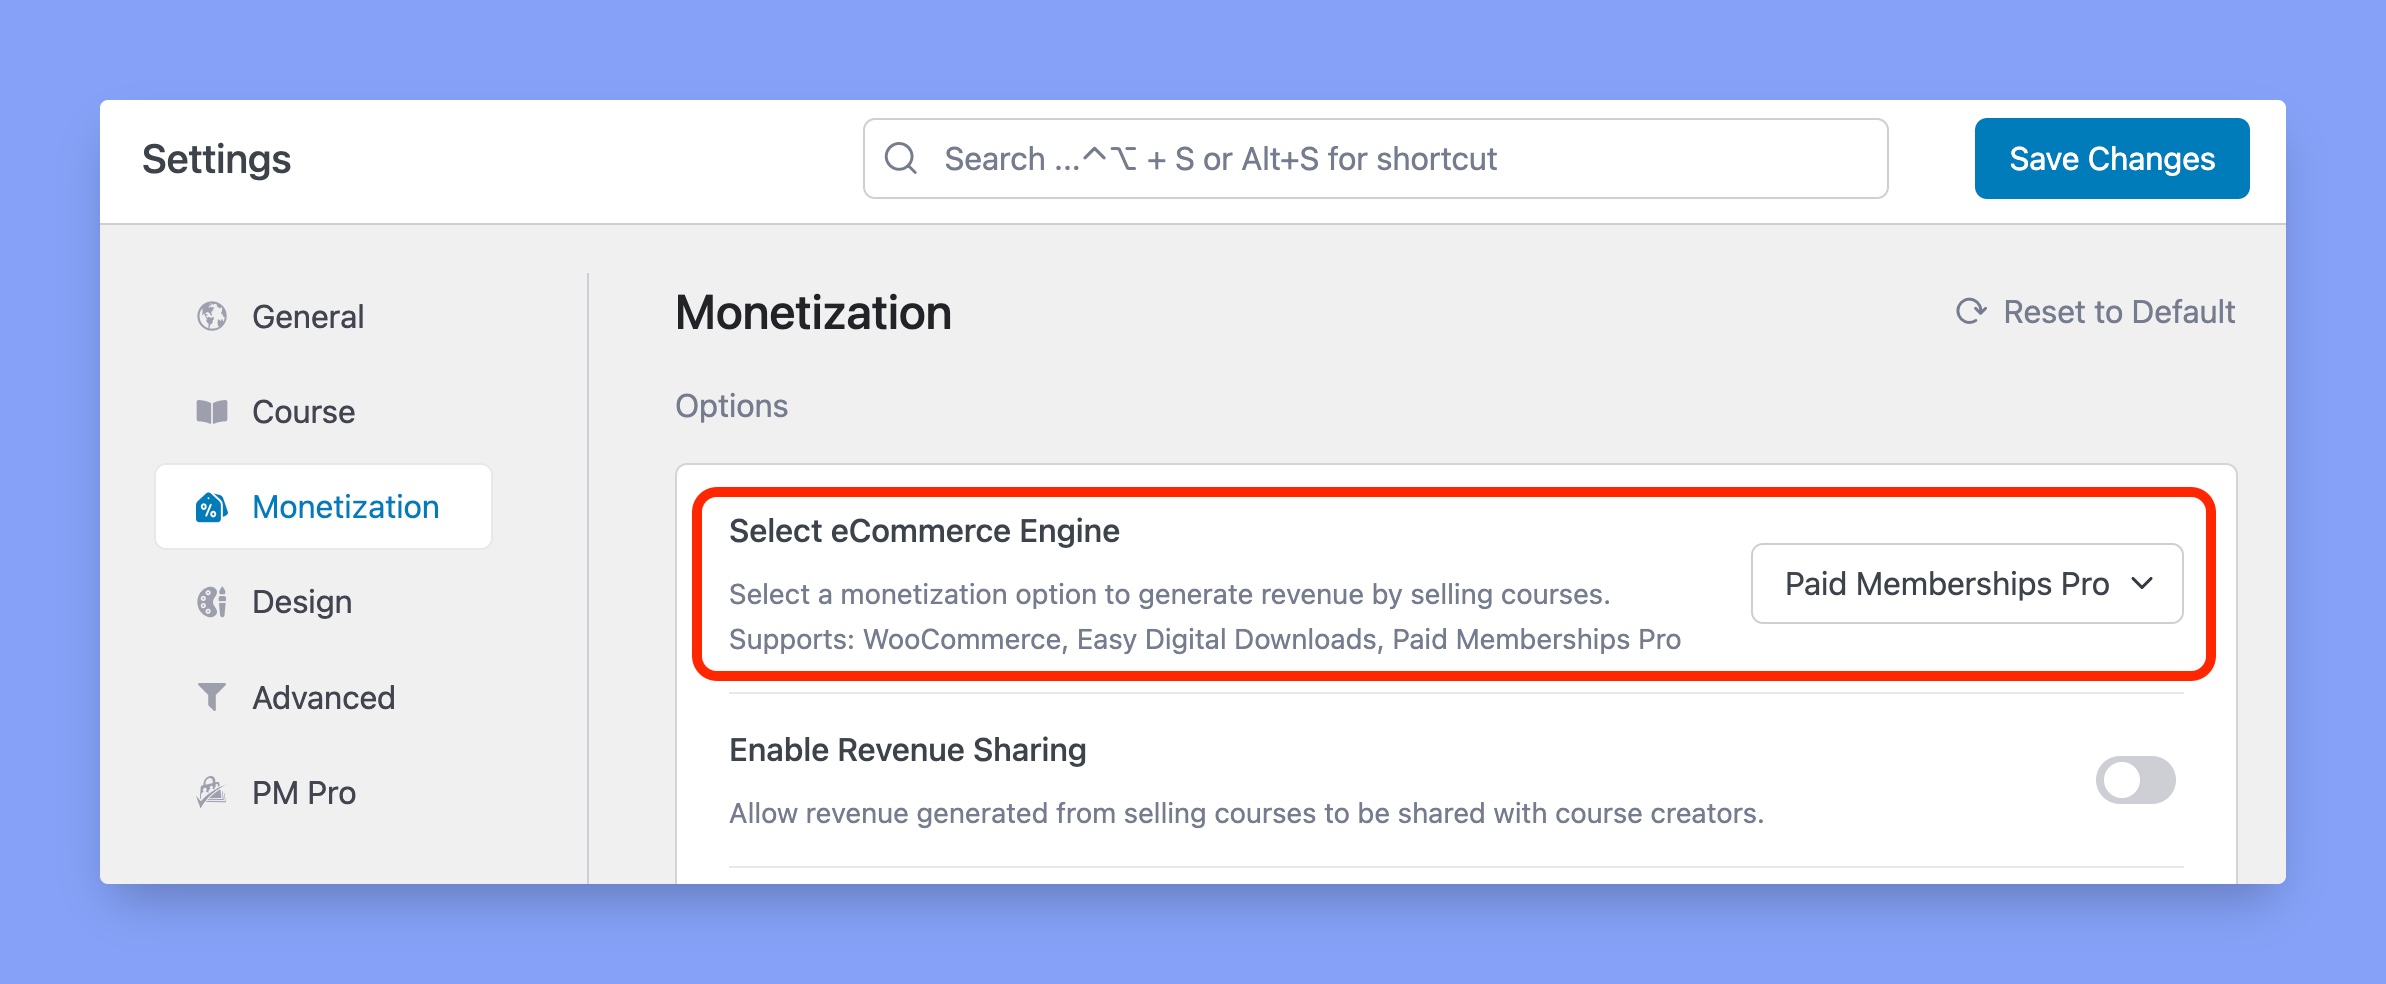
In order to create a membership website, you must enable monetization first. You can access the monetization option from Tutor LMS Pro > Settings > Monetization. Here, select Paid Memberships Pro as your eCommerce Engine and click on the Save Changes button on the top.
3. Add a New Membership Level
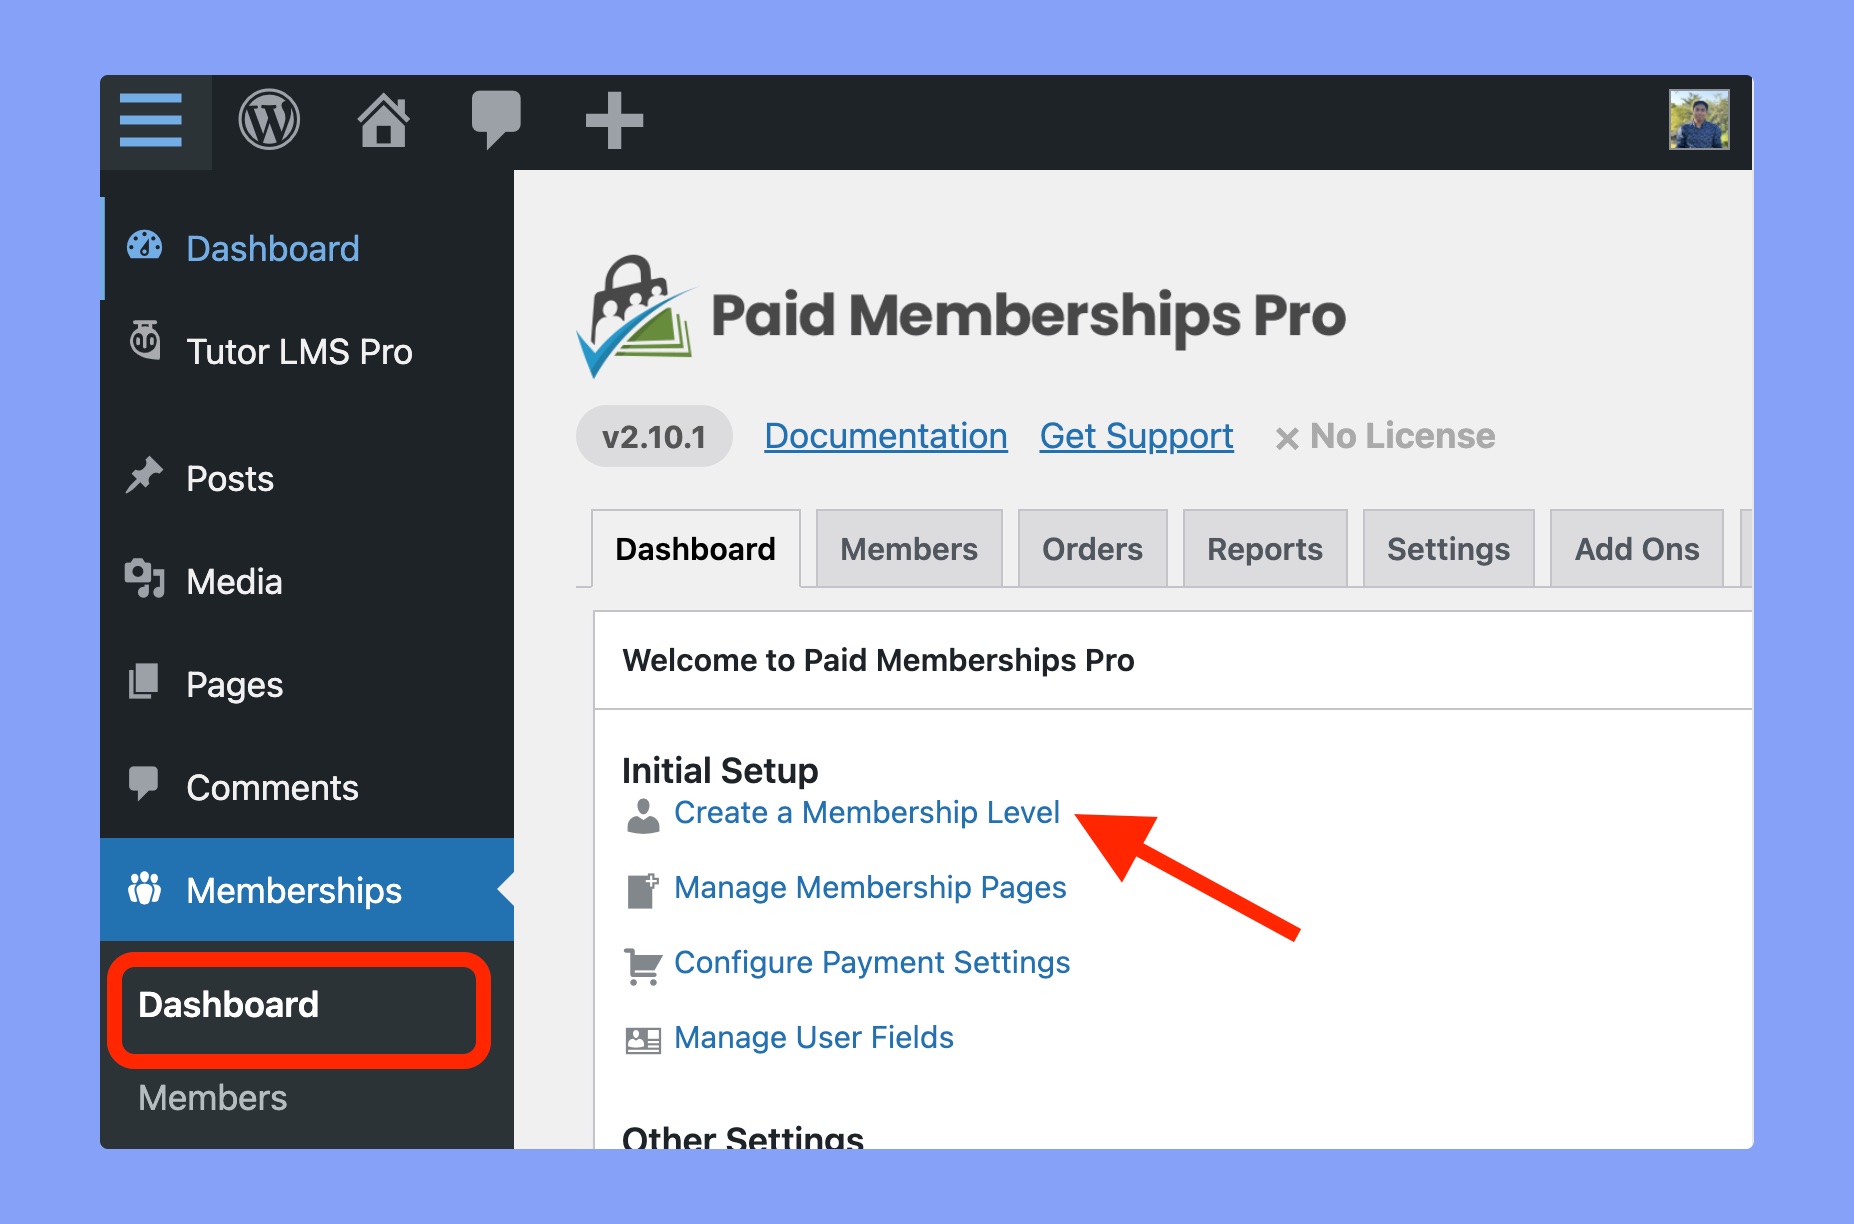
Login to your WP admin panel and go to Memberships > Dashboard. Here you’ll get the option to Create a Membership Level under the Initial Setup section.
However, you’ll get this screen only if you don’t have any existing membership level. If you have an existing level, you can add a level by clicking on the button on the top panel.
4. Choose a Membership Level
Up next, you have to choose what type of membership level you want to create. There are 9 predefined membership levels to choose from.
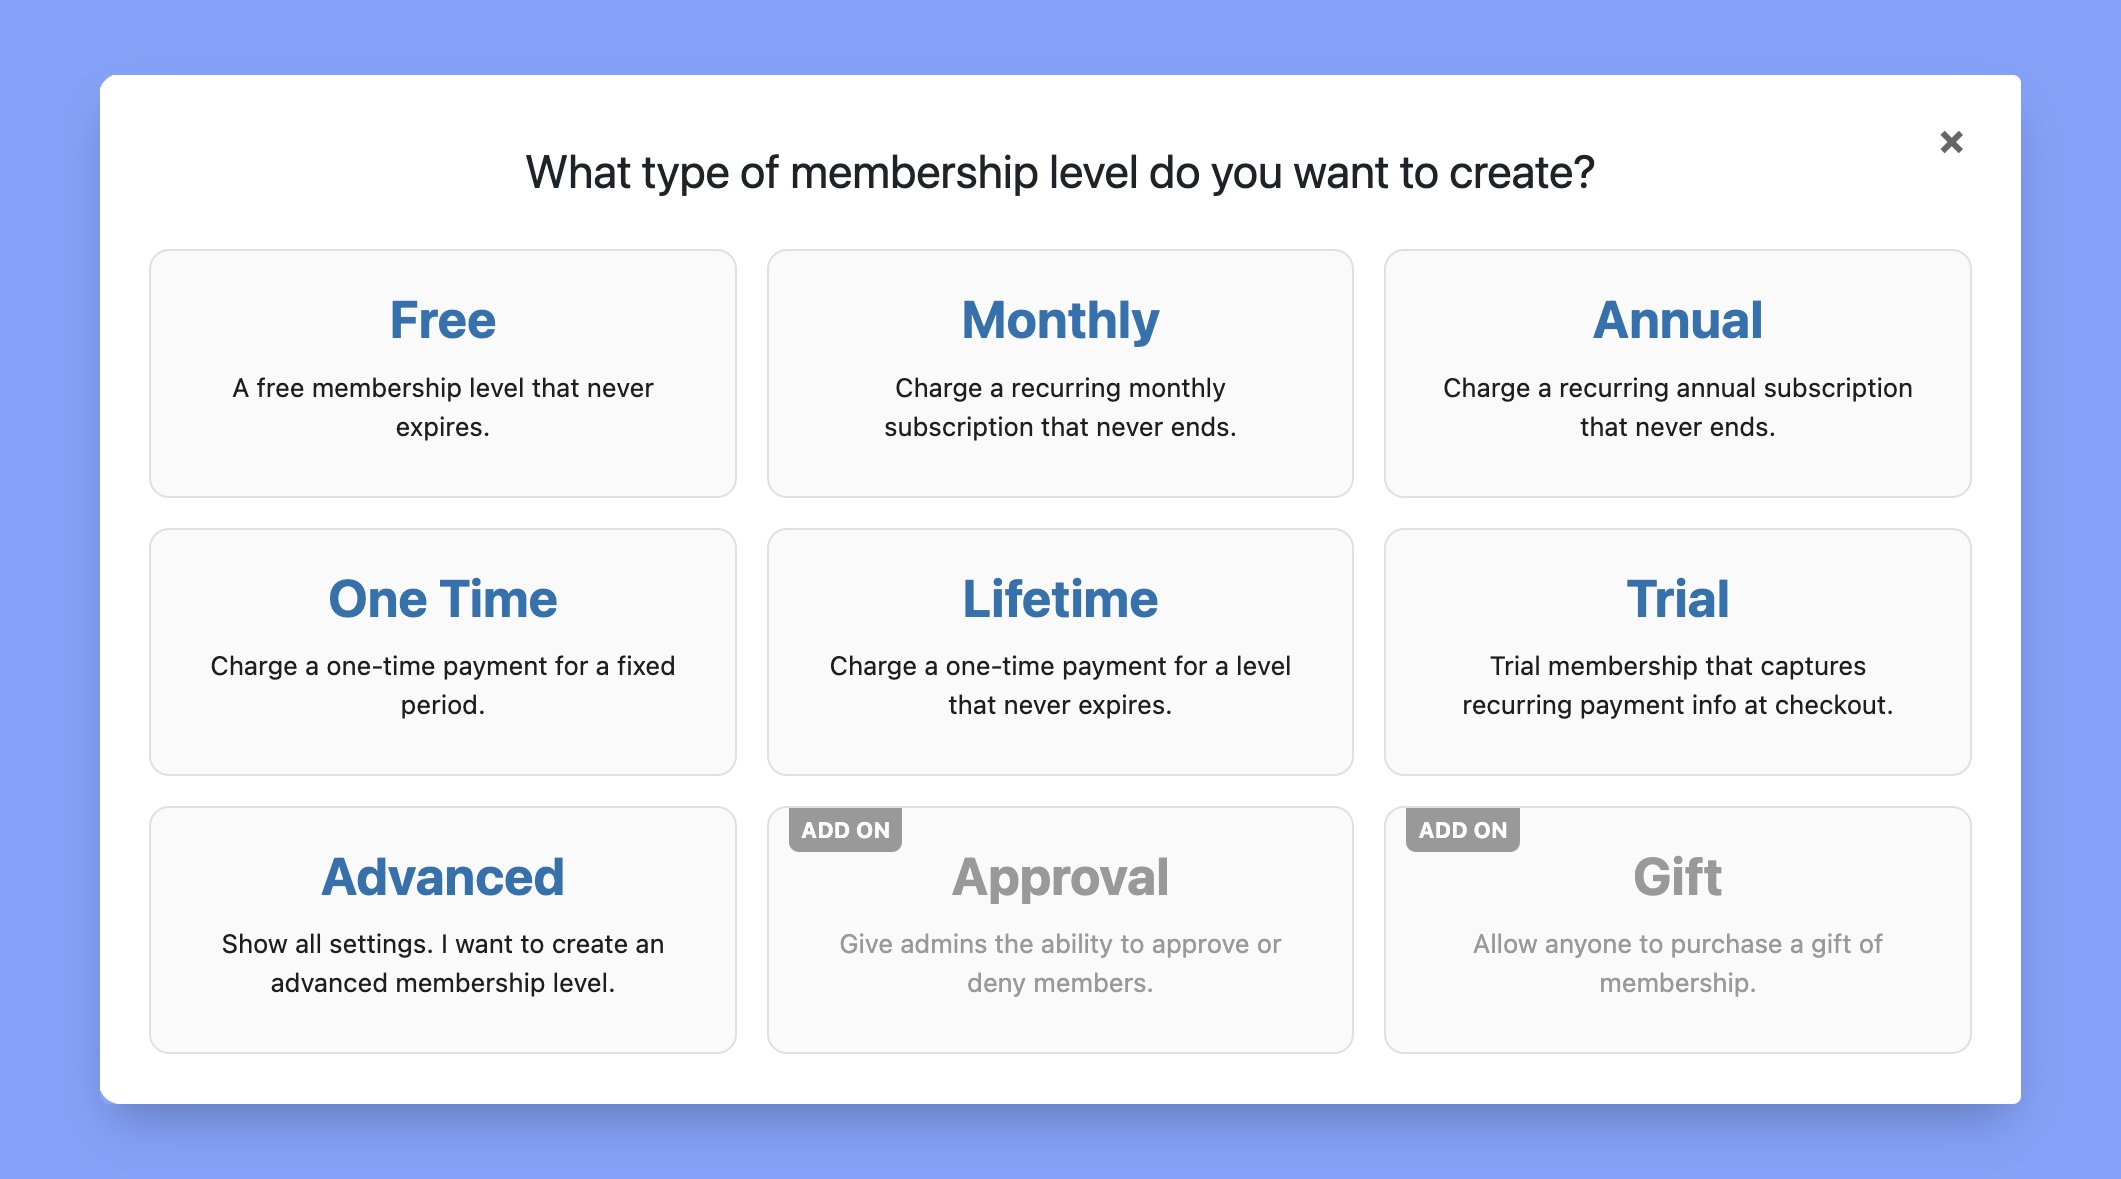
Here are the available membership levels:
- Free: It’s a free membership level with no expiry date.
- Monthly: This level will charge customers every month until he cancels the subscription.
- Annual: It will charge the customers annually.
- One Time: This method will charge the customers only once to get access for a certain time period.
- Lifetime: Customers will be charged only once and get lifetime access to the course if they choose this membership level.
- Trial: It offers a trial membership and enables recurring payments at checkout.
- Advanced: Use it if you want to create a customized membership level.
- Approval: It allows the admins to approve or deny members manually. You have to install an additional addon to enable it.
- Gift: It allows the customers to gift a course to others.
You can choose whichever membership level suits you the best.
5. Add General Information
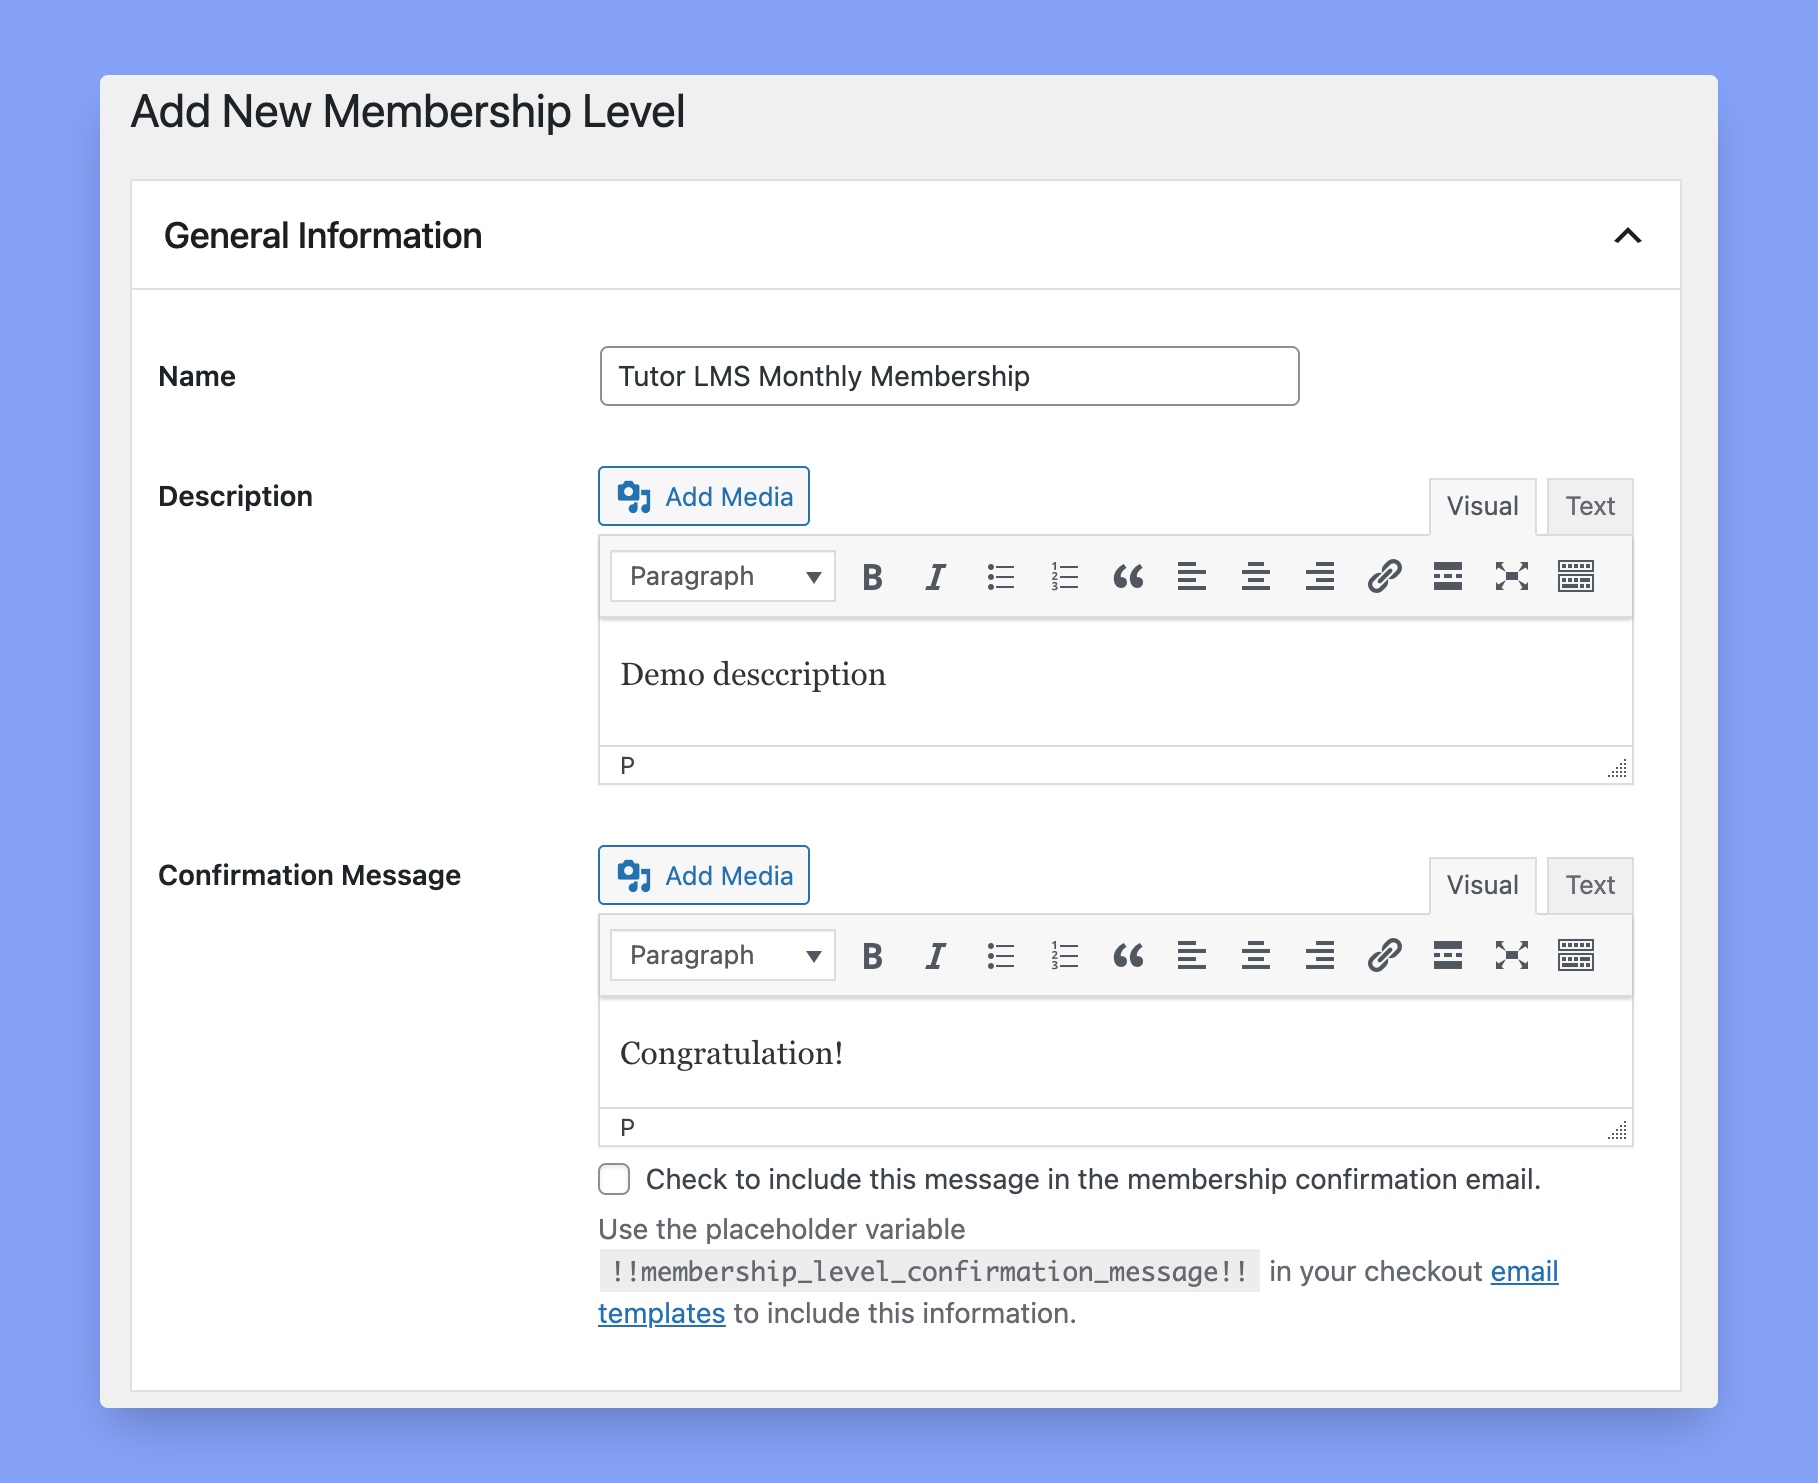
Add some general information like the membership level name, a short description, and a membership confirmation message here. You can also send this confirmation message via email by using the !!membership_level_confirmation_message!! placeholder variable.
6. Billing Details
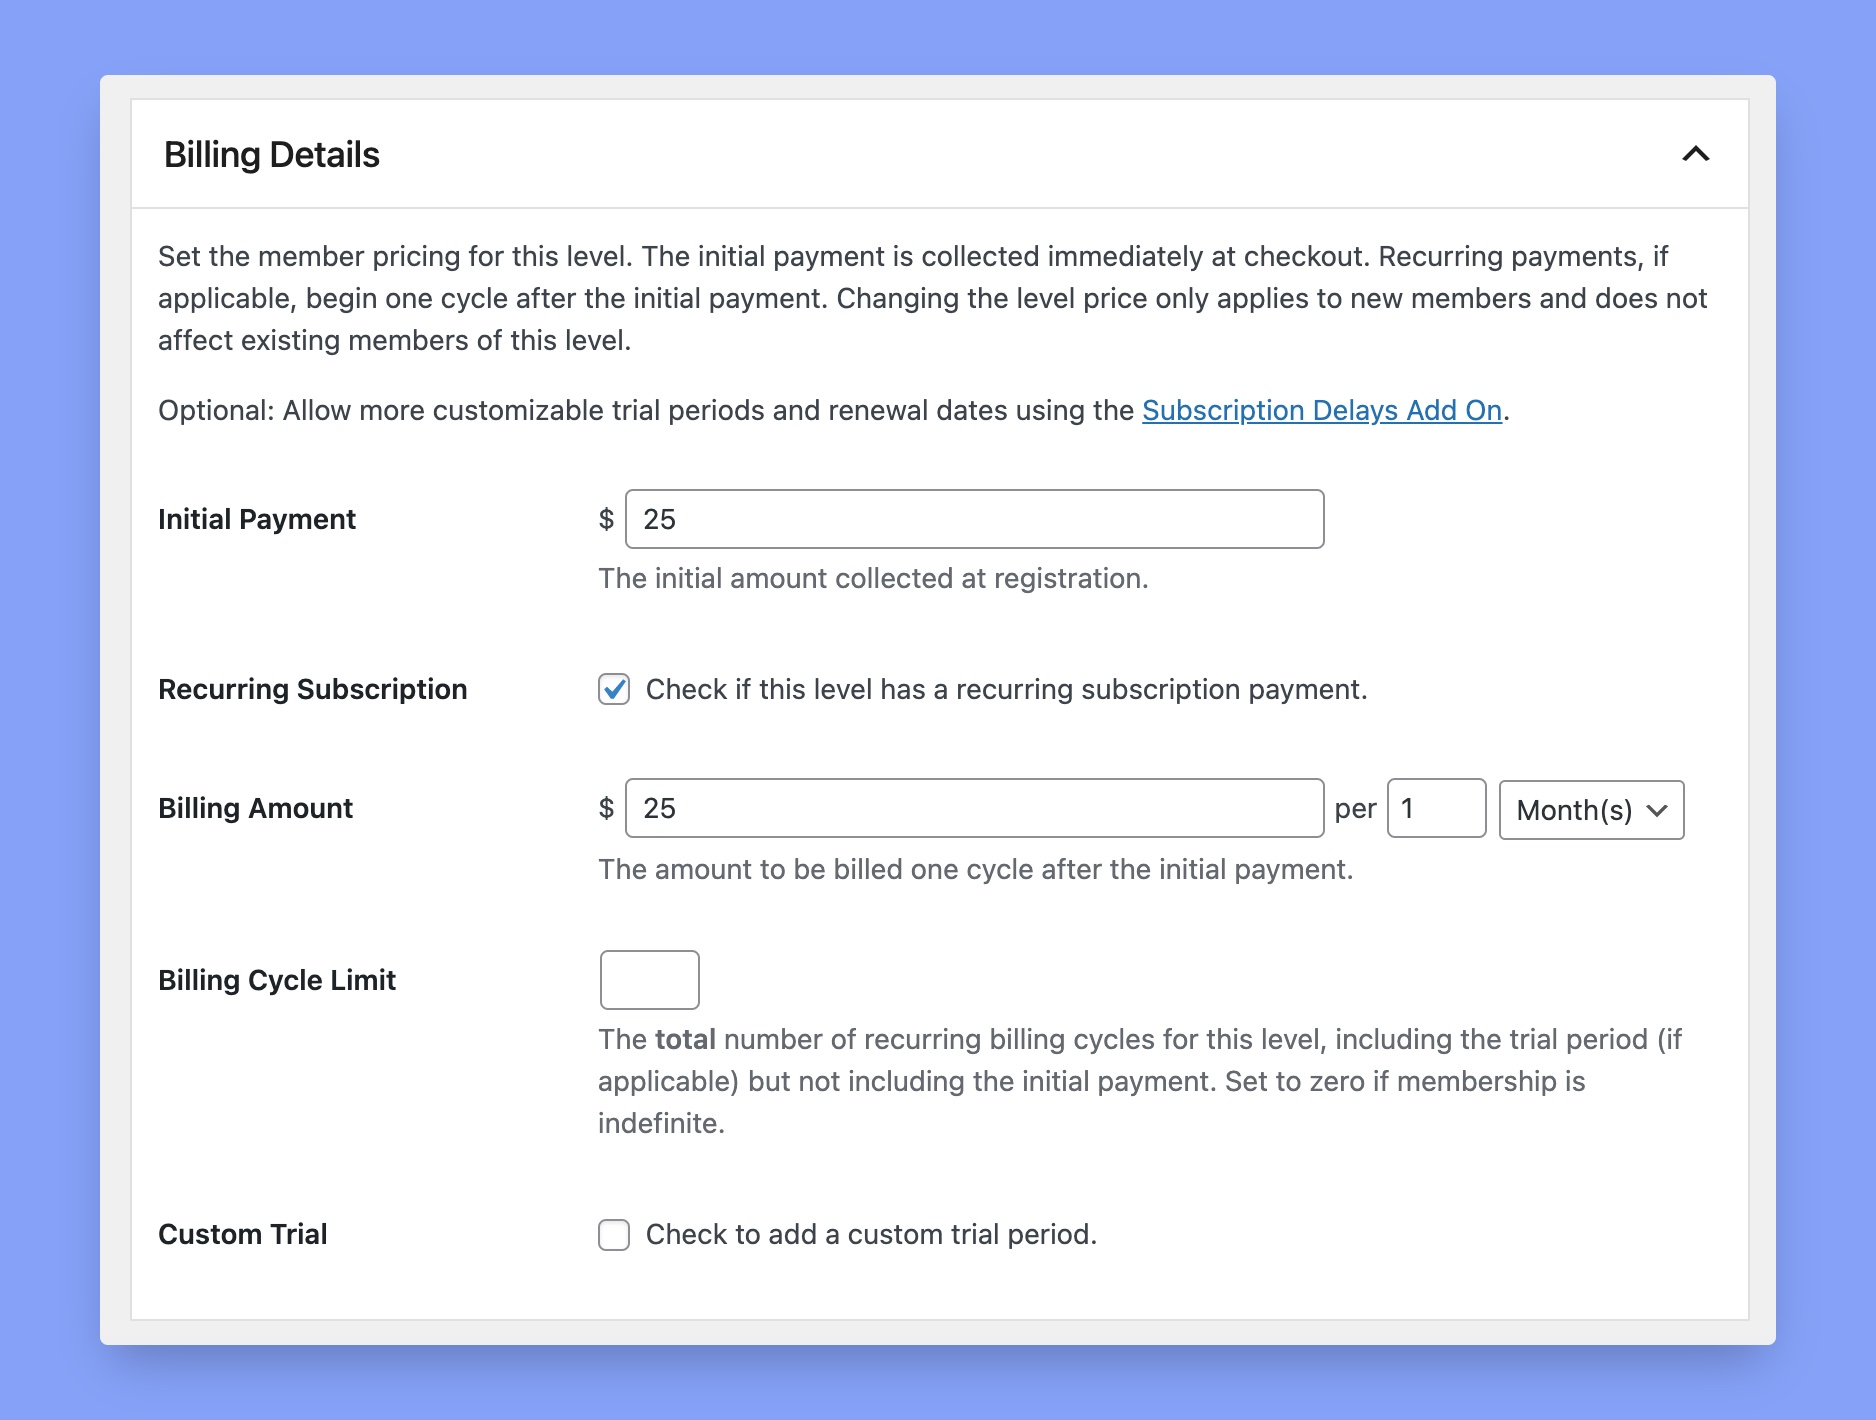
You have to set the member pricing in this section. Here is the information you’ll need to provide here:
- Initial Payment: Customers have to pay this amount during the checkout process.
- Recurring Subscription: Tick this option if you want to set up a recurring subscription model.
- Billing Amount: Enter the amount and billing frequency of recurring payments.
- Billing Cycle Limit: Enter the number of recurring billing cycles. Use zero (0) here if the membership is indefinite.
- Custom Trial: Put a tick mark here if you want to add a custom trial period.
7. Membership Expiration Date
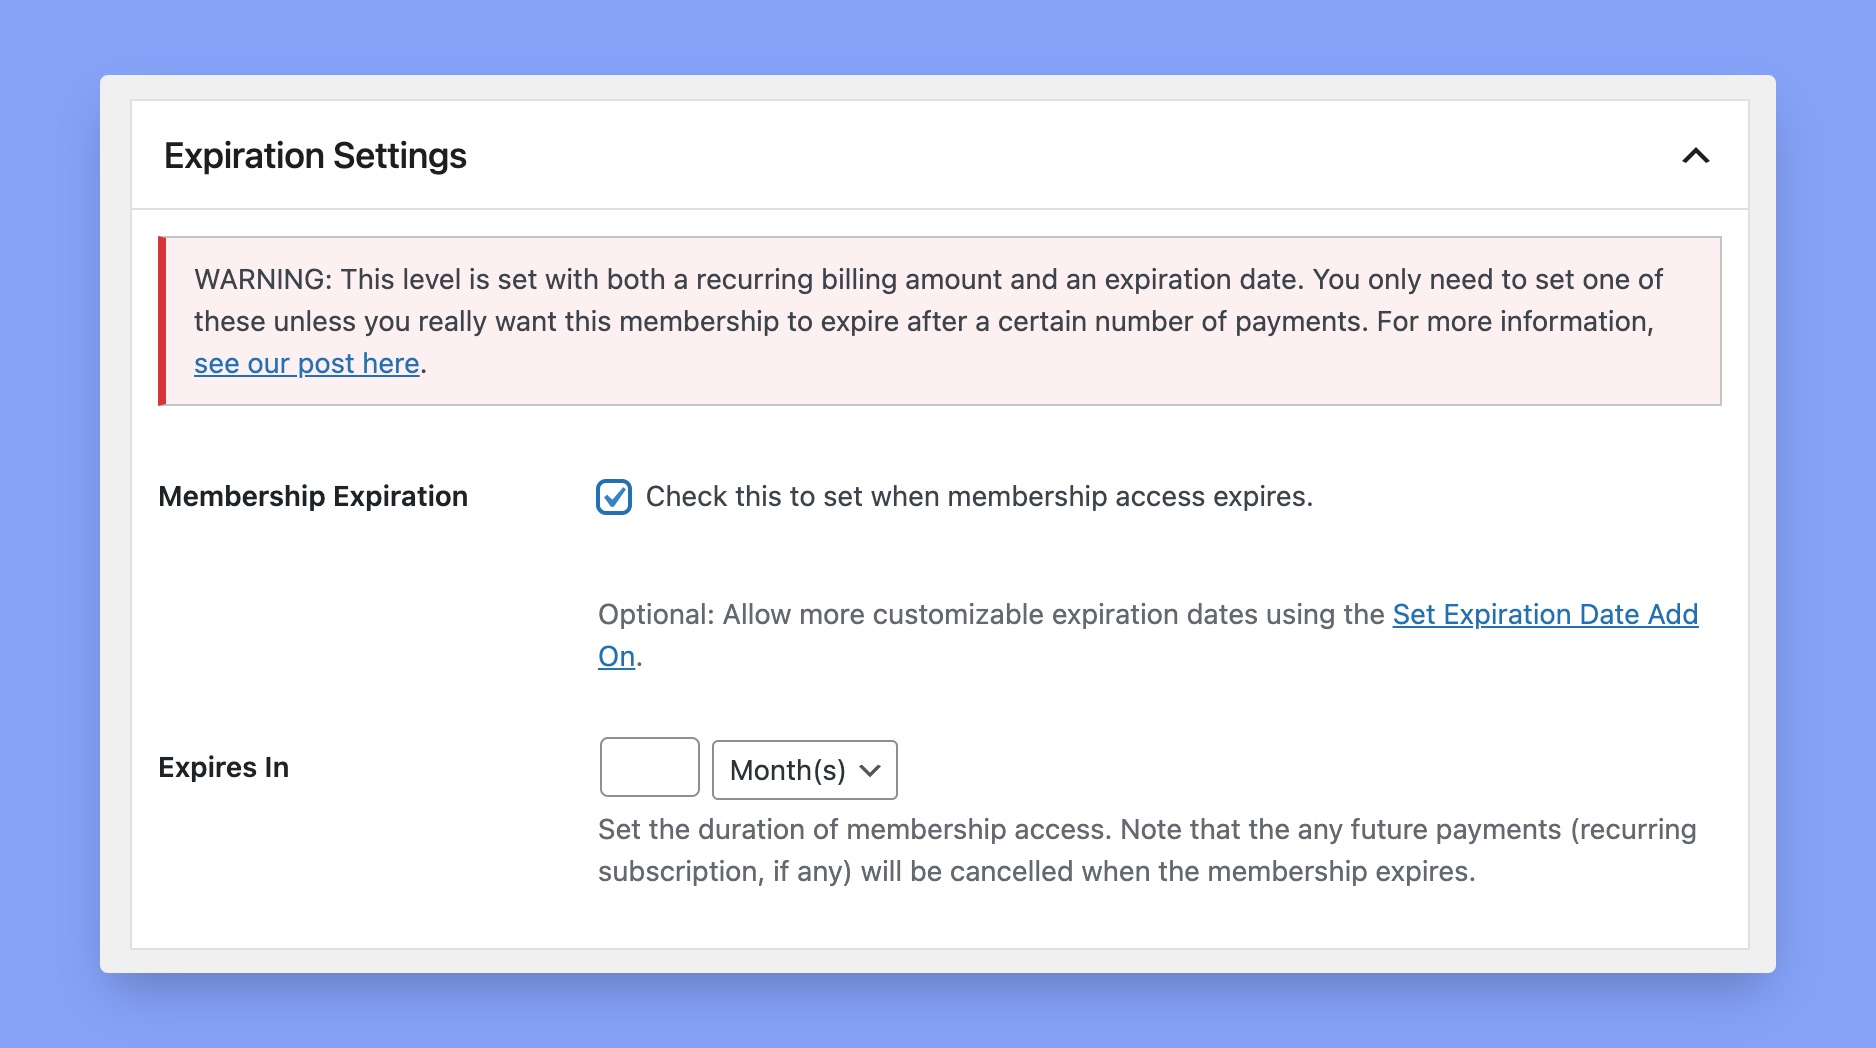
Use this Membership Expiration feature to set an expiration date for this membership level. You can set the expiration time in hours, days, weeks, months, and years. In case you need more customization here, use the Set Expiration Date addon.
8. Tutor LMS Content Settings
The Tutor LMS Content Settings option is available in the Other Settings tab.
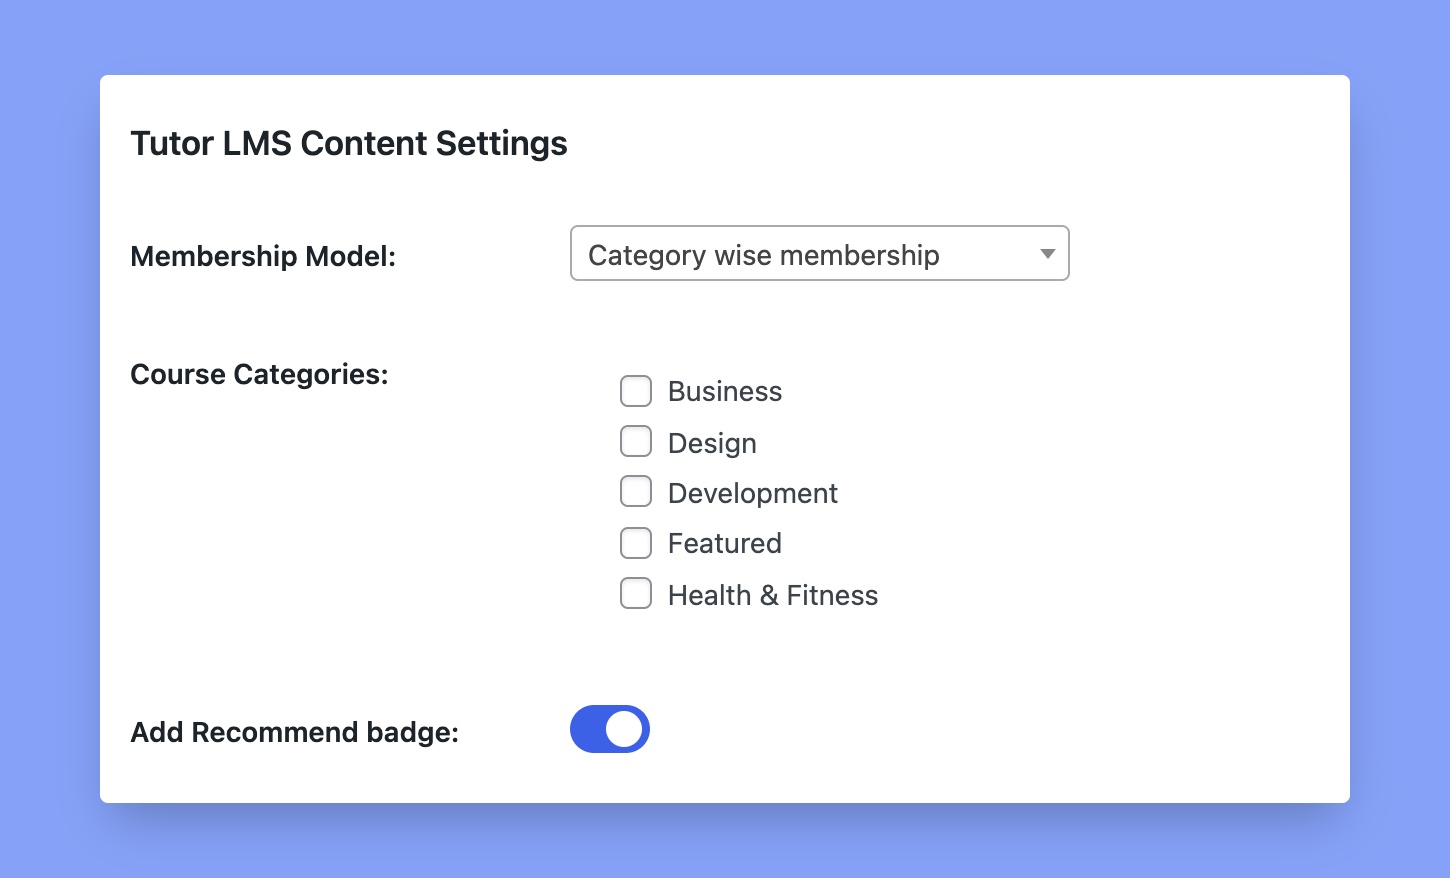
On the membership creation screen, you will see an option for selecting a membership model and adding a recommended badge on that membership level.
Membership Model
Tutor LMS offers two different types of membership models. These are:
- Full Website Membership: If you want the students to buy one membership plan to get access to the entire website and all the courses, then this option is for you.
For example, if you want to charge a monthly or yearly fee to access all the contents of the website, then you can select this option. - Category-wise Membership: If you want to charge different types of fees for different categories of courses, then this option is for you.
For example, you want to charge a $99 weekly fee for the business courses, but $89 for content courses. In this case, the category-wise membership is perfect.
Add Recommend Badge
Enabling this option will mark this specific membership level as recommended and add a star badge on it in the frontend preview.After setting up all of these, click on the Save Level button below and your subscription level will be created.
9. Offer Moneyback Guarantee
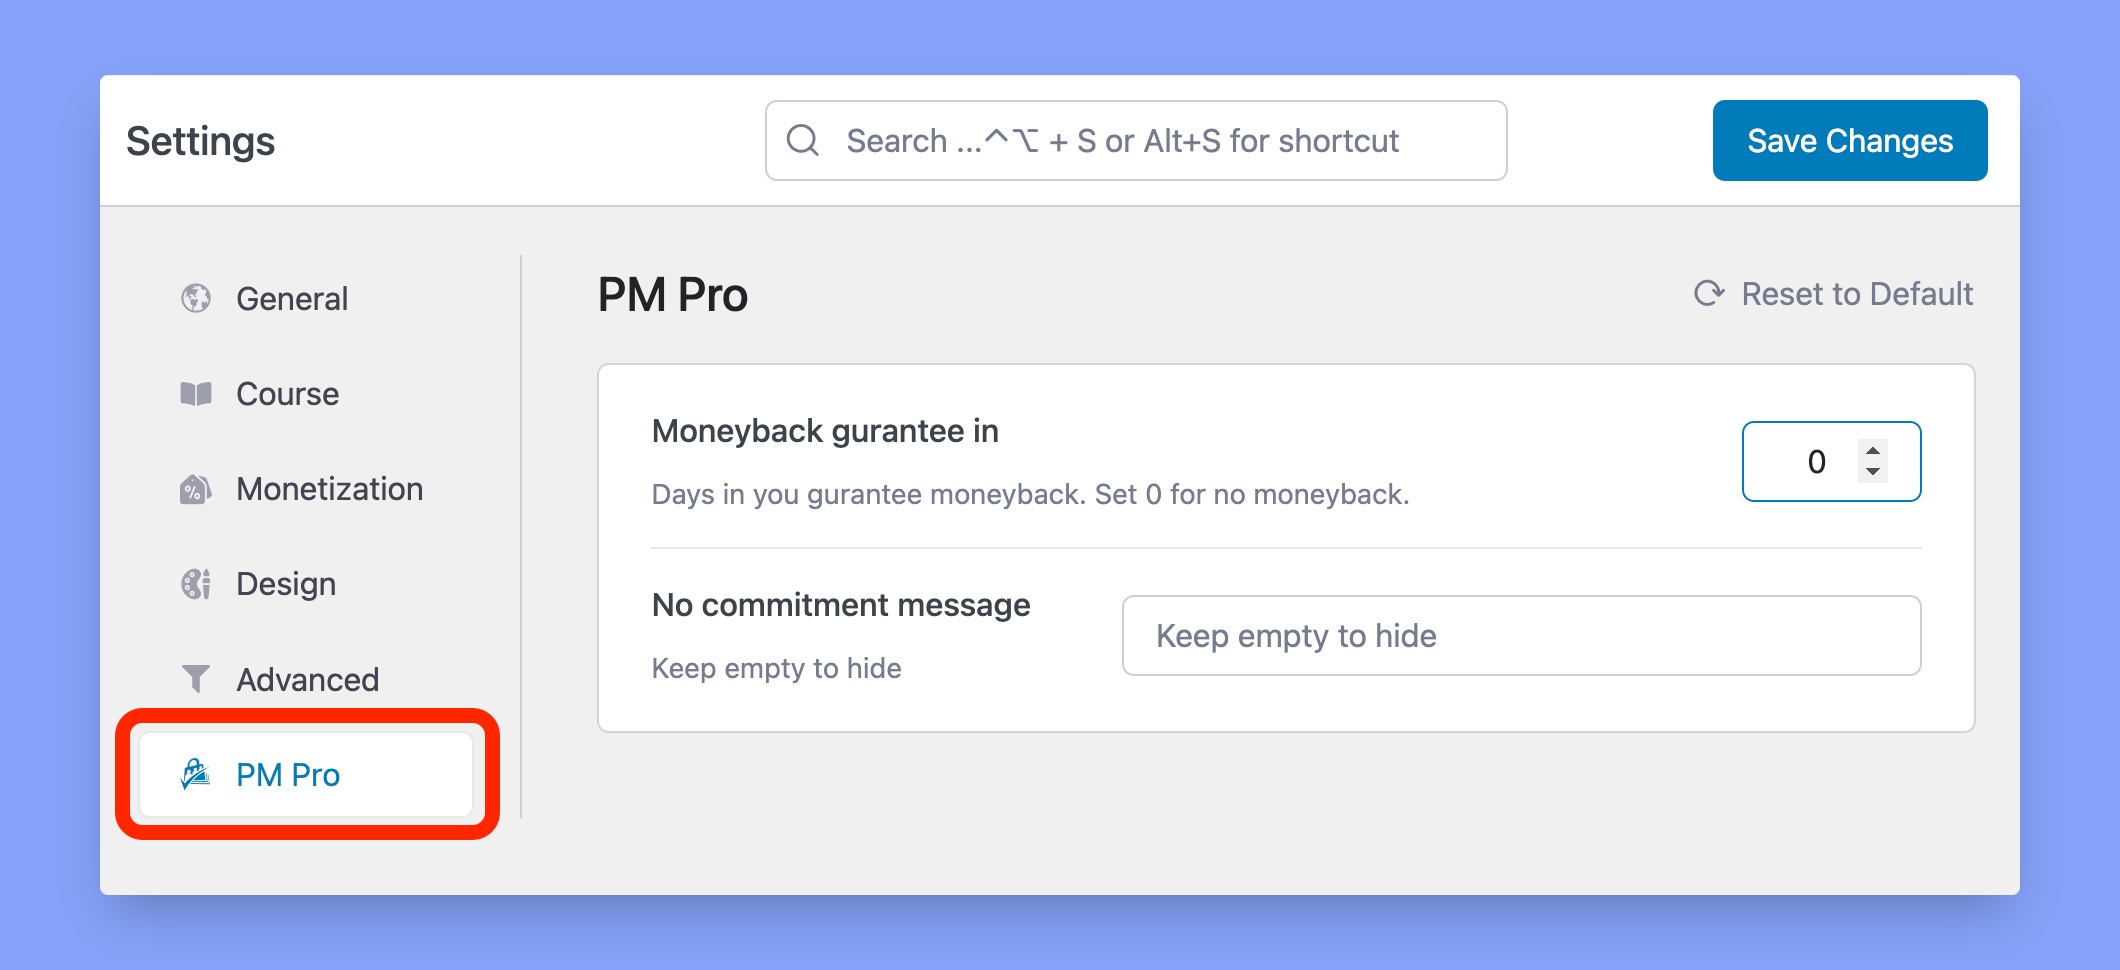
You can set the money-back guarantee for Tutor LMS courses by navigating to Tutor LMS Pro > Settings > PM Pro. Here, write the number of days for how long you are going to offer this money-back guarantee. Use zero if you are not offering any money-back guarantee right now. By the way, you can set your guarantee period only in the day’s format.
In the following box, set a commitment message for the customers. If you don’t want to share any message, just leave it blank.
Preview Membership Feature
The membership levels are shown differently on the course enrollment page and registration page. Here’s the frontend preview of membership levels while enrolling in a course:
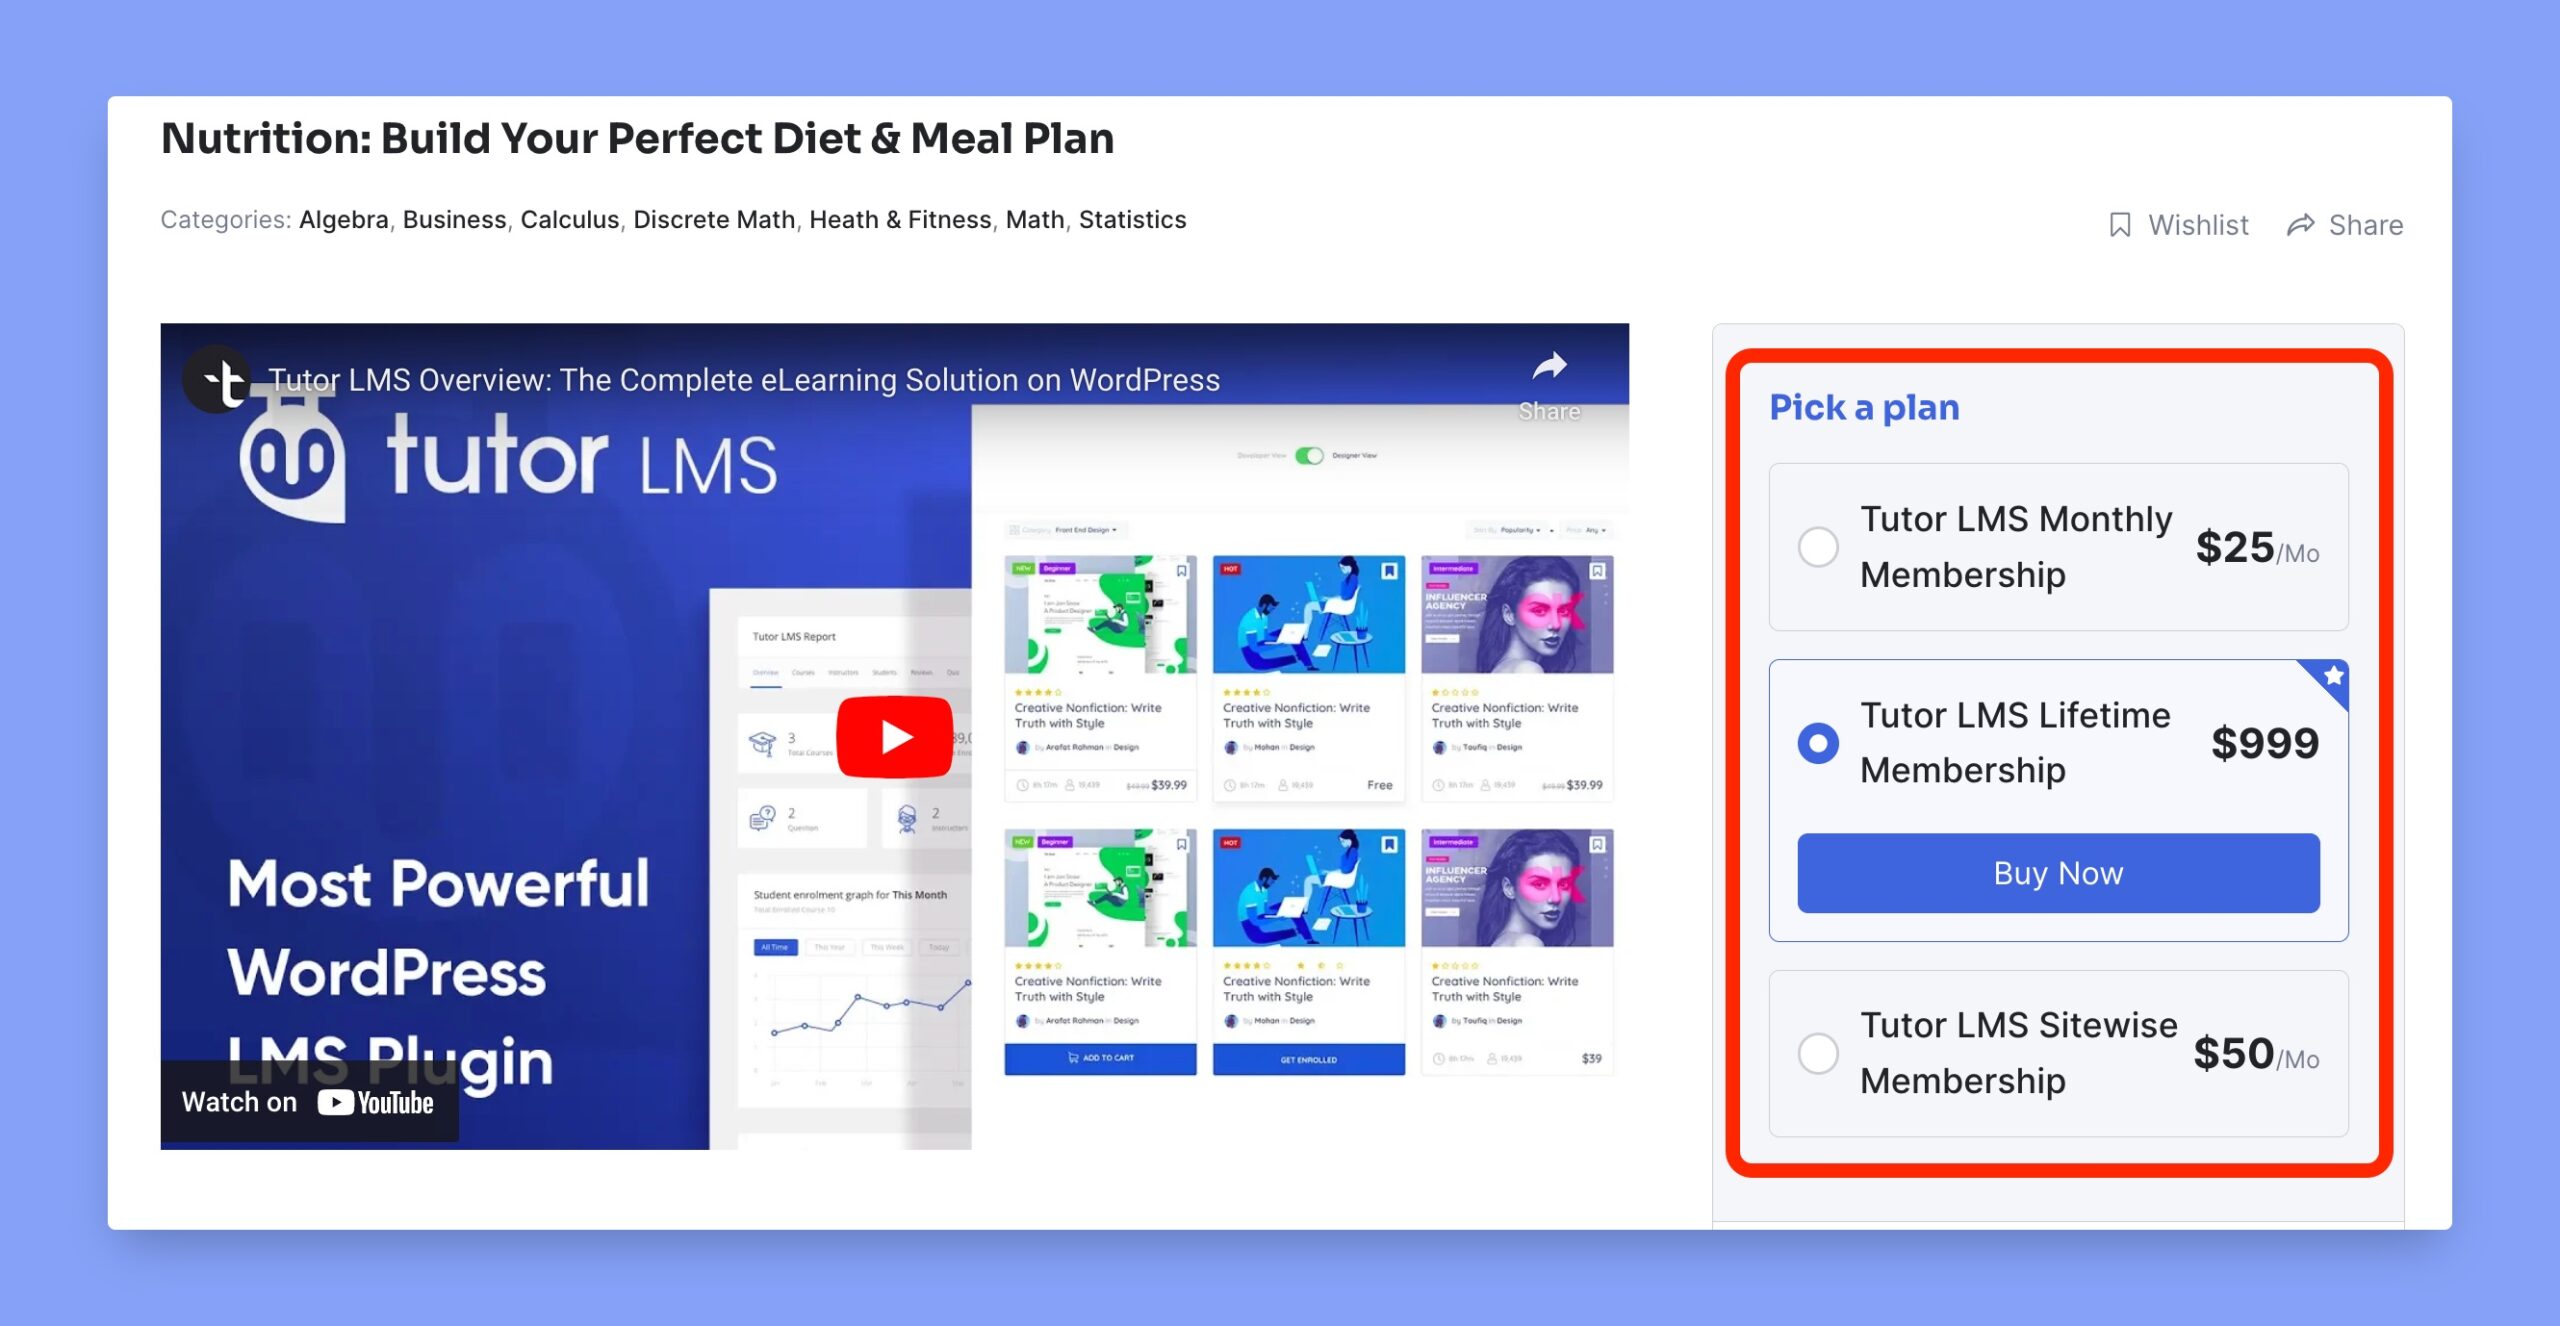
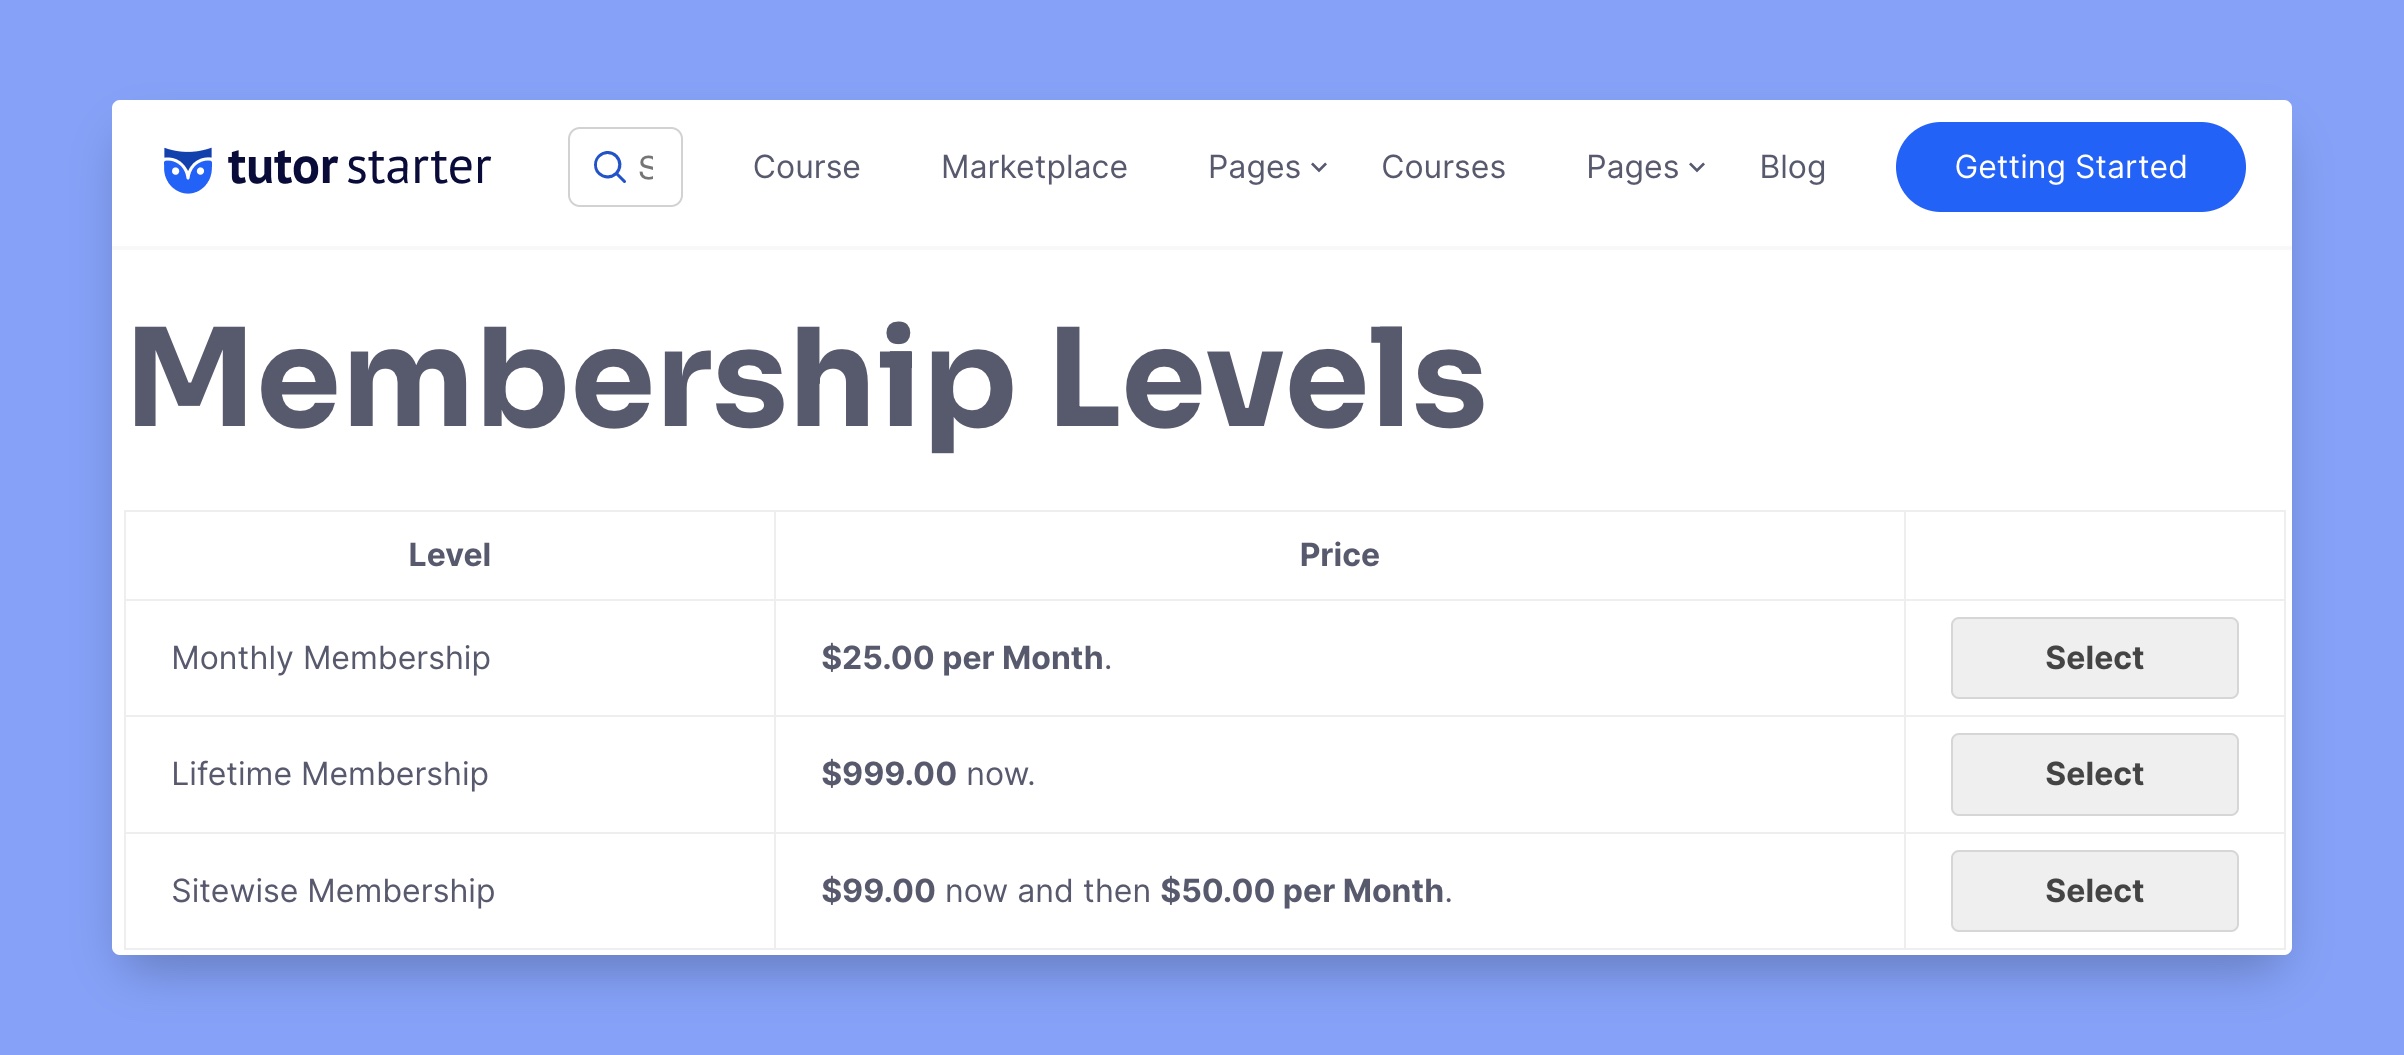
Here, the recommended badge will be selected automatically with a star badge on it. And, the following image is the preview of membership levels while registering on the website.
Students Haven’t Enrolled Automatically in Courses
Membership plugins only allow access to course content. It does not enroll users automatically. In order to enroll in a specific course, he/she has to enroll in that course manually. However, admins can also enroll students manually by using the Manual Enrollment addon.