Add a Custom Field on Registration
You can add custom fields on the Tutor registration page. This process is done by editing your theme files. So first and foremost, set up a child theme or keep a copy of all your theme files somewhere safe. Please be very careful and do not make direct edits to your theme files as you might potentially lose the changes upon updating the theme.
Check out our documentation on overriding templates to get more info.
We’ll go over two processes in this doc, we will add a custom field for “Phone Number” on the registration page. And then we’ll walk through how to add a completely new custom field.
Adding a Phone Number Custom Field
To add a phone number field we have two steps:
First Task
We need to store the input the user gives and also enforce that a student must provide their phone number to be able to complete the registration.
For this, we need this code snippet.
add_filter('tutor_student_registration_required_fields', 'required_phone_no_callback');
if ( ! function_exists('required_phone_no_callback')){
    function required_phone_no_callback($atts){
        $atts['phone_no'] = 'Phone Number field is required';
        return $atts;
    }
}
add_action('user_register', 'add_phone_after_user_register');
add_action('profile_update', 'add_phone_after_user_register');
if ( ! function_exists('add_phone_after_user_register')) {
    function add_phone_after_user_register($user_id){
        if ( ! empty($_POST['phone_no'])) {
            $phone_number = sanitize_text_field($_POST['phone_no']);
            update_user_meta($user_id, 'phone_number', $phone_number);
        }
    }
}
You must copy and paste this code to your child theme’s functions.php file.
You can also use a 3rd party code injecting plugin to get the same result. Just make sure you edit the right file e.g. functions.php.
The directory would be wp-content/childtheme/functions.php
This code ensures that a phone number is required during user registration and saves the phone number in the user’s metadata for future use.
Second Task
The next step is to add a field within the registration form so users can input their phone numbers.
For this, we need to use this code snippet
<div class="wp-block-qubely-themeumcode qubely-block-d342b5"><div class="themeum-block-code"><pre class="language-php"><code class="language-php"> <div class="tutor-form-row">
        <div class="tutor-form-col-12">
            <div class="tutor-form-group">
                <label>
                    <?php _e('Phone Number', 'tutor'); ?>
                </label>
                <input type="text" name="phone_no" value="<?php echo tutor_utils()->input_old('phone_no'); ?>" placeholder="<?php _e('Phone Number', 'tutor'); ?>">
            </div>
        </div>
    </div></code></pre></div></div>
You need to copy and paste this HTML code snippet into your registration.php file, and you should override the template file from your theme.
Once you set up the template folder within your theme, It should be found in this directory:
yourtheme/tutor/dashboard/registration.php
In summary, this code snippet adds a labeled input field for entering a phone number in a form, supporting translations, and pre-filling the input if there’s an old value.
Phone Number Field Added
Once you add these two code snippets, your registration form will look like this:
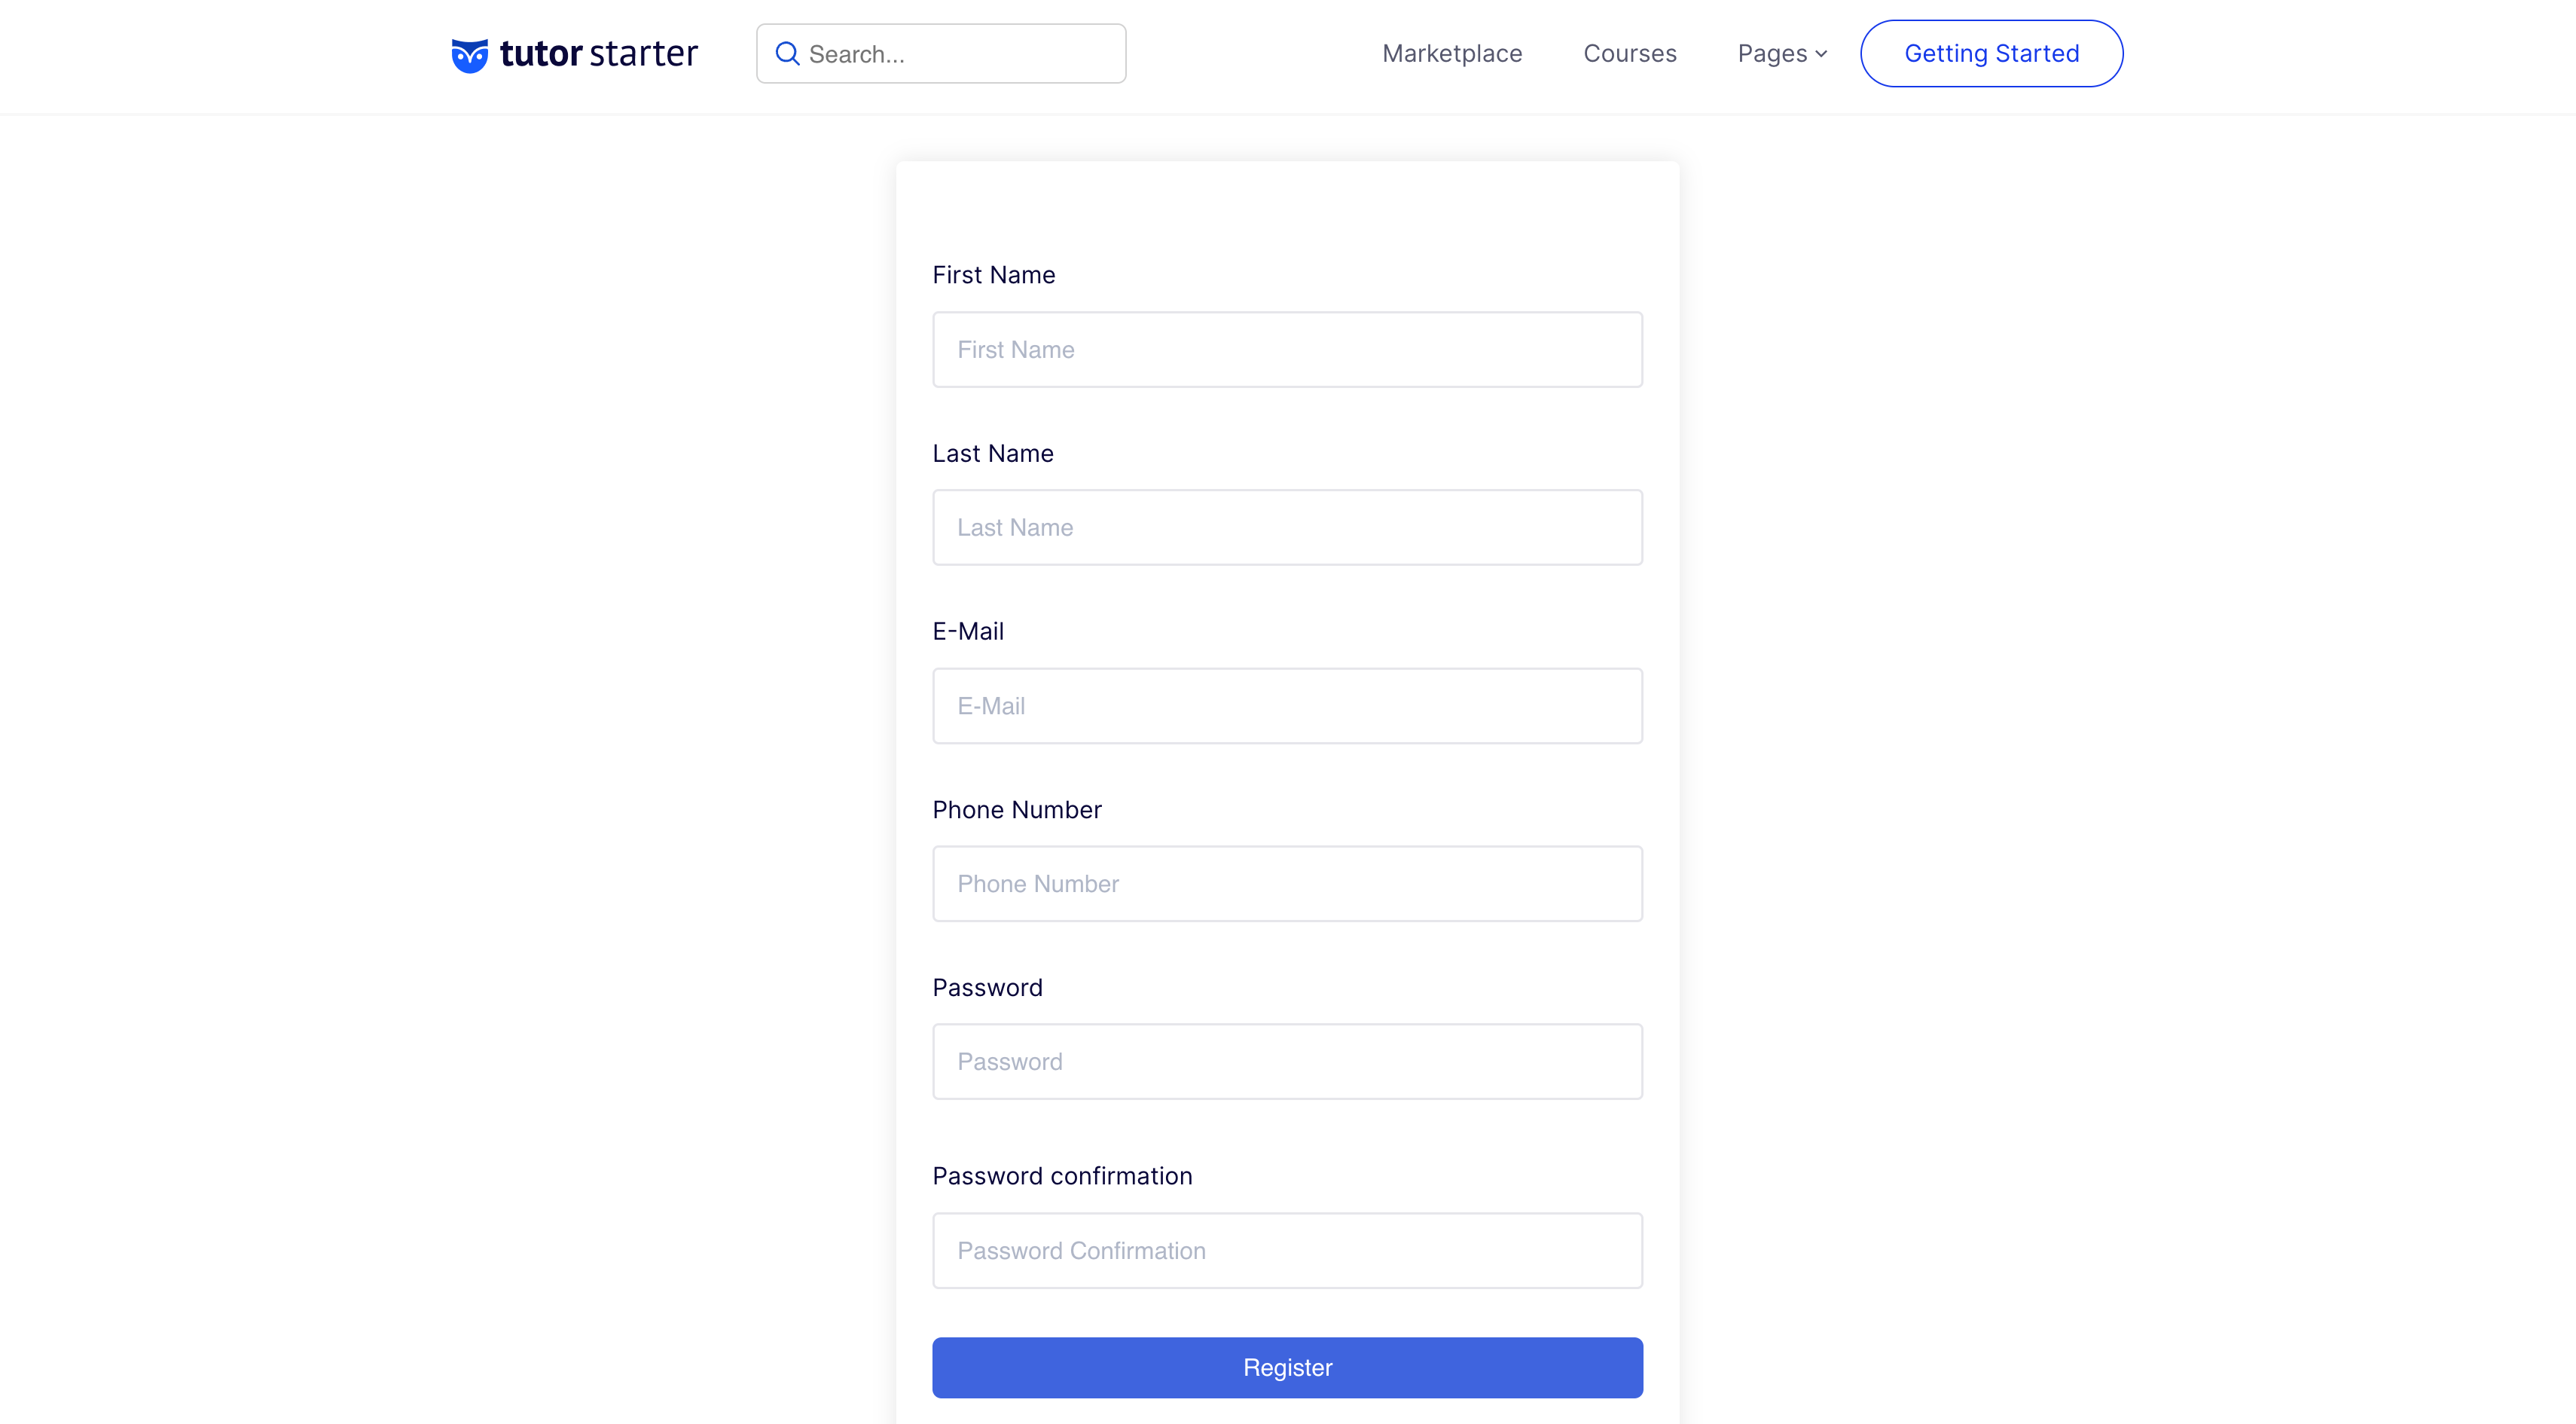
When new users register, they will have to input their phone number to sign up for your site. So Tutor LMS has built-in code for phone numbers in the registration form already, which is why we only needed to make minor code additions.
Adding Any Other Custom Fields to the Registration Page:
For a completely custom field on the registration form, we have a few steps to follow to get it done. We will add a new custom field called NID(National ID) as a required input for registration.
Step 1:
We need to add a field for the input and save it to user metadata
For this, we need to add this PHP snippet:
add_filter('tutor_student_registration_required_fields', 'required_nid_no_callback');
if ( ! function_exists('required_nid_no_callback')){
    function required_nid_no_callback($atts){
        $atts['nid'] = 'National Id';
        return $atts;
    }
}
add_action('user_register', 'add_nid_after_user_register');
add_action('profile_update', 'add_nid_after_user_register');
if ( ! function_exists('add_nid_after_user_register')) {
    function add_nid_after_user_register($user_id){
        if ( ! empty($_POST['nid'])) {
            $nid = sanitize_text_field($_POST['nid']);
            update_user_meta($user_id, '_nid', $nid);
        }
    }
}
Copy and paste this code this code to your child theme’s functions.php file.
Step 2:
The next step is to add a field within the registration form so users can input their phone numbers.
For this, we need to use this code snippet:
<div class="wp-block-qubely-themeumcode qubely-block-6f699b"><div class="themeum-block-code"><pre class="language-php"><code class="language-php"><div class="tutor-form-col-6">
    <div class="tutor-form-group">
        <label>
            <?php _e('NId', 'tutor'); ?>
        </label>
        <input type="text" name="nid" value="<?php echo tutor_utils()->input_old('nid'); ?>" placeholder="<?php _e('NID', 'tutor'); ?>">
    </div>
</div>
</code></pre></div></div>
You need to copy and paste this HTML code snippet into your registration.php file, and you should override the template file from your theme. Once you set up the template folder within your theme, It should be found in this directory:
yourtheme/tutor/dashboard/registration.php
Step 3:
We need to make sure whatever input the user gives is reflected on the dashboard profile page for the user(student/instructor). So we need to store this data and display it
For this, we need to add this code snippet:
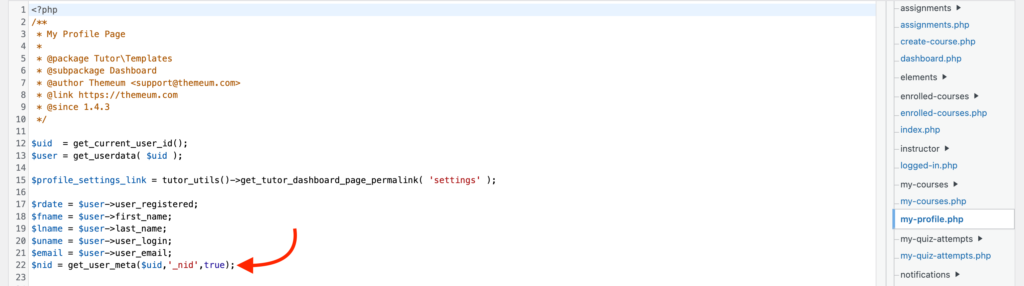
$nid = get_user_meta($uid,'_nid',true);Add this snippet in the my-profile.php file. The path for this file will be:
yourtheme/tutor/dashboard/my-profile.php
You should declare or add this variable near the top of the code with other variables.
Step 4:
Also on the same my-profile.php file, we need to add another code snippet.
This time we need to add this code snippet:
<div class="wp-block-qubely-themeumcode qubely-block-acdc86"><div class="themeum-block-code"><pre class="language-php"><code class="language-php"> <div class="tutor-dashboard-profile-item">
            <div class="heading">
                <span><?php _e('NId', 'tutor'); ?></span>
            </div>
            <div class="content">

                <p><?php  echo $nid ? $nid : "________"; ?> </p>
            </div>
        </div></code></pre></div></div>
Copy and paste this code in my-profile.php file.
This will show the NID in the user dashboard profile. So, it’s like having a slot for a number, if the user entered a value during signup they will see their NID and if there’s no number put in, you just see a bunch of underscores instead.
Step 5:
Next, we need to add an input field in dashboard > settings > profile, to be able to manually enter the NID for already registered users.
So we need to add this code snippet:
<div class="wp-block-qubely-themeumcode qubely-block-77ade4"><div class="themeum-block-code"><pre class="language-php"><code class="language-php"><div class="tutor-form-col-6">
                <div class="tutor-form-group">
                    <label>
                        <?php _e('Nid', 'tutor'); ?>
                    </label>
                    <input type="number" min="1" name="nid" value="<?php echo get_user_meta($user->ID,'_nid',true); ?>" placeholder="<?php _e('NId', 'tutor'); ?>">
                </div>
            </div></code></pre></div></div>
Copy and paste this code in the profile.php file. The path for this file will be:
yourtheme/tutor/dashboard/my-profile.php
So, in summary, this code creates an input field where users can enter their “NID” (National ID) value. If they have previously entered a value, it will be shown in the input field; otherwise, it will display “NID” as a placeholder.
Final result
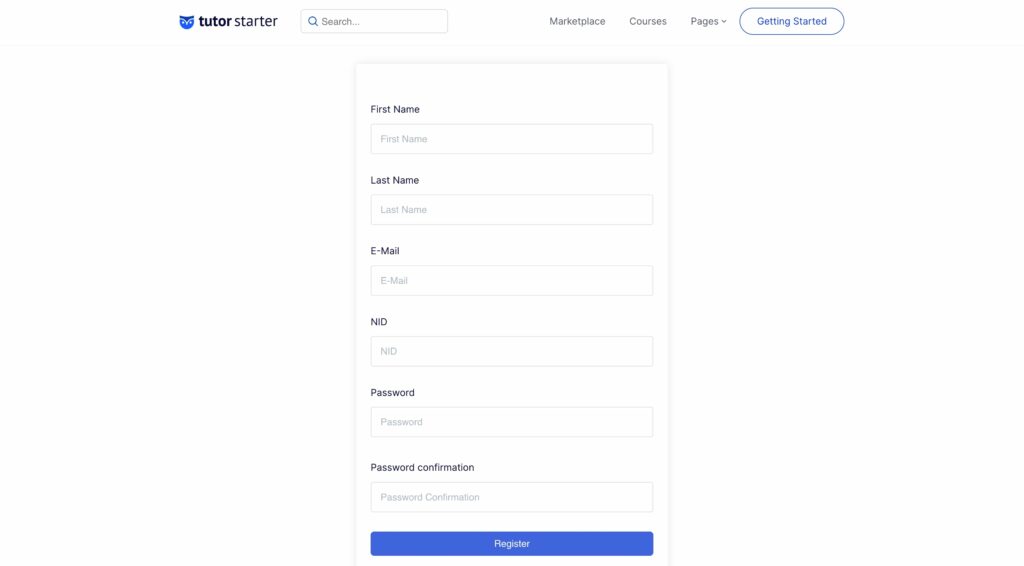
And that’s it. Now a new NID field is created in the registration form, and the profile page, and it will be displayed in the dashboard my profile section.
Here’s how it looks on the Registration Form:
Follow this same procedure to add other custom fields on the registration form for Tutor login. The code we used as an example is taking in integer values, so it’s applicable for any sort of numeric value. If you want it to also accept characters or strings, simply modify the code to allow for that.