Live Classes
The Live Classes section is where you schedule and manage live teaching sessions with your students. It integrates directly with two platforms (Google Meet and Zoom) and handles everything from initial setup through to running and reviewing sessions. You can access it by clicking Live Classes in the sidebar.
Prerequisites
The Live Classes feature requires the relevant add-on to be activated on your Tutor LMS settings before anything in this section will work. Depending on which platform you intend to use, the correct add-on must be enabled first:
- Google Meet: Requires the Tutor Google Meet add-on to be active.
- Zoom: Requires the Tutor Zoom add-on to be active.
Once the add-on is active, you will also need to connect your platform account through the Set API tab before any scheduling features become available. This process is covered in detail below.
For the complete setup guide for each platform, refer to the official Tutor LMS documentation:
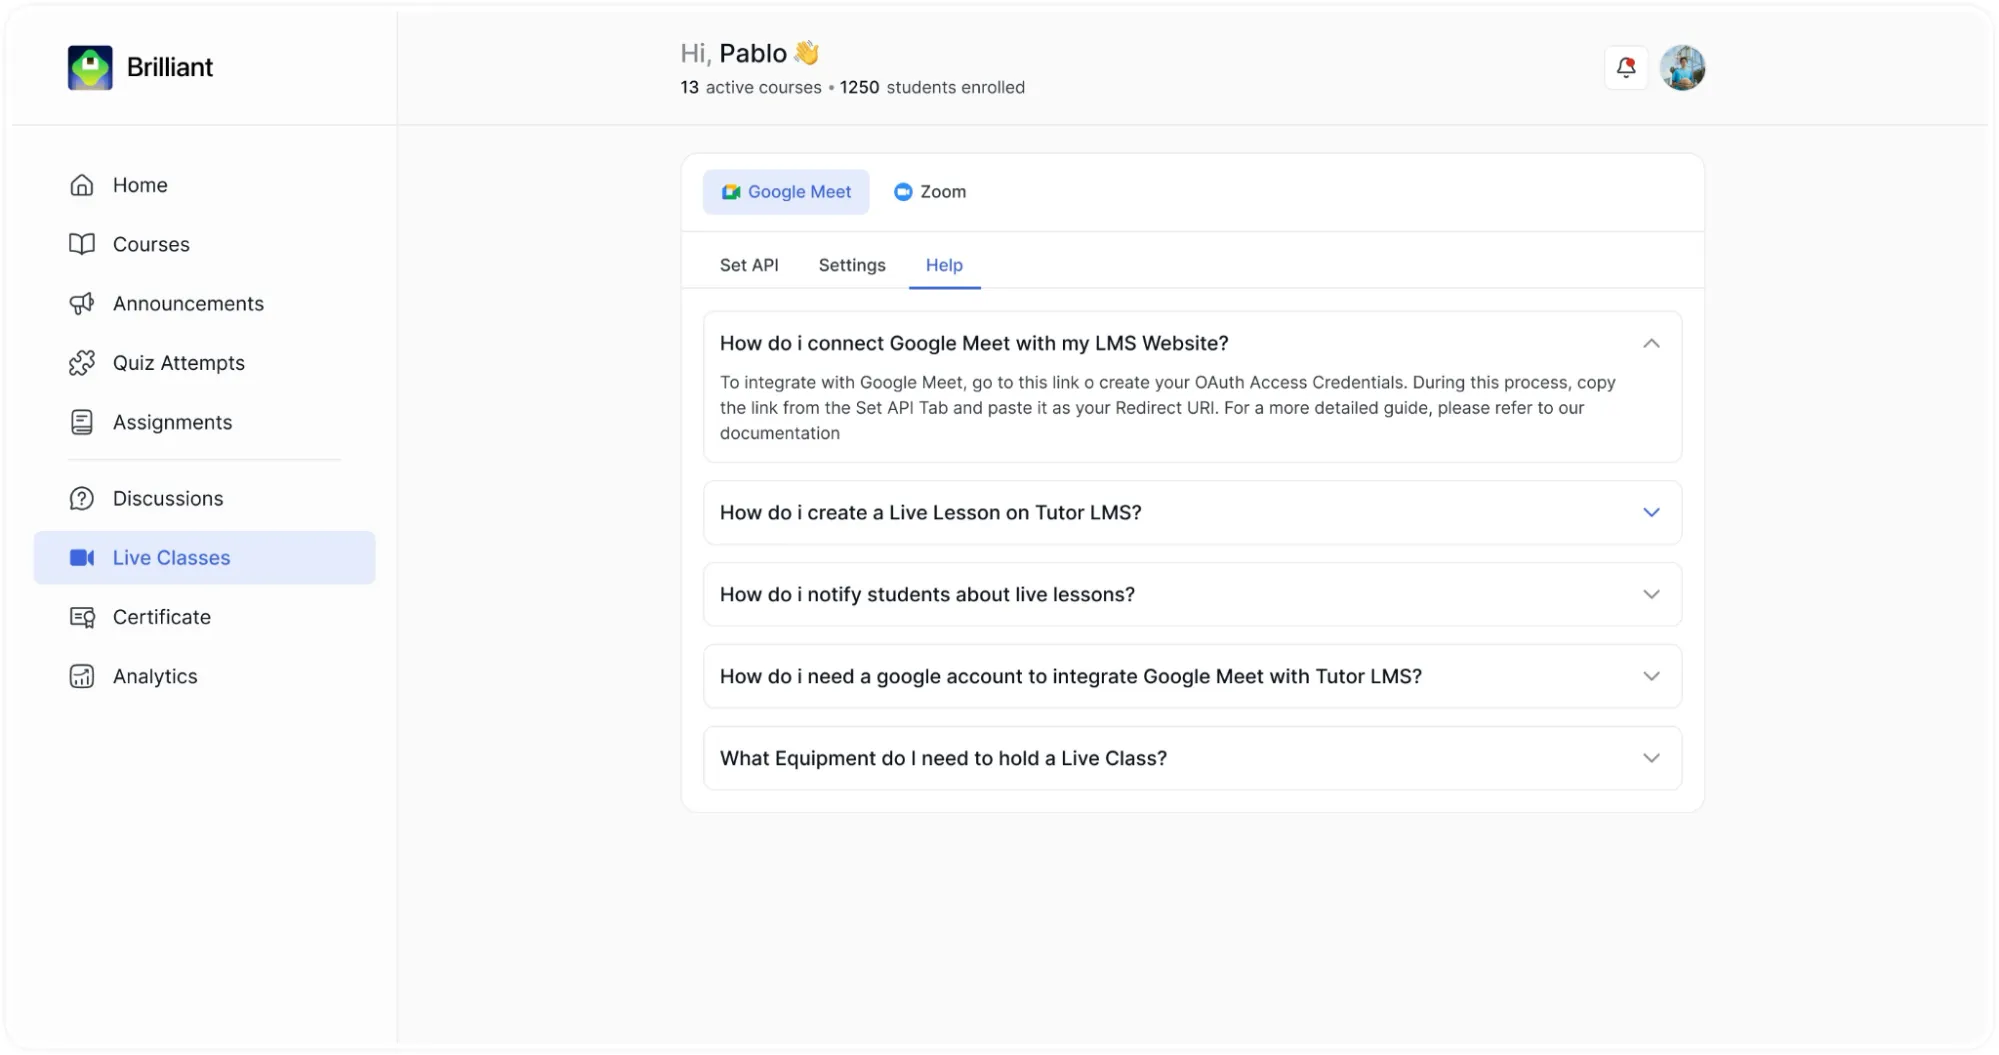
You can also access platform-specific help directly within the dashboard by opening the Help tab inside the Live Classes section. The Help tab contains a built-in FAQ with answers to the most common setup and usage questions for whichever platform you have selected.
Platform Selection
At the top of the Live Classes page, two platform buttons are displayed side by side: Google Meet and Zoom. Clicking either button switches the entire page to show settings, sessions, and controls for that platform. The currently active platform is visually highlighted with a filled background, making it clear which one you are working with at any given time. Both platforms are managed independently; sessions created under Google Meet are separate from sessions created under Zoom.
Zoom Integration
To get Zoom working smoothly in Tutor LMS you’ll need:
- An active Zoom account (free or paid)
- A Server-to-Server OAuth app created in the Zoom App Marketplace — your admin may already have provided the credentials, or you can create your own
Note: Because each instructor manages their own live classes, the admin’s Zoom credentials cannot be shared across instructor accounts. Every instructor needs to connect their own Zoom API credentials.
Step 1: Connect Your Zoom Account from the Instructor Dashboard
- Log in to the frontend instructor dashboard.
- In the left sidebar, click Live Classes > Zoom.
- Select the Set API tab.
- Enter your Account ID, Client ID, and Client Secret in the corresponding fields.
- Click Save & Check Connection.
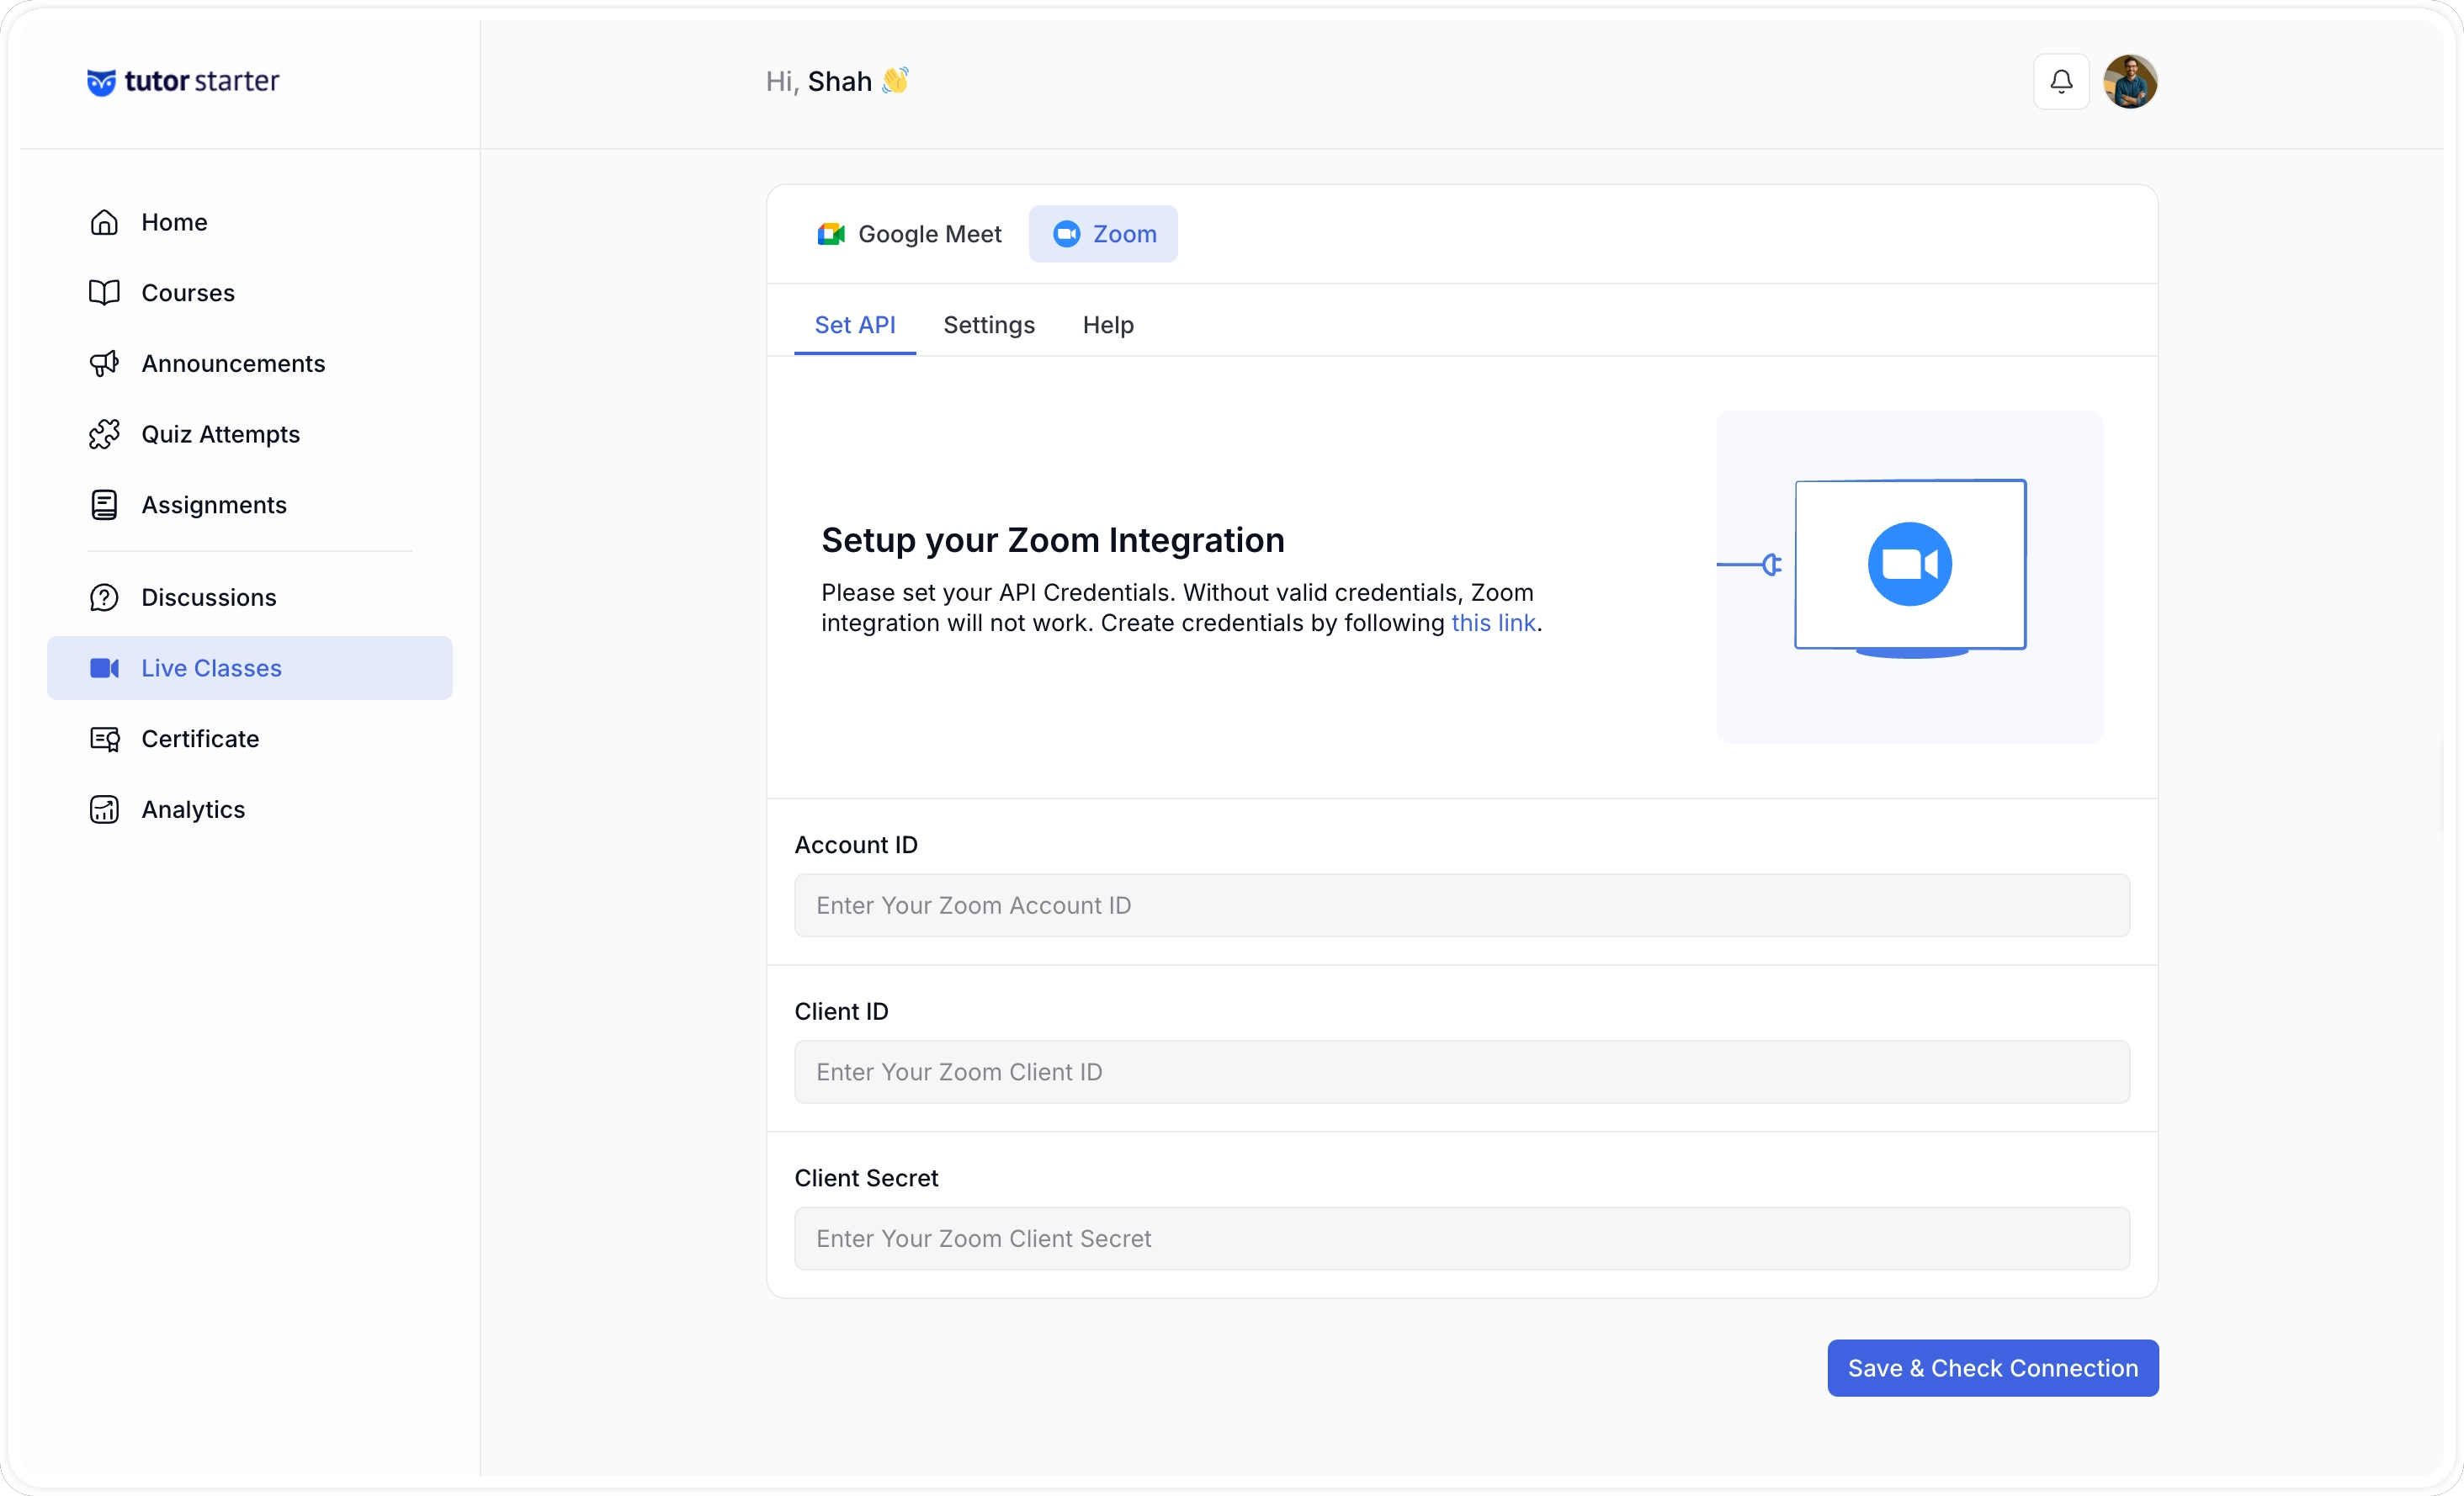
If the credentials are valid, a success confirmation will appear. If you see an error, double-check that your app is activated in the Zoom Marketplace and that the scopes have been saved correctly.
Note: If you consistently get a connection error even with correct credentials, go to WP Admin > Settings > Permalinks and click Save Changes without changing anything. This refreshes the permalink structure and often resolves the issue.
Step 2: Configure Default Meeting Settings (Optional)
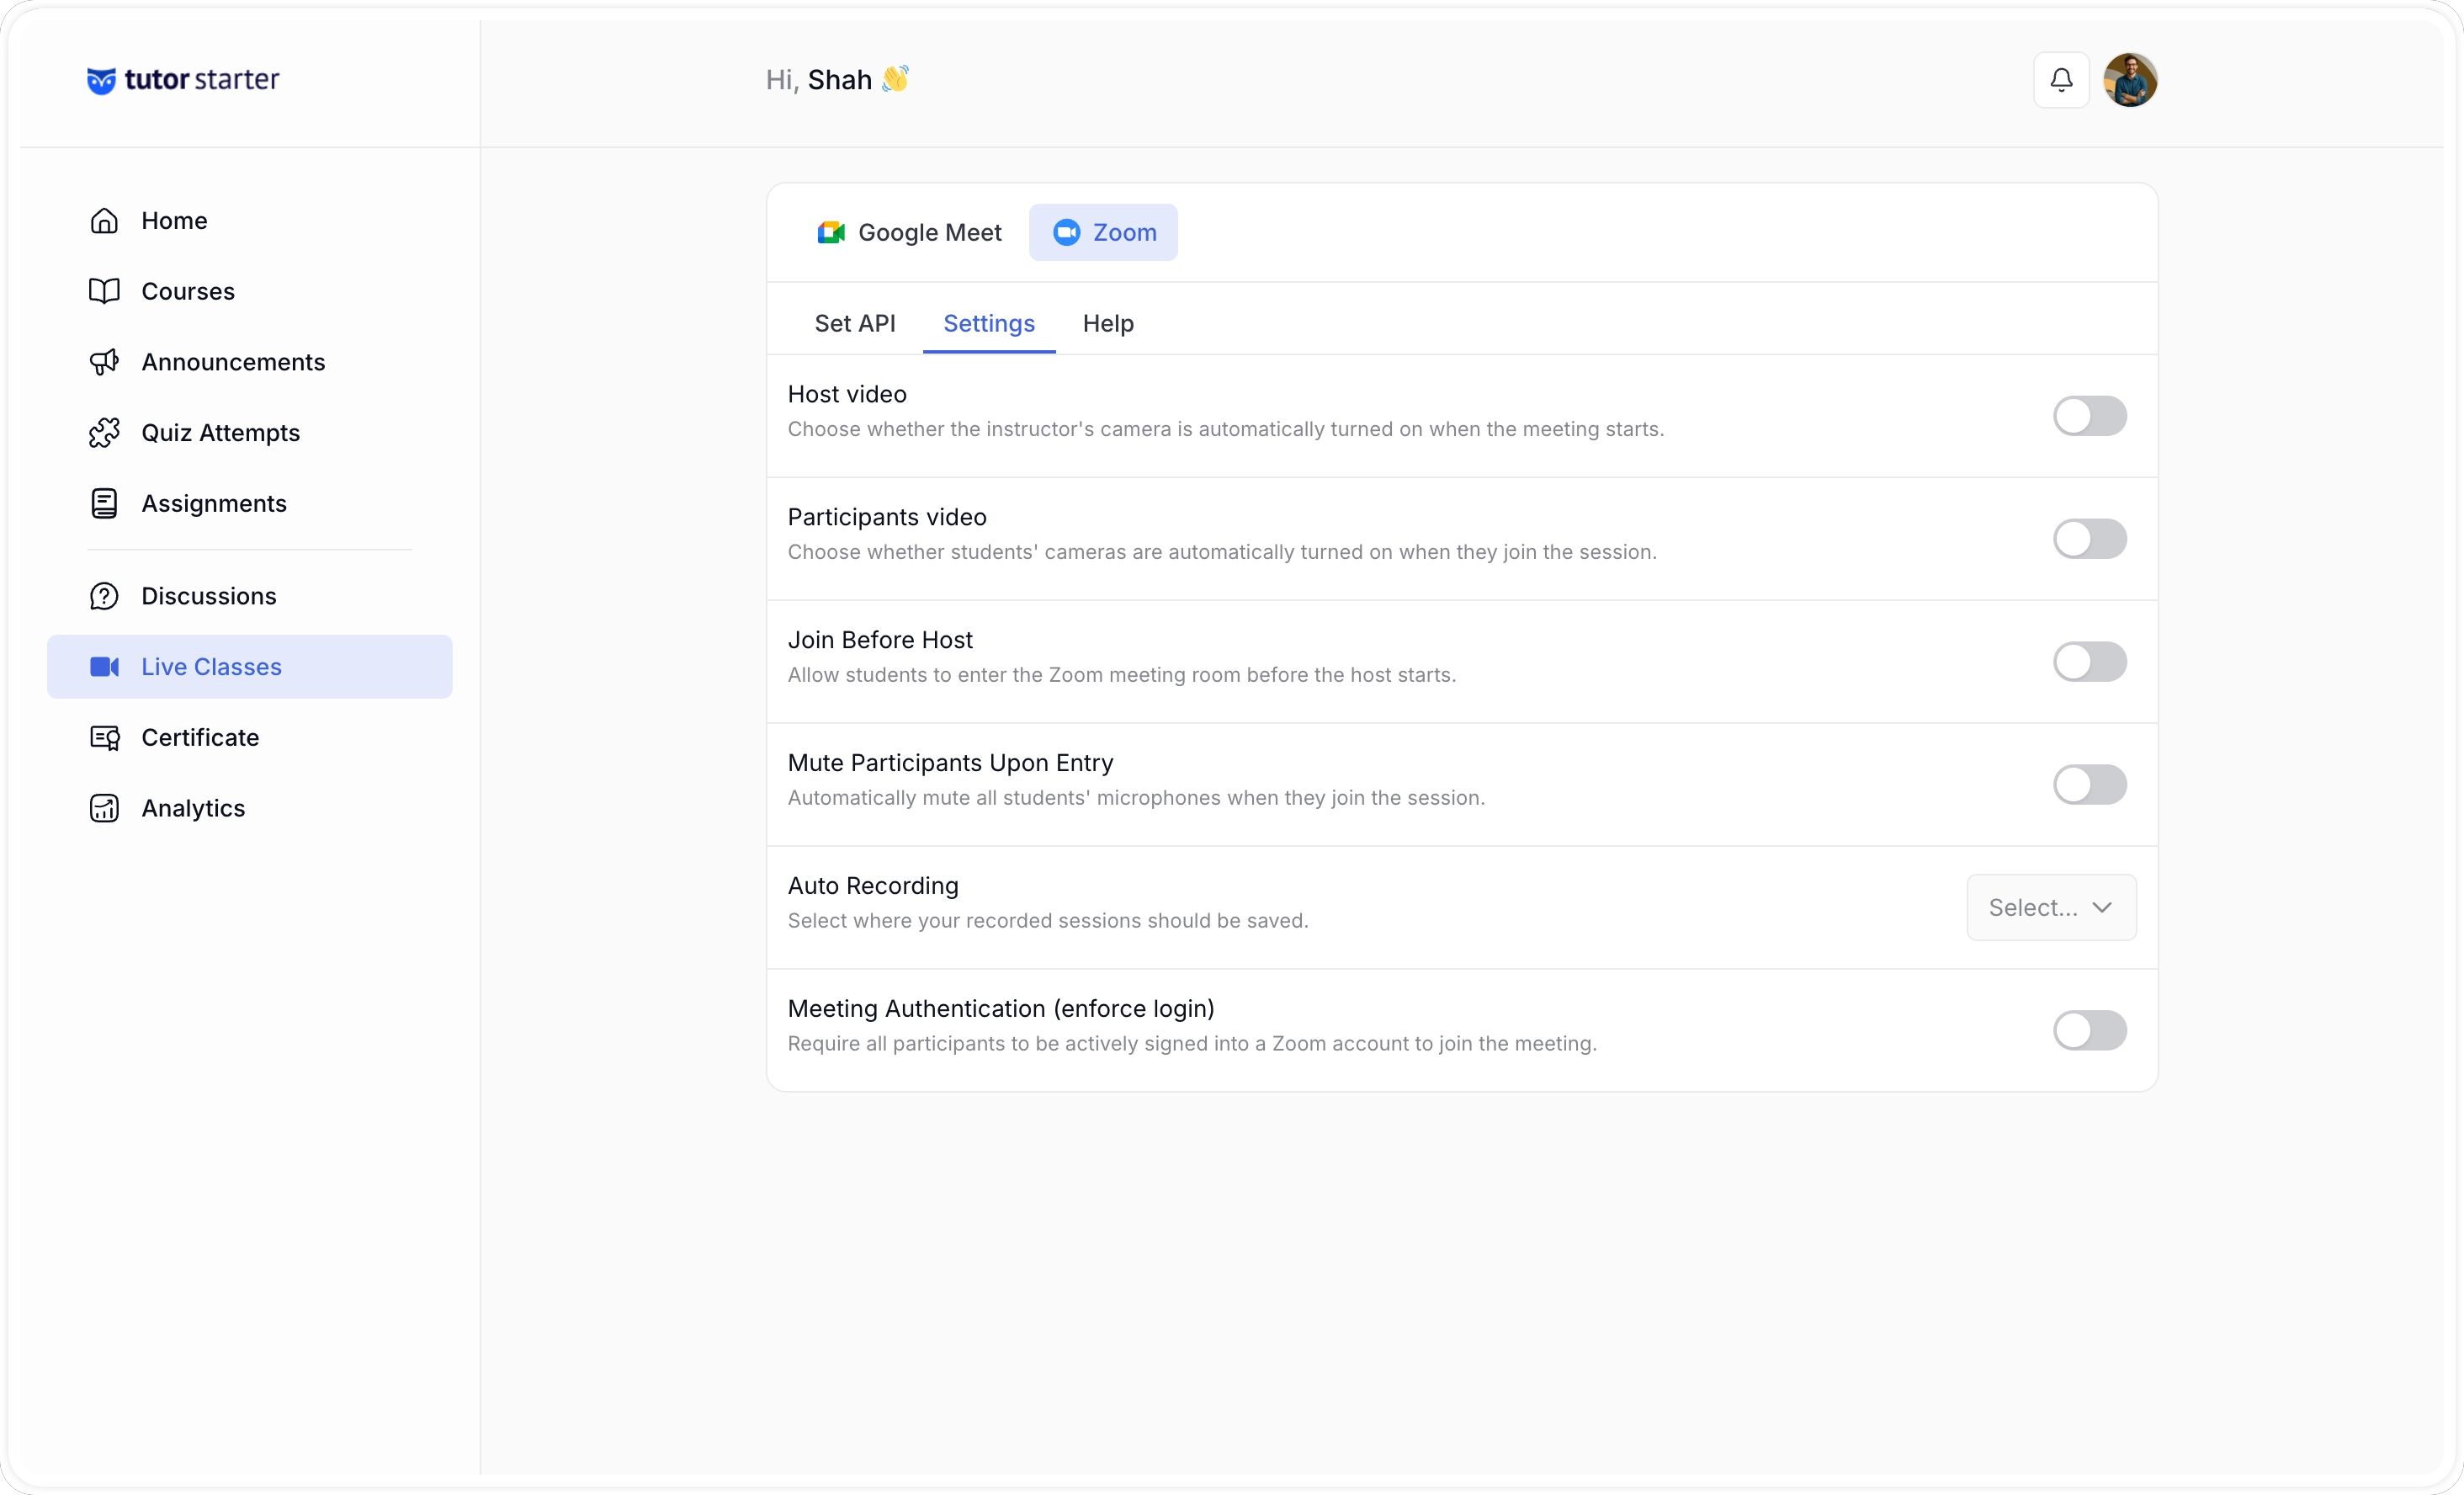
From the Settings tab in the Zoom section of your dashboard, you can configure default behavior for all your meetings:
- Host Video: Starts your video automatically when you join.
- Participants Video: Starts students’ video automatically when they join.
- Join Before Host: Allows students to enter the meeting room before you do. Only applies to scheduled or recurring meetings.
- Mute Participants: Mutes all participants when they enter the meeting.
- Recording Setting: Controls what gets recorded and where. Options are No Recording, Local Drive (saved to the host’s computer), or Zoom Cloud (requires a paid Zoom plan with cloud storage).
- Enforce Login: Requires participants to be logged in to Zoom to join. Useful if you want to verify attendance.
These are site-wide defaults. You can override recording settings per meeting when you create one.
Step 3: Create a Zoom Meeting from the Course Builder
- From the dashboard, navigate to your course and open it in the course builder.
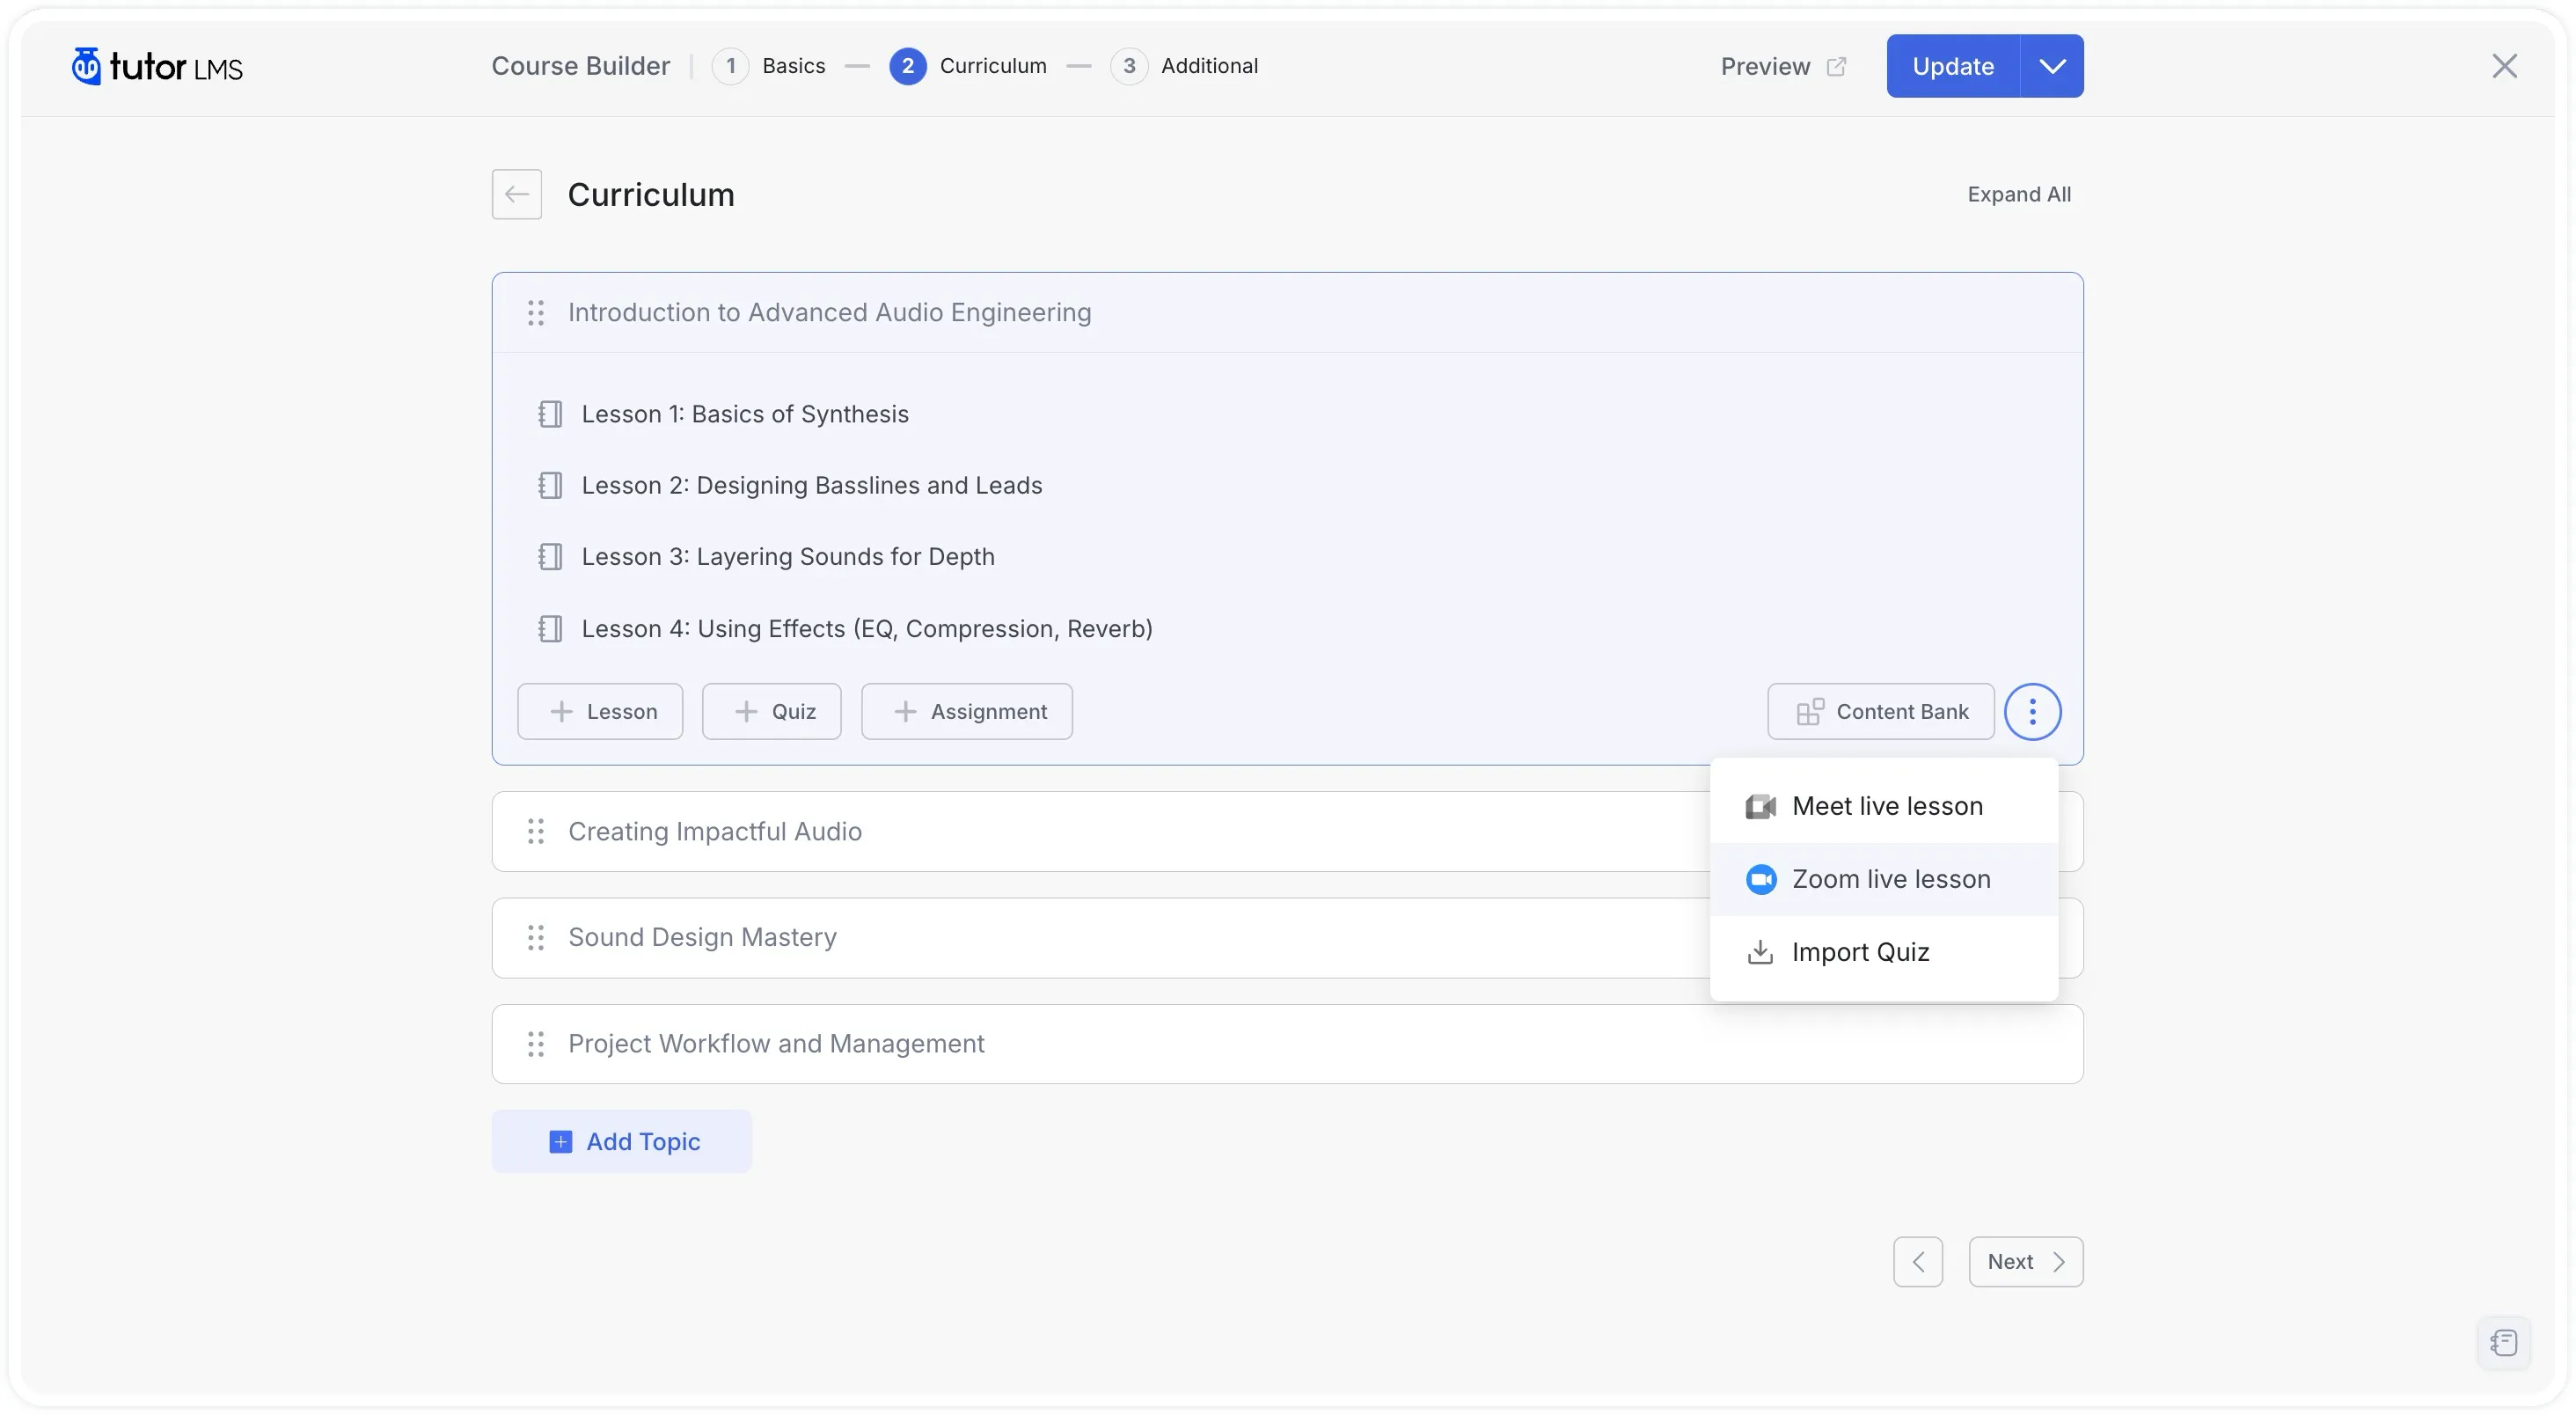
- In the curriculum area, locate the topic where you want to add the live session.
- Click the option menu and select the Zoom live Lesson option. A meeting creation form will appear.
- Fill in the meeting details:
- Meeting Name: Give the session a clear title. For example: “Week 3 Live Q&A.”
- Meeting Summary: Briefly describe what the session will cover. Students will see this in the lesson view.
- Meeting Date: Select the date and time the session will start.
- Meeting Duration: Set how long the session will run. If you’re on a free Zoom account, meetings are capped at 40 minutes.
- Time Zone: Select the timezone that applies to the start time. Students in other timezones will see the converted time.
- Auto Recording: Choose Local to save the recording to your computer, Cloud to save it to Zoom’s cloud storage, or No Recording to skip recording entirely. Note that students joining through a browser can’t record; only the Zoom desktop app can.
- Meeting Password: Set a password to restrict access. Only enrolled students with the correct credentials will be able to join.
- Meeting Host: This displays your name as the host. It can’t be changed from this form.
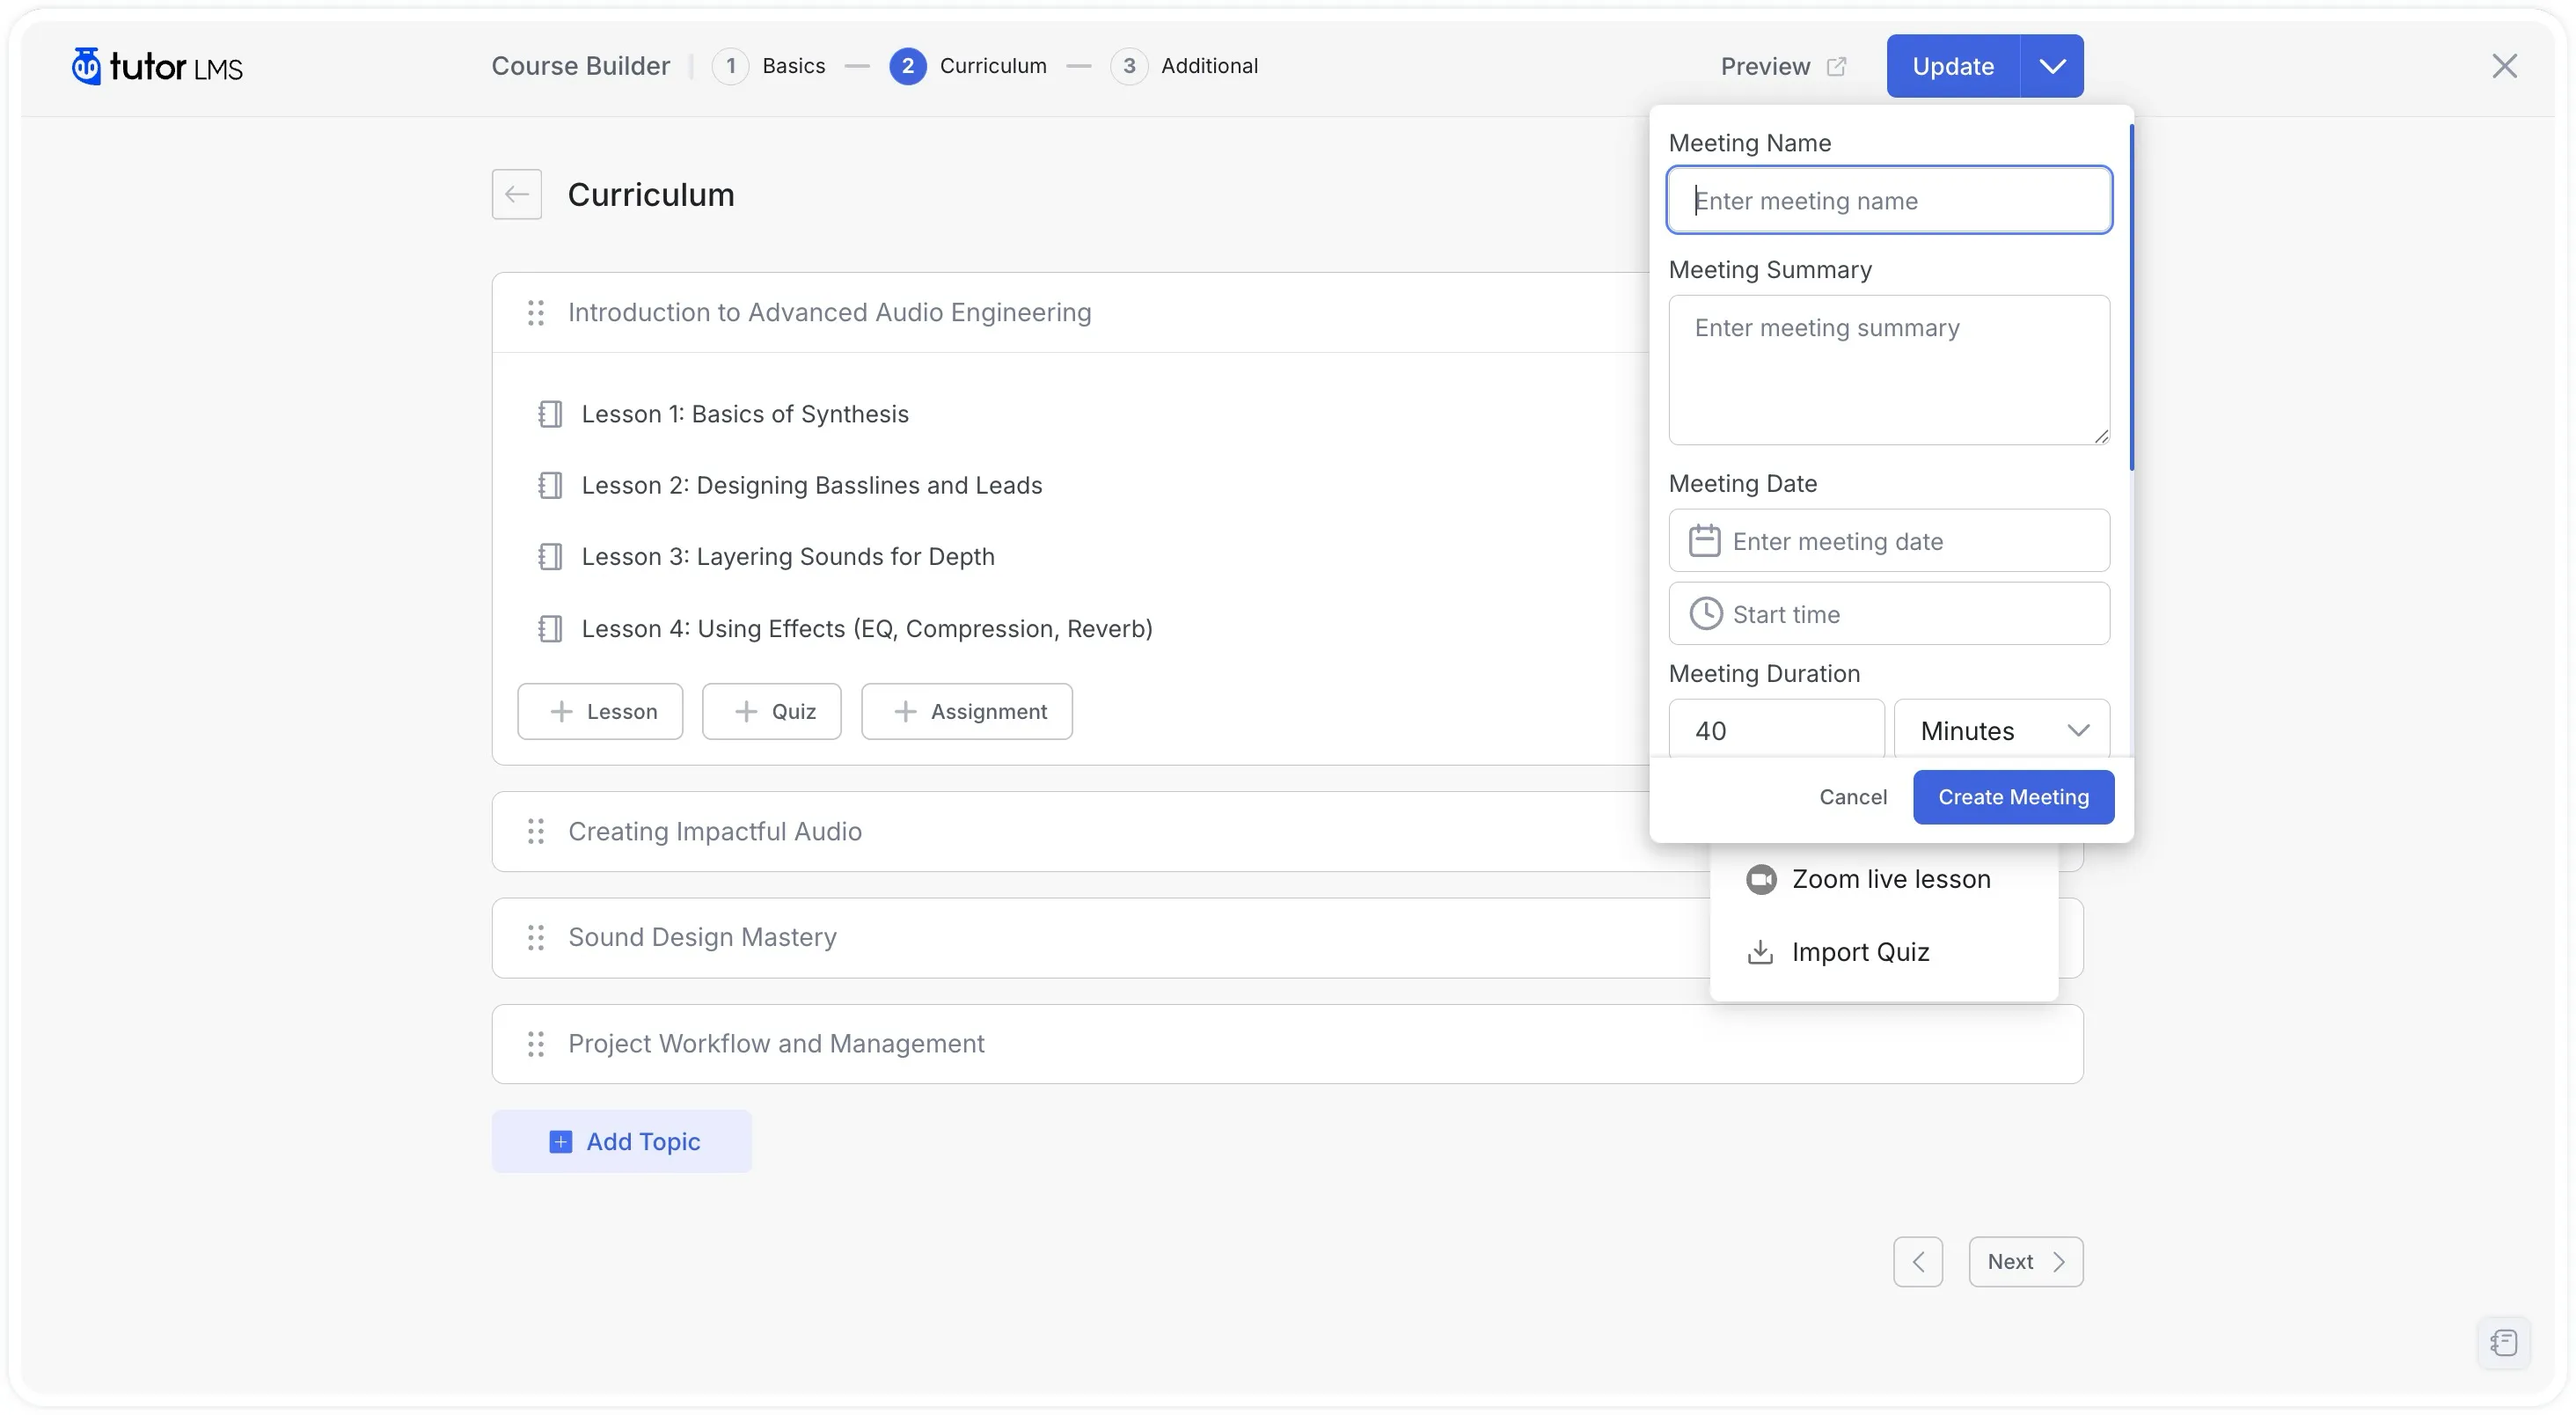
- Click Create Meeting.
The meeting will appear under All Meetings in the Zoom section of your dashboard, and students will see it on the lesson page with the meeting time, summary, and a Join button that becomes active at the scheduled time.
Step 4: Manage Your Meetings
From the Zoom section of your dashboard:
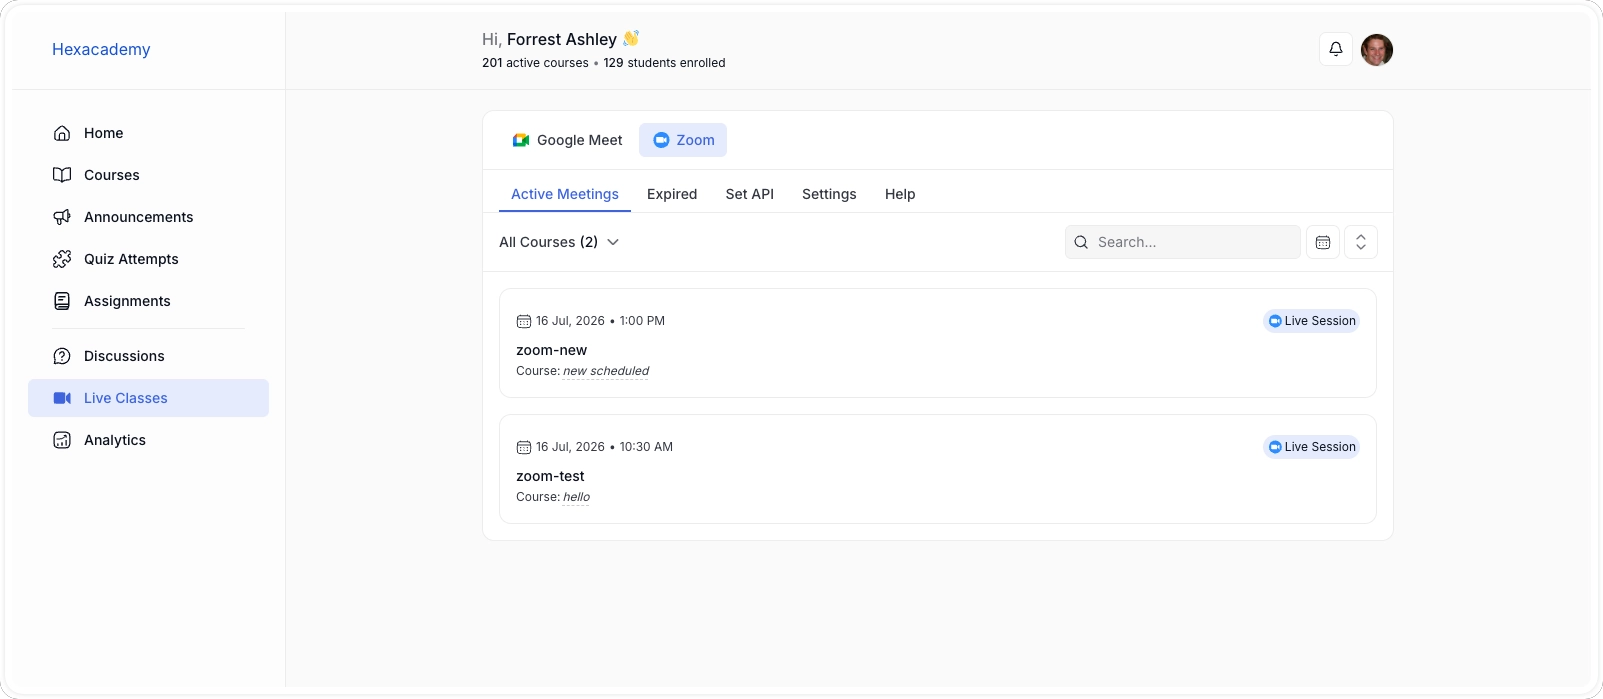
- All Meetings: Lists every upcoming Zoom session across your courses. You can search, filter by course or date, edit meeting details, or delete a meeting from here.
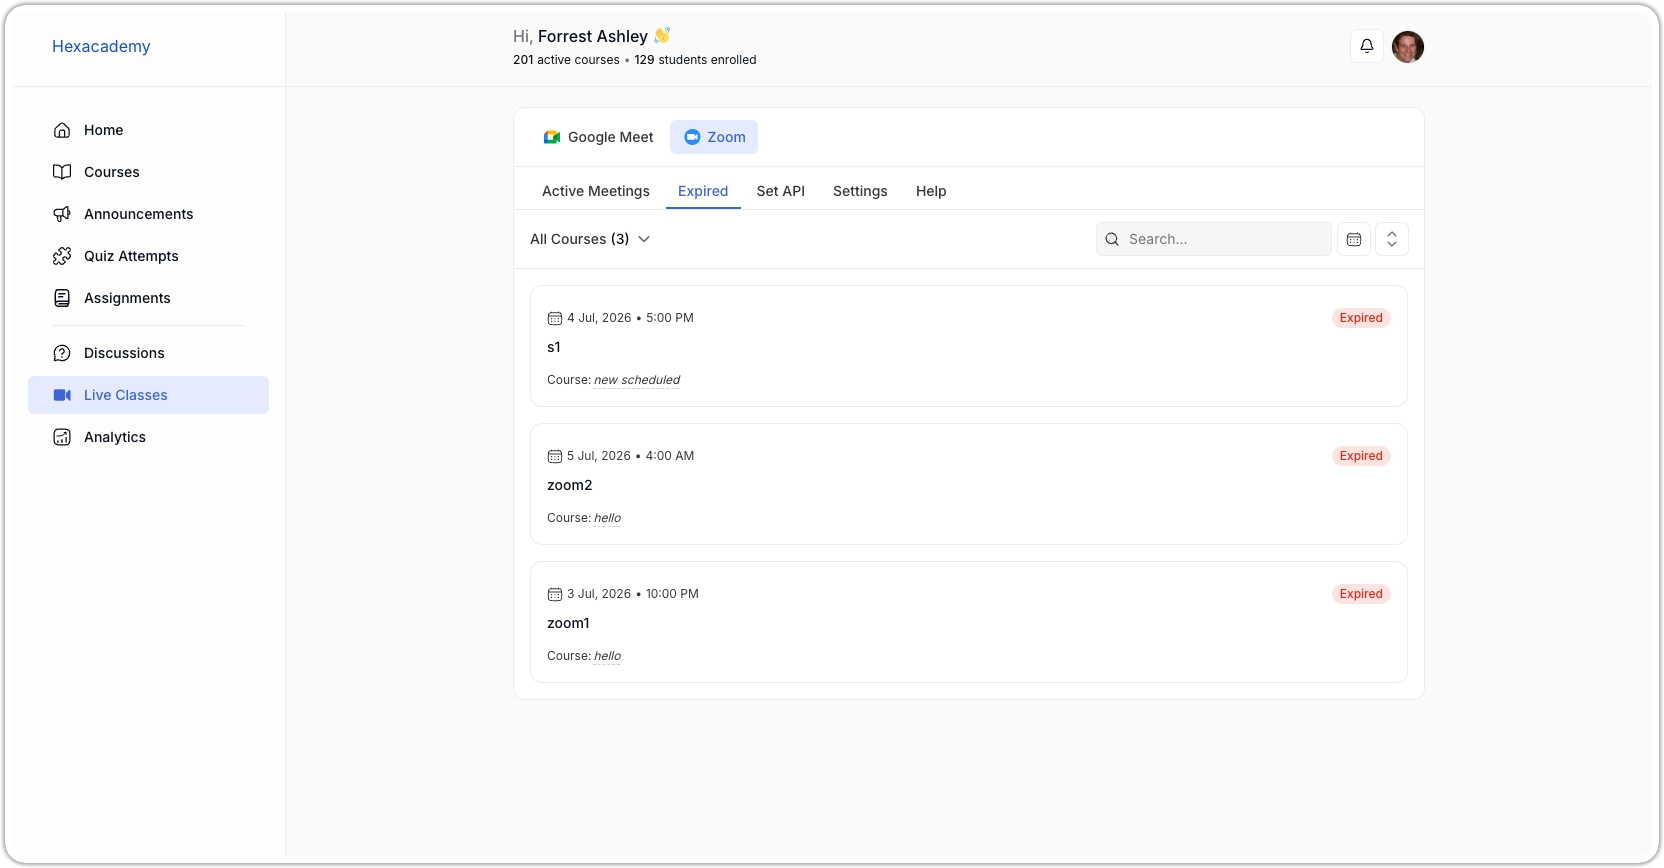
- Expired Meetings: Shows sessions that have already ended. If you need to reschedule one, click the edit icon and update the date and time. The meeting will move back to the All Meetings tab automatically.
Google Meet Integration
To get Google Meet working with Tutor LMS you’ll need:
- A Google account
- A Google Cloud project with the Google Calendar API enabled and OAuth credentials downloaded as a JSON file
Step 1: Connect Your Google Account from the Instructor Dashboard
- Log in to the frontend instructor dashboard.
- In the left sidebar, click Live Classes > Google Meet.
- Select the Set API tab.
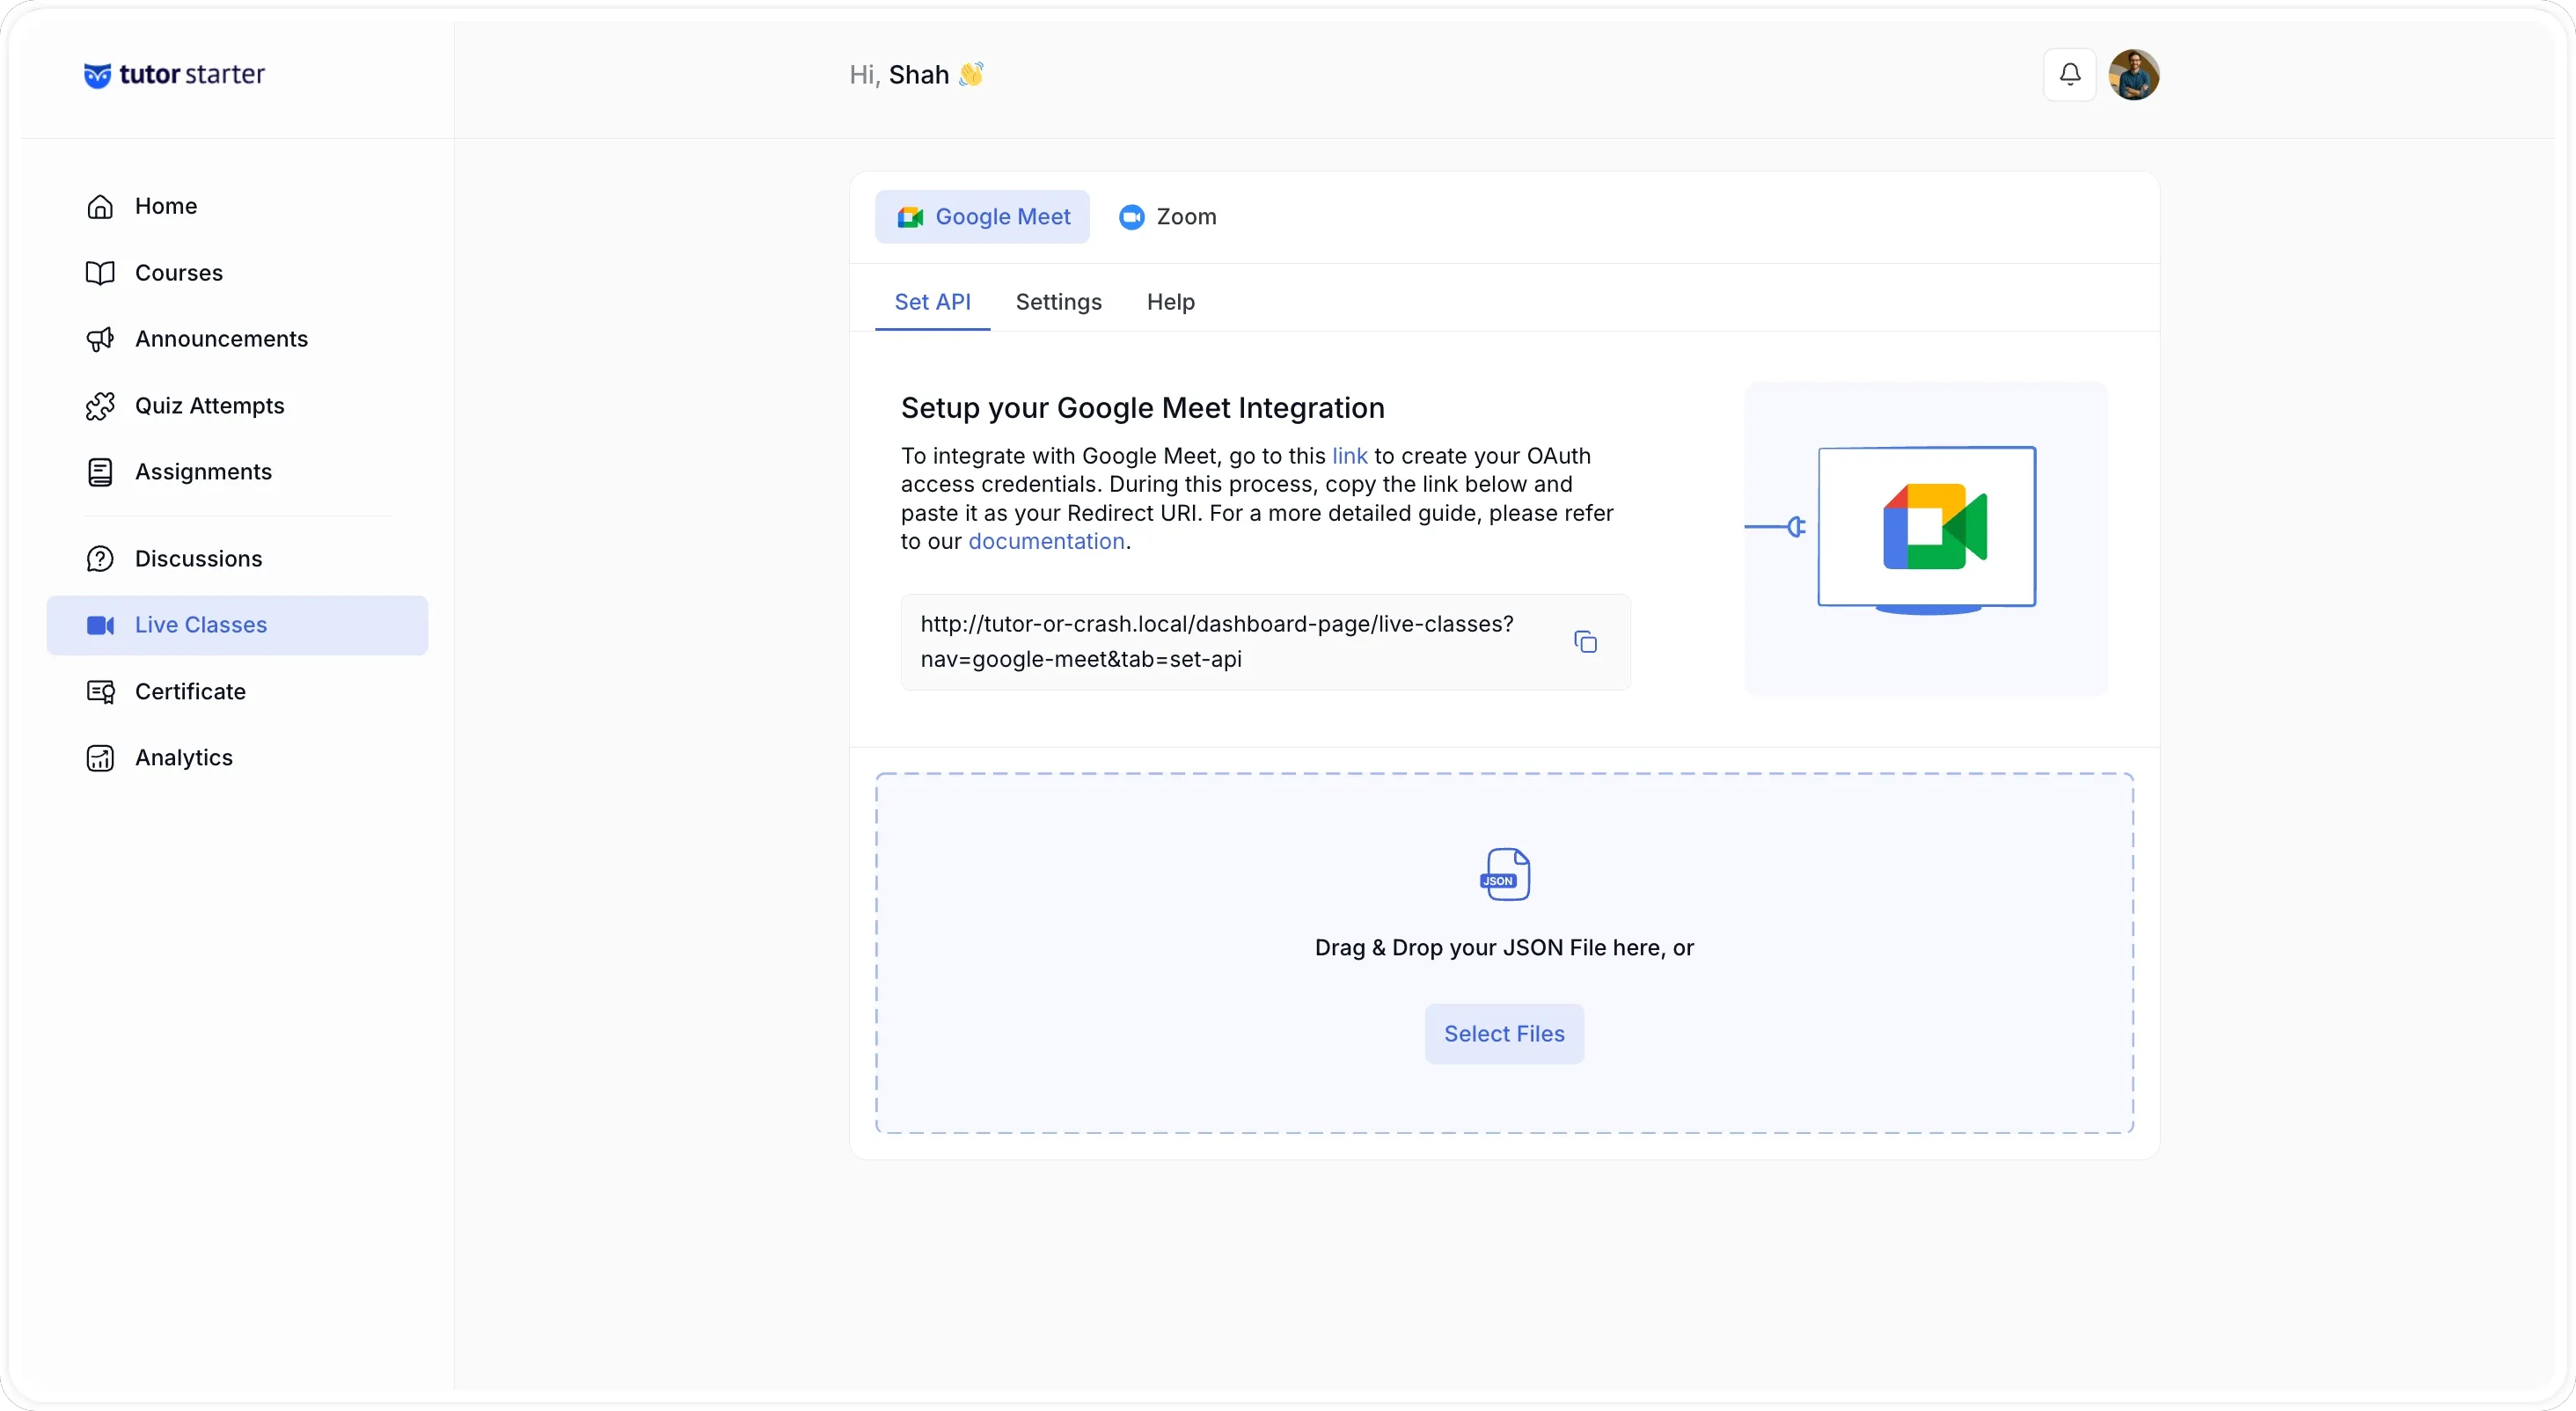
- Click Choose a file and upload the JSON credentials file.
- Once the file uploads successfully, click Go To Google’s Consent Screen.
- A Google authentication window will open. Select the Google account you want to use for hosting meetings.
- Review the permissions and click Allow (or Select All to grant all required permissions).
You’ll be redirected back to your dashboard with a confirmation that your Google account is now connected to Tutor LMS.
Note: If you ever need to switch to a different Google account or revoke access, click the Reset Credentials button on the Set API tab. This invalidates the current connection and lets you start the process again with new credentials.
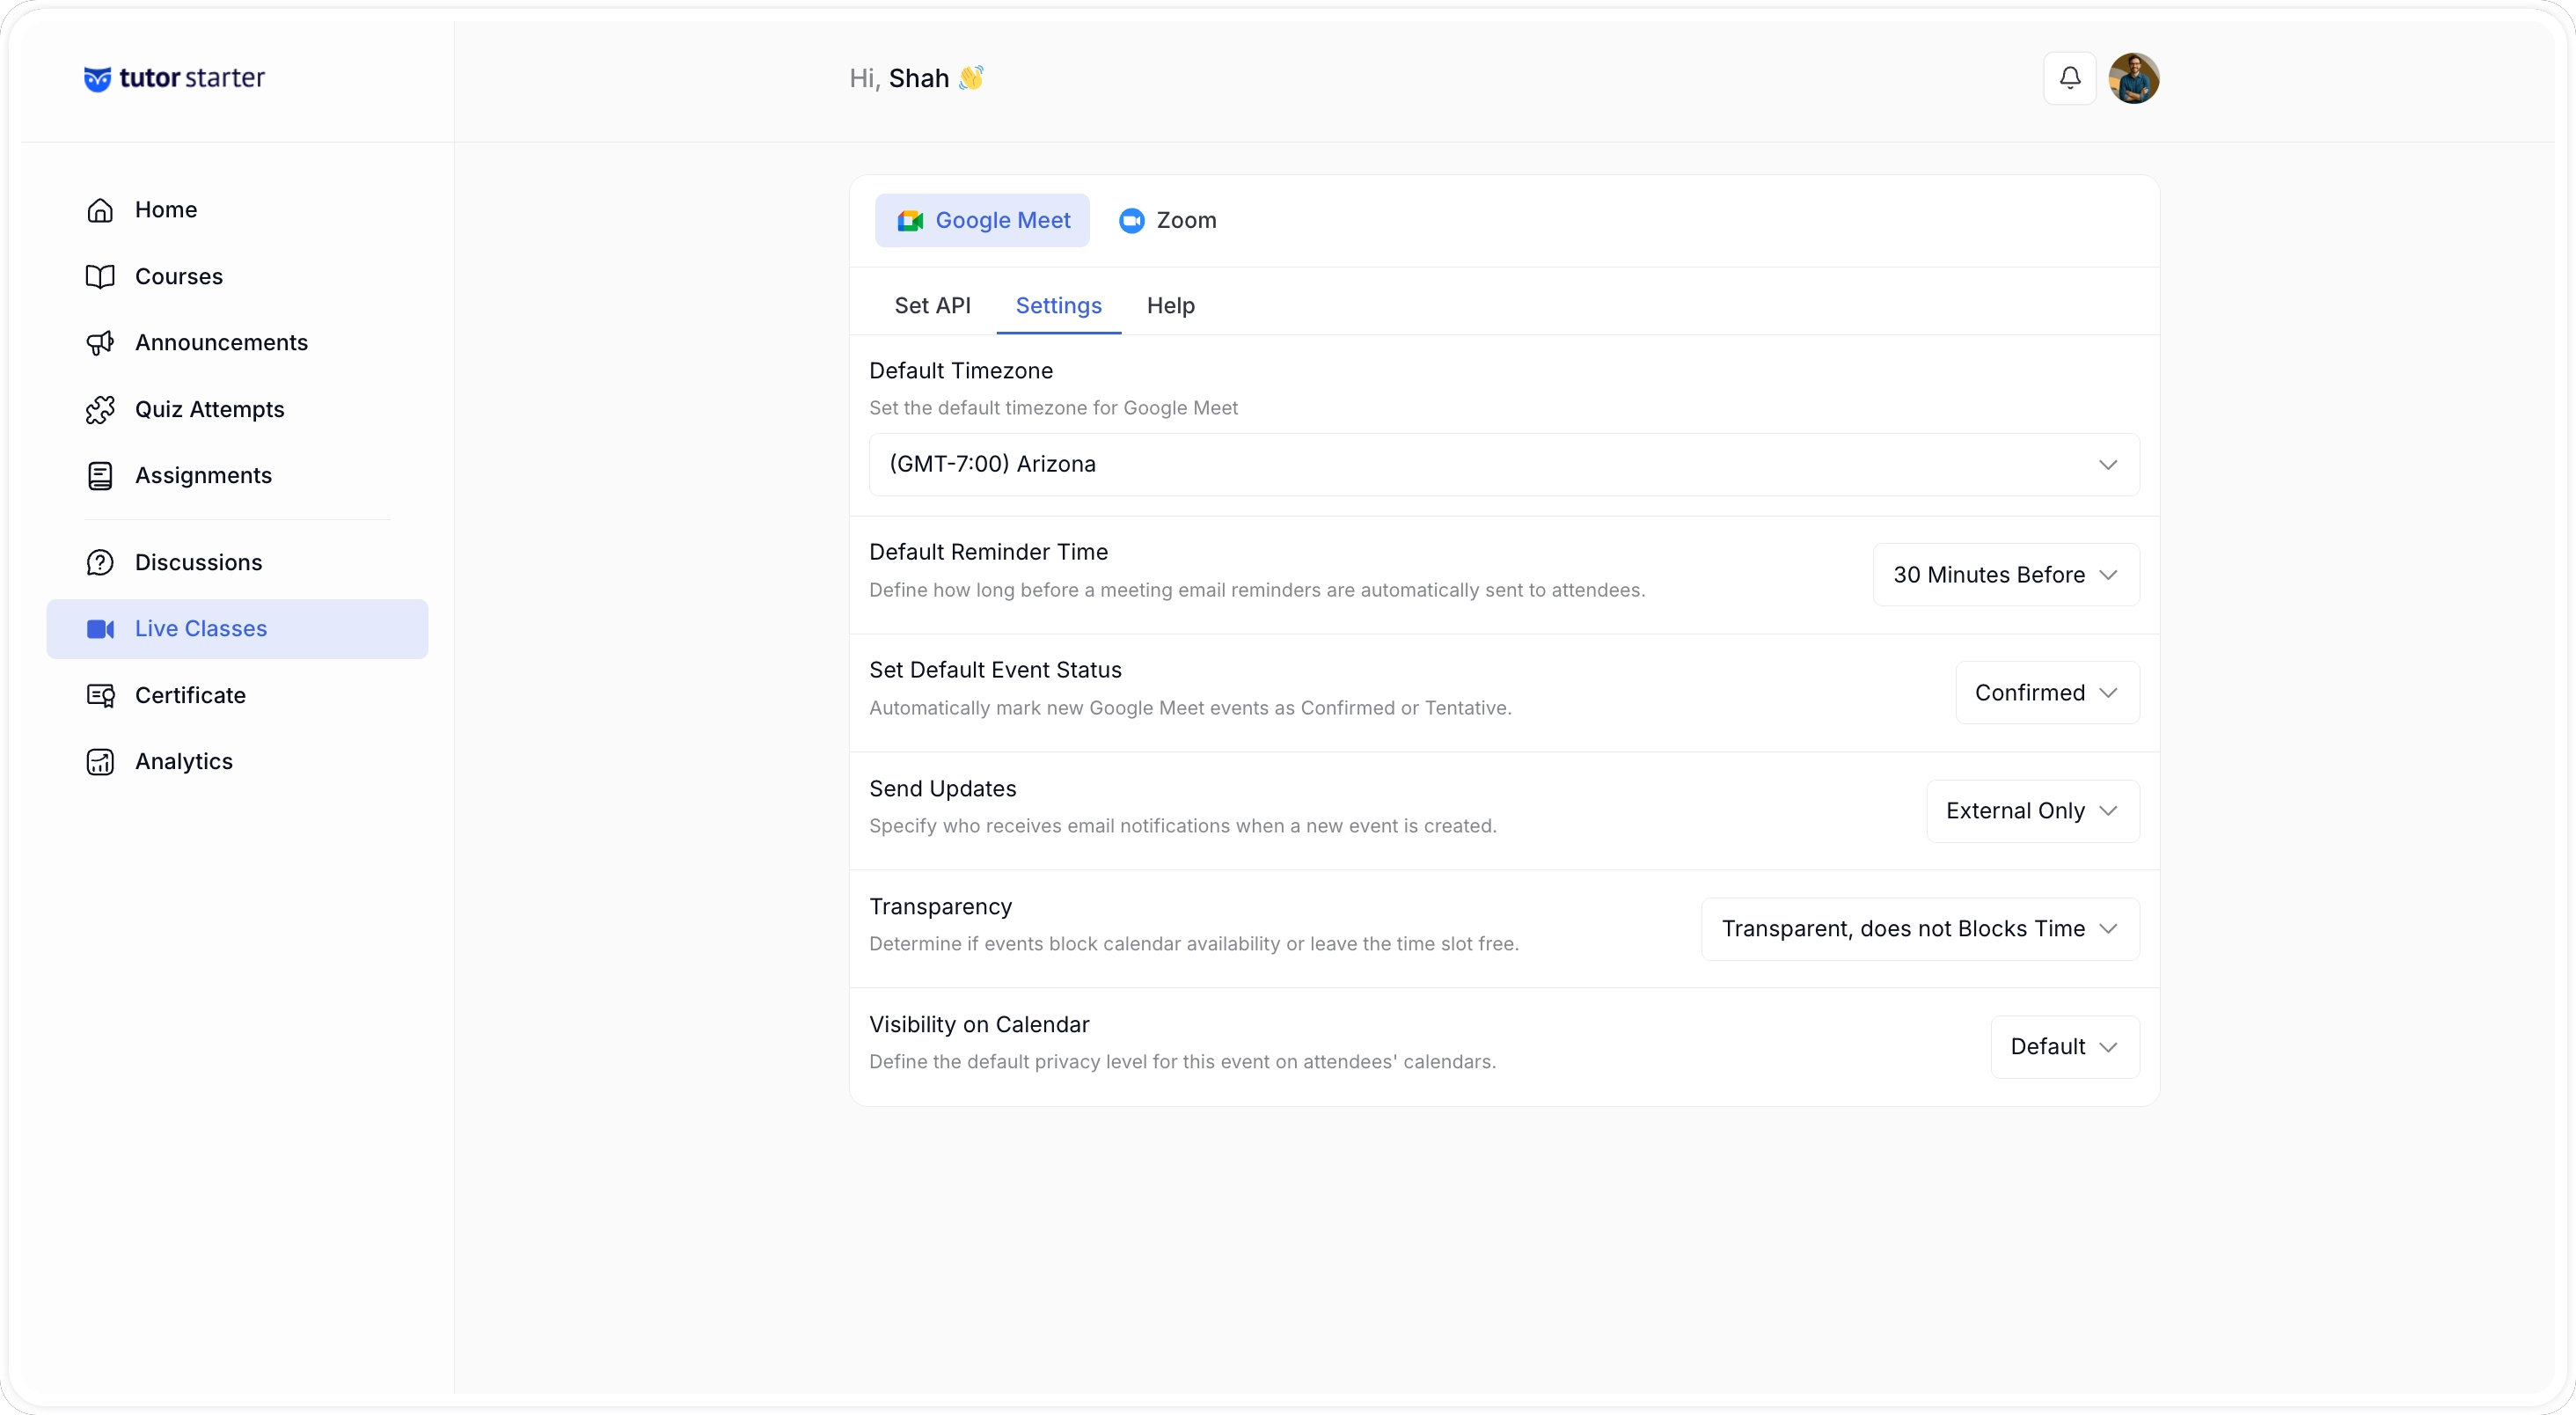
Step 2: Configure Default Meeting Settings (Optional)
From the Settings tab in the Google Meet section, you can set defaults that apply to all new meetings:
- Default Timezone: Sets the timezone used when creating a new meeting. You can override this per meeting.
- Default Reminder Time: Sets how far in advance enrolled students receive an email notification before the session.
- Default Event Status: Sets the default status for the calendar event (confirmed or tentative).
- Send Updates: Controls when notification emails go out. Some notifications may still send regardless of this setting.
- Transparency: Determines whether the event blocks time on participants’ Google Calendars.
- Visibility: Sets whether the event is visible to all calendar users or only those who are invited.
Step 3: Create a Google Meet Session from the Course Builder
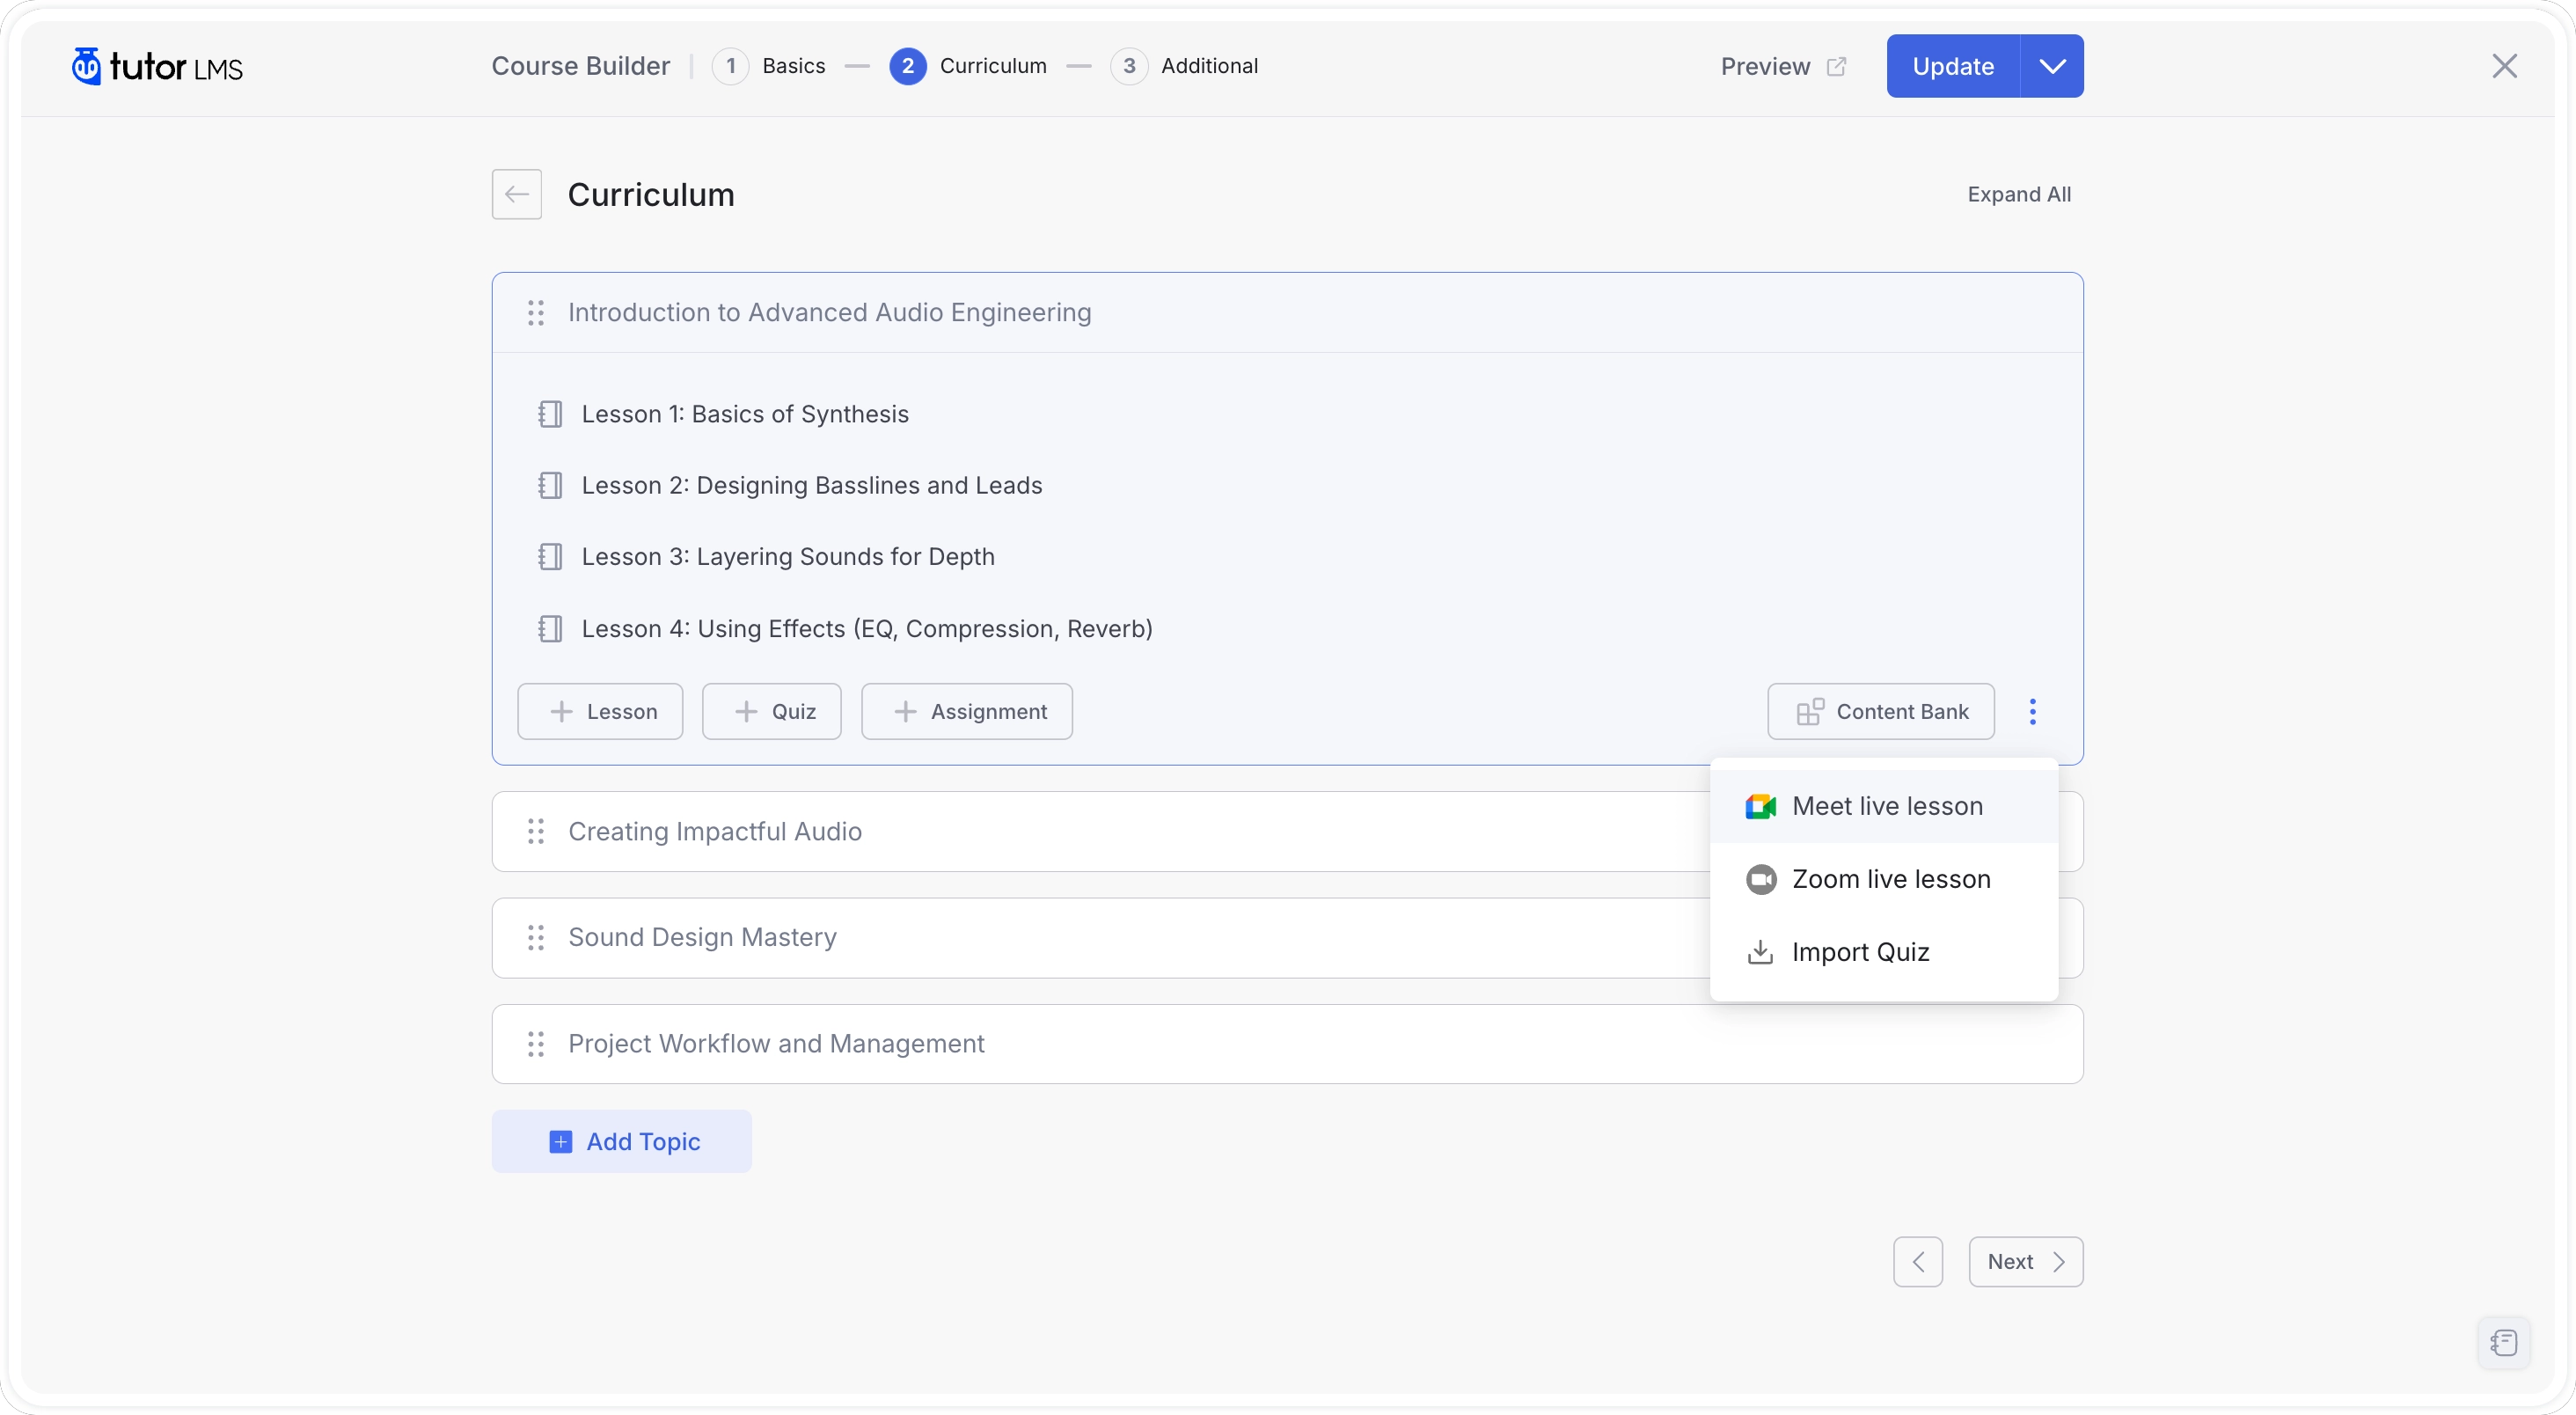
- From the dashboard, navigate to your course and open it in the course builder.
- In the curriculum area, locate the topic where you want to add the live session.
- Click the option menu and select the Meet live Lesson option. A meeting creation form will appear.
- Fill in the session details:
- Meeting Title: The name of the session as students will see it.
- Description: An optional summary of what the session will cover.
- Start Date and Time: When the session begins.
- Duration: How long the session runs. With a free Google account, meetings with more than two participants are limited to 60 minutes.
- Timezone: The timezone that corresponds to your selected start time.
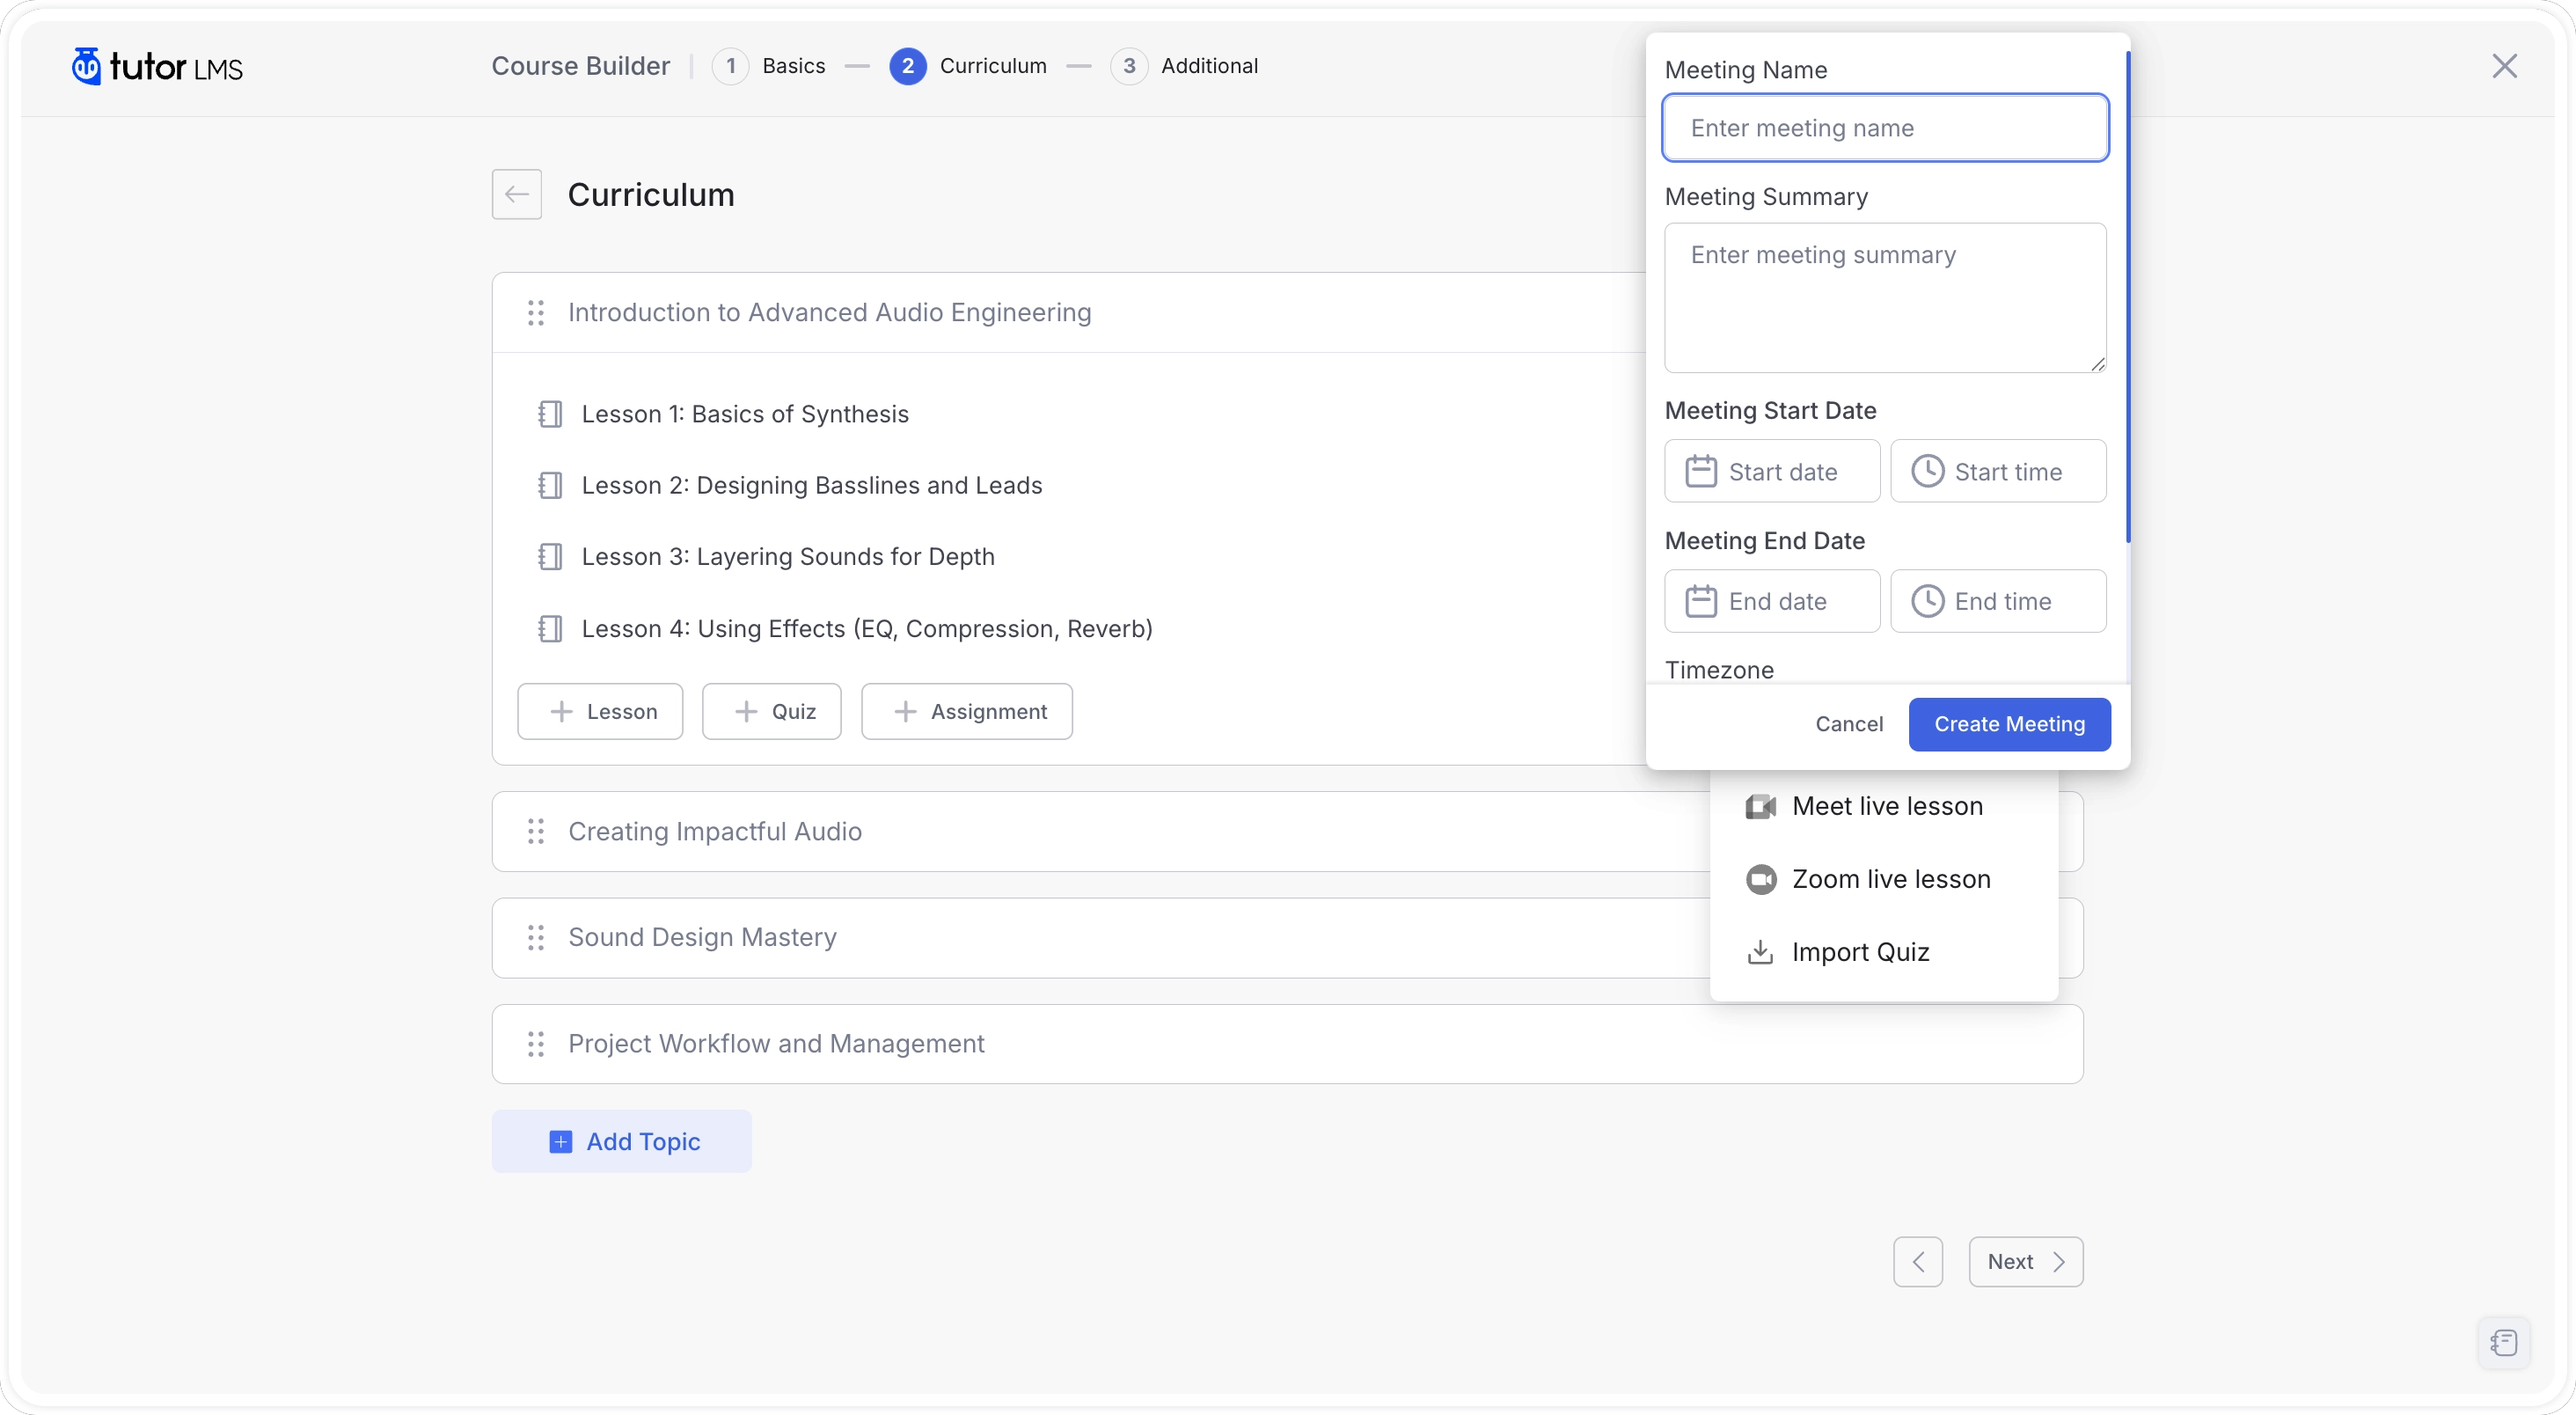
- Click Create Meeting.
The session will be added to the lesson and also appear in your Google Calendar. Students will see the meeting details on the lesson page, including the start time and a Join button that becomes active when the session is live.
Step 4: Manage Your Google Meet Sessions
From the Google Meet section of your dashboard:
- Active Meetings: Lists all scheduled and upcoming Google Meet sessions across your courses. You can edit or delete meetings from here.
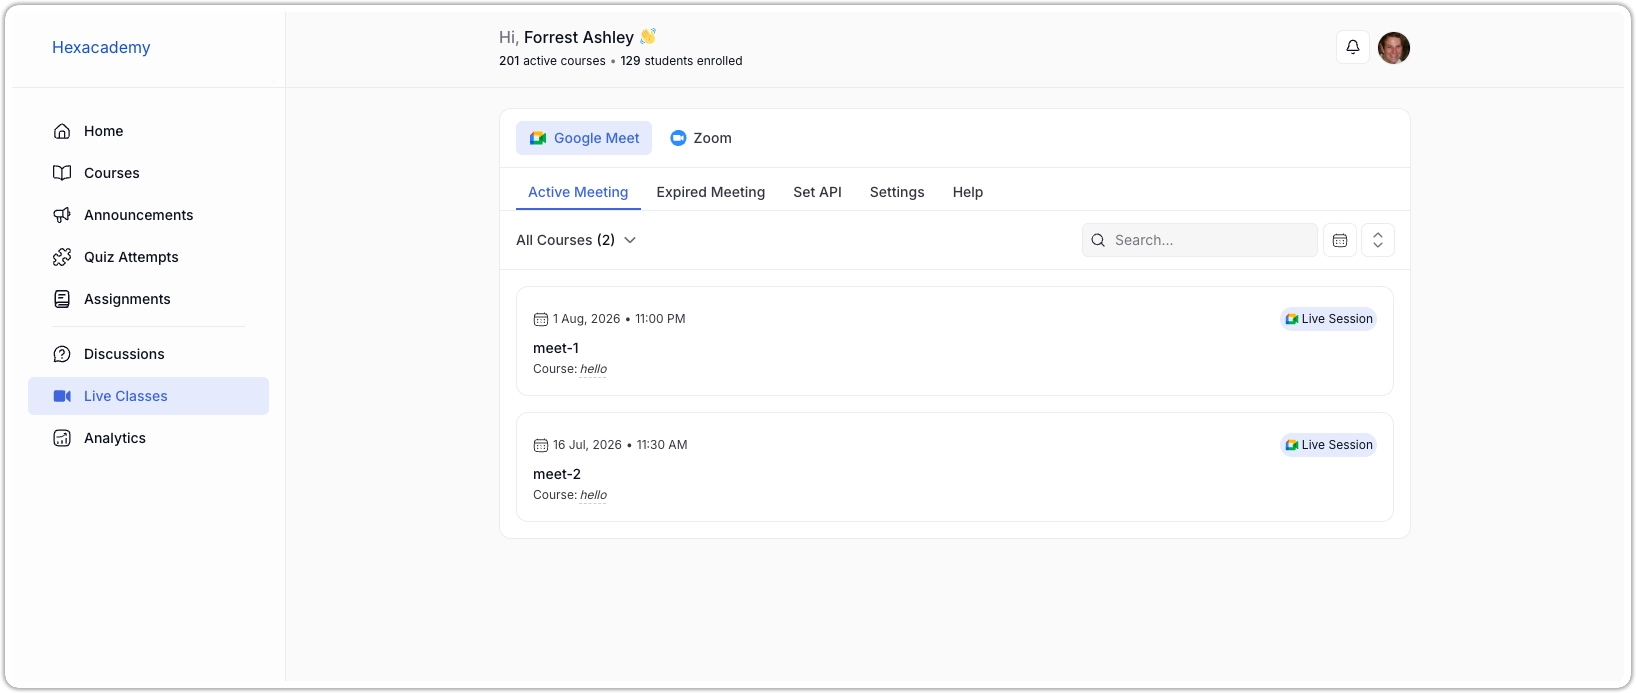
- Expired Meetings: Shows sessions that have already ended. If you need to reschedule one, click the edit icon and update the date and time. The meeting will move back to the All Meetings tab automatically.
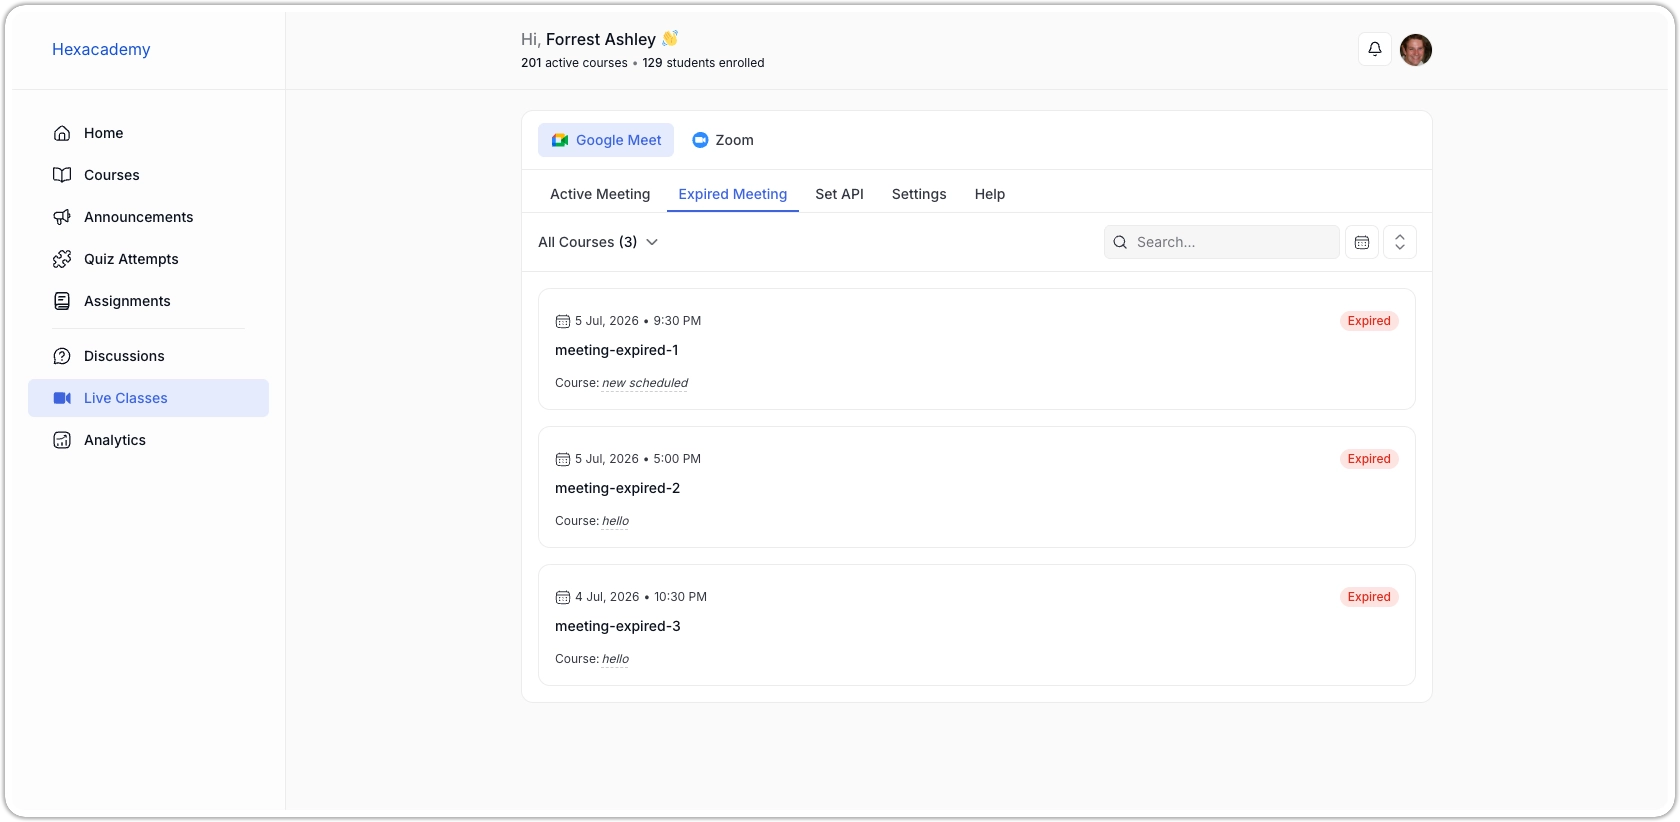
Each meeting you create also syncs to your Google Calendar, so you can manage reminders and invites from there as well.