Zoom Integration
Zoom Integration with Tutor LMS allows instructors and administrators to host live lessons and meetings in order to create a more interactive eLearning experience. To make use of Zoom Integration, you will need these two plugins installed and enabled:
- Tutor LMS v3.9 or later
- Tutor LMS Pro v3.9 or later
Remember that while Zoom (both free and pro) can be integrated with Tutor LMS Pro, the paid version of Zoom does not come included with it. You will have to purchase the pro version of Zoom separately if you want to use Zoom’s pro features.
Create a Zoom Account
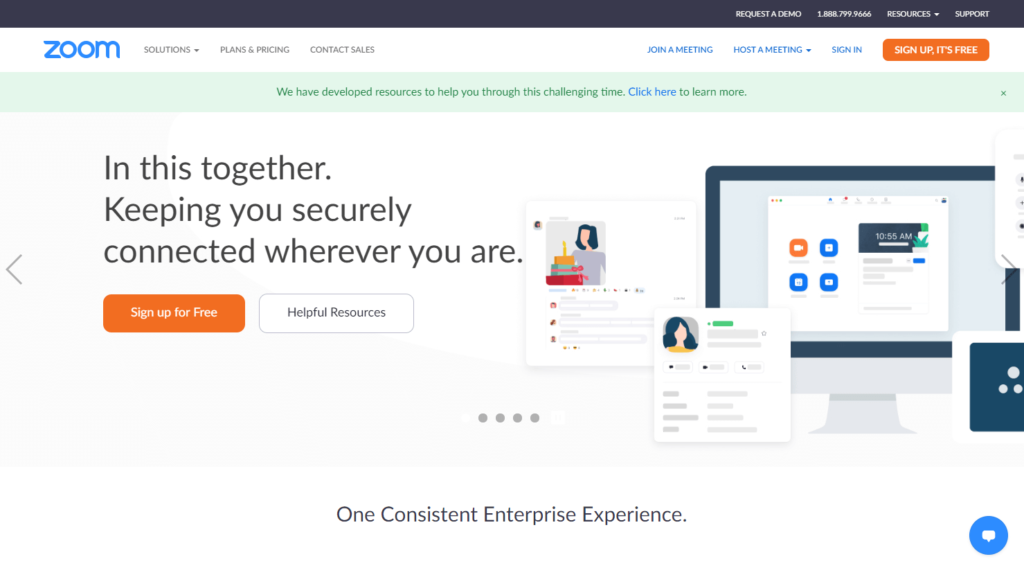
To get started, you need to create a Zoom account first. Visit Zoom’s website and sign up to create an account.
Create a Server-to-Server OAuth App
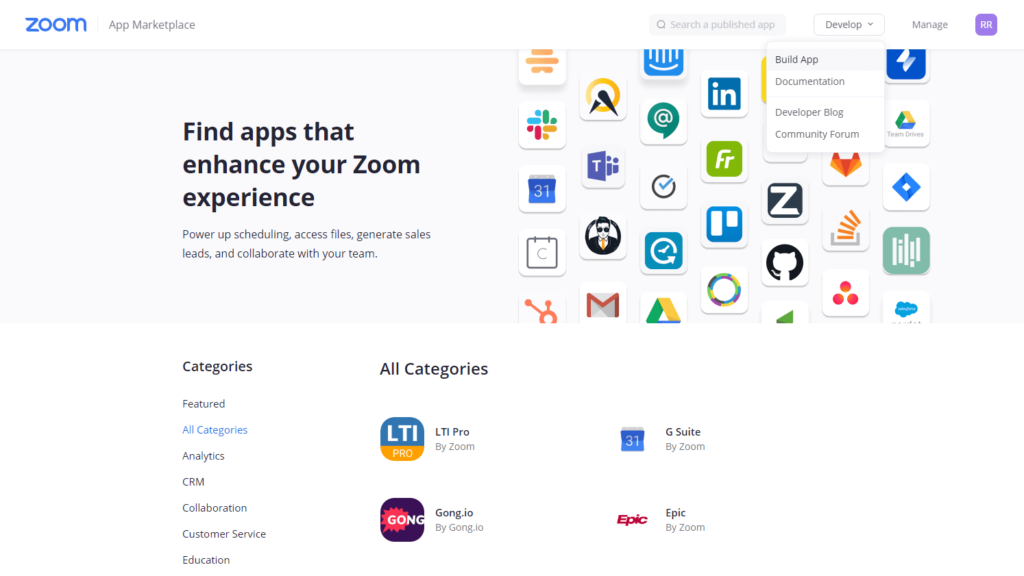
After creating an account, you must create an app that will connect Tutor LMS to Zoom.
Step 1: Go to the Zoom App Marketplace Developer Dashboard (https://marketplace.zoom.us/) and log in with your Zoom account.
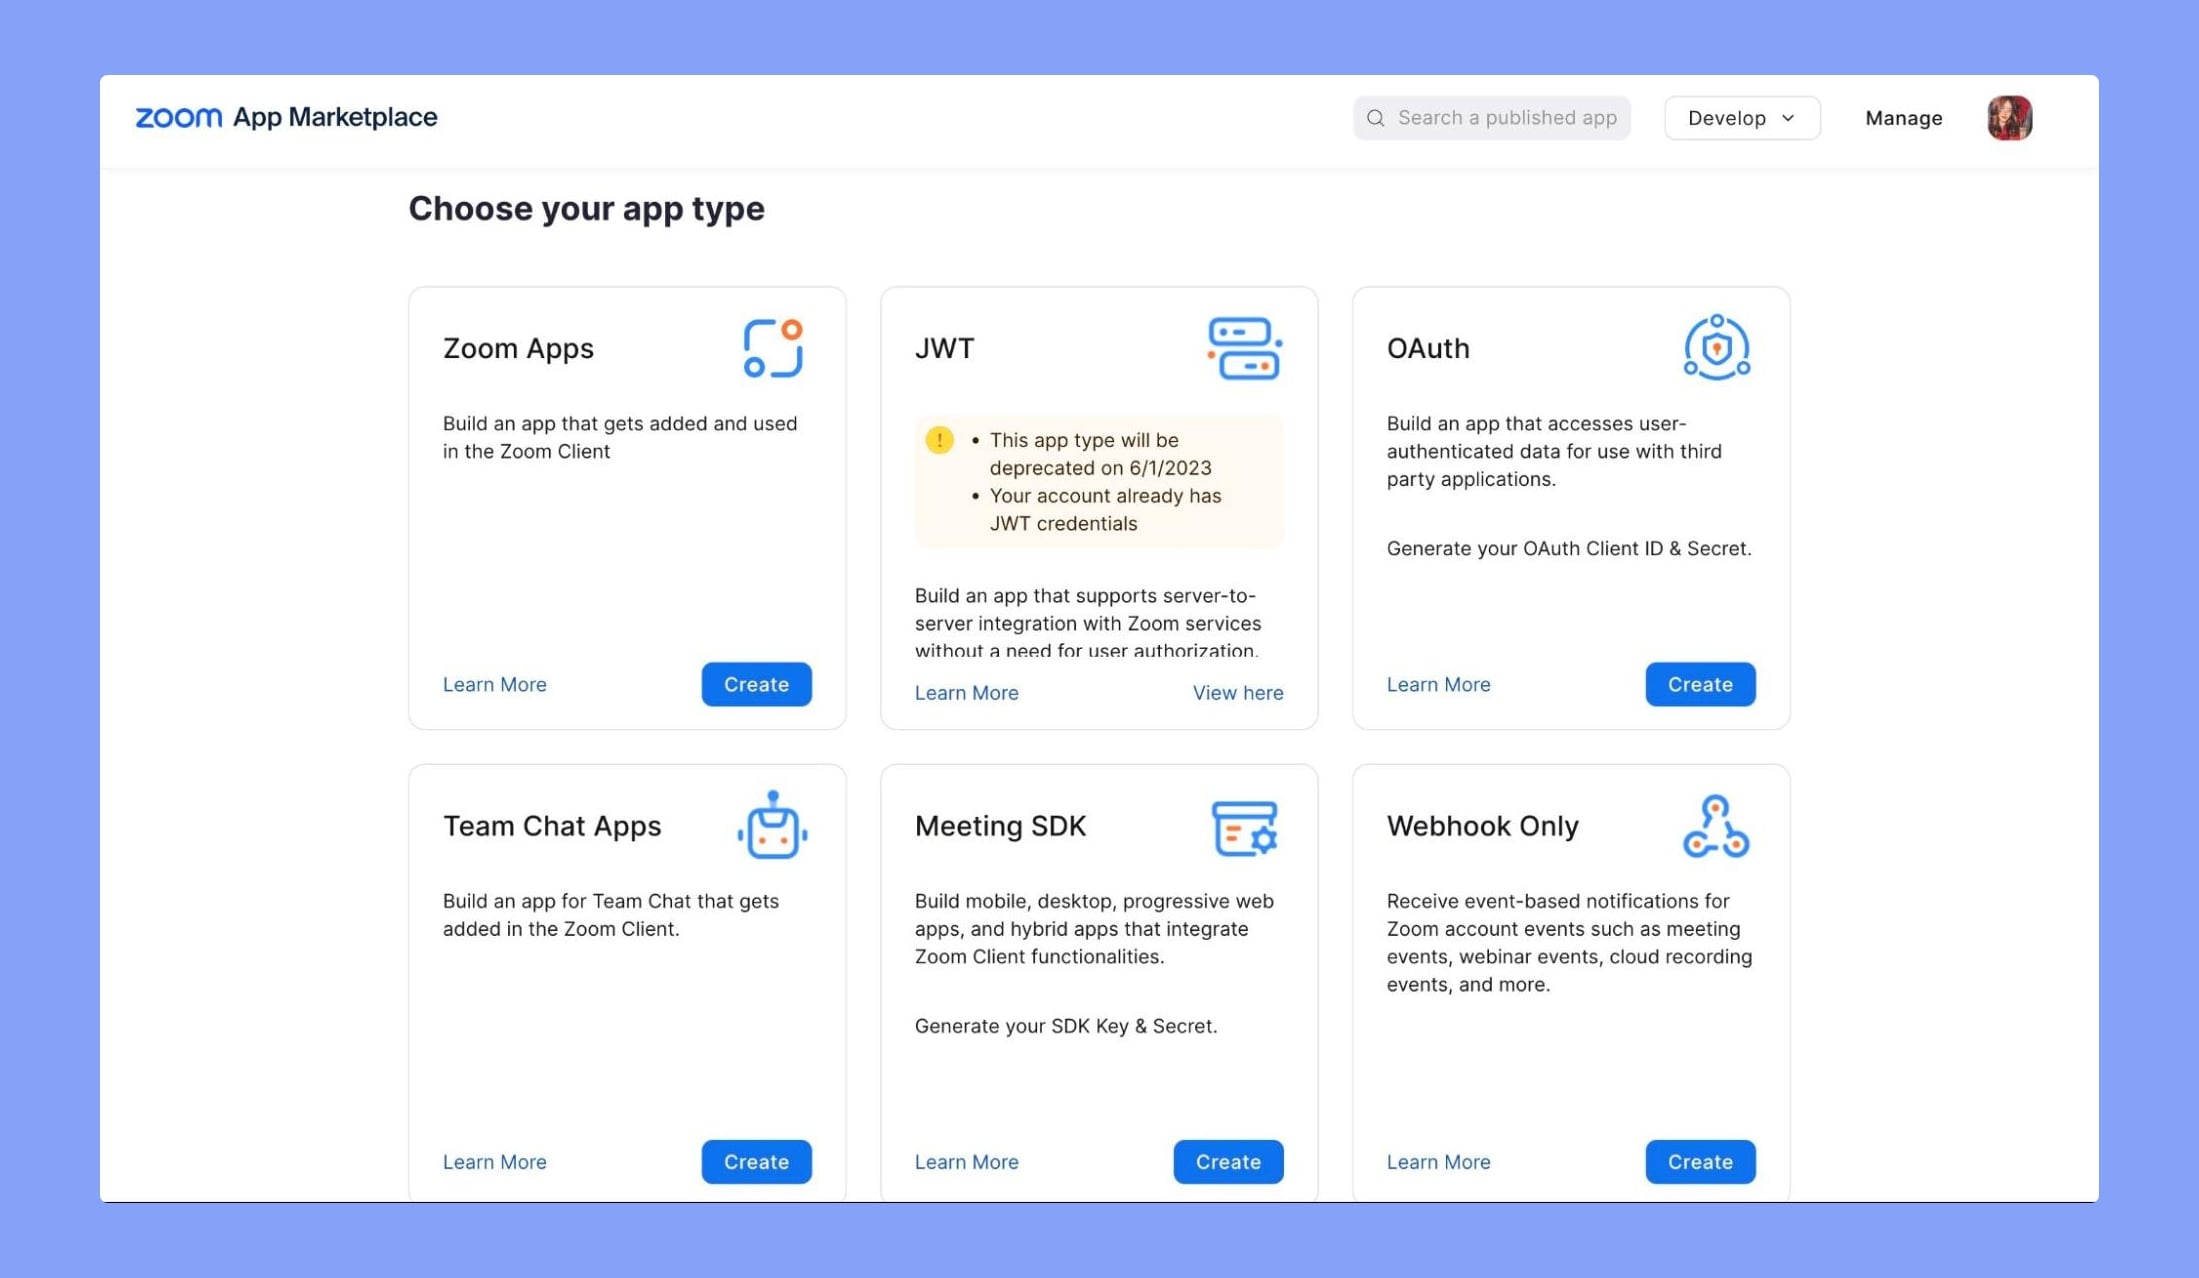
Step 2: Scroll down to find Server-to-Server. Click on “Create” under the Server-to-Server OAuth app type.
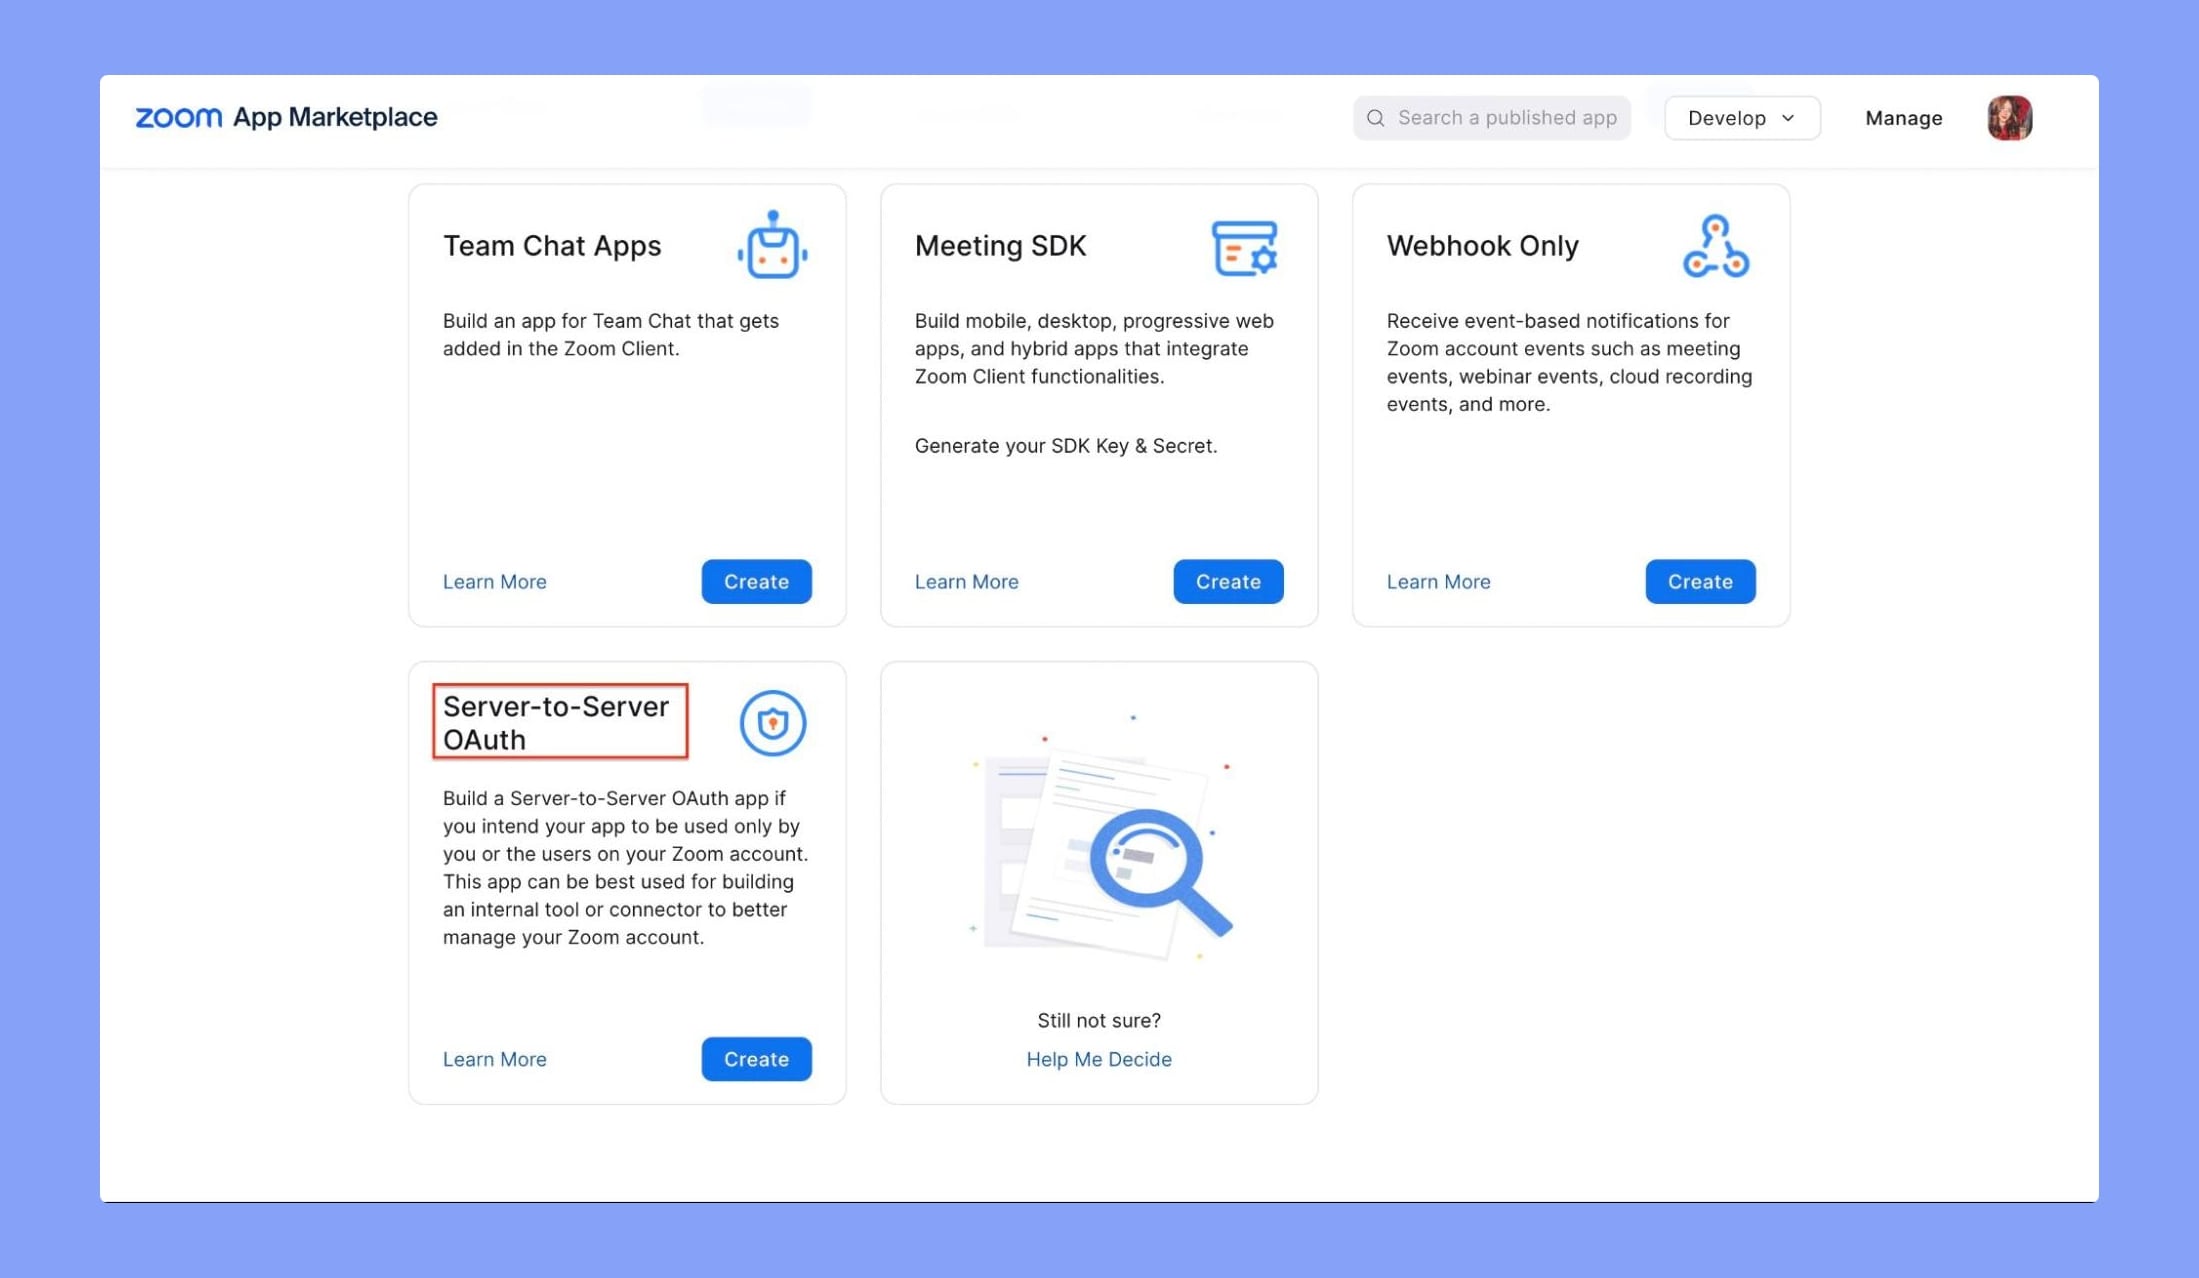
Step 3: Fill in the App Name field and click on Create.
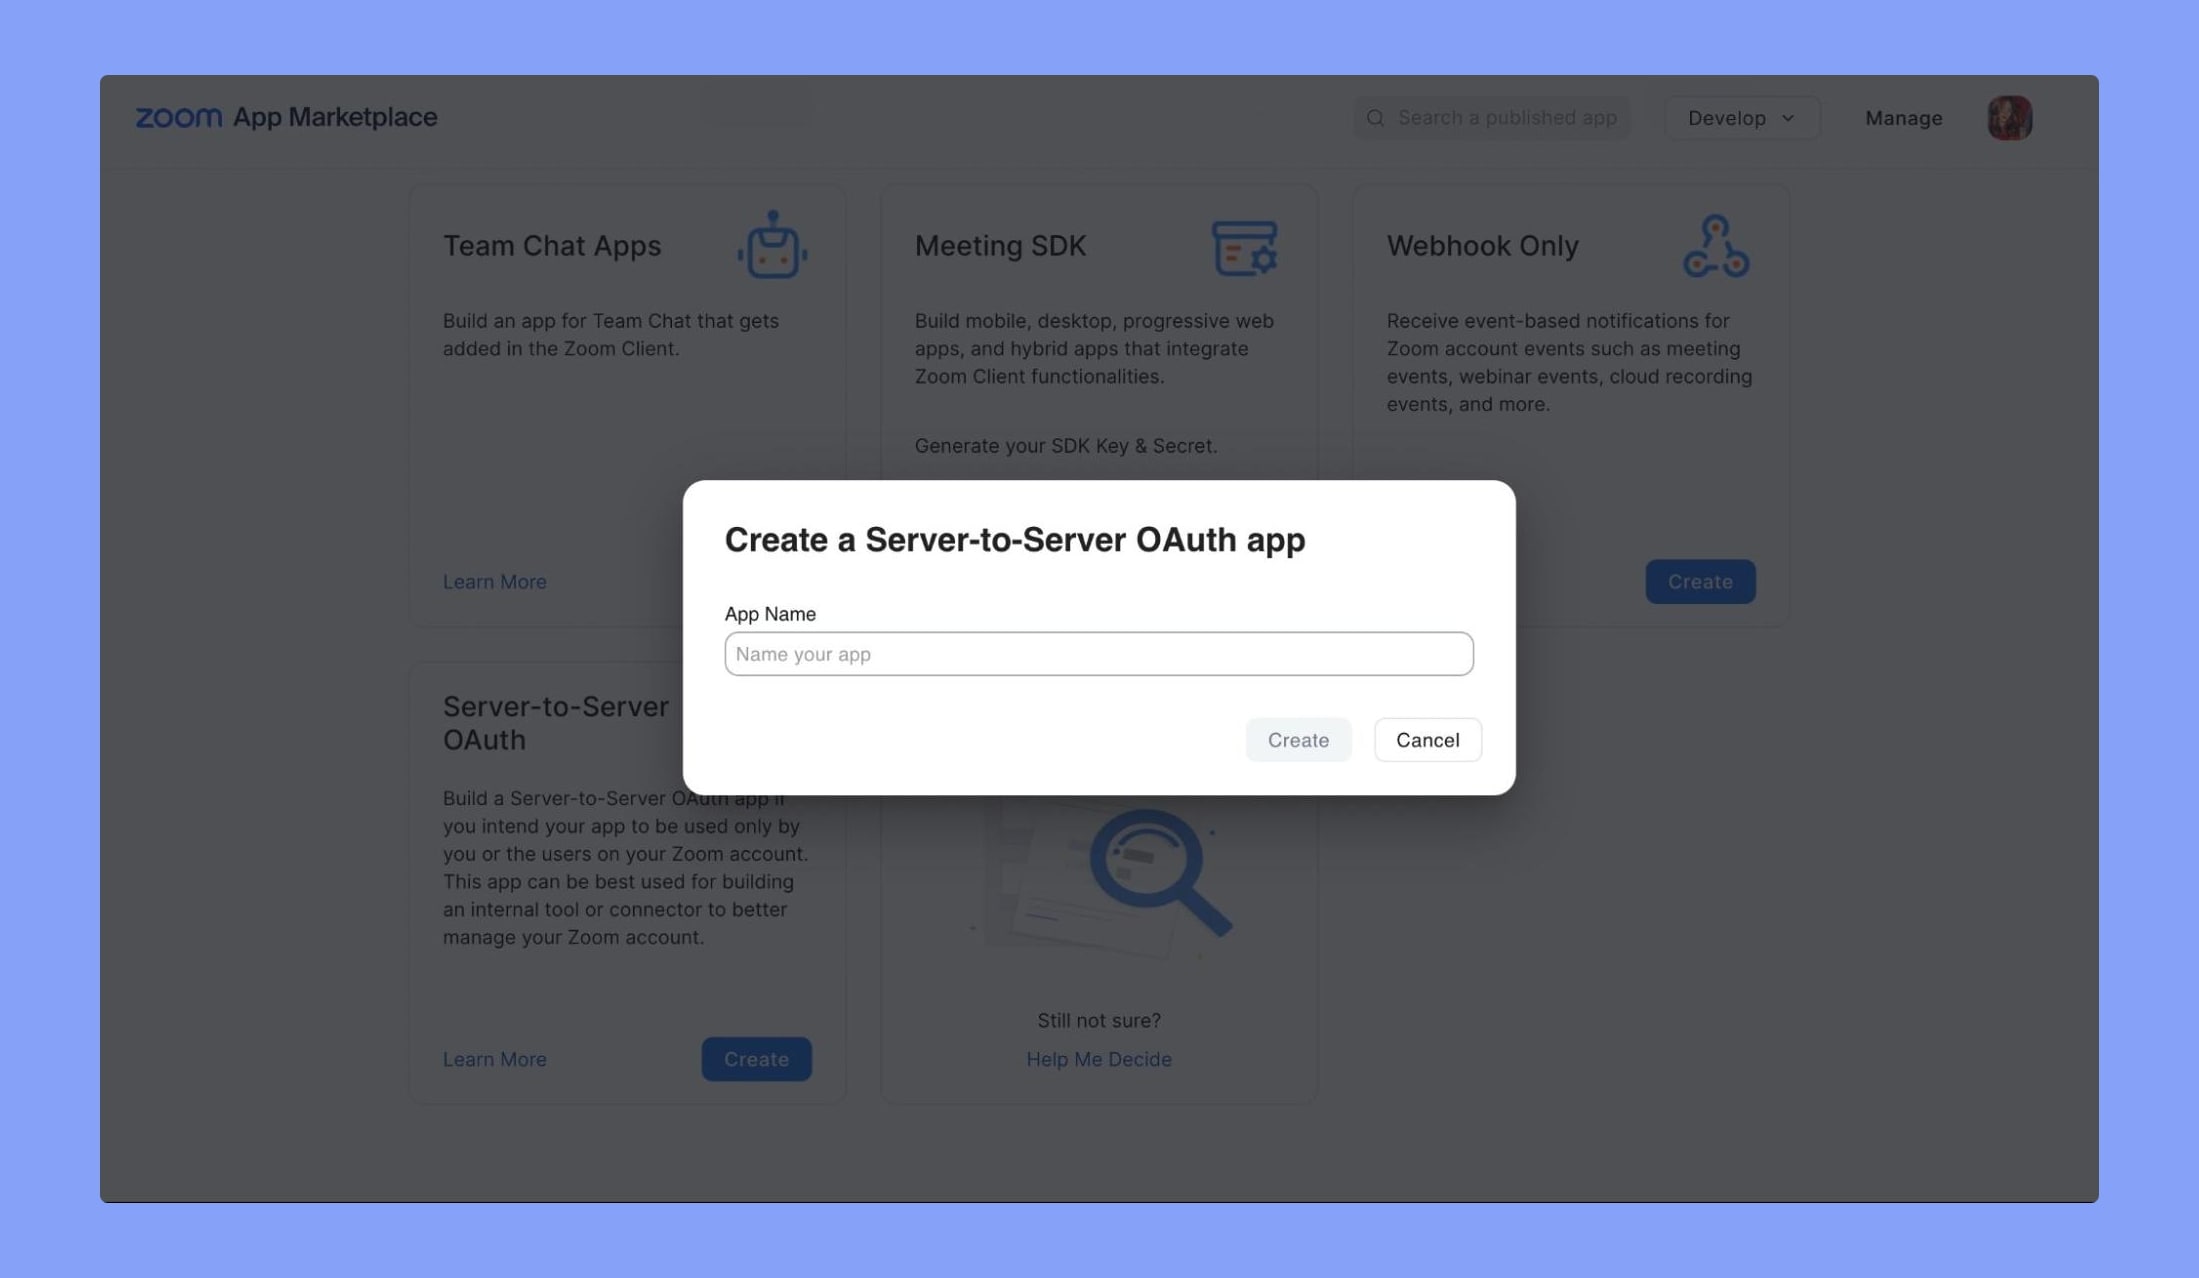
This will take you to the App credentials page. But first, you need to fill in the required Information & Scopes to Activate your app.
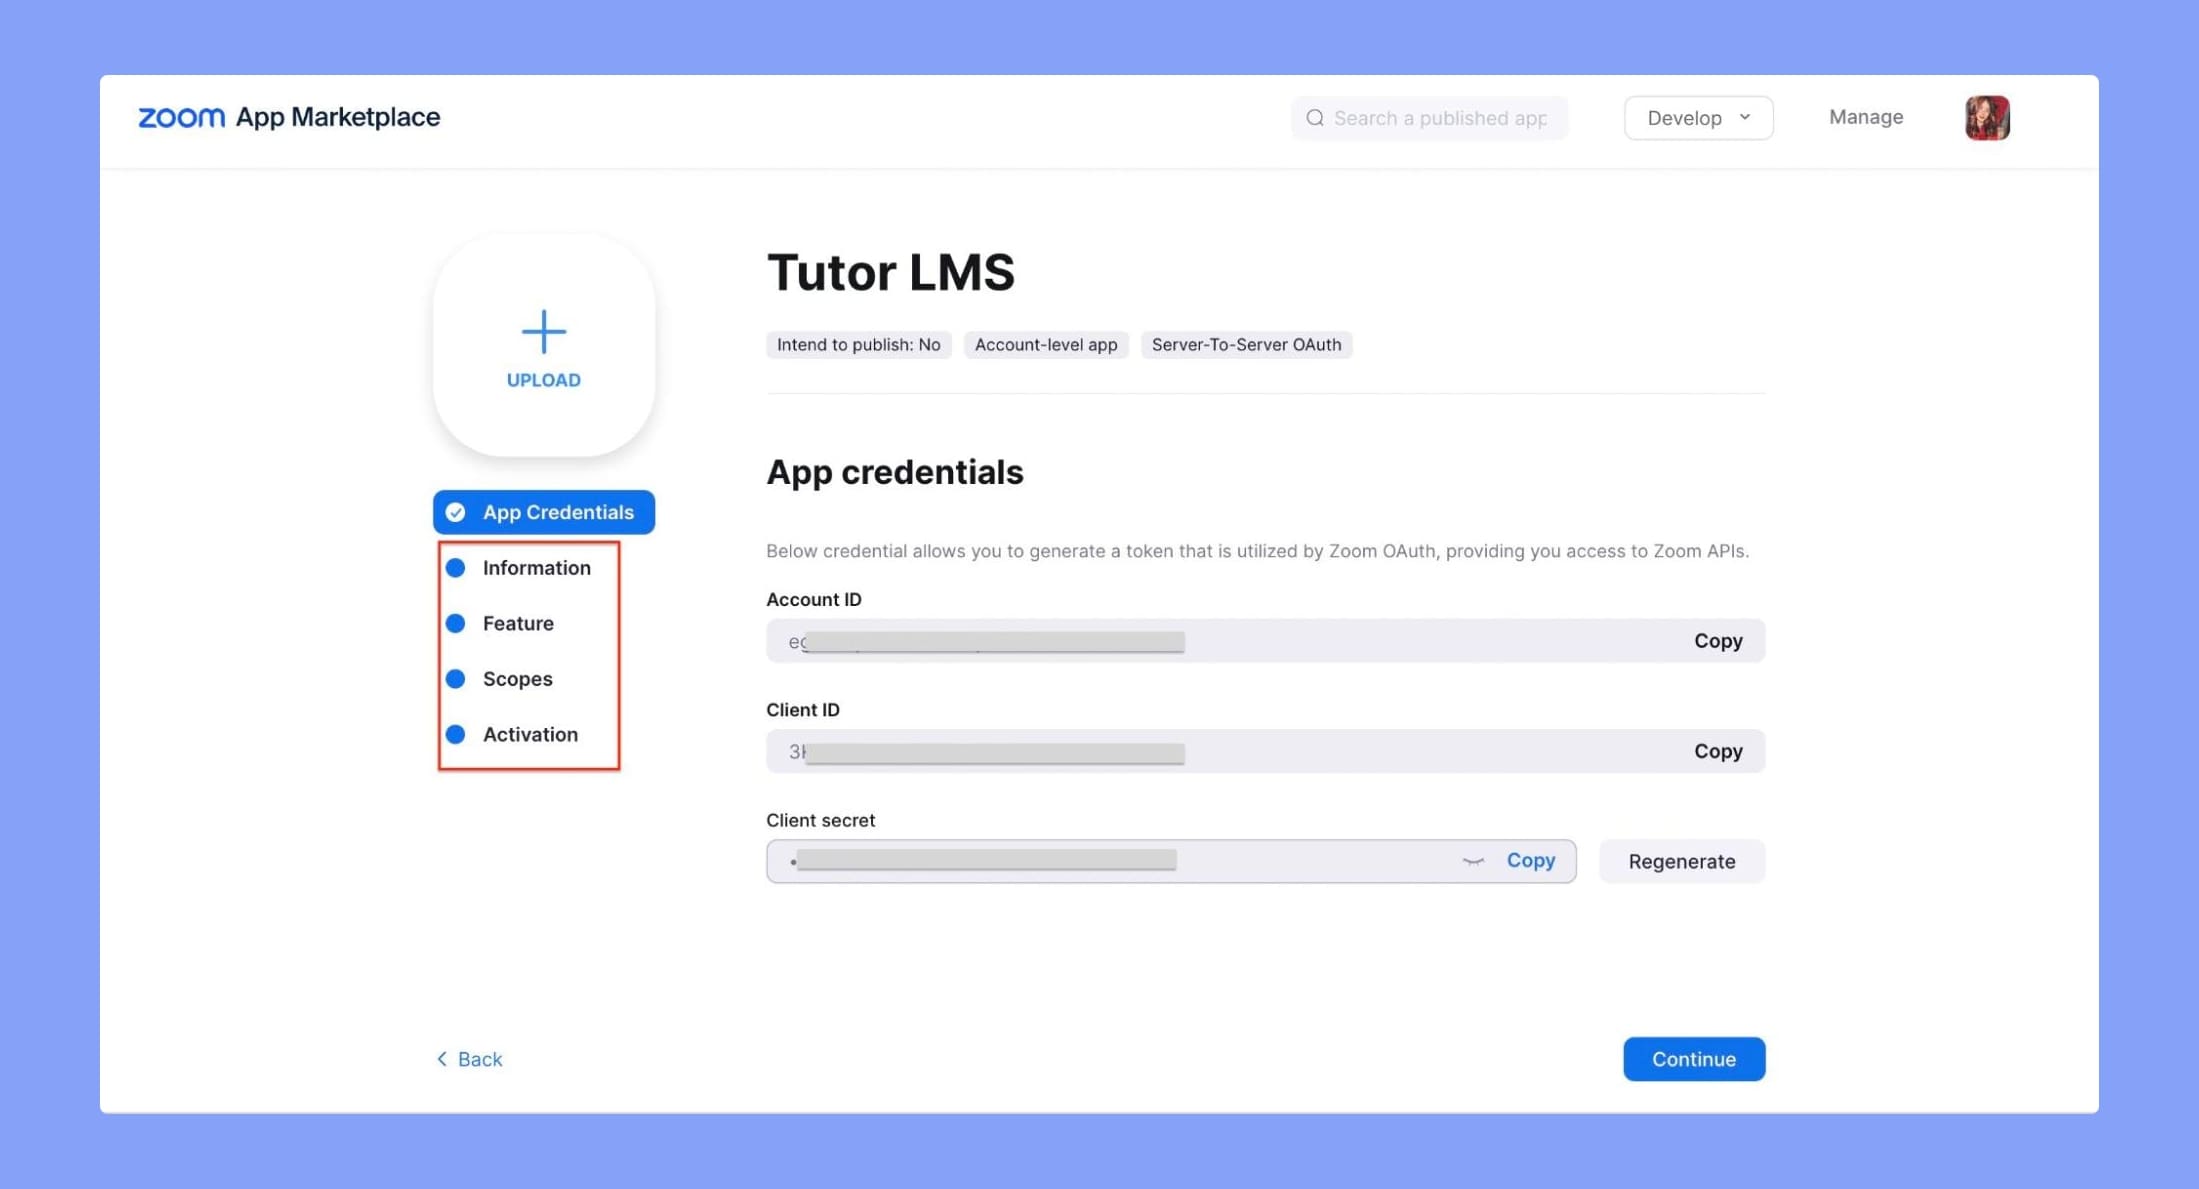
Step 4: Go to Information to set your Company Name and Developer Contact Information, i.e. your name and email address.
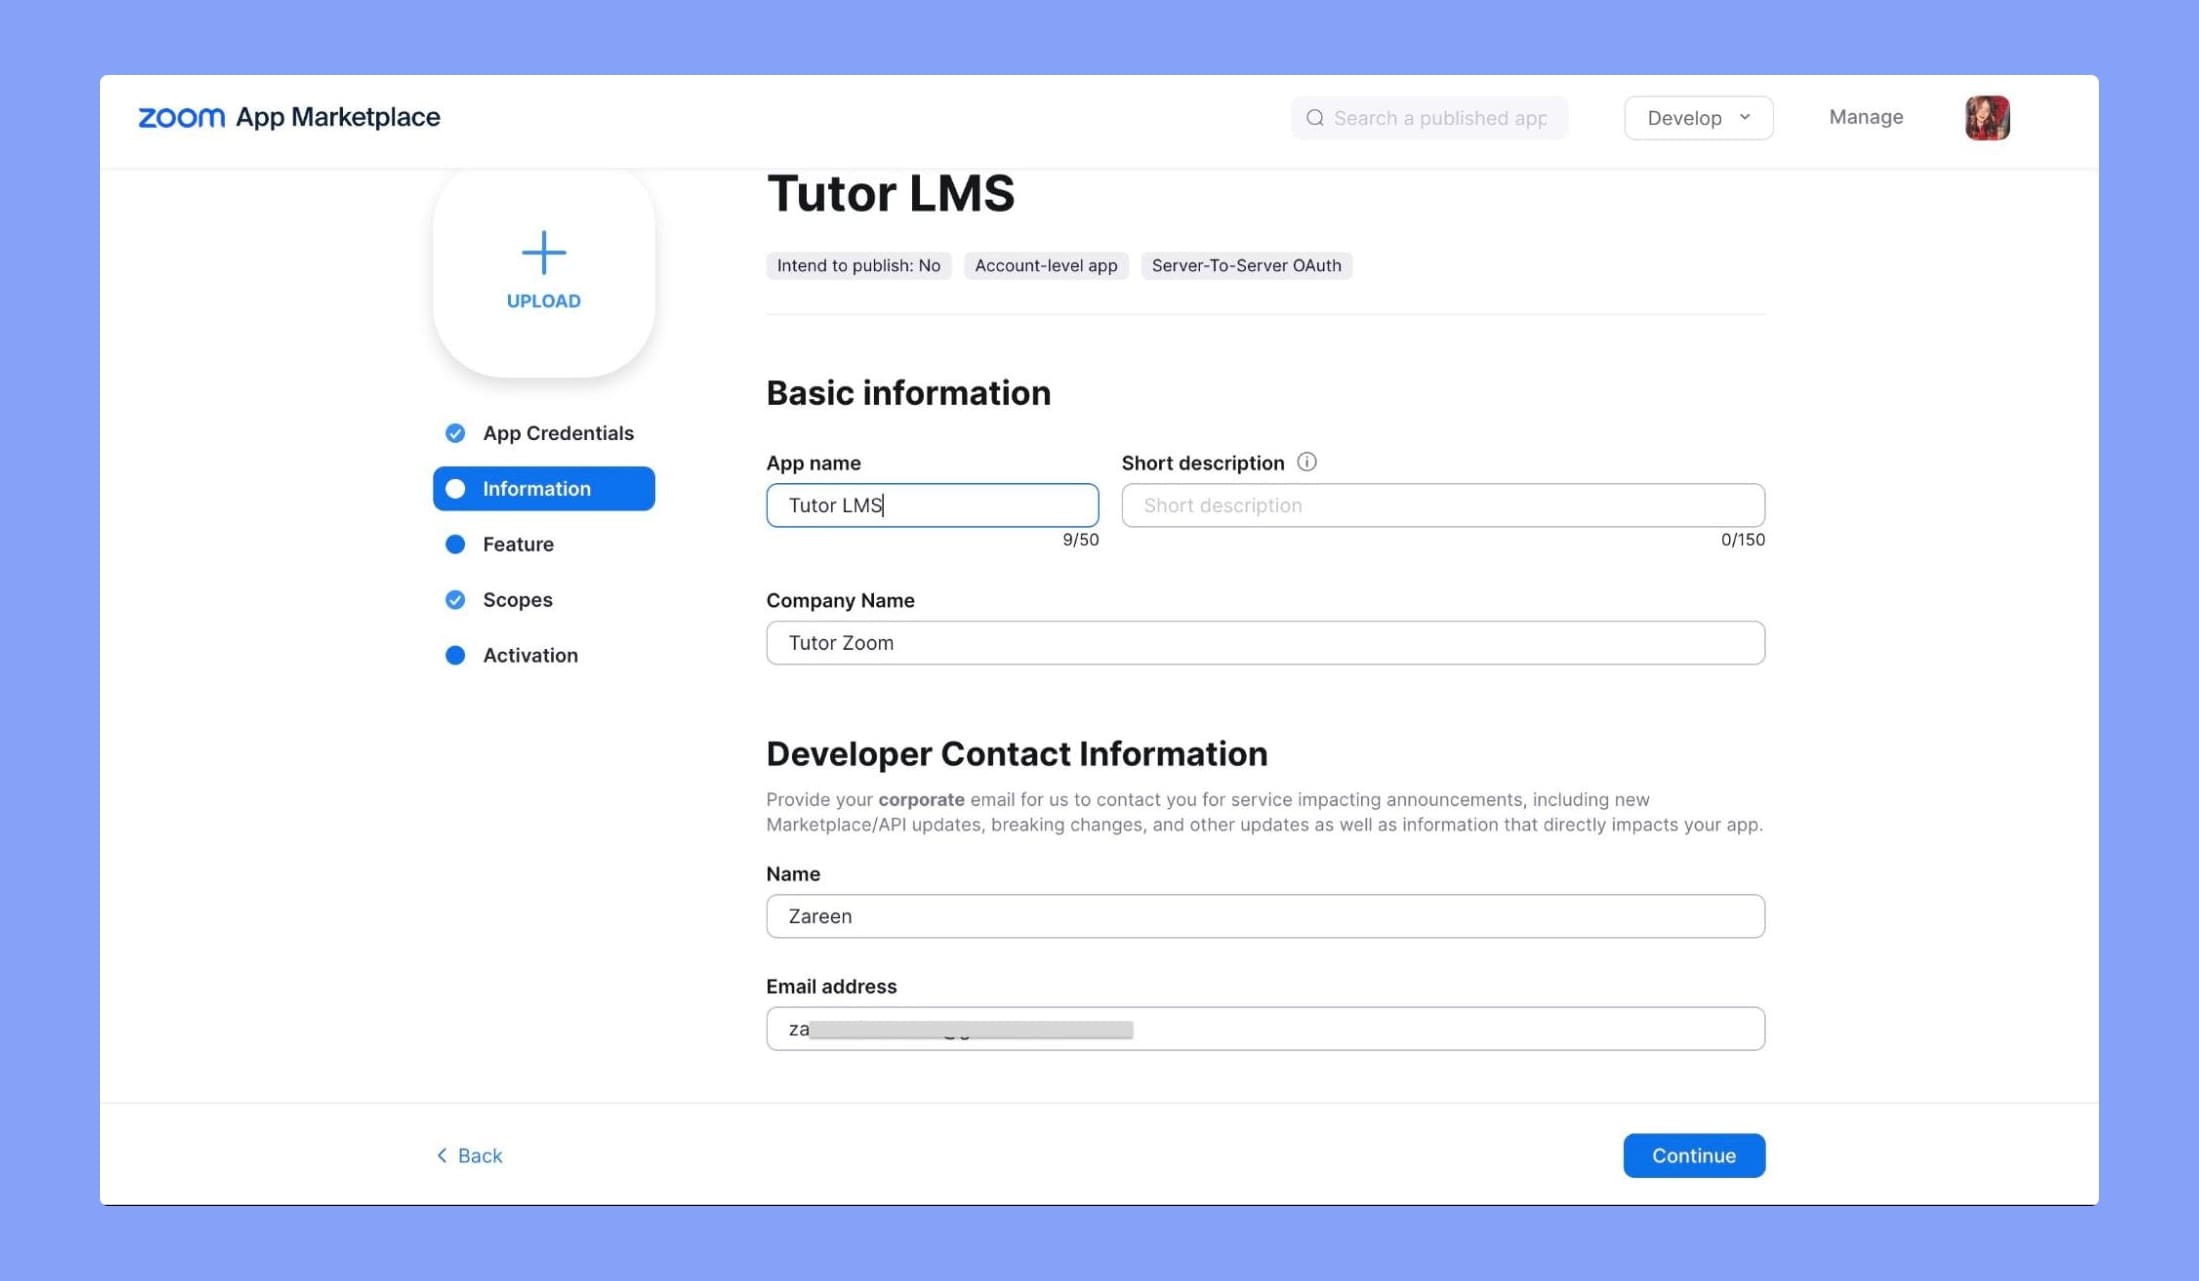
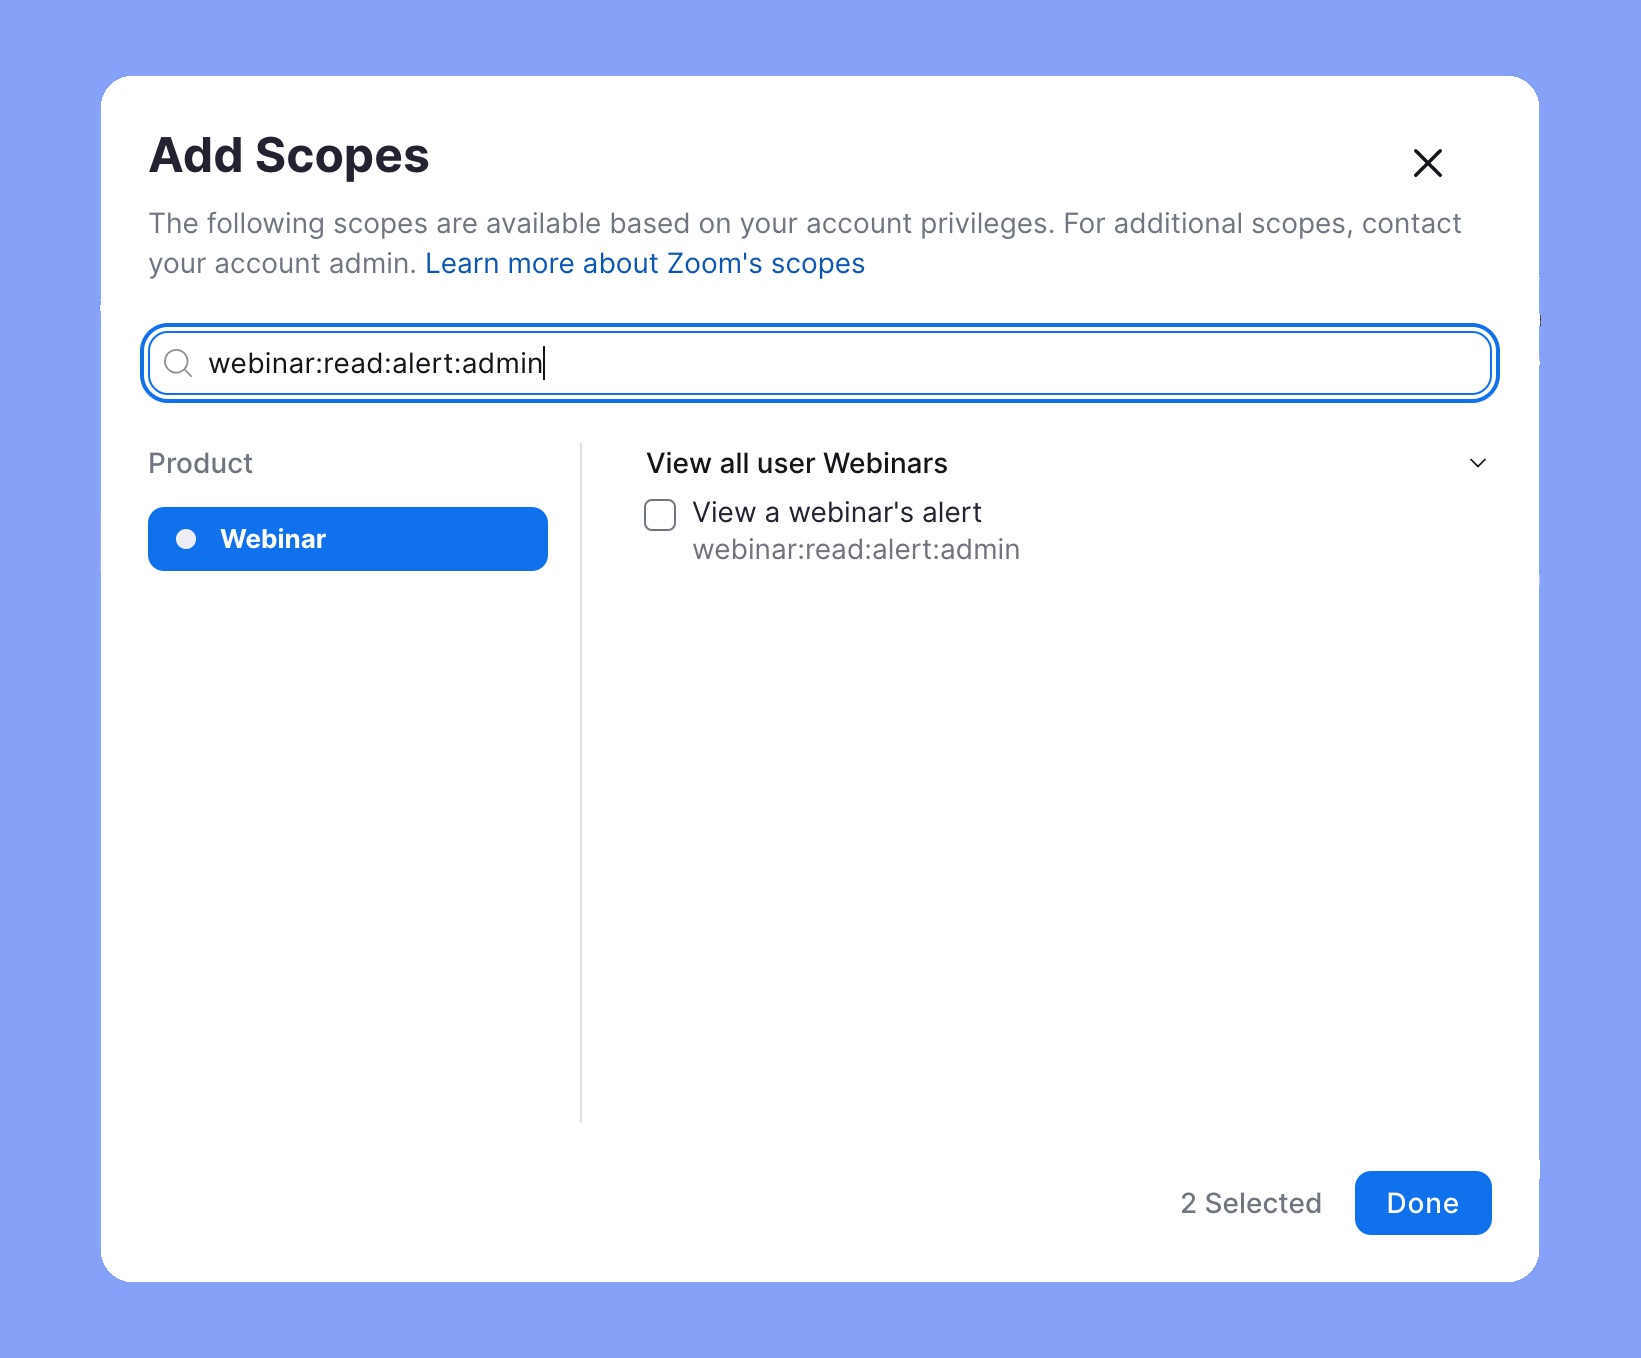
Step 5: Go to Scopes and configure your app’s necessary scopes based on your Tutor LMS integration requirements. We recommend you select the required scopes for Meeting, Webinar, Recording, and User.
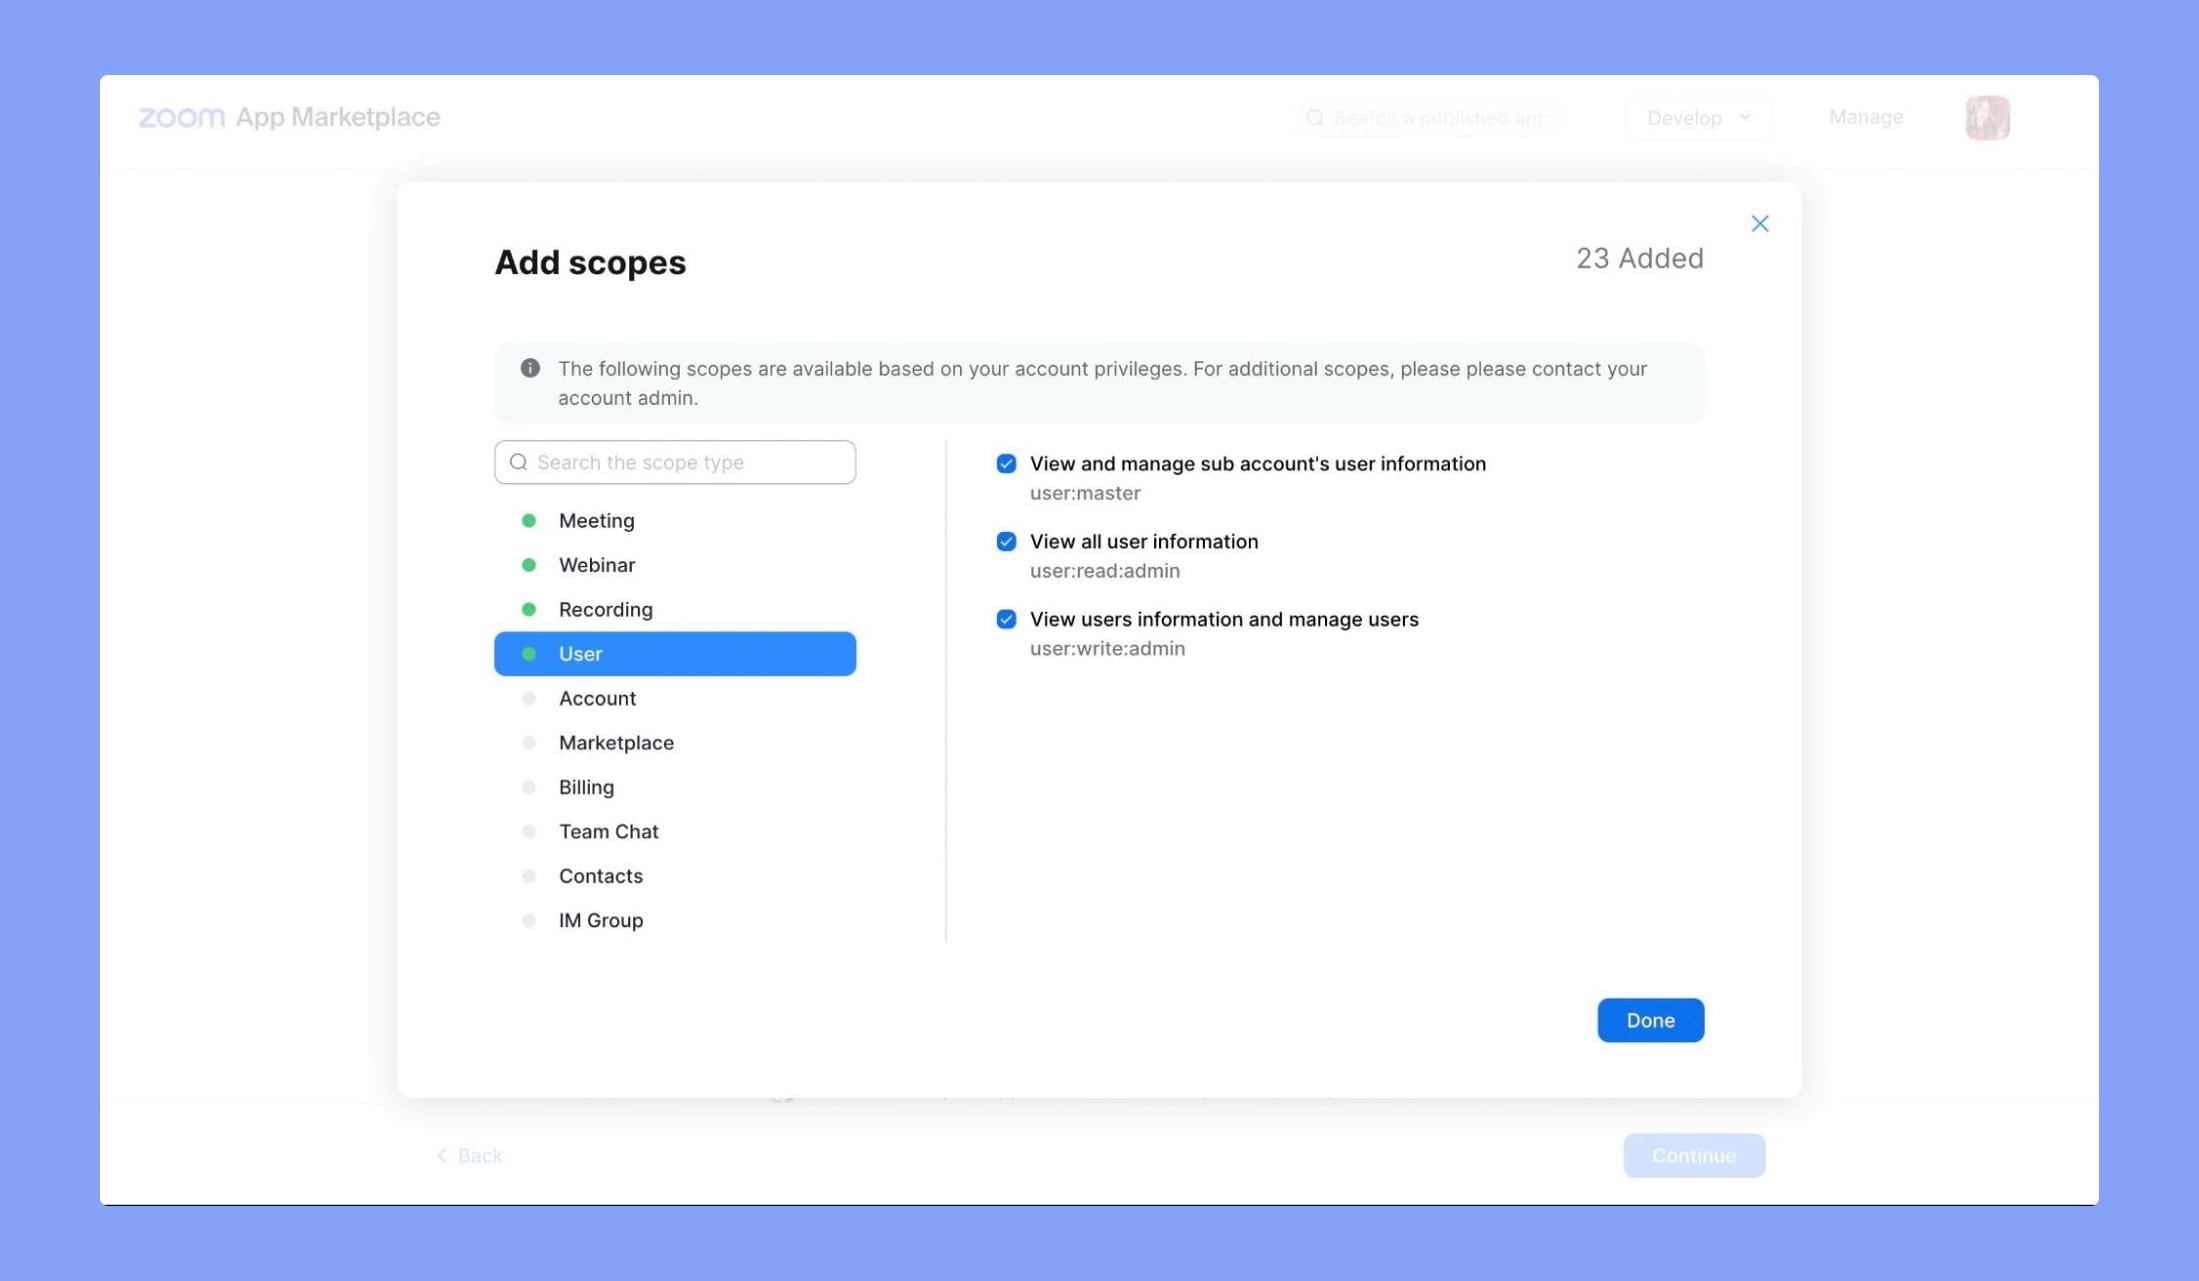
Here’s the list of required scopes –
Meeting Scopes:
meeting:read:local_recording_token:admin
meeting:read:summary:admin
meeting:read:list_summaries:admin
meeting:read:past_meeting:admin
meeting:read:meeting:admin
meeting:read:list_past_participants:admin
meeting:read:list_upcoming_meetings:admin
meeting:read:list_past_instances:admin
meeting:read:list_meetings:admin
meeting:read:invitation:admin
meeting:read:alert:admin
meeting:read:list_registrants:admin
meeting:read:livestream:admin
meeting:read:participant:admin
meeting:write:registrant:admin
meeting:update:meeting:admin
meeting:delete:meeting:admin
meeting:write:meeting:admin
meeting:write:invite_links:admin
meeting:read:list_summaries:master
meeting:read:summary:master
Recording Scopes:
archiving:read:archived_file_statistics:admin
archiving:read:list_archived_files:admin
User Scopes:
user:read:list_schedulers:admin
user:read:summary:admin
user:read:list_collaboration_devices:admin
user:read:list_users:admin
user:read:token:admin
user:read:user:admin
user:read:email:admin
user:read:list_permissions:admin
user:read:list_assistants:admin
user:read:list_assistants:master
user:read:list_permissions:master
user:read:summary:master
user:read:user:master
user:read:list_users:master
user:read:token:master
user:read:list_schedulers:master
user:read:zak:admin
Webinar Scopes:
webinar:read:list_past_instances:admin
webinar:read:list_webinars:admin
webinar:read:list_panelists:admin
webinar:read:list_absentees:admin
webinar:read:participant:admin
webinar:read:alert:admin
webinar:update:webinar:admin
webinar:delete:webinar:admin
⚠️ Note: If you’re having trouble finding these scopes, use the search bar of the Add Scopes page.
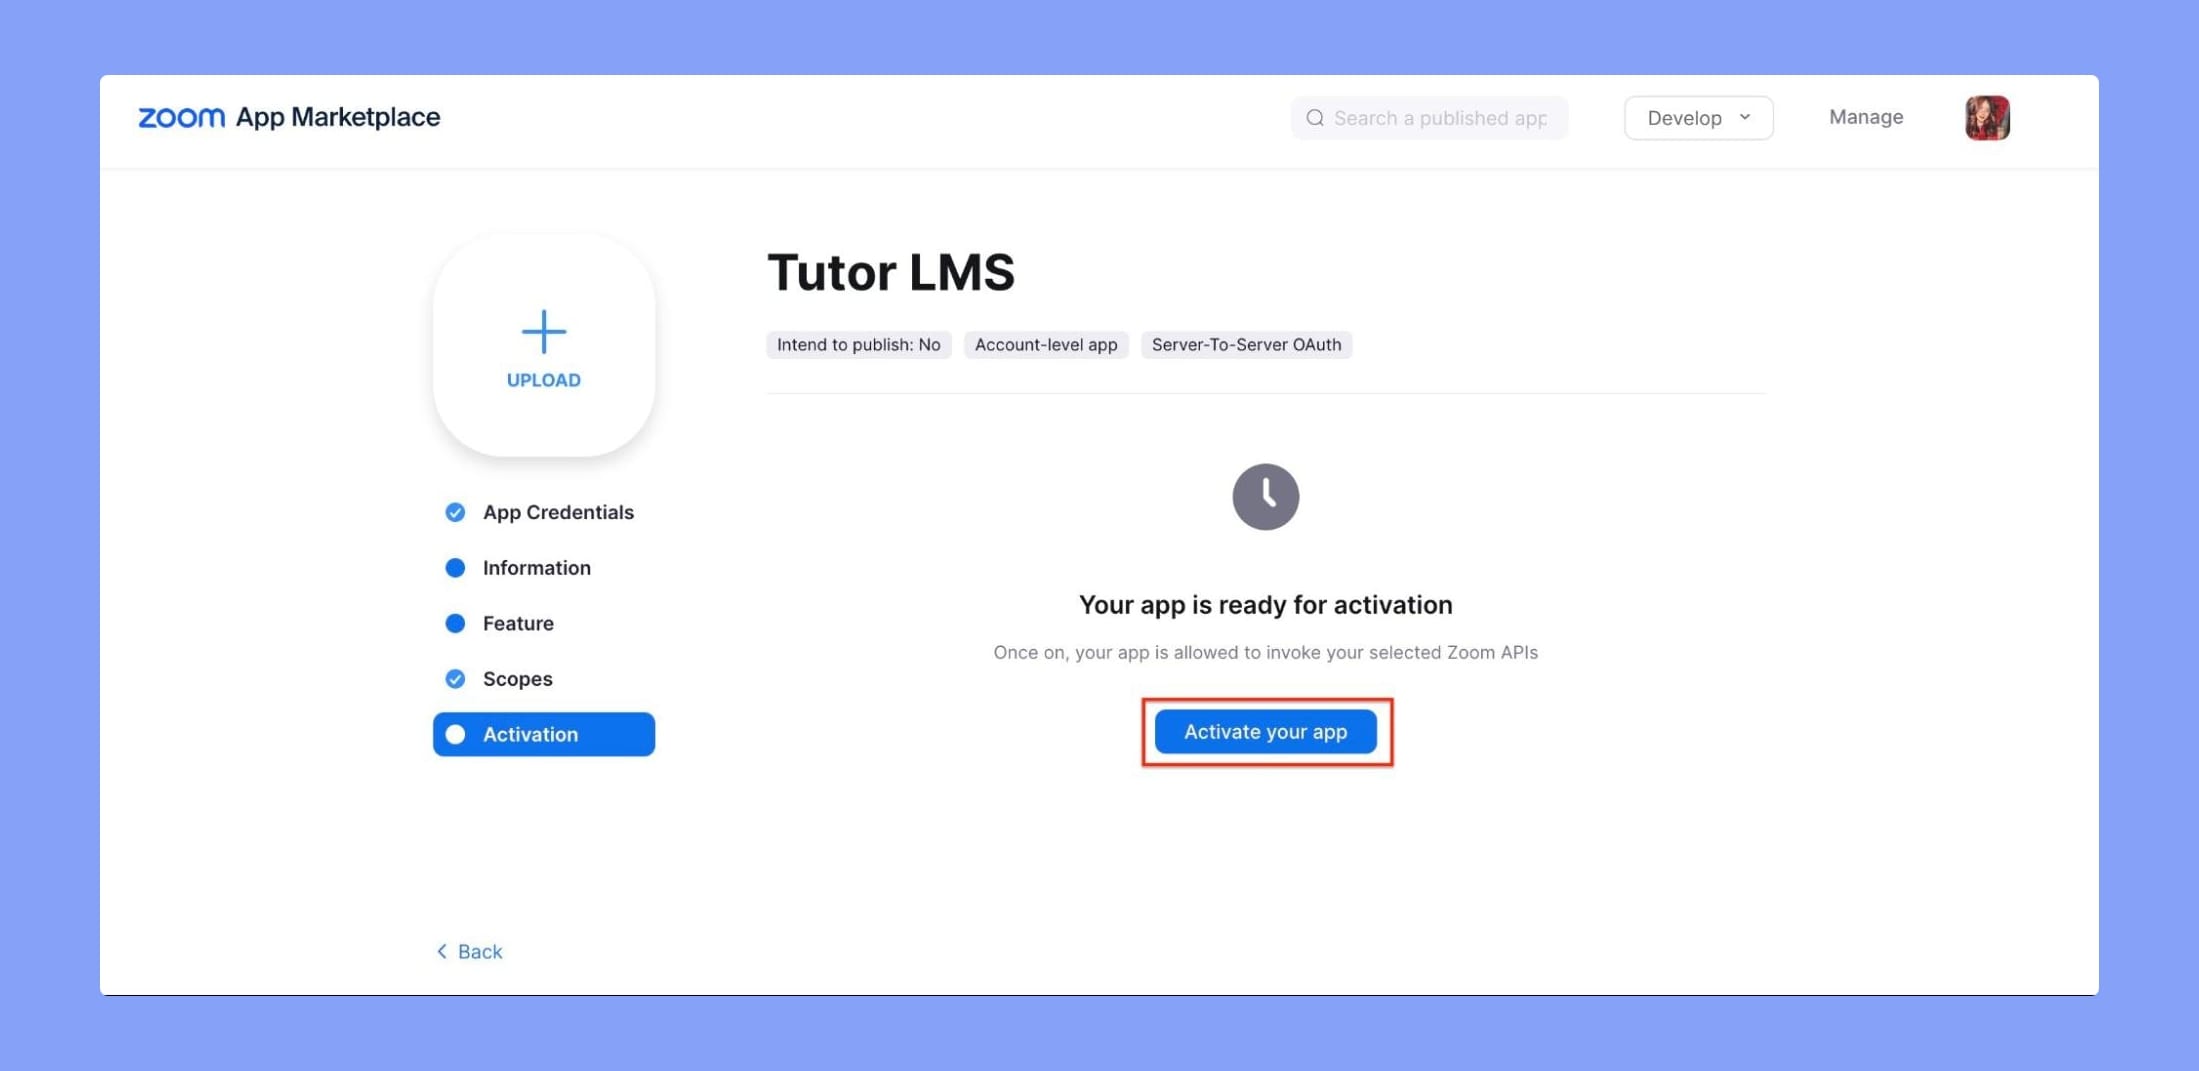
Step 6: Go to Activation, and activate your app.
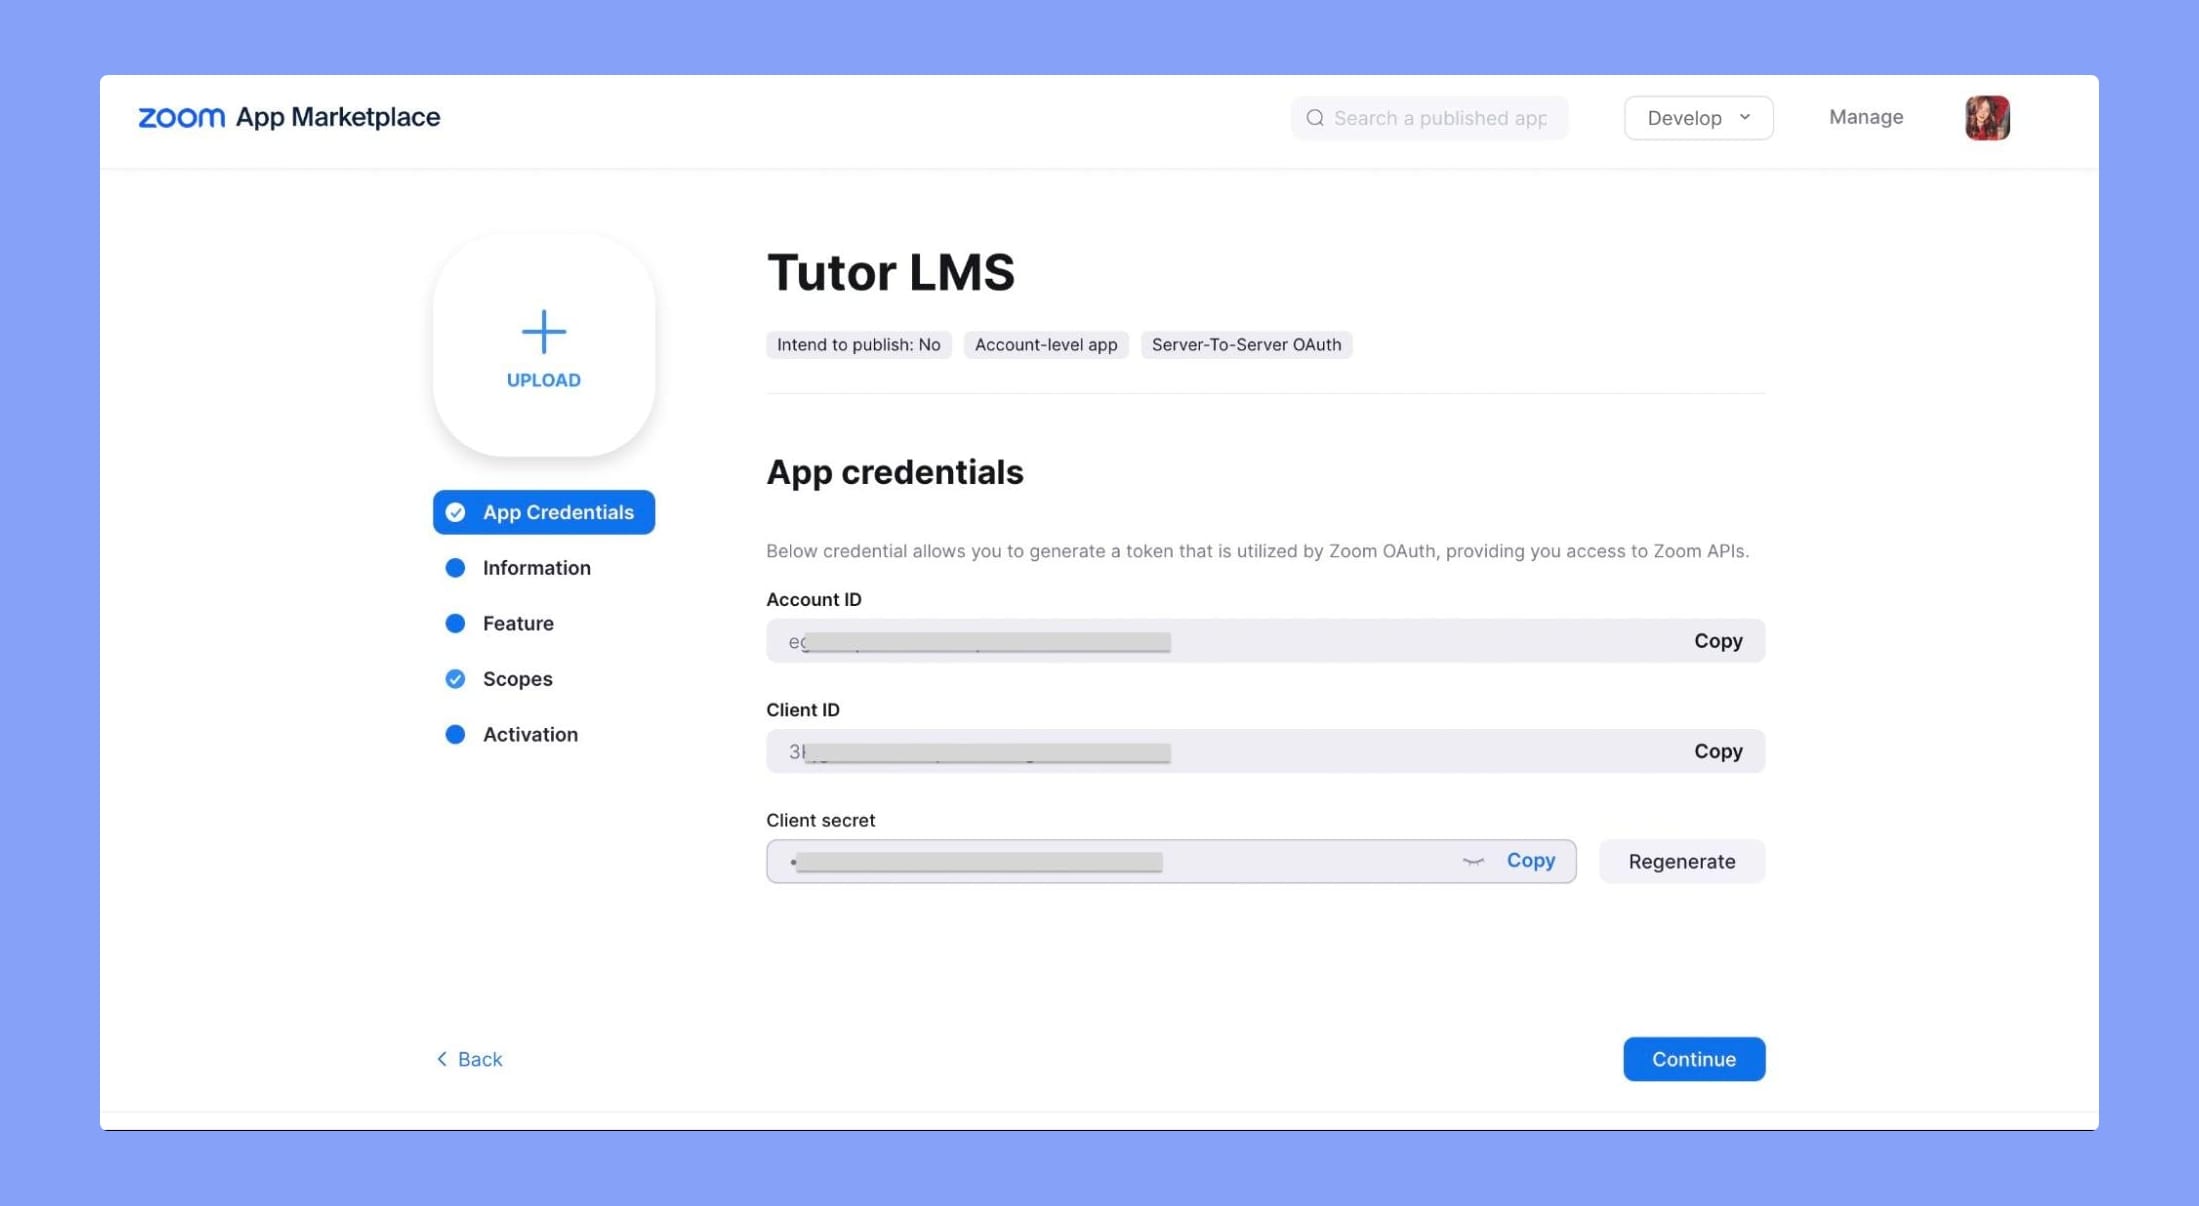
Obtain the App Credentials
Once your Server-to-Server OAuth app is activated, Go to App Credentials to obtain the Account ID, Client ID, and Client Secret. Keep these credentials handy as you will need them in the following step.
Connect Zoom to Tutor LMS
Finally, the last step is to connect Zoom to Tutor LMS. To do this, head over to your WordPress backend dashboard, and navigate to Tutor LMS Pro > Zoom > Set API.
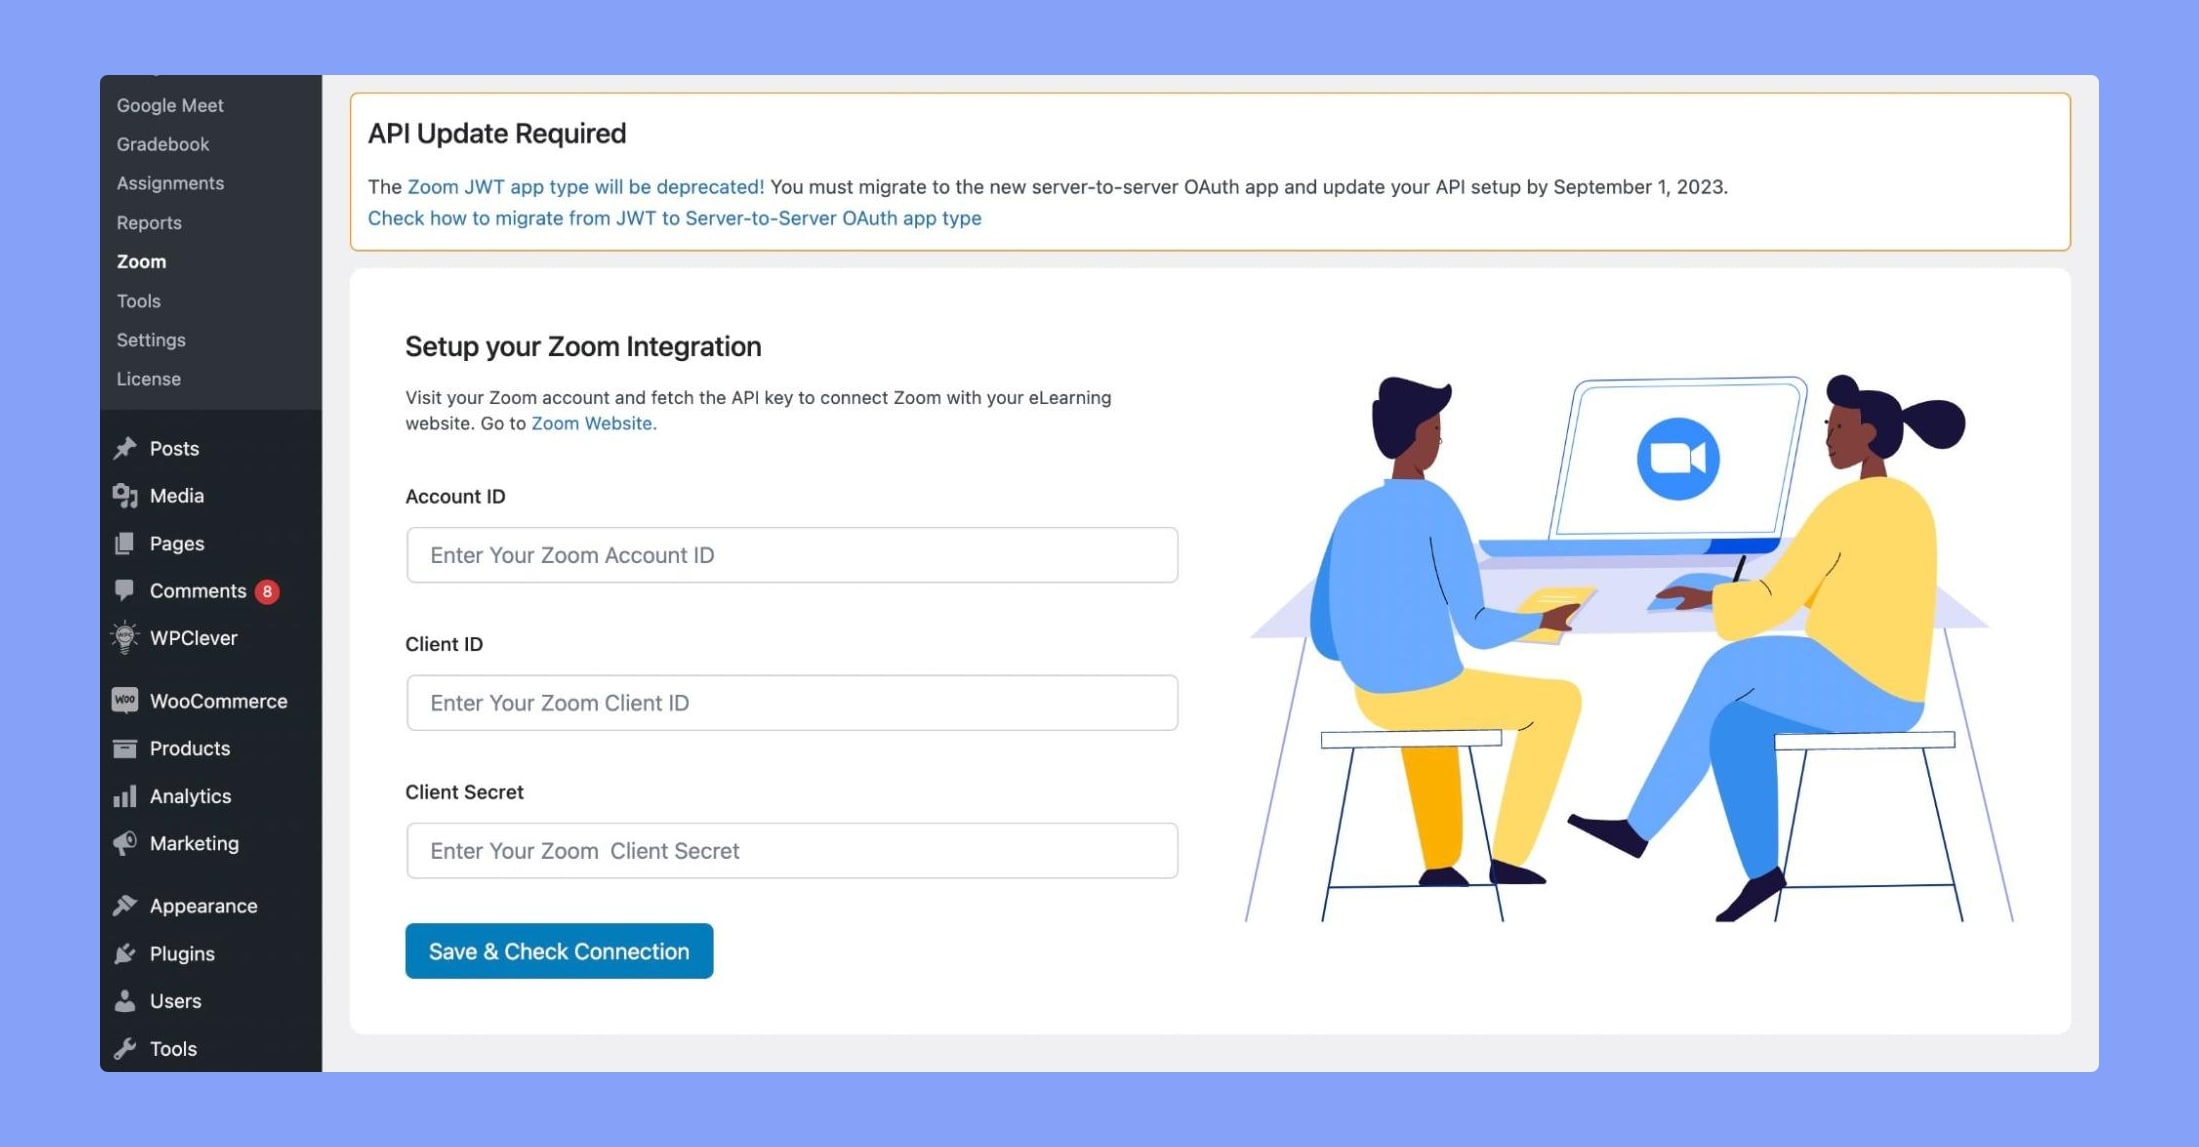
Add the new Server-to-Server OAuth app credentials (Account ID, Client ID, and Client Secret) obtained in the previous step.
Click on Save & Check Connection to update the integration settings.
Instructors can also go to the Frontend Dashboard > Zoom > Set API for the same purpose. If you get any error there, simply update your permalinks to Postname and the issue will be fixed. You can access the permalink settings from WP Admin > Settings > Permalinks.
Test and Verify
Thoroughly test your Tutor LMS integration with Zoom using the credentials. Check if the integration functionalities, such as creating meetings are working as expected.
Zoom Backend Panel
Apart from Set API, the Zoom Backend Panel has a few other functionalities. These are discussed in more detail below.
All Meeting Lists
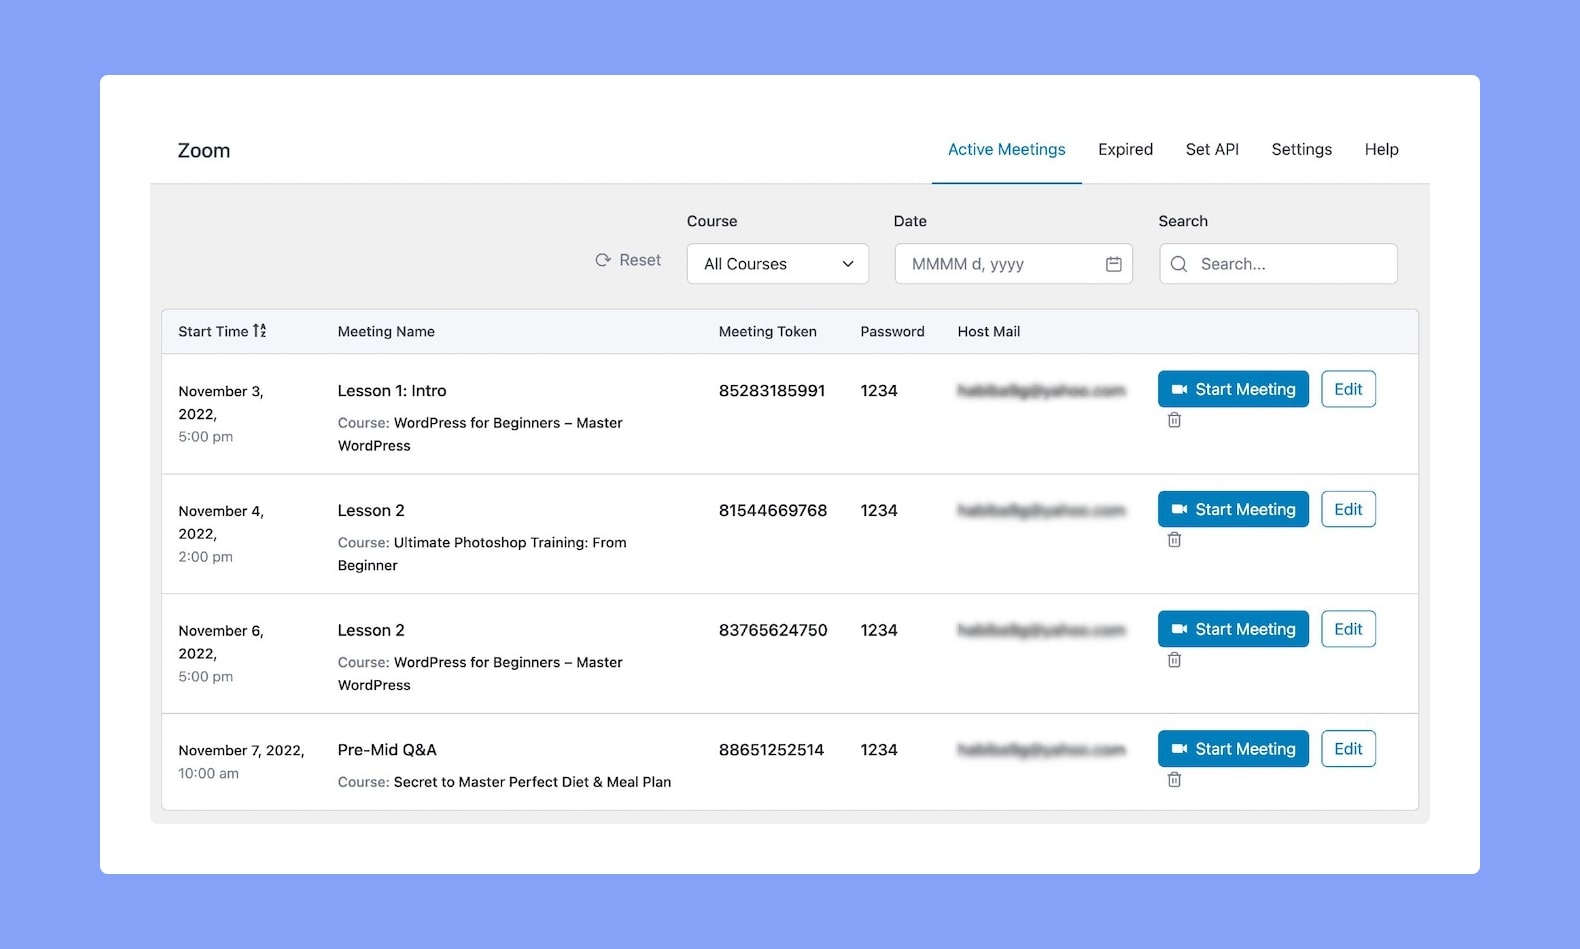
Once your Zoom Integration is set up and connected, you should see an All Meetings tab appear. This tab contains a list that gives administrators a detailed view of all the future Zoom Meetings that are currently scheduled.
Here, you can search for meetings, and filter by course, date, or status. You can also edit these meetings directly from this panel as well as delete them.
Expired Meetings
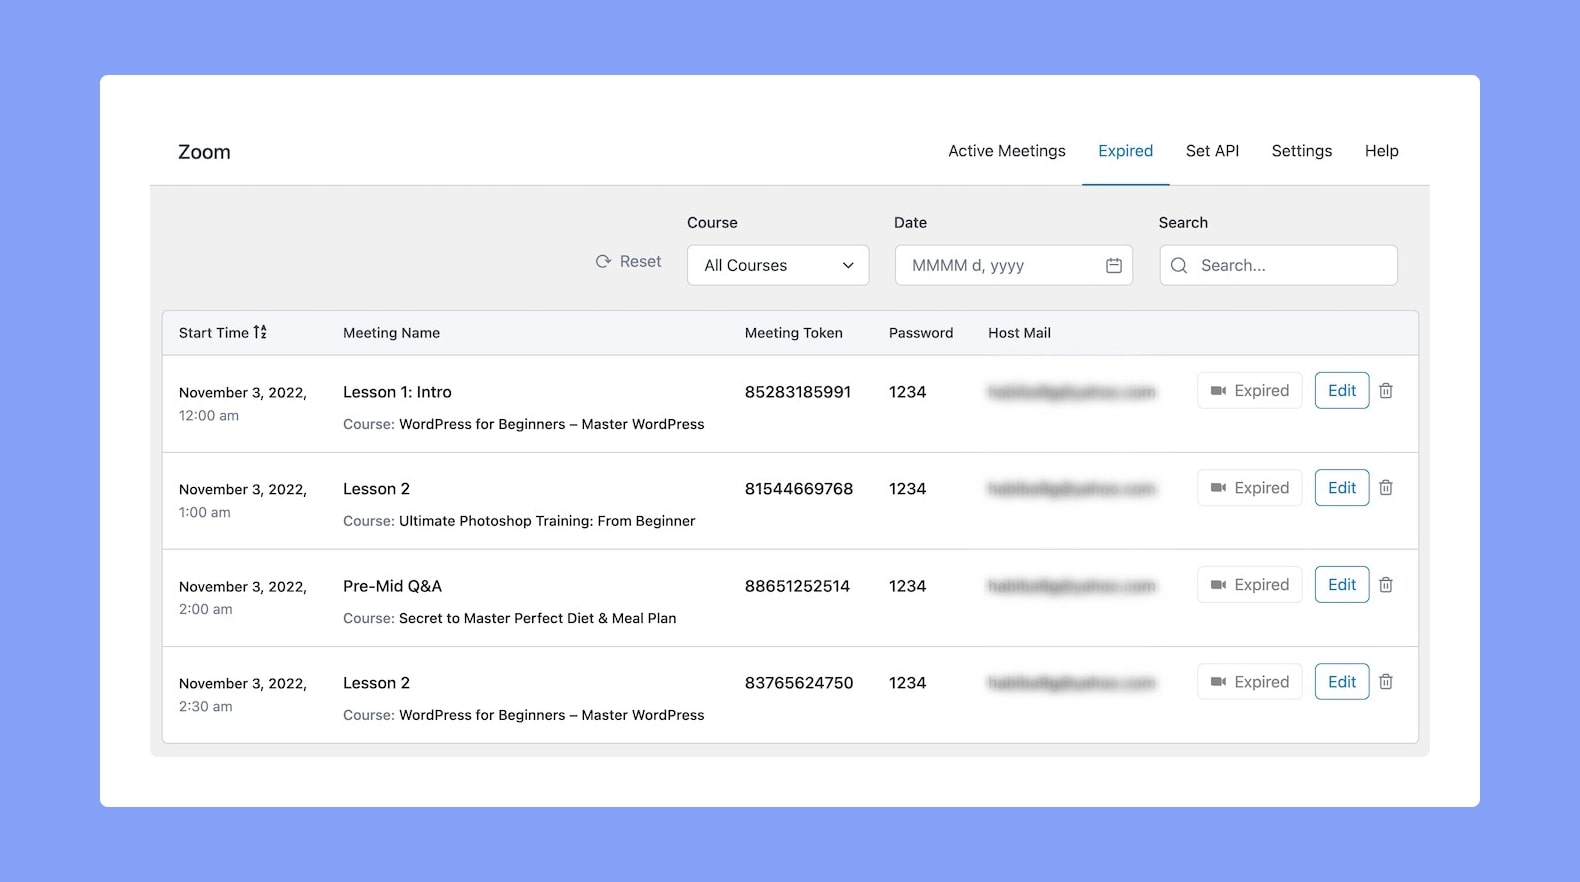
Next, under the Expired Meetings tab is where you’ll find all of the Zoom Meetings that have already passed. Similar to the previous tab, you’ll be able to search, filter, edit, and delete the meetings from here.
Settings
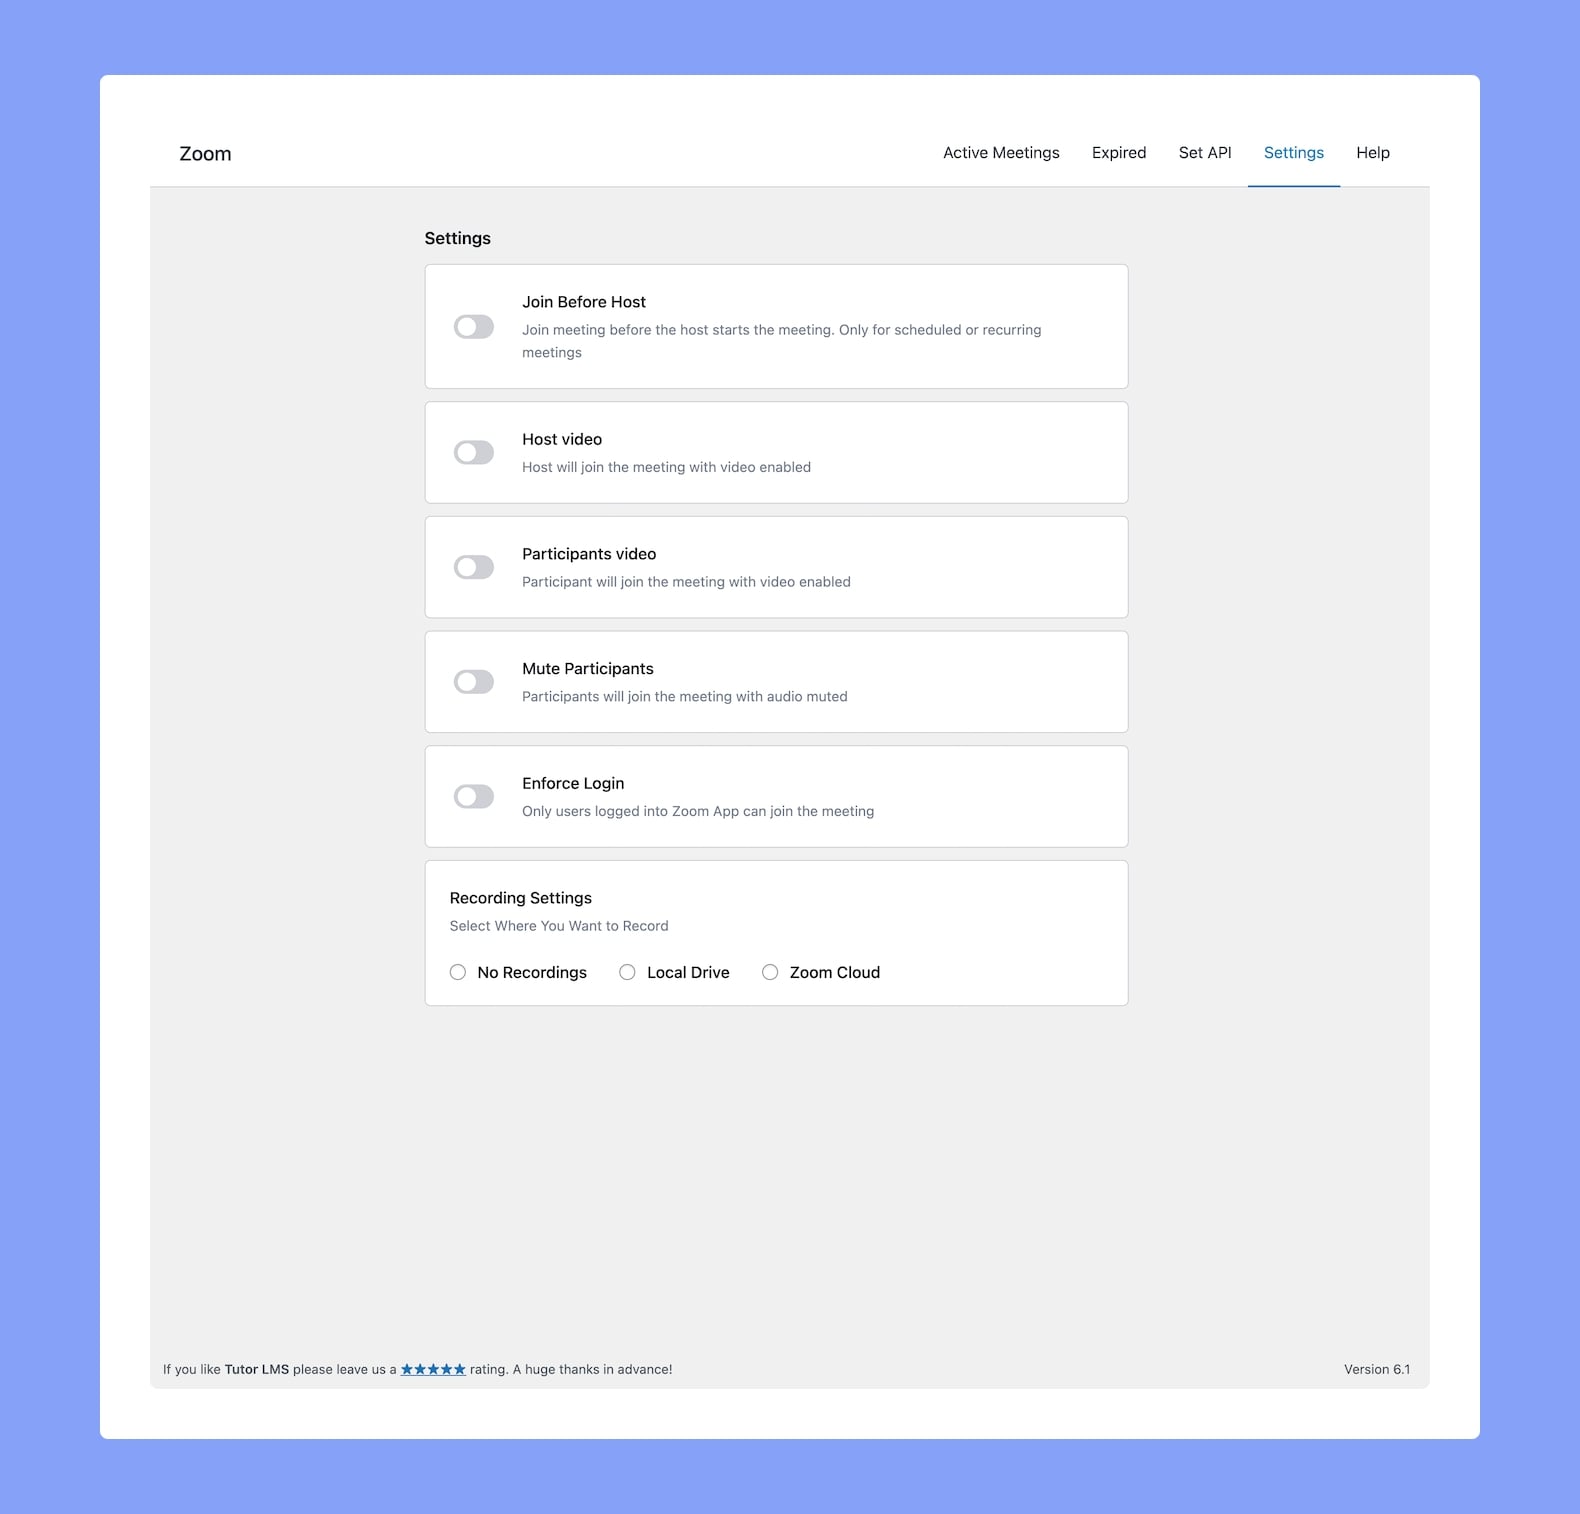
Next up is the Settings tab, and from here you’ll be able to customize the meeting behavior.
Join Before Host: This will allow students to join before the instructor. Only applicable to scheduled or recurring meetings.
Host Video: This will start the host’s video when the host joins a meeting.
Participants Video: This will start with participants’ video-enabled when they join the meeting.
Mute Participants: The participants’ audio will be muted initially when they join a meeting.
Enforce Login: This will only allow users who have logged into Zoom to join the meeting.
Recording Setting: You can specify what kind of recording access you want to give to students. Options include:
- No Recordings
- Local Drive
- Zoom Cloud
Creating a Zoom Meeting as Lesson
Now that you have set up Zoom Integration, it’s time to create your Zoom Meeting. From the course builder, either visit a course of your choice in edit mode or create a new course.
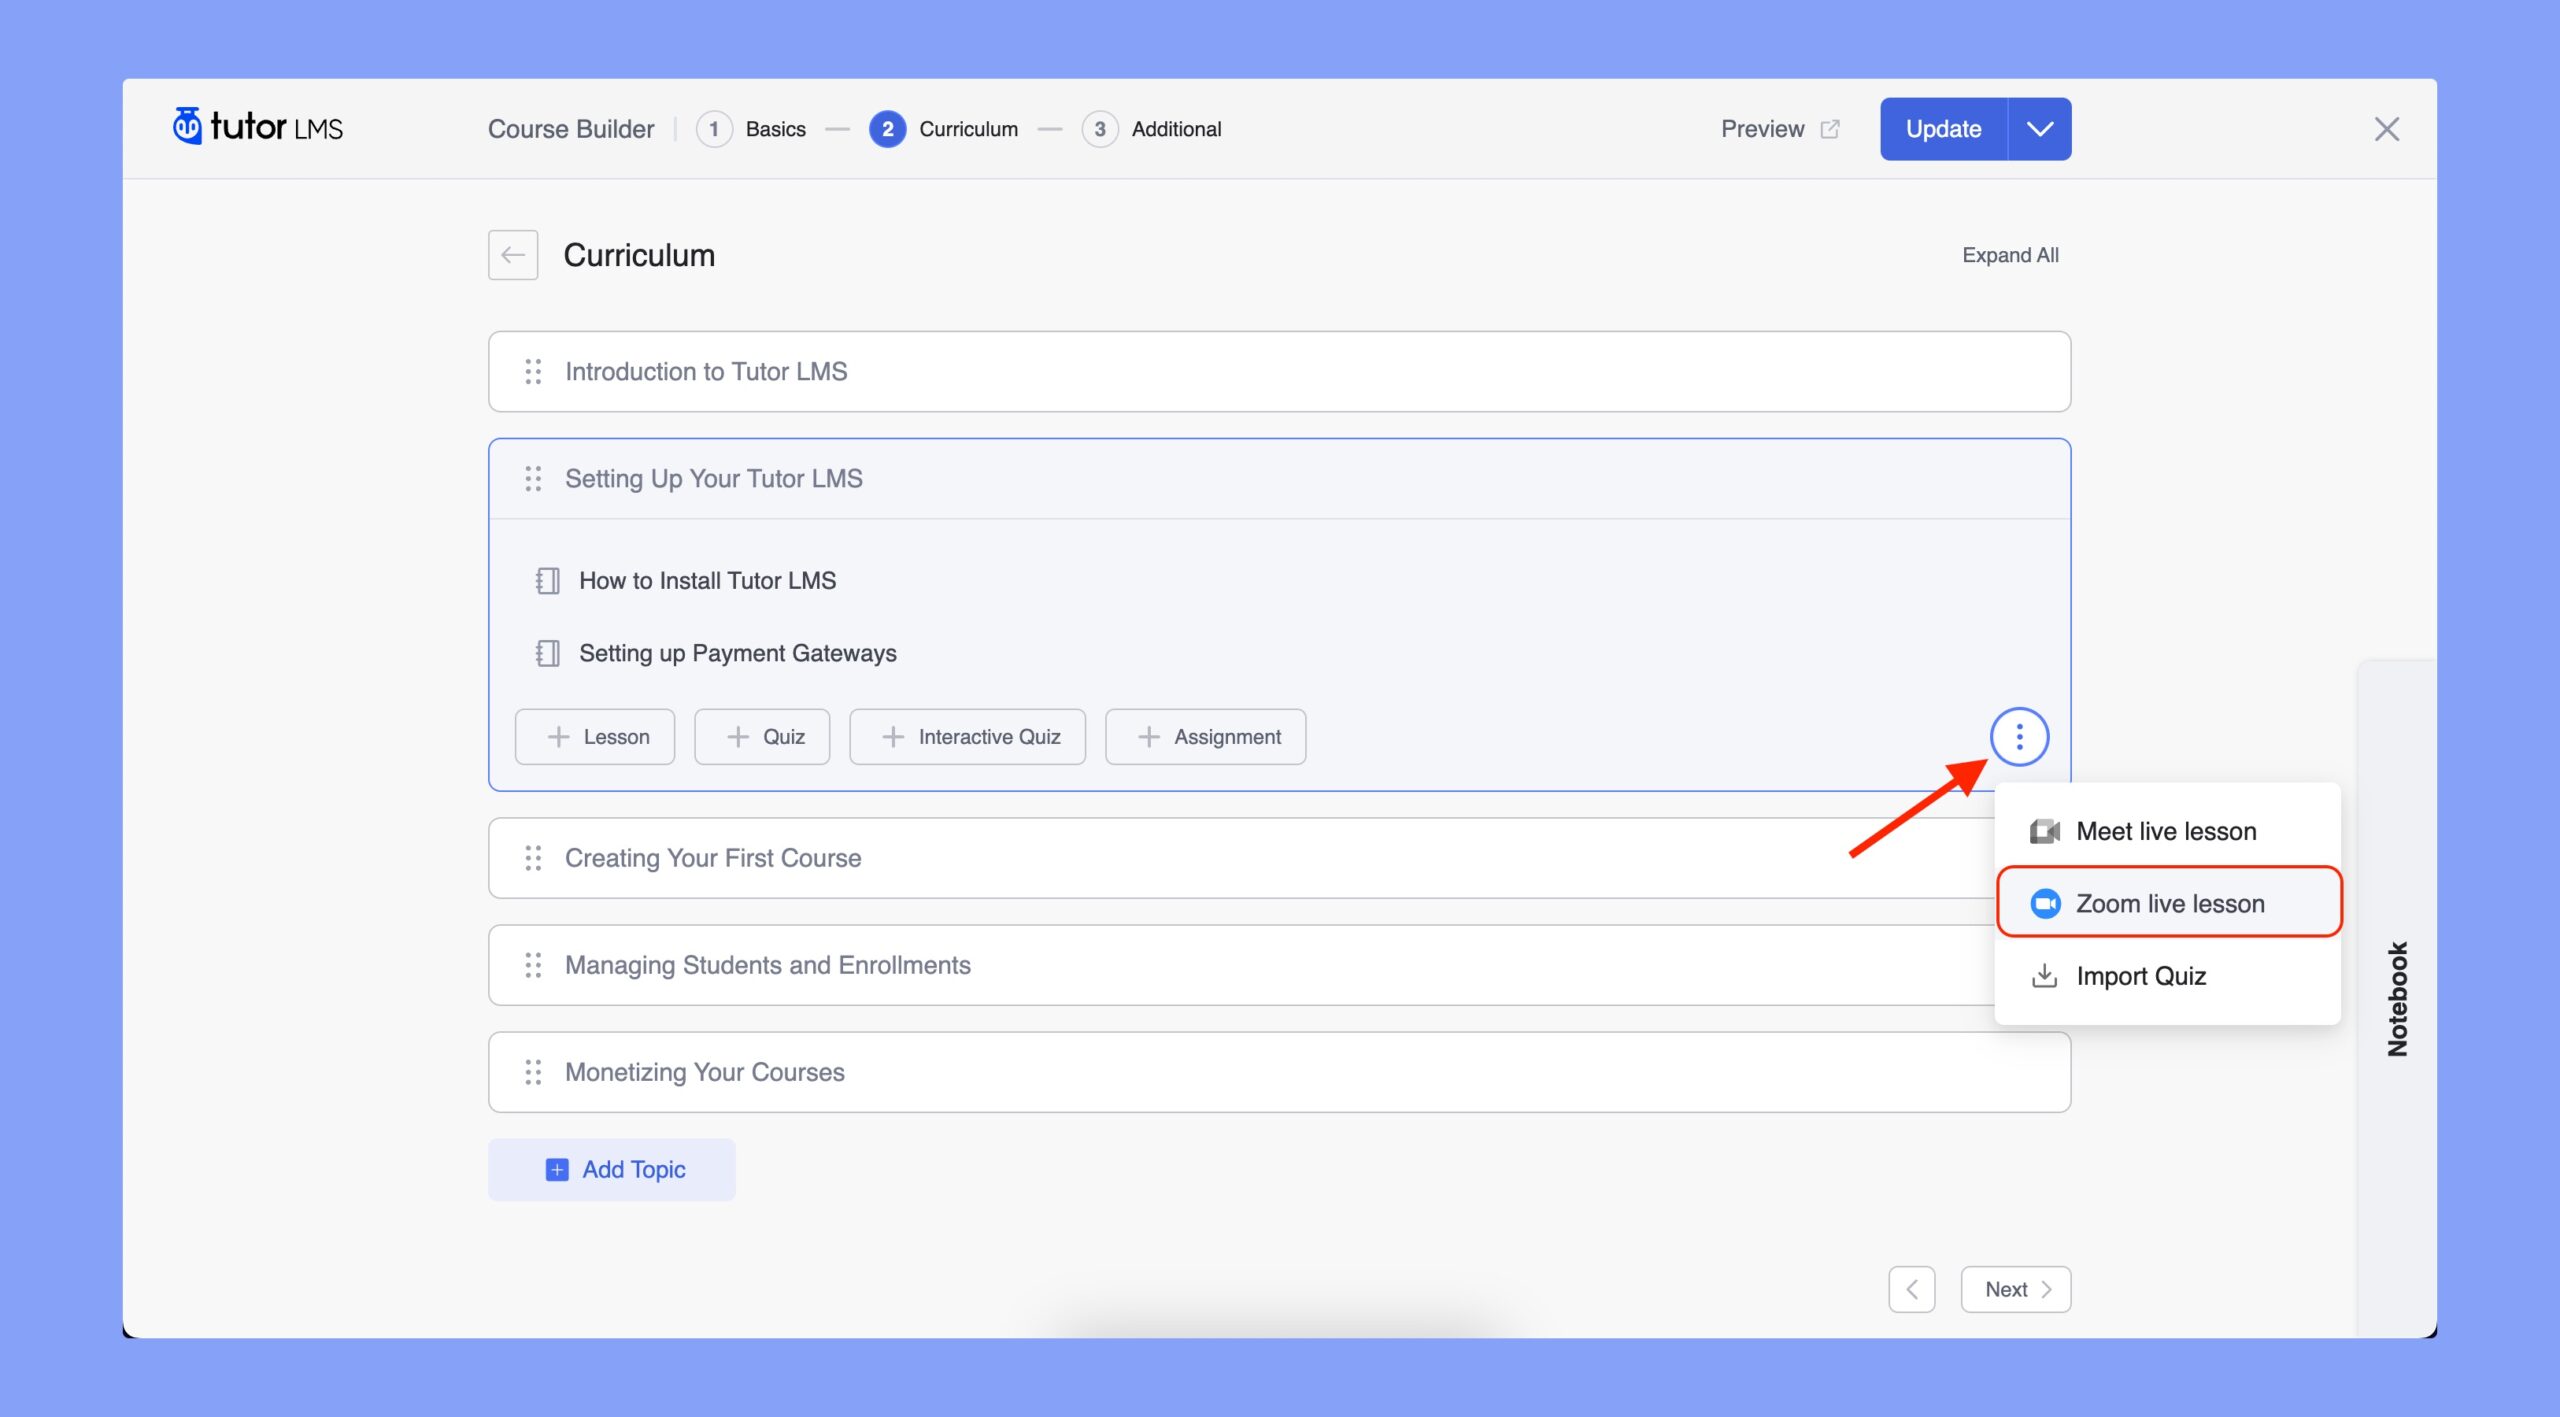
Scroll down to the Zoom Meeting section and click on the Create a Zoom Meeting button.
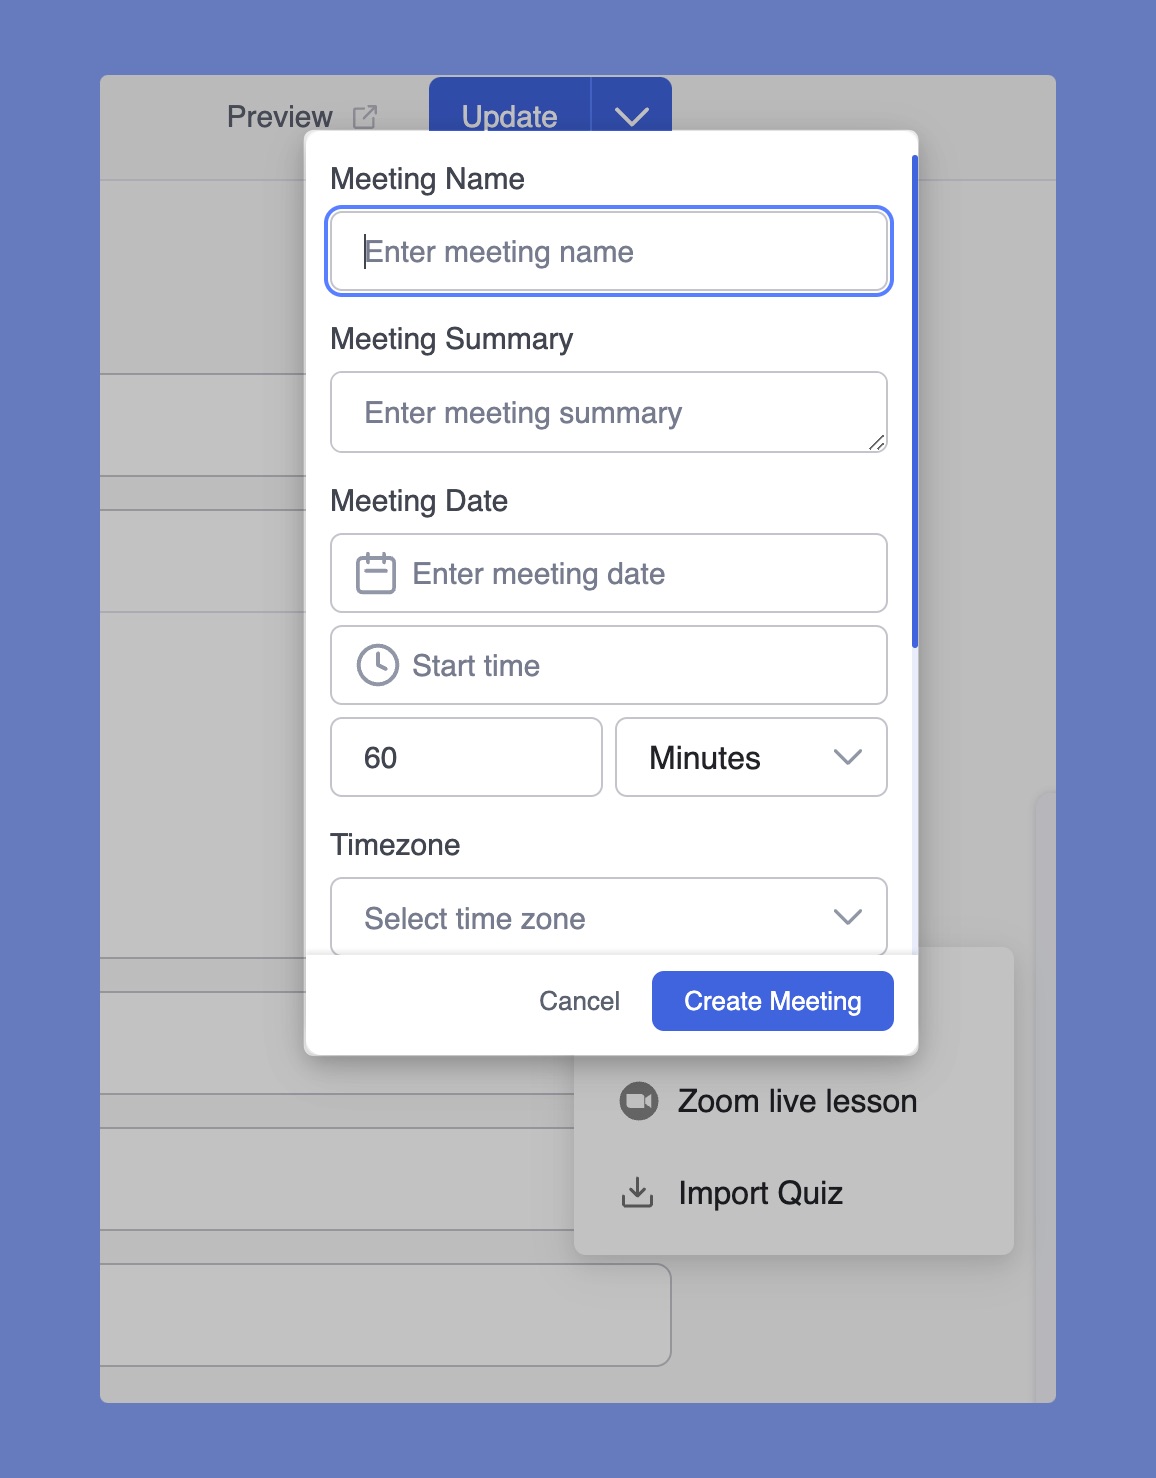
This will open the Zoom Meeting form where you can fill in the following meeting details:
Meeting Name: Give the meeting a name.
Meeting Summary: Give a summary of what the meeting is about. Mention things such as topics to be covered, type of meeting, etc.
Meeting Date: Select the time and date of the meeting.
Meeting Duration: Select the duration of the meeting. Keep in mind that if you are a free user of Zoom, you cannot hold meetings longer than 40min.
Time Zone: Specify the time zone for the meeting.
Auto Recording: Specify the Recording type of the meeting. Local will store the meeting on a user’s PC while Cloud will use Zoom Cloud Storage. You can also select No Recording to simply disable this option.
Meeting Password: Set a password that will restrict people from accessing the meeting randomly. Only the students with the proper credentials will be able to access the Zoom meeting.
Meetings Host: This section will display the name of the meeting host.
Finish off by clicking on the Create Meeting button. You’ll then see this meeting appear under All Meetings in the Zoom Panel.
Create Zoom Meeting for Courses
Besides creating a Zoom lesson, you can also schedule live classes for your eLearning courses from the Additional tab.
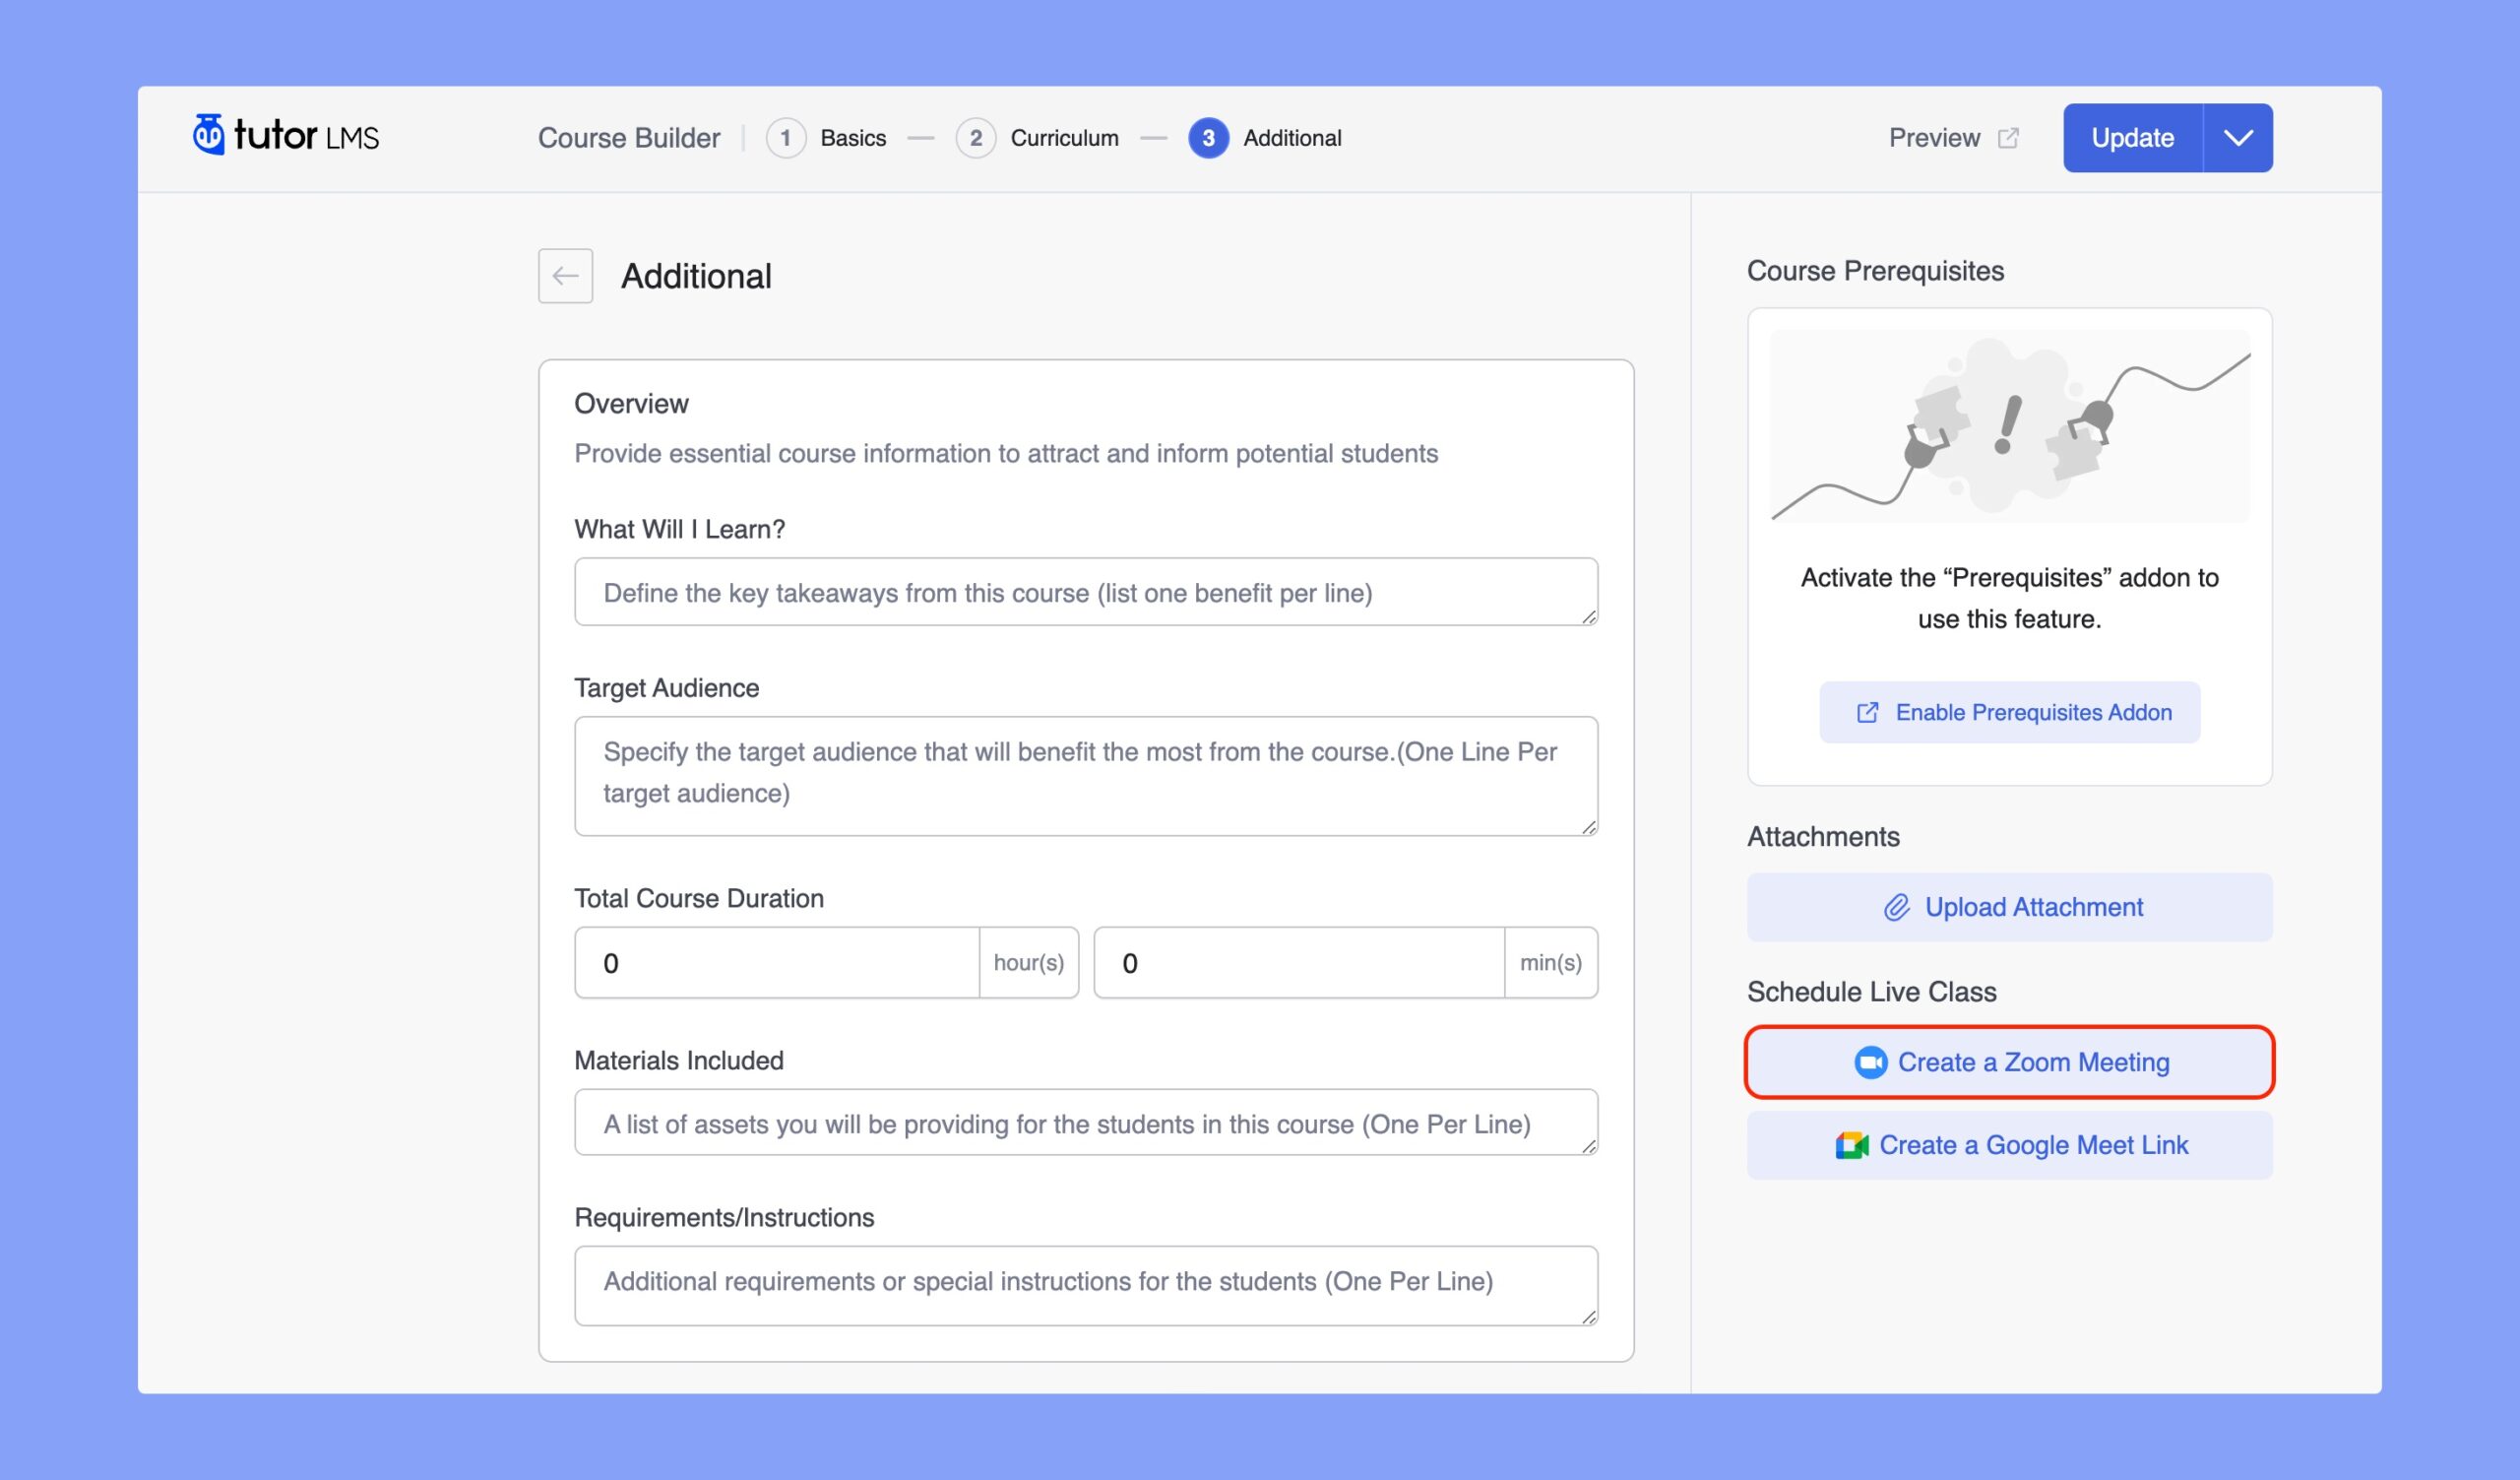
After setting up everything, the students will get the information about this upcoming meeting informatin on the lesson page.