Guest Purchase
When shopping online you might notice that you’re not always logged in before placing an order on a website. But during checkout, you are given a login/registration option to proceed with your order.
This kind of configuration helps to simplify the purchase process since it allows unregistered users to browse and buy any of your courses and only register during checkout once they’ve found a course they like.
So how do you implement this on a site created with Tutor LMS? Well, this entire process is managed by your eCommerce Engine, which in this circumstance could be one of the following:
- Native eCommerce
- WooCommerce, etc
So now, let us go over the step-by-step procedure of enabling Guest mode in these eCommerce engines:
1. Tutor LMS Native eCommerce
At first, make sure that you’ve enabled the Native eCommerce as the eCommerce engine. You can set it from Tutor LMS Pro > Settings > Monetization.
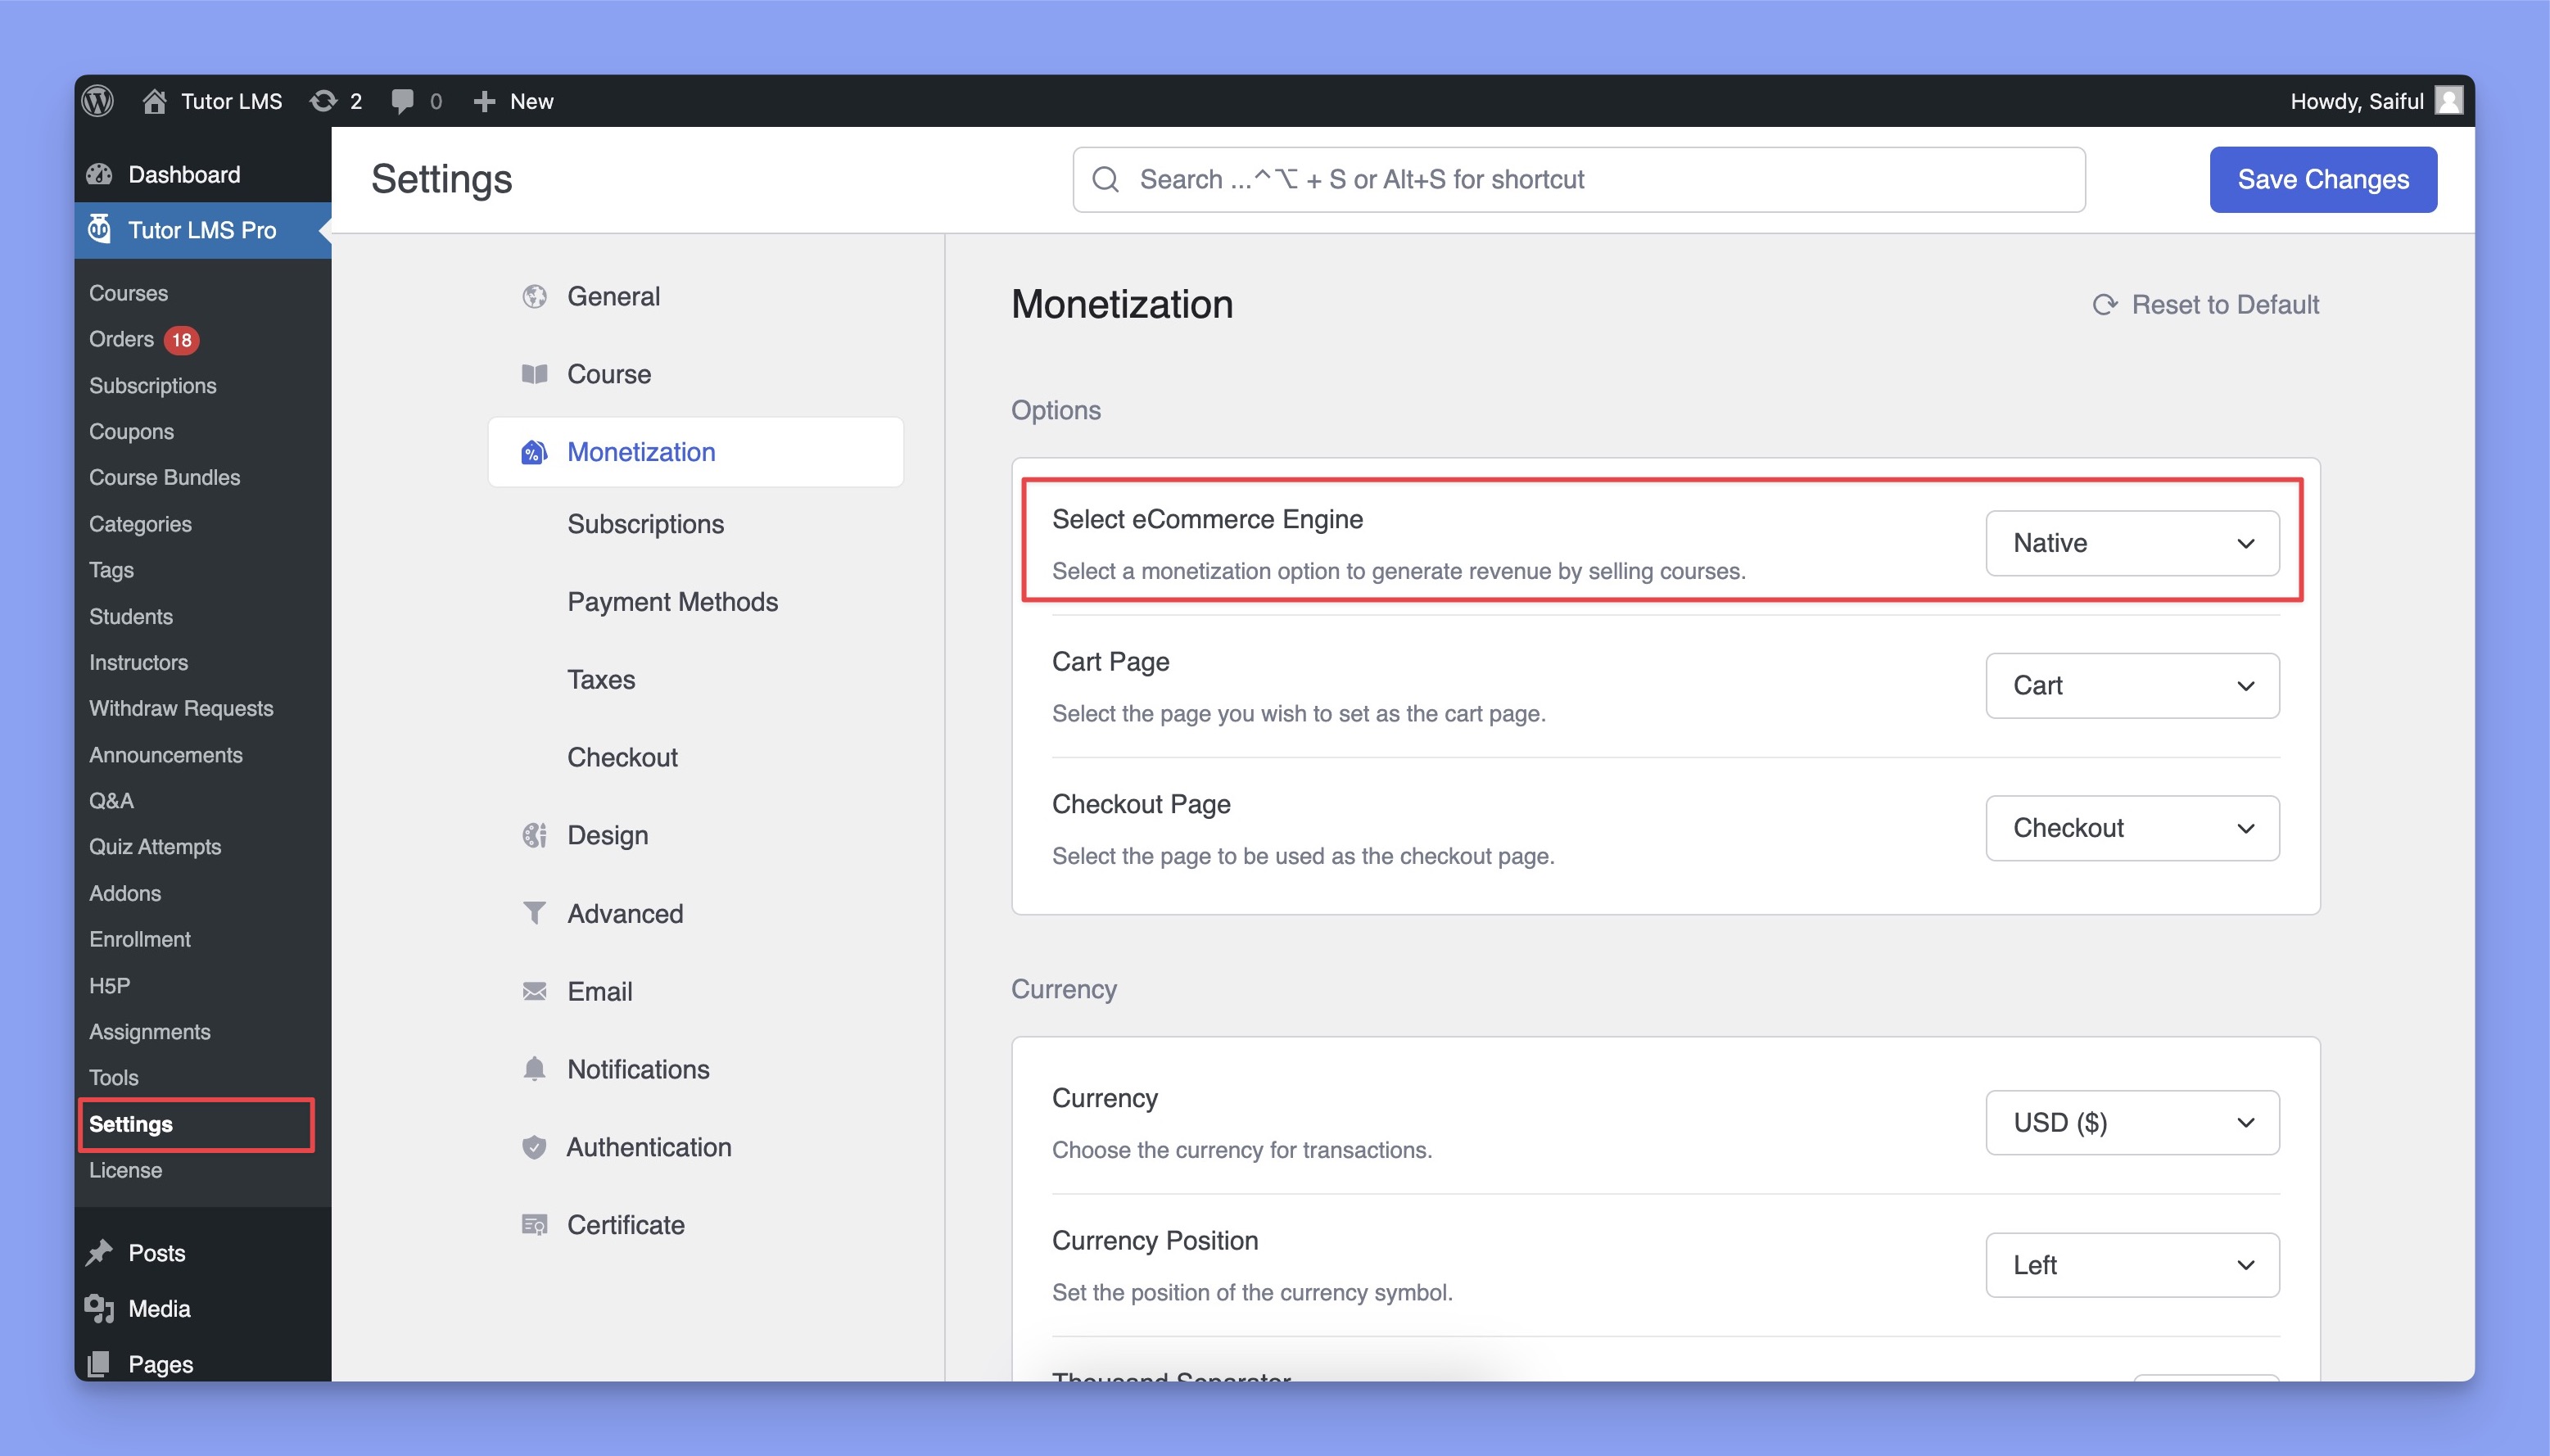
Then go to Tutor LMS Pro > Settings > Monetization > Checkout and enable the Guest Checkout option.
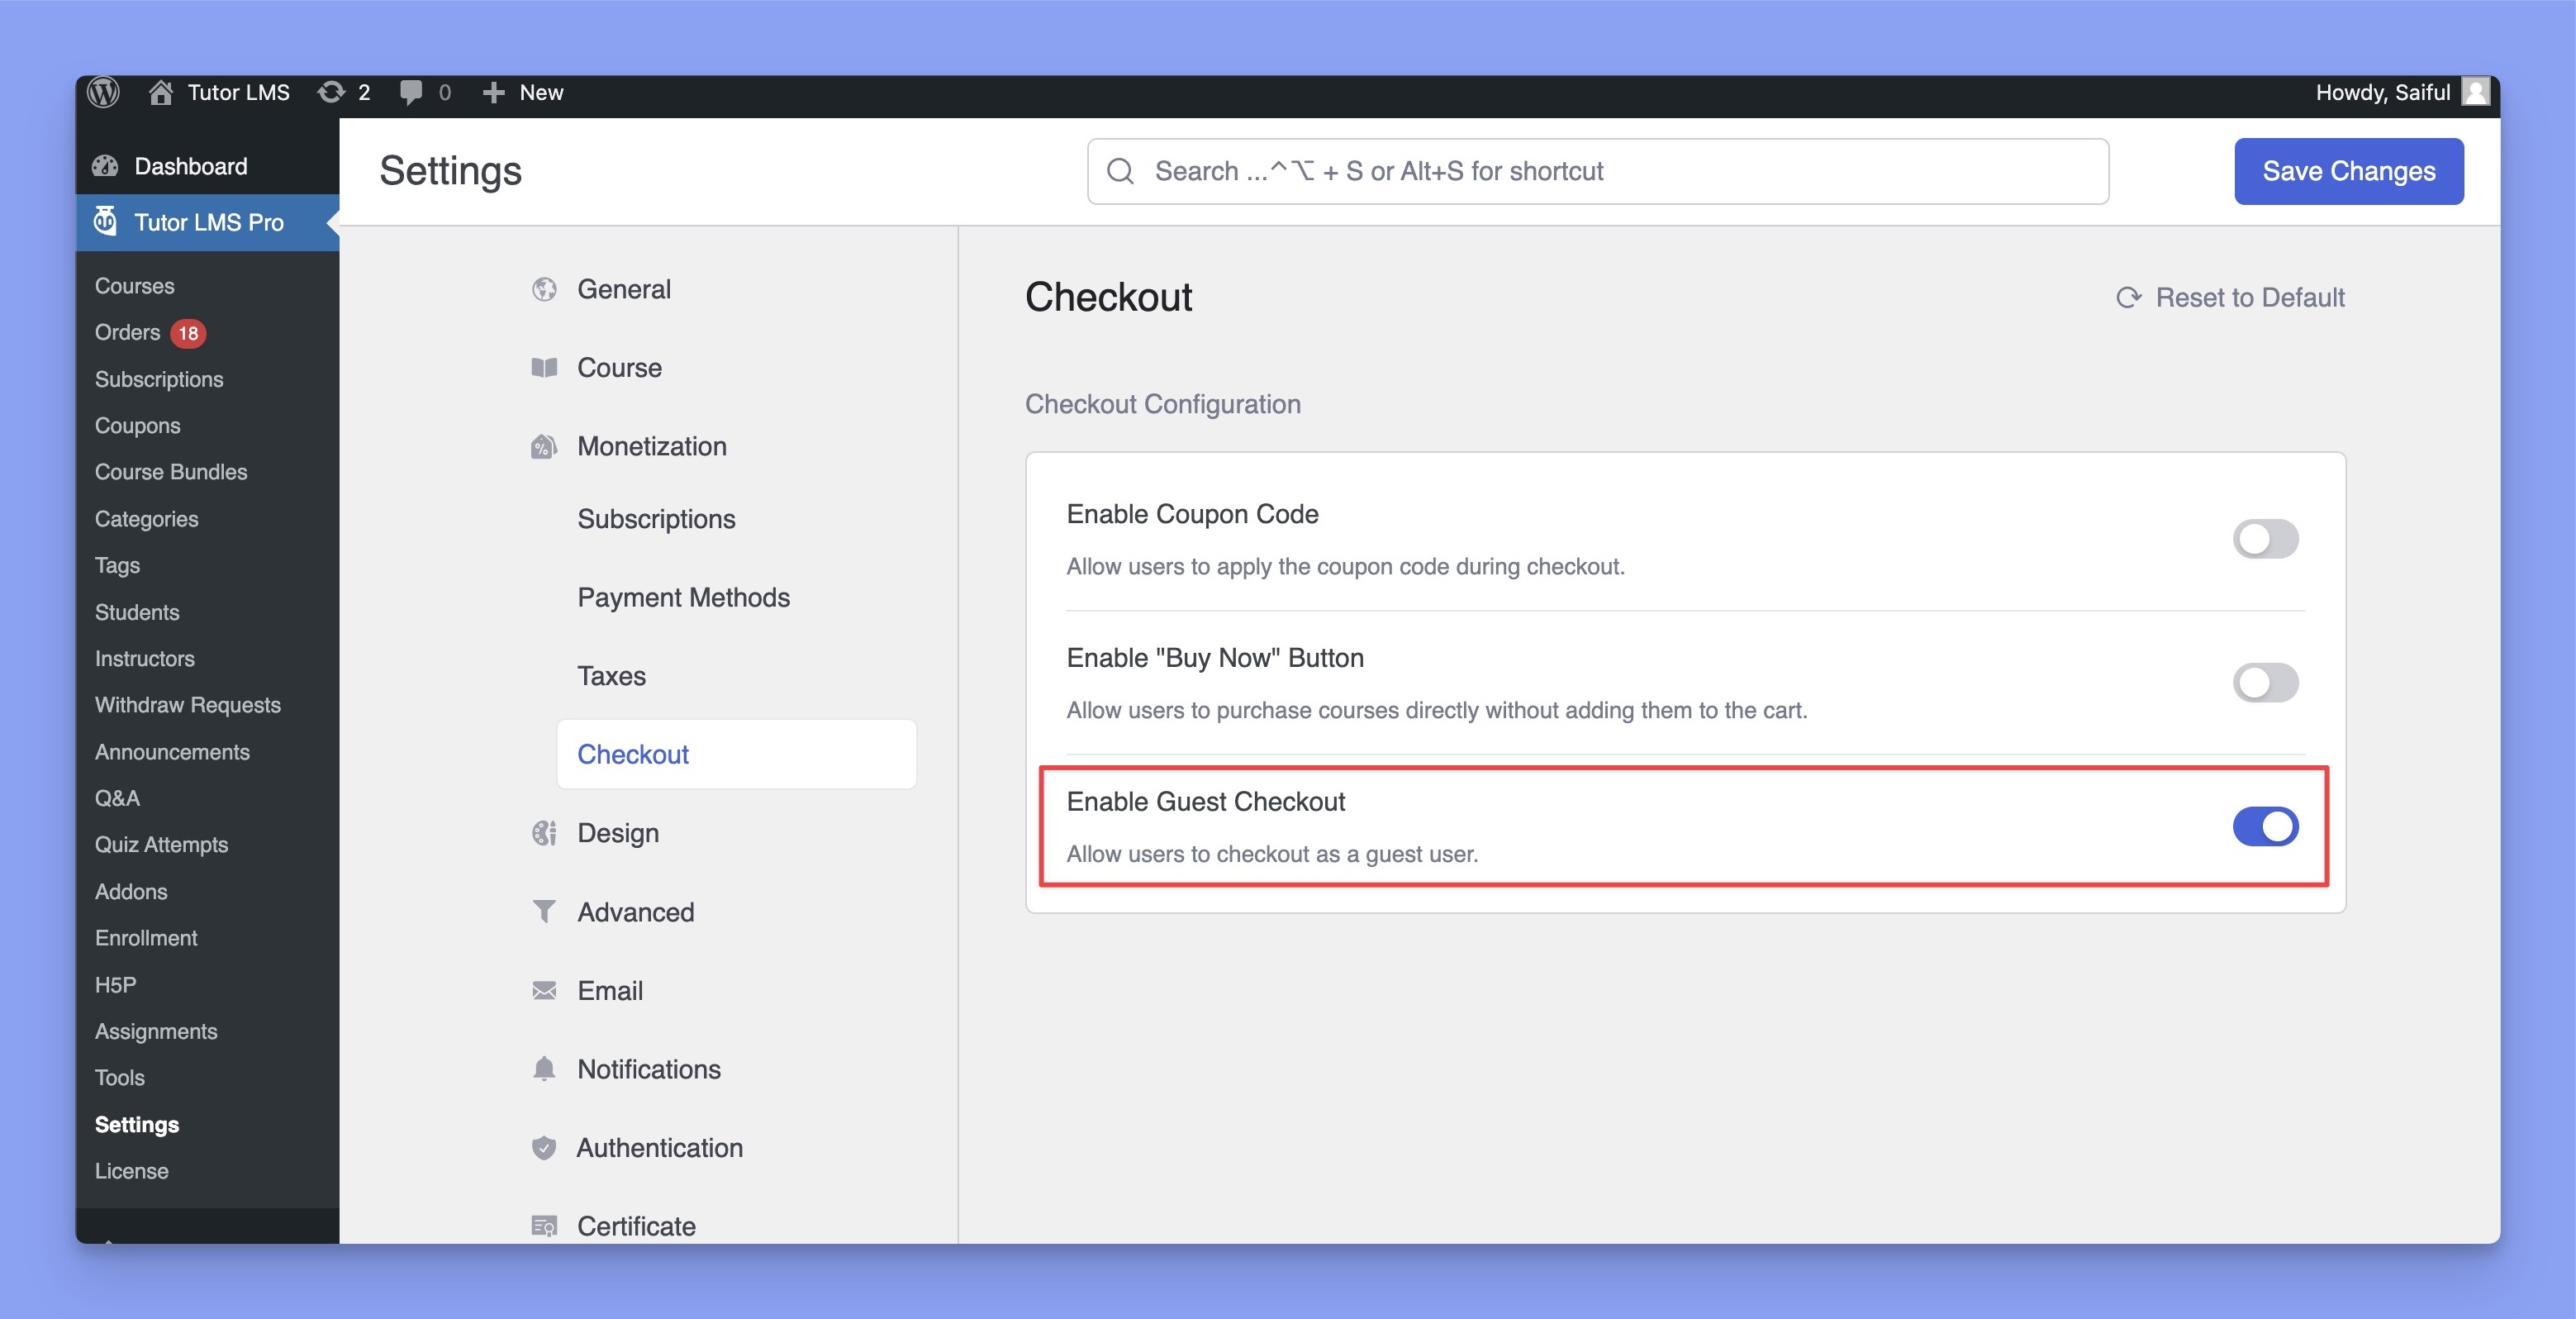
Finally click on the Save Changes button in the top-right corner and they guest checkout functionality will become enabled for your eLearning platform.
2. WooCommerce
Now, let’s demonstrate this process by using WooCommerce. To start the process, make sure that you have performed the following process:
- Installed and activated WooCommerce plugin
- Selected WooCommerce as the eCommerce engine
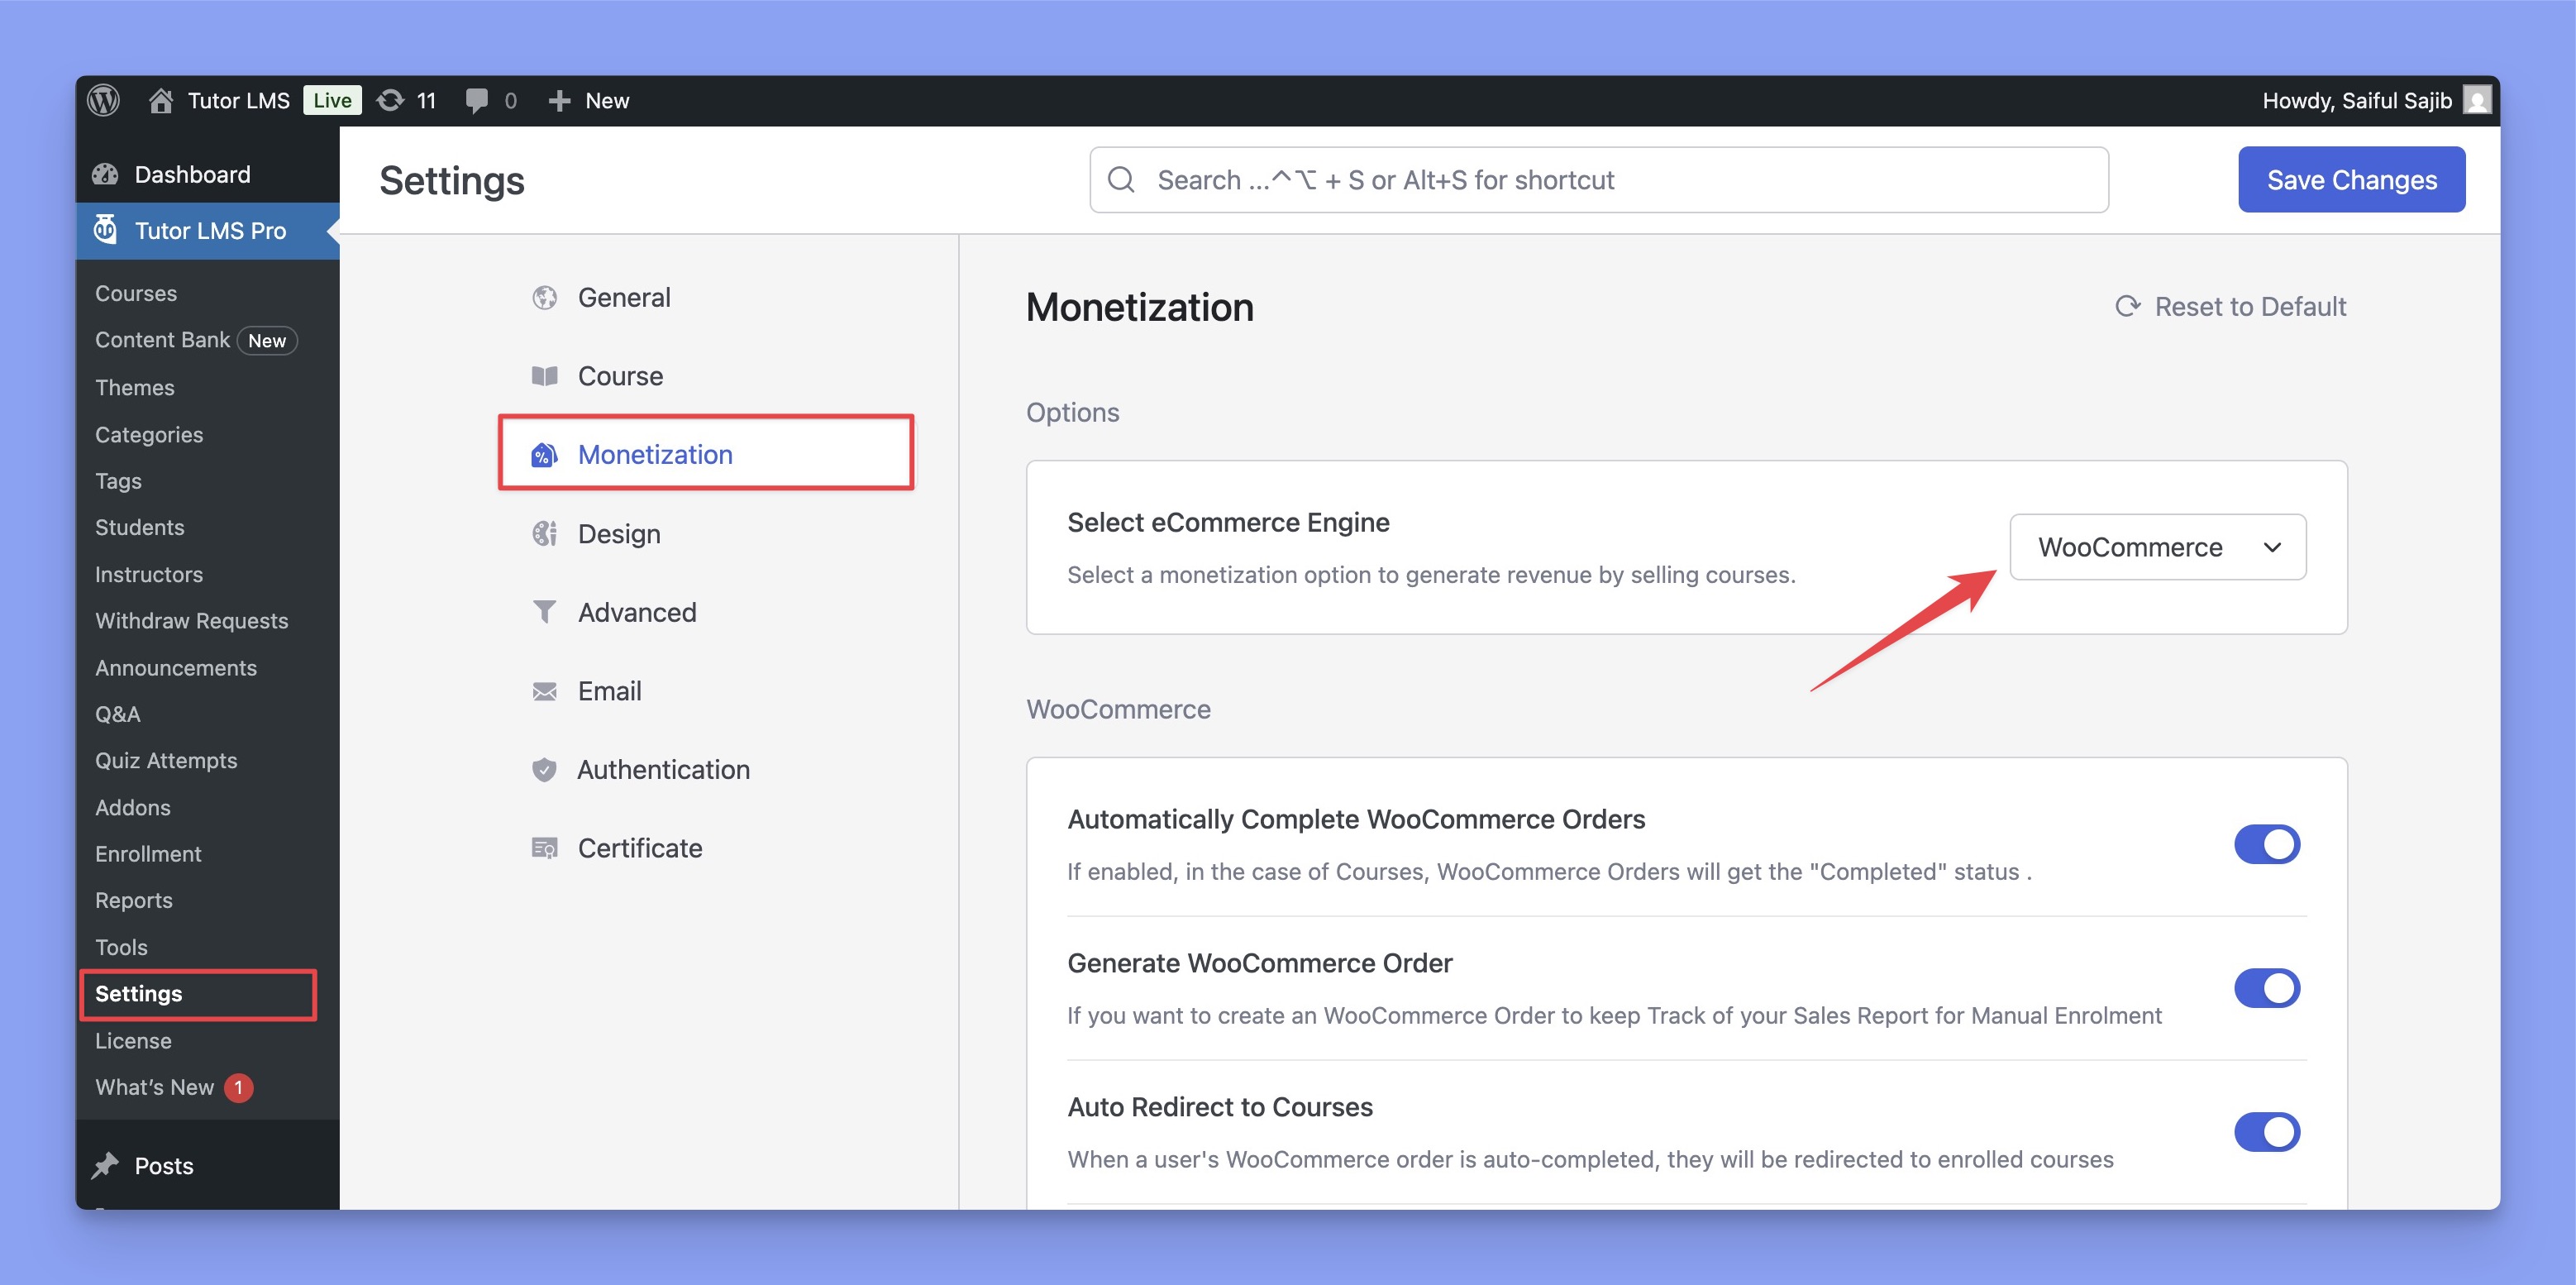
Enable Guest Mode
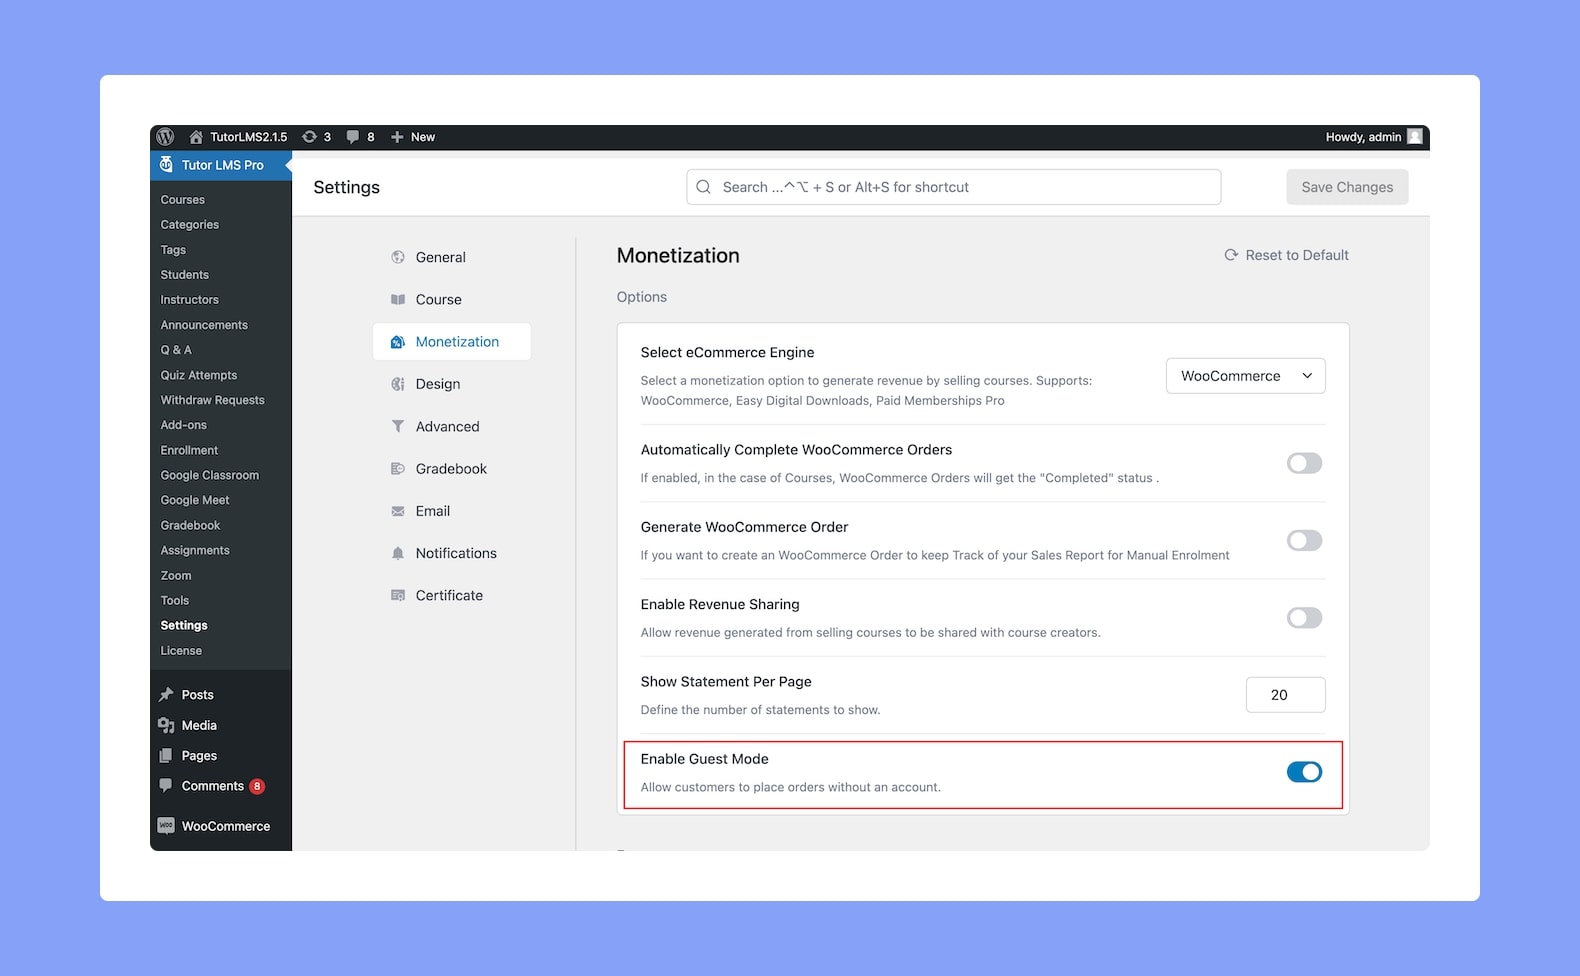
Next, you need to activate the option Enable Guest Mode from WP Admin > Tutor LMS > Settings > Monetization.
WooCommerce Settings
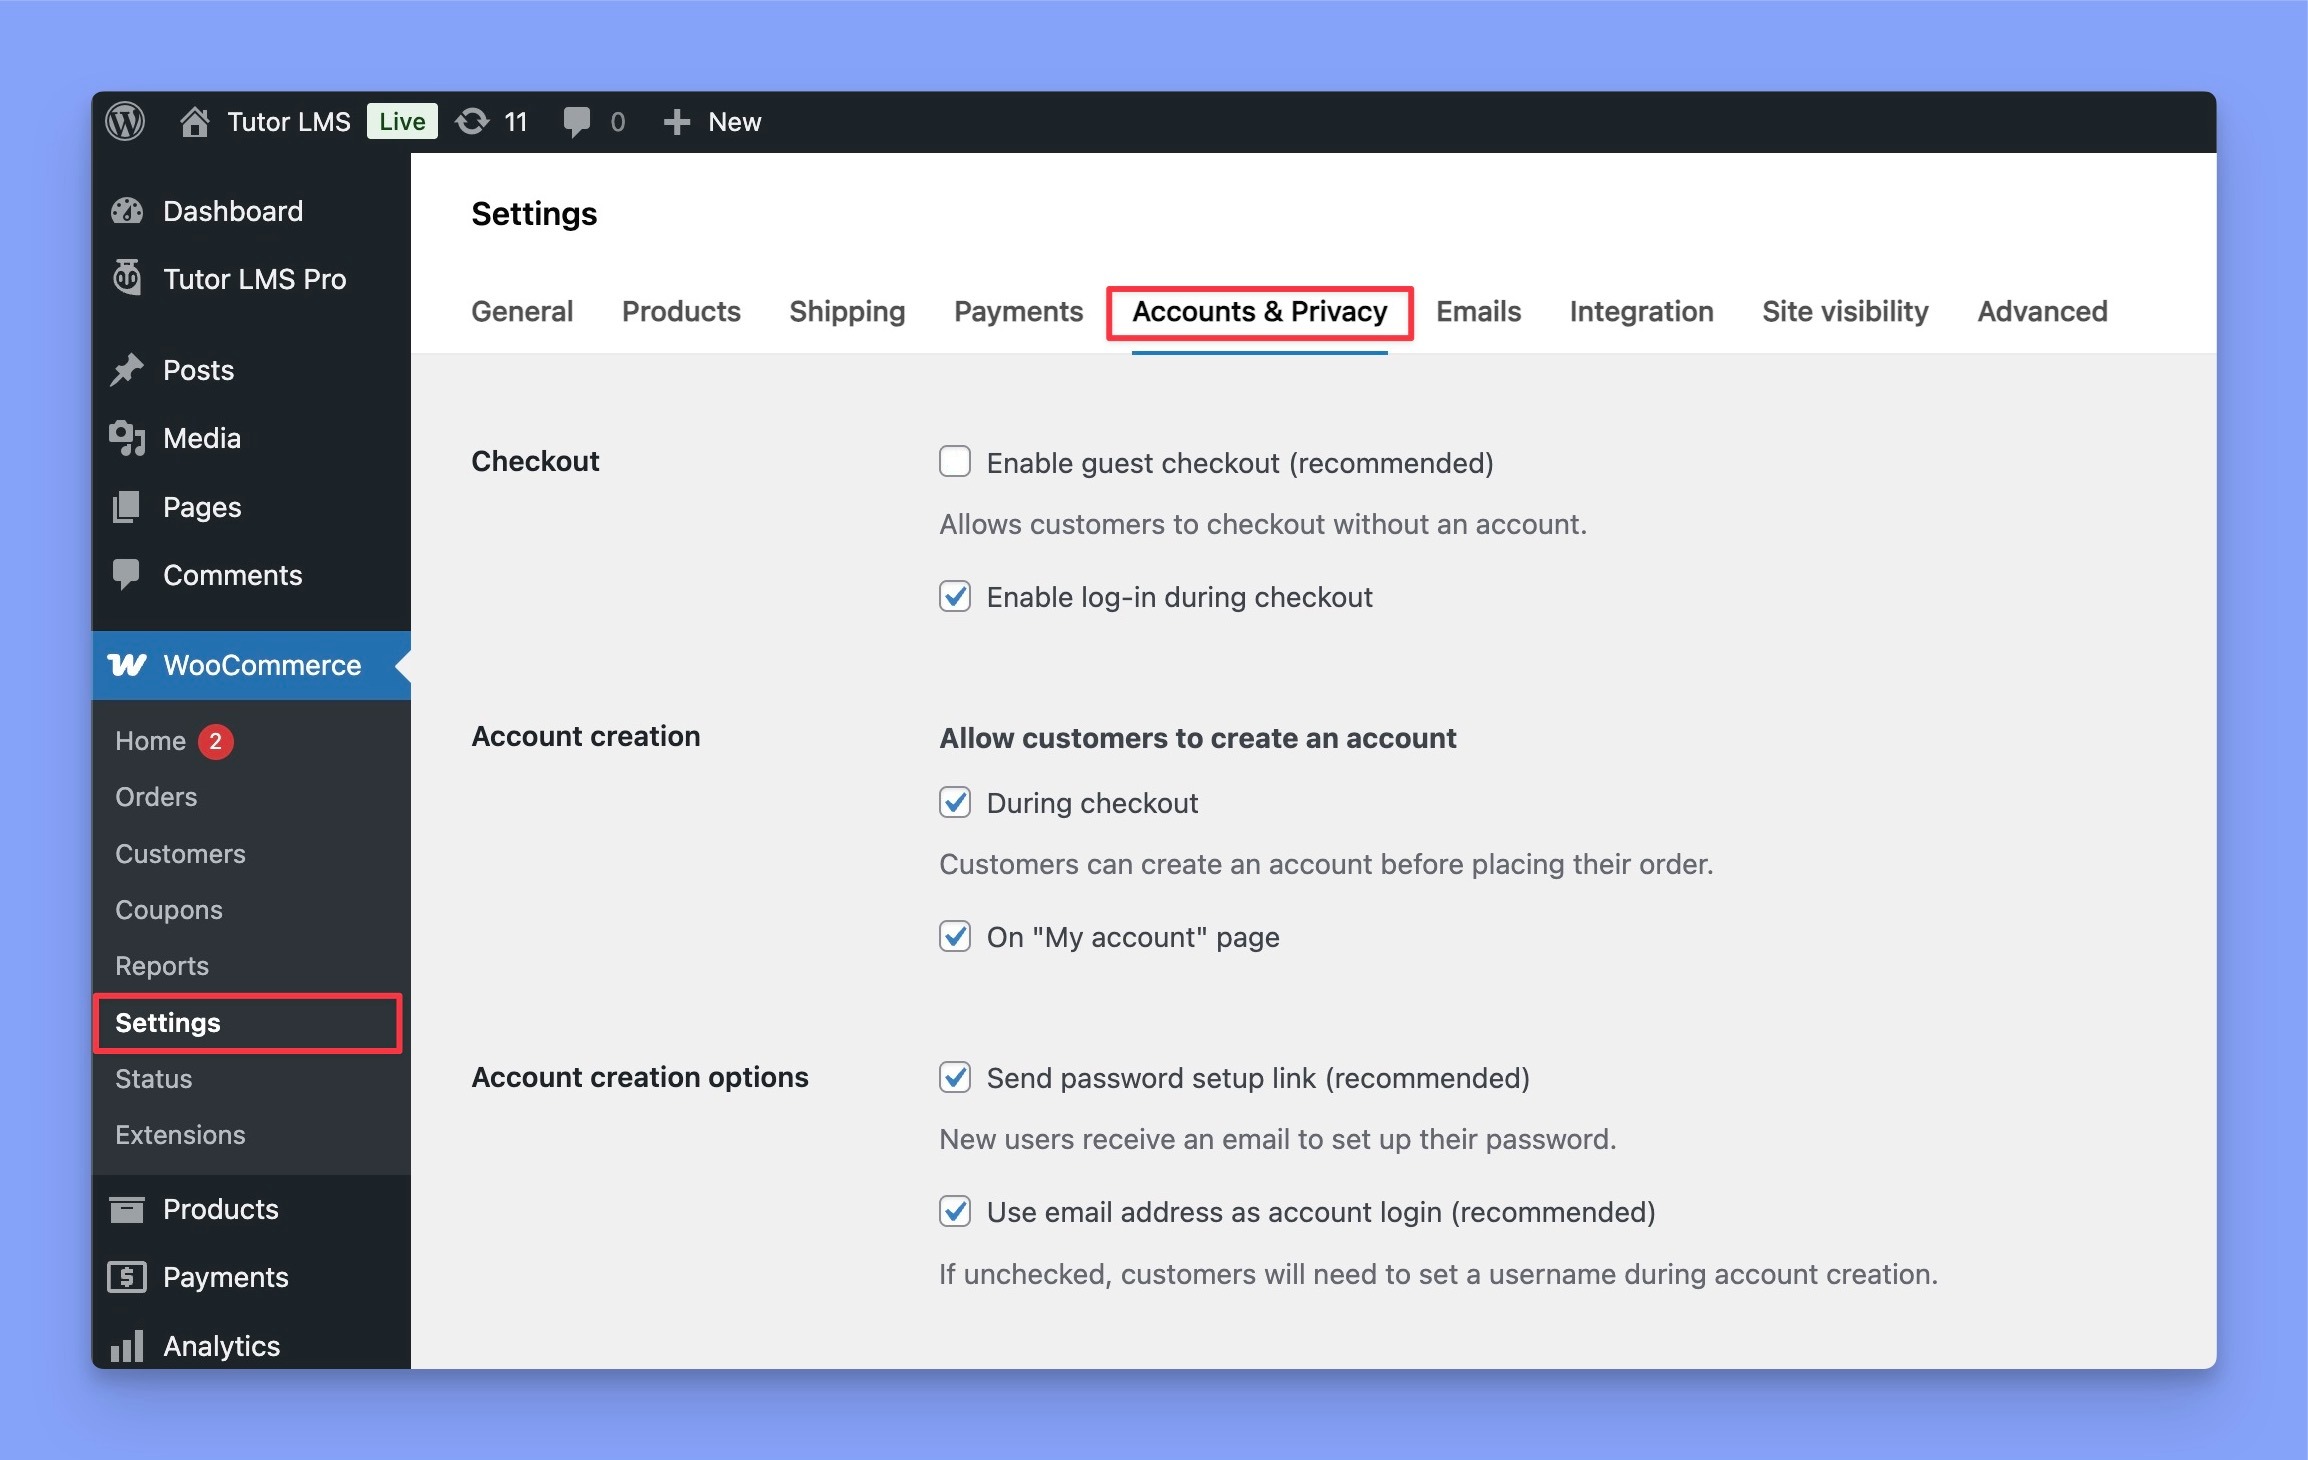
Then, it’s time to adjust WooCommerce Settings. Head over to WP Admin > WooCommerce > Settings > Account & Privacy (tab) and ensure the following options have been enabled:
- Enable log-in during checkout
- Allow customers to create an account
- During checkout
- On “My account” page
Hit Save Changes once you have configured these settings.
Finally, this is the most crucial step which, if missed out, will cause the users to not be automatically redirected to the course page.
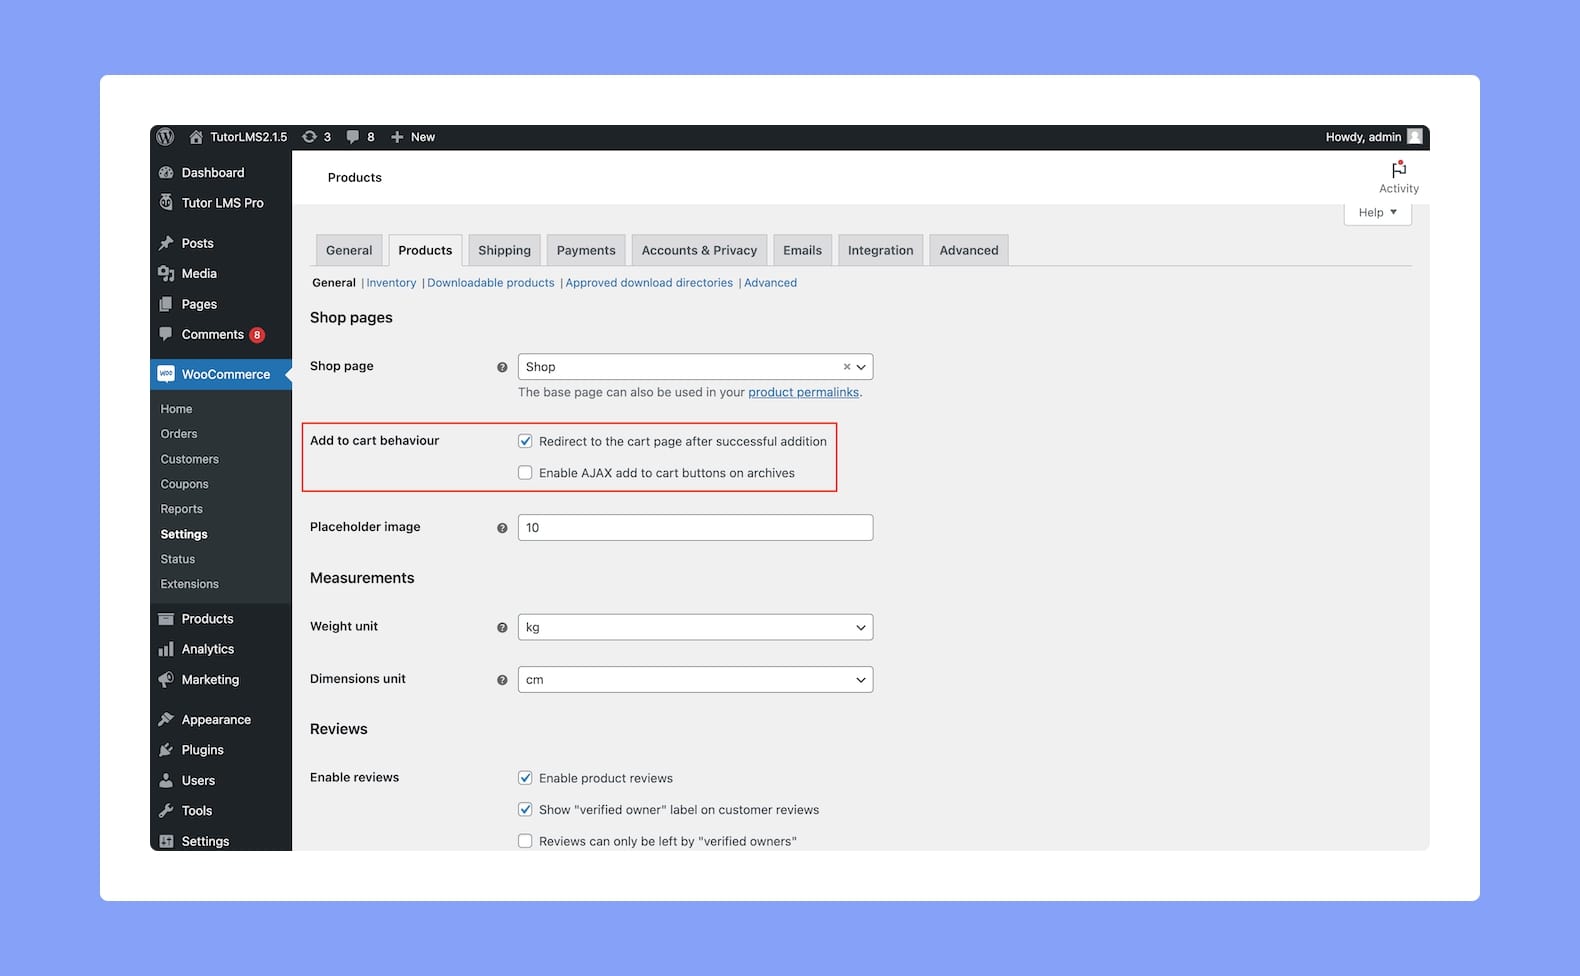
Navigate to WP Admin > WooCommerce > Settings > Products and find the Add to cart behavior section.
From this section, enable the “Redirect to the cart page after successful addition” option and make sure to uncheck the “Enable AJAX add to cart buttons on archives”.
When you’re done, make sure to hit the Save Changes button at the bottom.
Troubleshooting
If the process does not run smoothly, that can possibly mean one of the following things:
- You did not select WooCommerce as the eCommerce Engine from the Tutor LMS Monetization Settings.
- You did not activate Enable Guest Mode from the Tutor LMS Monetization Settings.
- You forgot to enable “Allow customers to place orders without an account” from the WooCommerce Accounts & Privacy Settings.
- You did not set up WooCommerce Checkout/Cart/Shop Pages in WooCommerce > Settings > Advanced.
To elaborate on the last point, WooCommerce requires a few pages to smoothly run an eCommerce transaction.
These pages are created automatically upon WooCommerce installation by the WooCommerce setup wizard.
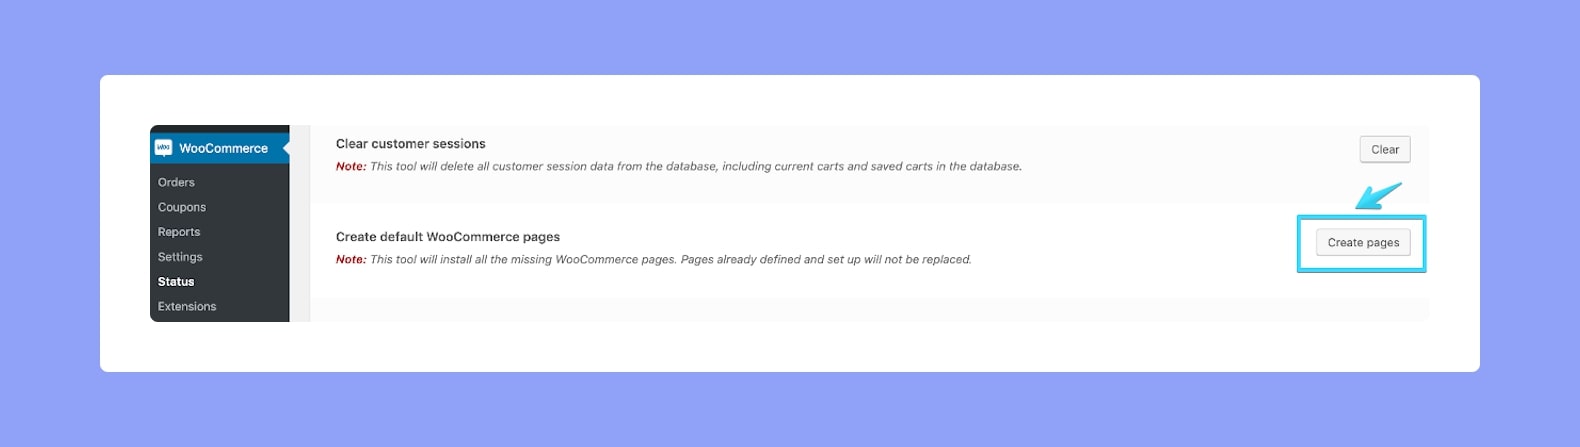
If you skipped the WooCommerce setup wizard during installation, you can install missing WooCommerce pages by going to WooCommerce > Status > Tools and clicking on the Create Pages option.