Memberships
The Gift Course feature allows users to purchase a course and send it to someone else as a gift. The recipient receives an email with the gifted course and can access it after claiming it.
1. Enable Gift Course
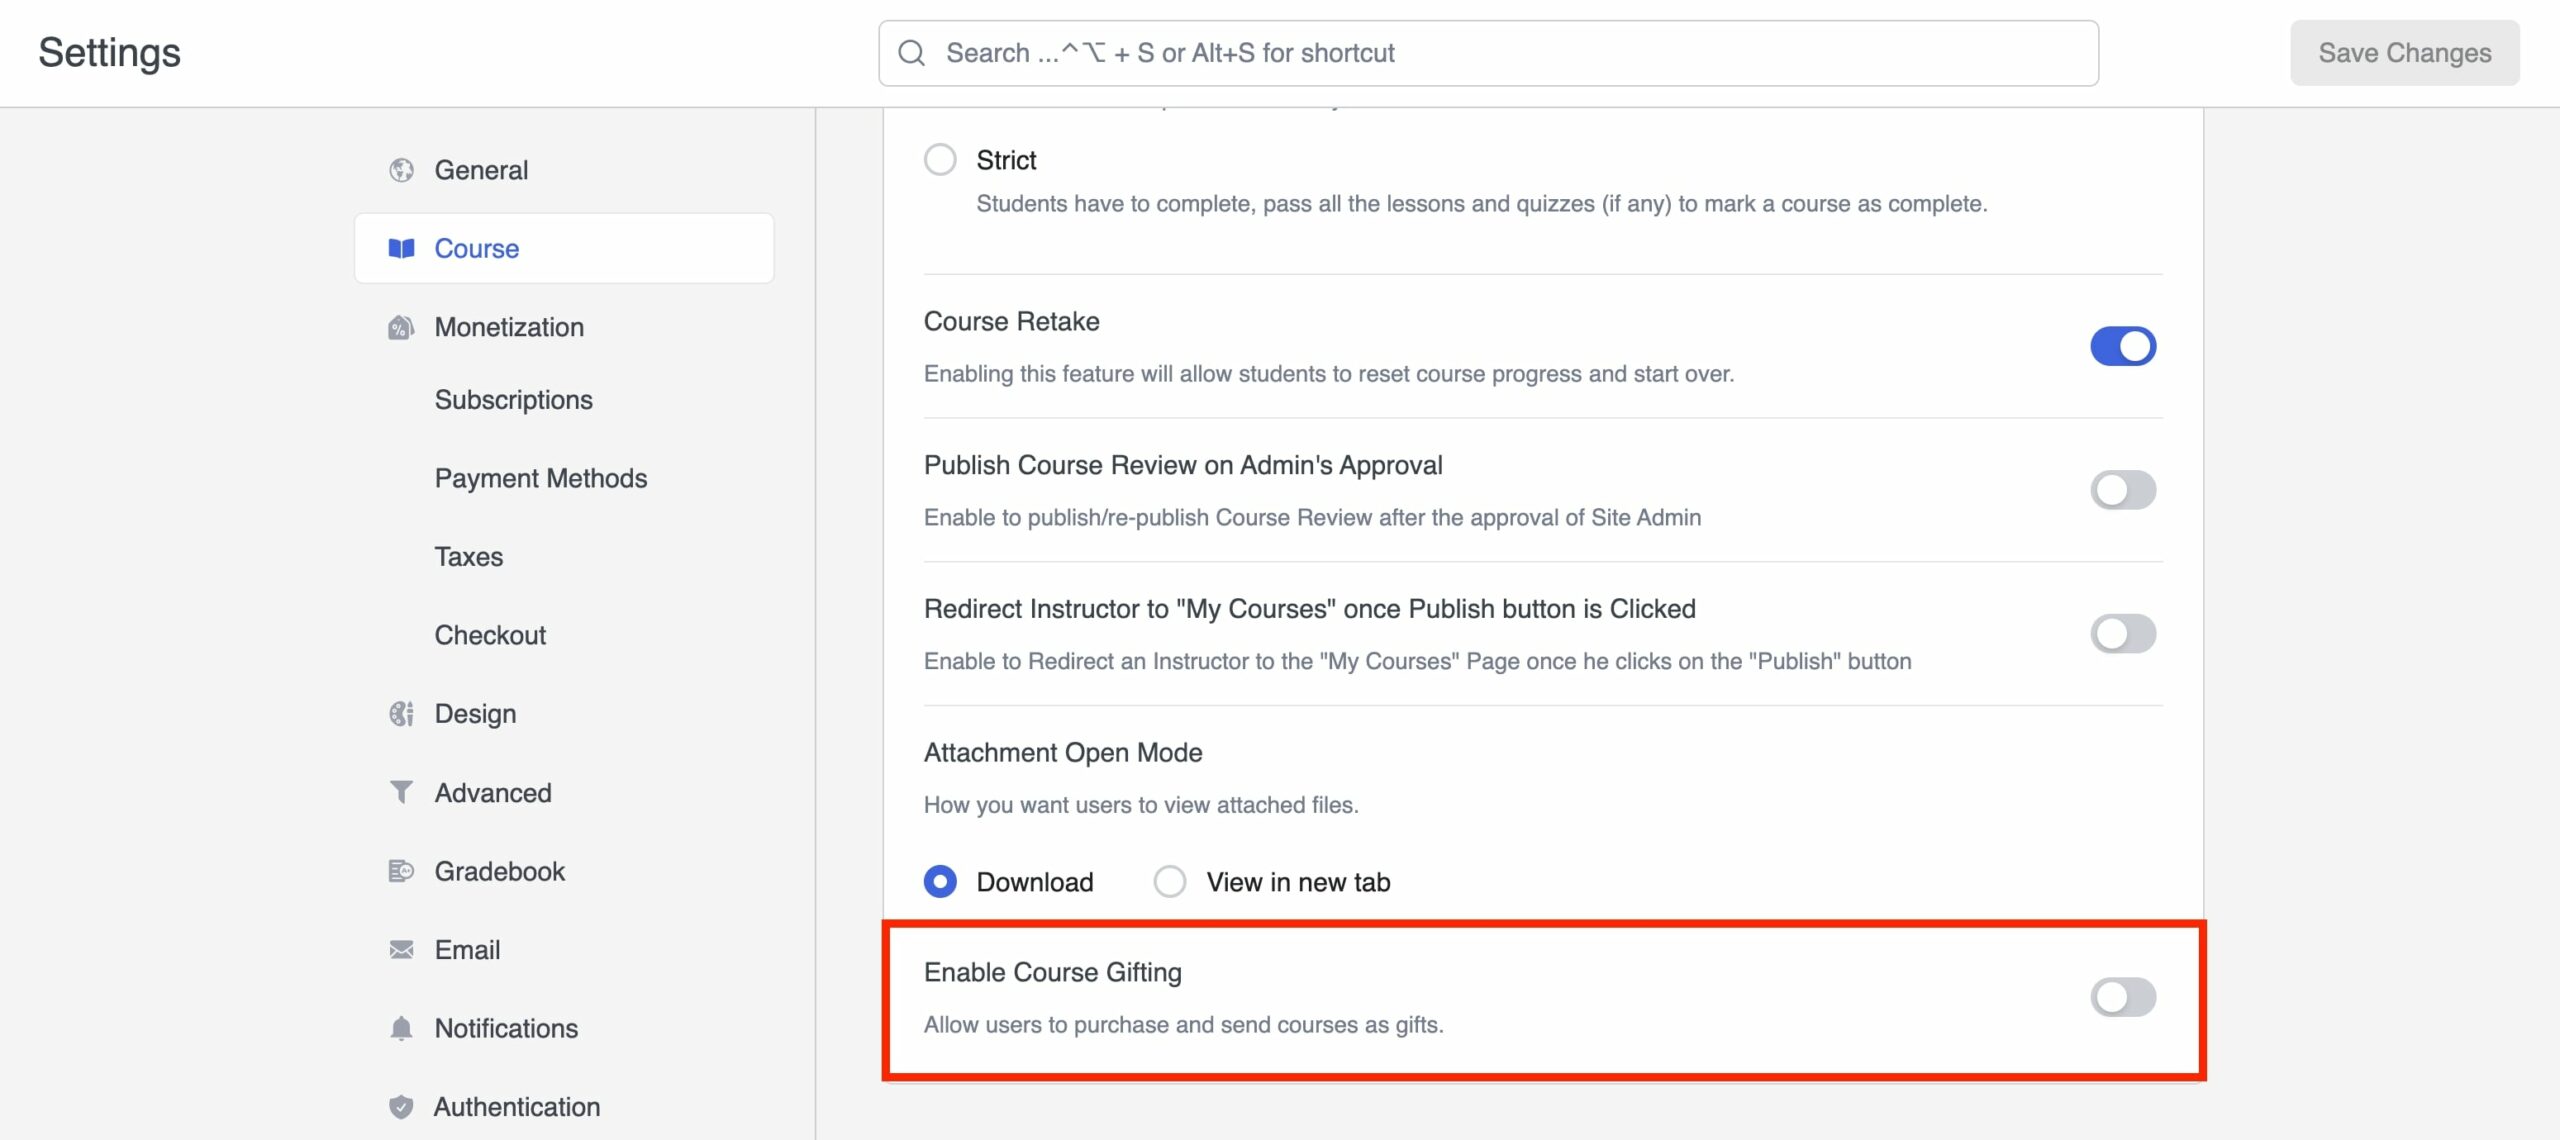
To enable gift course:
- Go to Tutor LMS → Settings → Course.
- Scroll down and toggle on Enable Course Gifting.
- Save your changes.
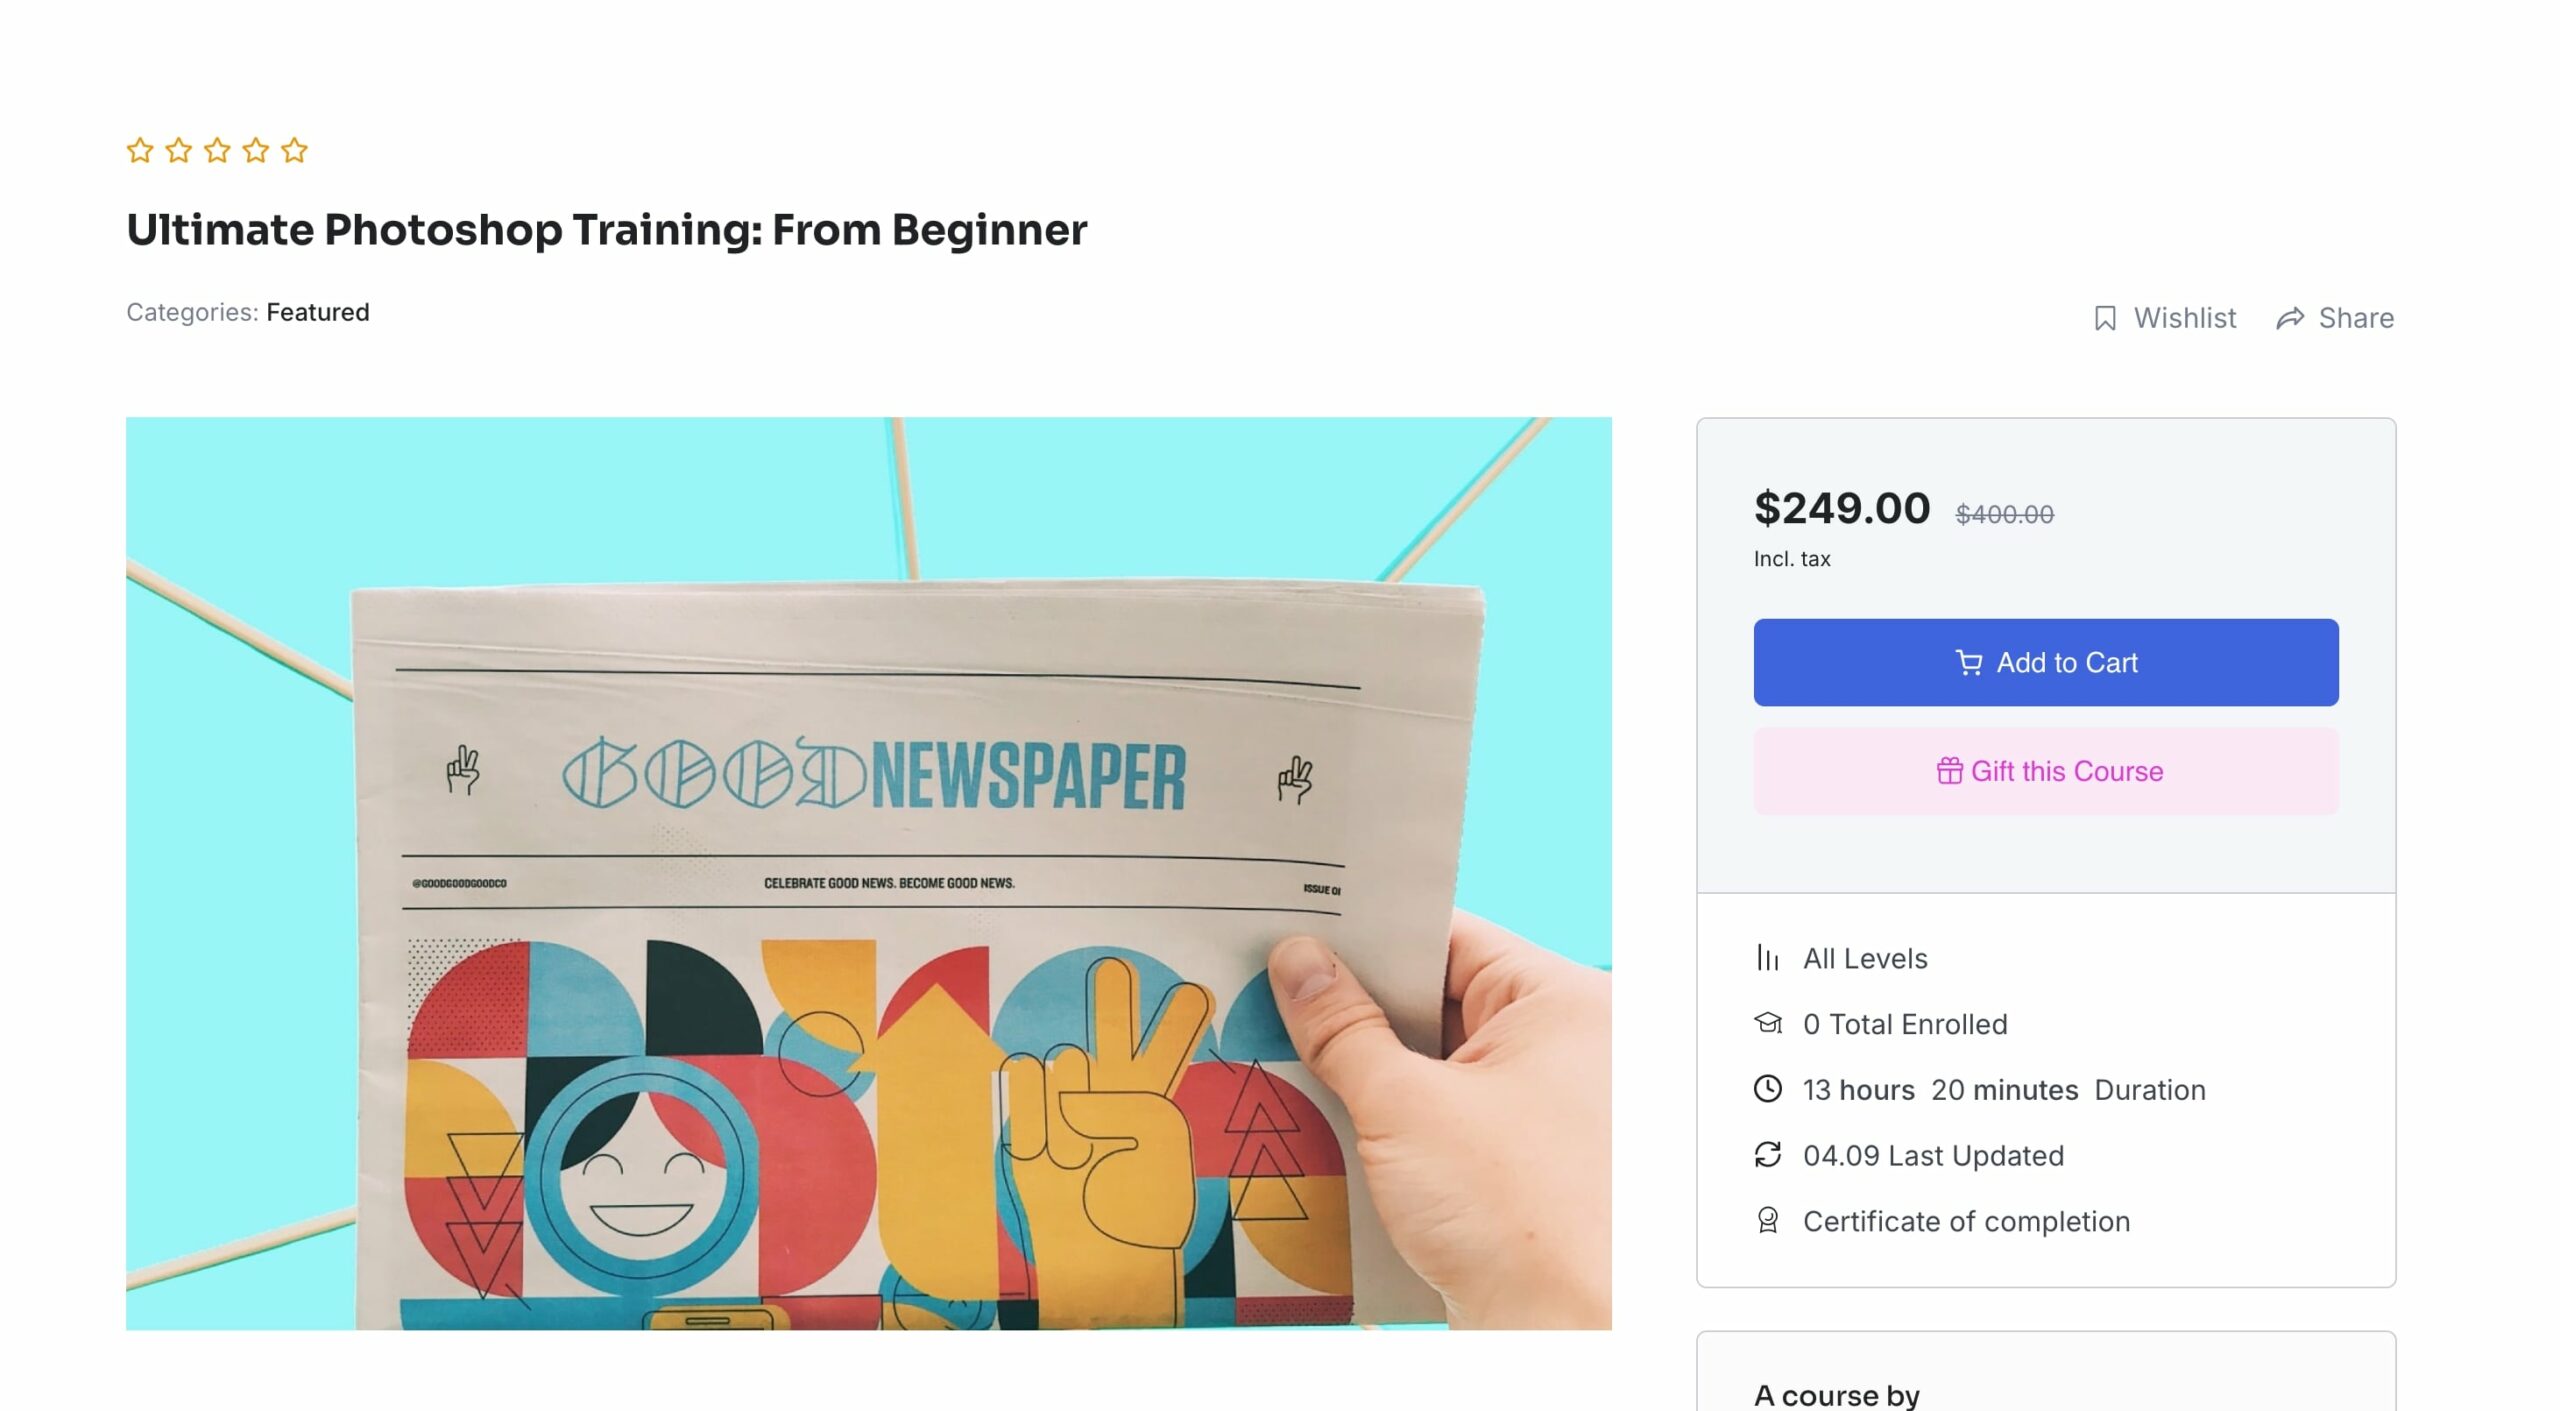
Once enabled, a “Gift this Course” button will appear on all course details pages.
2. Sending a Gift Course
- On the course page, click Gift this Course.
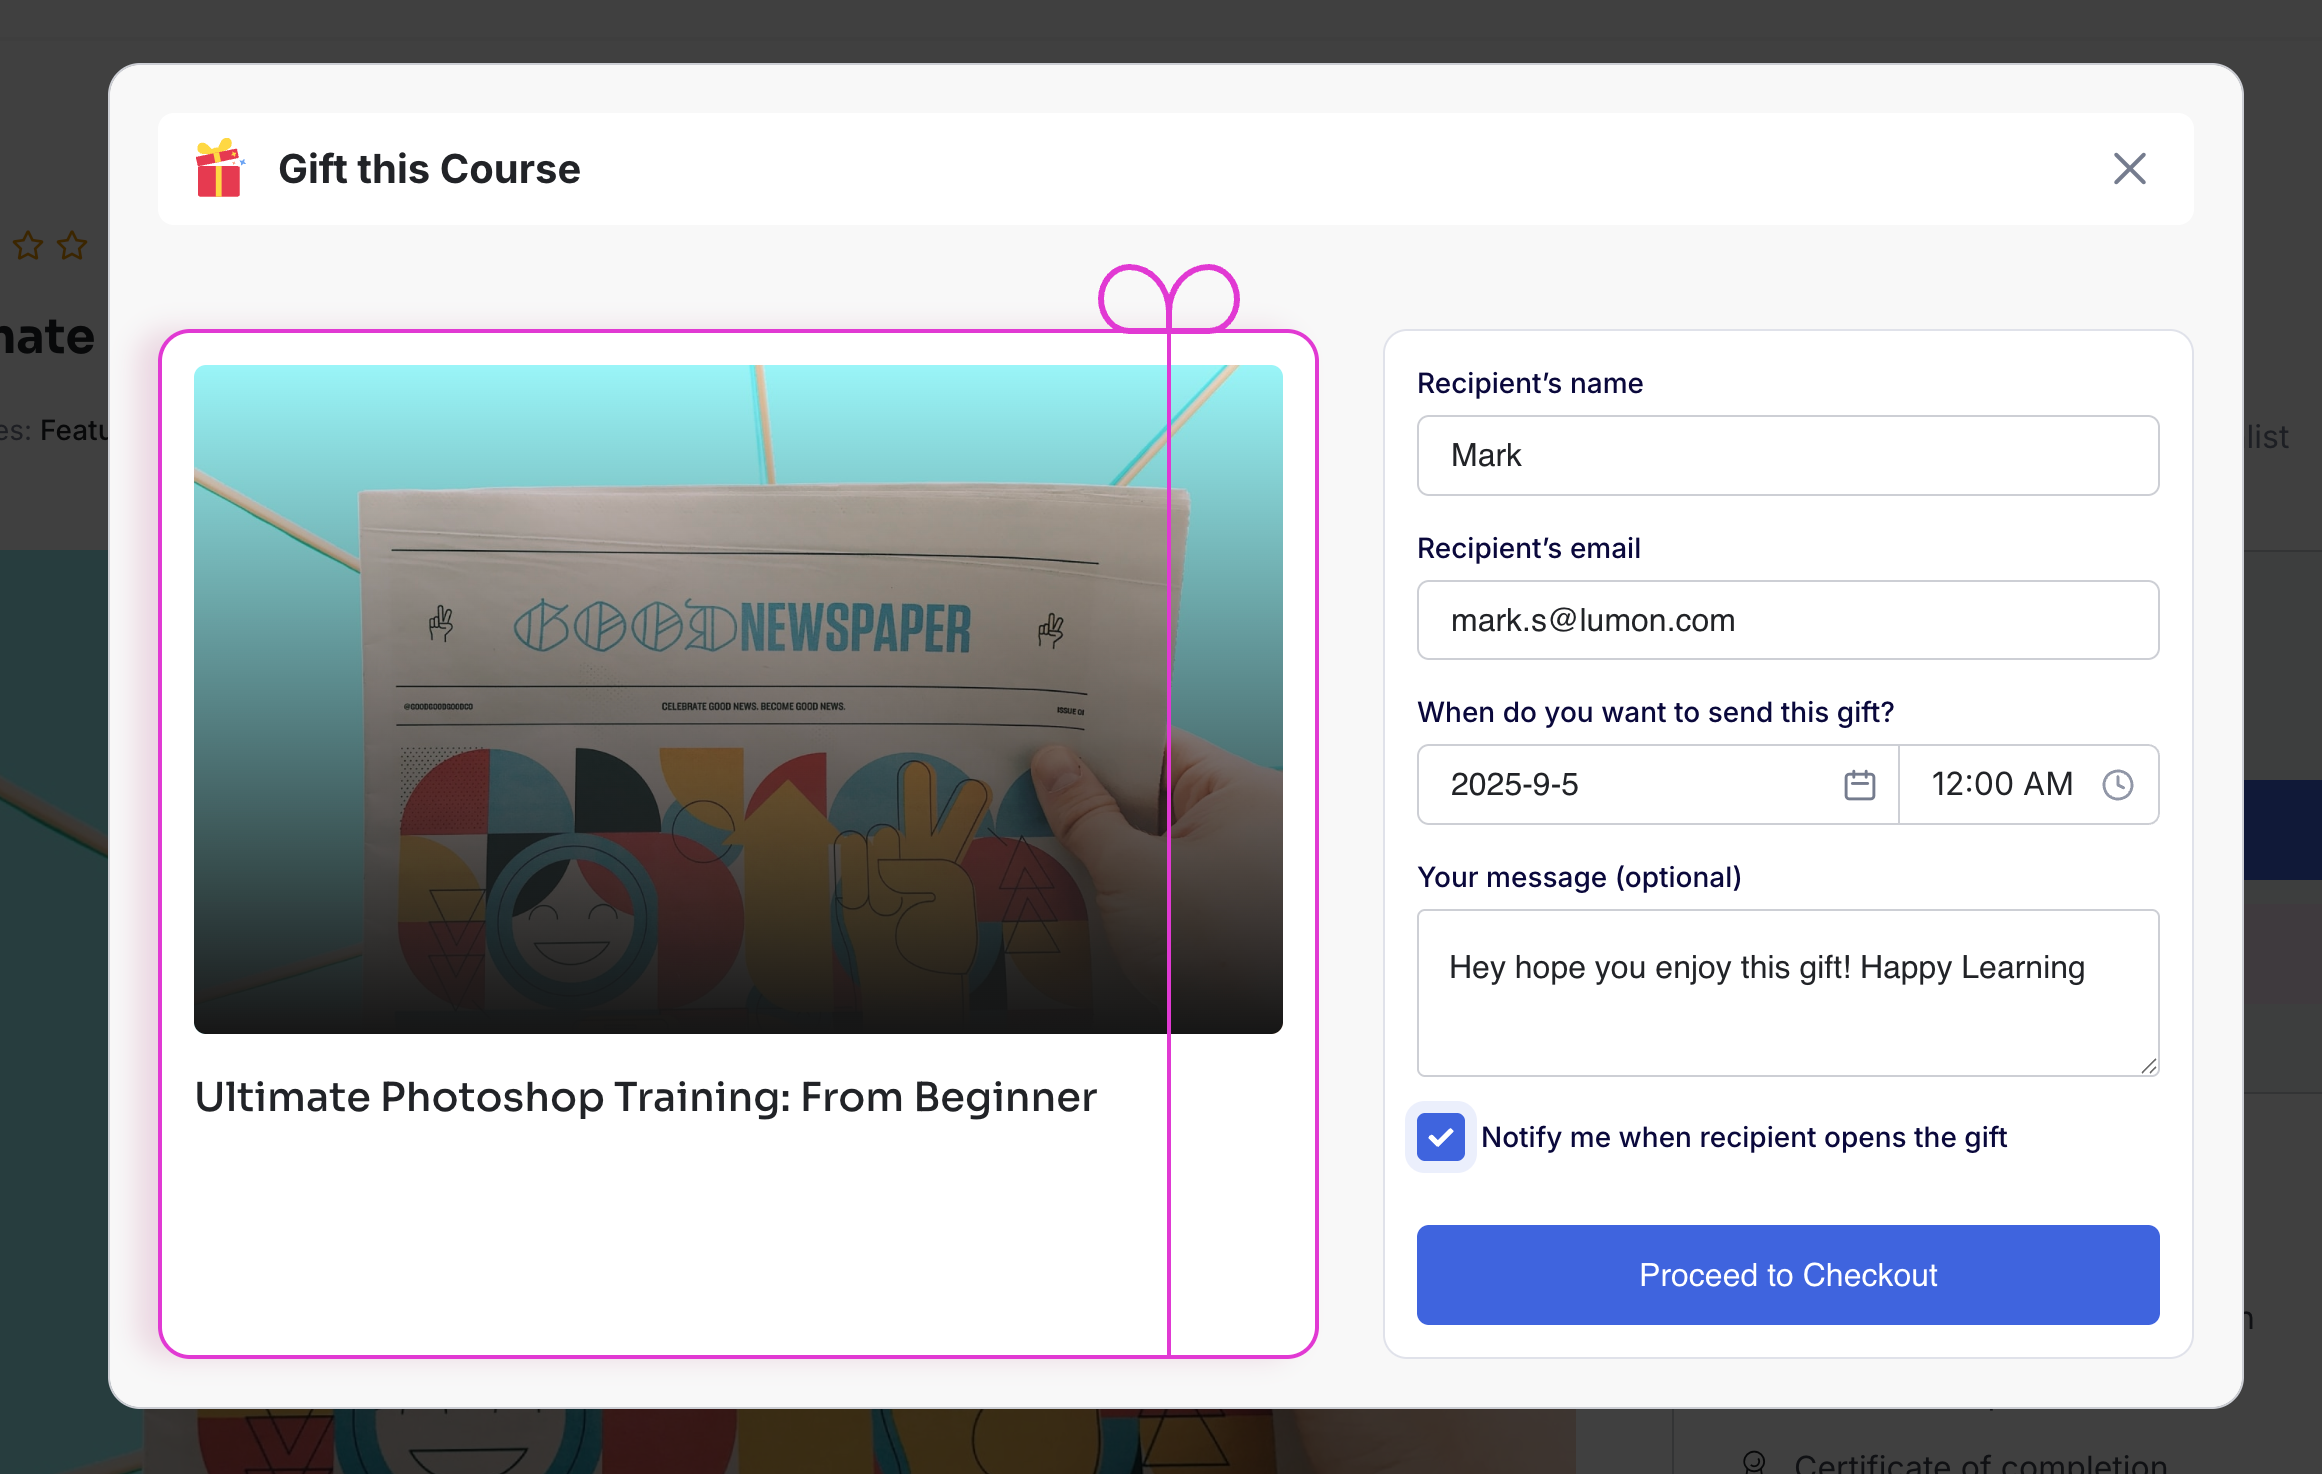
- Fill in the following details:
- Recipient’s Name
- Recipient’s Email
- Delivery Date & Time (optional – schedule when the gift email will be sent)
- Personal Message (optional)
- Recipient’s Name
- Click Proceed to Checkout and complete the purchase.
Senders can gift individual courses or course bundles. The process is the same for both.
3. Gift Delivery Process
- The recipient will receive an email with the gifted course.
- If the recipient has an account they will directly be redirected to their dashboard.
- If the recipient does not have an account with the site, Tutor LMS will:
- Automatically create an account for them.
- Send them a separate email to reset their password.
- Automatically create an account for them.
4. Claiming the Gift (Recipient)
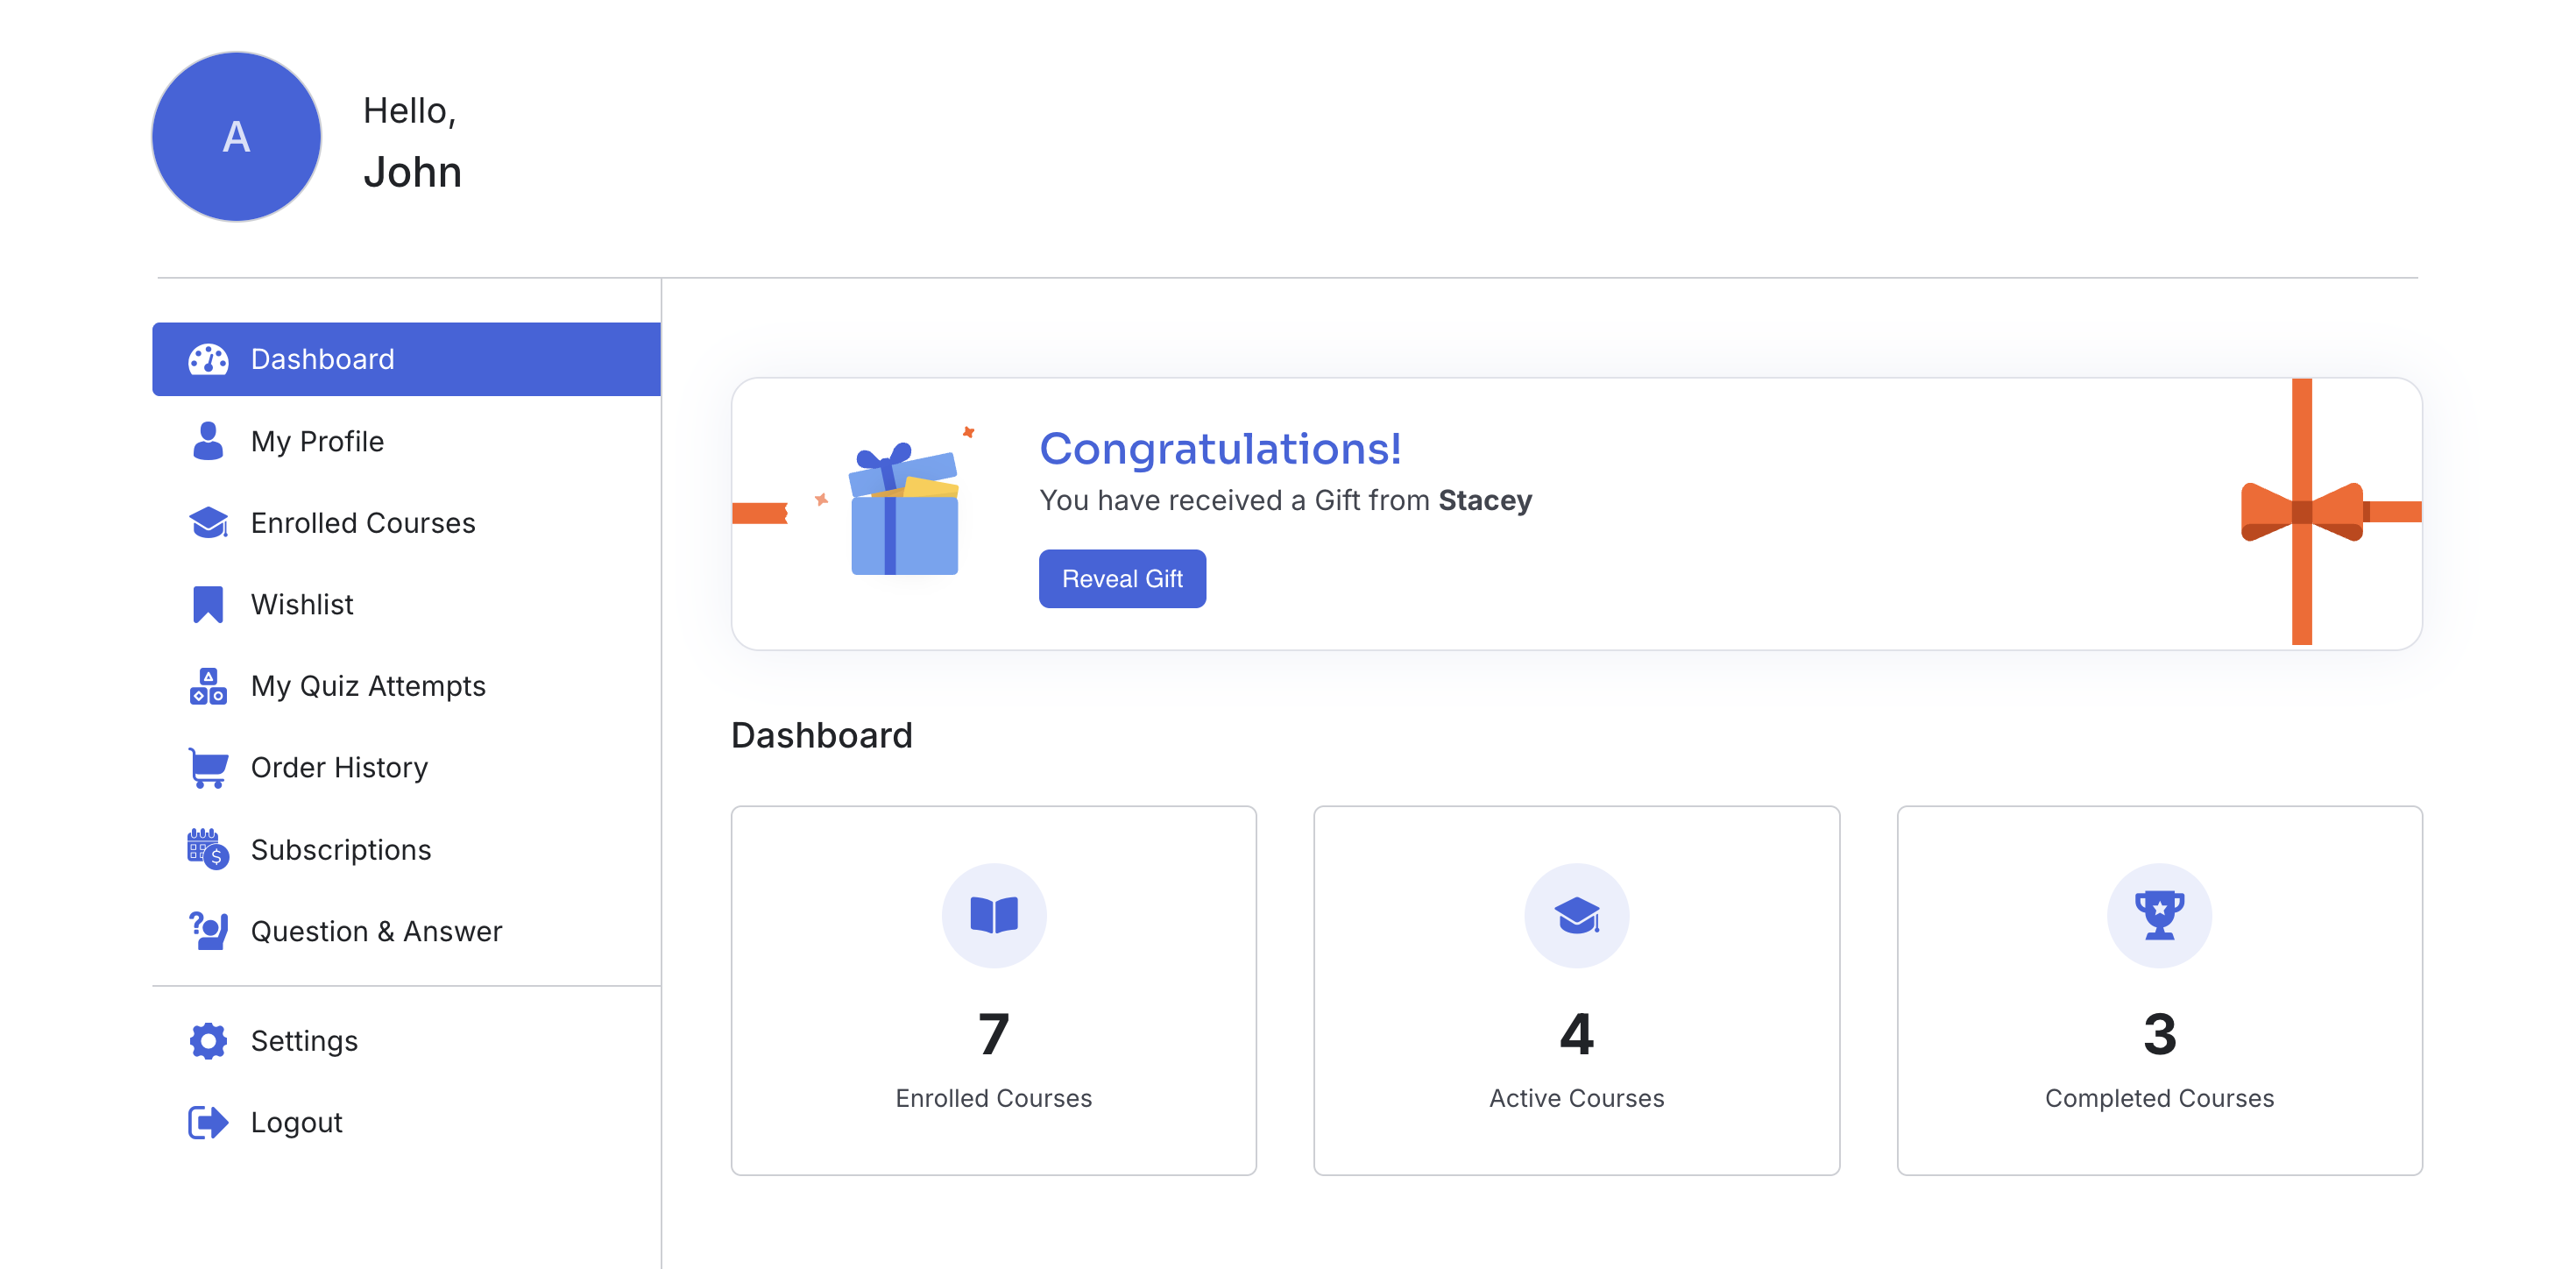
- After logging in, the recipient will see the gifted course in a separate section in their dashboard.
- Click Reveal Gift next to the course.
- Once revealed:
- The recipient is enrolled in the course.
- The course will appear in their My Courses section.
- The recipient is enrolled in the course.
- From this point, the course functions like any normal enrollment.
5. Refund Rules
- The sender can request a refund only if the recipient has not revealed the gift.
- Once the recipient clicks Reveal Gift, refunds are no longer allowed.
6. Customizing the Gift Email
You can modify the gift email template from:
Tutor LMS → Settings → Email
Note: Email addon must be enabled to be able to customize the template.
You will be able to customize the template for these two emails:
- Gift Course Purchase Confirmation
- Gift Course Delivery Notification
Happy Gifting!
Tutor LMS Membership is a powerful feature that allows course creators to set up subscription-based access to their courses. This feature supports both site-wide and category-specific membership plans.
Prerequisites
To use the Tutor LMS Membership feature, you have to install and activate the following plugins:
- Tutor LMS v3.5.0 or later
- Tutor LMS Pro v3.5.0 or later
Creating a Membership Plan
Creating a membership plan in Tutor LMS is a straightforward process. Follow the steps below to set up a membership plan tailored to your needs:
1. Enable the Subscriptions Addon
Visit your WordPress dashboard and navigate to Tutor LMS Pro > Addons section. Here, you’ll find the Subscriptions addon, among the other powerful addons. Simply toggle the switch to activate it, and you’re ready to begin crafting your membership plans.
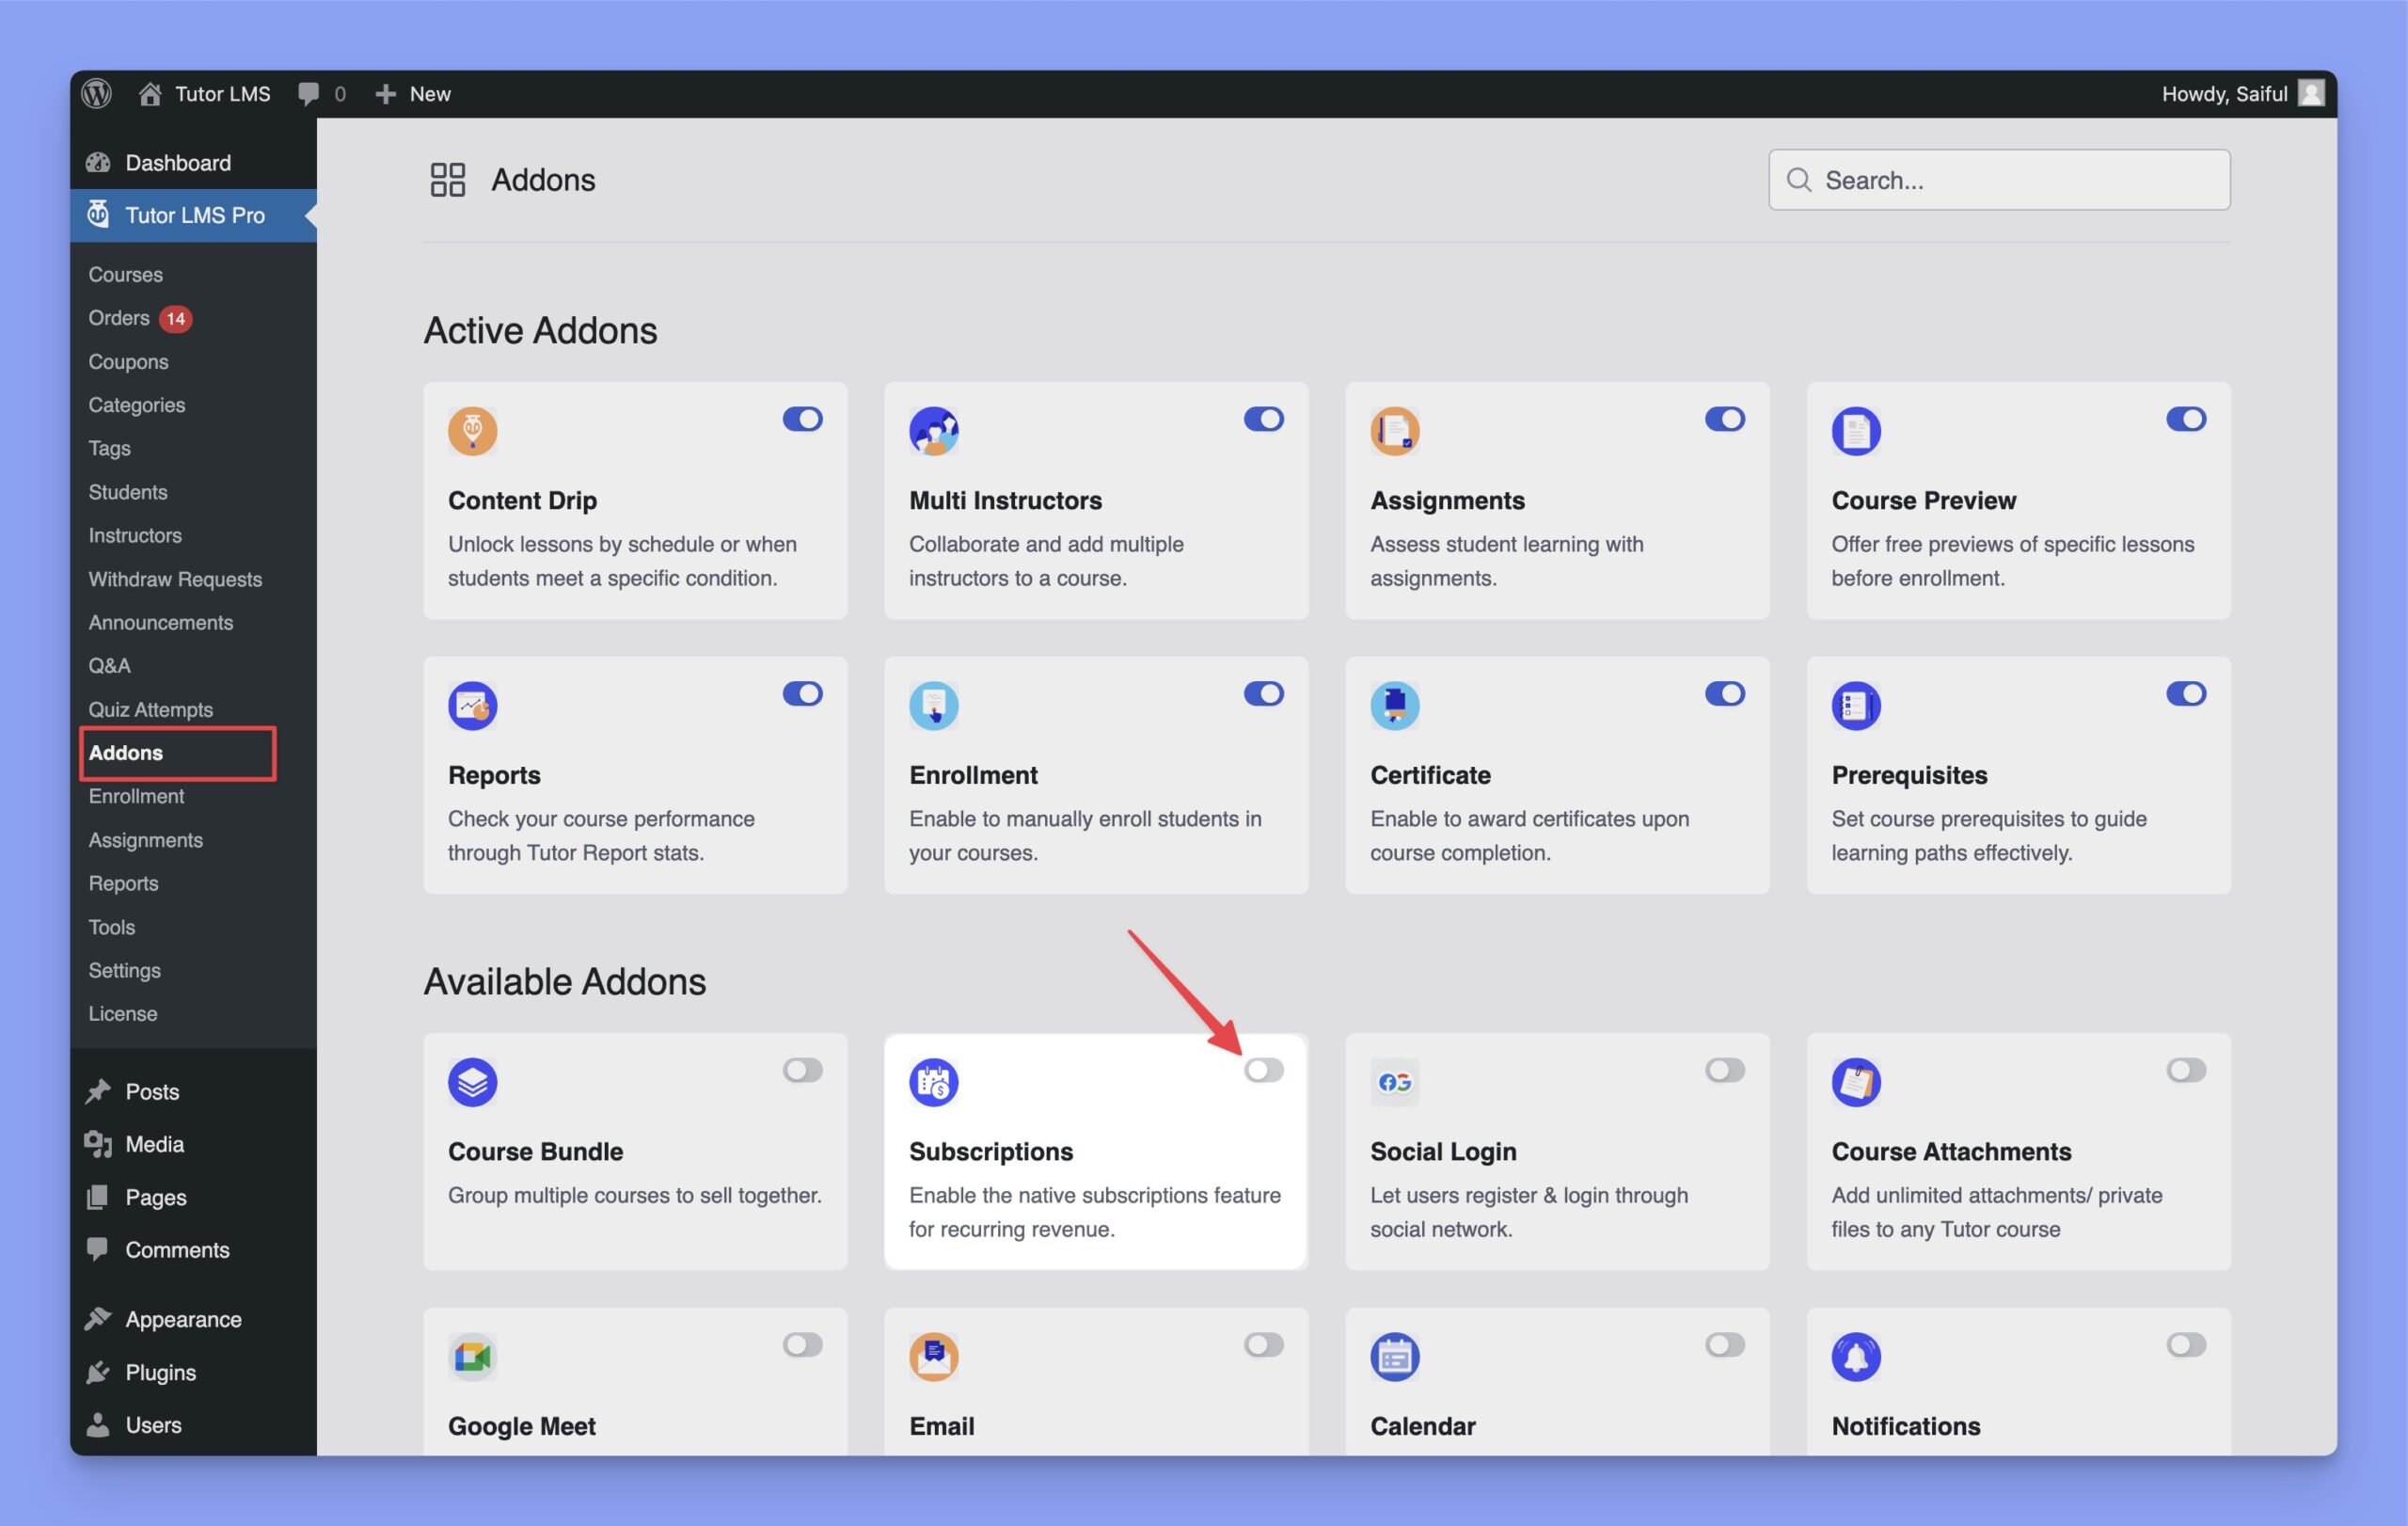
Note: The Membership feature is part of Tutor LMS Pro and requires an active Pro subscription to use it.
2. Create Membership plan
Navigate to Tutor LMS Pro > Settings > Subscriptions, and you’ll get the existing membership plan list. You’ll get the following screen if you don’t have any existing plans.
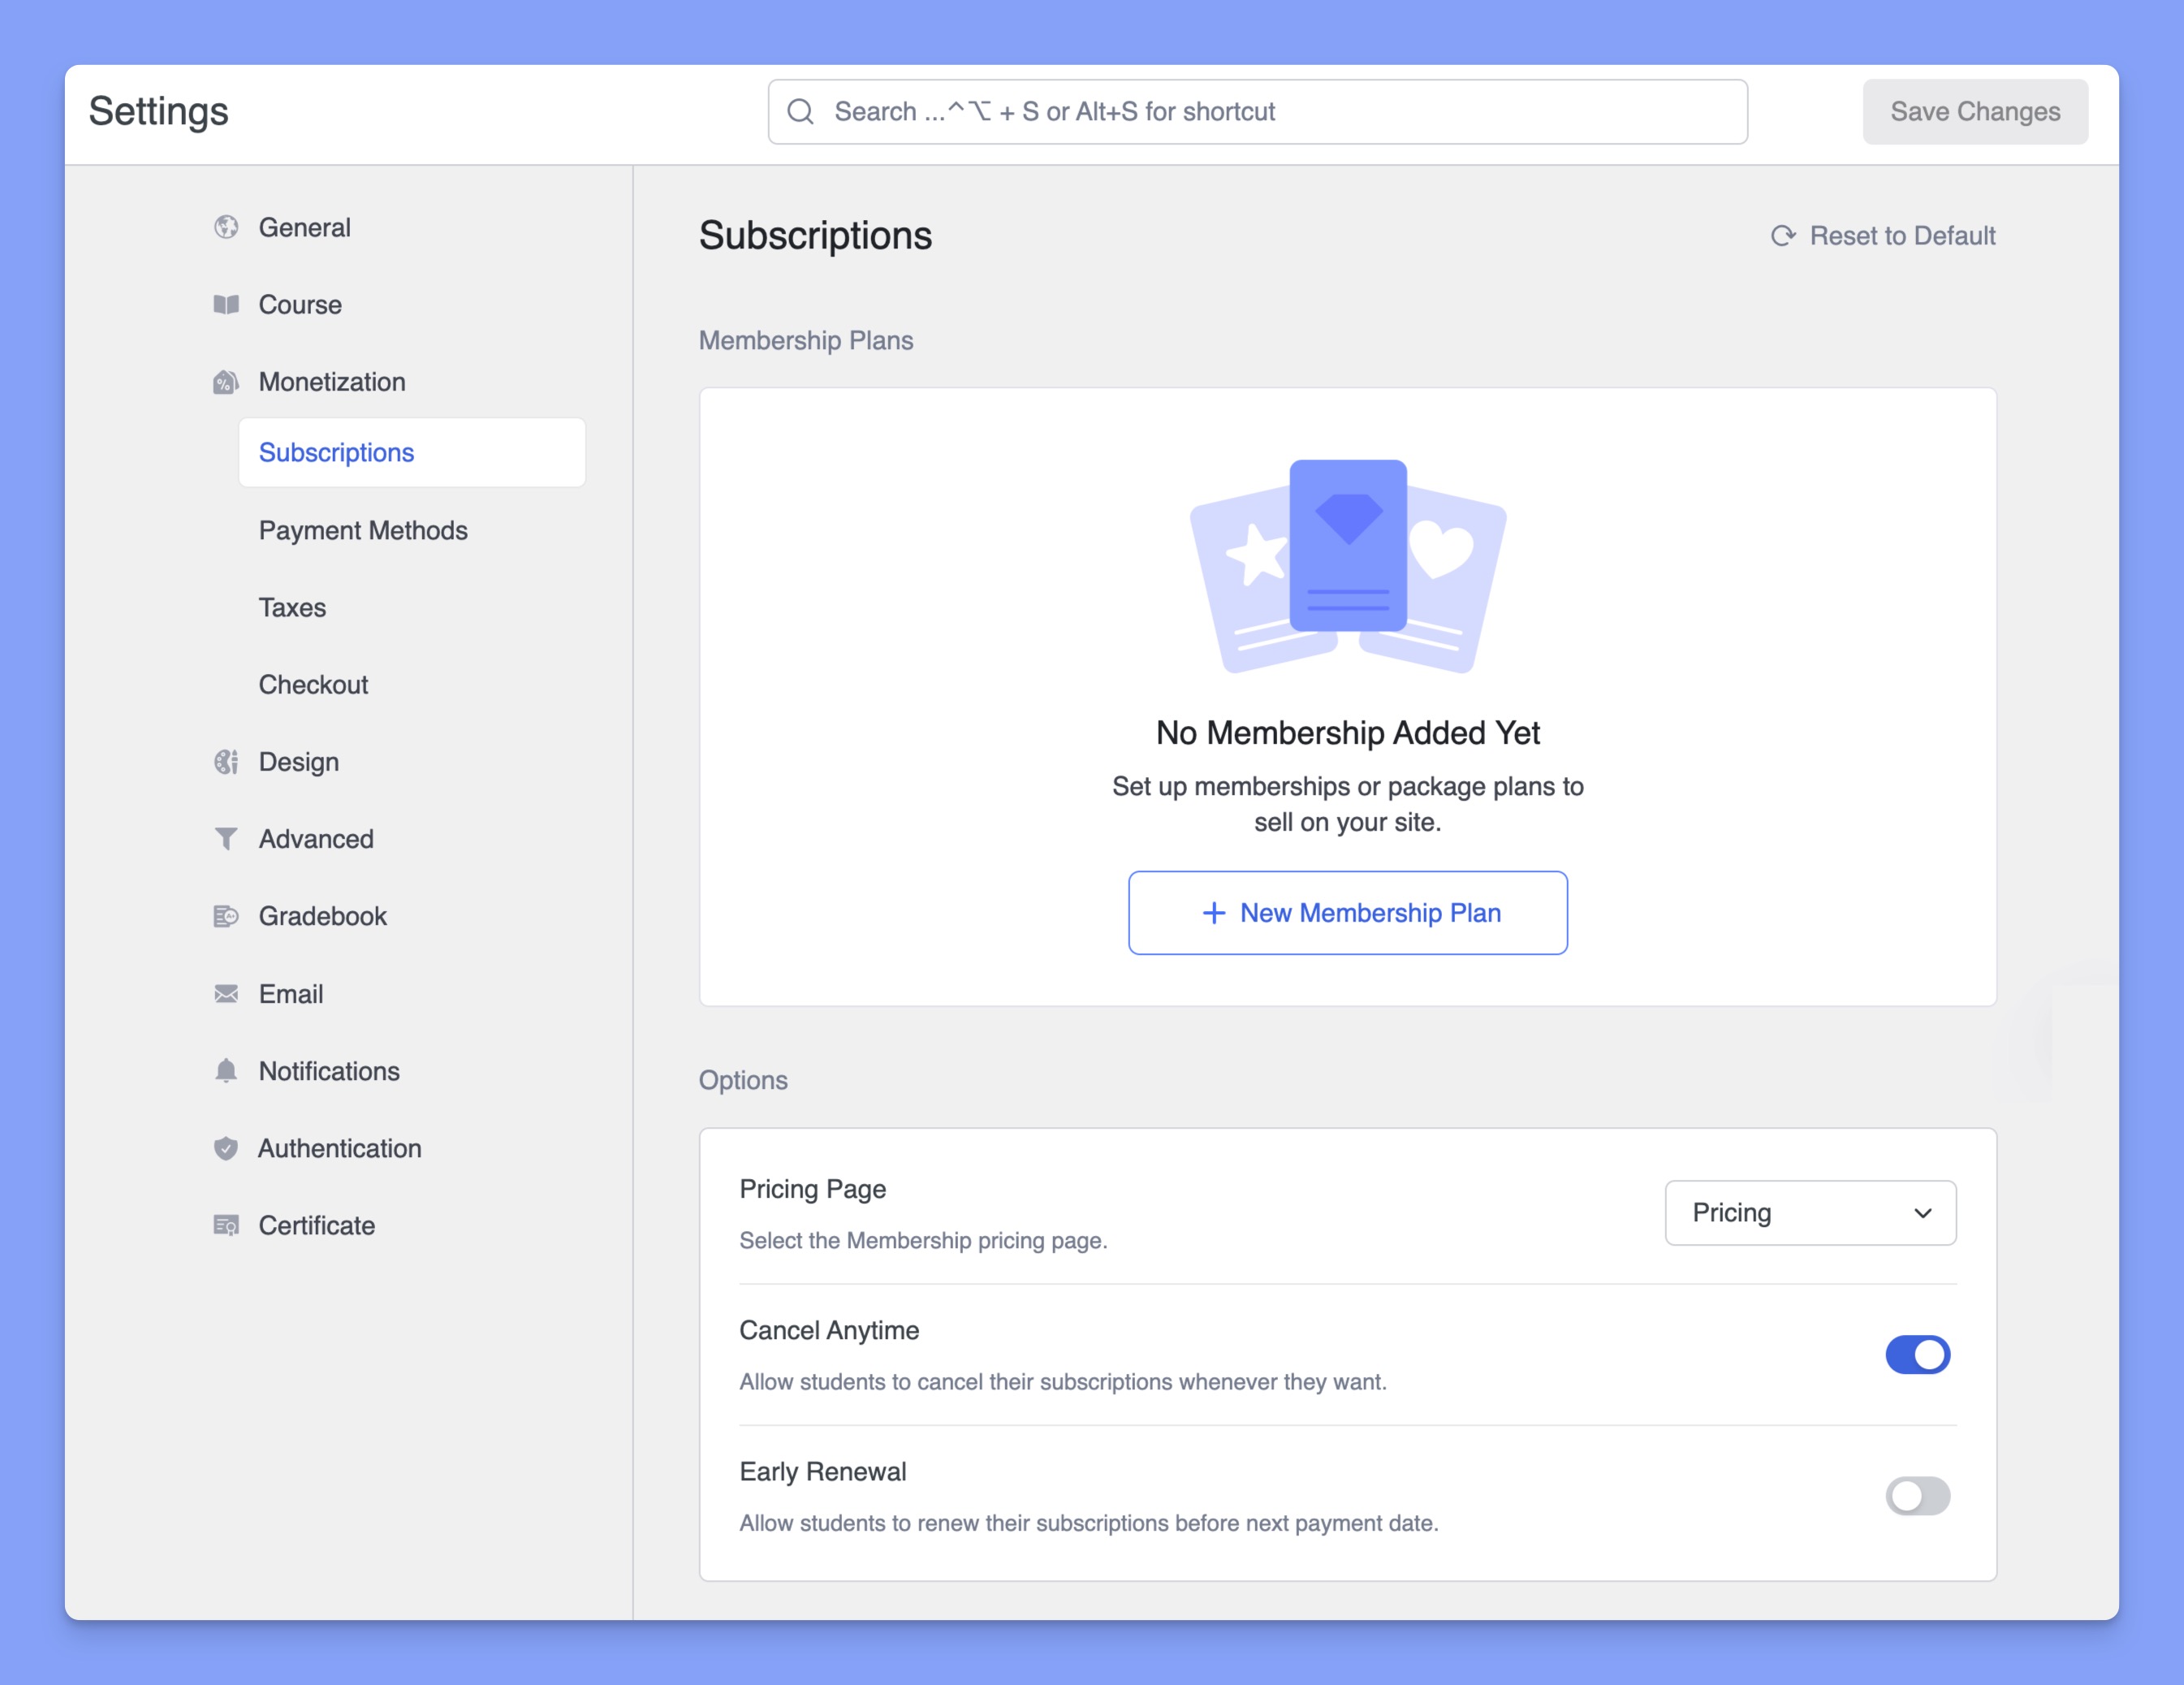
Now, click on the New Membership Plan button. This will open up the following membership plan creation window.
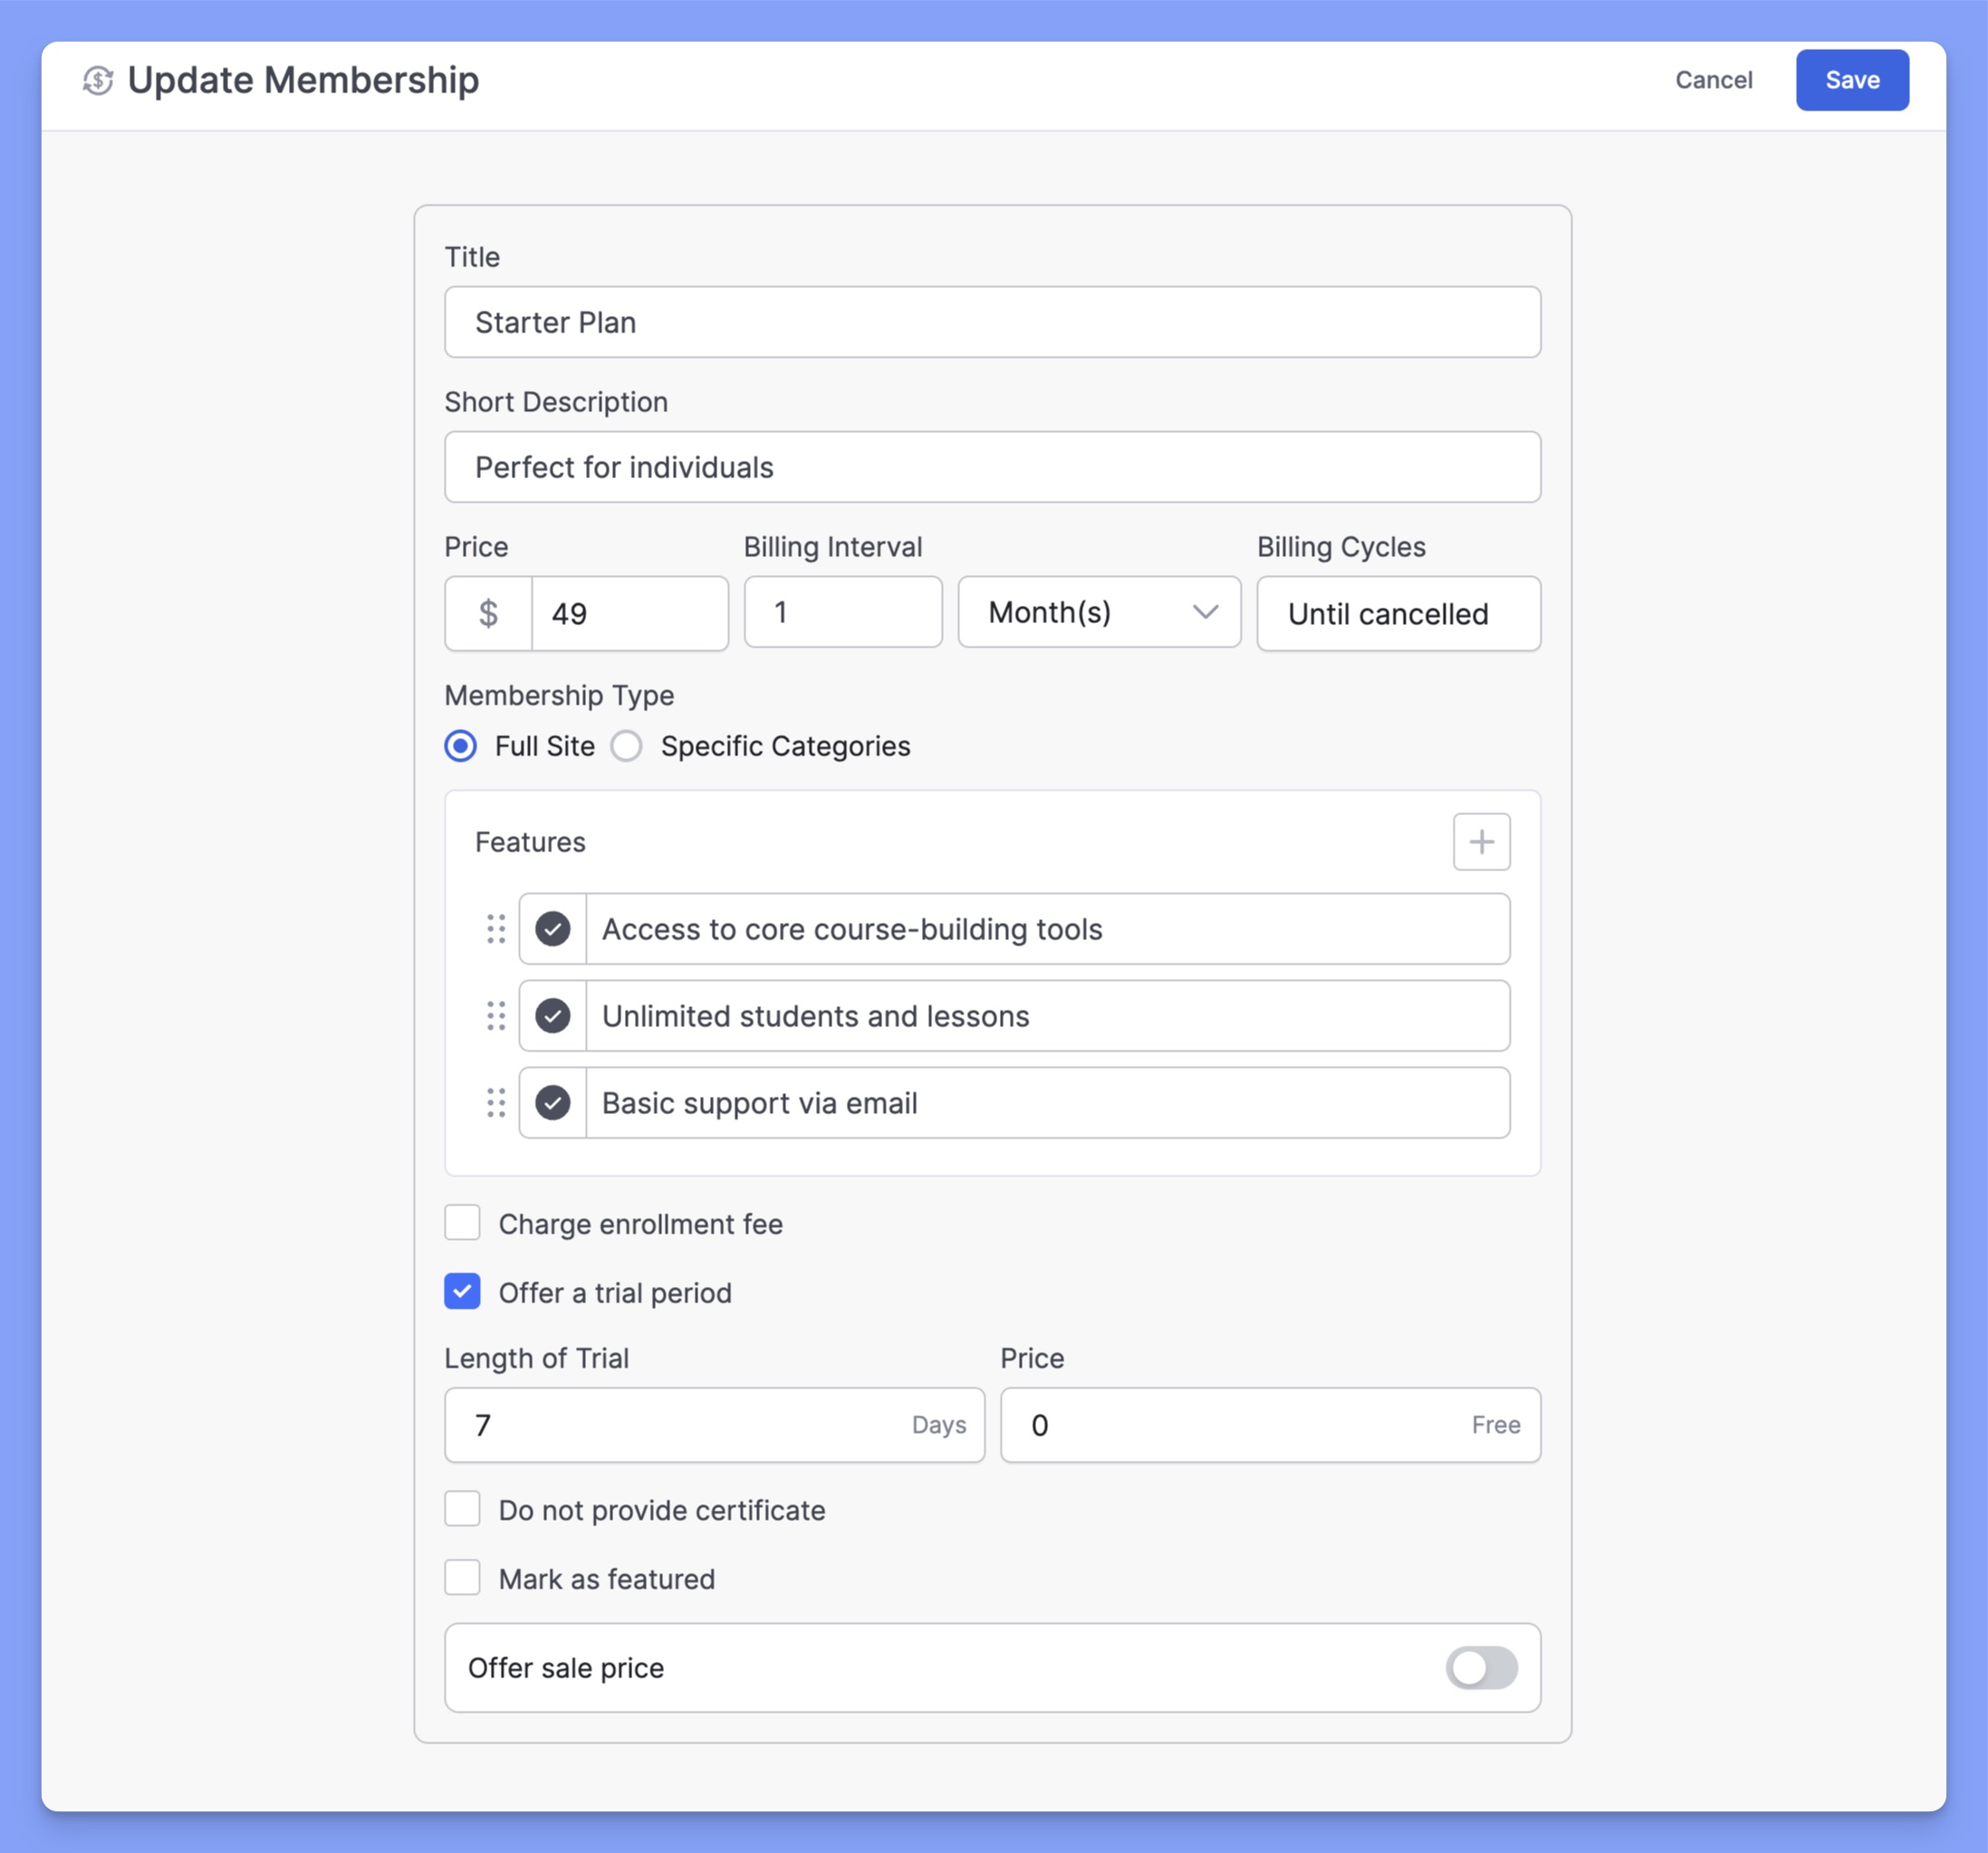
In this section, you have to input the following information:
- Title: Enter a name for your membership plan.
- Short Description: Provide a brief description of the membership plan.
- Price: Specify the amount users need to pay to access the plan.
- Billing Interval: Choose how frequently users will be billed. You can set the interval in days, weeks, months, and years.
- Billing Cycles: Set the total number of billing cycles. You can set the billing cycle in days, weeks, months, and years. Choose “Until Cancelled” for indefinite subscriptions.
- Membership Type: Choose whether you want to create a full-site or category-based membership.
- Features: Add additional features or benefits specific to this membership plan. Click the “+” button to add and describe key features.
- Charge Enrollment Fee: Check this box if you want to include an extra enrollment fee.
- Offer a trial period: Allows you to offer students a trial period before they’re charged for the course. By default, the trial price is set to zero (free trial), but you can add a charge in the pricing section if needed.
- Do Not Provide Certificate: Disable certificates for this membership plan if selected.
- Mark as Featured: Highlight this membership plan as featured to make it stand out. You can add customized text to highlight any specific membership plan.
- Offer Sale Price: Enable it to offer a discounted price for the membership plan and attract users with a limited-time offer or promotional price. You can also schedule the sale price for a certain period of time.
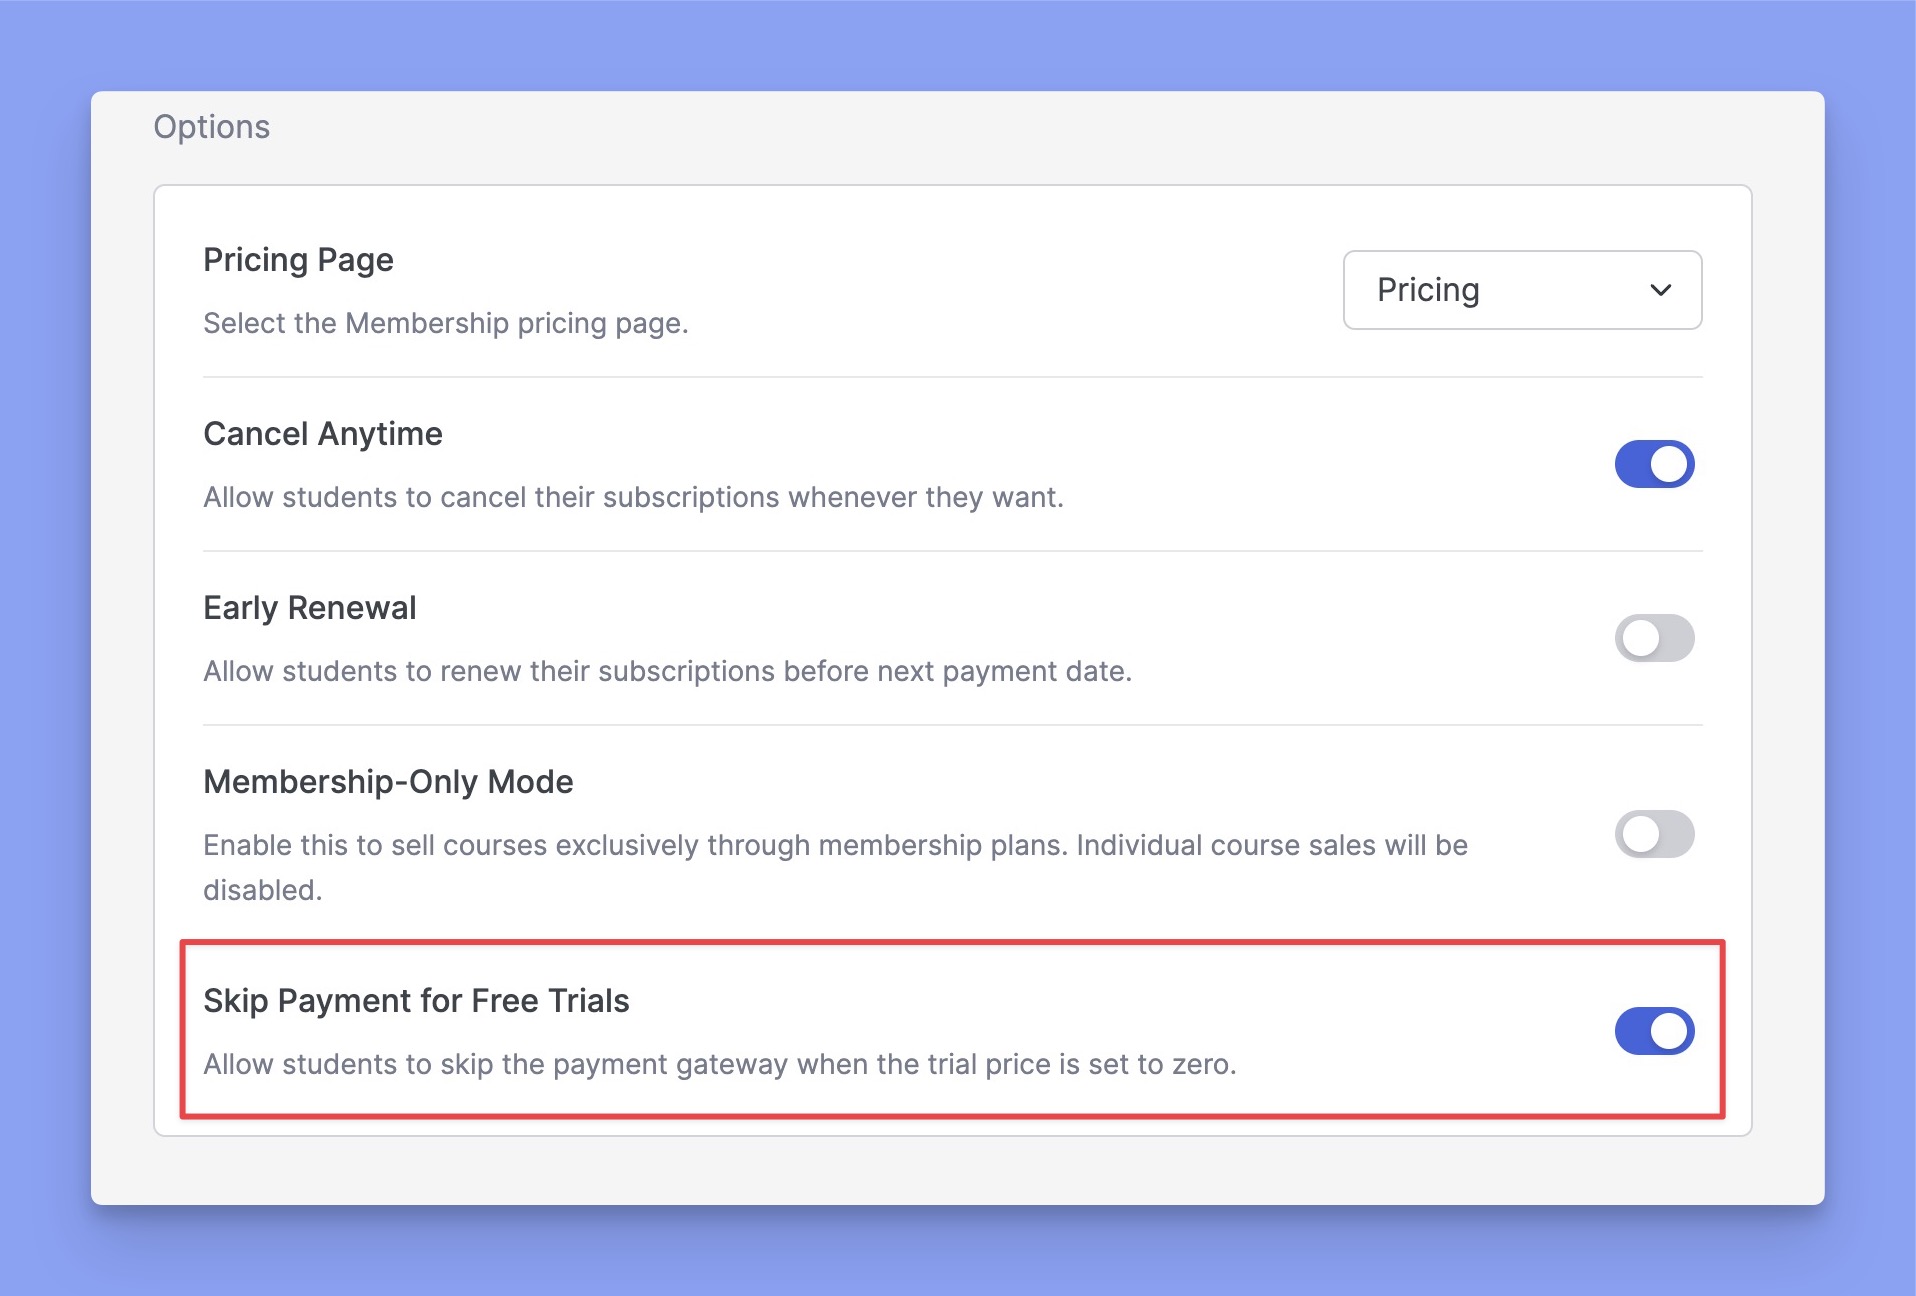
By the way, if you want students to access free trials without sharing their card details, you can enable the “Skip Payment for Free Trials” option. You’ll find it under Tutor LMS Pro > Settings > Subscriptions > Options.
3. Preview the Membership Plans
After creating membership plans, you can view them by navigating to Tutor LMS Pro > Settings > Subscriptions.
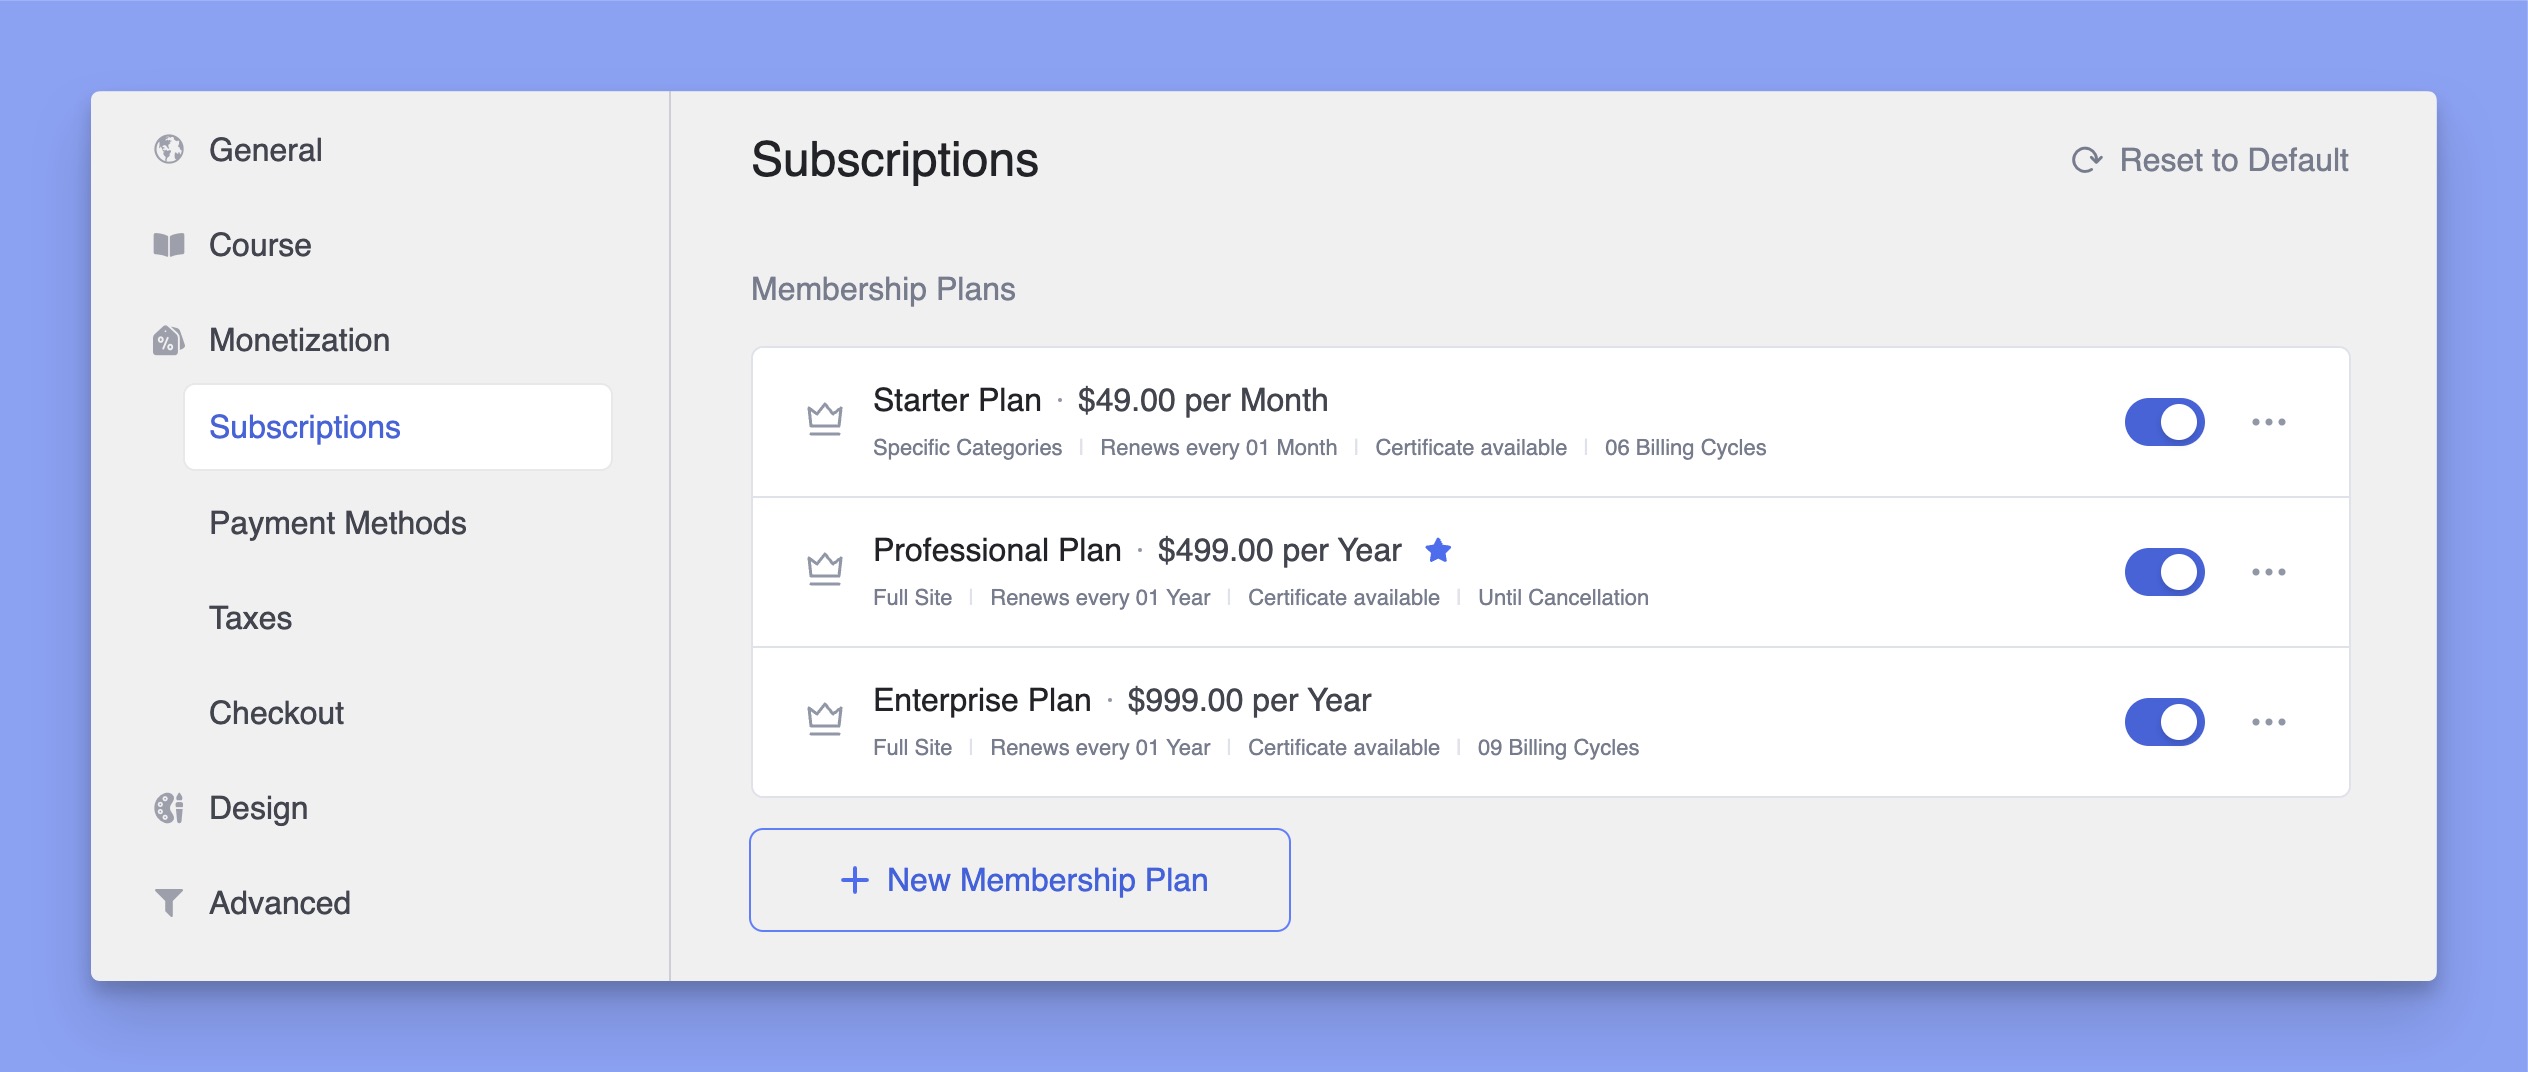
Here, the blue star icon indicates that a plan has been marked as the featured plan.
Now, let’s see how these membership plans appear on the course details page.
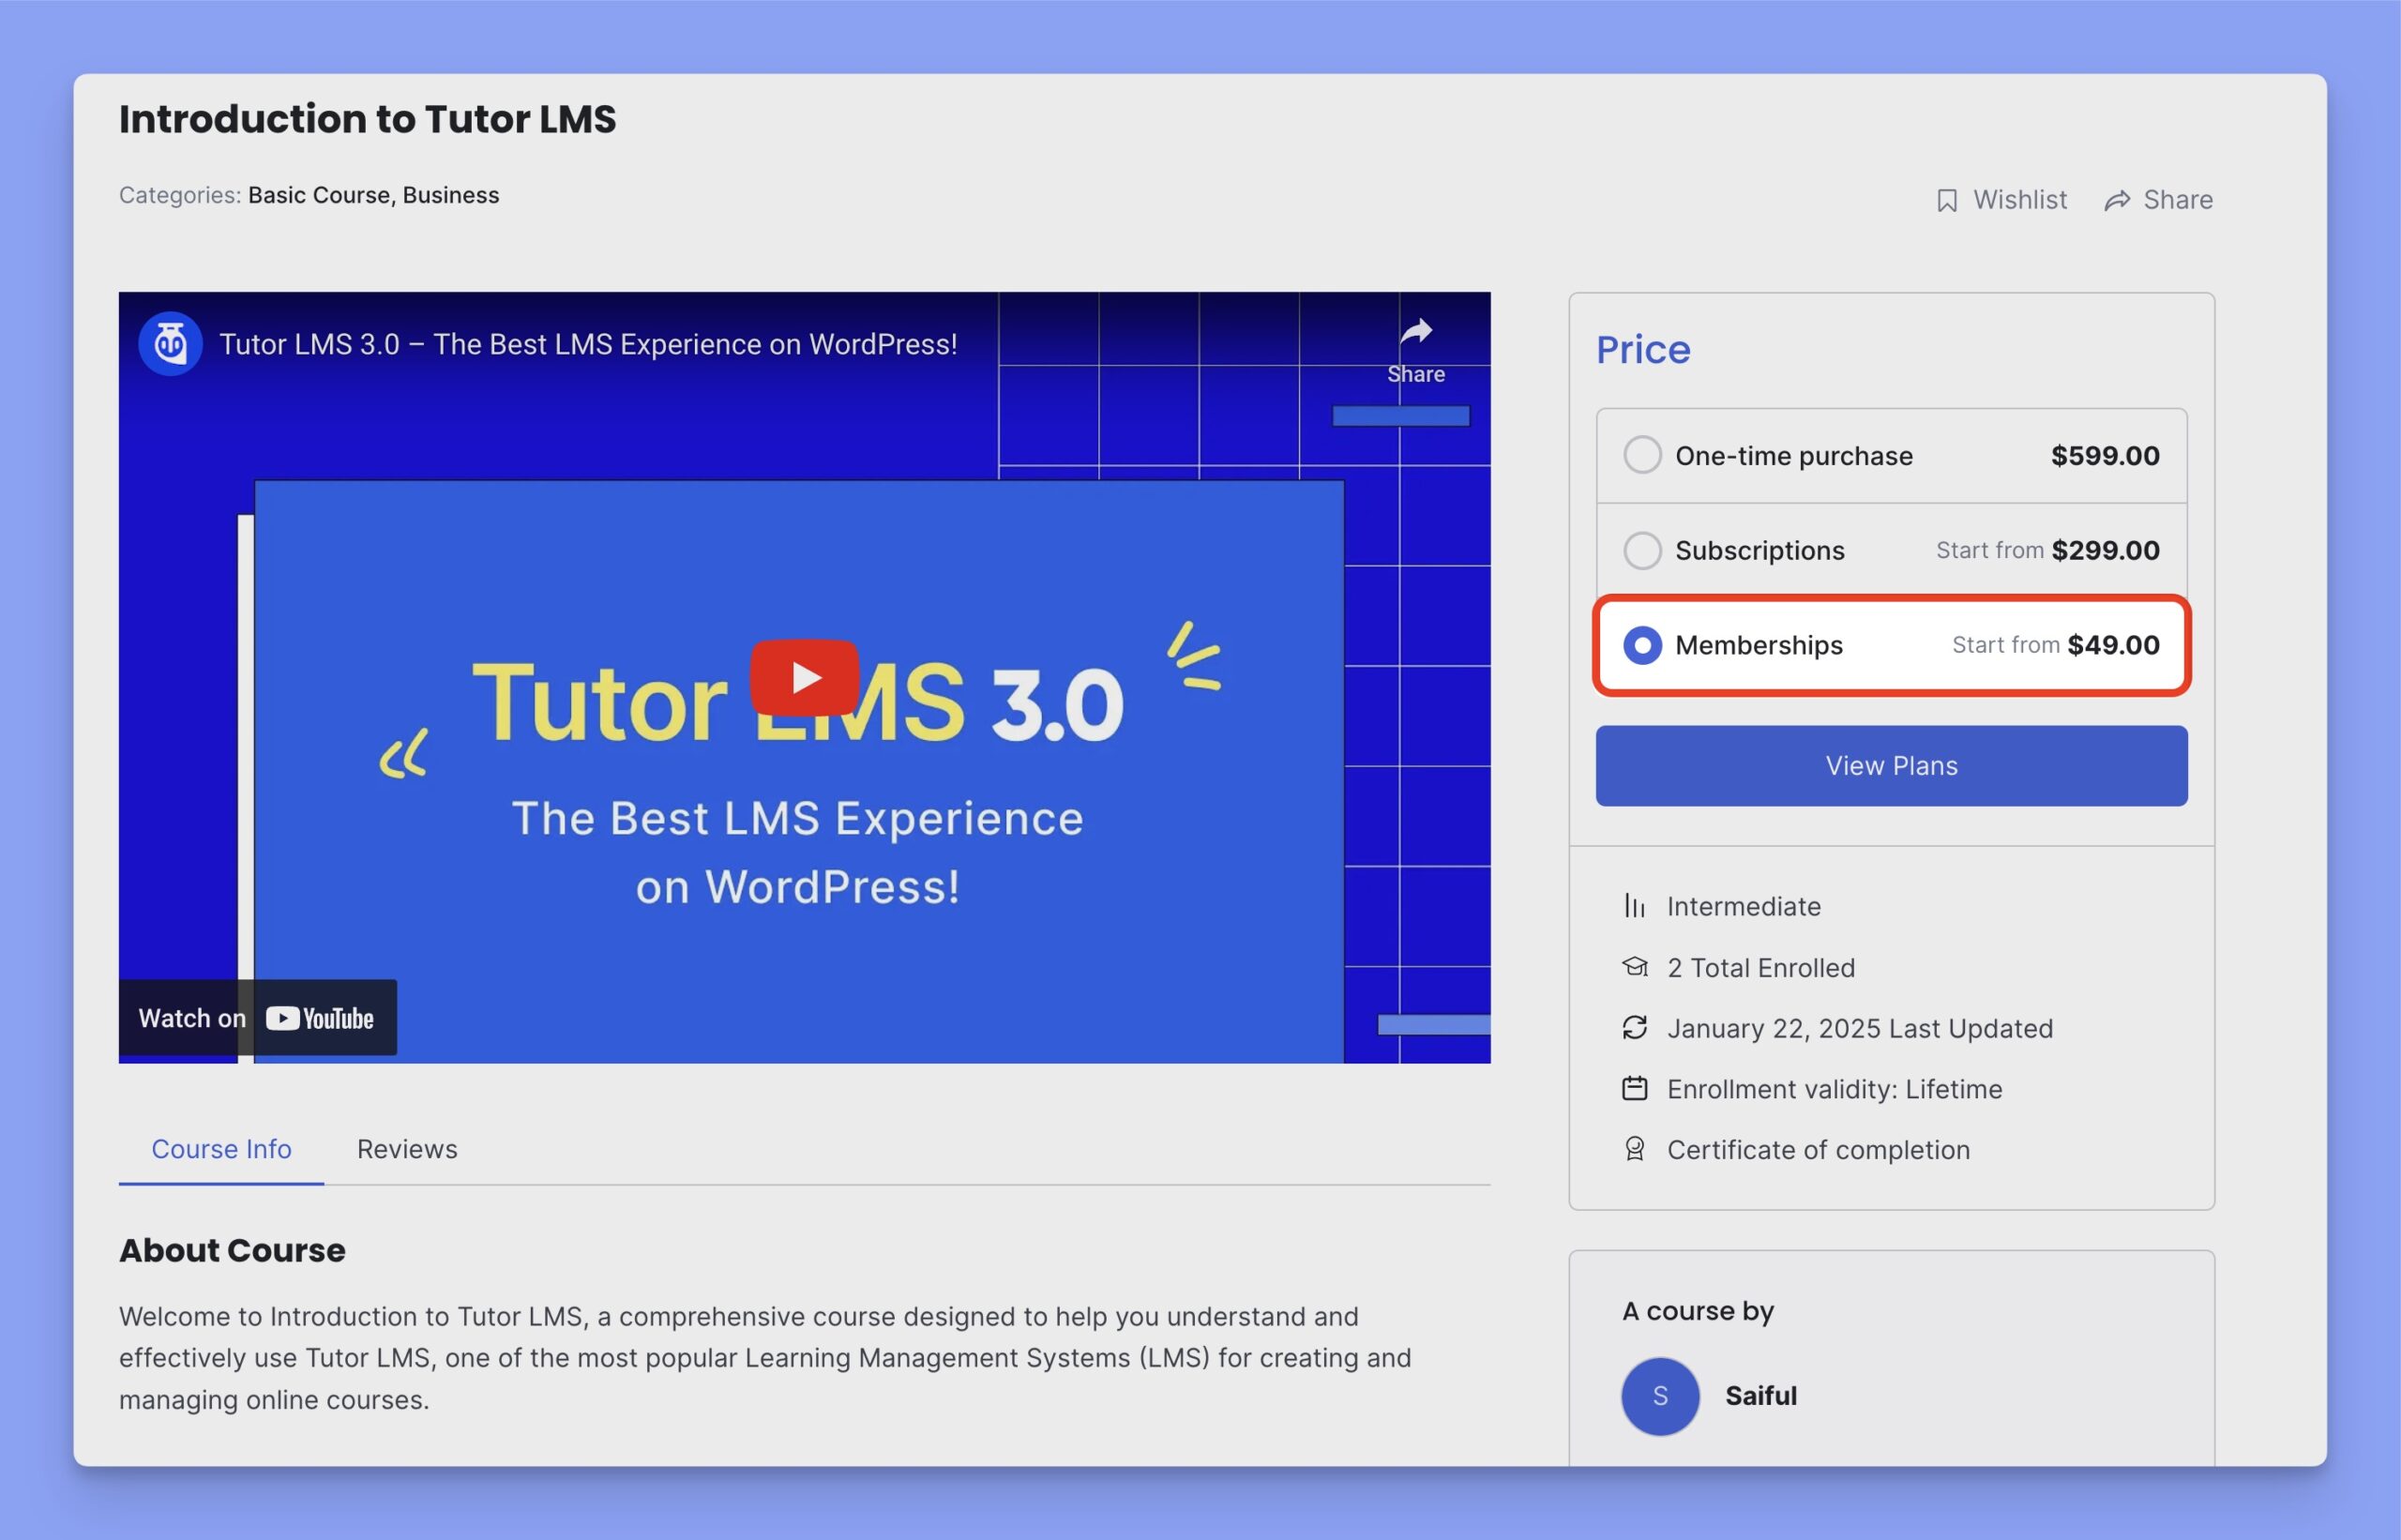
When users click View Plans, they’ll see the pricing page with all membership plans. It looks like this:
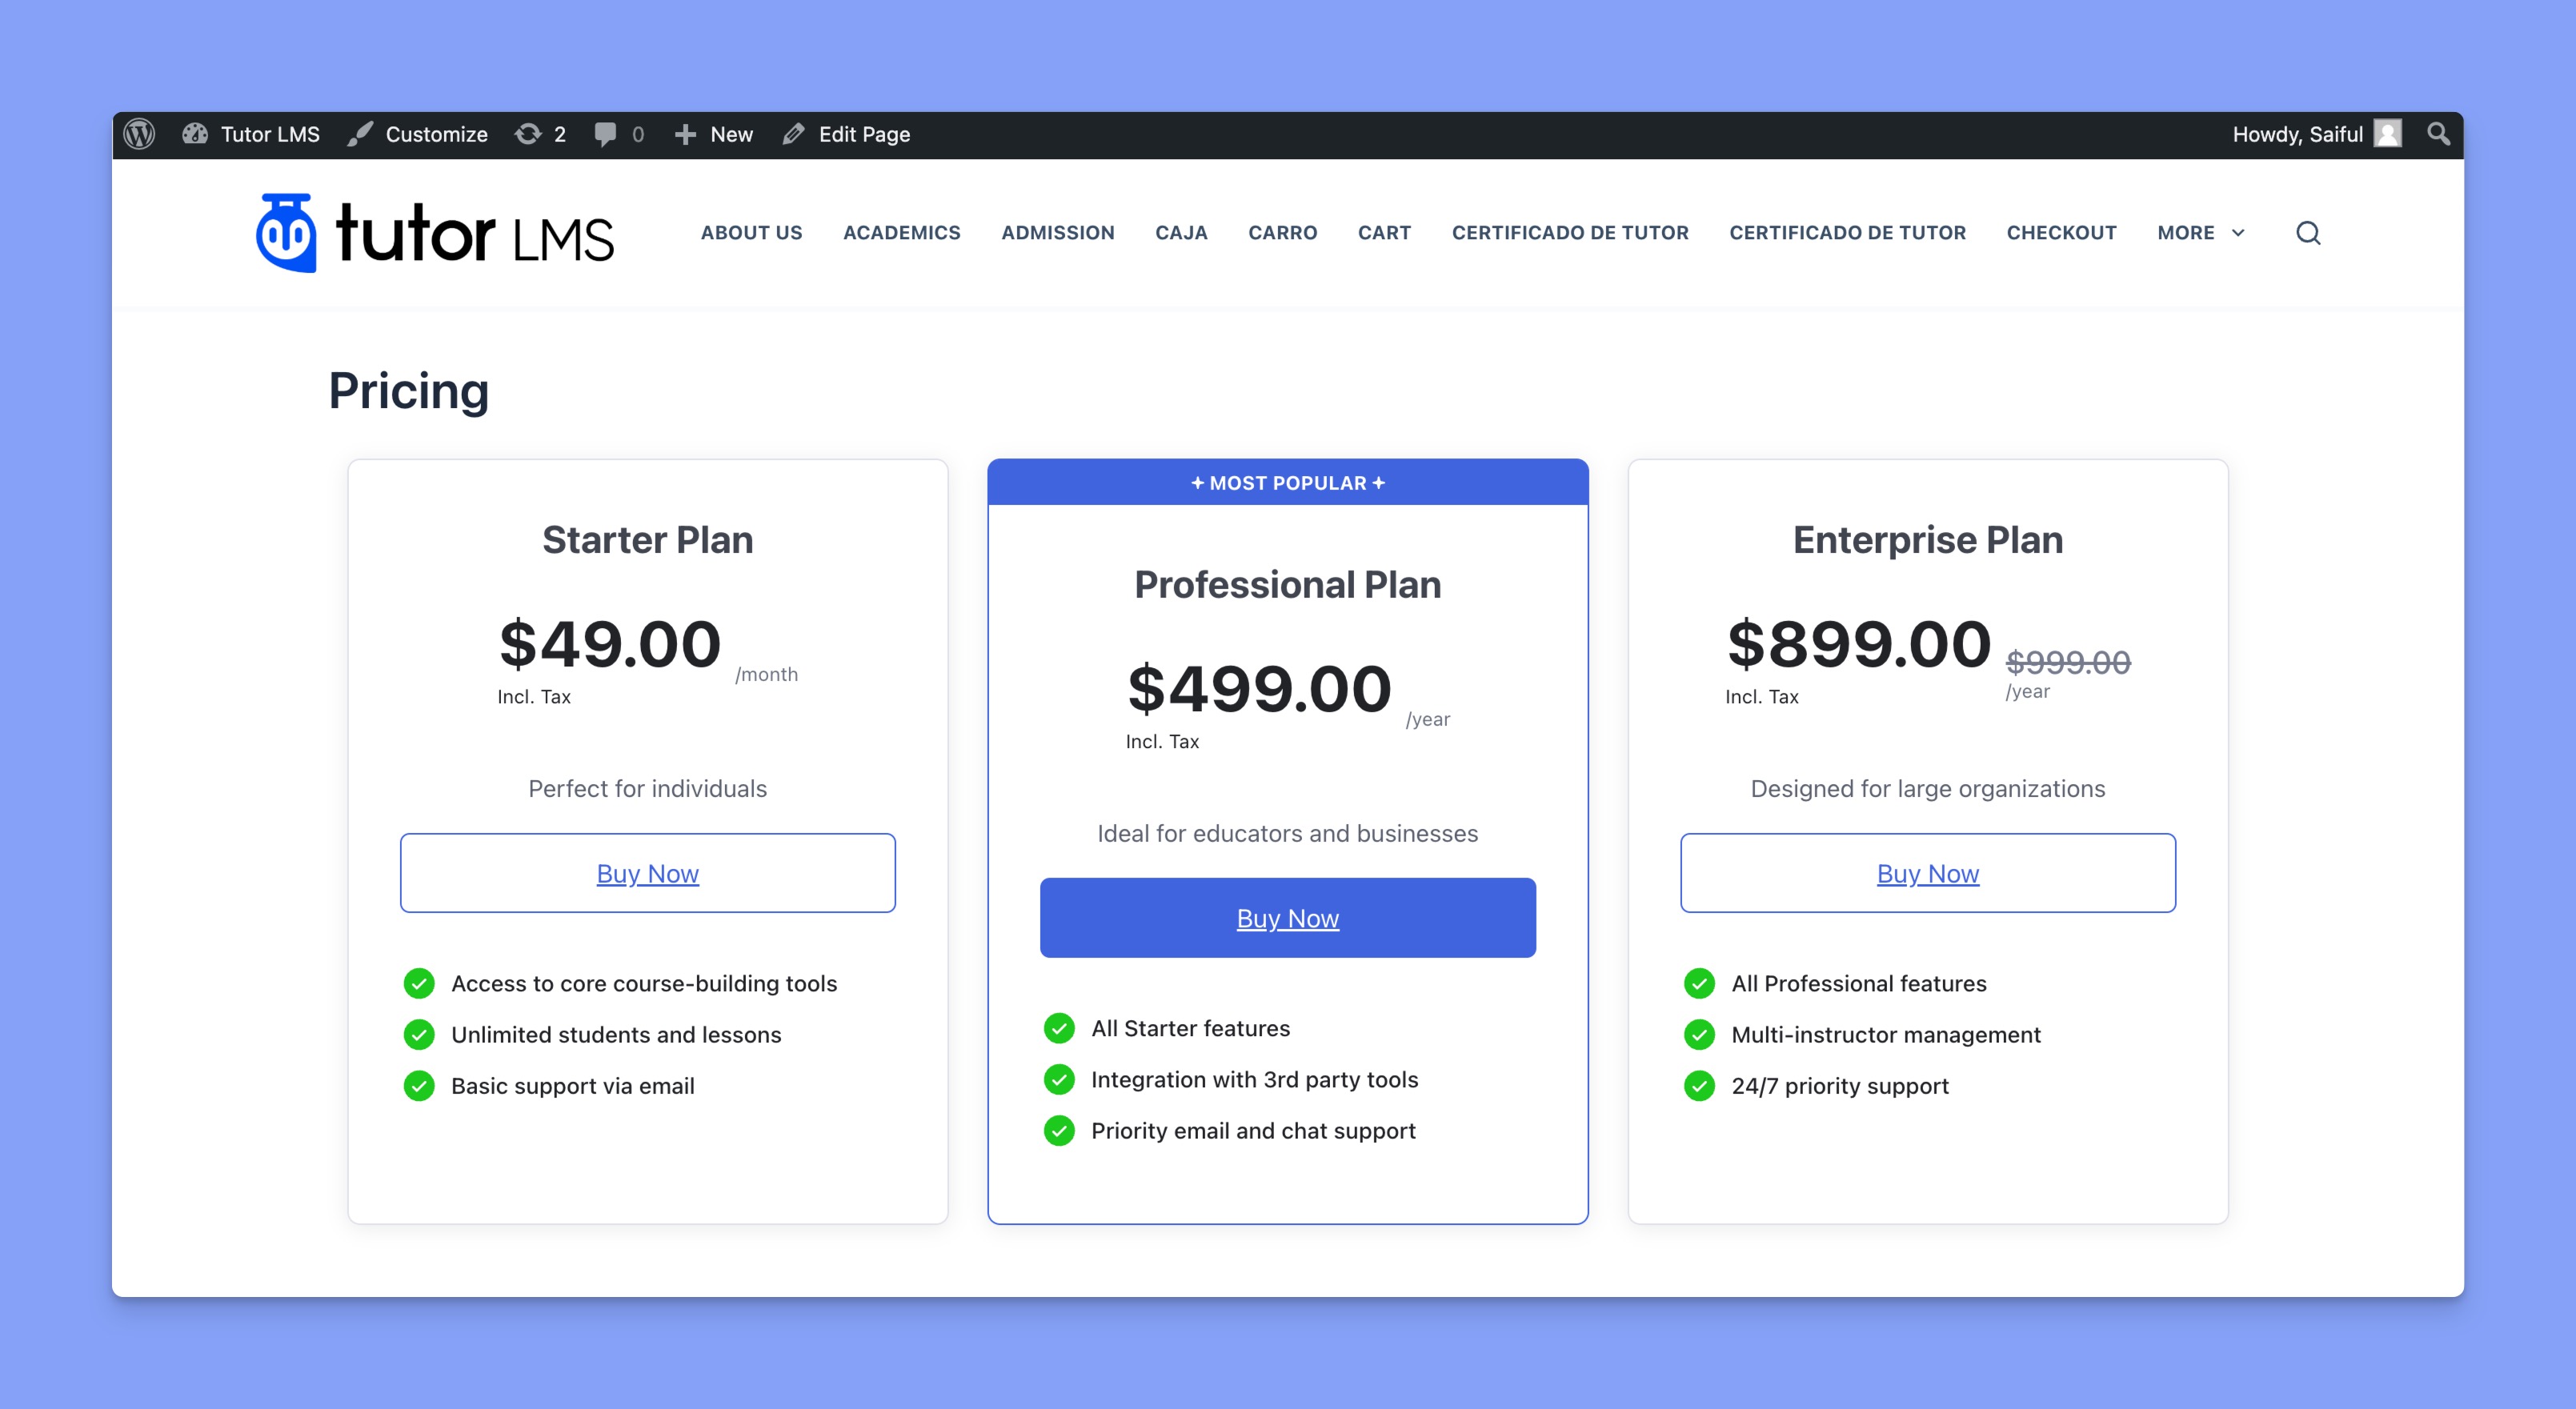
Then, students can purchase the membership plans just like purchasing an individual course.
4. View Membership Orders
After a user purchases a subscription plan, you can manage it by navigating to Tutor LMS Pro > Subscriptions.
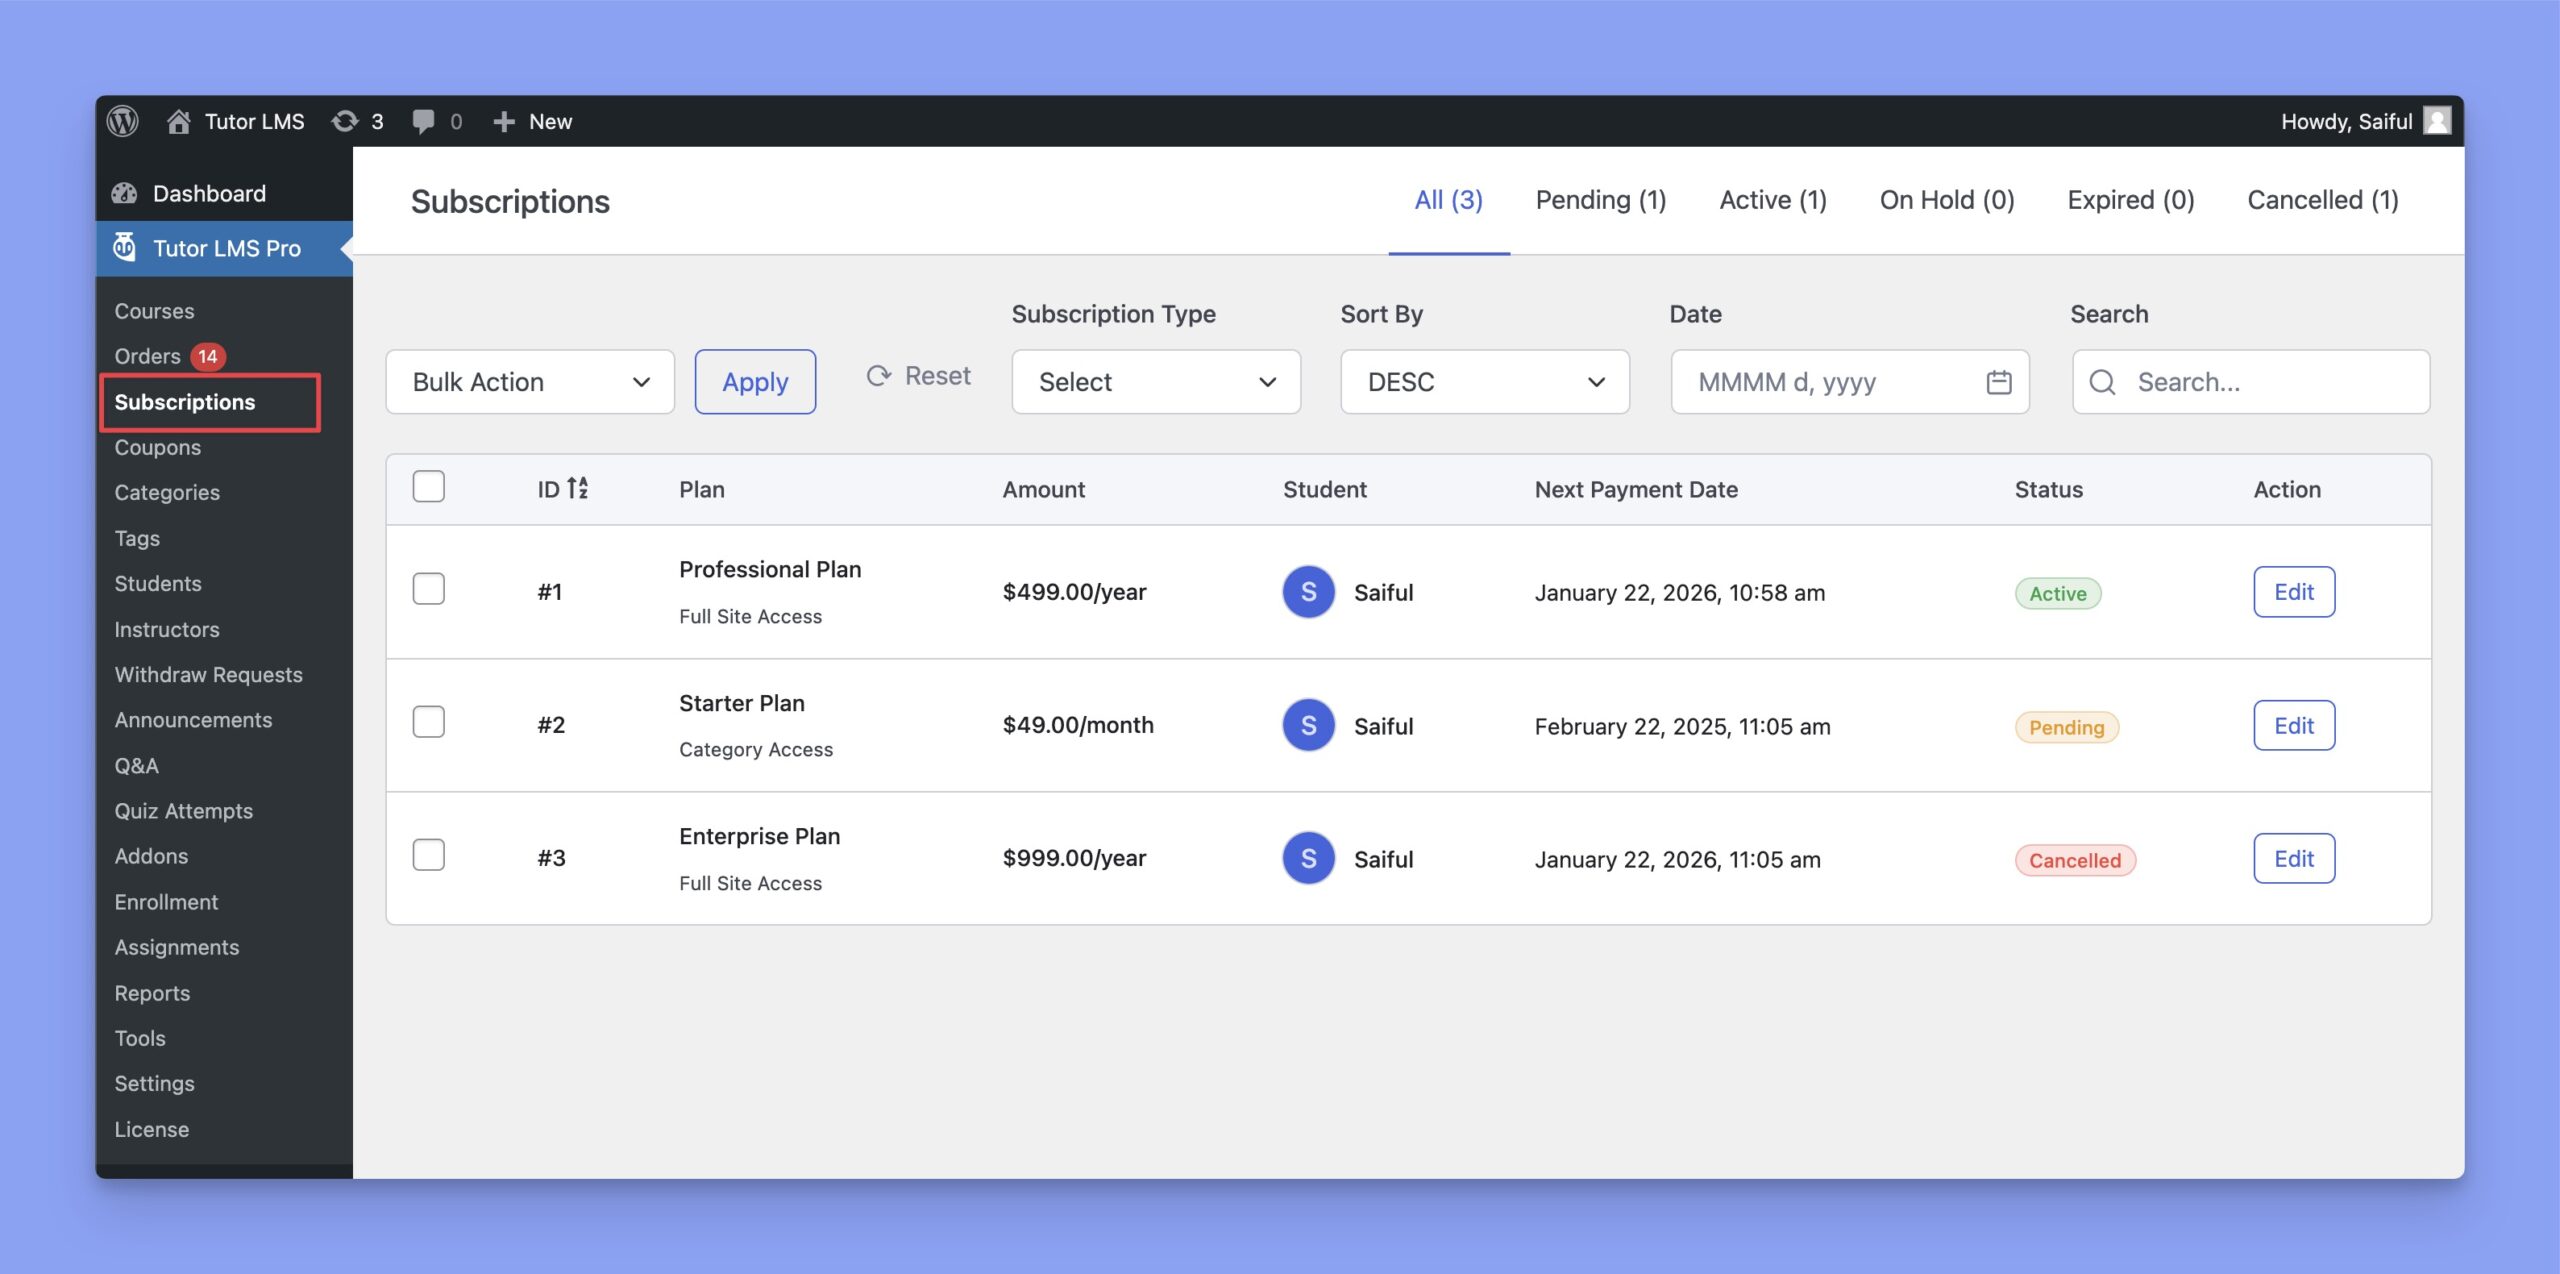
To view subscription details, click the Edit button in the action row. Here’s how the subscription details page will look:
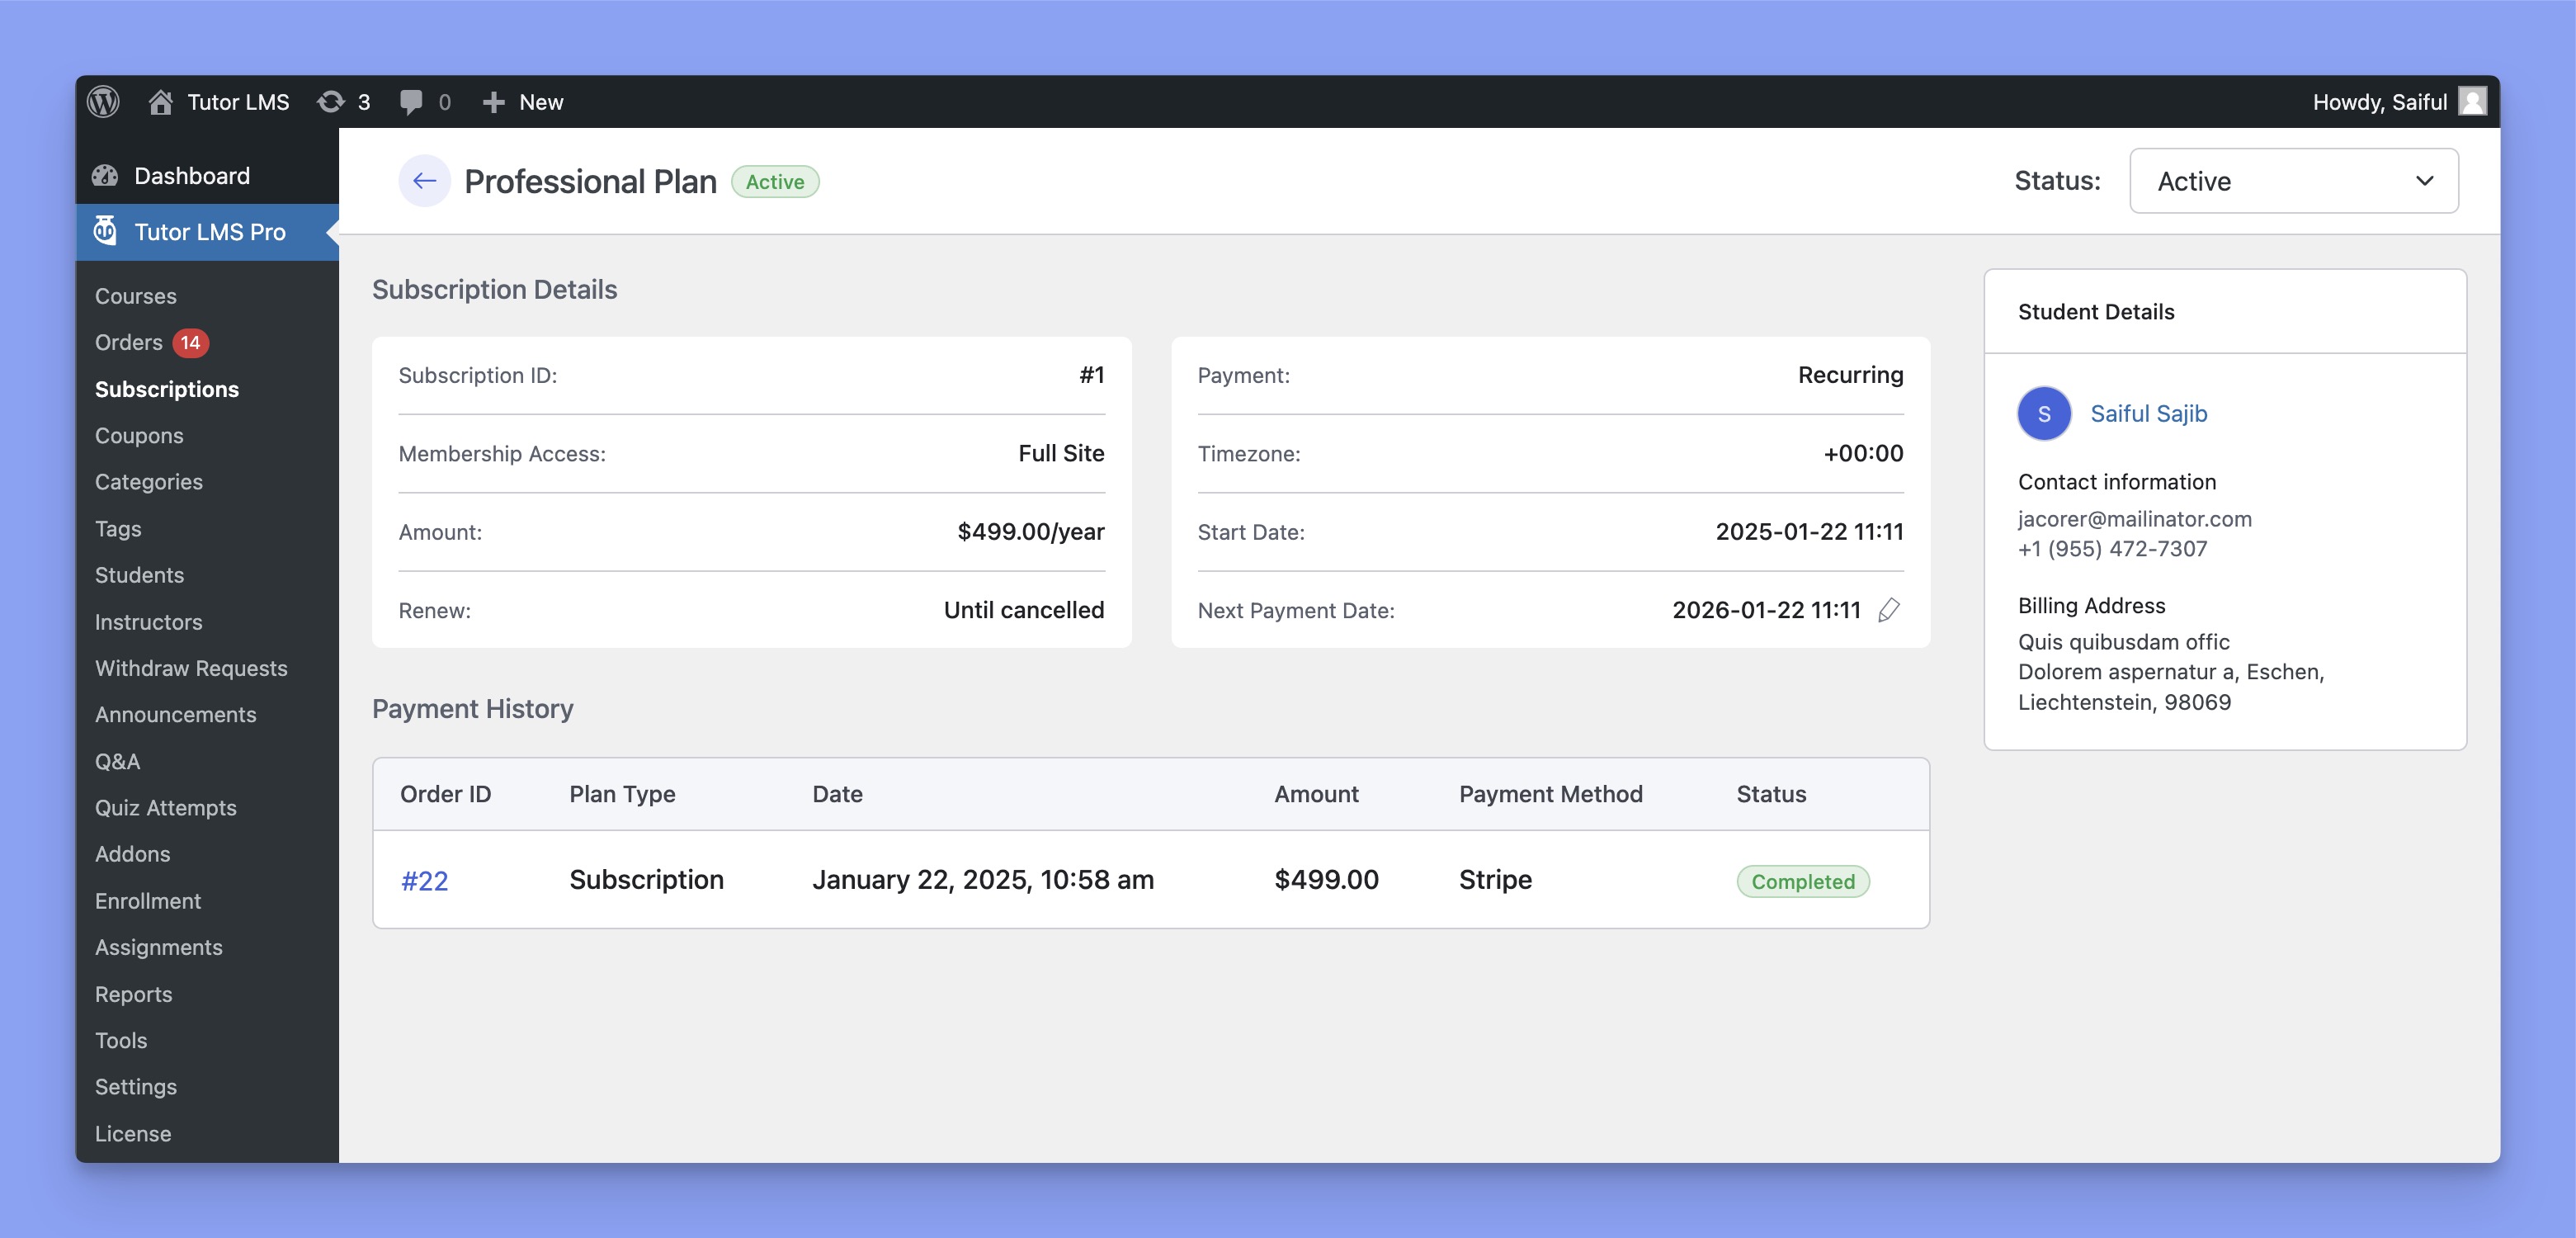
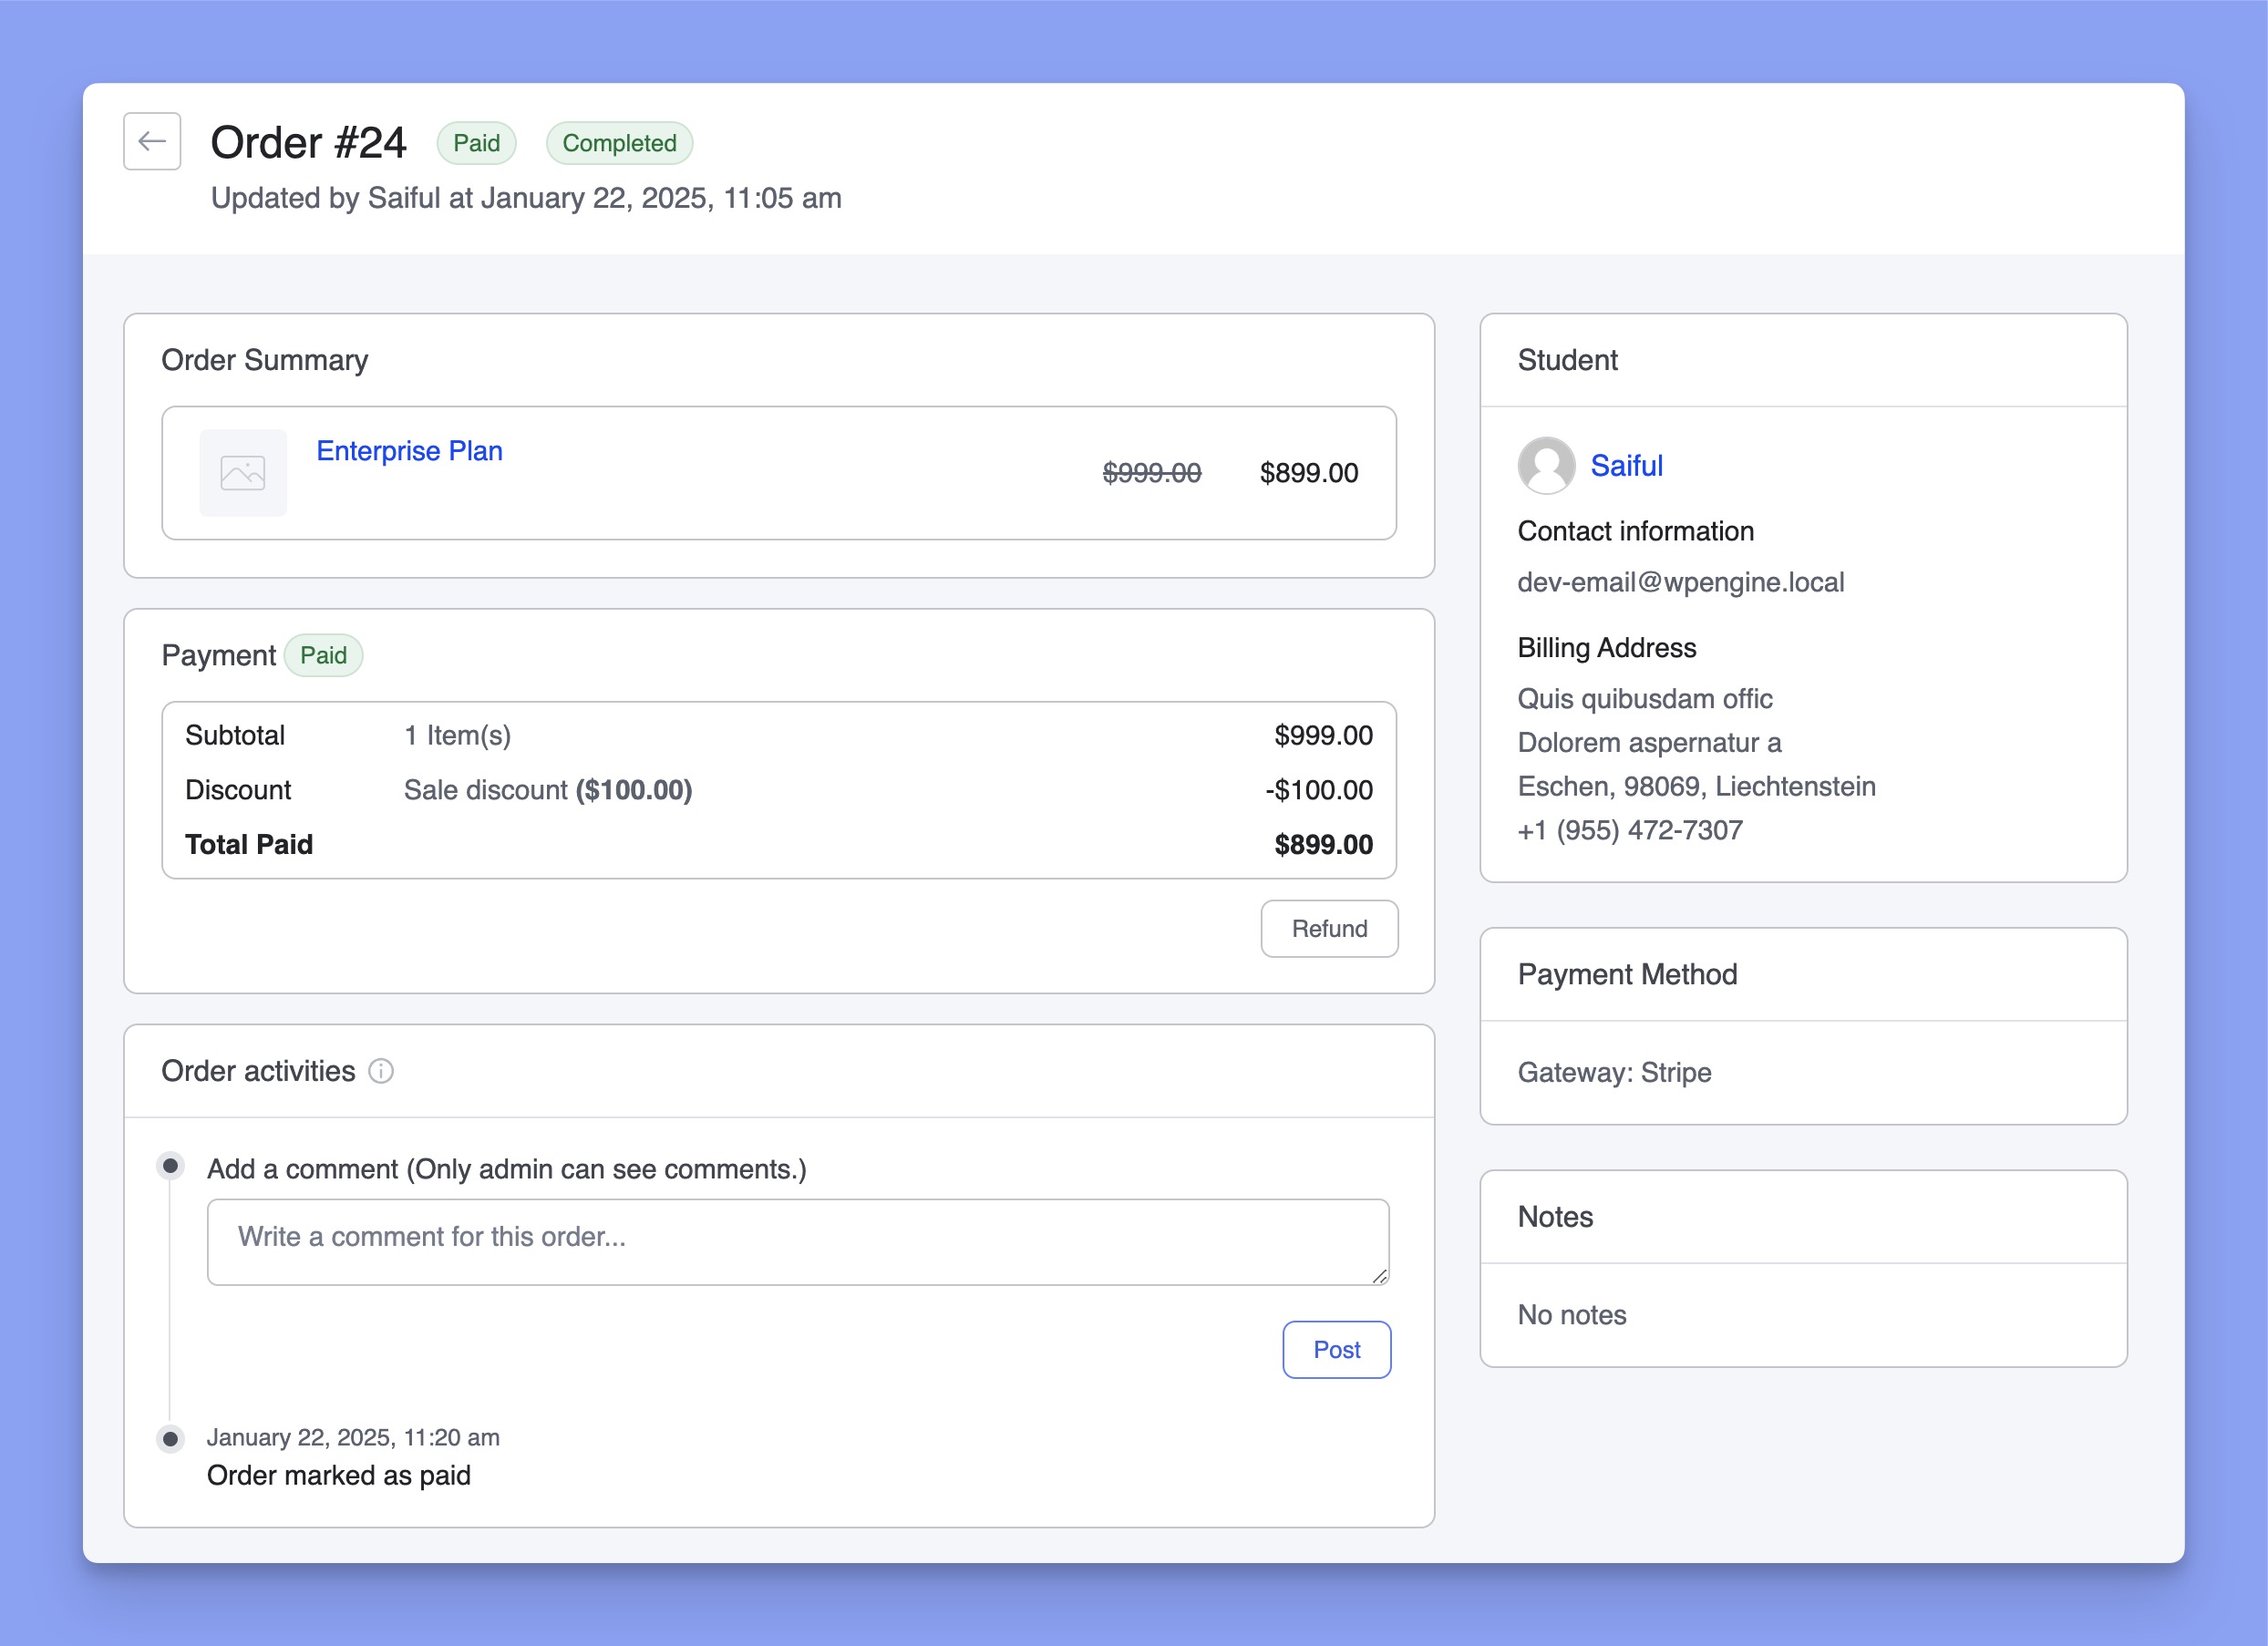
From there, you can update the subscription status, view subscription details, etc. You can also check the Order Details by clicking on the Order ID. As you can see in the previous image, the Order ID is #22. So you can access the order details by clicking on that number.
Here’s the order details page:
5. Access Membership Plans from Students Dashboard
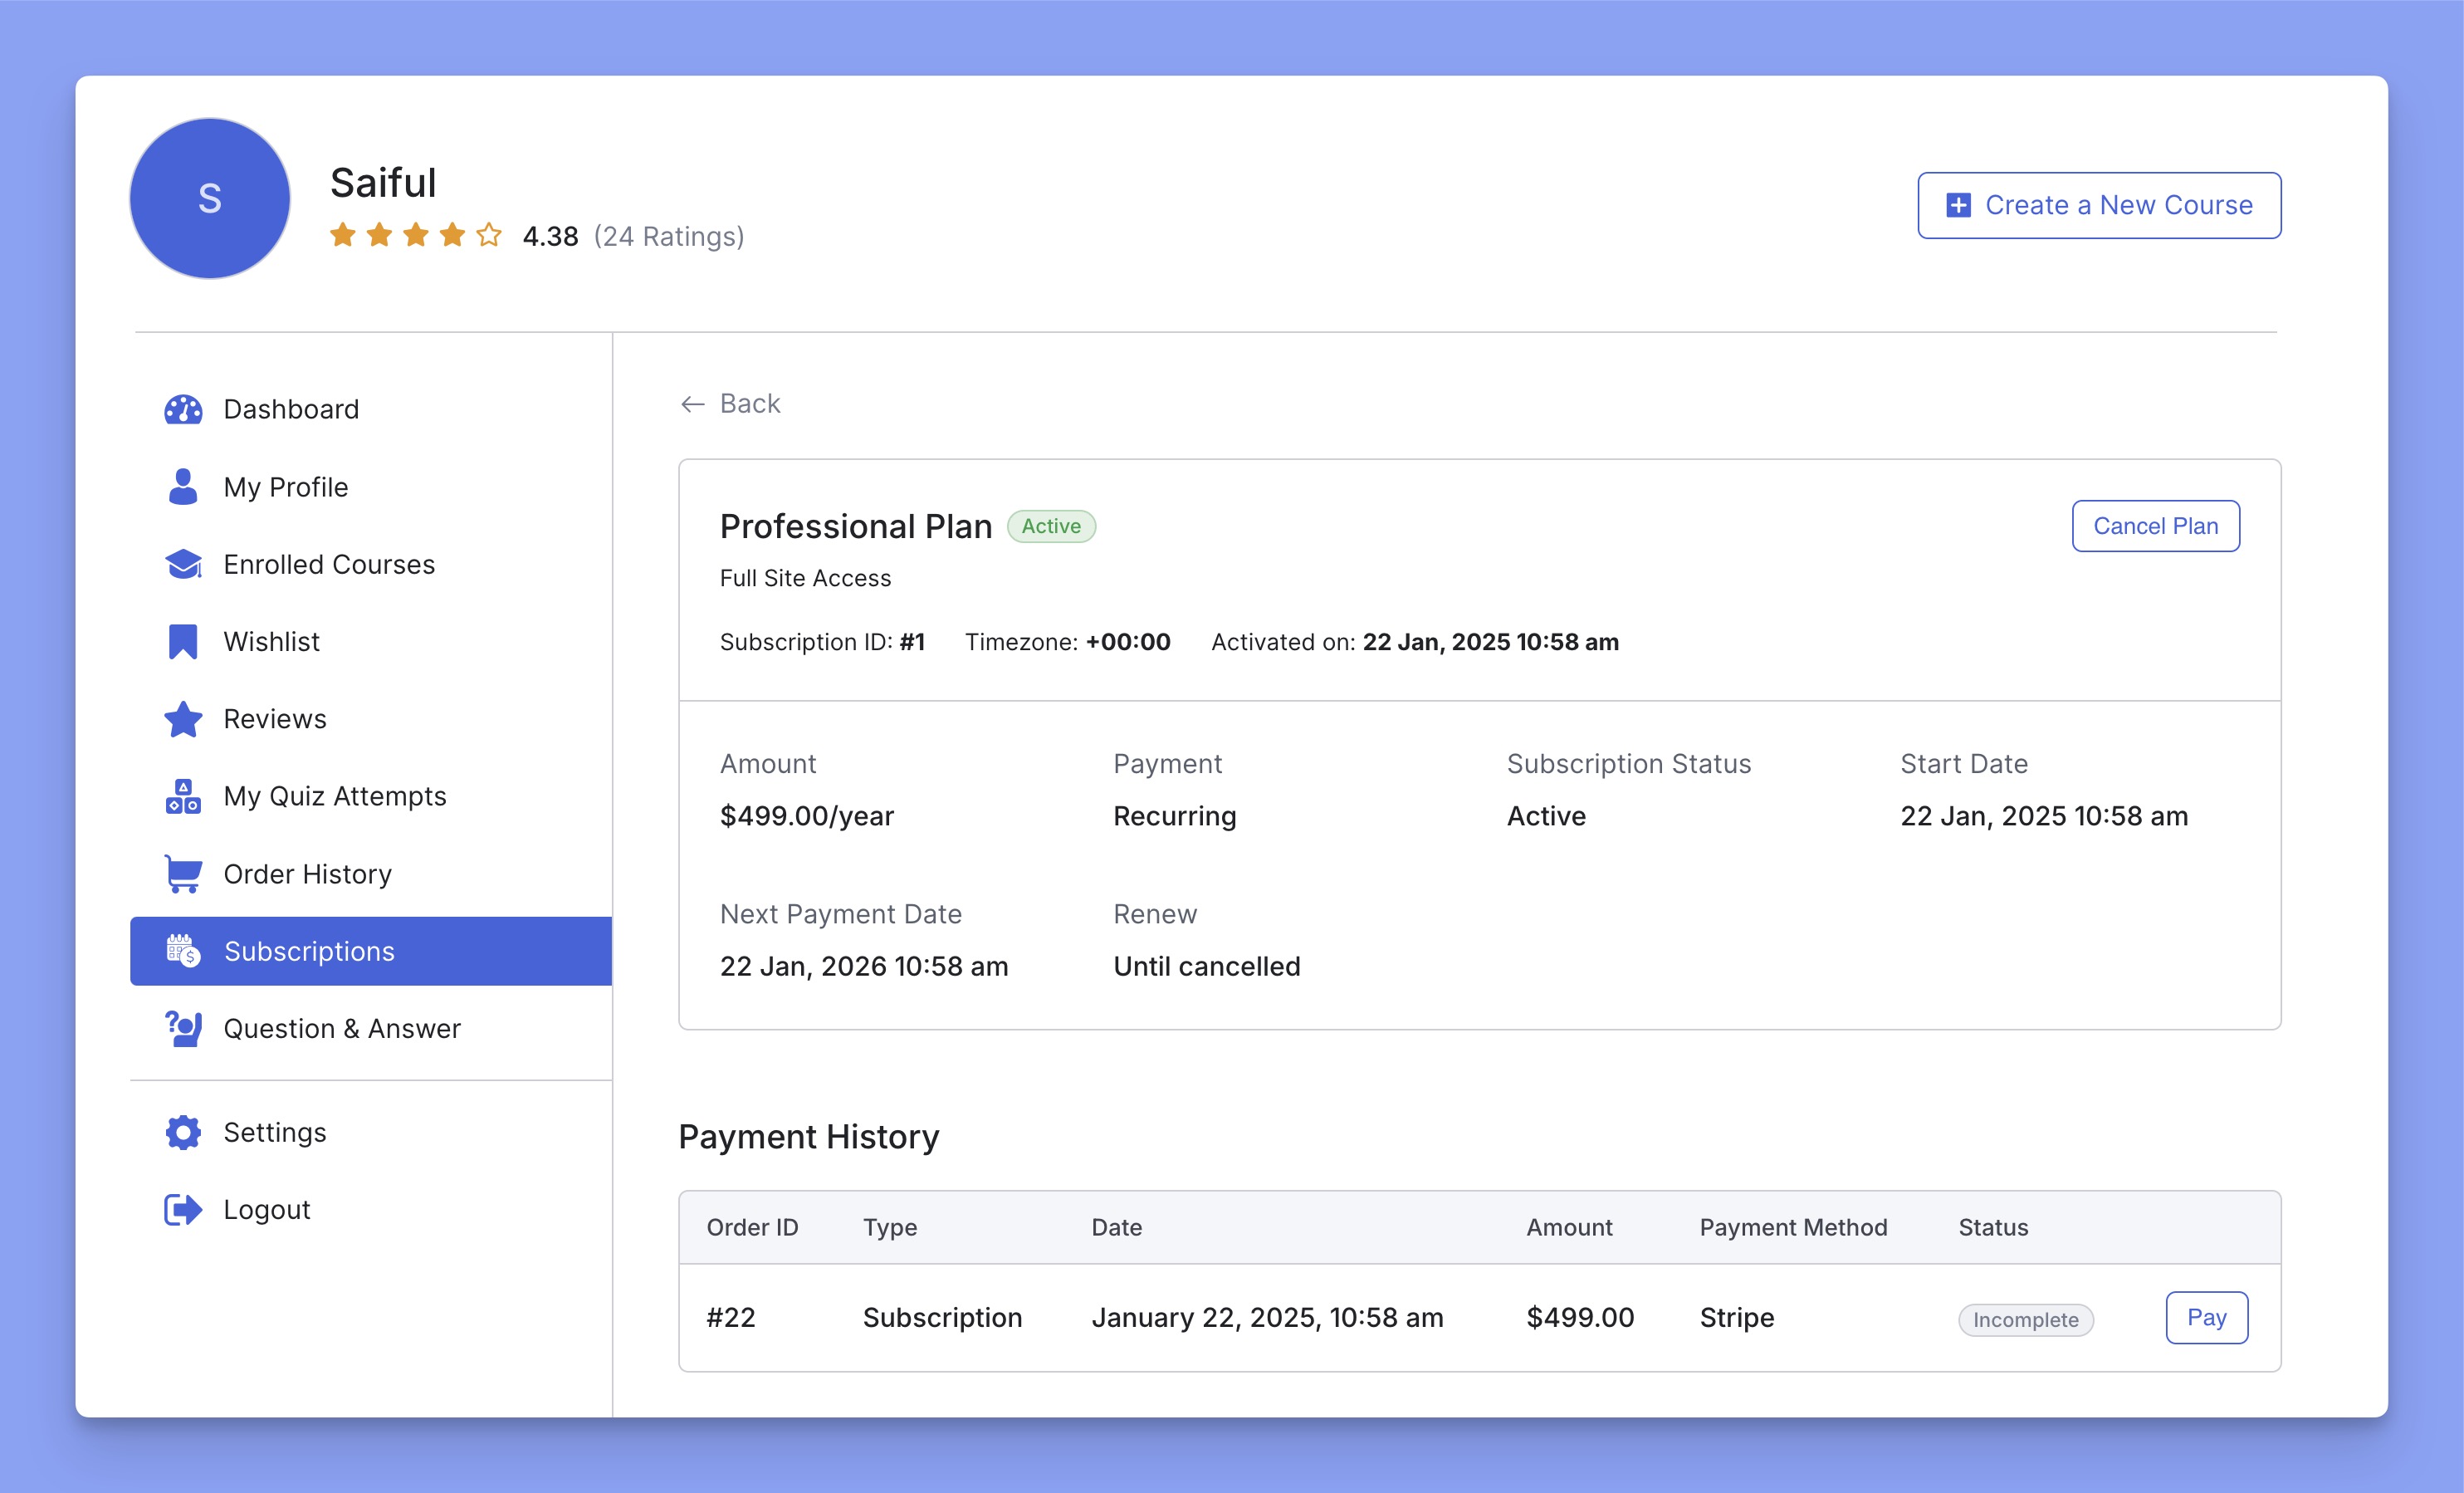
Once a student successfully purchases a membership, he can access the membership plan from his dashboard. Besides, students can cancel or re-subscribe their membership plan from here. Here’s the frontend dashboard view:
Types of Membership
Tutor LMS offers two different types of memberships:
- Full site membership
- Category-wise membership
Choose the full-site membership to grant access to all courses on your website. If you want to limit access to courses within selected categories, choose the category-wise membership option.
1. Creating a Full Site Membership
To create a full-site membership, you need to select the Full Site radio button under the Membership Type section. Thus, this membership plan will be applied to all courses on your website.
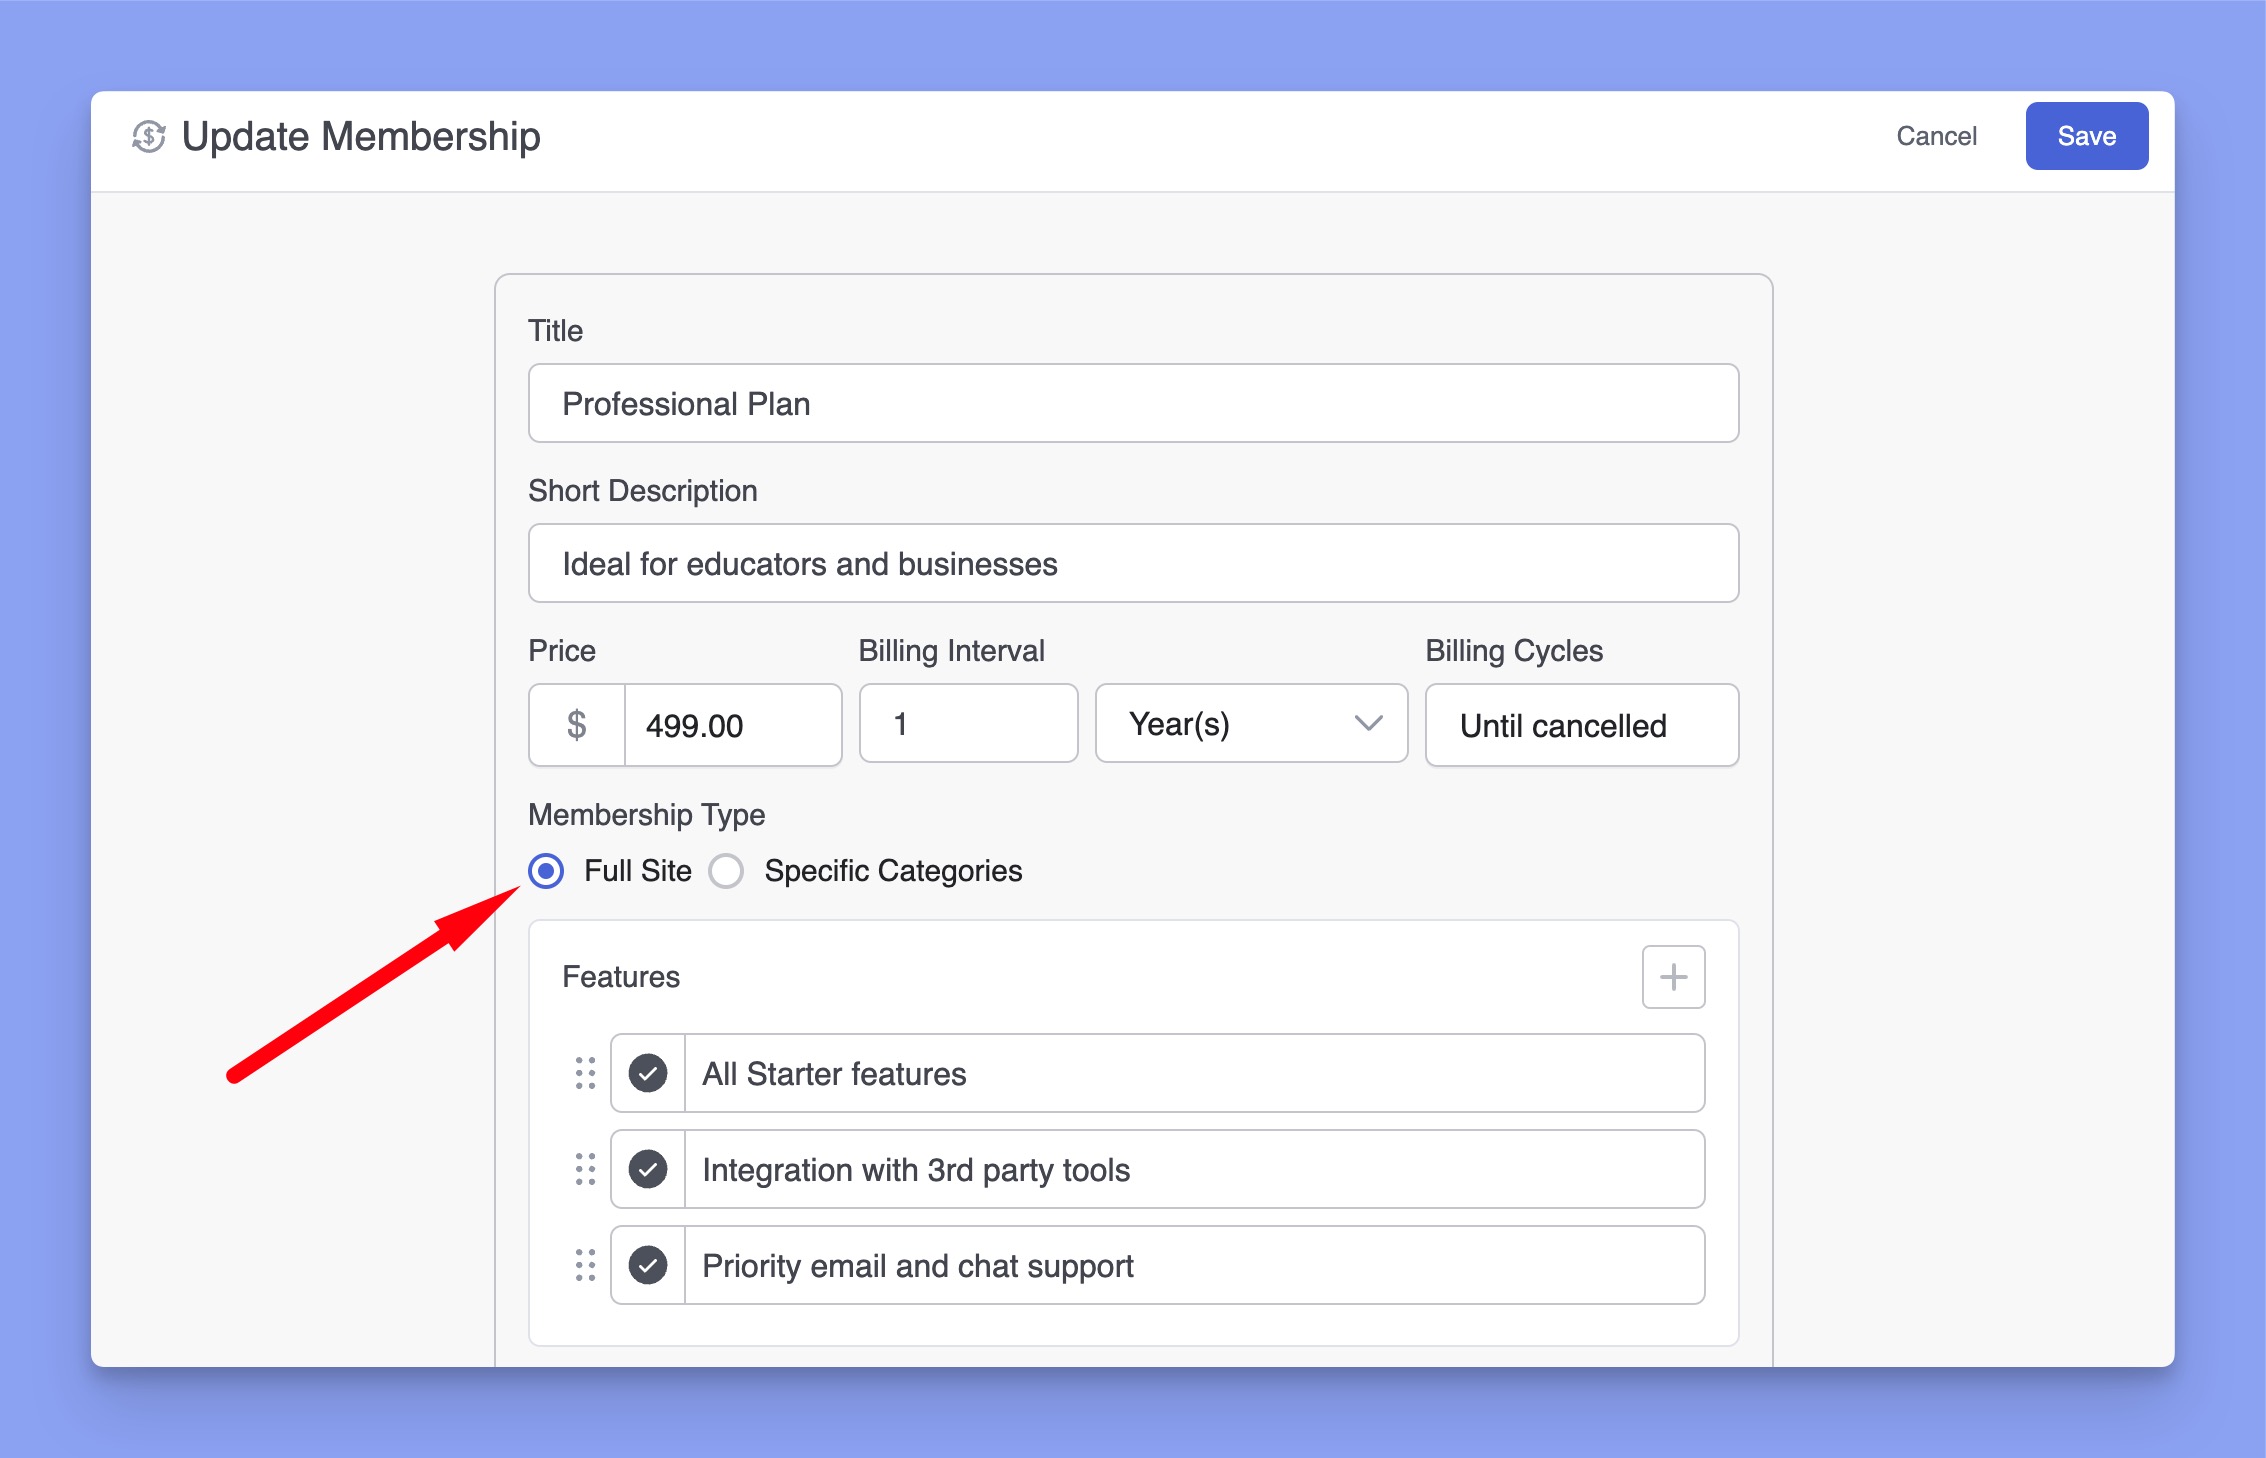
If a user purchases a full-site membership, he can access all the courses without any additional charge.
2. Creating a Category-wise Membership
If you select the Specific Categories option, you can select the categories by clicking the Add Categories button. Once a category is selected, the number of courses within it will be displayed under the category name.
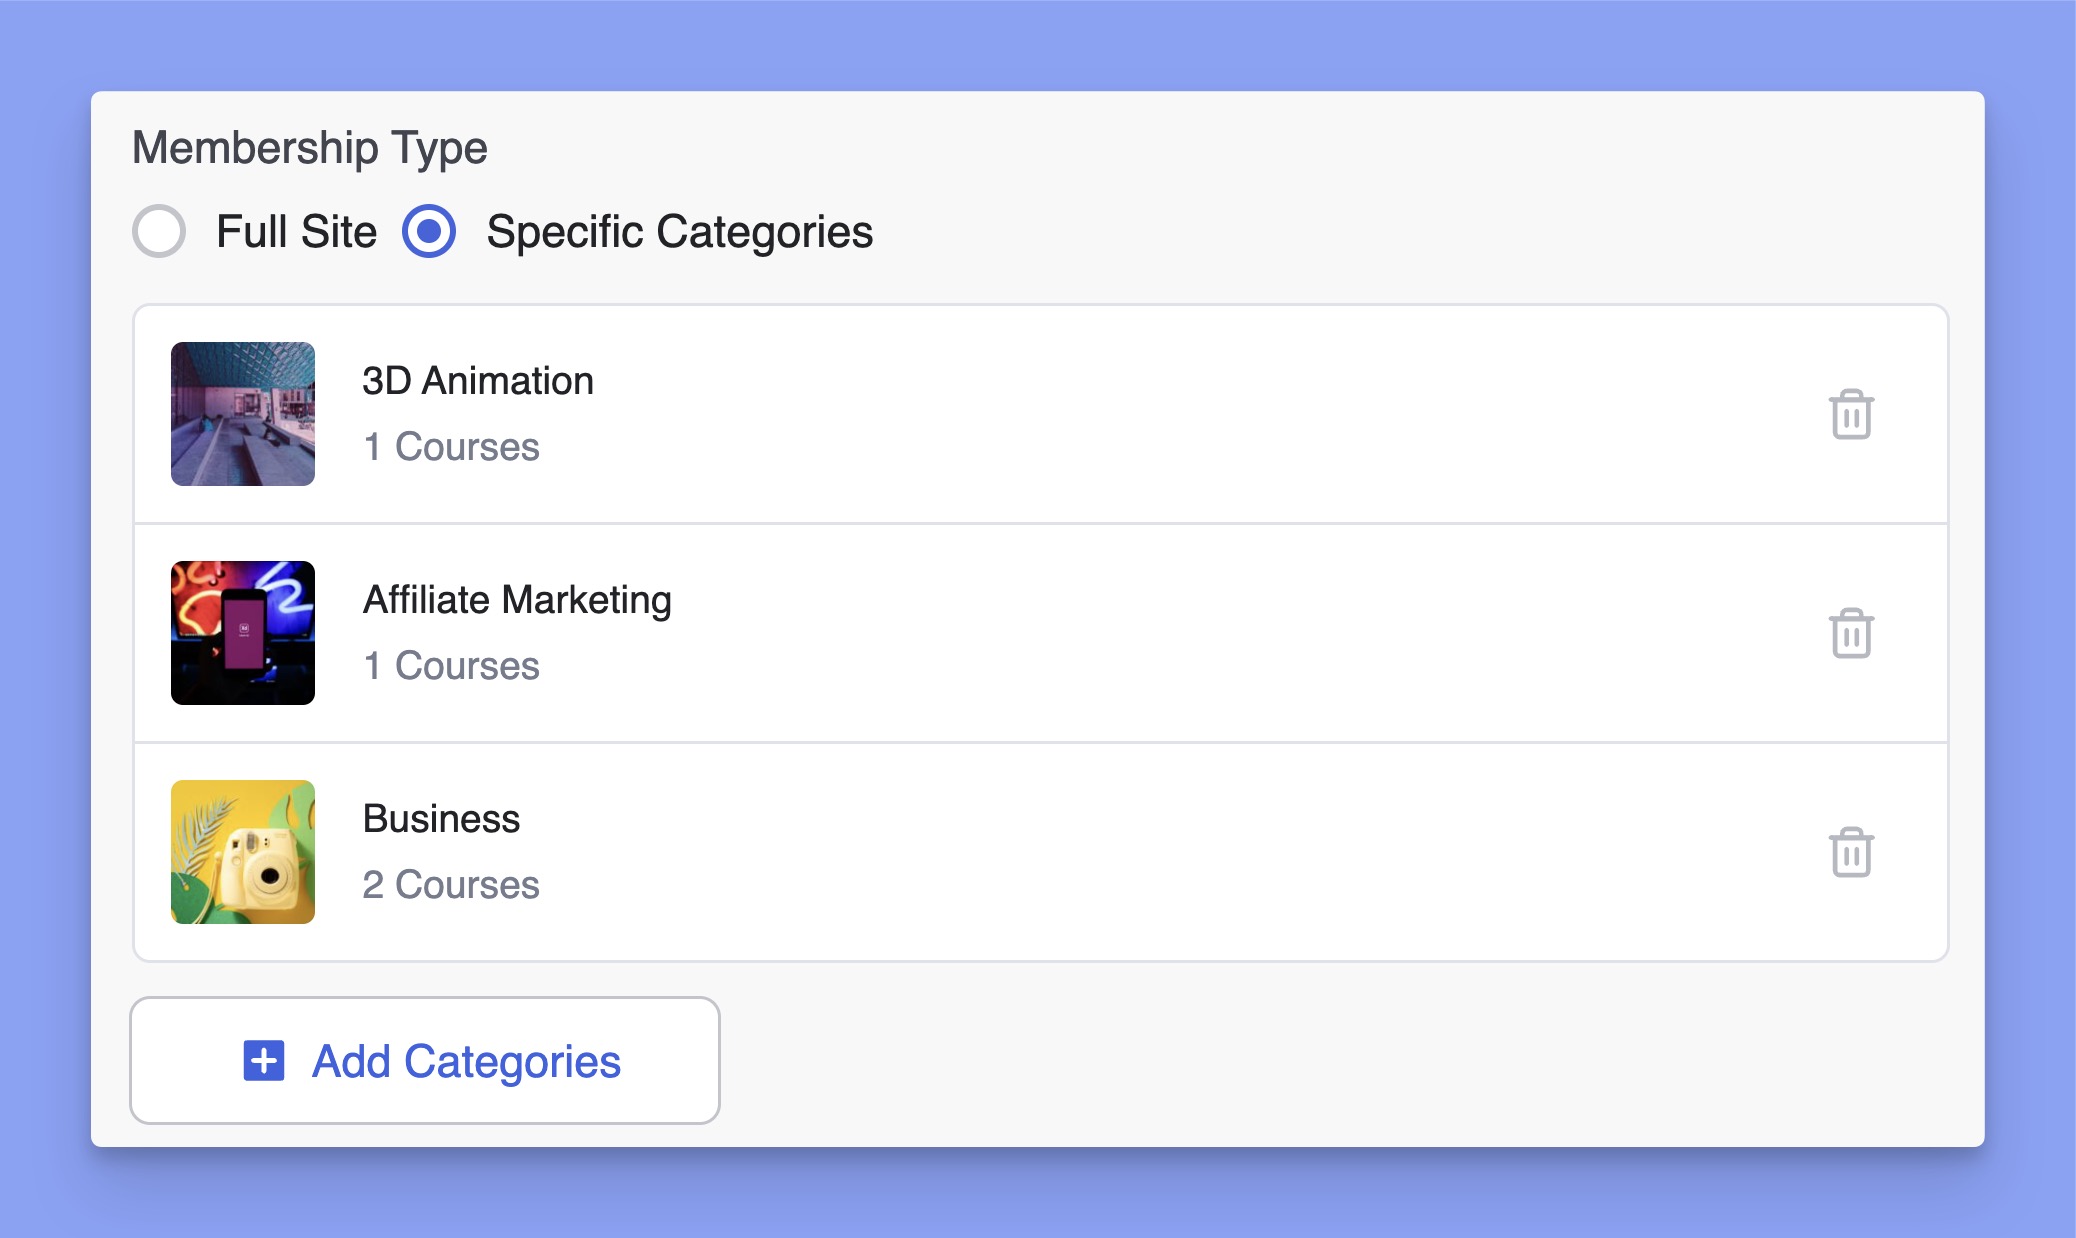
You can select an unlimited number of categories, and this membership plan will automatically apply to all courses within the chosen categories.
Creating a Membership-Only Site
To set up a membership-only site with Tutor LMS, go to Tutor LMS Pro > Settings > Subscriptions and enable Membership-Only Mode.
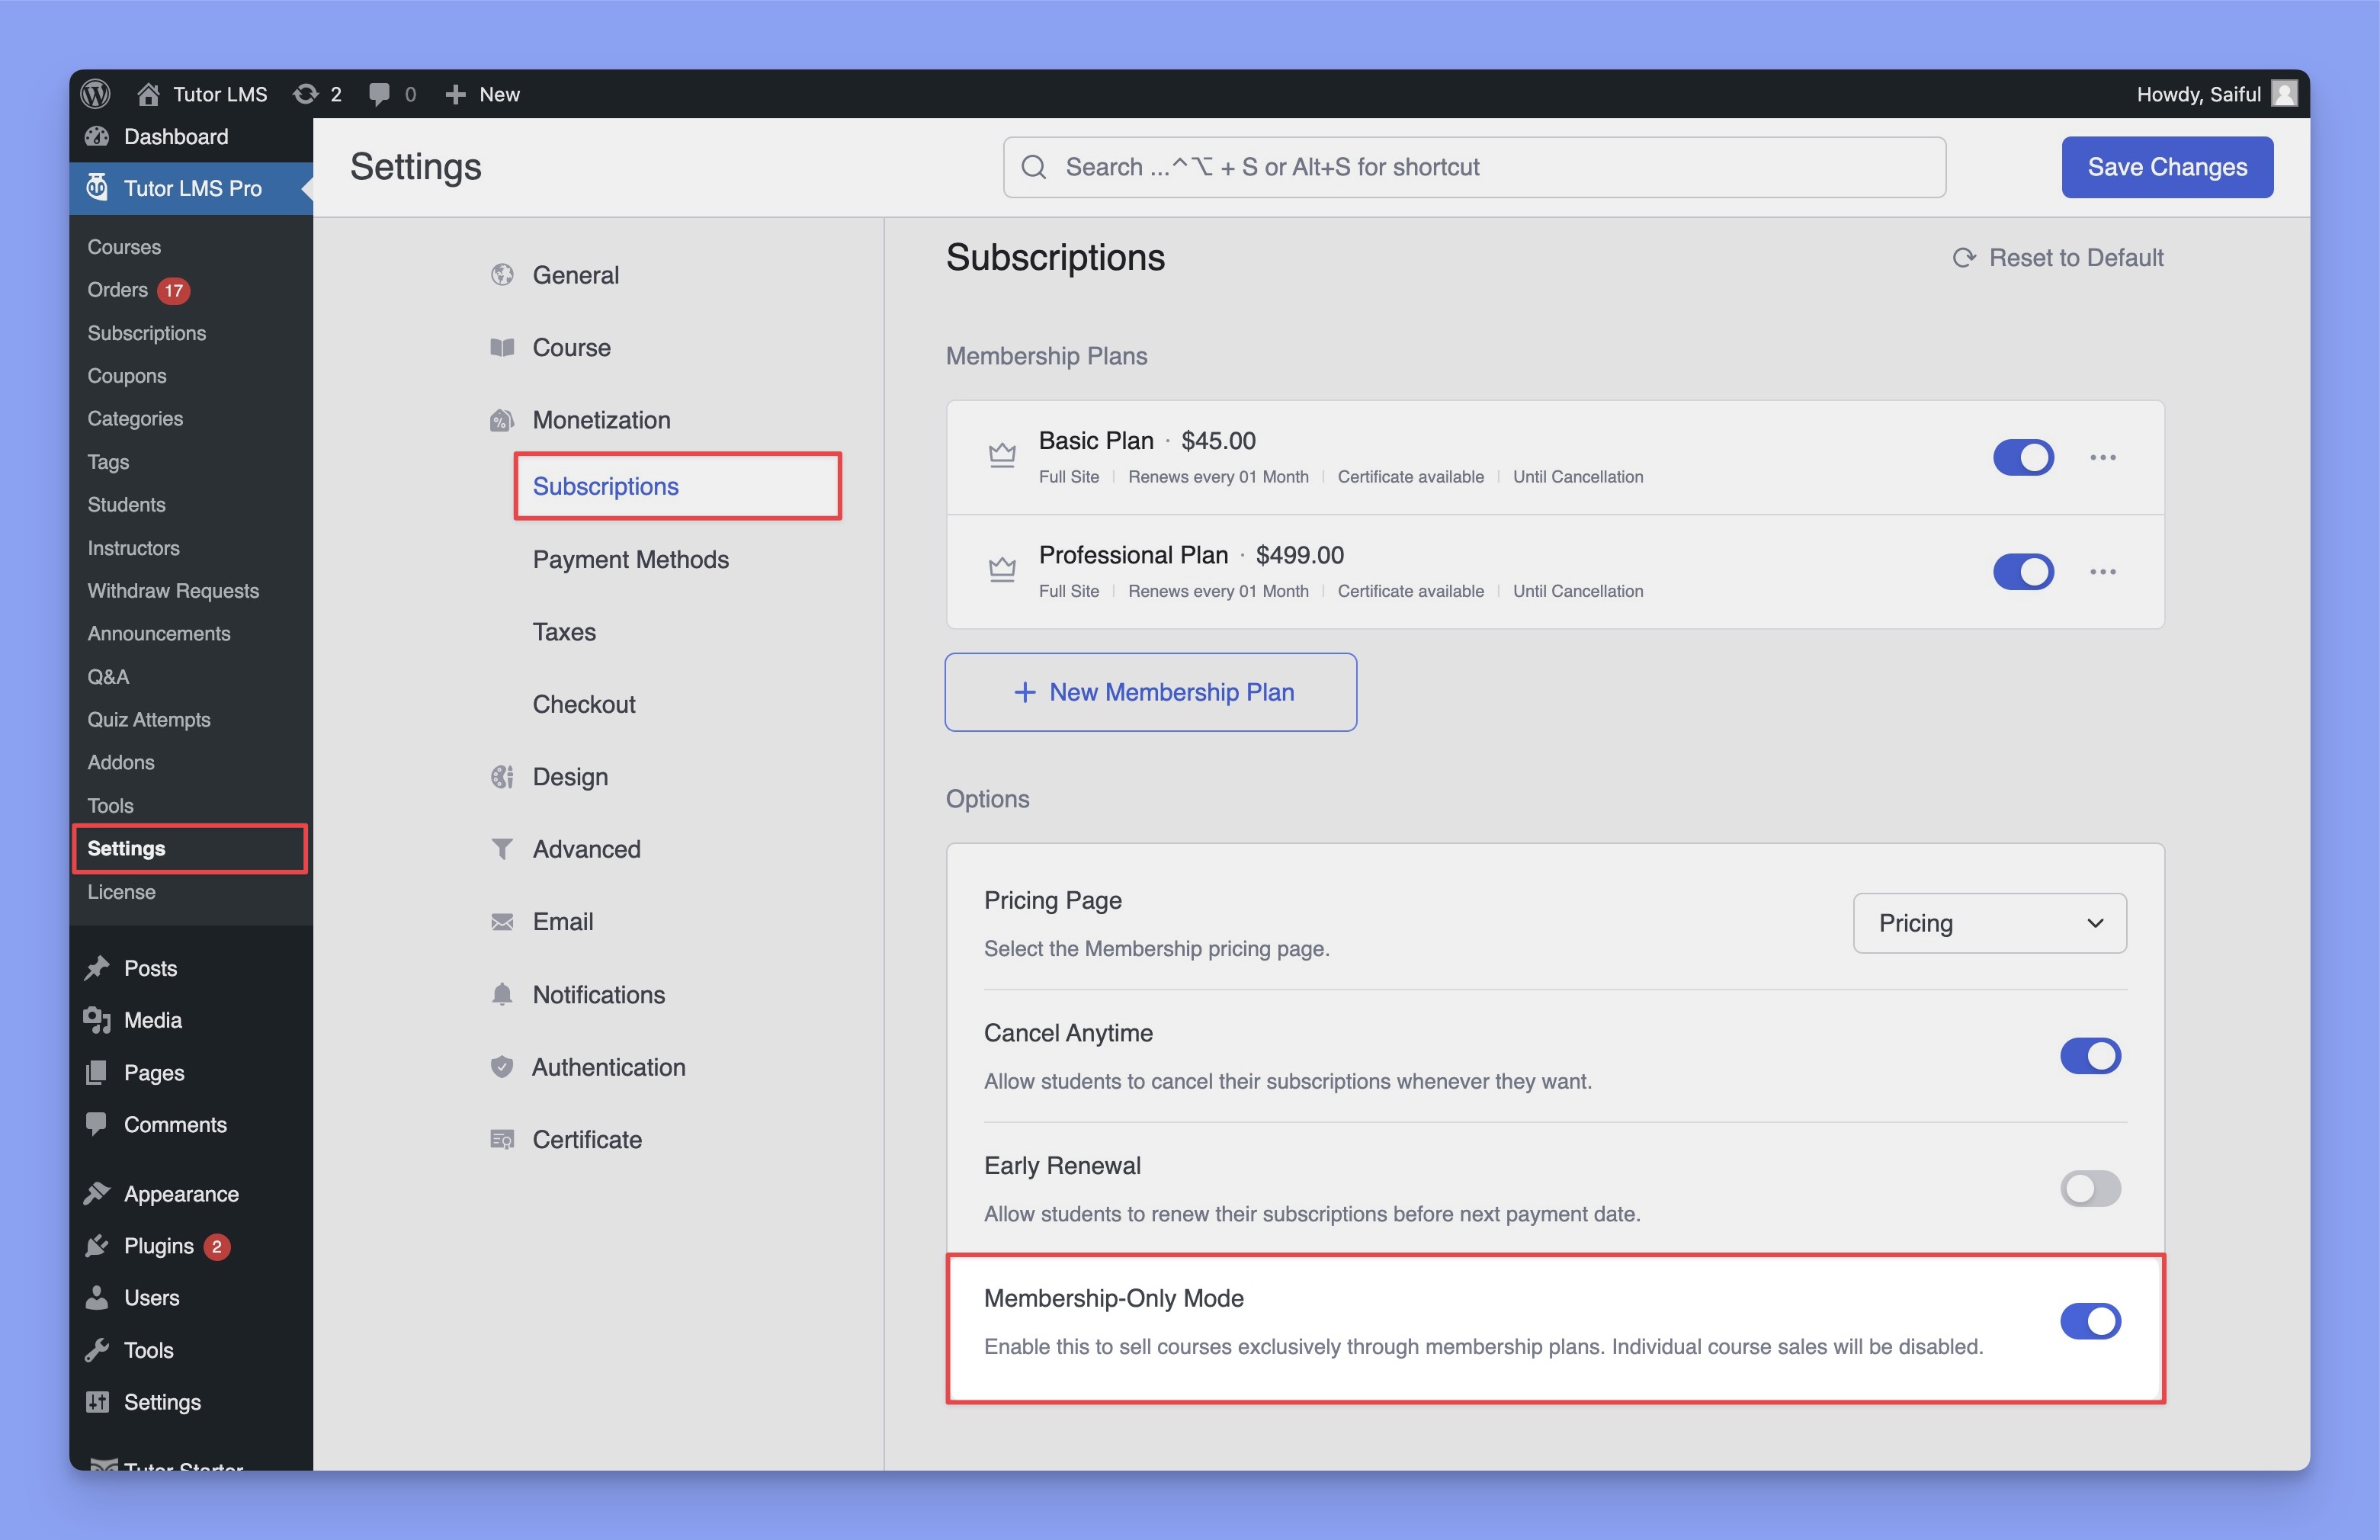
A confirmation screen will appear, explaining the shift to a subscription-based model.
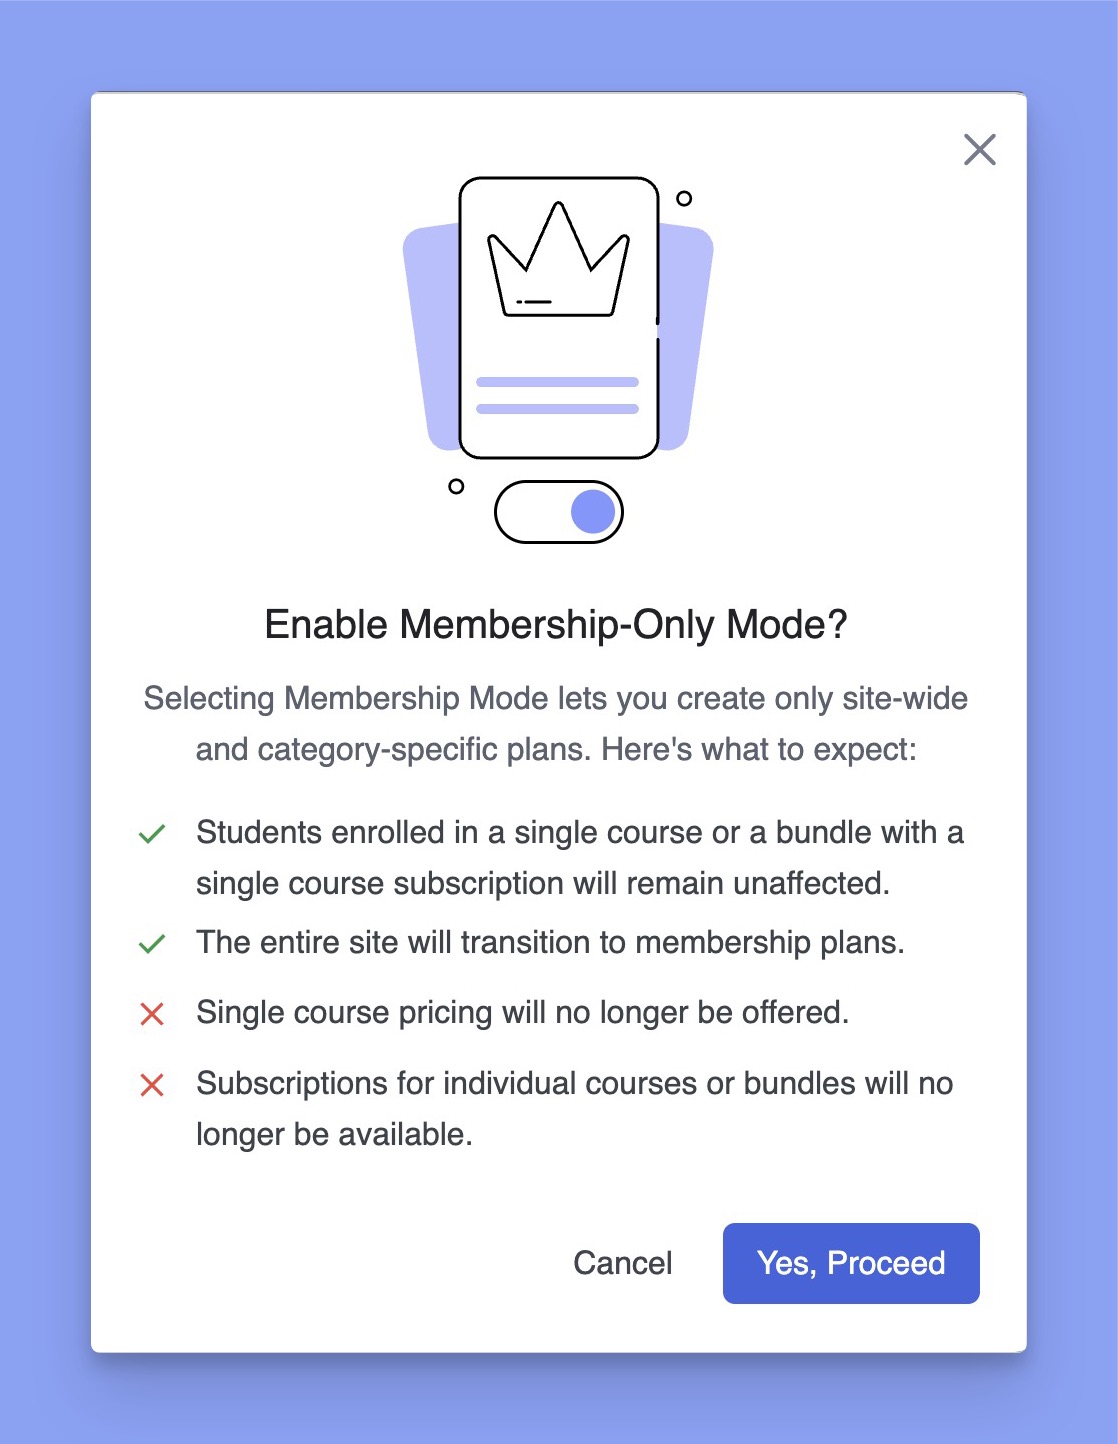
Click Yes, Proceed to activate it across your entire website. Then, click Save Changes in the top-right corner to finalize the setup.
After enabling this mode, your entire website will operate on a subscription-based system. So, you can no longer sell individual courses at separate prices. All courses on your site will be accessible only through a membership subscription.
Creating a Custom Membership Pricing Page
You can create a custom membership pricing page using a shortcode. Simply add the following shortcode to your page:
[tutor_membership_pricing]